Table des Matières
Publicité
Liens rapides
T0350
almost ready to fl y electric powered glider
Instruction manual • Bouwhandleiding • Bauanleitung • Instructions de montage
WARNING !
ACHTUNG !
This R/C kit and the model you
Dieser Bausatz eines
will build is not a toy.
ferngesteuerten Modells
ist kein Spielzeug.
LET OP !
ATTENTION !
Deze bouwdoos van een
Cet avion R/C
radiobestuurd model is geen
n'est pas un jouet.
speelgoed.
version: 26/10/2005
Publicité
Table des Matières
Dépannage

Manuels Connexes pour protech T0350


Sommaire des Matières pour protech T0350
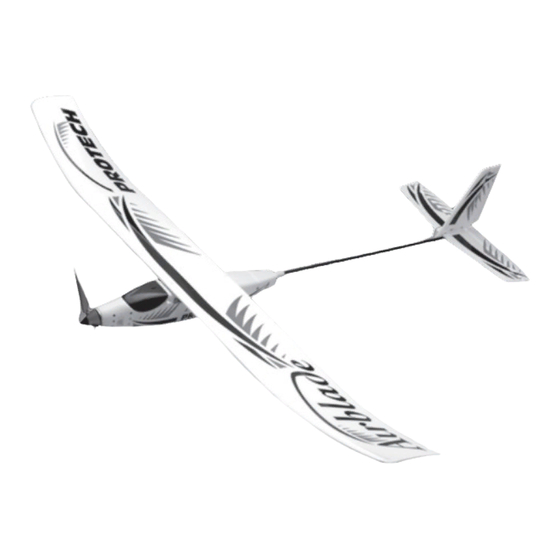
- Page 1 T0350 almost ready to fl y electric powered glider Instruction manual • Bouwhandleiding • Bauanleitung • Instructions de montage WARNING ! ACHTUNG ! This R/C kit and the model you Dieser Bausatz eines will build is not a toy. ferngesteuerten Modells ist kein Spielzeug.
- Page 2 Specifications / Specificaties / Technische Daten / Spécifications Spanwijdte: 1020 mm Wing span: 1020 mm Spannweite: 1020 mm Envergure: 1020 mm Lengte: 790 mm Length: 790 mm Länge: 790 mm Longueur: 790 mm Vleugelopp.: 11,65 dm Wing area: 11,65 dm Tragflügelinhalt: 11,65 dm Surface aile:...
- Page 3 Tools & items / Gereedschap & benodigdheden / Werkzeuge und alles Erforderliche / Equipements et outillage • To assemble this model some tools are needed. • Voor het samenstellen van het model zijn enkele gereedschappen nodig. • Zum Bauen dieses Modells sind einige Werkzeuge erforderlich . •...
-
Page 4: Important Safety Notes
Important Safety Notes • Be sure to read right through the instructions covering assembly and operation of your model before you at tempt to operate it for the fi rst time. You alone are responsible for the safe operation of your radio-con trol led model. Young people should only be permitted to build and fl y these mod els under the instruction and su per vi sion of an adult who is aware of the hazards involved in this activity. -
Page 5: Belangrijke Veiligheidsinstructies
Belangrijke Veiligheidsinstructies • Lees de instructies betreffende montage en werking van uw model vooraleer u het de eerste maal in gebruik neemt. U alleen bent verantwoordelijk voor de veilige werking van uw radio- bestuurd model. Kinderen mogen deze modellen slechts bouwen en vliegen onder het toeziend oog van een volwassene, die zich bewust is van de gevaren die dit met zich meebrengt. •... - Page 6 • Transmitter • Tender • Sender • Émetteur 1. Power LED’s: 1. LED de contrôle: 1. Power LED’s: 1. Strom LED’s: Shows the condition of the trans- Indique l’état des piles de l’émet- Tonen de conditie van de zender- Zeigt den Zustand der Senderbat- mitter batteries.
- Page 7 Installing the transmitter batteries / Installeren van de zenderbatterijen Installieren von die Senderbatterien / Installation des accus d’émetteur • Rechargeable NiCD cells should be fully charged before you install them in your transmitter. NEVER ATTEMPT TO CHARGE OR RECHARGE ALKALINE CELLS.
- Page 8 Installing the wing / Installeren van de vleugel Montieren von den Flügel / Installation d’aile A=A’ A’ • Place the wing on the fuselage. • Plaats de vleugel op de romp. • Plazieren Sie den Flügel aus auf • Positionnez l’aile sur le fuselage. •...
- Page 9 Installing the tailskid / Installeren van de staartsteun Montieren von das Heckrohr / Installation du patin arrière • Screw the tailskid at the bottom- • Schroef de staartsteun onderaan • Schrauben Sie das Heckrohr auf • Vissez le patin arrière au bas side of the plastic support on the de plastiek houder van de staart.
- Page 10 Setting the trim levers / Instellen van de trim Einstellung der Trimmung / Ajuster les trims • Verify the position of the two trim • Controleer de positie van de twee • Überprüfen Sie die Position der • Vérifi ez la position des 2 leviers levers.
- Page 11 Center of gravity / Zwaartepunt Schwerpunkt / Centre de gravité 45 - 50 mm • The correct adjustment of your • Het afregelen van uw vliegtuig is • Die korrekte Justage Ihres Flug- • Les réglages de votre avion aircraft is very important. Check zeer belangrijk.
- Page 12 Warnings / Waarschuwingen Warnung / Précautions • Antenna: • Antenne: • Antenne: • Antenne: Receives the signals from the Ontvangt het signaal van de zen- Empfängt die Signale vom Sen- Reçoit le signal de l’émetteur. transmitter. Never cut the an- der.
- Page 13 Checking the controls of the elevator / Controleren van de besturing van het hoogteroer Überprüfen der Steuerung des Höhenruders / Vérifi cation de la commande du profondeur TRIM ATTENTION: LET OP: ACHTUNG: ATTENTION: Practice operating the controls Oefen door de verschillende Sie sollten beim ersten Mal die Vérifi...
- Page 14 Checking the controls of the rudder / Controleren van de besturing van het richtingsroer Überprüfen der Steuerung des seitenruders / Vérifi cation de la commande de direction TRIM • With the transmitter (fi rst) and • Als de zender (eerst) en het mo- •...
- Page 15 Checking the controls of the motor / Controleren van de besturing van de motor Überprüfen der Steuerung des motors / Vérifi cation de la commande du moteur • Before testing the motor, make • Voor u begint, moet u erop letten •...
- Page 16 Charging the NiMH battery / Laden van de NiMH batterij Aufl aden der NiMH Akkus •/ Charger l’accu de propulsion NiMH ATTENTION: LET OP: ACHTUNG: ATTENTION: Before charging the battery, the Alvorens u de batterij oplaadt, Vor der Aufl adung der Batterie, Avant de charger l’accu il doit être battery must be fully discharged.
- Page 17 Range testing / Testen van het bereik Entfernungsprüfung / Test de portée de l’émetteur Before you fl y, you must check Voordat je gaat vliegen, moet je Bevor Sie anfangen zu fl iegen, Avant de naviguer avec le mo- the range of the radio control de reikwijdte controleren, d.w.z.
- Page 18 READY TO FLY / KLAAR OM TE VLIEGEN FERTIG ZUM FLIEGEN / PRÊT à VOLER After you have checked the controls Nadat u de besturing gecontroleerd Nachdem Sie die Kontrollen und die Après avoir vérifi é les commandes et and the range you may start fl ying. In hebt en de reikwijdte goed is, mag je Strecke überprüft haben, können Sie être certain que la portée de l’émet-...
- Page 19 READY TO FLY / KLAAR OM TE VLIEGEN FERTIG ZUM FLIEGEN / PRÊT à VOLER Warning: Waarschuwing: WARNUNG: AVERTISSEMENT : When the battery in the model begins Als de batterijen bijna leeg zijn zal het Wenn die Batterie im Modell an- Quand l’accu dans l’avion commence to run low, the model will slow down model in een korte periode drastisch...
- Page 20 Flying instructions / Vlieginstructies Fluganleitung / Instructions pour le vol • Choose an open fl ying area away • Kies een open plaats voor het • Wählen Sie einen offene Gelän- • Choisissez un endroit bien dé- from buildings, roads, power vliegen, verwijdert van gebou- de weg von den Gebäuden, von gagé...
- Page 21 Flying instructions / Vlieginstructies Fluganleitung / Instructions pour le vol • Always fully extent the transmit- • Trek de antenne volledig uit. • Die Antenne völlig ausziehen. • Toujours sortir l’antenne complè- ter antenna. • Kontroleer eerst de richting van •...
- Page 22 Flying instructions / Vlieginstructies Fluganleitung / Instructions pour le vol LANDING THE PLANE: LANDEN VAN HET MODEL: LANDUNG: ATTERRISSAGE: • When the plane is about 30 feet • Als het vliegtuig op ongeveer • Wenn das Flugzeug ungefähr 10 • Amorcez votre descente, virez above the ground turn it into 10m hoogte vliegt draai dan in de Meter über dem Grund ist müs-...
- Page 23 Flying instructions / Vlieginstructies Fluganleitung / Instructions pour le vol INTERFERENCE ZENDERSTORINGEN STÖRUNG INTERFERENCE • Before fl ying you should always • Voor het vliegen, moet U steeds • Vor das Fliegen sollte Sie immer • Avant de voler, vous devez tou- check to see if other planes in the kontroleren of er andere model- die Frequenz überprüfen, um zu...
-
Page 24: Important Safety Instructions
Flying instructions / Vlieginstructies Fluganleitung / Instructions pour le vol IMPORTANT SAFETY INSTRUC- BELANGRIJKE VEILIGHEIDSIN- WICHTIGE SICHERHEITSVOR- ATTENTION TIONS STRUCTIES SCHRIFTEN • Ne jamais faire passer vo- • Don’t fl y facing the sun because • Nooit het vliegtuig in de directe •... - Page 25 Maintenance / Onderhoud Wartung / Entretien • If any of the electronics get wet, • Als één van de elektronische on- • Sollte die Elektronik naß werden, • Si une partie quelconque de soak up any visible water, using a derdelen nat wordt moet je al het dann saugen das Wasser mit ei- l’électronique devient humide,...
-
Page 26: Troubleshooting
Troubleshooting This troubleshooting guide has been provided to help you diagnose and solve most problems that you may encounter with your model. Most problems encountered can be solved by carefully following the problem-cause-solution sections below. If you cannot solve the problem using this guide, please feel free to contact us (see last page). -
Page 27: Problemlöser
Problemlöser Dieser Problemloser ist zur Verfügung gestellt worden, um Ihnen zu helfen, die meisten Probleme zu bestimmen und zu lösen, die Sie mit Ihrem Model antreffen können. Die meisten angetroffenen Probleme können durch sorgfältiges Nachvollziehen des unten aufgeführten Problem-Ursache-Lösung-Schemas gelöst werden. Wenn Sie das Problem dennoch nicht lösen können, scheuen Sie sich nicht uns zu kontaktieren. - Page 28 EC-R&TTE certifi cate 28 • airblade...
- Page 29 Frequenties / Frequency Frequenz / Fréquences Frequency Channel Frequency Admitted in folowing countries Frequentie Kanaal Frequentie Toegelaten in volgende landen Frequenz Kanal Frequenz Zugelassen in folgende Länder Bande Canal Fréquence Admises dans les pays suivants 27 MHz-Band 26,965 26,975 26,985 26,995 27,005 27,015...
- Page 30 Spare parts list / Onderdelenlijst Ersatzstückliste / Liste de pièces détachées T0350.2 T0350.3 • Wing set • Fuselage set • Vleugel set • Romp set • Flügel satz • Fuselage satz • Set d’aile • Set de fuselage T0350.4 T0350.5 •...
- Page 31 Notes / Notities Notizen / Notice airblade • 31...
- Page 32 All you need is inside our 300 pages full colour catalog PROTECH® is a registered trademark Geelseweg 80 • B-2250 OLEN • Belgium Tel. +32 (0)14-25 92 83 • E-mail: info@protech.be www.protech.be 32 • airblade...