Se connecter
Télécharger
Manuels
Marques
Videotec Manuels
Caméras de surveillance
ULISSE MAXI
Videotec ULISSE MAXI Manuels
Manuels et Guides d'utilisation pour Videotec ULISSE MAXI. Nous avons
2
Videotec ULISSE MAXI manuels disponible en téléchargement PDF gratuit: Manuel D'instructions
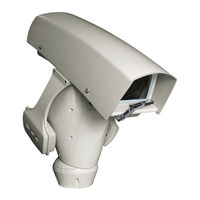
Videotec ULISSE MAXI Manuel D'instructions (364 pages)
Marque:
Videotec
| Catégorie:
Caméras de surveillance
| Taille: 37 MB
Table des Matières
English
5
Table des Matières
5
1 About this Manual
9
Typographical Conventions
9
2 Notes on Copyright and Information on Trademarks
9
3 Safety Rules
9
4 Identification
12
Product Description and Type Designation
12
Product Markings
12
Checking the Markings
12
5 Versions
13
LED Illuminators
13
Germanium Window
13
6 Preparing the Product for Use
14
Safety Precautions before Use
14
Unpacking
14
Safely Disposing of Packaging Material
14
Preparatory Work before Installation
15
Attaching the Bracket
15
Cables Management
15
7 Assembly
16
Fixing the Sunshield
16
How to Open the Housing
16
Assembling the Camera and Motorised Lenses
16
Cameras Features
16
Fastening the Lens and the Camera to the Internal Slide
17
Positioning of the H-20 Spacer on the Inner Slide
18
Internal Slide
18
Housing Board Description
19
Connection of the Camera and Motorised Lens
19
Adjustment of the Supply Voltage of the Lens Motors
20
8 Installation
21
Connecting the Cables to the Base
21
Fixing the Base to the Support
22
Connector Board Description
23
Connection of the Power Supply Line
24
24Vac Power Line Connection
25
120Vac and 230Vac Power Line Connection
25
Signal Cable Connection
26
Video Cable Connection
26
Telemetry Lines Connections
27
Connection of the Alarm Inputs, of the Twilight Switch and of the Relays
28
Standard Version
28
Fixing the Upper Body
29
Counterweights Installation
29
LED Illuminators Installation
30
Counterweight Removal
30
Fitting the Illuminator on the Bracket
30
Connection of the LED Illuminators
31
Connection for Cameras and LED Illuminators Synchronisation
32
Desiccant Bag
32
LED Illuminator Activation and Adjustment Instructions
32
Description of the LED Illuminator
32
Activation of the LED Illuminator Via an External Dusk Switch
33
Activation of the LED Illuminator Via the Integrated Dusk Sensor
33
LED Illuminator Switching on Threshold Adjustment
34
LED Illuminator Power Adjustment
34
Fastening of the Wiper Blade
35
Hardware Configuration
36
Opening the Configuration Door
36
DIP1 Configuration
36
DIP2 Configuration
36
DIP3 Configuration
37
Address Configuration
37
Setting of the Serial Communication Lines
37
DIP4 Configuration
37
Installation Examples
38
RS-485 RX Line
38
RS-422 Line (RS-485-1 RX E RS-485-2 TX)
38
Two-Way RS-485 TX/RX Line
38
9 Switching on
39
First Start-Up
39
Checks List
39
10 Configuration
40
OSM Interface (on Screen Menu)
40
Using the OSM
40
How to Use the Joystick
40
How to Move Around the Menus
41
How to Modify the Parameters
41
How to Change the Numeric Fields
42
How to Change Text
42
Configuration Via OSM
44
Main Menu
44
Language Selection Menu
44
ZFI Parameter Menu
44
Zone Titling Menu
45
Zone Masking Menu
46
Housing Serial Port Menu
47
Polarity Menu
47
Movement Menu
48
Manual Control Menu
48
Manual Control Menu (Limits)
49
Preset Menu
49
Preset Menu (Edit Preset)
49
Preset Menu (Utility Preset)
50
Patrol Menu
50
Autopan Menu
50
Motion Recall Menu
51
Display Menu
51
Digital I/O-Options Menu
51
Alarms Menu
52
Communication Menu
52
Washer Menu
53
Default Menu
53
Info Menu
53
11 Accessories
54
Washer
54
Washing System Connection
54
Wall Mount Bracket
55
Parapet Bracket
55
Power Supply with Illuminator Control
55
12 Instructions for Normal Operation
56
Visualizing the State of the Pan & Tilt
56
Saving a Preset
56
Restore a Preset Position (Scan)
56
Recalling the Home Position
56
Patrol Enabling
56
Autopan Enabling
57
Enabling the Wiper (Wiper)
57
Enabling the Washer (Washer)
57
Enabling the LED Illuminator
57
Unit Reboot
57
Special Controls
58
Special Configurations
59
13 Maintenance
60
Fuses Replacement
60
14 Cleaning
60
Window and Plastic Cover Cleaning
60
Cleaning the Germanium Window
60
15 Disposal of Waste Materials
60
16 Troubleshooting
61
17 Technical Data
63
General
63
Mechanical
63
Housing's Window
63
Electrical
63
Video
64
Communications
64
Protocols
64
I/O Interface
64
Lenses
64
Environment
64
Certifications
64
18 Technical Drawings
65
A Appendix - Address Table
68
Italiano
77
1 Informazioni Sul Presente Manuale
81
Convenzioni Tipografiche
81
2 Note Sul Copyright E Informazioni Sui Marchi Commerciali
81
3 Norme DI Sicurezza
81
4 Identificazione
84
Descrizione E Designazione del Prodotto
84
Marcatura del Prodotto
84
Controllo Della Marcatura
84
5 Versioni
85
Illuminatori a LED
85
Finestra in Germanio
85
6 Preparazione del Prodotto Per L'utilizzo
86
Precauzioni DI Sicurezza Prima Dell'utilizzo
86
Disimballaggio
86
Smaltimento in Sicurezza Dei Materiali DI Imballaggio
86
Lavoro Preparatorio Prima Dell'installazione
87
Fissaggio del Supporto
87
Passaggio Cavi
87
7 Assemblaggio
88
Fissaggio del Tettuccio
88
Apertura Della Custodia
88
Montaggio Telecamera E Ottiche Motorizzate
88
Caratteristiche Delle Telecamere
88
Fissaggio Dell'ottica E Della Telecamera Alla Slitta Interna
89
Posizionamento Della Slitta Interna
90
Descrizione Della Scheda Della Custodia
91
Collegamento Della Telecamera E Dell'ottica Motorizzata
91
Regolazione Della Tensione DI Alimentazione Dei Motori Delle Ottiche
92
8 Installazione
93
Collegamento Dei Cavi Alla Base
93
Fissaggio Della Base al Supporto
94
Descrizione Della Scheda Connettori
95
Collegamento Della Linea DI Alimentazione
96
Collegamento Della Linea DI Alimentazione in 24Vac
97
Collegamento Della Linea DI Alimentazione in 120Vac E 230Vac
97
Collegamento Dei Cavi DI Segnale
98
Collegamento del Cavo Video
98
Collegamento Delle Linee DI Telemetria
99
Collegamento Degli Ingressi DI Allarme, Dell'interruttore Crepuscolare E Dei Relè
100
Versione Standard
100
Fissaggio del Corpo Superiore
101
Montaggio Dei Contrappesi
101
Montaggio Degli Illuminatori a LED
102
Rimozione Dei Contrappesi
102
Montaggio Dell'illuminatore Sulla Staffa
102
Collegamento Degli Illuminatori a LED
103
Collegamento Per la Sincronizzazione Della Telecamera con Gli Illuminatori a LED
104
Sacchetto Disidratante
104
Regolazione E Modalità DI Attivazione Degli Illuminatori a LED
104
Descrizione Dell'illuminatore a LED
104
Attivazione Degli Illuminatori a LED Tramite un Interruttore Crepuscolare Esterno
105
Attivazione Degli Illuminatori a LED Tramite Il Sensore Crepuscolare Integrato
105
Regolazione Della Soglia DI Accensione Degli Illuminatori a LED
106
Regolazione Della Potenza Degli Illuminatori a LED
106
Fissaggio Della Spazzola del Tergicristallo
107
Configurazione Hardware
108
Apertura Dello Sportellino DI Configurazione
108
Configurazione del DIP1
108
Configurazione del DIP2
108
Configurazione del DIP3
109
Configurazione Dell'indirizzo
109
Configurazione Delle Linee DI Comunicazione Seriali
109
Configurazione del DIP4
109
Esempi DI Installazione
110
Linea RS-485 RX
110
Linea RS-485 TX/RX Bidirezionale
110
9 Accensione
111
Prima Accensione
111
Lista Dei Controlli
111
10 Configurazione
112
Interfaccia OSM (on Screen Menu)
112
Uso Dell'osm
112
Come Usare Il Joystick
112
Come Muoversi Nei Menù
113
Controllo Manuale
113
Come Modificare I Parametri
113
Come Modificare I Campi Numerici
114
Come Modificare I Testi
114
Configurazione Tramite OSM
116
Menù Principale
116
Menù Scelta Lingua
116
Menù Parametri ZFI
116
Menù Titolazione Aree
117
Menù Mascheratura Aree
118
Menù Seriale Custodia
119
Menù Polarità
119
Menù Movimento
120
Menù Controllo Manuale
120
Menù Controllo Manuale (Limiti)
121
Menù Preset
121
Menù Preset (Modifica Preset)
121
Menù Preset (Utilità Preset)
122
Menù Patrol
122
Menù Autopan
122
Menù Richiamo Movimenti
123
Menù Visualizzazioni
123
Menù I/O Digitali-Opzioni
123
Menù Allarmi
124
Menù Comunicazioni
124
Menù Impianto DI Lavaggio
125
Menù Default
125
Menù Info
125
11 Accessori
126
Impianto DI Lavaggio
126
Collegamento Dell'impianto DI Lavaggio
126
Supporto da Parete
127
Supporto da Parapetto
127
Alimentatore con Controllo Degli Illuminatori
127
12 Istruzioni DI Funzionamento Ordinario
128
Visualizzazione Dello Stato del Brandeggio
128
Salvataggio DI un Preset
128
Richiamo DI una Posizione DI Preset (Scan)
128
Richiamo Della Posizione DI Home
128
Attivazione del Patrol
128
Attivazione Dell'autopan
129
Attivazione del Tergicristallo (Wiper)
129
Attivazione Dell'impianto DI Lavaggio (Washer)
129
Attivazione Dell'illuminatore a LED
129
Reboot Dell'unità
129
Comandi Speciali
130
Configurazioni Speciali
131
13 Manutenzione
132
Sostituzione Dei Fusibili
132
14 Pulizia
132
Pulizia del Vetro E Delle Parti in Plastica
132
Pulizia Della Finestra in Germanio
132
15 Smaltimento Dei Rifiuti
132
16 Risoluzione Dei Problemi
133
17 Dati Tecnici
135
Generale
135
Meccanica
135
Finestre Per Custodia
135
Elettrico
135
Video
136
Comunicazioni
136
Protocolli
136
Interfaccia I/O
136
Ottiche
136
Ambiente
136
Certificazioni
136
18 Disegni Tecnici
137
A Appendice - Tabella Degli Indirizzi
140
Unité PTZ pour la Surveillance Dynamique de Vastes Zones Extérieures
147
Français
149
1 Propos de Ce Mode D'emploi
153
Conventions Typographiques
153
2 Notes Sur le Copyright et Informations Sur les Marques de Commerce
153
3 Normes de Securité
153
4 Identification
156
Description et Désignation du Produit
156
Marquage du Produit
156
Contrôle du Marquage
156
5 Versions
157
Projecteurs à LED
157
Fenêtre au Germanium
157
6 Préparation du Produit en Vue de L'utilisation
158
Précautions de Sécurité Avant L'utilisation
158
Déballage
158
Élimination Sans Danger des Matériaux D'emballage
158
Opérations à Effectuer Avant L'installation
159
Fixation du Support
159
Passage des Câbles
159
7 Assemblage
160
Fixation du Double Toit
160
Ouverture du Caisson
160
Montage Caméras, Systèmes Optiques Motorisés
160
Caractéristiques des Caméras
160
Fixation de L'optique et de la Caméra à la Glissière Interne
161
Positionnement de L'entretoise
162
Glissière Interne
162
Description de la Carte du Caisson
163
Branchement de la Caméra et de L'optique Motorisée
163
Réglage de la Tension D'alimentation des Moteurs des Optiques
164
8 Installation
165
Connexion des Câbles à la Base
165
Fixage de la Base au Support
166
Description de la Carte de Connexion
167
Connexion de la Ligne D'alimentation
168
Connexion de la Ligne D'alimentation en 24Vac
169
Raccordement de la Ligne D'alimentation en 120Vac et 230Vac
169
Connexion des Câbles de Signalisation
170
Connexion du Câble VIDéo
170
Connexion des Lignes de TéléMétrie
171
Branchement des Entrées D'alarme, de L'interrupteur Crépusculaire et des Relais
172
Version Standard
172
Fixation du Corps Supérieur
173
Montage du Contrepoids
173
Montage des Projecteurs à LED
174
Retrait des Contrepoids
174
Montage du Projecteur Sur L'étrier
174
Branchement des Projecteur à LED
175
Connexion pour la Synchronisation des Caméras Avec les Projecteurs à LED
176
Sachet Déshydratant
176
Réglage et Modalité D'activation des Projecteurs à LED
176
Description du Projecteur à LED
176
Activation des Projecteurs à LED à L'aide D'un Interrupteur Crépusculaire Externe
177
Activation des Projecteurs à LED à L'aide du Détecteur Crépusculaire Intégré
177
Réglage du Seuil D'allumage des Projecteurs à LED
178
Réglage de la Puissance des Projecteurs à LED
178
Fixation du Balai Essuie-Glace
179
Configuration du Matériel
180
Ouverture du Volet de Configuration
180
Configuration du DIP1
180
Configuration du DIP2
180
Configuration du DIP3
181
Configuration de L'adresse
181
Configuration des Lignes de Communications Sérielles
181
Configuration du DIP4
181
Exemple D'installation
182
Ligne RS-485 RX
182
Ligne RS-485 TX/RX Bidirectionnelle
182
9 Allumage
183
Premier Allumage
183
Liste des Contrôles
183
10 Configuration
184
Interface OSM (on Screen Menu)
184
Utilisation de L'osm
184
Utilisation du Joystick
184
Comment Se Déplacer Dans le Menu
185
Comment Modifier les Paramètres
185
Comment Modifier les Champs Numériques
186
Comment Modifier les Textes
186
Configuration Par OSM
188
Menu Principal
188
Menu Choix Langue
188
Menu Paramètres ZFI
188
Menu Titrage des Zones
189
Menu Masquage des Zones
190
Menu Communication Sérielle Caisson
191
Menu Polarité
191
Menu Mouvement
192
Menu Contrôle Manuel
192
Menu Contrôle Manuel (Limites)
193
Menu Preset
193
Menu Preset (Modifier Preset)
193
Menu Preset (Utilités Preset)
194
Menu Patrol
194
Menu Autopan
194
Menu Rappel Mouvements
195
Menu Affichages
195
Menu I/O Numériques-Options
195
Menu Alarmes
196
Menu des Communications
196
Menu Système de Lavage
197
Menu Par Défaut
197
Menu Infos
197
11 Accessoires
198
Système de Lavage
198
Branchement du Système de Lavage
198
Support Fixation Murale
199
Support Fixation Sol
199
Alimentateur Avec Contrôle des Projecteurs
199
12 Instructions de Fonctionnement Courant
200
Affichage de L'état de la Tourelle
200
Enregistrement D'un Preset
200
Rappel D'une Position de Preset (Scan)
200
Rappel de la Position de Home
200
Activation du Patrol
200
Activation de L'autopan
201
Validation de L'essuie-Glace (Wiper)
201
Activation du Système de Lavage (Washer)
201
Activation du Projecteur à LED
201
Reboot du Dispositif
201
Commandes Spéciales
202
Configuration Spéciales
203
13 Entretien
204
Remplacement des Fusibles
204
14 Nettoyage
204
Entretiens de la Vitre et des Parties en Plastique
204
Nettoyage de la Fenêtre au Germanium
204
15 Élimination des Déchets
204
16 Dépannage
205
17 Données Techniques
207
Généralités
207
Mécanique
207
Fenêtres pour Caisson
207
Électrique
207
VIDéo
208
Communications
208
Protocoles
208
Interface I/O
208
Optiques
208
Environnement
208
Certifications
208
18 Dessins Techniques
209
A Annexe - Tableau des Adresses
212
Publicité
Videotec ULISSE MAXI Manuel D'instructions (324 pages)
Marque:
Videotec
| Catégorie:
Caméras IP
| Taille: 37 MB
Table des Matières
Table des Matières
5
About this Manual
9
Typographical Conventions
9
Notes on Copyright and Information on Trademarks
9
Safety Rules
9
Identification
12
Product Description and Type Designation
12
Product Marking
12
Checking the Markings
12
Versions
13
LED Illuminators
13
Germanium Window
13
Preparing the Product for Use
14
Safety Precautions before Use
14
Unpacking
14
Safely Disposing of Packaging Material
14
Preparatory Work before Installation
15
Mounting the Bracket
15
Cables Management
15
Assembly
16
Sunshield Mounting
16
Assembling the Camera and Motorised Lenses
16
Cameras Features
16
How to Open the Housing
17
Fastening the Lens and the Camera to the Internal Slide
17
Positioning of the H-20 Spacer on the Inner Slide
18
Internal Slide
18
Housing Board Description
19
Connection of the Camera and Motorised Lens
19
Adjustment of the Supply Voltage of the Lens Motors
20
Connection of the Communication Line
20
Installation
21
Connection of the Cables to the Base
21
Fixing the Base to the Support
22
Connector Board Description
22
Connection of the Power Supply Line
23
24Vac Power Line Connection
24
120Vac and 230Vac Power Line Connection
24
Connection of the Alarm Inputs, of the Twilight Switch and of the Relays
25
Standard Version
25
Connection of the Ethernet Cable
25
Fixing the Upper Body
26
Counterweights Installation
26
LED Illuminators Installation
27
Counterweight Removal
27
Fitting the Illuminator on the Bracket
27
Connection of the LED Illuminators
28
Desiccant Bag
29
LED Illuminator Activation and Adjustment Instructions
29
Description of the LED Illuminator
29
Activation of the LED Illuminator Via an External Dusk Switch
30
Activation of the LED Illuminator Via the Integrated Dusk Sensor
30
Manually Activate the LED Illuminators
30
LED Illuminator Switching on Threshold Adjustment
31
LED Illuminator Power Adjustment
31
Fastening of the Wiper Blade
32
Hardware Configuration
33
Opening the Configuration Door
33
DIP1 Configuration
33
DIP2 Configuration
33
DIP3 Configuration
34
Address Configuration
34
Setting of the Serial Communication Lines
34
DIP4 Configuration
34
Switching on
35
Configuration
36
Web Interface
36
Products Equipped with Firmware Version Prior to 2.1
36
First Access to the Web
37
Home Page
37
User Controls Page
38
Device Parameters Page
39
Device Statistics Page
39
Network Configuration Page
39
User Configuration Page
40
Movement Parameters Page
40
Autopan Page
41
Patrol Page
41
Motions Recall Page
41
Preset Parameters Page
41
Digital I/O Page
42
Washer Page
42
Camera Settings Page
43
Tools Page
43
Factory Default
44
Vttunnel
44
Accessories
45
Washer
45
Washing System Connection
45
Wall Mount Bracket
46
Parapet Bracket
46
Power Supply with Illuminator Control
46
Instructions for Exceptional Operation
47
Analogue Video Connection
48
Camera Connection
48
Check Communication in RS485 Mode
51
Alarm Status Control
51
Reset the ONVIF Mode
52
Communication Control in ONVIF Mode
52
Maintenance
53
Fuses Replacement
53
Cleaning
53
Window and Plastic Cover Cleaning
53
Cleaning the Germanium Window
53
Disposal of Waste Materials
53
Troubleshooting
54
Technical Data
55
General
55
Mechanical
55
Housing's Window
55
Electrical
56
Communications
56
Protocols
56
Environment
56
Certifications
56
Technical Drawings
57
A Appendix - Address Table
60
Informazioni Sul Presente Manuale
73
Convenzioni Tipografiche
73
Note Sul Copyright E Informazioni Sui Marchi Commerciali
73
Norme DI Sicurezza
73
Identificazione
76
Descrizione E Designazione del Prodotto
76
Marcatura del Prodotto
76
Controllo Della Marcatura
76
Versioni
77
Illuminatori a LED
77
Finestra in Germanio
77
Preparazione del Prodotto Per L'utilizzo
78
Precauzioni DI Sicurezza Prima Dell'utilizzo
78
Disimballaggio
78
Smaltimento in Sicurezza Dei Materiali DI Imballaggio
78
Lavoro Preparatorio Prima Dell'installazione
79
Fissaggio del Supporto
79
Passaggio Cavi
79
Assemblaggio
80
Fissaggio del Tettuccio
80
Montaggio Telecamera E Ottiche Motorizzate
80
Caratteristiche Delle Telecamere
80
Apertura Della Custodia
81
Fissaggio Dell'ottica E Della Telecamera Alla Slitta Interna
81
Posizionamento Della Slitta Interna
82
Descrizione Della Scheda Della Custodia
83
Collegamento Della Telecamera E Dell'ottica Motorizzata
83
Regolazione Della Tensione DI Alimentazione Dei Motori Delle Ottiche
84
Collegamento Della Linea DI Comunicazione
84
Installazione
85
Collegamento Dei Cavi Alla Base
85
Fissaggio Della Base al Supporto
86
Descrizione Della Scheda Connettori
86
Collegamento Della Linea DI Alimentazione
87
Collegamento Della Linea DI Alimentazione in 24Vac
88
Collegamento Della Linea DI Alimentazione in 120Vac E 230Vac
88
Collegamento Degli Ingressi DI Allarme, Dell'interruttore Crepuscolare E Dei Relè
89
Versione Standard
89
Collegamento del Cavo DI Rete Ethernet
89
Fissaggio del Corpo Superiore
90
Montaggio Dei Contrappesi
90
Montaggio Degli Illuminatori a LED
91
Rimozione Dei Contrappesi
91
Montaggio Dell'illuminatore Sulla Staffa
91
Collegamento Degli Illuminatori a LED
92
Sacchetto Disidratante
93
Regolazione E Modalità DI Attivazione Degli Illuminatori a LED
93
Descrizione Dell'illuminatore a LED
93
Attivazione Degli Illuminatori a LED Tramite un Interruttore Crepuscolare Esterno
94
Attivazione Degli Illuminatori a LED Tramite Il Sensore Crepuscolare Integrato
94
Attivazione Manuale Degli Illuminatori a LED
94
Regolazione Della Soglia DI Accensione Degli Illuminatori a LED
95
Regolazione Della Potenza Degli Illuminatori a LED
95
Fissaggio Della Spazzola del Tergicristallo
96
Configurazione Hardware
97
Apertura Dello Sportellino DI Configurazione
97
Configurazione del DIP1
97
Configurazione del DIP2
97
Configurazione del DIP3
98
Configurazione Dell'indirizzo
98
Configurazione Delle Linee DI Comunicazione Seriali
98
Configurazione del DIP4
98
Accensione
99
Configurazione
100
Interfaccia Web
100
Prodotti Dotati DI Firmware Precedente Alla Versione 2.1
100
Primo Accesso alle Pagine Web
101
Pagina Home
101
Pagina Controlli Utente
102
Pagina Parametri Dispositivo
103
Pagina Statistiche Dispositivo
103
Pagina Configurazione Rete
103
Pagina Configurazione Utenti
104
Pagina Parametri Movimento
104
Pagina Autopan
105
Pagina Patrol
105
Pagina Richiamo Movimenti
105
Pagina Parametri Preset
105
Pagina Parametri Preset (Avanzato)
105
Pagina I/O Digitali
106
Pagina Washer
106
Pagina Parametri Telecamera
107
Pagina Strumenti
107
Factory Default
108
Vttunnel
108
Accessori
109
Impianto DI Lavaggio
109
Collegamento Dell'impianto DI Lavaggio
109
Supporto da Parete
110
Supporto da Parapetto
110
Alimentatore con Controllo Degli Illuminatori
110
Istruzioni DI Funzionamento Eccezionale
111
Modifica Della Modalità DI Comunicazione (da Protocollo ONVIF a Telemetria Seriale)
111
Collegamento Video Analogico
112
Connessione Della Telecamera
112
Controllo Della Comunicazione in Modalità RS485
115
Controllo Stato Allarmi
115
Ripristino Della Modalità ONVIF
116
Controllo Della Comunicazione in Modalità ONVIF
116
Manutenzione
117
Sostituzione Dei Fusibili
117
Pulizia
117
Pulizia del Vetro E Delle Parti in Plastica
117
Pulizia Della Finestra in Germanio
117
Smaltimento Dei Rifiuti
117
Risoluzione Dei Problemi
118
Dati Tecnici
119
Generale
119
Meccanica
119
Finestre Per Custodia
119
Elettrico
120
Comunicazioni
120
Protocolli
120
Ambiente
120
Certificazioni
120
Disegni Tecnici
121
A Appendice - Tabella Degli Indirizzi
124
Propos de Ce Mode D'emploi
137
Conventions Typographiques
137
Notes Sur le Copyright et Informations Sur les Marques de Commerce
137
Normes de Securité
137
Identification
140
Description et Désignation du Produit
140
Marquage du Produit
140
Contrôle du Marquage
140
Versions
141
Projecteurs à LED
141
Fenêtre en Germanium
141
Préparation du Produit en Vue de L'utilisation
142
Précautions de Sécurité Avant L'utilisation
142
Déballage
142
Élimination Sans Danger des Matériaux D'emballage
142
Opérations à Effectuer Avant L'installation
143
Fixation du Support
143
Passage des Câbles
143
Assemblage
144
Fixation du Double Toit
144
Montage Caméras, Systèmes Optiques Motorisés
144
Caractéristiques des Caméras
144
Ouverture du Caisson
145
Fixation de L'optique et de la Caméra à la Glissière Interne
145
Positionnement de L'entretoise
146
Glissière Interne
146
Description de la Carte du Caisson
147
Branchement de la Caméra et de L'optique Motorisée
147
Réglage de la Tension D'alimentation des Moteurs des Optiques
148
Branchement de la Ligne de Communication
148
Installation
149
Connexion des Câbles à la Base
149
Fixage de la Base au Support
150
Description de la Carte de Connexion
150
Connexion de la Ligne D'alimentation
151
Connexion de la Ligne D'alimentation en 24Vac
152
Raccordement de la Ligne D'alimentation en 120Vac et 230Vac
152
Branchement des Entrées D'alarme, de L'interrupteur Crépusculaire et des Relais
153
Version Standard
153
Branchement du Câble de Réseau Ethernet
153
Fixation du Corps Supérieur
154
Montage du Contrepoids
154
Montage des Projecteurs à LED
155
Retrait des Contrepoids
155
Montage du Projecteur Sur L'étrier
155
Branchement des Projecteur à LED
156
Sachet Déshydratant
157
Réglage et Modalité D'activation des Projecteurs à LED
157
Description du Projecteur à LED
157
Activation des Projecteurs à LED à L'aide D'un Interrupteur Crépusculaire Externe
158
Activation des Projecteurs à LED à L'aide du Détecteur Crépusculaire Intégré
158
Activation Manuelle des Projecteurs à LED
158
Réglage du Seuil D'allumage des Projecteurs à LED
159
Réglage de la Puissance des Projecteurs à LED
159
Fixation du Balai Essuie-Glace
160
Configuration du Matériel
161
Ouverture du Volet de Configuration
161
Configuration du DIP1
161
Configuration du DIP2
161
Configuration du DIP3
162
Configuration de L'adresse
162
Configuration des Lignes de Communications Sérielles
162
Configuration du DIP4
162
Allumage
163
Configuration
164
Interface Web
164
Produits Avec Firmware Antérieur à la Version 2.1
164
Premier Accès aux Pages Web
165
Page Home
165
Page Contrôles Utilisateur
166
Page Paramètres Dispositif
167
Page Statistiques Dispositif
167
Page Configuration Réseau
167
Page Configuration Utilisateurs
168
Page Paramètres Mouvement
168
Page Autopan
169
Page Patrol
169
Page Rappel Mouvements
169
Page Paramètres Preset
169
Page Paramètres Preset (Avancé)
169
Page I/O Digitaux
170
Page Washer
170
Page Paramètres Caméra
171
Page Instruments
171
Factory Default
172
Vttunnel
172
Accessoires
173
Système de Lavage
173
Branchement du Système de Lavage
173
Support Fixation Murale
174
Support Fixation Sol
174
Alimentateur Avec Contrôle des Projecteurs
174
Instructions de Fonctionnement Exceptionnel
175
Modification de la Modalité de Communication (depuis Protocole ONVIF à TéléMétrie Sérielle)
175
Connexion VIDéo Analogique
176
Connexion de la Caméra
176
Contrôle de la Communication en Mode RS485
179
Contrôle de L'état des Alarmes
179
Rétablissement du Mode ONVIF
180
Contrôle de la Communication en Mode ONVIF
180
Entretien
181
Remplacement des Fusibles
181
Nettoyage
181
Entretiens de la Vitre et des Parties en Plastique
181
Nettoyage de la Fenêtre en Germanium
181
Élimination des Déchets
181
Dépannage
182
Données Techniques
183
Généralités
183
Mécanique
183
Fenêtres pour Caisson
183
Électrique
184
Communications
184
Protocoles
184
Environnement
184
Certifications
184
Dessins Techniques
185
A Annexe - Tableau des Adresses
188
Allgemeines
201
Anmerkungen zum Copyright und Informationen zu den Handelsmarken
201
Sicherheitsnormen
201
Identifizierung
204
Beschreibung und Bezeichnung des Produktes
204
Kennzeichnung des Produkts
204
Prüfung der Kennzeichnung
204
Versionen
205
LED Scheinwerfer
205
Fensterscheibe aus Germanium
205
Vorbereitung des Produktes auf den Gebrauch
206
Sicherheitsvorkehrungen vor dem Gebrauch
206
Entfernen der Verpackung
206
Sichere Entsorgung der Verpackungsmaterialien
206
Auf die Installation Vorbereitende Tätigkeiten
207
Befestigung der Halterung
207
Kabelführung
207
Zusammenbau
208
Befestigung des Dachs
208
Montage Kamera und Motorisch Bewegte Optiken
208
Eigenschaften der Kameras
208
Öffnung des Schutzgehause
209
Befestigung der Optik und der Kamera am Innenschlitten
209
Innenschlittens
210
Beschreibung der Karte Gehäuse
211
Anschluss der Kamera und der Motorisch Bewegten Optik
211
Einstellung der Versorgungsspannung der Motoren der Optiken
212
Anschluss der Kommunikationslinie
212
Installation
213
Anschließen der Kabel an die Basis
213
Befestigung der Basis an der Halterung
214
Beschreibung der Karte Anschlüsse
214
Anschluss der Stromversorgung
215
Anschluss der Stromversorgunglinie 24Vac
216
Anschluss der Versorgungsleitung in 120Vac und 230Vac
216
Anschluss der Alarmeingänge, der Dämmerungsschalter und der Relais
217
Anschluss der Ethernet-Kabel
217
Befestigung des Oberen Körpers
218
Aufbau der Gegengewichte
218
Montage der Scheinwerfer mit LED
219
Entfernen der Gegengewichte
219
Montage des Scheinwerfers auf den Bügel
219
Anschluss der LED-Scheinwerfer
220
Trockenmittelbeutel
221
Einstellung und Aktivierungsarten der LED-Scheinwerfer
221
Beschreibung des LED-Scheinwerfers
221
Aktivierung der LED-Scheinwerfer durch einen Externen Dämmerungsschalter
222
Aktivierung der LED-Scheinwerfer durch den Integrierten Dämmerungssensor
222
Manuelle Aktivierung der LED-Scheinwerfer
222
Einstellung der Einschaltschwelle der LED-Scheinwerfer
223
Einstellung der Leistung der LED-Scheinwerfer
223
Befestigung des Wischerblattes
224
Publicité
Produits Connexes
Videotec ULISSE MAXI NETCAM
Videotec ULISSE
Videotec Ulisse Compact
Videotec ULISSE COMPACT THERMAL
Videotec ULISSE EVO UE
Videotec ULISSE EVO THERMAL UET
Videotec ULISSE EVO DUAL UED
Videotec ULISSE EVO
Videotec ULISSE EVO THERMAL
Videotec ULISSE RADICAL
Videotec Catégories
Caméras de surveillance
Accessoires de caméra
Contrôleurs
Équipement d'éclairage
Récepteurs
Plus Manuels Videotec
Connexion
Se connecter
OU
Se connecter avec Facebook
Se connecter avec Google
Télécharger le manuel
Télécharger depuis le disque dur
Télécharger depuis l'URL