
Manuels Connexes pour Nuova Simonelli AURELIA WAVE DIGIT-T3


Sommaire des Matières pour Nuova Simonelli AURELIA WAVE DIGIT-T3
- Page 1 AURELIA WAVE DIGIT - T LIBRETTO ISTRUZIONI (Istruzioni Originali) USER HANDBOOK (Translation of the Original Instructions) MANUEL D’INSTRUCTIONS (Traduction des Instructions Originales)
- Page 2 INDICE / INDEX / SOMMAIRE PRESCRIZIONI DI SICUREZZA SAFETY INDICATIONS PRESCRIPTIONS DE SÉCURITÉ INFORMAZIONI GENERALI / GENERAL INFORMATIONS / INFORMATIONS GÉNÉRALES DATI TECNICI / TECHNICAL DATA / DONNÉES TECHNIQUES DESCRIZIONE MACCHINA / MACHINE DESCRIPTION / DESCRIPTION DE LA MACHINE INSTALLAZIONE / INSTALLATION / INSTALLATION REGOLAZIONI DEL TECNICO QUALIFICATO / QUALIFIED TECHNICIAN ADJUSTMENTS / RÉGLAGES DU TECHNICIEN QUALIFIÉ...
- Page 3 IT PRESCRIZIONI DI SICUREZZA • Il presente libretto costituisce parte integrante ed essenziale del prodotto e dovrà essere consegnato all’utilizzatore. Leggere attentamente le avvertenze contenute nel presente libretto in quanto forniscono importanti indicazioni riguardanti la si- curezza di installazione, d’uso e manutenzione. Conservare con cura questo libret- to per ogni ulteriore consultazione.
- Page 4 i materiali in dotazione al dispositivo stesso. Qualora fosse necessario l’utilizzo di altra componentistica, l’installatore deve verificare l’idoneità dello stesso ad essere utilizzato a contatto con l’acqua per consumo umano. L’installatore deve eseguire i collegamenti idraulici rispettando le norme di igiene e sicurezza idrau- lica di tutela ambientale vigenti nel luogo di installazione.
- Page 5 rivolgersi esclusivamente a personale professionalmente qualificato. • In caso di necessità di sostituzione del cavo di alimentazione questa può essere eseguita solo da un centro assistenza autorizzato o dal costruttore. • L’alimentazione del dispositivo deve essere effettuata con acqua idonea al consu- mo umano conforme alle disposizioni vigenti nel luogo di installazione.
- Page 6 • Allorché si decida di non utilizzare più un apparec- chio di questo tipo si raccomanda di renderlo ino- perante dopo aver staccato la spina, tagliare il cavo di alimentazione. • Non disperdere la macchina nell’ambiente: per lo smaltimento rivolgersi ad un centro autorizzato o contattare il costruttore che darà...
- Page 7 I cavi elettrici di alimentazione devono essere dimensio- nati in funzione della massima corrente richiesta dalla macchina in modo che la caduta di tensione totale, a pieno carico, risulti inferiore al 2%. • Predisposizione idrica. Predisporre un idoneo scarico idrico e una rete idrica di alimentazione che forni- sce acqua con durezza massima di 3/5°...
- Page 8 Il Costruttore declina ogni responsabilità per eventuali danni a cose o persone derivanti dall’inosservanza del- le norme di sicurezza vigenti in materia di sollevamen- to e spostamento di materiali. MOVIMENTAZIONE • Sollevare lentamente il pallet a circa 30 cm da terra e raggiungere la zona di carico.
- Page 9 CONTROLLO CONTENUTI Al ricevimento della scatola, verificare che l’imballo sia integro e visivamente non danneggiato. All’interno dell’imballo deve esserci il libretto istruzioni e il relativo corredo. In caso di danneggiamenti o anomalie, contattare il concessionario di zona. Per qualsiasi comunicazione, citare sempre il numero di matricola. La comunicazione deve essere effettuata entro 8 giorni dalla ricezione della mac- china.
- Page 10 EN SAFETY INDICATIONS • The present manual is an integral and essential part of the product and is to be delivered to the user. Carefully read all warnings in the manual as they provide important information required to install, use and maintain the unit safely. Keep this manual in a safe place for further consultation.
- Page 11 • When installing the device, it is necessary to use the parts and materials supplied with the device itself. Should it be necessary to use other parts, the installation engineer needs to check their suitability for use in contact with water for human consumption.
- Page 12 turn off the unit and have it replaced by a professionally qualified technician. • Should it be necessary to replace the power cord, this replacement operation must only be performed by an authorized service centre or by the manufacturer. • The device needs to be supplied with water that is suitable for human consump- tion and compliant with the regulations in force in the place of installation.
- Page 13 • Should you decide to stop using this type of unit, we suggest you render it inoperable by unplugging it and cutting the power supply cord. • Never dispose of the machine in the environment: to dispose of the machine, contact an authorized center or contact the manufacturer for pertinent in- dications.
- Page 14 The power wires must be sized according to the maxi- mum current required by the machine to ensure a total voltage loss under full load of less than 2%. • Plumbing requirements. Prepare a suitable drain and a mains that supply water a maximum hardness of 3/5 French degrees (60/85 ppm).
- Page 15 Failure to respect current safety regulations and stand- ards on lifting and handling materials absolves the Manufacturer from all liability for possible damage to person or things. MOVEMENTS • Slowly lift the pallet about 30 cm from the ground and reach the loading area. •...
- Page 16 CONTENTS CHECK Upon receipt of the box, check that the packaging is intact and visually undamaged. Inside the packaging must be the instruction manual and the relative kit. In case of damage or faults, contact your local dealer. For any communication, always communicate the serial number. The communication must be carried out within 8 days from the receipt of the ma- chine.
- Page 17 FR PRESCRIPTIONS DE SÉCURITÉ • Ce manuel est partie intégrante et essentielle du produit et il doit par conséquent être remis à l’utilisateur. Lire attentivement les conseils qu’il contient car ils four- nissent des indications particulièrement importantes sur la sécurité de l’installa- tion, son utilisation et son entretien.
- Page 18 • Durant l’installation du dispositif, utiliser les composants et les matériaux fournis en dotation avec le dispositif. Si l’utilisation s’avère nécessaire • Si l’utilisation de composants supplémentaires s’avère nécessaire, l’installateur doit vérifier l’adéquation de ces derniers pour un emploi au contact de l’eau pour la consommation humaine.
- Page 19 • Le câble d’alimentation de cet appareil ne doit pas être remplacé par l’utilisateur. En cas d’endommagement du câble, éteindre l’appareil et le faire remplacer uni- quement par un technicien qualifié. • Si le cordon d’alimentation doit être remplacé, cette opération doit être effectuée exclusivement par un centre d’assistance agréé...
- Page 20 • Si vous décidez de ne plus utiliser cet appareil, il est vivement conseillé de le rendre inefficace en cou- pant le câble d’alimentation, après avoir débranché le câble du réseau d’alimentation électrique. • Ne jamais abandonner l’appareil dans l’environne- ment: pour son élimination totale, s’adresser à...
- Page 21 Les câbles d'alimentation électrique doivent être di- mensionnés en fonction du courant maximum requis par la machine pour que la chute de tension totale, à pleine charge, soit inférieure à 2%. • Prédisposition hydrique. Préparer une évacuation d'eau appropriée et un réseau d'alimentation en eau d'une dureté...
- Page 22 Le Fabricant décline toute responsabilité face aux éventuels dommages matériels ou corporels résultant du non-respect des règles de sécurité en vigueur en matière de levage et de déplacement de matériels. MANUTENTION • Soulever doucement la palette à 30 cm environ du sol et rejoindre la zone de chargement.
- Page 23 CONTRÔLES DES CONTENUS Au moment de la réception de la caisse, vérifier que l'emballage soit intègre et vi- suellement intact. L’emballage doit contenir le manuel d’instructions et l’équipe- ment. En cas de dommages ou d’anomalies, contacter le concessionnaire de zone. Pour toute communication, indiquer toujours le numéro de série de la machine.
- Page 24 INFORMAZIONI GENERALI GENERAL INFORMATIONS INFORMATIONS GÉNÉRALES COSTRUTTORE: SIMONELLI GROUP - Via E. Betti, 1 - Belforte del Chienti, Macerata (MC) - Italia MACCHINA DA CAFFÈ MODELLO: AURELIA WAVE DIGIT T MANUFACTURER: SIMONELLI GROUP - Via E. Betti, 1 - Belforte del Chienti, Macerata (MC) - Italy COFFEE MACHINE MODEL: AURELIA WAVE DIGIT T FABRICANT: SIMONELLI GROUP - Via E.
- Page 25 DATI TECNICI TECHNICAL DATA DONNÉES TECHNIQUES Versione DIGIT Version Version Gruppi Groups Groupes Voltaggio Voltage 230/380 230/380 Voltage Potenza (con scaldatazze) Power (with cup warmer) 5100 5900 6000 7000 8750 Puissance (avec chauffe-tasses) Potenza (senza scaldatazze) Power (without cup warmer) 4700 5400 5400...
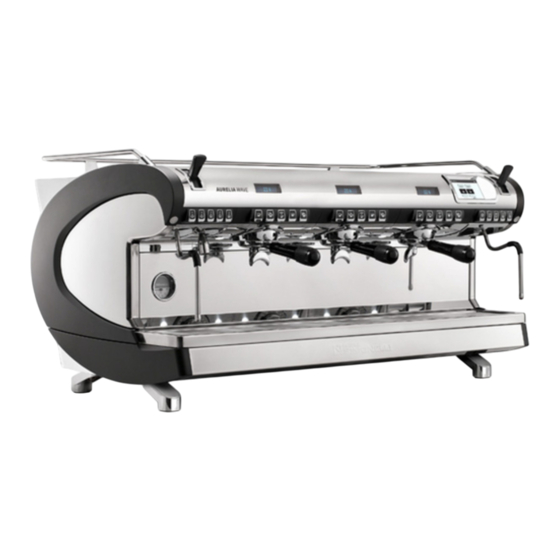
- Page 26 DESCRIZIONE MACCHINA MACHINE DESCRIPTION DESCRIPTION DE LA MACHINE 1.21 bar SUNDAY 20 MAY 12:34 °C °C °C 102.55 90.58 98.00...
- Page 27 Display touch screen Touch screen display Afficheur à écran tactile Regolatore Easycream (opt) Easycream regulator (opt) Régulateur Easycream (opt) Scaldatazze Cup warmer Chauffe-tasses Display Easycream (opt) Easycream display (opt) Afficheur Easycream (opt) Lancia Easycream (opt) Easycream wand (opt) Lance Easycream (opt) Gruppo erogazione Dispensing group Groupe de Distribution...
- Page 28 USO PREVISTO INTENDED USE USAGE PRÉVU • Macchina progettata e co- • Machine designed and built • Machine conçue et construite struita rispettando quanto respecting what is expressed conformément au contenu espresso nella dichiarazione in the declaration of con- de la déclaration de confor- di conformità.
- Page 29 USO IMPROPRIO IMPROPER USE USAGE NON CONFORME In questo paragrafo sono elen- This chapter lists a number Ce paragraphe énumère seu- cate solo alcune situazioni di reasonably foreseeable lement quelques situations uso scorretto ragionevolmente improper uses. The machine d’usage incorrect raisonnable- prevedibile.
- Page 30 INSTALLAZIONE INSTALLATION INSTALLATION 5 > > 30°C Per sollevare la macchina sono To lift the machine are neces- Au moins 2 personnes sont né- necessarie almeno 2 persone. sary 2 or more operators. cessaires pour soulever la ma- chine. POSIZIONAMENTO POSITIONING POSITIONNEMENT Prima di installare la macchina,...
- Page 31 ALLACCIAMENTO IDRICO WATER CONNECTION BRANCHEMENT À L’ARRIVÉE D’EAU Éviter les étrangle- Evitare strozzature Avoid throttling ments des tubes de nei tubi di collega- in the connecting connexion. Vérifier mento. Verificare tubes. Assess that que l'évacuation soit en me- che lo scarico sia in grado di the drain pipe is able to elim- sure d'éliminer les rebuts.
- Page 32 1 2 3 4 1 2 3 4 ALLACCIAMENTO ELECTRICAL BRANCHEMENT ELETTRICO CONNECTION ÉLECTRIQUE Avant de brancher a machine à un réseau électrique, vérifier Prima di allacciare la macchina Prior to connecting the machine que le voltage indiqué sur la a una rete elettrica verificare to the electrical mains, assess plaquette des données de la...
- Page 33 OPERAZIONI PRELIMINARI PRELIMINARY OPERATIONS OPÉRATIONS PRÉLIMINAIRES Al termine dell’installazione, At the end of installation, the Au terme de l’installation, le il dispositivo viene attivato e device is switched on and taken dispositif doit être actionné portato fino alla condizione no- to rated operating conditions, jusqu’à...
- Page 34 REGOLAZIONI DEL TECNICO QUALIFICATO QUALIFIED TECHNICIAN ADJUSTMENTS RÉGLAGES DU TECHNICIEN QUALIFIÉ Le operazioni di se- The operations de- Les opérations dé- guito descritte de- scribed below must crites ci-dessous vono essere svolte solo da tec- be carried out only by special- doivent être effectuées exclu- nici specializzati.
- Page 35 SOSTITUZIONE REPLACING REMPLACEMENT BATTERIA OROLOGIO THE CLOCK BATTERY BATTERIE MONTRE La centralina elettronica è prov- The electronic control unit has La centrale électronique est vista di una batteria al litio per a lithium battery to power the munie d’une batterie au lithium l’alimentazione dell’orologio clock;...
- Page 36 UTILIZZO UTILISATION L’operatore deve prima Before starting to use the Avant commencer di iniziare la lavorazione, appliance, the operator à travailler, l’opérateur accertarsi di aver letto e ben must be sure to have read and doit avoir lu et compris toutes compreso le prescrizioni di si- understood the safety prescrip- les prescriptions de sécurité...
- Page 37 1.21 bar SUNDAY 20 MAY 12:34 °C °C °C 102.55 90.58 98.00 6.1.1 6.1.1 6.1.1 ACCENSIONE / MANUAL MARCHE/ARRÊT MANUEL SPEGNIMENTO MANUALE SWITCHING ON/OFF ON - OFF Automatico Automatic On/Off ON - OFF Automatique NON PROGRAMMATO NOT PROGRAMMED NON PROGRAMMÉ Assicurarsi che l’interrut- Make sure that the gener- Contrôler que l'interrup-...
- Page 38 ON - OFF Automatico Automatic On/Off ON - OFF Automatique PROGRAMMATO PROGRAMMED: PROGRAMMÉ Assicurarsi che l’interrut- Make sure that the gener- Contrôler que l'interrup- tore generale sia sempre al switch is always on the teur principal soit tou- in posizione “I”. position “I”.
- Page 39 EROGAZIONE CAFFÈ COFFEE DISPENSING DISTRIBUTION CAFÉ Dopo aver messo a punto la After commissioning the ma- Après avoir mis au point la ma- macchina: chine: chine: • Inserire il filtro desiderato • Insert the desired filter (sin- • Introduire le filtre désiré (singolo o doppio all’interno gle or double inside the filter (simple ou double à...
- Page 40 EROGAZIONE VAPORE STEAM DISPENSING DISTRIBUTION VAPEUR Durante l’uso della lancia del While using the steam nozzle, Lors de l'utilisation de la lance vapore, prestare molta atten- you must pay attention to not à vapeur, veiller à ne pas placer zione a non mettere le mani place your hands beneath it les mains sous la lance et à...
- Page 41 PREPARAZIONE MAKING PRÉPARATION DEL CAPPUCCINO CAPPUCCINO DU CAPPUCCINO Immergere il beccuccio del va- Immerse the nozzle all the way Plonger le bec de la vapeur pore in fondo al recipiente di into a container 1/3 full of milk. dans le fond du récipient à lait latte pieno per 1/3.
- Page 42 EROGAZIONE ACQUA CALDA HOT WATER DISPENSING DISTRIBUTION EAU CHAUDE Lors de l'utilisation de la lance Durante l’uso della lancia While using the hot water noz- de l’eau chaude, veiller à ne pas dell’acqua calda, prestare mol- zle, pay careful attention not placer les mains sous la lance et ta attenzione a non mettere le to place your hands beneath it...
- Page 43 EASYCREAM (optional) EASYCREAM (optional) EASYCREAM (en option) Lors de l'utilisation de l’Easy- Durante l’uso dell’Easycream, When using Easycream, take prestare molta attenzione a non great care not to place your cream, veiller à ne pas placer les mains sous la lance et à ne mettere le mani sotto di essa e hands underneath it and never pas la toucher immédiatement...
- Page 44 PROGRAMMAZIONE PROGRAMMATION PROGRAMMATION 1.21 bar SUNDAY 20 MAY 12:34 °C °C °C 102.55 90.58 98.00 ZONE SENSIBILI SENSIBLE AREAS ZONES SENSIBLES...
- Page 45 Le schermate descritte nel pre- The screens described in this fenêtres-vidéo décrites sente manuale sono puramente manual are indicative only. dans ce manuel sont purement indicative. indicatives. HOME PAGE HOME PAGE PAGE D’ACCUEIL (HOME PAGE) Pressione vapore e barra Steam pressure and Pression vapeur et barre informazioni informations bar...
- Page 46 MY COFFEES MY COFFEES MY COFFEES Selezionare una ricetta per pro- Select a recipe to proceed with Sélectionner une recette pour cedere all’erogazione. the dispensing. procéder à la distribution. Recipe set Ricetta impostata Recette programmée Recipe set Ricetta impostata Recette programmée Recipe set Ricetta impostata Recette programmée...
- Page 47 7.1.1 7.1.1 7.1.1 ATTIVA RICETTA ACTIVE RECIPE ACTIVER RECETTE Selezionare una ricetta e con- Select a recipe and confirm it to Sélectionnez une recette et fermarla per attivare tutti i pa- activate all of parameters set. confirmez-la pour activer tous les rametri impostati.
- Page 48 100 °C 20 cc 50 cc 91 °C 40 cc 100 cc 17 g 7.1.2 7.1.2 7.1.2 CREATE A RECIPE CRÉER UNE RECETTE CREARE UNA RICETTA To make a new recipe, keep icon Pour créer une nouvelle recette, Per creare una nuova ricetta, 1, 2 or 3 pressed.
- Page 49 10 sec 12 sec 1,5 sec 5 sec 8 sec Impostare: Set: Configurer: Temperatura gruppo Group temperature Température groupe Temp. caldaia caffè (T Coffee boiler temp. (T Temp. chaudière café (T Grammi caffè macinato Grams ground coffee Grammes café moulu Dose 1 caffè...
- Page 50 6’ 10’ 4’ 9’ 5’ 11’ space Funzioni PULSEJET (optional) PULSEJET functions (optional) Fonctions PULSEJET (en option) Pulsejet pre-infusione Pre-infusion pulsejet Pulsejet pré-infusion (T on - T off) (T on - T off) (T on - T off) Pulsejet infusione Infusion pulsejet Pulsejet infusion (T on - T off)
- Page 51 IMPOSTAZIONE KEYS AND SCREEN PROGRAMMATION TASTI E SCHERMO SETTINGS TOUCHES ET AFFICHEUR Premere una delle icone per ac- Press one of the icons to access Frapper l’une des icônes pour ac- cedere al relativo menu. the relative menu. céder au menu correspondant. Unità...
- Page 52 7.2.1 7.2.1 7.2.1 UNITÀ DI MISURA UNIT OF MEASURE UNITÉ DE MESURE Choisir l’unité de mesure par Scegliere l’unità di misura di Choose the default measure- défaut. default. ments units. Fahrenheit Fahrenheit Fahrenheit Celsius Celsius Celsius Retour au menu précédent Al menu precedente To the previous menu Retour au menu principal...
- Page 53 7.2.2 7.2.2 7.2.2 LUMINOSITÀ LED ESTERNI EXTERNAL LED BRIGHTNESS LUMINOSITÉ LED EXTERNES Impostare la luminosità dei led Set the external led brightness. Programmer la luminosité des esterni. led externes. Al menu precedente To the previous menu Retour au menu précédent. Al menu principale To the main menu Retour au menu principal...
- Page 54 7.2.3 7.2.3 7.2.3 LUMINOSITÀ SCHERMO SCREEN BRIGHTNESS LUMINOSITÉ AFFICHEUR Impostare la luminosità del di- Set the screen light intensity. Programmer la luminosité de splay. l’afficheur. Al menu precedente To the previous menu Retour au menu précédent. Al menu principale To the main menu Retour au menu principal Decremento Decrease...
- Page 55 7.2.4 7.2.4 7.2.4 LUMINOSITÀ TASTI KEYS BRIGHTNESS LUMINOSITÉ TOUCHES Impostare la luminosità dei ta- Programmer la luminosité des Set the button pad light inten- sti. touches. sity. Al menu precedente Retour au menu précédent. To the previous menu Al menu principale Retour au menu principal To the main menu Decremento...
- Page 56 7.2.5 7.2.5 7.2.5 SOSPENSIONE SCHERMO SCREEN SUSPENSION SUSPENSION D’ÉCRAN Impostare il tempo di sospen- Set the time suspension of the Réglez le temps de suspension sione dello schermo dopo l’i- screen after inactivity. de l’ écran après inactivité. nattività. Incremento Increase Incrément Decremento...
- Page 57 7.2.6 7.2.6 7.2.6 VISUALIZZA TEMPERATURA DISPLAY BREWING AFFICHER LA TEMPÉRATURE EROGAZIONE TEMPERATURE DE DISTRIBUTION Impostare la visualizzazione Set the delivery temperature Programmer l’affichage de la della temperatura di erogazio- displaying on the screen. température de distribution sur ne sul display. l’afficheur.
- Page 58 7.2.7 7.2.7 7.2.7 VISUALIZZA TEMPO DELIVERY TIME AFFICHER LE TEMPS DE EROGAZIONE DISPLAYING DISTRIBUTION Impostare la visualizzazione del Set the delivery time displaying Programmer l’affichage du temps tempo di erogazione sul display. on the screen. de distribution sur l’afficheur. Temporizzato Timed Temporisé...
- Page 59 PROGRAMMA DOSI DOSE PROGRAMMING PROGRAMME DOSES Premere una delle icone per ac- Press one of the icons to access Frapper l’une des icônes pour accéder au menu correspondant. cedere al relativo menu. the relative menu. Programma gruppi Groups program Programme groupes Impostazioni standard Standard settings Programmations standard...
- Page 60 Al menu precedente Al menu principale Gruppo precedente Gruppo successivo Decremento Incremento To the previous menu To the main menu Previous group 20 cc 50 cc Next group Decrease Increase 40 cc 100 cc Retour au menu précédent Retour au menu principal Groupe précédent Groupe suivant Décrément...
- Page 61 7.3.2 7.3.2 7.3.2 IMPOSTAZIONI STANDARD PROGRAMMATIONS STANDARD SETTINGS STANDARD Scegliere il gruppo a cui applica- Choose on which groups apply Choisir le groupe auquel appli- re le impostazioni standard. the standard settings. quer les programmations stan- dard. Gruppo 1 Group 1 Groupe 1 Gruppo 2 Group 2...
- Page 62 1,5 s 7.3.3 7.3.3 7.3.3 ACQUA CALDA HOT WATER EAU CHAUDE Impostare i tempi di erogazione Programmer les temps de dis- Set the water delivery time for dell’acqua per le dosi da erogare. tribution de l’eau pour les doses the deliverable doses. I tasti acqua calda iniziano a à...
- Page 63 7.3.4 7.3.4 7.3.4 TRASFERIMENTO DOSI GROUPS DOSES TRANSFERT DES DOSES GRUPPI TRANSFER GROUPES Selezionare a quale gruppo Choose on which groups trans- Sélectionner le groupe auquel trasferire le dosi. Scorrendo le fer the doses. By scrolling the transférer les doses. En faisant pagine verso destra si hanno le pages to right, there are the op- défiler les pages vers la droite,...
- Page 64 0,5 s 1,0 s 7.3.5 7.3.5 7.3.5 PRE-INFUSIONE PRE-INFUSION PRÉ-INFUSION Selezionare il gruppo a cui atti- Select the group to activate the Sélectionner le groupe où acti- vare la pre-infusione. pre-infusion. ver la pré-infusion. La pre-infusione viene impostata Pre-infusion is setting previously La pré-infusion est programmée prima del Pulse-Jet (optional).
- Page 65 1,5 sec 35 °C 65 °C 7.3.6 7.3.6 7.3.6 EASYCREAM (OPTIONAL) EASYCREAM (OPTIONAL) EASYCREAM (EN OPTION) Impostare i parametri di eroga- Set the steam delivery param- Programmer les paramètres de zione vapore. eters. distribution vapeur. Ricordarsi di agire sulla vite di Remember to act on the Easy- Se rappeler d’agir sur la vis de regolazione dell’Easycream.
- Page 66 7.3.7 7.3.7 7.3.7 TECNOLOGIA PULSE-JET TECHNOLOGIE PULSE-JET (OPTIONAL) TECHNOLOGY (OPTIONAL) PULSE-JET (EN OPTION) Selezionare il gruppo e un’opzio- Select the group and a preset Sélectionner le groupe et une ne preimpostata per il Pulse-Jet. option for the Pulse-Jet. option pré-programmée pour le Pulse-Jet.
- Page 67 PULIZIA MACCHINA MACHINE CLEANING NETTOYAGE MACHINE Premere una delle icone per ac- Press one of the icons to access Frapper l’une des icônes pour cedere al relativo menù. the relative menu. accéder au menu correspondant. Lavaggio dei gruppi Washing groups Lavage des groupes Spurgo automatico gruppi Automatic groups purge...
- Page 68 7.4.1 7.4.1 7.4.1 LAVAGGIO DEI GRUPPI WASHING GROUPS LAVAGE DES GROUPES Impostare il ciclo di lavaggio Set the washing cycle for the Programmer le cycle de lavage per i singoli gruppi. single group. pour chaque groupe. Selezione gruppo Groups selection Sélection groupe Quantità...
- Page 69 7.4.2 7.4.2 7.4.2 SPURGO AUTOMATICO AUTOMATIC GROUPS PURGE AUTOMATIQUE GRUPPI (OPTIONAL) PURGE (OPTIONAL) GROUPES (EN OPTION) Impostare lo spurgo automati- Set the groups automatic purge Programmer la purge automa- co dei gruppi alla rimozione del at the filter-holder removal. tique des groupes lorsque le portafiltro.
- Page 70 7.4.3 7.4.3 7.4.3 ALLARME LAVAGGIO WASHING ALARM ALARME LAVAGE Impostare il numero delle ore Set the time before the washing Régler le nombre d'heures prima dell’allarme lavaggio. alarm message. avant l'alarme de lavage. Abilita/disabilita il Enable/disable the alarm Activer/désactiver le messaggio di allarme message message d'alarme...
- Page 71 GESTIONE POTENZA POWER MANAGEMENT GESTION PUISSANCE Premere una delle icone per ac- Press one of the icons to access Frapper l’une des icônes pour cedere al relativo menù. the relative menu. accéder au menu correspondant. Programmaz. settimanale Weekly programming Programmation Stand-by Stand-by hebdomadaire...
- Page 72 7.5.1 7.5.1 7.5.1 PROGRAMMAZIONE WEEKLY PROGRAMMATION SETTIMANALE PROGRAMMING HEBDOMADAIRE Impostare la programmazio- Set the weekly program for the Définir la programmation heb- ne settimanale per la gestione automatic ON/OFF manage- domadaire pour la gestion des delle accensione e degli spegni- ment.
- Page 73 0.80 bar 7.5.2 7.5.2 7.5.2 STAND BY STAND BY VEILLE (STAND-BY) Premere (C) o (D) per imposta- Press (C) or (D) to set the boil- Appuyez sur (C) ou (D) pour re la pressione della caldaia in er pressure in energy saving programmer la pression de la modalità...
- Page 74 7.5.3 7.5.3 7.5.3 SELEZIONE ATTIVA GROUPS ACTIVE SÉLECTION ACTIVE GRUPPI SELECTION GROUPES Selezionare i gruppi attivi sulla Select the active groups on Sélectionner les groupes actifs macchina. L’opzione sarà atti- the machine. The option will sur la machine. L’option sera va dal riavvio generale.
- Page 75 7.5.4 7.5.4 7.5.4 RIDUZIONE POTENZA POWER REDUCTION RÉDUCTION PUISSANCE Abilita/disabilita (1) la riduzio- Enable/disable (1) the power Valider/exclure (1) la réduction ne di potenza per ottimizzare il reduce to optimize the energy de puissance pour optimiser risparmio energetico. saving. l’économie d’énergie. La macchina riscalderà...
- Page 76 IMPOSTAZIONE TEMPERATURE PROGRAMMATION TEMPERATURE SETTINGS TEMPÉRATURES Premere una delle icone per ac- Press one of the icons to access Frapper l’une des icônes pour cedere al relativo menù. the relative menu. accéder au menu correspondant. Groups temperature (T Temperatura gruppi (T Température groupes (T Steam boiler settings Impostazioni caldaia...
- Page 77 94.0 °C 93.2 °C 7.6.1 7.6.1 7.6.1 TEMPERATURA GROUPS TEMPÉRATURE GRUPPI (T TEMPERATURE (T GROUPES (T Impostare la temperatura di la- Set the groups working temper- Programmer la température de voro dei gruppi. ature. travail des groupes. Setpoint Setpoint Setpoint Temperatura attuale Actual temperature Température actuelle...
- Page 78 1.17 bar 0.86 bar 7.6.2 7.6.2 7.6.2 IMPOSTAZIONE STEAM BOILER PROGRAMMATION CALDAIA VAPORE SETTING CHAUDIÈRE VAPEUR Impostare la pressione di lavo- Set the boiler working pressure. Programmer la pression de tra- ro della caldaia vapore. vail de la chaudière vapeur. Setpoint Setpoint Setpoint...
- Page 79 93.4 °C 92.0 °C 7.6.3 7.6.3 7.6.3 TEMPERATURE BOILERS TEMPÉRATURES CALDAIE (T TEMPERATURE (T CHAUDIÈRES (T Impostare la temperatura delle Set the group’s boilers temper- Programmer la température caldaie dei gruppi. ature. des chaudières des groupes. Setpoint Setpoint Setpoint Temperatura attuale Actual temperatures Température actuelle Selezione gruppo...
- Page 80 7.6.4 7.6.4 7.6.4 SCALDATAZZE (OPTIONAL) CUPWARMER (OPTIONAL) CHAUFFE-TASSES (EN MANUALE OPTION) MANUEL Impostare la tipologia dello Set the cupwarmer type. Programmer la typologie de scaldatazze. chauffe-tasses. Attivare lo scaldatazze manual- Activate the cupwarmer manu- Activer le chauffe-tasses ma- mente premendo il pulsante C. nuellement en appuyant sur le ally pressing the C button.
- Page 81 16’ 16’ 7.6.5 7.6.5 7.6.5 SCALDATAZZE (OPTIONAL) TIMED CHAUFFE-TASSES (EN TEMPORIZZATO CUPWARMER (OPTIONAL) OPTION) TEMPORISÉ Impostare la tipologia dello Set the cupwarmer type. Programmer la typologie de scaldatazze. chauffe-tasses. Modalità scaldatazze Timed cupwarmer mode Modalité chauffe-tasses temporizzato attivato activated temporisé activé Tempo ON (0÷30) ON time (0÷30) Temps ON (0÷30)
- Page 82 88.5 °C 7.6.6 7.6.6 7.6.6 SCALDATAZZE (OPTIONAL) THERMOREGULATED CHAUFFE-TASSES (EN TERMOREGOLATO CUPWARMER (OPTIONAL) OPTION) À RÉGULATION THERMIQUE Impostare la tipologia dello Set the cupwarmer type. Programmer la typologie de scaldatazze. chauffe-tasses. Modalità scaldatazze Thermoregulated Modalité chauffe-tasses termoregolato attivato cupwarmer mode activated thermo-réglé...
- Page 83 80 °C 85 °C 90 °C 7.6.7 7.6.7 7.6.7 ACQUA CALDA (OPTIONAL) HOT WATER (OPTIONAL) EAU CHAUDE (EN OPTION) Impostazione presente solo se Réglage présent uniquement si Available setting only if it’s in- installata la valvola proporzio- la vanne d'eau proportionnelle stalled the proportioning valve nale dell’acqua.
- Page 84 CONTATORI COUNTERS COMPTEURS Premere una delle icone per ac- Press one of the icons to access Frapper l’une des icônes pour cedere al relativo menù. the relative menu. accéder au menu correspondant. Contatori gruppo 1 Group 1 counters Compteurs groupe 1 Contatori gruppo 2 Group 2 counters Compteurs groupe 2...
- Page 85 7.7.1 7.7.1 7.7.1 CONTATORI GRUPPO GROUP COUNTER COMPTEURS GROUPE I contatori dei gruppi sono iden- The group counters are identi- Les compteurs des groupes sont tici fra loro. È possibile azzerare cal to each other. It can be reset identiques entre eux. Il est pos- questo contatore tenendo pre- hold on pushing over the rela- sible de réinitialiser ce comp-...
- Page 86 7.7.2 7.7.2 7.7.2 CONTATORE TOTALE GROUPS TOTAL COMPTEUR TOTAL GRUPPI COUNTER GROUPES Visualizza i contatori totali di Displays the total counters for Affiche les compteurs totaux de ogni singolo gruppo. each group. chaque groupe individuel. I conteggi sono visibili sotto le The counts are visible under the Les comptages sont visibles relative icone.
- Page 87 7.7.3 7.7.3 7.7.3 CONTATORE PARZIALE PARTIAL COUNTER COMPTEUR PARTIEL Visualizza le dosi erogate par- Displays the partial delivery Affiche les doses partielles ziali. È possibile azzerare que- doses. It can be reset hold on distribuées. Il est possible de sto contatore tenendo premuta pushing over the relative icon.
- Page 88 1000 7.7.4 7.7.4 7.7.4 CONTATORE ASSOLUTO ABSOLUTE COUNTER COMPTEUR ABSOLU Visualizza le dosi erogate totali. Displays the total delivery dos- Affiche les doses totales distri- Non è possibile azzerare questo es. It cannot be reset. buées. Ce compteur ne peut pas contatore.
- Page 89 7.7.5 7.7.5 7.7.5 CONTATORE MAINTENANCES COMPTEUR ENTRETIENS MANUTENZIONI COUNTER Affiche le nombre de doses dis- Visualizza il numero delle dosi Displays the number of deliv- tribuées depuis le dernier en- erogate dall’ultima manuten- ery doses from the last mainte- tretien effectué. zione effettuata.
- Page 90 IMPOSTAZIONI SETTINGS PROGRAMMATIONS Premere una delle icone per ac- Press one of the icons to access Frapper l’une des icônes pour cedere al relativo menù. the relative menu. accéder au menu correspondant. Impostazioni tecniche Technical settings Programmations Allarmi Alarms techniques Gestione password Password management Alarmes...
- Page 91 7.8.1 7.8.1 7.8.1 IMPOSTAZIONI TECNICHE TECHNICAL SETTINGS PROGRAMMATIONS TECHNIQUES Impostazioni generali delle fun- General settings of the system Programmations générales des zioni di sistema. functions. fonctions de système. Data e ora Date and time Date et heure Configura centralina Main board configuration Configurer centrale Informazioni Informations...
- Page 92 7.8.1.1 7.8.1.1 7.8.1.1 DATA E ORA DATE AND TIME DATE ET HEURE Impostare la data e l’ora di si- Set the system date and time, Programmer la date et l’heure du stema, visibili sul display. visible on the screen. système, visibles sur l’afficheur. Giorno Jour Mese...
- Page 93 7.8.1.2 7.8.1.2 7.8.1.2 CONFIGURA MAIN BOARD CONFIGURER CENTRALINA CONFIGURATION CENTRALE Da utilizzare solo da parte del To be used only by service en- L’utilisation est consentie uni- tecnico dell’assistenza. gineer. quement au technicien du ser- vice d’assistance. Impostare i parametri principali Set the main control unit pa- Programmer les paramètres della centralina.
- Page 94 Autolivello durante Auto-level during Niveau automatique erogazione deliveries pendant la distribution Abilita/disabilita autolivello Enable/disable auto-level Activer/désactiver le niveau con pompa pump automatique avec la Abilita/disabilita acqua Enable/disable hot water pompe calda con pompa pump Activer/désactiver l’eau Autolivello con acqua Auto-level with water chaude avec la pompe Niveau automatique avec Al menu precedente...
- Page 95 X.XX CONTROL UNIT X.XX OPTIONAL X.XX 7.8.1.3 7.8.1.3 7.8.1.3 INFORMAZIONI INFORMATIONS INFORMATIONS Visualizza le informazioni sul View the firmware and temper- Affiche les informations relatives firmware e temperatura. ature informations. au firmware et à la température. In caso di malfunzionamento In case of malfunctioning these En cas de mauvais fonctionne- queste informazioni devono es-...
- Page 96 7.8.1.4 7.8.1.4 7.8.1.4 CONFIGURA OPTIONAL OPTIONAL CONFIGURATION CONFIGURER OPTIONS Da impostare solo da parte del To be set only by service engi- La programmation est consentie tecnico di assistenza. neer. uniquement de la part du tech- nicien du service d’assistance. Permette di impostare e abi- Allow to set and enable the Permet de programmer et de...
- Page 97 7.8.1.5 7.8.1.5 7.8.1.5 LINGUA LANGUAGE LANGUE Impostare la lingua del display. Set the screen language. Programmer la langue de l’affi- cheur. Italiano Italian Italien Inglese English Anglais Francese French Français Tedesco German Allemand Spagnolo Spanish Espagnol Al menu precedente To the previous menu Retour au menu précédent Al menu principale To the main menu...
- Page 98 è quella di de- saver image is the default one celle par défaut (logo Nuova fault (logo Nuova Simonelli). (Nuova Simonelli logo). Simonelli). Pour activer l’image Per attivare in seguito l’immagi- To activate the default image par défaut ultérieurement, ap-...
- Page 99 Per caricare l’immagine utente To load the user image press Pour charger l’image utilisa- premere (2). (2). teur, appuyez sur (2). Se è già presente un’immagine If there is already a user image S’il y a déjà une image utilisa- utente all’interno della memo- in the memory, then it will be teur dans la mémoire, elle sera...
- Page 100 7.8.1.7 7.8.1.7 7.8.1.7 AGGIORNA VERSIONE VERSION UPDATE MISE À JOUR VERSION Collegare un dispositivo USB Connect an USB device to the Connecter un périphérique USB alla macchina per poter aggior- machine for update the soft- à la machine pour pouvoir mettre nare la versione software.
- Page 101 7.8.2 7.8.2 7.8.2 ALLARMI ALARMS ALARMES Permette di visualizzare, gestire Allow to displays, manage and Permet de visualiser, de gérer e impostare gli allarmi di fun- set the functional alarms on the et de régler les alarmes de fonc- zionamento sul display. screen.
- Page 102 7.8.2.1 7.8.2.1 7.8.2.1 STORICO ALLARMI ALARMS HISTORY HISTORIQUE ALARMES Visualizza l’elenco degli allarmi View the list of alarms that have Affiche la liste des alarmes qui che si sono verificati. Scorrere occurred. se sont vérifiées. Faites défi- l’elenco (1) in alto o in basso Scroll the list (1) up or down to ler la liste (1) vers le haut ou per vedere tutti gli allarmi.
- Page 103 100000 2018 7.8.2.2 7.8.2.2 7.8.2.2 ALLARMI MANUTENZIONE MAINTENANCE ALARMS ALARMES ENTRETIEN Abilita/disabilita la scadenza Enable/disable mainte- Active/désactive l'expiration dell’allarme di manutenzione o nance alarms deadline or the de l'alarme d’entretien ou le il numero di cicli dopo il quale cycles number representing nombre de cycles après les- verrà...
- Page 104 7.8.3 7.8.3 7.8.3 GESTIONE PRIVILEGI PRIVILEGE MANAGEMENT GESTION PRIVILÈGES Permette l’accesso alle funzioni: Allow to access the functions: Permet l’accès aux fonctions: Modifica password tecnico Technician password Changer le mot de passe du Modifica password utente modification technicien Gestione privilegi User password Changer le mot de passe de modification...
- Page 105 space done 7.8.3.1 7.8.3.1 7.8.3.1 MODIFICA PASSWORD TECHNICIAN PASSWORD MODIFIER TECHNICIEN MOT TECNICO EDITING DE PASSE Impostare una password per il Set a password for the techni- Définissez un mot de passe Tecnico, che permette l’accesso cian, which allows access to all pour le technicien, qui permet a tutte le funzioni della macchi- machine functions of the ma-...
- Page 106 space done 7.8.3.2 7.8.3.2 7.8.3.2 MODIFICA PASSWORD USER PASSWORD MODIFIER UTILISATEUR UTENTE EDITING MOT DE PASSE Impostare una password per il Set a password for the user, Définissez un mot de passe l’utente, composta da 4 carat- consisting of 4 characters, out- pour l’utilisateur, composé...
- Page 107 7.8.3.3 7.8.3.3 7.8.3.3 GESTIONE PRIVILEGI PRIVILEGE MANAGEMENT GESTION PRIVILÈGES Accesso consentito solo con Access allowed only with pass- Accès autorisé uniquement avec password di livello tecnico. word at technician level. mot de passe de niveau technique. Impostare gli accessi alle fun- Set accesses to functions for the Programmer les accès aux fonc- zioni per l’utente:...
- Page 108 7.8.4 7.8.4 7.8.4 DIAGNOSTICA DIAGNOSTICS DIAGNOSTIC Permette l’accesso alle funzioni: Allow to access the functions: Permet l’accès aux fonctions: Diagnostica generale General diagnostics Diagnostic général Tecnologia Smart Water Smart Water technology Technologie Smart Water (optional) (optional) (en option) Diagnostica gruppi Groups diagnostics Diagnostic groupes Al menu precedente...
- Page 109 7.8.4.1 7.8.4.1 7.8.4.1 DIAGNOSTICA GENERALE GENERAL DIAGNOSTICS DIAGNOSTIC GÉNÉRAL NOTA: Tutte le seguenti funzio- NOTE: All the following func- NOTE: Toutes les fonctions sui- ni possono essere gestite SOLO tions can be handled ONLY by vantes ne peuvent être utilisées dal tecnico dell’assistenza.
- Page 110 7.8.4.2 7.8.4.2 7.8.4.2 POMPA PUMP POMPE Permette di controllare lo stato Allow to check the functioning Permet de vérifier l'état de di funzionamento della pompa. state of the pump. fonctionnement de la pompe. Premere (1) per avviare la pom- Press (1) to start the pump. Frapper (1) pour démarrer la pompe.
- Page 111 7.8.4.3 7.8.4.3 7.8.4.3 VALVOLE VALVES VANNES Permette di controllare lo stato Allow to check the functioning Permet de vérifier l'état de di funzionamento delle valvole. state of valves. fonctionnement des vannes. • Selezionare il gruppo a cui • Select the group to open the •...
- Page 112 • Premere (2) per aprire la val- • Press (2) to open the hot wa- • Appuyer sur (2) pour ouvrir la vola acqua calda. ter valve. vanne eau chaude. • Premere (3) per aprire la lan- • Press (3) to open the left •...
- Page 113 7.8.4.4 7.8.4.4 7.8.4.4 FLUSSOMETRI FLOWMETERS DÉBITMÈTRES Permette di controllare i segnali Allows to check the signals de- Permet de contrôler les signaux rilevati dai flussometri dei grup- tected by the flowmeters of the lus par les débitmètres des groups. groupes. Segnale non rilevato Signal not detected Signal non lu...
- Page 114 1.25 bar 7.8.4.5 7.8.4.5 7.8.4.5 SENSORI DI PRESSIONE PRESSURE SENSORS CAPTEURS DE PRESSION Permette di controllare la pres- Allows to check the pressure de- Permet de contrôler la pression sione rilevata dai sensori di tected by the pressure sensors. lue par les capteurs de pression. pressione.
- Page 115 88 °C 90 °C 88 °C 90 °C 88 °C 90 °C 88 °C 90 °C 88 °C – 88 °C – – 89 °C – – 7.8.4.6 7.8.4.6 7.8.4.6 SENSORI DI TEMPERATURA TEMPERATURE SENSORS CAPTEURS DE TEMPÉRATURE Permette di controllare la tem- Allows to check the tempera- Permet de contrôler la tempé- peratura rilevata dai sensori di...
- Page 116 7.8.4.7 7.8.4.7 7.8.4.7 TECNOLOGIA SMART WATER TECHNOLOGIE SMART WATER TECHNOLOGY SMART WATER Impostare i parametri della tec- Set the Smart Water technology Programmer les paramètres de nologia Smart Water. parameters. la technologie Smart Water. Intervallo PH (min-max) PH range (min-max) Intervalle PH (min-max) TDS (min 20 - max 500) TDS (min 20 - max 500)
- Page 117 88 °C 90 °C 88 °C – 7.8.4.8 7.8.4.8 7.8.4.8 DIAGNOSTICA GRUPPI GROUPS DIAGNOSTICS DIAGNOSTIC GROUPES Visualizza la panoramica di dia- View the diagnostic overview of Affiche la vue d'ensemble du gnostica di ogni singolo gruppo. each individual group. diagnostic de chaque groupe Le informazioni sono identiche The informations are the same individuel.
- Page 118 PULIZIA CLEANING NETTOYAGE • Prima di eseguire qualsi- • The machine must be set • Avant d'effectuer toute asi operazione di pulizia, to “O” power before any opération de nettoyage, togliere tensione premen- cleaning operations are couper l'alimentation en do l’interruttore su "O". performed.
- Page 119 Il lavaggio iniziato non può es- The wash started cannot be Le lavage commencé ne peut sere fermato. Se si spegne la stopped. If the machine is pas être arrêté. Si la machine macchina a lavaggio iniziato, la switched off after the washing est éteinte après le début du macchina riprende dal risciac- has started, the machine will...
- Page 120 PULIZIA CLEANING THE NETTOYAGE DOCCETTE COFFEE-HOLDERS DOUCHES Effettuare la pulizia delle doc- Cleaning the coffee-holder once Il est recommandé d’effec- cette settimanalmente: a week: tuer le nettoyage des douches • Svitare la vite posta al centro • Turn the screw placed in the toutes les semaines.
- Page 121 MANUTENZIONE MAINTENANCE ENTRETIEN Durante la manutenzione / ripa- During maintenance/repairs, Pendant l'entretien / répara- razione i componenti utilizzati the parts used must be able tion, les composants utilisés devono garantire di mantenere to guarantee compliance with doivent garantir le maintien des i requisiti di igiene e sicurezza the safety and hygiene require- caractéristiques d'hygiène et...
- Page 122 SCHEMI DIAGRAM SCHÉMA...
- Page 123 10.1 10.1 10.1 SCHEMA ELETTRICO ELECTRICAL DIAGRAM SCHÉMA ÉLECTRIQUE 2 GRUPPI 2 GROUPS 2 GROUPES Interruttore Main Switch Interrupteur Relè Relay Relais Motore pompa Pump Motor Moteur pompe Resistenza boiler Boiler Heating Element Résistance chauffe-eau Termostato Thermostat Thermostat Elettrovalvola gruppo 2 Electrovalve group 2 Électrovanne groupe 2 Elettrovalvola gruppo 1...
- Page 125 10.2 10.2 10.2 SCHEMA ELETTRICO ELECTRICAL DIAGRAM SCHÉMA ÉLECTRIQUE 2 GRUPPI CSA 2 GROUPS CSA 2 GROUPES CSA Interruttore Main Switch Interrupteur Relè Relay Relais Motore pompa Pump Motor Moteur pompe Resistenza boiler Boiler Heating Element Résistance chauffe-eau Termostato Thermostat Thermostat Elettrovalvola gruppo 2 Electrovalve group 2...
- Page 127 10.3 10.3 10.3 SCHEMA ELETTRICO ELECTRICAL DIAGRAM SCHÉMA ÉLECTRIQUE 3 GRUPPI 2 GROUPS CSA 2 GROUPES CSA Interruttore Main Switch Interrupteur Relè Relay Relais Motore pompa Pump Motor Moteur pompe Resistenza boiler Boiler Heating Element Résistance chauffe-eau Termostato Thermostat Thermostat Elettrovalvola gruppo 1 Electrovalve group 1 Électrovanne groupe 1...
- Page 129 10.4 10.4 10.4 SCHEMA ELETTRICO ELECTRICAL DIAGRAM SCHÉMA ÉLECTRIQUE 3 GRUPPI CSA 2 GROUPS CSA 2 GROUPES CSA Interruttore Main Switch Interrupteur Relè Relay Relais Motore pompa Pump Motor Moteur pompe Resistenza boiler Boiler Heating Element Résistance chauffe-eau Termostato Thermostat Thermostat Elettrovalvola gruppo 1 Electrovalve group 1...
- Page 131 10.5 10.5 10.5 SCHEMA ELETTRICO ELECTRICAL DIAGRAM SCHÉMA ÉLECTRIQUE OPZIONALE OPTIONAL EN OPTION ECDX Sensore resistivo ECDX Right EasyCream resistive ECDX Capteur résistif EasyCream destro sensor EasyCream de droite ECSX Sensore resistivo ECDX Left EasyCream resistive ECSX Capteur résistif EasyCream sinistro sensor EasyCream de gauche Termocoppia K...
- Page 132 10.6 10.6 10.6 SCHEMA CALDAIA BOILER DIAGRAM SCHÉMA CHAUDIÈRE - 2 GRUPPI - 2 GROUPS - 2 GROUPES ELENCO PARTI / PARTS LIST / LISTE DES PARTIES Elemento Q.tà Numero Parte Descrizione Materiale Element Q.tà Part Number Description Material Élément Q.tà...
- Page 133 10.7 10.7 10.7 SCHEMA CALDAIA BOILER DIAGRAM SCHÉMA CHAUDIÈRE - 3 GRUPPI - 3 GROUPS - 3 GROUPES ELENCO PARTI / PARTS LIST / LISTE DES PARTIES Elemento Q.tà Numero Parte Descrizione Materiale Element Q.tà Part Number Description Material Élément Q.tà...
- Page 134 10.8 10.8 10.8 SCHEMA CALDAIA BOILER DIAGRAM SCHÉMA CHAUDIÈRE DIGIT - 2 GRUPPI DIGIT - 2 GROUPS DIGIT - 2 GROUPES ELENCO PARTI / PARTS LIST / LISTE DES PARTIES Elemento Q.tà Numero Parte Descrizione Materiale Element Q.tà Part Number Description Material Élément...
- Page 135 10.9 10.9 10.9 SCHEMA CALDAIA BOILER DIAGRAM SCHÉMA CHAUDIÈRE DIGIT - 3 GRUPPI DIGIT - 3 GROUPS DIGIT - 3 GROUPES ELENCO PARTI / PARTS LIST / LISTE DES PARTIES Elemento Q.tà Numero Parte Descrizione Materiale Element Q.tà Part Number Description Material Élément...
- Page 136 10.10 10.10 10.10 SCHEMA CALDAIA BOILER DIAGRAM SCHÉMA CHAUDIÈRE ELENCO PARTI / LIST PARTS / LISTE DES PARTIES Elemento Q.tà Numero Parte Descrizione Materiale Element Q.tà Part Number Description Material Élément Q.tà Numéro Partie Description Matériau Flangia Pr Lavorata Inox +1 / Flange Pr machined, stainless steel + 1 00041002 INOX AISI316L Flasque Pr finition inox + 1...
- Page 138 déc Lauro Fioretti Lauro Fioretti Lauro Fioretti 2006/42/EC 2014/35/EU 2014/30/EU (CE) No 1935/2004 2014/68/EU 2011/65/EU Regolamenti sulle buone pratiche di fabbricazione dei materiali, degli oggetti e all’utilizzo del (CE) No 2023/2006 bisfenolo A in vernici e rivestimenti destinati a venire in contatto con prodotti alimentari. Regulations on Good Manufacturing Practice of materials and objects and on the use of Bisphenol A in paints and coatings intended to come into contact with food.
- Page 139 Caldaia * Boiler in zona di applicazione articolo 3, comma 3 97/23/CE * Boiler in application area, article 3, section 3 97/23/EC * Chauffe-eau en zone d’application article 3, alinéa 3 97/23/CE Norme applicate: Raccolte M,S, VSR edizione '78 e '95 conser Applied regulations: Collections M,S, Normas appliquées: Recalte M, S, Disegno n°...
- Page 140 F +39 0733 950242 info@simonelliusa.com info@simonelligroup.it www.simonelliusa.com www.simonelligroup.it Nuova Distribution France Nuova Simonelli Asia Pacific Hexapole - Actipole - Bat 5 61 Kaki Bukit Ave 1 Rue Maurice Herzog #02-24 Shun Li Industrial Park 73420 Viviers Du Lac Singapore 417943...