
Manuels Connexes pour Wacker Neuson RD 16


Sommaire des Matières pour Wacker Neuson RD 16
- Page 1 All manuals and user guides at all-guides.com Operator’s Manual Ride-On Roller RD 16 0178395en 0310...
- Page 2 This publication may be photocopied by the original purchaser of the machine. Any other type of reproduction is prohibited without express written permission from Wacker Neuson Corporation. Any type of reproduction or distribution not authorized by Wacker Neuson Corporation represents an infringement of valid copyrights. Violators will be prosecuted. Trademarks All trademarks referenced in this manual are the property of their respective owners.
- Page 3 Expectations This manual provides information and procedures to safely operate and main- tain the above Wacker Neuson model(s). For your own safety and to reduce information in the risk of injury, carefully read, understand, and observe all instructions this manual described in this manual.
- Page 4 Serious injury hazards to the operator and persons in the work area Permanent damage to the machine which will not be covered under warranty Contact your Wacker Neuson dealer immediately if you have questions about approved or unapproved parts, attachments, or modifications.
- Page 5 All manuals and user guides at all-guides.com RD 16 Table of Contents Foreword Safety Information Signal Words found in this Manual ............9 Machine Description and Intended Use ..........10 Operating Safety ................12 Operator Safety while using Internal Combustion Engines ....14 Service Safety ..................
- Page 6 All manuals and user guides at all-guides.com Table of Contents RD 16 3.21 Parking Brake Button ................51 3.22 Direction and Speed ................52 3.23 Transmission ..................53 3.24 Vibration ....................54 3.25 Water Spray System ................55 3.26 Emergency Shutdown Procedure ............56 3.27 Battery Disconnect ................57 3.28...
- Page 7 Hydraulic Schematic Components ............. 91 Electrical Schematic—RD 16 ............. 92 Electrical Schematic Components—RD 16 ........94 Electrical Schematic—RD 16 IRH ............96 Electrical Schematic Components—RD 16 IRH ......... 98 Technical Data Engine ....................99 Roller ....................100 Dimensions mm (in.) ................ 101 Sound Measurements ..............
- Page 8 All manuals and user guides at all-guides.com Table of Contents RD 16 wc_bo0178395en_005TOC.fm...
- Page 9 All manuals and user guides at all-guides.com RD 16 Safety Information Safety Information Signal Words found in this Manual This is the safety alert symbol. It is used to alert you to potential personal hazards. Obey all safety messages that follow this symbol.
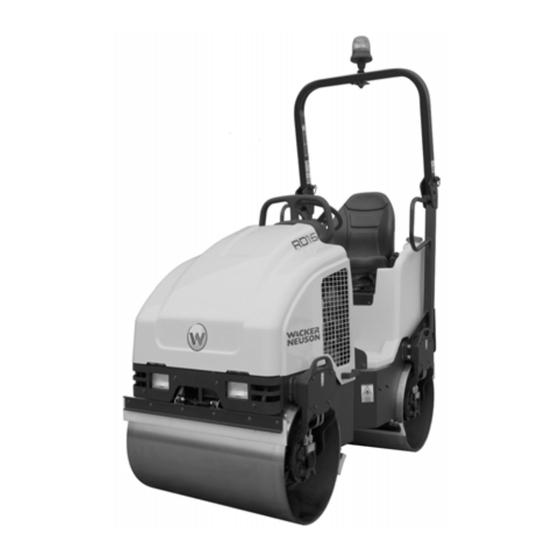
- Page 10 RD 16 Machine Description and Intended Use This machine is a dual drum, ride-on roller. The Wacker Neuson Ride- On Roller consists of an articulated frame onto which is mounted a gasoline or diesel engine, a fuel tank, a hydraulic tank, a water tank, a hydrostatic drive system, two steel drums containing internal eccentric weights, and an operator’s platform with a ROPS (Roll Over Protective...
- Page 11 All manuals and user guides at all-guides.com RD 16 Safety Information • Personal injury from improper lifting techniques • Crushing hazards from improper operation (feet, legs, or arms extending outside of the operator work station) and for other per- sons in the work zone •...
- Page 12 The machine must not be accessed or operated by: • children • people impaired by alcohol or drugs 1.3.2 Contact Wacker Neuson for additional training if necessary. 1.3.3 Personal Protective Equipment (PPE) Wear the following Personal Protective Equipment (PPE) while operating this machine: •...
- Page 13 1.3.11 NEVER use or attempt to repair damaged safety belts or ROPS. Replace only with Wacker Neuson spare parts. 1.3.12 ALWAYS disengage and stow the locking bar for the articulated steering joint before operating the machine. The machine cannot be steered when the locking bar is engaged.
- Page 14 All manuals and user guides at all-guides.com Safety Information RD 16 Operator Safety while using Internal Combustion Engines WARNING Internal combustion engines present special hazards during operation and fueling. Failure to follow the warnings and safety standards could result in severe injury or death.
- Page 15 • Only trained personnel shall troubleshoot or repair problems occurring with the machine. • Contact Wacker Neuson Corporation for additional training if nec- essary. When servicing or maintaining this machine: • Do not allow improperly trained people to service or maintain the machine.
- Page 16 All manuals and user guides at all-guides.com Safety Information RD 16 1.5.4 All adjustments and repairs MUST be completed before operation. Do not operate the machine with a known problem or deficiency! All repairs and adjustments should be completed by a qualified technician.
- Page 17 1.5.25 ALWAYS replace the safety devices and guards after repairs and maintenance. 1.5.26 When replacement parts are required for this machine, use only Wacker Neuson replacement parts or those parts equivalent to the original in all types of specifications, such as physical dimensions, type, strength, and material.
- Page 18 All manuals and user guides at all-guides.com Labels RD 16 Labels Label Locations wc_si000400gb.fm...
- Page 19 All manuals and user guides at all-guides.com RD 16 Labels Safety Labels Ref. Label Meaning WARNING! Read and understand the supplied Operator’s Manual before operating the machine. Failure to do so increases the risk of injury to yourself and others.
- Page 20 All manuals and user guides at all-guides.com Labels RD 16 Ref. Label Meaning WARNING! Pinch point. WARNING! Hot surface! NOTICE Lifting point. WARNING To reduce the risk of hearing loss, always wear hearing protection when operating this machine. wc_si000400gb.fm...
- Page 21 All manuals and user guides at all-guides.com RD 16 Labels Ref. Label Meaning WARNING Entanglement hazard. Rotating machinery. Do not reach inside machine when engine is running. WARNING! Disconnect battery before servicing. Read Repair Manual for instructions. Battery contains caustic acid and potentially explosive hydrogen gas.
- Page 22 All manuals and user guides at all-guides.com Labels RD 16 Ref. Label Meaning WARNING Entanglement hazard. Rotating machinery. Do not reach inside machine when engine is running. WARNING! Avoid crushing area. Articulated steering joint locking location. Lock the articulated steering joint before servicing the machine.
- Page 23 All manuals and user guides at all-guides.com RD 16 Labels Ref. Label Meaning No lift point. WARNING! Disconnect battery before servicing. 0165018 Lifting of machine to be done with spreader bar only! wc_si000400gb.fm...
- Page 24 All manuals and user guides at all-guides.com Labels RD 16 Ref. Label Meaning CAUTION! Electric shock hazard at auxiliary bat- tery positive terminal. Never touch this terminal and a metal portion of the machine simulta- neously. WARNING! Read and understand the supplied Operator’s Manual before operating the machine.
- Page 25 All manuals and user guides at all-guides.com RD 16 Labels Informational Labels Ref. Label Meaning Tie-down point. Hydraulic oil reservoir fill tube. Torque nuts to 13.6-14.7 Nm (120-130 in.lbs.) maximum. NOTICE Lifting point. Parking brake is disengaged. Parking brake is engaged.
- Page 26 All manuals and user guides at all-guides.com Labels RD 16 Ref. Label Meaning Grease points: Inspect and lubricate every 100 hours of operation. Guaranteed sound power level in dB(A). A nameplate listing the model number, item num- ber, revision number, and serial number is attached to each unit.
- Page 27 All manuals and user guides at all-guides.com RD 16 Labels Ref. Label Meaning Low sulfur fuel or ultra low sulfur fuel only. wc_si000400gb.fm...
- Page 28 All manuals and user guides at all-guides.com Operation RD 16 Operation Operation and Service Locations 7 28 wc_gr002947 wc_tx001075gb.fm...
- Page 29 All manuals and user guides at all-guides.com RD 16 Operation See Graphic: wc_gr002947 Ref. Description Ref. Description Air cleaner Water tank fill cap Articulated joint Lockarm Hand holds Operator’s platform Control panel Engine oil filter Dipstick Rear drum Drain hose—hydraulic tank...
- Page 30 All manuals and user guides at all-guides.com Operation RD 16 Control Panel RD 16 IRH 50 56 58 57 RD 16-90 50 56 58 57 RD 16-100 wc_gr004113 wc_tx001075gb.fm...
- Page 31 All manuals and user guides at all-guides.com RD 16 Operation See Graphic: wc_gr004113 Ref. Description Ref. Description Turn signal switch—LEFT and RIGHT Low fuel indicator (RD 16IRH only) Hour meter Air filter indicator Engine coolant temperature indicator Glow plug indicator...
- Page 32 All manuals and user guides at all-guides.com Operation RD 16 Roll Over Protection Structure (ROPS) The machine is equipped with a Roll Over Protection Structure (ROPS). The machine is normally delivered to the customer with the ROPS folded forward to facilitate transport.
- Page 33 All manuals and user guides at all-guides.com RD 16 Operation Foldable Roll Over Protection Structure (ROPS) (if equipped) See Graphic: wc_gr002957 The machine is equipped with a Roll Over Protection Structure (ROPS). The machine is normally delivered to the customer with the ROPS folded forward to facilitate transport.
- Page 34 All manuals and user guides at all-guides.com Operation RD 16 If the ROPS has been removed from the machine, it must be reinstalled before the machine is used. When reinstalling the ROPS, use the original nuts and bolts and tighten the bolts to the specified torques.
- Page 35 All manuals and user guides at all-guides.com RD 16 Operation Rotating Beacon (if equipped) See Graphic: wc_gr002957 The rotating beacon (34) powers up when the ignition switch is turned to the ON position. The beacon illuminates and rotates when powered To install the beacon: 3.5.1...
- Page 36 Parking lights (A) On the RD 16 IRH only, this switch position turns on the parking lights. Lights on (B) On the RD 16 IRH, this switch position turns on the rear work lights.
- Page 37 All manuals and user guides at all-guides.com RD 16 Operation Seat Belt See Graphic: wc_gr002238 Pull seat belt (c) out of the retractor in a continuous motion. Fasten seat belt catch (b) into buckle (a). Make sure that the seat belt is placed low across the lap of the operator.
- Page 38 All manuals and user guides at all-guides.com Operation RD 16 Operator Presence System See Graphic: wc_gr002962 The machine is equipped with an “operator presence system”. This system is part of the driver's seat and senses the weight of an operator in the seat.
- Page 39 All manuals and user guides at all-guides.com RD 16 Operation 3.10 Scraper Bars See Graphic: wc_gr003447 Scraper bars, located in front of and behind each drum, are used to prevent dirt and asphalt from sticking to and accumulating on the drum surface.
- Page 40 All manuals and user guides at all-guides.com Operation RD 16 3.11 Anti-Vandalism Protection and Machine Access Parts of the machine which may be subject to theft or vandalism when the vehicle is parked unattended can be padlocked to prevent unauthorized access or use.
- Page 41 All manuals and user guides at all-guides.com RD 16 Operation 3.12 Articulation Joint Lockarm See Graphic: wc_gr002956 A lockarm (23), located below the articulated joint, is provided to secure the front and rear halves of the roller together. Once secured, the lockarm prevents the two halves from swinging together.
- Page 42 All manuals and user guides at all-guides.com Operation RD 16 3.13 Machine Stability WARNING Crushing hazards. Certain job site conditions or operating practices may adversely affect machine stability. Follow the instructions below to reduce the risk of tipping or falling incidents.
- Page 43 All manuals and user guides at all-guides.com RD 16 Operation • Reduce travel speed and watch the drum position carefully when operating along the edge of an elevated surface. • Keep as much of the drum on the elevated surface as possible.
- Page 44 All manuals and user guides at all-guides.com Operation RD 16 3.14 Operation on Slopes See Graphic: wc_gr003448 When operating on slopes or hills special care must be taken to reduce the risk of personal injury or damage to the equipment. Always operate the machine up and down hills rather than from side to side.
- Page 45 3.17.2 Check the machine and its components for damage. If there is visible damage, do not operate the machine! Contact your Wacker Neuson dealer immediately for assistance. 3.17.3 Take inventory of all items included with the machine and verify that all loose components and fasteners are accounted for.
- Page 46 All manuals and user guides at all-guides.com Operation RD 16 Notes wc_tx001075gb.fm...
- Page 47 All manuals and user guides at all-guides.com RD 16 Operation 3.18 Before Starting Before starting the machine check the following: • Engine oil level • Engine coolant level • Hydraulic fluid level • Condition of fuel lines • Condition of air cleaner •...
- Page 48 All manuals and user guides at all-guides.com Operation RD 16 3.19 Starting See Graphic: wc_gr002952 Exhaust gases are toxic. Do not start the engine in enclosed spaces. WARNING 3.19.1 Sit down in the operator’s seat and fasten the seat belt.
- Page 49 All manuals and user guides at all-guides.com RD 16 Operation wc_tx001075gb.fm...
- Page 50 3.20.7 Stop the engine by turning the starting switch to the OFF position (55). Note: On the RD 16, the parking brake is automatically applied within the drive motors. The brakes are applied under the following conditions: •...
- Page 51 All manuals and user guides at all-guides.com RD 16 Operation 3.21 Parking Brake Button See Graphic: wc_gr002954 To hold the machine in a stopped position (parked), there is a mechanical parking brake on each drum drive motor. The mechanical parking brakes are spring-activated and hydraulically released (SAHR) type brakes.
- Page 52 All manuals and user guides at all-guides.com Operation RD 16 3.22 Direction and Speed See Graphic: wc_gr002954 The forward/reverse control (15) controls both the direction and speed of the roller. Use the control lever, rather than the throttle, to control the speed of the machine while compacting.
- Page 53 All manuals and user guides at all-guides.com RD 16 Operation 3.23 Transmission See Graphic: wc_gr002954 Both roller drums are fitted with hydraulic motors which are driven by an infinitely variable displacement pump and hydrostatic transmission. Forward and reverse travel are selected using a forward/reverse control (15) located next to the driver’s seat.
- Page 54 All manuals and user guides at all-guides.com Operation RD 16 3.24 Vibration See Graphic: wc_gr005893 The vibration is turned ON or OFF by a push button (10) located on the forward/reverse control (15). Press the button to turn vibration ON;...
- Page 55 All manuals and user guides at all-guides.com RD 16 Operation 3.25 Water Spray System See Graphic: wc_gr003638, wc_gr002947 Water from the tank is fed to the spray bars by an electric pump. The flow of the water is controlled by a switch and a rotary dial.
- Page 56 All manuals and user guides at all-guides.com Operation RD 16 3.26 Emergency Shutdown Procedure If a breakdown/accident occurs while the machine is operating, follow the procedure below. 3.26.1 Stop the engine. 3.26.2 Allow the engine and exhaust system to cool.
- Page 57 All manuals and user guides at all-guides.com RD 16 Operation 3.27 Battery Disconnect This machine is equipped with a battery disconnect switch located in the engine compartment. To disconnect and isolate the electrical system from the battery, remove the wing-nut and remove the cable from the stud.
- Page 58 All manuals and user guides at all-guides.com Operation RD 16 3.29 Panel Indicator Lights RD 16 IRH 50 56 58 57 RD 16-90 50 56 58 57 RD 16-100 wc_gr004117 wc_tx001075gb.fm...
- Page 59 All manuals and user guides at all-guides.com RD 16 Operation See Graphic: wc_gr004117 Engine coolant temperature indicator (48) This warning light illuminates to indicate that the engine has overheated and the engine will shut down. NOTICE: Trace the cause of overheating and rectify the situation before operating the machine.
- Page 60 All manuals and user guides at all-guides.com Operation RD 16 3.30 Turn Signal/Hazard Lights (if equipped) See Graphic: wc_gr004117 These switches are only available on machines equipped with the optional roading light package. Turn Signal Switch Press the turn signal switch (46) to activate the desired turn signal. The signal lights (53) will flash when the turn signal switch is operating.
- Page 61 All manuals and user guides at all-guides.com RD 16 Operation Notes wc_tx001075gb.fm...
- Page 62 All manuals and user guides at all-guides.com Maintenance RD 16 Maintenance Engine Maintenance Schedule The table below lists basic engine maintenance. Tasks designated with check marks may be performed by the operator. Tasks designated with square bullet points require special training and equipment.
- Page 63 All manuals and user guides at all-guides.com RD 16 Maintenance Roller Maintenance Schedule The table below lists basic machine maintenance. Tasks designated with check marks may be performed by the operator. Tasks designated with square bullet points require special training and equipment.
- Page 64 These include the ROPS and the seat belt. For your convenience, we have provided the following diagrams and lists of replacement parts for these safety-related features. For a complete list of spare parts for this machine, contact your Wacker Neuson dealer or visit www.wackerneuson.com. ROPS diagram wc_gr007046 wc_tx001076gb.fm...
- Page 65 All manuals and user guides at all-guides.com RD 16 Maintenance ROPS parts list Ref. Part No. Qty. Description Measurement 0163264 ROPS frame 0162980 Red reflector 0163627 Bracket 0163224 Mount 0162959 Beacon group option 0162345 Light bulb 0162341 Retaining clip 0020378...
- Page 66 All manuals and user guides at all-guides.com Maintenance RD 16 Seat assembly diagram wc_gr007047 wc_tx001076gb.fm...
- Page 67 All manuals and user guides at all-guides.com RD 16 Maintenance Seat assembly parts list Measurement Ref. Part No. Qty. Description and torque 0163274 Plate 0163324 Adjustable seat 0164779 Seat switch 0083220 Holder 0030066 Lock nut 34 Nm / 25 ft.lbs...
- Page 68 All manuals and user guides at all-guides.com Maintenance RD 16 Maintaining the Seat and the Seat Belt Background In order for the seat and seat belt to operate safely and properly over a long period of time, periodic maintenance and occasional repairs are necessary.
- Page 69 All manuals and user guides at all-guides.com RD 16 Maintenance Cleaning the Spray Bars Background Clogged or dirty spray bars can prevent water from spraying onto the drums. If water spray is noticeably reduced or absent even though there is water in the tank, then clean the spray bars.
- Page 70 All manuals and user guides at all-guides.com Maintenance RD 16 Rear Frame Access See Graphic: wc_gr004333 The operator’s platform is mounted on hinges and can be lifted open to provide access to the water pump, the water filter, the battery, the hydraulic hoses, and the fuel tank.
- Page 71 All manuals and user guides at all-guides.com RD 16 Maintenance Fuel Filter See Graphic: wc_gr002999 4.7.1 Change the fuel filter (a) every 300 hours of operation. Remove the filter (a) from the filter head (c). 4.7.2 Install the new filter. If necessary, prime the fuel lines. See section RD 16 Priming the Fuel System.
- Page 72 All manuals and user guides at all-guides.com Maintenance RD 16 Battery See Graphic: wc_gr002565 Before servicing this machine, make sure the ingnition switch is in the OFF position and that the battery is disconnected. Attach a “DO NOT START” sign to the machine. This will notify other personnel that the unit is being serviced and will reduce the chance of someone inadvertently trying to start the unit.
- Page 73 All manuals and user guides at all-guides.com RD 16 Maintenance Inspect the battery periodically. Keep the battery terminals clean and connections tight. When necessary, tighten the cables and grease the cable clamps with petroleum jelly. Maintain the battery at full charge to improve cold weather starting.
- Page 74 All manuals and user guides at all-guides.com Maintenance RD 16 4.10 Engine Oil and Filter See Graphic: wc_gr003780 Change the oil and the oil filter (b) every 250 hours. On new machines, change the oil after first 50 hours of operation. Drain the oil while engine is still warm.
- Page 75 All manuals and user guides at all-guides.com RD 16 Maintenance 4.11 Engine Air Cleaner See Graphic: wc_gr005161 Replace both air filter elements when the air filter warning light illuminates. See Section Control Panel. The air cleaner assembly contains a primary air filter element (a) and a secondary air filter element (d).
- Page 76 All manuals and user guides at all-guides.com Maintenance RD 16 4.12 Grease Fittings See Graphic: wc_gr003457 See section Technical Data for oil quantity and type. Articulation Joint Lockarm: The articulated joint is equipped with grease fittings (a) for lubrication. To avoid being pinched by the machine halves, set the lockarm before...
- Page 77 All manuals and user guides at all-guides.com RD 16 Maintenance 4.13 Hydraulic System Cleanliness Keeping the hydraulic oil clean is a vital factor affecting the service life of hydraulic components. Oil in hydraulic systems is used not only to transfer power, but also to lubricate the hydraulic components used in the system.
- Page 78 Maintenance RD 16 4.14 Hydraulic Oil Requirements Wacker Neuson recommends the use of a good petroleum-based, anti-wear hydraulic oil in the hydraulic system of this equipment. Good anti-wear hydraulic oils contain special additives to reduce oxidation, prevent foaming, and provide for good water separation.
- Page 79 All manuals and user guides at all-guides.com RD 16 Maintenance 4.15 Hydraulic Oil Level See Graphic: wc_gr005895 A hydraulic oil level sightglass (29) is located on the side of the hydraulic fluid reservoir. While the machine is turned off, check that the hydraulic oil level is visible at the middle level or higher in the sightglass.
- Page 80 All manuals and user guides at all-guides.com Maintenance RD 16 4.17 Changing the Hydraulic Oil & Filter Set all controls in neutral, stop the engine, and allow the engine and fluids to cool before performing this procedure. All oils eventually shear or thin out with use, reducing their lubricating ability.
- Page 81 Note: The RD 16 includes a spreader bar secured to the inside of the engine hood. Use only steel ropes or chains for lifting. Ropes or chains must have the suitable specified lifting capacity and must be at least 2000 mm (6.5 ft.) long.
- Page 82 All manuals and user guides at all-guides.com Maintenance RD 16 4.20 Tying Down and Transporting the Machine See Graphic: wc_gr003455 Lock the articulated joint lockarm. Refer to section Articulation Joint Lockarm for information. When transporting the machine, place blocks in front of and behind each drum and use the front and rear tie-down points (a) provided to securely fasten the machine to the trailer (two places).
- Page 83 All manuals and user guides at all-guides.com RD 16 Maintenance 4.21 Storage If machine is to be stored for more than 30 days: • Drain the fuel tank and drain the water tank. If ballast was added to the rear drum, also drain the rear drum.
- Page 84 All manuals and user guides at all-guides.com Maintenance RD 16 4.22 Towing Improper hookup and towing is hazardous and could result in injury or death to yourself or others. The towing connection must be rigid, or towing must be done by two WARNING machines of the same size or larger than the towed machine.
- Page 85 All manuals and user guides at all-guides.com RD 16 Maintenance Attach the towing device and machine before you release the brakes. If the engine is running, the machine can be towed for a short distance under certain conditions. The power train and steering system must be operable.
- Page 86 All manuals and user guides at all-guides.com Maintenance RD 16 4.23 Manually Releasing Parking Brake See Graphic: wc_gr002964 There are two drive motors on the roller—one on each drum. Each drive motor includes a parking brake that is spring activated and hydraulically released (SAHR).
- Page 87 All manuals and user guides at all-guides.com RD 16 Maintenance Note: Replacement drive motors come with the brakes in the ON position. wc_gr002964 wc_tx001076gb.fm...
- Page 88 All manuals and user guides at all-guides.com Maintenance RD 16 4.24 Troubleshooting Problem / Symptom Reason / Remedy ENGINE DOES NOT • Fuel tank empty. START • Wrong type of fuel. • Old fuel. Drain tank, change fuel filter and fill with fresh fuel.
- Page 89 All manuals and user guides at all-guides.com RD 16 Maintenance Notes: wc_tx001076gb.fm...
- Page 90 All manuals and user guides at all-guides.com Schematics RD 16 Schematics Hydraulic Schematic wc_tx001074gb.fm...
- Page 91 All manuals and user guides at all-guides.com RD 16 Schematics Hydraulic Schematic Components Ref. Description Ref. Description Steering cylinder Return filter Steering unit Tank Drive motor Suction strainer Bypass Vibration solenoid valve Charge pump Exciter motor Main pump Pressure relief valve Exciter pump wc_tx001074gb.fm...
- Page 92 All manuals and user guides at all-guides.com Schematics RD 16 Electrical Schematic—RD 16 wc_tx001074gb.fm...
- Page 93 All manuals and user guides at all-guides.com RD 16 Schematics May be in harness wc_tx001074gb.fm...
- Page 94 All manuals and user guides at all-guides.com Schematics RD 16 Electrical Schematic Components—RD 16 Ref. Description Ref. Description Light switch (optional) Vibration solenoid (front only) Flasher Vibration solenoid (front & rear) Turn signal switch Brake and bypass solenoid Hazard switch...
- Page 95 All manuals and user guides at all-guides.com RD 16 Schematics Notes: wc_tx001074gb.fm...
- Page 96 All manuals and user guides at all-guides.com Schematics RD 16 Electrical Schematic—RD 16 IRH wc_tx001074gb.fm...
- Page 97 All manuals and user guides at all-guides.com RD 16 Schematics wc_tx001074gb.fm...
- Page 98 All manuals and user guides at all-guides.com Schematics RD 16 Electrical Schematic Components—RD 16 IRH Ref. Description Ref. Description Light switch (optional) Brake and bypass solenoid Flasher Reverse alarm Turn signal switch Fuel solenoid Hazard switch Horn Left turn signal light...
- Page 99 Technical Data Engine Engine Power Rating Net power rating per ISO 3046/1-IFN. Actual power output may vary due to conditions of specific use. Item no. RD 16 / RD 16 IRH Engine Engine type 3-cylinder, 4-cycle, liquid-cooled, diesel engine Engine make...
- Page 100 Forward / Reverse Speed 0-9.3 (0-5.8) (mph) Gradeability Vibration Frequency 4200 Lubrication Item No. RD 16 / RD 16 IRH Lubrication Engine Lubrication type SAE 15W40 Class SD rated L (pt) 2.4 (2.5) Hydraulic System Premium grade, anti-wear hydraulic fluid 10W30...
- Page 101 All manuals and user guides at all-guides.com RD 16 Technical Data Dimensions mm (in.) 2547 (100.3) 2289 RD 16-90 (90.1) RD 16 IRH 1806 (71.1) (22) 1382 (54.4) (35.4) 1950 1002 (76.8) (39.4) wc_td000312gb.fm...
- Page 102 All manuals and user guides at all-guides.com Technical Data RD 16 Sound Measurements The operating sound level, measured per the requirements of Appendix 1, Paragraph 1.7.4.f of the EC-Machine Regulations, is: • the guaranteed sound power level (L • 106 dB(A) •...
- Page 103 All manuals and user guides at all-guides.com RD 16 Technical Data Hydraulic Pressures System Operating Pressure Relief Pressure Drive** 55–76 800–1100 4350 Steering* 45–51 650–725 —normal 41–55 600–800 —while turning 90–103 1300–1500 Vibration 4200 —single drum 103–131 1500–1900 —dual drum 138–165...
- Page 104 All manuals and user guides at all-guides.com...
- Page 105 All manuals and user guides at all-guides.com KE40246P2 6/9/05 3:16 PM Page i SAFETY ALERT SYMBOL This Safety Alert Symbol means ATTENTION is involved! Why is SAFETY important to YOU? 3 BIG REASONS : The Safety Alert Symbol identifies important safety messages on machines, safety signs, in manuals, or •...
- Page 106 All manuals and user guides at all-guides.com WORD OF EXPLANATION................FOREWORD......................A WORD TO THE USER ..................FOLLOW A SAFETY PROGRAM ..............PREPARE FOR SAFE OPERATION..............START SAFELY....................WORK SAFELY ....................PARK & SHUTDOWN SAFELY ..............LOAD & UNLOAD MACHINE SAFELY ............TRANSPORTING SAFELY ................
- Page 107 WORD OF EXPLANATION All manuals and user guides at all-guides.com This Safety Manual covers many different types of Manufacturers produce machines with many roller compactors … including steel wheel rollers, built-in safety features. Employers provide vibratory rollers, rubber-tired rollers, segmented accident prevention programs.Yet, the ultimate pad/sheepsfoot soil compactors and landfill responsibility to operate and maintain your...
- Page 108 A WORD TO THE USER All manuals and user guides at all-guides.com It is your responsibility to read and understand this safety manual and the manufacturer's manual(s) before operating your machine.This safety manual takes you step-by-step through your working day. Remember that YOU are the key to safety.
- Page 109 FOLLOW A SAFETY PROGRAM All manuals and user guides at all-guides.com KNOW WHAT IT IS? Consult your supervisor for specific instructions on a job, and the personal safety equipment required. For instance, you may need: • Hard Hat • Safety Shoes •...
- Page 110 PREPARE FOR SAFE OPERATION All manuals and user guides at all-guides.com LEARN TO BE SAFE NEVER operate a machine which is new to you without first being instructed in its proper operation. READ the operator’s manual. If one has not been provided, GET ONE AND STUDY IT BEFORE CHECK IT OUT! OPERATING THE MACHINE.
- Page 111 PREPARE FOR SAFE OPERATION All manuals and user guides at all-guides.com FIRE PREVENTION Because ether or other starting fluids are flammable, do not smoke when using them. Always follow the Never allow flammable fluids or materials to instructions on the container and in the operator’s contact hot surfaces.
- Page 112 PREPARE FOR SAFE OPERATION All manuals and user guides at all-guides.com Before starting, carefully inspect your machine for A stalled or faltering engine can result in a real any evidence of physical damage such as cracking, hazard when operating on grades, in traffic or in bending or deformation of plates or welds.
- Page 113 START SAFELY All manuals and user guides at all-guides.com Walk around your machine once more just prior to mounting it – checking for people and objects that might be in the way – then MOUNT PROPERLY USING STEPS AND HANDHOLDS PROVIDED. Always use seat belts if your machine is equipped with a ROPS.
- Page 114 START SAFELY All manuals and user guides at all-guides.com COLD WEATHER OPERATION BOOSTER CABLE INSTRUCTIONS Consult the engine manufacturer’s operation manual 1. Connect positive (+) cable to positive post of for proper cold weather starting procedure. discharged battery. When using cold weather starting aids, be sure to 2.
- Page 115 WORK SAFELY All manuals and user guides at all-guides.com For maximum safety on machines with more than one operator’s position, operate from the position giving the greatest visibility of potential hazards. NEVER allow unqualified or unauthorized personnel to operate your machine. NEVER allow other personnel to ride on your machine unless appropriate seating is provided …...
- Page 116 WORK SAFELY All manuals and user guides at all-guides.com Avoid operating your machine too close to an overhang, deep ditch or hole. If your machine inadvertently gets close to a tipping condition or drop-off, STOP and get off the machine after applying the parking brake …...
- Page 117 PARK AND SHUT DOWN SAFELY All manuals and user guides at all-guides.com PARK SAFELY angles to the slope. Make sure the machine is on a firm footing, and that there is no danger of sliding. Park in an off the road area, out of traffic, or as Do NOT leave your machine until you are sure it is instructed.
- Page 118 LOAD AND UNLOAD MACHINE SAFELY All manuals and user guides at all-guides.com Loading and unloading machines always involves • The ramp surface must provide adequate traction. potential hazards. EXTREME CAUTION SHOULD Be sure the surface is clean and free of grease, oil, ice, and loose material.
- Page 119 TRANSPORTING SAFELY All manuals and user guides at all-guides.com TOWING NEVER allow anyone to ride on a trailer or towed machine. (FIG. 28) ALWAYS use EXTRA care when towing a trailer or machine… when maneuvering in tight places, when backing When necessary to disconnect and park a trailer or (visibility is reduced, and jackknifing must be avoided), and towed machine, ALWAYS select a location that is level...
- Page 120 PERFORM MAINTENANCE SAFELY All manuals and user guides at all-guides.com CLOTHING AND PERSONAL machinery. (FIG. 31) Heavy gloves should be worn PROTECTIVE ITEMS for many operations. Keep hands and clothing well away from engine EXHAUST FUMES fan and moving parts while engine is running. Engine exhaust fumes can cause sickness or death.
- Page 121 PERFORM MAINTENANCE SAFELY All manuals and user guides at all-guides.com Before beginning welding or burning operations, drain JACKING AND BLOCKING fuel lines and tank and move all flammable material to a ALWAYS lower all movable attachments to the ground safe distance, and be certain a fire extinguisher is readily or to their lowest position before servicing a machine.
- Page 122 PERFORM MAINTENANCE SAFELY All manuals and user guides at all-guides.com FIRE PREVENTION CHECKLIST (FIG. 36) • Remove debris such as rags, coal dust, oil, leaves, pine needles. • Check and repair fuel and hydraulic leaks. • Check and repair damaged wiring. •...
- Page 123 PERFORM MAINTENANCE SAFELY All manuals and user guides at all-guides.com SERVICING COOLING SYSTEM When checking coolant level: • Stop the engine and let the engine and radiator cool before checking. (FIG. 38) If an overheated engine requires a shutdown: • Wait for the radiator to cool.
- Page 124 PERFORM MAINTENANCE SAFELY All manuals and user guides at all-guides.com BATTERY SERVICING To prevent a battery explosion: (Fig. 40) • Maintain the electrolyte at the recommended level. Check level frequently. Add distilled water to batteries only before starting up, never when shutting down.With electrolyte at the proper level, less space is available for gases to accumulate in the battery.
- Page 125 PERFORM MAINTENANCE SAFELY All manuals and user guides at all-guides.com HYDRAULIC SYSTEMS (CONT’D) Keep hydraulic relief valve settings set to the manufacturer’s recommendations. Excessive If you are struck by escaping hydraulic fluid pressures could result in structural or under pressure, serious injury can occur if hydraulic failures.
- Page 126 PERFORM MAINTENANCE SAFELY All manuals and user guides at all-guides.com TIRE PRESSURE Check tire pressure before starting operation. An air pressure rise during operation is normal and should NOT be reduced. Overloads or over- speeds may produce increased tire pressures due to heat.
- Page 127 SPECIAL OPERATING AND MAINTENANCE PRECAUTIONS All manuals and user guides at all-guides.com PARKING AND TRANSPORTING Extreme care should be exercised when loading or unloading a walk-behind roller. It is generally ALWAYS select a level area to park in and, if best to stand behind and to one side rather than possible, one where children are unlikely to be directly behind a machine being propelled up or...
- Page 128 SPECIAL OPERATING AND MAINTENANCE PRECAUTIONS All manuals and user guides at all-guides.com FOR LANDFILL COMPACTORS General Operators of landfill compactors should carefully handle fill materials that could be picked up and thrown by the wheels, become lodged in the machine, or that are highly flammable. Frequent checks should be made for wire, cable or other material wound around the axle members.
- Page 129 TEST YOUR KNOWLEDGE All manuals and user guides at all-guides.com Do you understand this AEM SAFETY MANUAL AND • Proper operating procedures? ITEMS SUCH AS … • Proper parking, shutdown, and dismounting procedures? • Your safety program? • Proper maintenance procedures? •...
- Page 130 All manuals and user guides at all-guides.com KE40246P1 6/9/05 3:14 PM Page 1...
- Page 131 All manuals and user guides at all-guides.com EC DECLARATION OF CONFORMITY WACKER NEUSON CORPORATION, N92W15000 ANTHONY AVENUE, MENOMONEE FALLS, WISCONSIN USA AUTHORIZED REPRESENTATIVE IN THE EUROPEAN UNION Axel Häret WACKER NEUSON SE Preußenstraße 41 80809 München hereby certifies that the construction equipment specified hereunder: Category: This machine is a dual drum, ride-on roller.
- Page 132 Fax: +49 - (0)89-3 54 02-390 Wacker Neuson Corporation · N92W15000 Anthony Ave. · Menomonee Falls, WI 53051 · Tel. : (262) 255-0500 · Fax: (262) 255-0550 ·Tel. : (800) 770-0957 Wacker Neuson Limited - Room 1701–03 & 1717–20, 17/F. Tower 1, Grand Century Place, 193 Prince Edward Road West, Mongkok, Kowloon, Hongkong.
- Page 133 All manuals and user guides at all-guides.com Notice d’Emploi Rouleau RD 16 0178395fr 0610...
- Page 134 Tout autre type de reproduction est interdit sans l’autorisation écrite expresse de Wacker Neuson Corporation. Tout type de reproduction ou de distribution non autorisé par Wacker Neuson Corporation représente une violation des copyrights en vigueur. Les contrevenants feront l’objet de poursuites.
- Page 135 Informations attendues dans ce manuel Ce manuel fournit des informations et renseigne sur les procédures à suivre pour utiliser et entretenir en toute sécurité le ou les modèles Wacker Neuson ci-dessus. Par mesure de sécurité et pour réduire les risques de blessure, lire attentivement, bien assimiler et observer les consignes décrites dans...
- Page 136 Blessures graves pour l’opérateur et les personnes dans la zone de travail Dégâts irréversibles pour la machine non couverts par la garantie Contacter immédiatement un revendeur Wacker Neuson pour toute question sur les pièces, accessoires et modifications approuvés et non approuvés.
- Page 137 All manuals and user guides at all-guides.com RD 16 Table des matières Avant-Propos Informations sur la sécurité Références d’appel se trouvant dans ce manuel ......... 9 Description de la machine et utilisation prévue ........10 Sécurité d’utilisation ................12 Sécurité pour l’opérateur en utilisant le moteur ........14 Sécurité...
- Page 138 All manuals and user guides at all-guides.com Table des matières RD 16 3.21 Bouton de frein de stationnement ............53 3.22 Direction et vitesse ................54 3.23 Translation ...................55 3.24 Vibration ....................56 3.25 Système de pulvérisation d'eau ............57 3.26 Procédure d'arrêt d'urgence ..............58 3.27...
- Page 139 Schéma du système hydraulique - Parties Constituantes ....95 Schéma électrique—RD 16 ..............96 Composants du schéma électrique—RD 16 ........98 Schéma électrique—RD 16 IRH ............100 Composants du schéma électrique—RD 16 IRH ......102 Données Techniques Moteur ....................104 Rouleau .................... 105 Lubrification ..................
- Page 140 All manuals and user guides at all-guides.com Table des matières RD 16 wc_bo0178395fr_005TOC.fm...
- Page 141 All manuals and user guides at all-guides.com RD 16 Informations sur la sécurité Informations sur la sécurité Références d’appel se trouvant dans ce manuel Ce symbole signale un point de sécurité. Il est utilisé pour vous avertir qu’il existe un risque de lésion corporelle..
- Page 142 Description de la machine et utilisation prévue Cette machine est un rouleau à conducteur porté à double tambour. Le rouleau à conducteur porté Wacker Neuson comprend un châssis articulé sur lequel est monté un moteur à essence ou diesel, un réservoir de carburant, un réservoir hydraulique, un réservoir d’eau,...
- Page 143 All manuals and user guides at all-guides.com RD 16 Informations sur la sécurité d’étiquettes d’avertissement. Il peut cependant demeurer des risques même après que toutes les mesures de protection ont été prises. Ce sont les risques résiduels. Sur cette machine, ces derniers peuvent inclure l’exposition aux éléments suivants :...
- Page 144 • enfants • personnes sous l’emprise de l’alcool ou de drogues Si besoin est, contacter Wacker Neuson pour une formation complémentaire. Porter l’équipement de protection individuel (PPE) Porter l’équipement de protection individuel (PPE) lors de l’utilisation de cette machine : •...
- Page 145 All manuals and user guides at all-guides.com RD 16 Informations sur la sécurité 1.3.5 Ne JAMAIS laisser la machine en marche sans surveillance. 1.3.6 Ne JAMAIS faire fonctionner la machine si le bouchon de carburant est desserré ou manquant. 1.3.7 Se tenir à...
- Page 146 All manuals and user guides at all-guides.com Informations sur la sécurité RD 16 Sécurité pour l’opérateur en utilisant le moteur AVERTISSEMENT Les moteurs à combustion interne présentent des risques particuliers à l’utilisation ou lorsque l’on fait le plein en carburant. Le non-respect de ces avertissements et de ces normes de sécurité...
- Page 147 All manuals and user guides at all-guides.com RD 16 Informations sur la sécurité • Faire le plein du réservoir de carburant dans un endroit bien ven- tilé. • Remettre le bouchon du réservoir de carburant en place après avoir fait le plein.
- Page 148 All manuals and user guides at all-guides.com Informations sur la sécurité RD 16 • Si besoin est, contacter Wacker Neuson Corporation pour une formationcomplémentaire. Lors de l’entretien ou de la maintenance de cette machine: • Ne pas autoriser des personnes insuffisamment formées à...
- Page 149 1.5.24 Lorsque des pièces de rechange sont nécessaires pour cette machine, utiliser uniquement des pièces de rechange d’origine Wacker Neuson ou des pièces équivalentes aux pièces originales pour toutes les spécifications, dimensions, type, résistance et matériau.
- Page 150 All manuals and user guides at all-guides.com Autocollants RD 16 Autocollants Situation des Autocollants wc_si000400fr.fm...
- Page 151 All manuals and user guides at all-guides.com RD 16 Autocollants Autocollant de sécurité Réf. Autocollant Signification AVERTISSEMENT ! Avant d’utiliser cette machine, lire attentivement et assimiler la Notice d’Emploi. Dans le cas contraire, le risque de se blesser ou de blesser les autres augmente.
- Page 152 All manuals and user guides at all-guides.com Autocollants RD 16 Réf. Autocollant Signification PRÉCAUTION ! Avant de mettre cette machine en marche, lire attentivement et comprendre le Manuel de l’utili- sateur. Dans le cas contraire, vous augmentez le risque de vous blesser et de blesser les autres.
- Page 153 All manuals and user guides at all-guides.com RD 16 Autocollants Réf. Autocollant Signification AVERTISSEMENT Afin de réduire le risque de perte d’acuité audi- tive, toujours porter une protection antibruit lors de l’utilisation de cette machine. AVERTISSEMENT Risque de coincement des mains. Mécanisme rotatif.
- Page 154 All manuals and user guides at all-guides.com Autocollants RD 16 Réf. Autocollant Signification AVERTISSEMENT! Toujours porter la ceinture de sécurité pour con- duire le rouleau. AVERTISSEMENT ! Eviter zone de raccordement à pince. AVERTISSEMENT Risque de coincement des mains. Mécanisme rotatif. Ne pas mettre les mains à...
- Page 155 All manuals and user guides at all-guides.com RD 16 Autocollants Réf. Autocollant Signification AVERTISSEMENT ! Eviter d’écraser la zone. Emplacement du dispositif de verrouillage du joint articulé de direction. Verrouiller le joint articulé de direction avant toute intervention sur la machine.
- Page 156 All manuals and user guides at all-guides.com Autocollants RD 16 Réf. Autocollant Signification AVERTISSEMENT ! Débrancher la batterie avant toute maintenance. 0165018 Ne soulever la machine qu’au moyen d’une plaque d’écartement. PRÉCAUTION ! Risque d’électrocution à la borne positive de batterie auxiliaire. Ne jamais toucher en même temps cette borne et une pièce métal-...
- Page 157 All manuals and user guides at all-guides.com RD 16 Autocollants Réf. Autocollant Signification AVERTISSEMENT ! Avant d’utiliser cette machine, lire attentivement et assimiler la Notice d’Emploi. Dans le cas contraire, le risque de se blesser ou de blesser les autres augmente.
- Page 158 All manuals and user guides at all-guides.com Autocollants RD 16 Autocollants d'information Réf. Autocollant Signification Point d’attache Tube de remplissage de l’huile hydraulique Serrer les écrous à un couple de 13,6 à 14,7Nm maximum. ATTENTION Point de levage Frein de stationnement desserré.
- Page 159 All manuals and user guides at all-guides.com RD 16 Autocollants Réf. Autocollant Signification Graisseurs: Inspecter et lubrifier toutes les 100 heures d’opération. Niveau de puissance acoustique garanti en dB(A). Une plaque signalétique mentionnant le numéro de modèle, le numéro de référence, le niveau de révision et le numéro de série est apposée sur...
- Page 160 All manuals and user guides at all-guides.com Autocollants RD 16 Réf. Autocollant Signification Combustible à basse teneur en soufre ou com- bustible à faible teneur en soufre wc_si000400fr.fm...
- Page 161 All manuals and user guides at all-guides.com RD 16 Autocollants wc_si000400fr.fm...
- Page 162 All manuals and user guides at all-guides.com Fonctionnement RD 16 Fonctionnement Emplacement des commandes et entretien 7 28 wc_gr002947 wc_tx001075fr.fm...
- Page 163 All manuals and user guides at all-guides.com RD 16 Fonctionnement Voir Dessin : wc_gr002947 Réf. Description Réf Description Filtre à air Bouchon de remplissage du réser- voir d’eau Joint articulé Bras de verrouillage Mains courantes Plate-forme de l’opérateur Tableau de commande Filtre à...
- Page 164 All manuals and user guides at all-guides.com Fonctionnement RD 16 Panneau de commande RD 16 IRH 50 56 58 57 RD 16-90 50 56 58 57 RD 16-100 wc_gr004113 wc_tx001075fr.fm...
- Page 165 All manuals and user guides at all-guides.com RD 16 Fonctionnement Voir Dessin : wc_gr004113 Réf. Description Réf. Description Commutateur de clignotant— Témoin de bas niveau de carburant GAUCHE et DROIT (RD 16IRH uniquement) Compteur horaire Témoin de colmatage du filtre à air Témoin de température du liquide de...
- Page 166 All manuals and user guides at all-guides.com Fonctionnement RD 16 ATTENTION : ne pas utiliser l’arceau de protection au retournement pour soulever la machine. 3.3.2 Retirer le ruban d’expédition des deux côtés du châssis. Conserver les rondelles. 3.3.3 Desserrer le boulon de montage inférieur des deux côtés.
- Page 167 All manuals and user guides at all-guides.com RD 16 Fonctionnement Arceau de Protection au Retournement (ROPS) pliable Voir Dessin : wc_gr002957 La machine est équipée d’un arceau de protection au retournement. A la livraison de la machine au client, l’arceau de protection au retournement est habituellement replié...
- Page 168 All manuals and user guides at all-guides.com Fonctionnement RD 16 Vérifier une fois par mois le couple de serrage de toutes les vis de fixation de l’arceau de protection au retournement. Vérifier que le châssis de l’arceau de protection au retournement n’est pas rouillé, fissuré, cassé...
- Page 169 All manuals and user guides at all-guides.com RD 16 Fonctionnement Gyrophare (si équipé) Voir Dessin : wc_gr002957 Le gyrophare (34) s’allume quand la clé de contact est mise en position ON (MARCHE). Le gyrophare s’allume et tourne lorsqu’il est sous tension.
- Page 170 Sur le RD 16 IRH uniquement, ce commutateur allume les feux de stationnement. Commutateur d’allumage des feux (B) Sur le RD 16 IRH, cette position allume les feux de travail arrière. Sur le RD 16, ce commutateur allume les feux avant et arrière. Commutateur de feux de route avant (C) Sur le RD 16 IRH uniquement, ce commutateur allume les feux avant.
- Page 171 All manuals and user guides at all-guides.com RD 16 Fonctionnement Ceinture de sécurité Voir Dessin : wc_gr002238 Tirer la ceinture (c) de l’enrouleur sans à-coups. Mettre l’ardillon de la ceinture de sécurité (b) dans la boucle (a). S’assurer que la ceinture de sécurité est positionnée au-dessus des cuisses de l’opérateur.
- Page 172 All manuals and user guides at all-guides.com Fonctionnement RD 16 Système de détection de la présence de l’opérateur Voir Dessin : wc_gr002962 La machine est équipée d’un système de « détection de présence de l’opérateur ». Ce système est intégré au siège de l’opérateur et détecte le poids de celui-ci sur le siège.
- Page 173 All manuals and user guides at all-guides.com RD 16 Fonctionnement 3.10 Racleurs Voir Dessin : wc_gr003447 Les barres de raclage situées devant ou derrière chaque tambour sont utilisées pour empêcher la saleté et l’asphalte de se coller et de s’accumuler sur la surface des tambours.
- Page 174 All manuals and user guides at all-guides.com Fonctionnement RD 16 3.11 Protection contre le Vandalisme Les pièces de la machine qui pourraient faire l’objet de vols ou de vandalisme lorsque le véhicule est laissé sans surveillance peuvent être cadenassées pour éviter toute utilisation frauduleuse.
- Page 175 All manuals and user guides at all-guides.com RD 16 Fonctionnement 3.12 Goujon de blocage du joint articulé Voir Dessin : wc_gr002956 Un bras de verrouillage (23), situé en dessous du joint articulé, est prévu pour fixer les parties avant et arrière du rouleau ensemble. Une fois fixé, le bras de verrouillage empêche les deux parties de se replier.
- Page 176 All manuals and user guides at all-guides.com Fonctionnement RD 16 3.13 Stabilité de la machine AVERTISSEMENT Risque d’écrasement. Certaines conditions sur les chantiers ou pratiques opératoires risquent de compromettre la stabilité de la machine. Suivre les instructions ci-dessous pour réduire le risque de basculement ou de chute.
- Page 177 All manuals and user guides at all-guides.com RD 16 Fonctionnement Tambours en porte-à-faux Cette machine peut subitement basculer si plus de la moitié de la largeur des tambours dépasse du bord de la surface en hauteur. • Ralentir la marche et observer attentivement la position des tambours lors de l’utilisation de la machine le long du bord d’une...
- Page 178 All manuals and user guides at all-guides.com Fonctionnement RD 16 3.14 Utilisation sur des terrains en pente Voir Dessin : wc_gr003448 Lors d’une utilisation sur des terrains en pente, il faut être particulièrement prudent afin de réduire tout risque de lésion corporelle ou de dommage à...
- Page 179 3.17.2 Vérifier si la machine et ses composants ne sont pas endommagés. En cas de dommage visible, ne pas faire fonctionner la machine ! Contacter le concessionnaire Wacker Neuson local pour obtenir de l’assistance. 3.17.3 Faire l’inventaire de tous les articles inclus avec la machine et vérifier la présence de tous les composants non fixés et de toutes les...
- Page 180 All manuals and user guides at all-guides.com Fonctionnement RD 16 Remarques : wc_tx001075fr.fm...
- Page 181 All manuals and user guides at all-guides.com RD 16 Fonctionnement 3.18 Avant de Démarrer Avant de démarrer, vérifier les points suivants : • Niveau de l’huile du moteur • Niveau de liquide de refroidissement moteur • Niveau de l’huile hydraulique •...
- Page 182 All manuals and user guides at all-guides.com Fonctionnement RD 16 3.19 Démarrage Voir Dessin : wc_gr002952 Les gaz d’échappement sont toxiques. Ne pas démarrer le moteur dans des espaces confinés. AVERTISSEMENT 3.19.1 S’asseoir sur le siège de l’opérateur puis boucler la ceinture de sécurité.
- Page 183 All manuals and user guides at all-guides.com RD 16 Fonctionnement wc_tx001075fr.fm...
- Page 184 éviter tout mouvement de la machine. 3.20.7 Arrêter le moteur en mettant l’interrupteur d’allumage en position OFF (ARRÊT) (55). Remarque : Sur le RD 16, le frein de stationnement s’engage automatiquement dans les moteurs d’entraînement. Les freins s’engagent dans les conditions suivantes : •...
- Page 185 All manuals and user guides at all-guides.com RD 16 Fonctionnement 3.21 Bouton de frein de stationnement Voir Dessin : wc_gr002954 Le moteur d’entraînement de chaque tambour est équipé d’un frein de stationnement mécanique, prévu pour immobiliser la machine à l’arrêt.
- Page 186 All manuals and user guides at all-guides.com Fonctionnement RD 16 3.22 Direction et vitesse Voir Dessin : wc_gr002954 La commande de marche avant/marche arrière (15) commande le sens de marche et la vitesse du rouleau. Utiliser le levier de commande plutôt que le levier des gaz pour contrôler la vitesse de la machine lors du compactage.
- Page 187 All manuals and user guides at all-guides.com RD 16 Fonctionnement 3.23 Translation Voir Dessin : wc_gr002954 Les deux tambours du rouleau sont entraînés par une pompe à cylindrée à variation continue et une transmission hydrostatique entraîne les moteurs hydrauliques montés sur chaque tambour. Une commande de marche avant/marche arrière, située sur le côté...
- Page 188 All manuals and user guides at all-guides.com Fonctionnement RD 16 3.24 Vibration Voir Dessin : wc_gr005893 La commande de vibration est ACTIVÉE ou DÉSACTIVÉE à l’aide d’un bouton-poussoir (10) situé sur la commande de marche avant/ marche arrière (15). Appuyer sur ce bouton pour ACTIVER la commande de vibration et rappuyer pour la DÉSACTIVER.
- Page 189 All manuals and user guides at all-guides.com RD 16 Fonctionnement 3.25 Système de pulvérisation d'eau Voir Dessin : wc_gr003638, wc_gr002947 L’eau en provenance du réservoir est fournie aux barres d’arrosage par une pompe électrique. Le débit d’eau est commandé par un commutateur et un sélecteur rotatif.
- Page 190 All manuals and user guides at all-guides.com Fonctionnement RD 16 3.26 Procédure d'arrêt d'urgence En cas de panne ou d’accident en cours d’utilisation de la machine, procéder comme suit. 3.26.1 Arrêter le moteur. 3.26.2 Laisser refroidir le moteur et le système d’échappement.
- Page 191 All manuals and user guides at all-guides.com RD 16 Fonctionnement 3.27 Sectionneur de la batterie Cette machine est équipée d’un interrupteur de sectionnement de batterie situé dans le compartiment moteur. Pour débrancher et isoler le circuit électrique de la batterie, retirer l’écrou à...
- Page 192 All manuals and user guides at all-guides.com Fonctionnement RD 16 3.29 Lampes Pilotes RD 16 IRH 50 56 58 57 RD 16-90 50 56 58 57 RD 16-100 wc_gr004117 wc_tx001075fr.fm...
- Page 193 All manuals and user guides at all-guides.com RD 16 Fonctionnement Voir Dessin : wc_gr004117 Témoin de température du liquide de refroidissement moteur (48) Ce voyant d’alerte s’allume en cas de surchauffe du moteur, avant que ce dernier ne se coupe.
- Page 194 All manuals and user guides at all-guides.com Fonctionnement RD 16 3.30 Clignotants / feux de détresse (si équipé) Voir Dessin : wc_gr004117 Ces commutateurs sont disponibles uniquement sur les machines équipées d’un kit optionnel de feux de route. Commutateur de clignotant Appuyer sur le commutateur de clignotant (46) pour activer le clignotant souhaité.
- Page 195 All manuals and user guides at all-guides.com RD 16 Fonctionnement Remarques : wc_tx001075fr.fm...
- Page 196 All manuals and user guides at all-guides.com Entretien RD 16 Entretien Calendrier d'entretien du moteur Le tableau ci-dessous indique l’entretien de base du moteur. Les tâches indiquées par des coches peuvent être exécutées par l’opérateur. Les tâches indiquées par des puces carrées exigent une formation spéciale et des équipements particuliers.
- Page 197 All manuals and user guides at all-guides.com RD 16 Entretien Calendrier d'entretien du rouleau Le tableau ci-dessous indique l’entretien de base de la machine. Les tâches indiquées par des coches peuvent être exécutées par l’opérateur. Les tâches indiquées par des puces carrées exigent une formation spéciale et des équipements particuliers.
- Page 198 Pour plus de commodité, les diagrammes et les listes de pièces détachées ayant cette fonction sont fournis ci-dessous. Pour la liste complète des pièces détachées pour cette machine, contacter un revendeur Wacker Neuson ou aller sur le site www.wackerneuson.com. Diagramme du ROPS wc_gr007046...
- Page 199 All manuals and user guides at all-guides.com RD 16 Entretien Liste des pièces du ROPS Réf. Qté Description Mesure 0163264 Châssis ROPS 0162980 Réflecteur rouge 0163627 Support 0163224 Support 0162959 Option-groupe de gyrophares 0162345 Ampoule 0162341 Clé de serrage 0020378 Vis à...
- Page 200 All manuals and user guides at all-guides.com Entretien RD 16 Diagramme du siège wc_gr007047 wc_tx001076fr.fm...
- Page 201 All manuals and user guides at all-guides.com RD 16 Entretien Liste des pièces du siège Mesure et Réf. Qté Description couple 0163274 Plaque d’appui 0163324 Siège ajustable 0164779 Contacteur de siège 0083220 Attache 0030066 Contre-écrou 34 Nm/25 ft.lb 0013002 Vis à tête hexagonale M12 x 25 86 Nm/63 ft.lb...
- Page 202 All manuals and user guides at all-guides.com Entretien RD 16 Entretien du siège et de sa ceinture Contexte Un entretien préventif et des réparations occasionnelles sont nécessaires pour pouvoir utiliser le siège et sa ceinture de sécurité correctement et en toute sécurité à long terme. Un matériel mal entretenu peut devenir dangereux pour la sécurité...
- Page 203 All manuals and user guides at all-guides.com RD 16 Entretien Nettoyage des barres d'arrosage Contexte Les barres d’arrosage bouchées ou sales peuvent empêcher la pulvérisation d’eau sur les tambours. Si l’arrosage est sensiblement réduit, voire absent, malgré la présence d’eau dans le réservoir, nettoyer les barres d’arrosage.
- Page 204 All manuals and user guides at all-guides.com Entretien RD 16 Accès au châssis arrière Voir Dessin : wc_gr004333 La plate-forme de l’opérateur est montée sur des charnières et peut se relever pour ouvrir l’accès à la pompe à eau, au filtre à eau, à la batterie, aux tuyaux hydrauliques et au réservoir de carburant.
- Page 205 4.7.2 Installer un nouveau filtre. Si nécessaire, amorcer les conduits de carburant. Voir la section Amorce du système de carburant du RD 16. L’essence est extrêmement inflammable ! Couper le moteur et laisser le moteur refroidir avant de remplacer le filtre à carburant.
- Page 206 All manuals and user guides at all-guides.com Entretien RD 16 Batterie Voir Dessin : wc_gr002565 Avant de réviser cette machine, vérifier que l’interrupteur de mise en marche est en position d’arrêt et que la batterie est débranchée. Coller une étiquette « NE PAS DEMARRER » sur la machine. Ceci servira d’avertissement aux autres membres du personnel que la machine est...
- Page 207 All manuals and user guides at all-guides.com RD 16 Entretien Inspecter régulièrement la batterie. Maintenir les bornes de la batterie en état de propreté et les branchement bien serrés. Si nécessaire, serrer les câbles et graisser les agrafes au pétrolatum.
- Page 208 All manuals and user guides at all-guides.com Entretien RD 16 4.10 L’huile et du filtre Voir Dessin : wc_gr003780 Remplacer l’huile et le filtre à huile (b) toutes les 250 heures. Sur les machines neuves, remplacer l’huile après les 50 premières heures de marche.
- Page 209 All manuals and user guides at all-guides.com RD 16 Entretien 4.11 Filtre à air Voir Dessin : wc_gr005161 Remplacer les deux éléments filtrants lorsque le voyant du filtre à air s’allume. Voir la section Panneau de commande. Le filtre à air comporte un élément filtrant principal (a) et un élément filtrant secondaire (d).
- Page 210 All manuals and user guides at all-guides.com Entretien RD 16 4.12 Graisseurs Voir Dessin : wc_gr003457 Voir Caractéristiques techniques pour connaître la quantité et le type d’huile. Goujon de blocage du joint articulé : Le joint articulé est équipé de graisseurs (a) pour la lubrification.
- Page 211 All manuals and user guides at all-guides.com RD 16 Entretien 4.13 Propreté du système hydraulique Il est indispensable de veiller à la propreté permanente de l’huile hydraulique afin de prolonger la durée de vie des pièces du circuit hydraulique. L’huile des circuits hydrauliques sert non seulement à...
- Page 212 Entretien RD 16 4.14 Spécification de l’huile hydraulique Wacker Neuson recommande l’utilisation d’une huile hydraulique de haute qualité à base de pétrole, ayant des propriétés anti-usure. Les bonnes huiles anti-usure contiennent certains additifs qui permettent de réduire l’oxydation, d’empêcher la formation de mousse et possèdent de grandes qualités hydrofuges.
- Page 213 All manuals and user guides at all-guides.com RD 16 Entretien 4.15 Niveau d’huile hydraulique Voir Dessin : wc_gr005895 Un hublot de contrôle indiquant le niveau d’huile hydraulique (29) est situé au milieu à droite de la machine dans le compartiment moteur.
- Page 214 All manuals and user guides at all-guides.com Entretien RD 16 4.17 Remplacement de l’huile et du filtre hydraulique Placer toutes les commandes au point mort, couper le moteur et laisser refroidir le moteur et les fluides avant d’effectuer cette procédure.
- Page 215 All manuals and user guides at all-guides.com RD 16 Entretien 4.18 Alimentation du système hydraulique 4.18.1 Remplir l’installation hydraulique d’huile hydraulique propre jusqu’à ce que cette dernière atteigne, au minimum, la moitié du regard. Ne pas réutiliser l’huile hydraulique usagée.
- Page 216 à chaque anneau de levage, et d’un palonnier pour éviter que les câbles n’entrent en contact avec la machine. Remarque : Le RD 16 comprend un palonnier fixé à l’intérieur du capot moteur. N’utiliser que des câbles ou des chaînes de levage en acier. Les câbles ou les chaînes doivent avoir la capacité...
- Page 217 All manuals and user guides at all-guides.com RD 16 Entretien 4.20 Immobilisation et transport de la machine Voir Dessin : wc_gr003455 Verrouiller le goujon de blocage du joint articulé. Se reporter à la section Goujon de blocage du joint articulé pour information.
- Page 218 All manuals and user guides at all-guides.com Entretien RD 16 4.21 Stockage Si la machine ne doit pas être utilisée pendant plus de trente jours : • Purger les réservoirs d’eau et d’huile. Purger également la bille arrière s’il contient du gravier.
- Page 219 All manuals and user guides at all-guides.com RD 16 Entretien 4.22 Remorquage Un attelage et un remorquage incorrects sont dangereux et peuvent occasionner des blessures et des accidents mortels. L’attelage doit être rigide sinon le remorquage devra être effectué par AVERTISSEMENT deux machines de même taille ou par une machine plus grande que...
- Page 220 All manuals and user guides at all-guides.com Entretien RD 16 Normalement, la machine qui effectue le remorquage devra être de même capacité que la machine qui est en panne. S’assurer que la machine qui effectue le remorquage possède suffisamment de force de freinage et qu’elle soit suffisamment lourde et puissante.
- Page 221 All manuals and user guides at all-guides.com RD 16 Entretien 4.22.7 Remorquer la machine en panne, à vitesse lente jusqu’à l’emplacement souhaité. ATTENTION : ne pas remorquer le rouleau sur des longues distances ou à des vitesses supérieures à 3km/h. Les moteurs d’entraînement pourraient être endommagés.
- Page 222 All manuals and user guides at all-guides.com Entretien RD 16 4.23 Désengager manuellement les freins de stationnement Voir Dessin : wc_gr002964 Le rouleau comporte deux moteurs d’entraînement, un sur chaque tambour. Chaque moteur d’entraînement est muni d’un frein de stationnement de type serrage à ressort et desserrage hydraulique.
- Page 223 All manuals and user guides at all-guides.com RD 16 Entretien Remarque : après l’intervention, s’assurer que les vis de desserrage ont repris leur position normale de fonctionnement. Remarque : les moteurs d’entraînement de rechange sont livrés avec les freins en position ACTIVE.
- Page 224 All manuals and user guides at all-guides.com Entretien RD 16 4.24 Recherches d’Origine des Pannes Problème / Cause / Remède Symptôme LE MOTEUR NE • Réservoir de carburant vide. DÉMARRE PAS • Mauvais type de carburant. • Carburant usagé. Vidanger le réservoir, remplacer le filtre à...
- Page 225 All manuals and user guides at all-guides.com RD 16 Entretien Remarques : wc_tx001076fr.fm...
- Page 226 All manuals and user guides at all-guides.com Schémas RD 16 Schémas Schéma du système hydraulique wc_tx001074fr.fm...
- Page 227 All manuals and user guides at all-guides.com RD 16 Schémas Schéma du système hydraulique - Parties Constituantes Réf. Description Réf. Description Vérin de direction Filtre de retour Boîtier de direction Réservoir Moteur d’entraînement Crépine Dérivation Électrovanne de vibration Pompe de charge Moteur d’excitatrice...
- Page 228 All manuals and user guides at all-guides.com Schémas RD 16 Schéma électrique—RD 16 wc_tx001074fr.fm...
- Page 229 All manuals and user guides at all-guides.com RD 16 Schémas May be in harness wc_tx001074fr.fm...
- Page 230 All manuals and user guides at all-guides.com Schémas RD 16 Composants du schéma électrique—RD 16 Réf. Description Réf. Description Commutateur d’éclairage (option) Solénoïde du système de vibration (avant seulement) Feu clignotant Solénoïde du système de vibration (avant et arrière) Commutateur signal clignotant Solénoïde de la dérivation et du frein...
- Page 231 All manuals and user guides at all-guides.com RD 16 Schémas Remarques : wc_tx001074fr.fm...
- Page 232 All manuals and user guides at all-guides.com Schémas RD 16 Schéma électrique—RD 16 IRH wc_tx001074fr.fm...
- Page 233 All manuals and user guides at all-guides.com RD 16 Schémas wc_tx001074fr.fm...
- Page 234 All manuals and user guides at all-guides.com Schémas RD 16 Composants du schéma électrique—RD 16 IRH Réf. Description Réf. Description Commutateur d’éclairage Solénoïde de la dérivation et du (option) frein Feu clignotant Alarme de marche arrière Commutateur signal clignotant Solénoïde de carburant...
- Page 235 All manuals and user guides at all-guides.com RD 16 Schémas wc_tx001074fr.fm...
- Page 236 Puissance nominale nette conformément à ISO 3046/1-IFN. La puissance réelle peut varier selon les conditions spécifiques d'utilisation. Numére de référence : RD 16 / RD 16 IRH Moteur Type du moteur Moteur diesel tricylindre, 4 temps, à refroidissement par eau...
- Page 237 Rayon de braquage 2,87 Vitesse avant/arrière 0-9,3 Rampe gravissable Fréquence de vibrations 4200 Lubrification Numére de référence : RD 16 / RD 16 IRH Lubrification Carter du moteur SAE 15W40 type SD sup. 2,4 Système hydraulique Qualité sup., huile hydraulique type...
- Page 238 All manuals and user guides at all-guides.com Données Techniques RD 16 Dimensions mm (in.) 2547 (100.3) 2289 RD 16-90 (90.1) RD 16 IRH 1806 (71.1) (22) 1382 (54.4) (35.4) 1950 1002 (76.8) (39.4) wc_td000312fr.fm...
- Page 239 All manuals and user guides at all-guides.com RD 16 Données Techniques Mesures du Bruit Les specifications acoustiques demandées suivant Chapitre 1, Paragraphe 1.7.4.f de la réglementation CEE pour machines sont : • Niveau de puissance acoustique garanti (L 106 dB(A) •...
- Page 240 All manuals and user guides at all-guides.com Données Techniques RD 16 Pressions hydrauliques Système Pression de fonctionnement Pression de décharge Entraînement 55–76 800–1100 4350 Direction* 45–51 650–725 —normal 41–55 600–800 —en tournant 90–103 1300–1500 Vibration 4200 —un tambour 103–131 1500–1900 —deux tambours...
- Page 241 All manuals and user guides at all-guides.com DÉCLARATION DE CONFORMITÉ C.E. WACKER NEUSON CORPORATION, N92W15000 ANTHONY AVENUE, MENOMONEE FALLS, WISCONSIN USA REPRÉSENTANT AGRÉÉ AUPRÈS DE L’UNION Axel Häret EUROPÉENNE WACKER NEUSON SE Preußenstraße 41 80809 München atteste que le matériel : Catégorie :...
- Page 242 Fax: +49 - (0)89-3 54 02-390 Wacker Neuson Corporation · N92W15000 Anthony Ave. · Menomonee Falls, WI 53051 · Tel. : (262) 255-0500 · Fax: (262) 255-0550 ·Tel. : (800) 770-0957 Wacker Neuson Limited - Room 1701–03 & 1717–20, 17/F. Tower 1, Grand Century Place, 193 Prince Edward Road West, Mongkok, Kowloon, Hongkong.
- Page 243 All manuals and user guides at all-guides.com...
- Page 244 Fax: +49 - (0)89-3 54 02-390 Wacker Neuson Corporation · N92W15000 Anthony Ave. · Menomonee Falls, WI 53051 · Tel. : (262) 255-0500 · Fax: (262) 255-0550 ·Tel. : (800) 770-0957 Wacker Neuson Limited - Room 1701–03 & 1717–20, 17/F. Tower 1, Grand Century Place, 193 Prince Edward Road West, Mongkok, Kowloon, Hongkong.