Table des Matières
Publicité
Les langues disponibles
Les langues disponibles
Liens rapides
Technical Manual
Manuel technique
Technische Handleiding
PGM
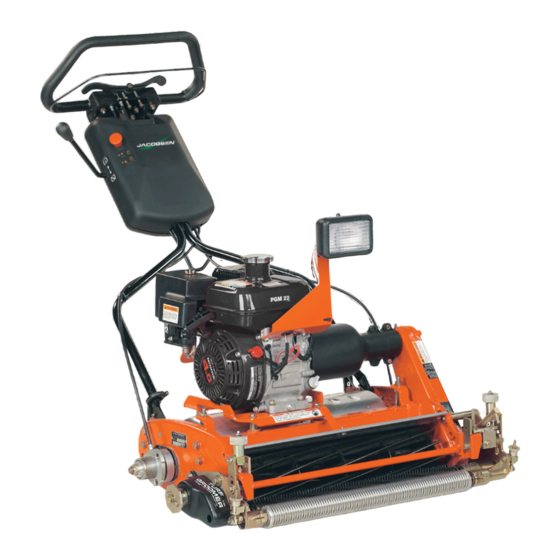
63280 – PGM 22, Honda GX120 Engine
63280 – PGM 22, Moteur Honda GX120
63280 – PGM 22, Motor Honda GX120
WARNING: If incorrectly used, this machine can cause severe injury. Those who
use and maintain this machine should be trained in its proper use, warned of its
dangers and should read the entire manual before attempting to set up, operate,
adjust or service the machine.
AVERTISSEMENT : Risque de blessures graves en cas d'utilisation incorrecte de la
machine. Les opérateurs et le personnel d'entretien doivent être formés et conscients
des dangers encourus. Ils doivent lire avec attention le manuel avant d'essayer de
monter, d'utiliser, de régler ou maintenir la machine
WAARSCHUWING: Bij verkeerd gebruik kan deze machine ernstig lichamelijk letsel veroorzaken.
Degenen die de machine gebruiken en onderhouden moeten worden getraind in het juiste gebruik
ervan, worden gewaarschuwd voor de gevaren ervan en behoren de volledige handleiding
aandachtig te lezen alvorens de machine bedrijfs-klaar te maken, te bedienen, af te stellen en/of
te onderhouden..
FR
GB
All manuals and user guides at all-guides.com
NL
4131595-BE
Publicité
Table des Matières

Manuels Connexes pour Textron Jacobsen PGM Serie


Sommaire des Matières pour Textron Jacobsen PGM Serie
- Page 1 All manuals and user guides at all-guides.com 4131595-BE Technical Manual Manuel technique Technische Handleiding 63280 – PGM 22, Honda GX120 Engine 63280 – PGM 22, Moteur Honda GX120 63280 – PGM 22, Motor Honda GX120 WARNING: If incorrectly used, this machine can cause severe injury. Those who use and maintain this machine should be trained in its proper use, warned of its dangers and should read the entire manual before attempting to set up, operate, adjust or service the machine.
- Page 2 Safety and Operation Manual to service the machine. The Safety and Operation Manual must be kept available for reference by the operator. Copyright 2005 Textron Inc. “All rights reserved, including the right to reproduce this material or portions thereof in any form.”...
-
Page 3: Service Parts
All manuals and user guides at all-guides.com Suggested Stocking Guide To Keep your Equipment fully operational and productive, maintain a stock of the more commonly used maintenance items. We have included part numbers for additional support materials and training aids. A more complete listing of accessories and attachments can be found in the Specifications Section. - Page 4 All manuals and user guides at all-guides.com SAFETY SAFETY OPERATING SAFETY ______________________________________________________ WARNING EQUIPMENT OPERATED IMPROPERLY OR BY UNTRAINED PERSONNEL CAN BE DANGEROUS. Familiarize yourself with the location and proper use of all controls. Inexperienced operator’s should receive instruction from someone familiar with the equipment before being allowed to operate the machine. 1.
- Page 5 All manuals and user guides at all-guides.com SAFETY IMPORTANT SAFETY NOTES ________________________________________________ This safety alert symbol is used to alert you to potential hazards. DANGER - Indicates an imminently hazardous situation which, if not avoided, WILL result in death or serious injury. WARNING - Indicates a potentially hazardous situation which, if not avoided, COULD result in death or serious injury.
- Page 6 (Honda), Operator Presence Control, grass catcher, brakes and kickstand. ® Serial Number ....An identification plate, like the one A Textron Company shown, listing the serial number, is CHARLOTTE, NC MADE IN U.S.A. attached to the right side frame.
- Page 7 All manuals and user guides at all-guides.com SPECIFICATIONS WEIGHT__________________________________________________________________ Weight (Mass) PGM 22..187 lb., (85 kg) with catcher, roller, kickstand. ACCESSORIES____________________________________________________________ Contact your authorized Jacobsen dealer for a complete listing of accessories and implements. PGM MagKnife Conversion Kit ......4131020 Pneumatic Transport Tires ........62293 Front Gear Drive .............68557 Front Roller Brush ...........68536...
- Page 8 All manuals and user guides at all-guides.com DECALS DECALS DECALS _________________________________________________________________ Familiarize yourself with the decals, they are critical to the safe operation of the mower. REPLACE DAMAGED DECALS IMMEDIATELY. CAUTION DANGER 1. Read operator’s manual before operating To avoid serious bodily injury stop engine machine.
-
Page 9: Initial Inspection
All manuals and user guides at all-guides.com INITIAL INSPECTION INITIAL INSPECTION GENERAL ________________________________________________________________ Accessories not included with this product must be The set-up and testing of the unit should always be ordered separately. See instructions provided with performed by a trained technician, familiar with the accessory for installation and parts. - Page 10 All manuals and user guides at all-guides.com CONTROLS CONTROLS ICONS ___________________________________________________________________ Operator Presence Control Engine Throttle Fast Slow Unlock Engine Run Engine Off Lock Parking Brake Engaged Disengaged Fuel Choke Gasoline WARNING Never attempt to operate the machine unless you have read the Safety and Operation Manual, the Parts and Maintenance Manual, the engine manual and know how to operate all controls correctly.
- Page 11 All manuals and user guides at all-guides.com CONTROLS E. Reel Clutch Lever – To disengage, turn handle (E) to point downwards. Always disengage clutch when mower is being transported. WARNING To prevent bodily injury or property damage, never engage the reel clutch lever while the engine is running or the O.P.C.
- Page 12 All manuals and user guides at all-guides.com OPERATION OPERATION DAILY INSPECTION________________________________________________________ 2. Check the fuel supply and crankcase oil level. All CAUTION fluids must be at the full level mark. 3. Make sure the mower is adjusted to the required The daily inspection should be performed only cutting height.
- Page 13 All manuals and user guides at all-guides.com OPERATION OPERATING PROCEDURES _________________________________________________ CAUTION To help prevent injury, always wear safety glasses, leather work shoes or boots, a hard hat, and ear protection. Long hair, loose clothing or jewelry may get tangled in moving parts. 1.
- Page 14 All manuals and user guides at all-guides.com OPERATION STARTING/STOPPING ENGINE ______________________________________________ CAUTION Always start and stop the engine when the mower is on level ground. Keep feet away from blade when starting engine. Starting 1. Check oil level and fuel supply then open fuel valve lever (G).
- Page 15 All manuals and user guides at all-guides.com OPERATION TRANSPORT WHEELS (OPTIONAL KIT 62293)__________________________________ 6. When using a vehicle to transport the mower, apply WARNING parking brake, stop engine and close fuel shut-off valve. Chock or block the wheels. Always stop the engine and disengage the drive 7.
- Page 16 All manuals and user guides at all-guides.com OPERATION MOWING_________________________________________________________________ 1. Stop engine. Place mower on kickstand and remove 5. For a more even playing surface and neater the transport wheels if installed. (See Section 6.5) appearance, alter the mowing pattern each time a green is mowed.
- Page 17 All manuals and user guides at all-guides.com OPERATION DAILY MAINTENANCE______________________________________________________ 1. Park the mower on a flat, level surface. Engage 4. Fill fuel tank at the end of each operating day. Do parking brake and stop the engine. not fill above the fuel strainer shoulder. Close fuel valve (G) when unit is not in use.
- Page 18 All manuals and user guides at all-guides.com ADJUSTMENTS ADJUSTMENTS GENERAL________________________________________________________________ 2. Replace, adjust, worn damaged WARNING components. 3. Long hair, jewelry or loose fitting clothing may get Before you adjust, clean or repair this equipment, tangled in moving parts. always disengage all drives, engage parking brake and stop engine to prevent serious injury.
- Page 19 All manuals and user guides at all-guides.com ADJUSTMENTS BEDKNIFE _______________________________________________________________ 1. Read Section 7.2 before making the adjustment. b. Adjust the trailing end of the reel in the same manner, then recheck the adjustment at the 2. Start adjustment at the leading end of the reel, leading end.
- Page 20 All manuals and user guides at all-guides.com ADJUSTMENTS CUTTING HEIGHT _________________________________________________________ Note: Make sure the bedknife is properly adjusted before 6. Repeat Steps 4 and 5 on the opposite end of the setting the cutting height. (Section 7.3). reel then tighten nuts (M). Recheck and readjust the cutting height if necessary.
- Page 21 All manuals and user guides at all-guides.com ADJUSTMENTS TORQUE SPECIFICATION ___________________________________________________ CAUTION All torque values included in these charts are approximate and are for reference only. Use of these torque values is at your sole risk. Jacobsen is not responsible for any loss, claim, or damage arising from the use of these charts. Extreme caution should always be used when using any torque value.
- Page 22 All manuals and user guides at all-guides.com MAINTENANCE MAINTENANCE GENERAL________________________________________________________________ c. Replace worn or damaged parts before operating WARNING the machine. d. Keep all fluids at their proper levels. Before you clean, adjust, or repair this equipment, disengage all drives, engage parking brake and stop e.
- Page 23 All manuals and user guides at all-guides.com MAINTENANCE ENGINE OIL ______________________________________________________________ Check the engine oil at the start of each day, before starting the engine. If the oil level is low, remove oil filler cap and add oil as required. Perform initial oil change after the first 20 hours of operation.
- Page 24 All manuals and user guides at all-guides.com MAINTENANCE BEDKNIFE SHOE REMOVAL ________________________________________________ 1. To remove the shoe (E), loosen nut (A) and turn nuts (B) counterclockwise 1/4 turn or more to bring the bedknife into light contact with the reel blades. 2.
- Page 25 All manuals and user guides at all-guides.com MAINTENANCE WHEEL BEARING _________________________________________________________ The bearing has the word “lock” and an arrow stamped on the face. When replacing the bearing, make Inside absolutely certain that the bearing is installed in the proper direction of rotation. Outside For the Right wheel, install the bearing with the “lock➡”...
- Page 26 All manuals and user guides at all-guides.com MAINTENANCE 8.10 TROUBLESHOOTING ______________________________________________________ Before making any adjustments or performing maintenance, read maintenance section for procedures and warnings. Symptoms Probable Causes Solution Engines does not start Choke in wrong position See Engine Manual Empty fuel tank or dirty fuel Drain and refill with fresh, clean fuel Fuel shut-off valve...
- Page 27 All manuals and user guides at all-guides.com MAINTENANCE 8.11 LUBRICATION ____________________________________________________________ The mower was designed for minimum lubrication. Over greasing will produce high loads on the bearings and engine; thereby reducing the performance of the machine. All maintenance intervals must be performed more frequently when operating in extremely dusty conditions.
- Page 28 All manuals and user guides at all-guides.com NOTES NOTES...
- Page 29 All manuals and user guides at all-guides.com...
- Page 30 Le Manuel de sécurité et de fonctionnement doit être mis à la disposition de l’opérateur, à des fins de référence. Copyright 2005, Textron Inc. ‘Tous droits réservés. Il est interdit de reproduire tout ou en partie de ce document’ LITHO AUX ETATS-UNIS 6-2005...
-
Page 31: Stockage Des Pièces De Rechange
All manuals and user guides at all-guides.com Stockage des pièces de rechange Afin de garder votre équipement pleinement opérationnel et productif, conservez un stock des éléments de maintenance les plus couramment utilisés. Nous avons inclus les références des matériels de support et didactiques supplémentaires. - Page 32 All manuals and user guides at all-guides.com SECURITE SECURITE CONSIGNES DE SECURITE RELATIVES AU FONCTIONNEMENT __________________ AVERTISSEMENT LES MACHINES SONT DANGEREUSES QUAND ELLES NE SONT PAS UTILISEES CORRECTEMENT OU QUAND DU PERSONNEL NON FORME LES UTILISE Familiarisez-vous aux diverses positions des commandes et à leur fonctionnement. Il faut être formé par une personne compétente ou suivre un cours de formation avant d'utiliser les machines.
- Page 33 All manuals and user guides at all-guides.com SECURITE CONSIGNES DE SECURITE IMPORTANTES ____________________________________ Ce symbole sert à vous signaler la présence de dangers éventuels. DANGER - Indique un danger immédiat avec RISQUE de mort ou de blessures graves. AVERTISSEMENT - Indique un danger avec RISQUE EVENTUEL de mort ou de blessures graves. ATTENTION - Indique un danger possible avec RISQUE EVENTUEL de légères blessures ou d'endommagement de la machine ou des biens.
- Page 34 InCommand™, 4 CV, moteur essence (Honda), Contrôle de présence de l’opérateur, bac à ® herbe, freins et béquille. A Textron Company Numéro de série ..... Plaque signalétique, telle CHARLOTTE, NC MADE IN U.S.A. qu’illustrée, indiquant le numéro YEAR OF...
- Page 35 All manuals and user guides at all-guides.com SPECIFICATIONS POID ____________________________________________________________________ Poids (Masse) du PGM 22...... 85 kg avec bac à herbe, rouleau et béquille. ACCESSOIRES____________________________________________________________ Contactez votre revendeur Jacobsen agréé pour obtenir une liste complète des accessoires et équipements. Kit de conversion PGM MagKnife ......4131020 Pneumatiques de transport .........62293 Transmission par engrenages avant ......68557 Brosse de rouleau avant ..........68536...
- Page 36 All manuals and user guides at all-guides.com VIGNETTES VIGNETTES VIGNETTES ______________________________________________________________ Familiarisez-vous à la signification des vignettes ; celles-ci sont importantes pour la sécurité du fonctionnement de la machine. REMPLACEZ IMMEDIATEMENT LES VIGNETTES DETERIOREES. DANGER ATTENTION Risque de blessures graves : arrêter le 1.
-
Page 37: Inspection Initiale
All manuals and user guides at all-guides.com INSPECTION INITIALE INSPECTION INITIALE GENERALITES ____________________________________________________________ Les accessoires qui ne sont pas inclus avec le produit La préparation et le test de l’unité devraient toujours être doivent être commandés séparément. Consultez les réalisés par un technicien expérimenté, habitué à instructions fournies avec tout accessoire pour obtenir l’utilisation de cet équipement des informations sur l’installation et les pièces. - Page 38 All manuals and user guides at all-guides.com COMMANDES COMMANDES ICONES__________________________________________________________________ Contrôle de présence de l’opérateur Moteur Accélérateur Maxi Mini Déverrouillé Moteur Moteur en marche arrêté Verrouillé Frein de stationnement Serré Desserré Carburant Starter Essence AVERTISSEMENT Ne pas essayer de conduire le véhicule avant d'avoir lu attentivement et complètement le manuel de sécurité...
- Page 39 All manuals and user guides at all-guides.com COMMANDES E. Levier d’entraînement des tourets – Tourner la poignée (E) vers le bas pour désengager le cylindre. Toujours débrayer la tondeuse pour la transporter. AVERTISSEMENT Pour éviter tout accident corporel ou matériel, ne jamais engager le levier d'embrayage de cylindre alors que le moteur tourne ou que le CPO est engagé.
-
Page 40: Fonctionnement
All manuals and user guides at all-guides.com FONCTIONNEMENT FONCTIONNEMENT CONTROLES QUOTIDIENS _________________________________________________ 2. Vérifiez les niveaux de carburant et du carter ATTENTION d'huile. Tous les fluides doivent être au niveau du repère plein. L'inspection quotidienne ne doit être effectuée que 3. - Page 41 All manuals and user guides at all-guides.com FONCTIONNEMENT UTILISATION______________________________________________________________ ATTENTION Pour éviter des blessures, toujours porter des lunettes de sécurité, des chaussures ou des bottes de travail en cuir, un casque et une protection auditive. Les cheveux longs, vêtements lâches ou bijoux risquent de se coincer dans les pièces mobiles.
- Page 42 All manuals and user guides at all-guides.com FONCTIONNEMENT DEMARRAGE / ARRET DU MOTEUR__________________________________________ ATTENTION Veiller à toujours démarrer et arrêter la machine sur une surface plane. Garder les pieds à l’écart des lames pour démarrer le moteur. Démarrage 1. Vérifiez le niveau d’huile et la présence de carburant puis ouvrez le levier de la soupape de carburant (G).
- Page 43 All manuals and user guides at all-guides.com FONCTIONNEMENT ROUES DE TRANSPORT (KIT OPTIONNEL 62293)_______________________________ 5. Poussez la machine vers l'avant pour la libérer de la AVERTISSEMENT béquille, démarrez le moteur et engagez le levier du CPO (C). Toujours arrêter le moteur et désengager les 6.
- Page 44 All manuals and user guides at all-guides.com FONCTIONNEMENT TONTE __________________________________________________________________ 1. Arrêtez le moteur. Placez la machine sur la béquille 5. Afin d’obtenir une surface de jeu plus régulière et et retirez les roues de transport (Voir le Chapitre 6.5). une délimitation plus nette, changez le modèle de tonte chaque fois que vous tondez un green.
- Page 45 All manuals and user guides at all-guides.com FONCTIONNEMENT MAINTENANCE QUOTIDIENNE ______________________________________________ 1. Placez la machine sur une surface plane. Serrez le Maniez prudemment le carburant qui est très frein de stationnement et arrêtez le moteur. inflammable. Utilisez un récipient adapté dont le bec puisse s'infiltrer dans le goulot de remplissage du 2.
- Page 46 All manuals and user guides at all-guides.com REGLAGES REGLAGES GENERALITES____________________________________________________________ 2. Les composants usés ou endommagés doivent être AVERTISSEMENT remplacés et non ajustés. 3. Les cheveux longs, bijoux ou vêtements lâches Avant de régler, nettoyer ou réparer ce matériel, risquent d’être coincés par les pièces mobiles. toujours désembrayer tous les entraînements, serrer le frein de stationnement et arrêter le moteur pour ATTENTION...
- Page 47 All manuals and user guides at all-guides.com REGLAGES CONTRE-LAME ___________________________________________________________ 1. Lisez le Chapitre 7.2 avant d'effectuer le réglage. b. Réglez le bord de fuite des lames de cylindre de la même manière, puis revérifiez le réglage du 2. Commencez le réglage sur le bord d'attaque du bord d'attaque.
- Page 48 All manuals and user guides at all-guides.com REGLAGES HAUTEUR DE COUPE ______________________________________________________ Remarque : Assurez-vous que la contre-lame est 6. Répétez les étapes 4 et 5 de l'autre côté du correctement ajustée avant de régler la hauteur de coupe cylindre, puis serrez les écrous (M). Vérifiez à (Chapitre 7.3).
- Page 49 All manuals and user guides at all-guides.com REGLAGES SPECIFICATIONS DES COUPLES DE SERRAGE ________________________________ ATTENTION Les valeurs des couples de serrage, indiquées dans les tableaux, sont toutes des valeurs approximatives et ne sont données qu’à titre de référence. Toute utilisation de ces valeurs est à vos propres risques. Jacobsen décline toute responsabilité...
- Page 50 All manuals and user guides at all-guides.com MAINTENANCE MAINTENANCE GENERALITES____________________________________________________________ c. Remplacez les pièces usées ou endommagées AVERTISSEMENT avant de vous servir de la machine. d. Veillez à ce que les fluides soient toujours aux Avant de régler, nettoyer ou réparer ce matériel, niveaux requis.
- Page 51 All manuals and user guides at all-guides.com MAINTENANCE HUILE MOTEUR ___________________________________________________________ Vérifiez l’huile moteur tous les jours, en début de journée, avant de démarrer le moteur. Quand il est bas, rétablissez-le. Remplacez l’huile après les 20 premières heures d’horamètre puis ensuite toutes les 100 heures. Reportez-vous au Manuel Moteur du fabricant pour tous renseignements concernant l’entretien de la machine.
- Page 52 All manuals and user guides at all-guides.com MAINTENANCE RETRAIT DU SUPPORT DE LA CONTRE-LAME _________________________________ 1. Pour retirer le support (E), desserrez l’écrou (A) et 7. Ajustez la contre-lame par rapport au touret. Serrez tournez les écrous (B) d’un quart de tour ou plus le matériel.
- Page 53 All manuals and user guides at all-guides.com MAINTENANCE ROULEMENT DE ROUE _____________________________________________________ Le mot «LOCK» et une flèche sont estampés sur la face du roulement. Lors du remplacement du roulement, veillez à le Intérieur monter dans le sens de rotation correct. Extérieur Roue droite : Installez le roulement avec la flèche et le mot «LOCK➡»...
- Page 54 All manuals and user guides at all-guides.com MAINTENANCE 8.10 DEPISTAGE DES DEFAUTS _________________________________________________ Avant d’effectuer des réglages ou de procéder à la maintenance, lisez la section consacrée à la maintenance pour connaître les procédures et les mises en garde. Symptômes Causes probables Solution Le moteur ne...
- Page 55 All manuals and user guides at all-guides.com MAINTENANCE 8.11 GRAISSAGE ______________________________________________________________ La tondeuse a été conçue pour un graissage minimum. Le graissage excessif entraînera des surcharges sur les roulements et le moteur, ce qui réduira la performance de la machine. Tous les entretiens réguliers doivent être effectués plus fréquemment en cas de fonctionnement dans des conditions extrêmement poussiéreuses.
-
Page 56: Remarques
All manuals and user guides at all-guides.com REMARQUES REMARQUES... - Page 57 All manuals and user guides at all-guides.com REMARQUES...
- Page 58 Veiligheids- en bedieningshandleiding om de machine te bedienen. De Veiligheids- en bedieningshandleiding moet beschikbaar zijn zodat de bestuurder hem kan raadplegen. Copyright 2005 Textron Inc. "Alle rechten voorbehouden inclusief het recht op reproductie in enigerlei vorm van dit materiaal of gedeelten ervan". LITHO IN DE VS. 6-2005...
-
Page 59: Service-Onderdelen
All manuals and user guides at all-guides.com Aanbevolen Voorraadvorming Houd om uw machine volledig operationeel en productief te houden de meer algemeen gebruikte onderhoudsonderdelen op voorraad. We hebben de artikelnummers voor bijkomend ondersteuningsmateriaal en trainingshulp bijgesloten. Een complete lijst van accessoires en aanbouwapparatuur vindt u in het hoofdstuk “Specificaties”. - Page 60 All manuals and user guides at all-guides.com VEILIGHEID VEILIGHEID OPERATIONELE VEILIGHEID________________________________________________ WAARSCHUWING APPARATUUR DIE VERKEERD OF DOOR ONGETRAIND PERSONEEL WORDT BEDIEND, KAN GEVAARLIJK ZIJN Maak uzelf vertrouwd met de locatie en het juiste gebruik van alle bedieningen. Onervaren bedieners behoren te worden geïnstrueerd door iemand die vertrouwd is met de machine alvorens toestemming te krijgen er zelf gebruik van te maken.
- Page 61 All manuals and user guides at all-guides.com VEILIGHEID BELANGRIJKE VEILIGHEIDSOVERWEGINGEN _________________________________ Dit veiligheidssymbool wordt gebruikt om u te attenderen op potentiële gevaren. GEVAAR - duidt op dreigende gevaarlijke situatie die, indien niet vermeden, ZAL resulteren in dood of ernstig letsel. WAARSCHUWING - duidt op een potentieel gevaarlijke situatie die, indien niet vermeden, KAN resulteren in dood of ernstig letsel.
-
Page 62: Specificaties
559 mm met InCommand™ service-informatie. controlesysteem, 2,98 kW benzinemotor (Honda), Operator Presentieregeling, ® grasopvangbak, remmen en A Textron Company standaard. CHARLOTTE, NC MADE IN U.S.A. Serienummer ....Een identificatieplaatje (zoals YEAR OF 2005 afgebeeld) met het serienummer... - Page 63 All manuals and user guides at all-guides.com SPECIFICATIES GEWICHT ________________________________________________________________ Gewicht (Massa) PGM 22 ..85 kg met opvangbak, rol, standaard. ACCESSOIRES____________________________________________________________ Neem contact op met een bevoegde Jacobsendealer voor een volledige lijst van accessoires en aanbouwelementen. PGM MagKnife conversie-uitrusting ....... 4131020 Pneumatische transportbanden ........
- Page 64 All manuals and user guides at all-guides.com DECALPLAATJES DECALPLAATJES DECALPLAATJES _________________________________________________________ Maak uzelf vertrouwd met de decalplaatjes aangezien ze van essentieel belang zijn voor de veilige bediening en werking van de machine. ONTBREKENDE OF BESCHADIGDE DECALPLAATJES MOETEN ONMIDDELLIJK WORDEN VERVANGEN VOORZICHTIG GEVAAR 1.
- Page 65 All manuals and user guides at all-guides.com EERSTE INSPECTIE EERSTE INSPECTIE ALGEMEEN_______________________________________________________________ Accessoires die niet bij dit product zijn bijgeleverd, Het instellen en het testen van de eenheid moet altijd moeten apart worden besteld. Zie de bijgeleverde uitgevoerd worden door een getraind technicus die instructies voor de installatie en onderdelen van de bekend is met de werking van het apparaat.
- Page 66 All manuals and user guides at all-guides.com BEDIENINGSELEMENTEN BEDIENINGSELEMENTEN SYMBOLEN ______________________________________________________________ Parkeerrem Motor uit OPC ontgrendelen Brandstof Ingeschakeld Uitgeschakeld Benzine OPC vergrendelen Motor loopt Gashendel Snel Langzaam Choke WAARSCHUWING Probeer de machine niet te gebruiken voordat u de Veiligheids- en bedieningshandleiding, de Onderdelen- en onderhoudshandleiding en de Motorhandleiding geheel en zorgvuldig hebt doorgelezen.
- Page 67 All manuals and user guides at all-guides.com BEDIENINGSELEMENTEN E. Kooikoppelingshendel – Om de kooikoppeling uit te schakelen, draait u de hendel (E) zodat deze naar onderen is gericht. Schakel de koppeling altijd uit wanneer de maaier vervoerd wordt. WAARSCHUWING Om lichamelijk letsel of materiële schade te voorkomen, mag de kooikoppelingshendel nooit ingeschakeld worden terwijl de motor draait of de OPC-beugel ingeschakeld is.
- Page 68 All manuals and user guides at all-guides.com BEDIENING BEDIENING DAGELIJKSE INSPECTIE ___________________________________________________ 2. Controleer de hoeveelheid brandstof en het oliepeil VOORZICHTIG in het carter. Alle vloeistoffen moeten tot aan het merkteken Vol komen. De dagelijkse inspectie mag uitsluitend worden 3. Controleer of de maaier op de juiste maaihoogte is uitgevoerd terwijl de motor stilstaat en alle vloeistoffen afgesteld.
- Page 69 All manuals and user guides at all-guides.com BEDIENING BEDIENINGSPROCEDURES _________________________________________________ VOORZICHTIG Draag altijd een veiligheidsbril, lederen werkschoenen of laarzen, een helm en oorbescherming om letsel te helpen voorkomen. Lang haar, sieraden en ruimvallende kleding kunnen door bewegende delen worden gegrepen. 1.
- Page 70 All manuals and user guides at all-guides.com BEDIENING MOTOR STARTEN/STOPPEN ________________________________________________ VOORZICHTIG Start en stop de motor altijd wanneer de maaier op een vlakke ondergrond staat. Houd bij het starten van de motor uw voeten van het mes weg. Starten 1.
- Page 71 All manuals and user guides at all-guides.com BEDIENING TRANSPORTWIELEN (OPTIONELE UITRUSTING 62293) _________________________ 5. Duw de maaier naar voren van de standaard af, WAARSCHUWING start de motor en schakel de OPC-beugel in (C). 6. Wanneer de maaier op een voertuig wordt vervoerd, Stop de motor en schakel de aandrijvingshendels dient u de parkeerrem in te schakelen, de motor te steeds uit voordat u de transportwielen aanbrengt...
- Page 72 All manuals and user guides at all-guides.com BEDIENING MAAIEN _________________________________________________________________ 1. Zet de motor uit. Zet de maaier op de standaard om 5. Om het speelveld gelijkmatiger te maken en er de transportwielen te verwijderen (zie Hoofdstuk netter te doen uitzien verandert u het maaipatroon 6.5).
- Page 73 All manuals and user guides at all-guides.com BEDIENING DAGELIJKS ONDERHOUD __________________________________________________ 1. Parkeer de maaier op een stevige en vlakke Behandel brandstof voorzichtig - het is zeer ondergrond. Schakel de parkeerrem in en stop de ontvlambaar. Gebruik een geschikte container. De motor.
- Page 74 All manuals and user guides at all-guides.com AFSTELLINGEN AFSTELLINGEN ALGEMEEN ______________________________________________________________ 2. Versleten beschadigde onderdelen moeten WAARSCHUWING worden vervangen in plaats van aan de situatie te worden aangepast. Voordat deze machine gaat bijstellen, 3. Lang haar, sieraden en ruimvallende kleding kunnen schoonmaken of repareren, moet u alle aandrijvingen door bewegende delen worden gegrepen.
- Page 75 All manuals and user guides at all-guides.com AFSTELLINGEN ONDERBLAD _____________________________________________________________ 1. Lees Hoofdstuk 7.2 alvorens de afstelling te verrich- b. Stel het achterste einde van de kooi op dezelfde ten. wijze af en controleer vervolgens de afstelling bij het voorste einde opnieuw. 2.
- Page 76 All manuals and user guides at all-guides.com AFSTELLINGEN MAAIHOOGTE ____________________________________________________________ N.B: Controleer of het onderblad goed is afgesteld voordat u 6. Herhaal stap 4 en 5 aan het andere uiteinde van de de maaihoogte instelt (Hoofdstuk 7.3). kooi en draai daarna de moeren (M) vast. Controleer de maaihoogte opnieuw en stel deze zo nodig bij.
- Page 77 All manuals and user guides at all-guides.com AFSTELLINGEN DRAAIKOPPELSPECIFICATIE _______________________________________________ VOORZICHTIG Alle draaikoppelwaarden in deze tabellen zijn bij benadering en dienen uitsluitend als richtlijn. Gebruik van deze waarden is geheel voor eigen risico. Jacobsen kan niet verantwoordelijk worden gesteld voor enig verlies, enige aanspraak op of eis tot schadevergoeding als gevolg van het gebruik van deze tabellen.
- Page 78 All manuals and user guides at all-guides.com ONDERHOUD ONDERHOUD ALGEMEEN ______________________________________________________________ c. Vervang versleten of beschadigde onderdelen WAARSCHUWING voordat de machine wordt bediend. d. Houd alle vloeistoffen op het voorgeschreven Voordat u deze machine gaat bijstellen, schoonmaken niveau. of repareren, moet u alle aandrijvingen uitschakelen, de parkeerrem aanzetten en de motor stoppen om e.
- Page 79 All manuals and user guides at all-guides.com ONDERHOUD MOTOROLIE ______________________________________________________________ Controleer de motorolie aan het begin van iedere werkdag alvorens de motor te starten. Als het oliepeil laag is, verwijder dan de olievuldop en giet olie naar behoefte bij. Voer de eerste olieverversing na de eerste 20 bedrijfsuren uit en vervolgens na iedere 100 bedrijfsuren.
- Page 80 All manuals and user guides at all-guides.com ONDERHOUD VERWIJDEREN VAN SLEDEMESBLOK________________________________________ 1. Om het blok (E) te verwijderen maakt u de moer (A) los en draait u de moeren (B) een kwartslag of meer linksom om het sledemes lichtjes in contact met de haspelbladen te brengen.
- Page 81 All manuals and user guides at all-guides.com ONDERHOUD WIELLAGER ______________________________________________________________ Op de voorkant van het lager staan het woord “LOCK” en een pijl gestempeld. Bij het vervangen van een lager Binnen moet u absoluut zeker zijn dat het in de juiste draairichting wordt aangebracht.
- Page 82 All manuals and user guides at all-guides.com ONDERHOUD 8.10 FOUTOPSPORING _________________________________________________________ Lees het deel over onderhoud voor procedures en waarschuwingen voordat u aanpassingen doet of onderhoudt pleegt. Problemen Mogelijke oorzaken Oplossing Motor start niet Choke in verkeerde stand Zie motorhandleiding Lege brandstoftank of vuile brandstof Aftappen en opnieuw vullen met verse, schone brandstof...
- Page 83 All manuals and user guides at all-guides.com ONDERHOUD 8.11 SMERING ________________________________________________________________ De maaier is voor minimale smering ontworpen. Teveel smering zal de lagers en de motor extra belasten. Daardoor worden de prestaties van de machine verminderd. Alle onderhoudsintervallen moeten vaker worden uitgevoerd wanneer in zeer stoffige omstandigheden wordt gewerkt.
- Page 84 All manuals and user guides at all-guides.com NOTITIES NOTITIES...
- Page 85 All manuals and user guides at all-guides.com PARTS CATALOG PARTS CATALOG 10.1 TABLE OF CONTENTS______________________________________________________ 1.1 ..Decals .......... 2 2.1 ..Handle and Controls ....4 3.1 ..Left Chain Cover ......6 4.1 .
- Page 86 All manuals and user guides at all-guides.com Serial No. All 1.1 Decals REEL CLUTCH CONTROL CAUTION CAUTION DISENGAGE ENGAGE BE SURE THE TRACTION CLUTCH ALLOW ENGINE LEVER IS IN NEUTRAL BEFORE TO COOL FOR 2 J-T-3001792 STARTING THE ENGINE. MINUTES BEFORE REFUELING TO ENGAGE TRACTION 1.
- Page 87 All manuals and user guides at all-guides.com PRECAUCION CAUTION 1. No opere esta maquina sin previo entrenamiento, instruccion y sin haber 1. Read operators manual before leido el manual de operacion. operating machine. 2. Tenga todas las guardas en su lugar y 2.
- Page 88 All manuals and user guides at all-guides.com Serial No. All 2.1 Handle and Controls 17 / 18 19 / 20...
- Page 89 All manuals and user guides at all-guides.com Item Part No. Qty. Description Serial Numbers/Notes 366708 Flanged Bearing 400262 Screw, 3/8-16 x 1” Hex Head 400268 Screw, 3/8-16 x 1-3/4” Hex Head 434029 Screw, 1/4-20 x 1” Socket Head 443102 Nut, 1/4-20 Hex 443110 Nut, 3/8-16 Hex 444718...
- Page 90 All manuals and user guides at all-guides.com Serial No. All 3.1 Left Chain Cover...
- Page 91 All manuals and user guides at all-guides.com Item Part No. Qty. Description Serial Numbers/Notes ●▲ 207480 Cover, Chain 472201 Plug, 1/8 Pipe,Square Head ◆ 400102 Screw, 1/4-20 x 3/8” Hex Head 446130 Lockwasher, 1/4 Heavy 304756 Retainer 503438 Lever, Shift 339910 •...
- Page 92 All manuals and user guides at all-guides.com Serial No. All 4.1 Left Side Frame...
- Page 93 All manuals and user guides at all-guides.com Item Part No. Qty. Description Serial Numbers/Notes ● 2811557 Frame, L.H. 337677 • Seal, Oil 2811124 • Stud, Handle 336962 • Seal, Oil 500534 • Bearing Cup and Cone 545940 • Bushing 365753 •...
- Page 94 All manuals and user guides at all-guides.com Serial No. All 5.1 Right Side Frame...
- Page 95 All manuals and user guides at all-guides.com Item Part No. Qty. Description Serial Numbers/Notes 2811558 Frame, R.H. 337677 • Seal, Oil 336962 • Seal, Oil 500534 • Bearing Cup and Cone 2811124 • Stud, Handle 545940 • Bushing 307377 Spacer, Shaft 471223 Fitting, Grease 471214...
- Page 96 All manuals and user guides at all-guides.com Serial No. All 6.1 Cross Bars, Reel and BedKnife 35 16 31/33 Standard Bedknife Options 503477 22" High Profile 503478 22" Low Profile 503479 22" Tournament 5002887 22" Special Tournament Optional MagKnife Bedknife 4131369 22"...
- Page 97 All manuals and user guides at all-guides.com Item Part No. Qty. Description Serial Numbers/Notes ●▲ 122544 Cross Bar, Front 122545 Cross Bar, Rear 400266 Screw, 3/8-16 x 1-1/2” 446142 Lockwasher, 3/8 Heavy 304740 Tie Rod, Front 443114 Nut, 7/16-14 Hex 446148 Lockwasher, 7/16 363328...
- Page 98 All manuals and user guides at all-guides.com Serial No. All 7.1 Engine and Clutch Part of Engine Part of Engine Throttle Cable Installation...
- Page 99 All manuals and user guides at all-guides.com Item Part No. Qty. Description Serial Numbers/Notes 303873 Washer 309756 Sprocket, 365658 Spacer, Engine Mounting 400194 Screw, 5/16-18 x 1-3/4” Hex Head 306369 Screw, 5/16-24 x 1” Hex Head 434029 Screw, 1/4-20 x 1” Socket Head 441677 Carriage Bolt, 5/16-18 x 1-1/2”...
- Page 100 All manuals and user guides at all-guides.com Serial No. All 8.1 Traction Rollers...
- Page 101 All manuals and user guides at all-guides.com PGM 22 Item Part No. Qty. Description Serial Numbers/Notes 3004026 Shaft, Roller 163801 Gear, Differential 325656 • Bushing 344745 Washer, Thrust 202947 Pinion 308030 Washer, Pinion Thrust 103862 Housing, Differential 308033 • Bushing 403723 Screw, #10-24 x 5/8”...
-
Page 102: Transport Wheels
All manuals and user guides at all-guides.com Serial No. All 9.1 Transport Wheels... - Page 103 All manuals and user guides at all-guides.com Item Part No. Qty. Description Serial Numbers/Notes 1000477 Hub, L.H. Wheel 338766 • Bearing 366705 • Seal 1000476 Hub, R.H. Wheel (Includes 2 and 3) 366697 Bushing 366718 Collar, Latching 445801 Nut, 5/8-18 Hex Jam Lock 361451 Washer 164056...
- Page 104 All manuals and user guides at all-guides.com...
- Page 105 All manuals and user guides at all-guides.com...
- Page 106 All manuals and user guides at all-guides.com...