
Manuels Connexes pour Soehnle Professional Standard


Sommaire des Matières pour Soehnle Professional Standard
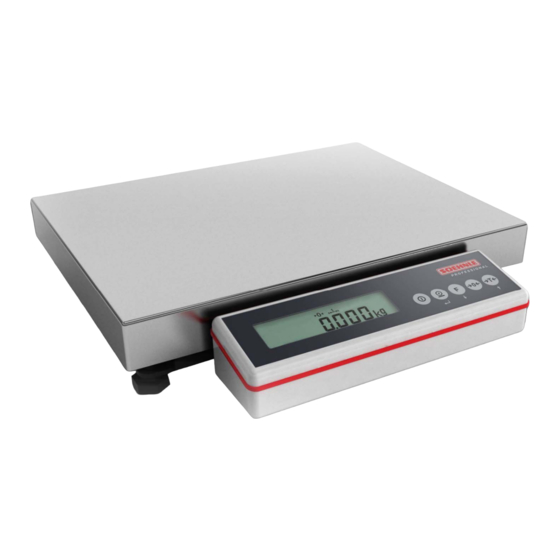
- Page 1 Kompaktwaage Compact scale Balance compacte Standard Bedienungsanleitung User Manual Mode d´emploi Seite 3 | Page 26 | Page 49 ...
- Page 2 www.soehnle-professional.com...
-
Page 3: Table Des Matières
1. ALLGEMEINE INFORMATIONEN 1.1 Verwendungszweck 1.2 Sicherheitshinweise 1.3 Reinigung 1.4 Wartung und Service 1.5 Gewährleistung/Haftung 1.6 Technische Daten 1.7 Inbetriebnahme 1.8 Einschalten/Ausschalten 1.9 Das Anzeigenfeld und -symbole 1.10 Erläuterung des Typenschilds 1.11 Bedientasten 1.12 Elektronisches Typenschild 1.13 Frei belegbare Funktions-Taste 2. -
Page 4: Allgemeine Informationen
1. ALLGEMEINE INFORMATIONEN 1.1 Verwendungszweck Die Soehnle Professional Kompaktwaage Standard ist für das Wiegen, Tarieren, Nullstellen, Plus-/ Minus Verwiegung, Zuwiegen, Zählen mit PLU Speicher, Kontrollieren, Stückkontrolle, neutrales Messen, Prozentwiegung und Preisrechnung konzipiert. 1.2 Sicherheitshinweise Lesen Sie bitte vor Inbetriebnahme des Gerätes die in der Bedienungsanleitung aufgeführten Informationen sorgfältig durch. -
Page 5: Wartung Und Service
Schutzart IP 42. Hohe Luftfeuchtigkeit, Dämpfe, aggressive Flüssigkeiten und starke Verschmutzung sind zu vermeiden. 1.5 Gewährleistung/Haftung Soweit ein von Soehnle Professional zu vertretender Mangel der gelieferten Sache vorliegt, ist Soehnle Professional berechtigt, wahlweise den Mangel entweder zu beseitigen oder Ersatz zu liefern. Ersetzte Teile werden Eigentum von Soehnle Professional. -
Page 6: Technische Daten
1.6 Technische Daten > Hinterleuchtete LCD-Anzeige (dimmbar), Ziffernhöhe: 16 mm > Hochauflösend nicht eichfähig oder geeicht nach Genauigkeitsklasse III > Integrierte Echtzeit-Uhr > Netzteil-Betrieb 100-240 V AC / 50-60 Hz, UK-Wechseladapter siehe Zubehör > Materialien: Wägeplattform: Rostfreier Edelstahl Unterkonstruktion: Rostfreier Edelstahl oder pulverbeschichteter Stahl Anzeigengehäuse: Kunststoff >... -
Page 7: Das Anzeigenfeld Und -Symbole
1.9 Das Anzeigenfeld und -symbole Aktiver Wägebereich Nullmeldung Nettowägung Taraanzeige Handtara Holdmode (Anzeige ist zum besseren Ablesen festgesetzt) Stückzählmodus Akkuzustand Die folgenden Funktionszeichen und Symbole sind nicht auf der Tastaturfolie abgebildet, bei der Funktionsbedingung wird das Dreieck an dieser Position im Display angezeigt: Funktion und Stillstandszeichen beim Neutralen Messen Alibispeicher Funktion und Stillstandszeichen bei Prozentwägung... -
Page 8: Erläuterung Des Typenschilds
1.10 Erläuterung des Typenschilds Typenschild eichfähig: Typenschild nicht eichfähig: Wägebereiche Höchstlast des Wägebereichs Mindestlast des Wägebereichs Eichwert (Zifferschritt), d= bei nicht eichfähiger Waage Seriennummer der Waage (Waagentyp mit Variante, Endziffer des Fabrikationsjahrs, Zählnummer) CE 12 EG-Konformitätszeichen mit Jahr der Anbringung, gleichzeitig Beginn der Eichgültigkeit Genauigkeitsklasse TCM 128/12-4961... -
Page 9: Bedientasten
1.11 Die Bedientasten Bedienmodus Einstellmodus Ein/Aus-Taste oder Zweite Taste für die UCAL-Aktivierung Rücksprung in Wägemodus bei aktiven Anwenderprogrammen Druck-Taste oder Einstieg zur Editierfunktion innerhalb Enter-Taste des Einstellschrittes oder Parameter speichern und zum nächsten Einstellschritt springen Funktions-Taste zum Einstellschritt Rückwärtstakten oder freien Programmieren Wert verkleinern Nullstell-Taste oder... -
Page 10: Elektronisches Typenschild
1.12 Elektronisches Typenschild Durch gleichzeitiges Drücken der Druck- und Tara-Taste gelangen Sie zur Anzeige des elektronischen Typenschilds (1nFo). Mittels der Pfeiltasten (Funktions- und Tara-Taste) kann das elektronische Typenschild sowie Serien-Nr. und Eichzähler der aufgeschalteten Messstelle in der Anzeige durchgetaktet werden. Mit der Nullstell-Taste wird die Anzeige des elektronischen Typenschilds abgebrochen bzw. -
Page 11: Frei Belegbare Funktions-Taste
1.13 Frei belegbare Funktions-Taste Funktions-Taste aktivieren: Druck- und danach zusammen mit der Ein/Aus-Taste 5 Sekunden lang betätigen bis UCAL1 erscheint. Mit der Tara-Taste hoch schalten bis UCAL4 erscheint und mit der Druck-Taste übernehmen. Anschließend mit der Tara-Taste bis zur Position 02 takten und mit der Druck-Taste übernehmen. -
Page 12: Grundfunktionen
2. GRUNDFUNKTIONEN Die Grundfunktionen sind identisch oder vergleichbar für alle Anwendungsprogramme zu verwenden. 2.1 Einschalten Nur bei unbelasteter Waage. Nach Ablauf der Prüfroutine wird kurzzeitig der Eichzähler angezeigt und anschließend schaltet die Anzeige auf Null. Die Waage ist wiegebereit. Wiegegut auflegen. -
Page 13: Zweite Einheit Umstellen
2.4 Zweite Einheit umstellen Die Möglichkeit der Gewichtseinheiten - Umschaltung muss im Kalibrier-Modus freigegeben werden (ECAL 1 Pos. 05 Wert = 0)! Eine kg – lb – Umstellung ist nur bei der nicht eichfähigen Ausführung möglich! Im Einstell-Modus muss für die Belegung der Funktions-Taste ”Zweite Einheit” ausgewählt sein! Einstellung Funktions-Taste siehe Kapitel 1.13 oder Usermode 3710 (siehe separate Beschreibung 470.702.099) UCAL 4 Pos. -
Page 14: Tarafunktion
2.5 Tarafunktion Manuelles Tarieren Einen leeren Behälter auf die Plattform stellen und die Tara-Taste drücken. Tara-Handeingabe Dazu muss im Einstell-Modus für die Belegung der Funktions-Taste ”Tara-Handeingabe” ausgewählt sein. Einstellung Funktions-Taste siehe Usermode 3710 (siehe separate Beschreibung 470.702.099) UCAL 4 Pos. 02 = Wert 4. Wert mit der Tara-Taste oder der Funktions-Taste einstellen. -
Page 15: Zehnfache Auflösung
2.6 Zehnfache Auflösung X10 Die zehnfach höhere Auflösung erscheint durch gleichzeitiges Drücken der Druck-Taste und der Nullstell-Taste. Bei eichfähig kalibrierten Waagen erscheint die höhere Auflösung für 5 Sekunden oder blinkend so lange die Tasten gedrückt gehalten werden – bei nicht eichfähig kalibrierten Waagen so lange bis die Druck-Taste und Nullstell-Taste wieder betätigt werden. -
Page 16: Hold-Funktion
UCAL 4 Pos. 02 = Wert 1. Im Wägebetrieb wird die Holdfunktion durch Drücken der Funktions-Taste ausgelöst. Folgende Holdfunktionen stehen standardmäßig im Standard Kompaktwaagen Programm zur Verfügung, um Gewichtsdaten einzufrieren. Default ist „0“. Die Einstellung der Hold-Funktion erfolgt im Einstellmodus (siehe separate Beschreibung 470.702.099 Usermode 3710) -
Page 17: Anwendungsprogramme Und Funktionen
3. ANWENDUNGSPROGRAMME UND FUNKTIONEN Die verschiedenen Anwendungsprogramme der Soehnle Professional Kompaktwaage Standard bieten Ihnen umfangreiche Lösungen für Ihre Wägeaufgaben. Sie können die Anwendungsprogramme im Einstellmodus (siehe separate Beschreibung 470.702.099 Usermode 3710) an Ihren spezifischen Bedarf anpassen. Es stehen folgende Anwendungsprogramme oder Funktionen zur Auswahl: Wiegen und Tarieren Zählen... -
Page 18: Plu Speicher
Zählen mit Tara Sehen Sie dazu Punkt 2.5. Ein aktives Taragewicht ist am ”N” in der Anzeige zu erkennen. 3.3 PLU - Speicher Der PLU – Speicher (Product look up) hat 100 Speicherplätze. Über die Schnittstelle wird der PLU - Speicher beschrieben. Jede PLU beinhaltet Name, Stückgewicht und Taragewicht. -
Page 19: Kontrollieren
3.4 Kontrollieren Die Einstellung der Schaltpunkte zum Kontrollieren wird im Einstellmodus vorgenommen. UCAL 2 Pos 01 Sollwert Gewicht Plus Toleranz Gewicht UCAL 2 Pos 02 UCAL 2 Pos 03 Minus Toleranz Gewicht Einstellung: Druck- und danach zusammen mit der Ein/Aus-Taste 5 Sekunden lang betätigen bis UCAL1 erscheint. -
Page 20: Stückkontrolle
Die Gewichtskontrolle wird optisch mit der externen Ampel (optional) oder durch das Waagenterminal über den Piepston und dem blinkenden Display innerhalb Toleranz durchgeführt. Weitere Einstellmöglichkeiten zum Kontrollieren siehe im Einstellmodus (470.702.099 Usermode 3710). 3.5 Stückkontrolle Die Einstellung der Schaltpunkte zur Stückkontrolle wird im Einstellmodus vorgenommen. -
Page 21: Neutrales Messen
Mit der Tara-Taste, Funktions-Taste und Nullstell-Taste den Zahlenwert für das Minus Toleranz Zählen / Neutrales Messen wie beim Sollwert Zählen / Neutrales Messen einstellen. Nach der Einstellung der Minus Toleranz Zählen / Neutrales Messen mit Druck-Taste übernehmen, Pos. 07 im UCAL2 wird angezeigt. Nullstell-Taste betätigen, UCAL2 wird im Display angezeigt. - Page 22 Eingabe des Faktors für die Umrechnung im Einstellmodus Druck- und danach zusammen mit der Ein/Aus-Taste 5 Sekunden lang betätigen bis UCAL1 erscheint. Mit der Druck-Taste in den UCAL1 gehen. Rückwärtstakten mit der Funktions-Taste bis zur Pos. 26. Mit der Druck-Taste in das Eingabefeld für Nachkommastellen des Faktors gehen. Die Anzahl der Nachkommastellen mit der Tara-Taste und Funktions-Taste einstellen.
-
Page 23: Preisrechnung
3.7 Preisrechnung Funktionalität und Bedienung wie unter „Neutrales Messen“. 3.8 Prozentwägung Im Einstell-Modus muss für die Belegung der Funktions-Taste „Prozentwägung“ ausgewählt sein! Einstellung Funktions-Taste siehe Kapitel 1.13 oder Usermode 3710 (siehe separate Beschreibung 470.702.099) UCAL 4 Pos. 02 = Wert 7. Anwendung Prozentwägung Aktivierung Funktion Prozentwägung über die Funktions-Taste. -
Page 24: Glp - Protokoll
3.11 GLP - Protokoll Die Waagenprüfung und Ausgabe des GLP - Protokolls ist wie folgt: Für die Durchführung wird ein Eichprüfgewicht und ein Drucker mit dem Verbindungskabel benötigt, nach unserer Empfehlung sollte das Prüfgewicht min. 30 % von der Höchstlast sein. Druck- und danach zusammen mit der Ein/Aus-Taste 5 Sekunden lang betätigen bis UCAL1 erscheint. -
Page 25: Störungen - Ursachen Und Beseitigung
4. STÖRUNGEN – URSACHEN UND BESEITIGUNG ANZEIGE BESEITIGUNG Beim Einschalten setzt die Waage Die Plattform entlasten. Eventuell automatisch Null. Befindet sich die Schmutz entfernen. Zeigt die Waage außerhalb des vorgesehenen Waage nach einigen Sekunden Toleranzbereichs, zeigt die Anzeige -0-. nicht Null an, bitte Ihren Service- Partner verständigen. - Page 26 1. GENERAL INFORMATION 1.1 Intended use 1.2 Safety instructions 1.3 Cleaning 1.4 Maintenance and service 1.5 Warranty/liability 1.6 Technical data 1.7 Startup 1.8 Switching On/Off 1.9 Display panel and symbols 1.10 Explanation of data plate 1.11 Control keys 1.12 Electronic data plate 1.13 User programmable function key 2.
-
Page 27: General Information
1. GENERAL INFORMATION 1.1 Intended use Soehnle Professional standard compact scales are designed for weighing, taring, zero setting, plus/minus weighing, component adding, counting with PLU memory, control, piece quantity checking, neutral measurement, percentage weighing, and price calculation. 1.2 Safety instructions Please read through the information in this user manual carefully before using the equipment for the first time. -
Page 28: Maintenance And Service
If your product requires servicing, please contact your dealer or Soehnle Professional Customer Service. Soehnle Professional will not accept liability for any damage resulting from any of the following causes: Unsuitable, improper storage or use, faulty assembly or startup by the purchaser or third party,... -
Page 29: Technical Data
1.6 Technical data > Backlit LCD display (dimmable), digit height: 16 mm > High resolution, non-approvable or approved to Accuracy Class III > Integrated real-time clock > Power adapter 100-240 V AC / 50-60 Hz, UK plug adapter (see Accessories), US plug adapter on demand >... -
Page 30: Display Panel And Symbols
1.9 Display panel and symbols Active weighing range Zero indication Net weighing Tare indicator Manual tare Hold mode (the display is held for easier reading) Piece counting mode Battery level The following function signs and symbols are not shown on the keypad, but are indicated by a triangle at this position on the display when the related function is active: Function and stability symbol for neutral measurement Alibi memory... -
Page 31: Explanation Of Data Plate
1.10 Explanation of data plate Data plate for approved version: Data plate for non-approved version: Weighing ranges Maximum load for weighing range Minimum load for weighing range Calibration value (scale division unit), d= for non-approved scales Serial number of scales (scales type and variant, final digits of year of manufacture,consecutive number) CE 12 EC conformity mark with year of issue and start of calibration validity... -
Page 32: Control Keys
1.11 Control keys Operating mode Setting mode On/Off button or return to weighing Second button for UCAL activation mode if application programs are running Print button or Enter key Open the Edit function in the present setting step or save the parameter and go on to the next setting step Function key for user programming Go back to previous setting step or... -
Page 33: Electronic Data Plate
1.12 Electronic data plate Press the Print and Tare buttons at the same time to view the electronic data plate (1nFo). Use the arrow keys (Function key and Tare button) to scroll through the electronic data plate, serial number and calibration counter for the measuring station selected on the display. -
Page 34: User Programmable Function Key
1.13 User programmable function key To activate the function key: Press and hold the Print button and then press the On/Off button for 5 seconds until UCAL1 appears. With the Tare button, raise this value to UCAL4 and then press the Print button to store. -
Page 35: Basic Functions
2. BASIC FUNCTIONS The basic functions are used in the same or similar ways in all application programs. 2.1 Switching On Only with the scales unloaded. After the test routine is completed, the calibration counter appears briefly and then the display switches to zero. - Page 36 2.4 Switching to the second unit of weight Switching between different units of weight must be enabled in Calibration Mode (ECAL 1 Position 05 Value = 0)! Switching between kg and lb is available in the non-approved version only! To program the Function key, "Second unit of weight"...
-
Page 37: Tare Function
2.5 Tare function Manual taring Place an empty container on the platform and press the Tare button. Manual tare input To program the Function key, "Manual Tare Input" must be selected in Setting mode. To set the Function key, see User Mode 3710 (see separate description 470.702.099). -
Page 38: Alibi Memory
2.6 X10 resolution The resolution can be increased by a factor of ten by simultaneously pressing the Print button and the Zero button. On verifiable calibrated scales, the higher resolution appears for 5 seconds or flashes as long as the buttons are pressed and held – on non-verifiable calibrated scales it appears until the Print button and Zero button are pressed again. -
Page 39: Hold Function
In weighing mode, the Hold function is activated by pressing the Function key. The following Hold functions can be used to freeze the weight data and are provided as standard in the Standard Compact range of scales. Default is "0". The Hold function is set in Setting mode (see separate description 470.702.099 User mode 3710) UCAL 1 Position 02. -
Page 40: Application Programs And Functions
3. APPLICATION PROGRAMS AND FUNCTIONS The various application programs in Soehnle Professional standard compact scales provide a wide range of solutions for your weighing tasks. You can adapt the application programs to your particular needs in Setting mode (see separate description 470.702.099 User mode 3710). -
Page 41: Plu Memory
Counting with tare Refer to Paragraph 2.5. When a Tare weight is active, the letter "N" appears on the display. 3.3 PLU memory The PLU (Product Look Up) memory has 100 memory locations. The PLU memory is written through the interface. Each PLU location contains a name, piece weight, and tare weight. -
Page 42: Control
3.4 Control The control switching points are set in Setting mode. UCAL 2 Pos 01 Weight reference value UCAL 2 Pos 02 Weight positive tolerance UCAL 2 Pos 03 Weight negative tolerance Setting: Press and hold the Print button and then press the On/Off button for 5 seconds until UCAL1 appears. -
Page 43: Piece Quantity Check
Weight checks are performed within the tolerance, either visually through the external traffic lights display (optional) or on the scales terminal with a beep signal and flashing display. For additional control settings, see Setting mode (470.702.099 User mode 3710). 3.5 Piece quantity check The switching points for piece quantity checking are set in Setting mode. -
Page 44: Neutral Measurement
Use the Tare, Function and Zero buttons to set a number value for the negative tolerance for Count / Neutral Measurement as for the Count / Neutral Measurement reference value. After setting the negative tolerance for Count / Neutral Measurement, store with the Print button, position 07 in UCAL2 is displayed. - Page 45 Entering the conversion factor in Setting mode Press and hold the Print button and then press the On/Off button for 5 seconds until UCAL1 appears. Press the Print button to go into UCAL1. Using the Function key, scroll back to position 26. Use the Print button in the input field to go into the decimal places.
-
Page 46: Price Calculation
3.7 Price calculation Functionality and operation are as described for "Neutral Measurement". 3.8 Percentage weighing To program the Function key, "Percentage measurement" must be selected in Setting mode! For Function key settings, see Paragraph 1.13 or User mode 3710 (see separate description 470.702.099) UCAL 4 Position 02 = Value 7. -
Page 47: Glp Report
3.11 GLP report The scales calibration can be tested and a GLP compliant report printed as follows: A calibration test weight and a printer with connecting cable are required. We recommend using a test weight that has at least 30% of maximum weight. Press and hold the Print button and then press the On/Off button for 5 seconds until UCAL1 appears. -
Page 48: Faults - Causes And Remedies
4. FAULTS – CAUSES AND REMEDIES DISPLAY REMEDY When switched on, the scales are set Unload the platform. Remove any automatically to zero. If the scales are dirt if present. If the scales do not outside the specified tolerance range, display a zero after a few the display shows -0-. - Page 49 1. INFORMATIONS GENERALES 1.1 Objet 1.2 Consignes de sécurité 1.3 Nettoyage 1.4 Entretien et service après-vente 1.5 Garantie/Responsabilité 1.6 Caractéristiques techniques 1.7 Mise en service 1.8 Mise en marche/Arrêt 1.9 Le tableau d'affichage et les symboles 1.10 Présentation de la plaque signalétique 1.11 Touches de commande 1.12 Plaque signalétique électronique...
-
Page 50: Informations Generales
1. INFORMATIONS GENERALES 1.1 Objet La balance compacte modéle Standard de Soehnle Professional est conçue pour le pesage, le tarage, la remise à zéro, le pesage plus/moins, la tare cumulable, le comptage avec mémoire PLU, le contrôle poids, le contrôle de pièces, le pesage neutre, le pesage en pourcentage et le calcul poids/prix, en métrologie légale ou en usage interne. -
Page 51: Entretien Et Service
être évités. 1.5 Garantie/Responsabilité En cas de défaut dû à Soehnle Professional sur le produit livré, la société Soehnle Professional est habilitée à corriger le défaut ou à effectuer un échange standard. Les pièces remplacées restent la propriété... -
Page 52: Caractéristiques Techniques
1.6 Caractéristiques techniques > Affichage LCD rétro-éclairé (avec gradation de lumière), hauteur de chiffre : 16 mm > Haute résolution non homologuée ou homologuée classe III > Horloge en temps réel intégrée > Bloc d'alimentation 100-240 VCA / 50-60 Hz, adaptateur R.U., voir accessoires >... -
Page 53: Le Tableau D'affichage Et Les Symboles
1.9 Le tableau d'affichage et les symboles Plage de pesée active Affichage du zéro Pesage net Affichage de la tare Tare manuelle Mode hold (l'afficheur est défini pour une meilleure lecture) Mode comptage de pièces Charge de la batterie Les signes et symboles suivants ne sont pas illustrés sur le clavier, le triangle est affiché... -
Page 54: Présentation De La Plaque Signalétique
1.10 Présentation de la plaque signalétique Plaque signalétique homologuée à l'étalonnage : Plaque signalétique non homologuée à l'étalonnage : Plages de pesée Charge maximale de la plage de pesée Charge minimale de la plage de pesée Valeur d'étalonnage (incrément), d= pour une balance non homologuée à l'étalonnage Numéro de série de la balance (type de balance avec variante, dernier chiffre de l'année de fabrication, numéro de comptage) -
Page 55: Touches De Commande
1.11 Les touches de commande Mode commande Mode réglage Touche Marche/Arrêt ou Deuxième touche pour l'activation retour en mode pesage pour les UCAL programmes utilisateur actifs Touche Impression ou Accès à la fonction édition dans touche Enter l'étape de réglage ou enregistrement des paramètres et passage à... -
Page 56: Plaque Signalétique Électronique
1.12 Plaque signalétique électronique En appuyant simultanément sur la touche Impression et sur la touche Tare, vous accédez à l'affichage de la plaque signalétique électronique (1nFo). A l'aide des touches fléchées (touches Fonction et Tare), la plaque signalétique électronique ainsi que le n° de série et le compteur d'étalonnage du point de mesure activé... -
Page 57: Touche De Fonction Librement Configurable
1.13 Touche de fonction librement configurable Activer la touche Fonction : Appuyer sur Impression puis sur la touche Marche/Arrêt pendant 5 secondes jusqu'à ce que UCAL1 apparaisse. Avec la touche Tare, démarrer jusqu'à ce que UCAL4 apparaisse et reprendre avec la touche Impression. -
Page 58: Fonctions De Base
2. FONCTIONS DE BASE Les fonctions de base sont identiques ou comparables pour tous les programmes utilisateur. 2.1 Mise en marche Uniquement applicable lorsque le plateau de pesage est vide. A la fin de la routine de contrôle, le compteur d'étalonnage est affiché brièvement puis l'afficheur indique zéro. -
Page 59: Configurer Une Deuxième Unité
2.4 Configurer une deuxième unité La possibilité de commutation des unités de poids doit être autorisée en mode calibrage (ECAL 1 Pos. 05 Valeur = 0) ! Une commutation kg – lb – est uniquement possible pour le modèle non homologué à... -
Page 60: Fonction Tare
2.5 Fonction Tare Tarage manuel Placer un récipient vide sur la plate-forme et appuyer sur la touche Tare. Saisie manuelle de la tare En mode réglage pour l'affectation de la touche Fonction, « Saisie manuelle de la tare » doit être sélectionné. Réglage de la touche Fonction, voir Usermode 3710 (voir description séparée 470.702.099). -
Page 61: Résolution Amplifiée (Décuplée)
2.6 Résolution amplifiée (décuplée X10) La résolution décuplée apparaît en appuyant simultanément sur les touches Impression et Remise à zéro. Pour les balances calibrées homologuées à l'étalonnage, la résolution supérieure apparaît pendant 5 secondes ou clignote tant que les touches sont maintenues enfoncées –... -
Page 62: Fonction Hold
Le mode hold est désactivé avec la touche Fonction. 2.9 Branchement d´une lampe signalétique Le terminal Standard dispose de 4 sorties qui peuvent être configurées individuellement en mode réglage (voir description séparée 470.702.099 Usermode 3710). Les sorties sont configurées par défaut pour la lampe externe. -
Page 63: Fonctions
3. PROGRAMMES ET FONCTIONS Les différents programmes de la balance compacte Standard de Soehnle Professional vous offrent des solutions complètes pour vos activités de pesée. Vous pouvez adapter les programmes en mode réglage (voir description séparée 470.702.099 Usermode 3710) à vos besoins spécifiques. -
Page 64: Mémoire Plu
Compter avec une tare Voir à cet effet le Point 2.5. Un poids de tare actif est indiqué par un « N » à l'écran. 3.3 Mémoire PLU La mémoire PLU (Product look up) a 100 emplacements. La mémoire PLU est décrite avec l'interface. Chaque PLU comporte un nom, un poids unitaire et un poids de tare. -
Page 65: Contrôle Poids
3.4 Contrôle poids Le réglage des points de commutation pour le contrôle est effectué en mode réglage. UCAL 2 Pos 01 Valeur de consigne Poids UCAL 2 Pos 02 Tolérance Plus Poids UCAL 2 Pos 03 Tolérance Moins Poids Réglage : Appuyer sur Impression puis sur la touche Marche/Arrêt pendant 5 secondes jusqu'à... -
Page 66: Contrôle De Pièces
Le contrôle du poids est effectué de manière optique avec la lampe externe (option) ou par le terminal de la balance au moyen d'un bip et de l'écran clignotant dans la tolérance. Pour d'autres possibilités de réglage sur le contrôle, voir mode réglage (470.702.099 Usermode 3710). -
Page 67: Mesure Neutre
Avec la touche Tare, Fonction et Mise à zéro, régler la valeur de comptage de Tolérance moins Comptage / Mesure neutre comme pour valeur de consigne Comptage / Mesure neutre. Après le réglage de Tolérance moins Comptage / Mesure neutre reprendre avec la touche Impression, Pos. - Page 68 Saisie du facteur de conversion en mode réglage Appuyer sur Impression puis sur la touche Marche/Arrêt pendant 5 secondes jusqu'à ce que UCAL1 apparaisse. Avec la touche Impression, aller dans UCAL1. Reculer avec la touche Fonction jusqu'à la Pos. 26. Avec la touche Impression, aller dans le champ de saisie pour la précision décimale du facteur.
-
Page 69: Calcul Poids/Prix
3.7 Calcul poids/prix Fonctionnalité et commande identiques à « Mesure neutre ». 3.8 Pesage en pourcentage En mode réglage, pour l'affectation de la touche Fonction « Pesage en pourcentage » doit être sélectionné ! Réglage de la touche Fonction, voir Chapitre 1.13 ou Usermode 3710 (voir description séparée 470.702.099) UCAL 4 Pos. -
Page 70: Protocole Glp
3.11 Protocole GLP Le contrôle de la balance et l'impression du protocole GLP ont lieu comme suit : Pour l'exécution, il faut un poids de contrôle d'étalonnage et une imprimante avec câble de raccordement, nous recommandons un poids de contrôle de min. -
Page 71: Messages D´erreurs - Causes Et
4. MESSAGES D´ERREURS – CAUSES ET SOLUTIONS AFFICHAGE SOLUTION Lors du démarrage, la balance est Décharger la plate-forme. Eliminer automatiquement remise à zéro. Si la éventuellement les saletés. Si la balance est en dehors de la plage de balance n'indique pas zéro au tolérance bout de quelques secondes, prévue, l'afficheur indique -0-. - Page 72 Soehnle Professional GmbH & Co. KG Manfred-von-Ardenne-Allee 12 DE-71522 Backnang Telefon: +49 (0) 71 91 / 34 53 - 220 Telefax: +49 (0) 71 91 / 34 53 – 211 info@soehnle-professional.com www.soehnle-professional.com 470.051.146 DE|GB|FR 04/13 Technische Änderungen vorbehalten...