Publicité
Les langues disponibles
Les langues disponibles
Liens rapides
Publicité

Manuels Connexes pour ARENDO 304943/20200828FS027

Sommaire des Matières pour ARENDO 304943/20200828FS027
- Page 1 BREADMAKER User Manual Mod.-Nr.: 304943/20200828FS027...
- Page 2 Table of contents 1. Deutsch........................ 3 2. English ....................... 32 3. Français......................61 4. Italiano ....................... 90 5. Español ......................119...
- Page 3 WICHTIGE SICHERHEITSHINWEISE FÜR DIESES GERÄT • Stellen Sie vor dem Anschluss des Gerätes sicher, dass die Netzspannung mit der Angabe des Typen- schildes auf dem Gerät übereinstimmt! • Dieses Gerät darf nicht mit einem beschädigten oder defekten Kabel oder Stecker in Betrieb genommen werden! •...
- Page 4 • Stellen Sie den Brotbackautomat nicht in der Nähe von anderen heißen Geräten wie z.B. einem Gas-, Elektro- oder Backofen auf. • Bewegen Sie das Produkt keinesfalls, wenn es mit heißer Flüssigkeit wie z.B. Marmelade gefüllt ist! • Berühren Sie keine bewegenden oder drehenden Teile des Gerätes, wenn es eingeschaltet ist! •...
- Page 5 • Um den Brotbackautomaten vollständig vom Strom- netz zu trennen, ziehen Sie den Netzstecker aus der Steckdose! • Benutzen Sie das Gerät nur für vorgesehene und in dieser Bedienungsanleitung aufgeführte Verwen- dungen! • Gebrauchen Sie es nicht im Freien! • Das Gerät darf von Kindern ab 8 Jahren und von Per- sonen mit verringerten physischen, sensorischen oder mentalen Fähigkeiten oder Mangel an Erfah- rung und/oder Wissen benutzt werden, wenn sie...
- Page 6 ACHTUNG: Dieses Gerät wird während des Be- triebs sehr heiß! Es besteht Verbrennungsge- fahr! Vielen Dank, dass Sie sich für ein Produkt von Arendo entschieden haben. Damit Sie auch lange Freude mit Ihrem erworbenen Gerät haben werden, lesen Sie sich bitte die nachfolgende Bedienungsan- leitung aufmerksam durch.
- Page 7 2. Technische Daten Spannungsversorgung 230-240 V AC 50 Hz Leistungsaufnahme 580 W Gewicht 4452 g (Hauptgerät ohne Zubehör) Features • Anti-Rutsch-Füße • Überhitzungsschutz • Antihaftbeschichtete Backform • Konstante Temperatur • Warmhaltefunktion (1 Stunde) • Optimierte Heizfunktion (energiesparend) • 13 vordefinierte Programme •...
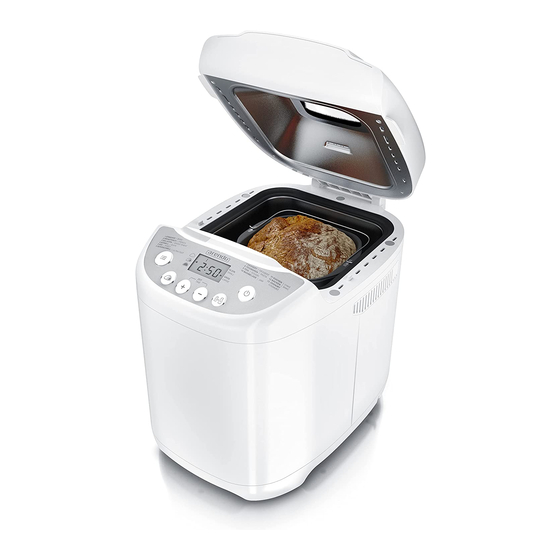
- Page 8 Nummer Beschreibung Deckel Fenster Display Bedienelemente Backform Dosierlöffel Messbecher Knethaken Knethakenentferner Joghurt-einsatz/behälter mit verschließbaren Deckel Deutsch...
- Page 9 4. Vor dem ersten Gebrauch • Überprüfen Sie, ob das Zubehör und alle Teile vollständig und un- beschädigt im Lieferumfang enthalten sind. • Reinigen Sie alle Teile wie im Kapitel “Reinigung und Pflege” in dieser Bedienungsanleitung beschrieben. • Stellen Sie den Betriebsmodus “Bake” ein. Backen Sie ohne Inhalt etwa 10-15 Minuten.
- Page 10 6. Inbetriebnahme / Bedienung Nachdem Sie die Erst-Inbetriebnahme durchgeführt haben, können Sie das Gerät in Betrieb nehmen. 1. Fetten Sie die Backform und den Knethaken mit Margarine oder Butter ein, welche zum Backen geeignet ist. 2. Setzen Sie zuerst die Backform in den Brotbackautomaten ein, indem Sie diese im Uhrzeigersinn drehen, um sie zu verriegeln.
- Page 11 7. Drücken Sie wiederholt die Taste "Menü", um den gewünschten Modus auszuwählen. 8. Passen Sie den Bräunungsgrad mit der "Bräunung"-Taste an. Sie haben die Möglichkeit zwischen 3 Bräunungsgraden auszuwäh- len (leicht gebräunt, mittel gebräunt und dunkel gebräunt). 9. Wählen Sie über die "Größe"-Taste das Brotgewicht aus. Sie ha- ben die Möglichkeit zwischen "Klein"(750 g) und "Groß"...
- Page 12 Sobald der Vorgang beendet ist, ertönt ein akustisches Signal. Wenn Ihnen die Bräunung des Brotes zu hell ist, können Sie die Backzeit manuell anpassen. Drücken Sie die "Menü"-Taste und wählen Sie den Modus "12 Bake" aus. Passen Sie die Zeit mit den Tasten "Zeit+"...
- Page 13 8. Programme Durch Betätigen der Menü-Taste können Sie das gewünschte Pro- gramm auswählen. Nach jedem Tippen auf die MENÜ-Taste ändert sich die Programmanzeige. Die verschiedenen Programme und deren Funktionen werden nachfolgend zusammengefasst. Für Weiß- und Mischbrote aus Weizen- oder Roggenmehl. Standard (Basic) Bräunung und Gewicht sind anpassbar und die Zeitverzöge- rung ist verfügbar.
- Page 14 Zum Zubereiten von Desserts, z.B. Pudding usw. Bräunung ist anpassbar. Gewicht ist nicht anpass- Dessert (7) bar und die Zeitverzögerung ist nicht verfügbar. Programmdauer: 1 Stunde 20 Minuten Nur zum Kneten. Dieses Programm ist für Pasta (wie z.B. Nudeln) bestimmt. Teigwaren (Pasta) (8) Bräunung und Gewicht sind nicht anpassbar und die Zeitverzögerung ist verfügbar.
- Page 15 9. Auswahl der Brotgröße und des Bräunungsgrads Drücken Sie die Taste “Größe/Gewicht”, um die Größe bzw. das Gewicht des Brotes einzustellen. Sie können zwischen folgenden Werten wählen: 750 g (klein) oder 1000 g (groß) Ihre Auswahl wird auf dem Display rechts mit einem Pfeil angezeigt. Beachten Sie, dass die Backzeit je nach Brotgewicht und Größe vari- ieren kann.
- Page 16 11. Programm abbrechen Wenn das Programm begonnen hat, kann der Betrieb mit der “START/STOP”-Taste jederzeit unterbrochen werden. 12. Speicher Falls die Stromversorgung des Gerätes unterbrochen wird, kann der zuvor aktivierte Vorgang automatisch innerhalb von 10 Minuten forgesetzt werden. Wenn die Unterbrechung länger als 10 Minuten anhält, kann der Brotbackautomat die Daten nicht speichern.
- Page 17 Geben Sie im Anschluss die gewünschten Zutaten in die Backform ein. Beachten Sie hierbei zwingend die Reihenfolge des Rezepts. In der Regel wird erst die Flüssigkeit, im Anschluss Zucker, Salz oder Mehl und schließlich Backpulver oder Hefe hineingegeben. Sobald die Zutaten in der Backform sind, schließen Sie den Deckel des Brotbackautomaten.
- Page 18 Sobald der komplette Vorgang beendet ist, ertönt ein Piepton. Drü- cken Sie die “Start/Stop”-Taste für ca. 2 Sekunden, um das aktuelle Programm zu beenden oder ziehen Sie den Netzstecker. Nachdem das Programm beendet wurde, können Sie das Brot entnehmen, indem Sie den Deckel öffnen, die Backform mit Ofenhandschuhen entgegen des Uhrzeigersinns drehen und sie entnehmen.
- Page 19 Brote aus Fertigmischungen Sie können in diesem Brotbackautomaten nahezu alle im Handel er- hältlichen Brotbackmischungen verwenden. Jedoch raten wir von reinen Roggenbroten ab, da diese nicht zufriedenstellend gebacken werden. Beachten Sie die Mengenangaben auf der Packung und gehen Sie in folgenden Schritten vor: - Schalten Sie den Brotbackautomaten ein und geben Sie die Flüssig- keit, so wie auf der Fertigmischung empfohlen, hinzu.
- Page 20 5. Wiegen Sie den Gelierzucker nach den Angaben auf der Packung ab und schütten Sie den Gelierzucker auf das Fruchtmus. Verriegeln Sie die Backform, indem Sie diese im Uhrzeigersinn dre- hen, um ihn im Gerät zu verriegeln (LOCK). Schließen Sie den Deckel des Gerätes.
- Page 21 1. Füllen Sie etwa 1 Liter Milch in den Joghurt-Einsatz. Geben Sie dann etwa 100 ml reifen Joghurt dazu. Rühren Sie die Mischung gut durch. Hinweis: Zucker, Aromen, Fruchtmischungen und/oder andere Zuta- ten sollten Sie erst zugeben, nachdem der Joghurt fertig ist. Achtung!: Achten Sie unbedingt darauf, dass Sie ausschließlich das Programm "Joghurt (Yoghurt) (13)"...
- Page 22 Küchengeräte aus Holz, um ein Zerkratzen der Backform zu vermei- den. Drücken Sie die “Start/Stop”-Taste vor dem Öffnen des Deckels. 16.4 Programm 6 (Ultraschnell) Der Brotbackautomat kann mit dem Programm “Ultraschnell” ver- gleichweise zu den anderen Programmen schneller backen. Beach- ten Sie hierfür, dass die Wassertemperatur zwischen 48°C und 50°C liegen muss.
- Page 23 Hefe oder Backpulver Trockene Zutaten Flüssigkeit (z.B. Wasser) Stellen Sie sicher, dass bei der Zugabe das Mehl nicht komplett von Flüssigkeit durchweicht werden darf. Hefe muss anschließend auf das trockene Mehl gegeben werden und sollte nicht mit Salz in Be- rührung kommen.
- Page 24 dig ab. Setzen Sie diese wieder in den Brotbackautomaten, indem Sie die Backform auf das Getriebe setzen und im Uhrzeigersinn drehen, bis die Backform einrastet. Sollte der Knethaken nur mühsam aus dem Brot herauszubekommen sein, verwenden Sie dafür den Knethakenentferner. Benutzen Sie ein feuchtes Tuch, um den Rest des Gehäuses und den Deckel zu reinigen.
- Page 25 Fehler Fehlergrund Fehlerbehebung - Ungeeignetes Pro- - Wählen Sie das richtige Programm. gramm ausgewählt - Öffnen Sie während des Program- Die Zutaten sind - Der Deckel wurde zu mablaufs den Deckel nicht. ungleichmäßig ver- häufig geöffnet mischt und das Brot - Überprüfen Sie den Sitz des - Der Drehwiederstand ist nicht zufriedenstel-...
- Page 26 Mehl ohne Backpulver Das Mehl ohne Backpulver ist auch bekannt als Weißmehl. Es ist für schnelles Backen oder für verschiedene Kekse geeignet. Glutenmehl Glutenmehl hat einen hohen Anteil an Gluten und Proteinen. Diese Mehlform verleiht dem Teig eine bestimmte Elastizität. Dadurch behält der Teig die Form.
- Page 27 Backsoda Backsoda ist dem Backpulver sehr ähnlich. Backsoda kann in Kombi- nation mit Backpulver verwendet werden. Backpulver Backpulver wird dafür verwendet, um zum Beispiel Kuchen oder Brote im “Programm - 9 Ultraschnell” zu backen. Backpulver benö- tigt keine wirkliche “Gehphase”. Salz Salz eignet sich dafür, den Geschmack des Brotes sowie die Farbe der Brotkruste zu verbessern.
- Page 28 Sie Hefe nach jedem Gebrauch unverzüglich wieder in einem Kühl- schrank. Sollte das Brot schlecht aufgehen, ist das in den meisten Fällen auf die Hefe zurückzuführen! Auf folgende Art und Weise können Sie nachprüfen, ob Ihre Hefe noch frisch und aktiv ist: 1.
- Page 29 Weißbrot Bauernbrot Brotgröße 1000 g Brotgröße 1000 g 350 ml 360 ml lauwarmes Wasser lauwarmes Wasser Mehl 500 g Mehl Typ 1050 600 g Hefe 1/2 Packet Trockenhefe 1 Packung 1 Esslöffel 1 Teelöffel Meersalz Salz Zucker 1 Esslöffel Zucker 1 Teelöffel 1 Esslöffel Weizensauerteig...
- Page 30 Kuchen Rührkuchen Eier 125 g Zucker Butter/Margarine 125 g Vanillezucker 1 Päckchen Milch 1/4 Tasse Weißmehl 300 g Backpulver 1 Päckchen Programm: 10 - Kuchen Zubereitung: Geben Sie zuerst Eier, Butter, Zucker und den Vanillezucker in eine Schüssel und rühren Sie die Mischung schaumig.
- Page 31 Beitrag zum Schutz unserer Umwelt. WEEE Richtlinie 2012/19/EU WEEE Register-Nr: DE 67896761 Hiermit erklärt die Firma WD Plus GmbH, dass sich das Gerät 304943/20200828FS027 in Übereinstimmung mit den grundlegenden Anforderungen und den übrigen einschlägigen Bestimmungen befindet. Eine vollständige Konformitätserklärung erhalten Sie bei: WD Plus GmbH, Wohlenbergstraße 16, 30179 Hannover...
- Page 32 IMPORTANT SAFETY GUIDELINES FOR THIS APPLI- ANCE • Before connecting the appliance, ensure that the mains voltage matches the specification on the nameplate of the appliance! • This appliance should not be operated if the cable or plug is damaged or defective! •...
- Page 33 • Do not touch any moving or rotating parts of the ap- pliance when it is switched on! • Do not turn on the bread machine if the baking at- tachment has not been properly filled with ingredi- ents. • Never remove the baking mould during operation! •...
- Page 34 pervised or instructed with regard to safe use of the appliance, and have understood the resultant dan- gers. The appliance is not a toy. Cleaning and main- tenance of the appliance should not be done by chil- dren without supervision! •...
- Page 35 CAUTION: This appliance becomes very hot during use! There is a risk of burns! Thank you for choosing an Arendo product. Please read the following user manual carefully so that you can get the most from the product you have purchased. Before using the product, first check that the delivered item is complete, accurate and undamaged.
- Page 36 2. Technical data Power supply 230-240 V AC 50 Hz Power consumption 580 W Weight 4452 g (main unit without accessories) Features • Non-slip base • Overheating protection • Non-stick baking mould • Constant temperature • Keep-warm function (1 hour) •...
- Page 37 Number Description Window Display Operating controls Baking mould Measuring spoon Measuring cup Kneader Kneader remover Yoghurt attachment/container with lockable lid English...
- Page 38 4. Before first use • Check that the accessories and all parts are complete as per the scope of supply and are not damaged. • Clean all the parts as described in the chapter "Cleaning and Care" of this user manual. •...
- Page 39 6. Use / operation After completing the initial start-up, you can put the appliance into operation. 1. Apply margarine or butter which is suitable for baking to the bak- ing mould and kneader. 2. First, place the bread mould in the bread machine by turning it clockwise to lock it.
- Page 40 7. Press the "Menu" button repeatedly to select the desired mode. 8. Adjust the degree of browning using the "Browning" button. You can choose between three degrees of browning (slightly browned, medium browned and dark browned). 9. Use the "Size" button to select the weight of the bread. You can select between "Small"...
- Page 41 You will hear an audible beep once the process is completed. If the degree of browning of the bread is not enough, you can adjust the baking time manually. Press the "Menu" button and select the "12 Bake" mode. Adjust the time using the "Time+" and "Time-" buttons.
- Page 42 8. Programs You can select the desired program by pressing the menu button. The program display changes each time you press the MENU but- ton. The various programs and their functions are summarized below. For white and mixed breads made of wheat or rye flour. Basic (1) Browning and weight can be adjusted and the time delay is available.
- Page 43 For making desserts such as pudding, etc. Browning can be adjusted. Weight cannot be adjusted, Dessert (7) and time delay is not available. Program duration: 1 hour 20 minutes Only for kneading. This program is intended for pasta (such as noodles). Pasta (8) Browning and weight cannot be adjusted and the time delay is available.
- Page 44 9. Selection of bread size and degree of browning Press the "Size/Weight" button to adjust the size or weight of the bread. You can choose between the following values: 750 g (small) or 1000 g (large) Your selection is shown on the display at the right with an arrow. Note that the baking time can vary depending on the weight and size of the bread.
- Page 45 11. Cancelling the program Once the program begins, the operation can be stopped at any time using the "START/STOP" button. 12. Memory If the power supply to the appliance is interrupted, the operation that was previously active can be automatically resumed within 10 minutes.
- Page 46 Add the desired ingredients to the baking mould. It is important to follow the sequence given in the recipe. Generally, the liquid is added first, then sugar, salt or flour and finally the baking powder or yeast. Once the ingredients are added to the baking mould, close the lid of the bread machine.
- Page 47 Once the entire process is completed, you will hear a beep. Press the "Start/Stop" button for about 2 seconds to end the current program or disconnect the mains plug. Once the program is complete, you can remove the bread by opening the lid, turning the baking mould anticlockwise wearing oven gloves and then removing it.
- Page 48 Bread made of ready-mixes You can use almost any commercially available bread mixes in this bread machine. However, we do not recommend pure rye bread, as these are not baked satisfactorily. Read the quantity information on the package and follow these steps: - Turn the bread machine on and add the liquid as recommended on the ready-mix.
- Page 49 5. Weigh the gelling sugar as specified on the package and add the gelling sugar to the fruit pulp. Lock the baking mould in the appliance by turning it clockwise (LOCK). Close the appliance lid. 6. Connect the mains plug to the socket and select the "Jam (10)" program by pressing the "MENU"...
- Page 50 Caution!: Please ensure that only the "Yoghurt (13)" program has been selected. Otherwise, boiling milk could spill onto the heating elements and cause damage, or result in a fire or electricity hazard! 2. Close the lid of the yoghurt container and then place it in the dough mould.
- Page 51 16.4 Program 6 (Ultra fast) The bread machine can bake more quickly in the "Ultra fast" pro- gram compared to the other programs. Please note that the water temperature has to be between 48°C and 50°C for this purpose. The temperature is crucial for the final quality of the bread.
- Page 52 Yeast or baking powder Dry ingredients Liquid (e.g. water) When adding, make sure that the flour is not be completely soaked by liquid. Yeast has to be then added to the dry flour and should not come in contact with salt. Once the dough has been kneaded for a few minutes, you will hear a series of beeps.
- Page 53 clean them. Dry the baking mould and kneader completely. Put them back in the bread machine by placing the baking mould on the shaft and turn it clockwise until the baking mould locks into place. If the kneader does not come out of the bread easily, use the knead- er remover.
- Page 54 Error Error reason Troubleshooting - Inappropriate program - Select the correct program. selected - Do not open the lid when the The ingredients are - The lid was opened too program is running. mixed unevenly and often the bread is not - Check if the kneader is seated - The rotation resistance baked satisfactorily.
- Page 55 Flour without baking powder Flour without baking powder is also known as white flour. It is suita- ble for fast baking or for different biscuits. Gluten flour Gluten flour has high gluten and protein content. This type of flour gives the dough a certain elasticity. It helps the dough to retain its shape.
- Page 56 Baking powder Baking powder is used, for example, to bake cakes or breads in "Program - 9 Ultra fast". Baking powder does not require any "Rising phase". Salt Salt is used to improve the taste of the bread and the colour of the bread crust.
- Page 57 If the bread does not rise properly, this is mostly due to the yeast! This is how you can check whether your yeast is fresh and active: 1. Pour half a measuring cup of warm water (45-50 ° C). 2. Add a teaspoon of white sugar to the measuring cup and stir the contents.
- Page 58 White bread Farmhouse bread Bread size 1000 g Bread size 1000 g 350 ml 360 ml Lukewarm water Lukewarm water Flour 500 g Flour type 1050 600 g Yeast 1/2 packet Dry yeast 1 pack 1 tablespoons 1 teaspoon Sea salt Salt Sugar 1 tablespoons...
- Page 59 Pound cake Eggs 125 g Sugar Butter / Margarine 125 g Vanilla sugar 1 small packet Milk 1/4 cup White flour 300 g Baking powder 1 small packet Program: 10 - Cake Preparation: First add eggs, butter, sugar and vanilla sugar to a bowl and stir the mixture until it be- comes fluffy.
- Page 60 WEEE directive 2012/19/EU WEEE Register no.: DE 67896761 The company WD Plus GmbH hereby certifies that the appliance 304943/20200828FS027 complies with the fundamental requirements and all other relevant stipulations. A com- plete conformity statement can be obtained from: WD Plus GmbH, Wohlenbergstraße 16,...
- Page 61 CONSIGNES DE SÉCURITÉ IMPORTANTES POUR CET APPAREIL • Avant de connecter l'appareil, assurez-vous que la tension réseau correspond à l'indication de la plaque signalétique sur l'appareil! • Cet appareil ne doit pas mis en service avec un câble ou un connecteur défectueux ou endommagé ! •...
- Page 62 • Ne déplacez aucunement le produit s’il est rempli avec un liquide chaud comme par ex. la confiture ! • Ne touchez pas de pièce mobile ou rotative de l’ap- pareil lorsque celui-ci est allumé ! • N’allumez pas la machine à pain si l’accessoire de cuisson n’a pas été...
- Page 63 • L’appareil peut être utilisé par des enfants de plus de 8 ans et des personnes avec des capacités phy- siques, sensorielles ou mentales diminuées et/ou un manque d'expérience et de savoir si elles ont été instruites sous surveillance ou relativement à un emploi sûr de l'appareil, et si elles comprennent les dangers associés.
- Page 64 ! Il existe un risque de brû- lures ! Nous vous remercions d'avoir choisi un produit d'Arendo. Pour que vous puissiez profiter longtemps de l'appareil acquis, veuillez lire at- tentivement le mode d'emploi suivant. Avant la mise en service du produit livré, vérifiez s'il est complet, sans défauts et intact.
- Page 65 2. Caractéristiques techniques Alimentation électri- 230-240 V CA 50 Hz Puissance absorbée 580 W Poids 4452 g (appareil principal sans accessoires) Caractéristiques • Pieds antidérapants • Protection contre la surchauffe • Moule à revêtement anti-adhésif • Température constante • Fonction de maintien de chaleur (1 heure) •...
- Page 66 Numéro Description Couvercle Fenêtres Écran d’affichage Éléments de commande Moule Cuillère doseuse Gobelet gradué Crochet pétrisseur Outil de retrait du crochet pétrisseur Insert/Récipient à yaourt avec couvercle fermable Français...
- Page 67 4. Avant la première utilisation • Vérifiez si les accessoires et toutes les pièces sont complets, in- tacts et contenus dans le volume de livraison. • Nettoyez toutes les pièces selon les instructions du chapitre « Nettoyage et entretien » du présent mode d'emploi. •...
- Page 68 6. Mise en service / commande Vous pouvez uniquement mettre l’appareil en service après avoir ef- fectué la mise en service initiale. 1. Graissez le moule et le crochet pétrisseur avec de la margarine ou du beurre approprié à la cuisson. 2.
- Page 69 7. Appuyez de manière répétitive sur la touche « Menu » pour sé- lectionner le mode souhaité. 8. Adaptez le degré de brunissage avec la touche « Brunissage ». Vous avez la possibilité de choisir entre 3 degrés de brunissage (légèrement bruni, moyennement bruni et bruni foncé).
- Page 70 Dès que le processus entier terminé, un signal acoustique retentit. Si le brunissage du pain vous paraît trop clair, vous pouvez adapter le temps de cuisson manuellement. Appuyez sur la touche « Menu » et sélectionnez le mode « 12 Bake ». Adaptez le temps à l’aide des touches «...
- Page 71 8. Programmes Vous pouvez sélectionner le programme de votre choix en appuyant sur la touche Menu. L'affichage du programme change après avoir appuyé sur la touche MENU. Les différents programmes et les fonc- tions associées sont récapitulés comme suit. Pour des pains blancs et pains bis en farine de blé ou de Standard (Basic) seigle.
- Page 72 Pour la préparation de desserts, comme par ex. du pudding etc. Dessert (7) Le brunissage est adaptable. Le poids n’est pas adaptable et la temporisation n’est pas disponible. Durée du programme : 1 heure 20 minutes Uniquement pour pétrir. Ce programme est destiné aux pâtes (comme par ex.
- Page 73 9. Sélection de la taille du pain et du degré de brunissage Appuyez sur la touche « Taille/Poids » pour régler la taille ou le poids du pain. Vous avez le choix entre les valeurs suivantes : 750 g (petit) ou 1000 g (grand) Votre sélection s’affiche à...
- Page 74 11. Annuler le programme Une fois que le programme a commencé, le mode peut être inter- rompu à tout moment avec la touche « DÉMARRAGE/ARRÊT ». 12. Mémoire Si le courant de l’appareil doit être coupé, le processus préala- blement activé peut être automatiquement repris dans l’espace de 10 minutes.
- Page 75 Versez ensuite les ingrédients souhaités dans le moule. Respec- tez impérativement l’ordre de la recette. En règle générale, il faut d'abord incorporer le liquide, puis le sucre, le sel ou la farine et enfin la levure chimique ou la levure. Dès que les ingrédients se trouvent dans le moule, fermez le cou- vercle de la machine à...
- Page 76 Une fois le processus entier terminé, un bip retentit. Appuyez sur la touche « Démarrage/Arrêt » pendant environ 2 secondes pour ter- miner le programme actuel ou débranchez la fiche secteur. Une fois le programme terminé, vous pouvez défourner le pain, en ouvrant le couvercle, en tournant dans le sens horaire le moule avec des gants de cuisine et en retirant celui-ci.
- Page 77 Pains à partir de mélanges prêts à l’emploi Presque toutes les préparations de pain à cuire en vente dans le com- merce peuvent être utilisées dans cette machine à pain. Nous vous déconseillons toutefois du pain de seigle pur car il ne cuit pas de façon satisfaisante.
- Page 78 5. Pesez le sucre gélifiant selon les instructions figurant sur l'embal- lage et versez-le sur la purée de fruits. Verrouillez le moule en le tournant dans le sens des aiguilles d’une montre pour le verrouiller dans l’appareil (LOCK). Fermez le couvercle de l’appareil.
- Page 79 L'appareil chauffe le mélange jusqu'à la température requise. 1. Remplissez environ 1 litre de lait dans le récipient à yaourt. Ajou- tez ensuite environ 100 ml de yaourt mûr. Remuez bien le mé- lange. Remarque : Vous ne devriez ajouter le sucre, les arômes, les mélanges de fruits et/ou d’autres ingrédients qu’après que le yaourt soit termi- né.
- Page 80 16.4 Programme 6 (Super rapide) Par comparaison aux autres programmes, la machine à pain peut cuire plus vite avec le programme « Super rapide ». Veuillez retenir que la température de l’eau doit se situer entre 48 °C et 50 °C. La qualité...
- Page 81 Levure ou levure chimique Ingrédients secs Liquide (par ex. eau) Liquide (lait, eau etc.), œufs, sel et poudre de lait etc. Prenez soin d’éviter l'absorption complète de liquide par la farine en l’incorporant. La levure doit être ensuite ajoutée à la farine sèche et ne doit pas entrer en contact avec le sel.
- Page 82 Séchez complètement le moule, puis le crochet pétrisseur. Remet- tez-les dans la machine à pain, en posant le moule sur la transmis- sion, et tournez-le dans le sens horaire jusqu'à ce que le moule s'em- boîte. Si le crochet pétrisseur se retirer difficilement du pain, alors utilisez l’outil de retrait du crochet pétrisseur.
- Page 83 Erreur Motif du défaut Dépannage - Mauvais programme - Choisissez le bon programme. sélectionné - N’ouvrez pas le couvercle pendant Les ingrédients ne - Le couvercle a été trop le déroulement du programme. sont pas mélangés souvent ouvert uniformément et le - Vérifiez le logement du crochet - La résistance à...
- Page 84 Farine sans levure chimique La farine sans levure chimique est également connue sous le nom de farine blanche. Elle est destinée à une cuisson rapide et à diffé- rents types de biscuits. Farine au gluten La farine au gluten a une forte teneur en gluten et protéines. Cette forme de farine confère une certaine élasticité...
- Page 85 Soude La soude est très similaire à la levure chimique. La soude peut être utilisée en même temps que la levure chimique. Levure chimique La levure chimique sert par exemple à cuire des gâteaux ou des pains dans le « Programme - 9 Super rapide ». La levure chimique peut se passer d’une «...
- Page 86 Stockez la levure fraîche uniquement dans le réfrigérateur car une température trop chaude peut éliminer les champignons de la levure. Si vous achetez de la levure, faites attention à la date de pé- remption. Après l’utilisation, rangez immédiatement la levure dans le réfrigérateur.
- Page 87 Pain blanc Pain de campagne Taille du pain 1000 g Taille du pain 1000 g 350 ml 360 ml Eau tiède Eau tiède Farine 500 g Farine type 1050 600 g Levure 1/2 paquet Levure sèche 1 paquet 1 cuillères à 1 cuillère à...
- Page 88 Gâteau Quatre-quarts Œufs 125 g Sucre Beurre/margarine 125 g Sucre vanillé 1 sachet Lait 1/4 de tasse Farine blanche 300 g Levure chimique 1 sachet Programme : 10 - Gâteau Préparation : Mettez d’abord les œufs, le beurre, le sucre et le sucre vanillé dans un bol et faites émulsionner le mélange.
- Page 89 Directive DEEE 2012/19/UE Numéro de registre DEEE : DE 67896761 La société WD Plus GmbH déclare par la présente que l’appareil 304943/20200828FS027 est conforme aux exigences fondamentales et aux autres dispositions pertinentes. Pour obtenir une déclaration de conformité complète, adressez-vous à : WD Plus GmbH, Wohlenbergstraße 16, 30179 Hanovre...
- Page 90 IMPORTANTI INFORMAZIONI SULLA SICUREZZA PER QUESTO APPARECCHIO • Prima di collegare l’apparecchio accertarsi che la tensione di rete disponibile corrisponda all’indica- zione riportata sulla targhetta! • Non usare il prodotto se il cavo o la spina sono dan- neggiati o difettosi! •...
- Page 91 • Non toccare le parti mobili o rotanti dell'apparec- chio quando è acceso! • Non accendere la macchina per il pane solo, se il cestello non è riempito correttamente con gli ingre- dienti. • Non rimuovere mai il cestello durante il funziona- mento! •...
- Page 92 • L’apparecchio può essere utilizzato dai bambini a partire dagli 8 anni di età e da persone con capacità fisiche, sensoriali o mentali ridotte o mancanza di esperienza e/o di conoscenza solo se sotto adeguata sorveglianza o se istruiti in merito all'utilizzo sicuro dell'apparecchio e ai pericoli che ne possono scatu- rire.
- Page 93 ATTENZIONE: L’apparecchio durante l’uso si ri- scalda molto! Rischio di ustioni! Grazie per aver scelto un prodotto di Arendo. Per utilizzare con sod- disfazione il prodotto acquistato, si prega di leggere attentamente le seguenti istruzioni per l’uso. Prima della messa in funzione della merce consegnata, verificare che sia integra, esente da difetti e non danneggiata.
- Page 94 2. Dati tecnici Alimentazione di ten- 230-240 V AC 50 Hz sione Potenza assorbita 580 W Peso 4452 g (apparecchio principale senza accessori) Caratteristiche • Piedini antiscivolo • Protezione contro il surriscaldamento • Cestello con rivestimento antiaderente • Temperatura costante •...
- Page 95 Numero Descrizione Coperchio Finestrella Display Elementi di comando Cestello Cucchiaio dosatore Misurino dosatore Pala impastatrice Gancio per estrarre la pala impastatrice Contenitore/inserto per yogurt con coperchio chiudibile Italiano...
- Page 96 4. Prima del primo utilizzo • Controllare che gli accessori e i componenti siano completi e privi di danni. • Pulire tutti i componenti come descritto nel capitolo in "Pulizia e cura" delle presenti istruzioni per l’uso. • Impostare la modalità di funzionamento in “Bake”. Cuocere senza contenuto per circa 10-15 minuti.
- Page 97 6. Messa in funzione / comando Dopo aver eseguito la prima messa in esercizio, potete mettere in funzione questo apparecchio. 1. Oliate il cestello e la pala impastatrice con margarina o burro adatti alla cottura in forno. 2. Prima dovete inserire il cestello nella macchina per il pane, ruo- tandolo in senso orario per farlo scattare in posizione.
- Page 98 7. Premere ripetutamente il tasto "Menù" per selezionare la moda- lità desiderata. 8. Regolate il grado di doratura con il tasto “Doratura”. Avete la pos- sibilità di scegliere tra 3 gradi di doratura (doratura leggera, dora- tura media e doratura scura). 9.
- Page 99 Se la doratura del pane è troppo chiara, potete adattare il tempo di cottura manualmente. Premete il tasto "Menù" e selezionate la mo- dalità “12 Bake”. Regolate il tempo con i tasti “Tempo+” e “Tempo-”. Premete infine il tasto “Start/Stop”, per avviare l’apparecchio. •...
- Page 100 8. Programmi Premendo il tasto menu ” è possibile selezionare il programma desiderato. Ogni volta che si tocca il tasto MENU, la visualizzazione del programma cambia. I vari programmi e le loro funzioni sono riassunti nel seguito. Per pane bianco o misto di farina di grano o di segale. Standard (Basic) La doratura e il peso sono regolabili e il tempo di ritardo è...
- Page 101 Per la preparazione di dessert, per es. pudding ecc. La doratura è regolabile. Il peso non è regolabile e il Dessert (7) tempo di ritardo non è disponibile. Durata del programma: 1 ora e 20 minuti Solo per l’impasto. Questo programma è destinato alla preparazione della pasta.
- Page 102 9. Selezione della dimensione del pane e del grado di doratura Premere il tasto "Dimensione/peso" per impostare la dimensione o il peso del pane. Si può scegliere tra i seguenti valori: 750 g (piccolo) o 1000 g (grande) La vostra scelta verrà indicata da una freccia sul display a destra. Si prega di notare che il tempo di cottura può...
- Page 103 11. Interruzione del programma Una volta avviato il programma, il funzionamento può essere inter- rotto in qualsiasi momento con il tasto "START/STOP". 12. Memoria Se l'alimentazione elettrica dell'apparecchio viene interrotta, il processo precedentemente attivato può essere automaticamente ripreso entro 10 minuti. Se l'interruzione dura più di 10 minuti, la macchina per il pane non può...
- Page 104 Infine inserire gli ingredienti nel cestello. A tale proposito, rispetta- re scrupolosamente la sequenza indicata nella ricetta. Di norma, si aggiunge prima il liquido, poi lo zucchero, il sale o la farina e infine il bicarbonato o il lievito. Una volta che gli ingredienti sono nel cestello, chiudere il coperchio della macchina per il pane.
- Page 105 Non appena il processo completo è terminato, viene emesso un se- gnale acustico. Premere il tasto “Start/Stop" per circa 2 secondi, per terminare il programma in esecuzione, oppure estrarre la spina. Una volta terminato il programma, è possibile rimuovere il pane aprendo il coperchio, ruotando cestello con i guanti da forno in senso antio- rario e estraendolo.
- Page 106 Pane con impasti pronti In questa macchina per il pane si possono utilizzare quasi tutti gli impasto per il pane disponibili in commercio. Tuttavia, sconsigliamo il pane di segale puro, in quanto non viene cotto in modo soddisfa- cente. Osservare le informazioni relative alle quantità sulla confezione e procedere come segue: - Accendere la macchina per il pane e inserire il liquido, come consi- gliato nell’impasto pronto.
- Page 107 5. Pesate lo zucchero gelificante secondo le indicazioni riportate sulla confezione e versate lo zucchero sulla mousse di frutta. Chiudete il cestello, ruotandolo in senso orario per farlo scattare in posizione (LOCK). Chiudere il coperchio dell'apparecchio. 6. Inserire la spina nella presa di corrente e selezionare il program- ma “Marmellata (Jam) (19) mediante il tasto “MENU’”.
- Page 108 1. Riempire circa 1 litro di latte nel contenitore dello yogurt. Poi ag- giungere circa 100 ml di yogurt maturo. Mescolare bene il com- posto. Nota: lo zucchero, gli aromi, la frutta e/o altri ingredienti dovrebbero essere aggiunto solo quando è pronto lo yogurt. Attenzione!: Prestate assolutamente attenzione di aver selezionato esclusivamente il programma "Yogurt (Yoghurt) (13)".
- Page 109 16.4 Programma 6 (ultraveloce) La macchina per il pane può cuocere più velocemente con il pro- gramma "Ultraveloce" rispetto agli altri programmi. Si tenga presen- te che la temperatura dell'acqua deve essere compresa tra 48 °C e 50 °C. L'influsso della temperatura è determinante per la qualità finale del pane.
- Page 110 Lievito o lievito in polvere Ingredienti secchi Liquido (ad es. acqua) Liquido (latte, acqua ecc.), uova, sale e latte in polvere ecc. Assicurarsi che la farina non sia completamente bagnata dal liquido quando viene aggiunta. Il lievito deve essere aggiunto alla farina sec- ca e non deve venire a contatto con il sale.
- Page 111 e ruotandolo in senso orario fino a quando non scatta in posizione. Se risultasse difficile estrarre la pala impastatrice dal pane, utilizzare l’apposito gancio. Usare un panno umido per pulire la parte restante della scatola e il coperchio. Pulire con cura la scatola, la finestrella di controllo e il co- perchio.
- Page 112 Guasto Motivo anomalia Risoluzione anomalie - È stato selezionato un - Selezionare il programma corretto. programma non adatto Gli ingredienti sono - Non aprire il coperchio mentre il - Il coperchio è stato stati mescolati in programma è in esecuzione. aperto troppo spesso modo non uniforme e - Verificare il posizionamento della...
- Page 113 Farina senza lievito in polvere La farina senza lievito in polvere è conosciuta anche come farina bianca. È adatta per la cottura rapida o per biscotti vari. Farina di glutine La farina di glutine ha un'elevata quantità di glutine e proteine. Questo tipo di farina conferisce all’impasto una certa elasticità.
- Page 114 Lievito in polvere Il lievito in polvere viene utilizzato per cuocere torte o pane con il "Programma - 9 ultraveloce". Il lievito in polvere non richiede una vera e propria "fase di lievitazione". Sale Il sale è adatto per migliorare il gusto del pane e il colore della crosta del pane.
- Page 115 Se il pane non lievita bene, nella maggior parte dei casi questo è dovuto al lievito! È possibile verificare se il lievito è ancora fresco e attivo nel modo seguente: 1. Versare mezzo bicchiere di acqua calda (45-50 °C) nel misurino dosatore.
- Page 116 Pane bianco Pane del contadino Dimensione del pane 1000 g Dimensione del pane 1000 g 350 ml 360 ml Acqua tiepida Acqua tiepida Farina 500 g Tipo di farina 1050 600 g Lievito 1/2 pacchetto Lievito secco 1 pacchetto 1 cucchiaio 1 cucchiaino Sale marino Sale...
- Page 117 Torta Pan di spagna Uova 125 g Zucchero Burro/margarina 125 g Zucchero vanigliato 1 bustina Latte 1/4 tazza Farina bianca 300 g Lievito in polvere 1 bustina Programma: 10 - Torta Preparazione: Mettere prima le uova, il burro, lo zucchero e lo zucchero vanigliato in una ciotola e mes- colare il composto fino a quando non diventa spumoso.
- Page 118 Direttiva RAEE 2012/19/UE Numero reg. RAEE: DE 67896761 Con la presente la ditta WD Plus GmbH dichiara che l'apparecchio 304943/20200828FS027 è conforme ai requisiti essenziali e alle rimanenti disposizioni in materia. Una dichiarazi- one di conformità completa è disponibile presso: WD Plus GmbH, Wohlenbergstraße 16,...
- Page 119 OBSERVACIONES IMPORTANTES DE SEGURIDAD PARA ESTE APARATO • Antes de conectar el aparato, asegúrese de que la tensión de red coincide con los datos que aparecen en la placa. • No utilice el aparato si el cable o el enchufe están dañados o defectuosos.
- Page 120 • No toque las piezas móviles o giratorias del aparato cuando esté encendido. • No encienda la panificadora si no se llenado el mol- de correctamente. • No saque el molde mientras esté funcionando. • No golpee el molde sobre un borde o una encimera para sacar el pan, ya que podría dañarlo.
- Page 121 del aparato y los peligros que pueden derivarse del mismo. Este producto no es un juguete. No deje que los niños se encarguen de la limpieza y el manteni- miento del aparato sin supervisión. • Se debe vigilar a los niños para que no jueguen con el aparato.
- Page 122 ATENCIÓN: ¡El aparato se calienta mucho du- rante el funcionamiento! ¡Peligro de quemadu- ras! Muchas gracias por escoger un producto de Arendo. Para que pueda disfrutar durante mucho tiempo de su adquisición, le rogamos que lea atentamente las siguientes instrucciones de uso. Antes de poner- lo en marcha, compruebe que el producto suministrado no presenta defectos ni daños.
- Page 123 2. Datos técnicos Suministro de energía 230-240 V CA 50 Hz Consumo de potencia 580 W Peso 4452 g (aparato principal sin accesorios) Propiedades • Pies antideslizantes • Protección contra sobrecalentamiento • Molde con revestimiento antiadherente • Temperatura constante • Función de mantenimiento de calor (1 hora) •...
- Page 124 Número Descripción Tapa Mirilla Pantalla Elementos de mando Molde Cuchara dosificadora Jarra medidora Gancho de amasar Varilla para retirar el gancho de amasar Pieza insertable/recipiente para el yogur con tapa de cierre Español...
- Page 125 4. Antes del primer uso • Compruebe que no falta ninguna pieza ni ninguna presenta da- ños. • Limpie todas las piezas como se describe en el capítulo «Limpieza y cuidado» de estas instrucciones de uso. • Ajuste el modo de funcionamiento «Hornear». Deje funcionar el aparato vacío durante unos 10-15 minutos.
- Page 126 6. Puesta en marcha/uso Una vez que haya llevado a cabo la primera puesta en marcha, puede poner en funcionamiento el aparato. 1. Engrase el molde y el gancho de amasar con margarina o mante- quilla aptas para hornear. 2. Primero, ponga el molde en la panificadora y gírelo en sentido de las agujas del reloj para fijarlo en su lugar.
- Page 127 7. Pulse de manera repetida el botón «Menú» para seleccionar el modo deseado. 8. Ajuste el nivel de tueste con el botón «Tueste». Puede elegir en- tre 3 niveles de tueste (claro, medio y oscuro). 9. Seleccione el peso del pan con el botón «Tamaño». Puede elegir entre «Pequeño»...
- Page 128 Una señal acústica indica que el programa ha finalizado. Si considera que el tueste del pan es demasiado claro, puede ajustar manualmente el tiempo de horneado. Pulse el botón «Menú» y se- leccione el modo «Horneado 12». Ajuste el tiempo con los botones «Tiempo+»...
- Page 129 8. Programa Pulse el botón del menú para seleccionar el programa deseado. La pantalla cambia cada vez que pulse el botón MENÚ. A continuación se resumen los distintos programas y funciones. Para pan blanco y de mezcla, de trigo o de harina de cente- Estándar (Basic) no.
- Page 130 Para la elaboración de postres como, p. ej. el pudin etc. El tueste no es configurable. El peso no se puede Postre (7) configurar, y el tiempo de demora no está disponible. Duración del programa: 1 hora y 20 minutos Solo para amasado.
- Page 131 9. Selección del tamaño del pan y nivel de tostado Pulse el botón «Tamaño/Peso» para seleccionar el tamaño o el peso del pan. Puede escoger entre los valores siguientes: 750 g (pequeño) o 1000 g (grande) Una flecha en la parte derecha de la pantalla mostrará su selección. Tenga en cuenta que el tiempo de horneado puede variar en fun- ción del peso y del tamaño del pan.
- Page 132 11. Detener el programa Puede detener el programa una vez que ha comenzado pulsando el botón «START/STOP». 12. Memoria Si se interrumpe el suministro de corriente del aparato, es posible reanudar el programa activado previamente en un plazo de 10 mi- nutos.
- Page 133 Coloque luego en el molde los ingredientes deseados. Respete el or- den de la receta. Por lo general, se añade en primer lugar el líquido, y luego el azúcar, la sal o la harina, seguido de la levadura o polvos de hornear.
- Page 134 Un pitido indica que el programa ha finalizado. Pulse el botón «START/ STOP» durante unos 2 segundos para finalizar el programa que está utilizando o para sacar el enchufe. Después de finalizar el programa, puede sacar el pan abriendo la tapa y girando - no se olvide de usar manoplas - el molde en sentido contrario a las agujas del reloj.
- Page 135 Panes a partir de mezclas de harina Puede utilizar prácticamente cualquier mezcla de harina de super- mercado en esta panificadora. No obstante, no le recomendamos hornear pan de centeno porque los resultados no son satisfactorios. Tenga en cuenta las cantidades en el paquete y proceda de la siguien- te manera: - Encienda la panificadora y ponga el líquido recomendado en el pa- quete de la mezcla de harina.
- Page 136 5. Pese el azúcar gelificante según la información que aparece en el paquete y viértalo sobre el puré de fruta. Fije el molde al aparato girándolo en sentido de las agujas del reloj (LOCK). Cierre la tapa del aparato. 6. Conecte el enchufe a la toma de corriente y seleccione con el botón «MENÚ»...
- Page 137 1. Llenar aproximadamente 1 litro de leche en el recipiente de yo- gur. A continuación, añada unos 100 ml de yogur maduro. Remo- ver bien la mezcla. Indicación: el azúcar, los aromas, las mezclas de frutas y/u otros in- gredientes deben añadirse cuando el yogur está preparado. ¡Atención!: Asegúrese de que ha elegido únicamente el programa «Yogur (Yoghurt) (13)».
- Page 138 16.4 Programa 6 (ultrarrápido) En comparación con otros programas, la panificadora puede hornear más rápido con este programa. Tenga en cuenta que la temperatura del agua debe estar entre 48 °C y 50 °C. La temperatura influye de forma decisiva en la calidad del pan. Si la temperatura del agua es in- ferior, es posible que el pan no leve correctamente y que el resultado se vea afectado de forma negativa.
- Page 139 Levadura o polvos de hornear Ingredientes secos Líquido (p. ej., agua) Asegúrese de que la harina no quede completamente empapada por el líquido. Añada la levadura sobre la harina seca, no debe entrar en contacto con la sal. Después de amasar la masa durante unos minutos, suena una se- ñal con varios pitidos seguidos.
- Page 140 Utilice la varilla para sacar el gancho de amasar si se ha quedado pegado al pan. Utilice un paño humedecido para limpiar el resto de la carcasa y la tapa. Limpie la carcasa, la mirilla y la tapa con cuidado. No use limpia- dores agresivos ni utensilios afilados.
- Page 141 Error Causa Solución de errores - Se ha seleccionado el - Seleccione el programa adecuado. programa inadecuado - No abra la tapa durante el progra- Los ingredientes no - Se ha abierto la tapa se han mezclado de demasiadas veces forma uniforme y el - Compruebe que el gancho de - La resistencia al giro es...
- Page 142 Harina sin polvos de hornear Esta harina es conocida como harina de trigo. Adecuada para hor- neados rápidos y diversas galletas. Harina de fuerza Esta harina tiene un contenido más alto de gluten y proteínas. Apor- ta a la masa una elasticidad determinada, que le permite mantener la forma dada.
- Page 143 Polvos de hornear Se utilizan para hornear bizcochos o panes en el «Programa - 9 Ul- trarrápido». Los polvos de hornear no necesitan una fase de levado. La sal sirve para mejorar el sabor del pan y el color de la corteza. ¡Respete siempre las indicaciones de la receta! Demasiada sal pue- de afectar al desarrollo de la levadura.
- Page 144 1. Vierta medio vaso medidor de agua caliente (45-50°C). 2. Añada una cucharadita de azúcar blanco y mezcle el contenido. A continuación, agregue dos cucharaditas de levadura al agua. 3. Coloque el vaso medidor durante unos 10 minutos en un lugar caliente sin dar vueltas al agua.
- Page 145 Pan blanco Pan campesino Tamaño del pan 1000 g Tamaño del pan 1000 g 350 ml 360 ml Agua templada Agua templada Harina 500 g Harina de tipo 1050 600 g Levadura 1/2 paquete Levadura seca 1 paquete 1 cucharadita 1 cucharadita Sal marina Azúcar...
- Page 146 Bizcocho Bizcocho Huevos 125 g Azúcar Mantequilla/margarina 125 g Azúcar avainillado 1 paquete Leche 1/4 taza Harina de trigo 300 g Polvos de hornear 1 paquete Programa: 10 - Bizcocho Preparación: Ponga en primer lugar los huevos, la mantequilla, el azúcar y el azúcar avainillado en un cuen- co y mezcle los ingredientes hasta que espumen.
- Page 147 Directiva WEEE 2012/19/UE Número de registro WEEE: DE 67896761 La empresa WD Plus GmbH declara por la presente que el aparato 304943/20200828FS027 satisface los requisitos esenciales y el resto de disposiciones pertinentes. Solicite una declaración de conformidad completa en: WD Plus GmbH, Wohlenbergstraße 16, 30179 Hannover (Alemania) Español...
- Page 148 WD Plus GmbH Wohlenbergstraße 16 D-30179 Hannover...