
Manuels Connexes pour Sime Planet Dewy 60 BFR


Sommaire des Matières pour Sime Planet Dewy 60 BFR
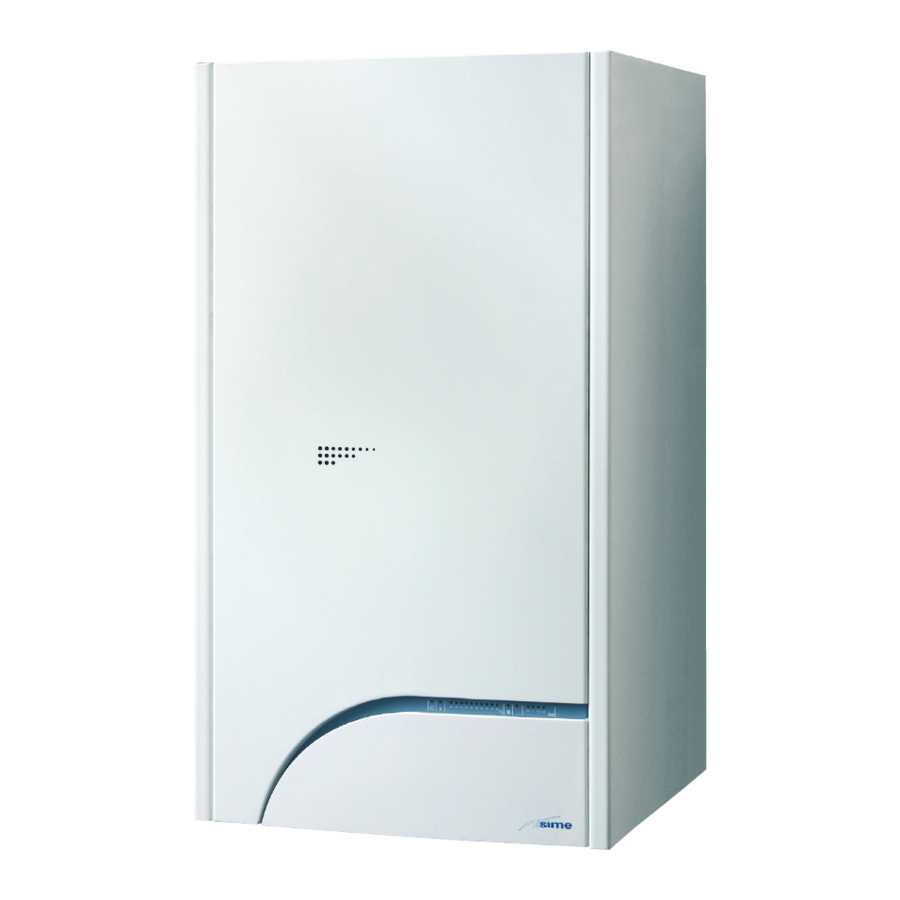
- Page 1 Installation Instruction and Care Guide Planet Dewy 60 BFR of Gas-Fired Wall Hung Hot Water Boilers...
-
Page 3: Table Des Matières
Installation Instruction and Care Guide Planet Dewy 60 BFR of Gas-Fired Wall Hung Hot Water Boilers TABLE OF CONTENTS WARNING : If the information in this manual DESCRIPTION OF THE BOILER is not followed exactly, a fire of explosion may 1. -
Page 4: Description Of The Boiler
“PLANET DEWY 60 BFR” with eletronic ANSI Z21. 13 and CSA 4.9 GAS FIRED LOW ignition, modulation, and direct sealed for- “PLANET DEWY 60 BFR” boilers are gas- PRESSURE STEAM AND HOT WATER BOI- ced-draft. The instructions given in this fired thermal appliances for central heating, LERS. -
Page 5: Technical Features
TECHNICAL FEATURES CLEARANCES FROM Model PLANET DEWY 60 BFR Units Natural gas Propane COMBUSTIBLE MATERIALS: Bottom: 0 mm (0 in.) Maximum input 61. 1 61. 1 Sides: 10 mm (0.4 in.) But/h 210,000 210,000 Vent: 10 mm (0.4 in.) Front: 0 mm (0 in.) Minimum input 24.3... -
Page 6: Installation
3. With control qualified installer, service agency or the gas It is essential that in rooms where the boi- unit code 8096301, supplied by Sime upon supplier and is familiar with the require- ler are installed at least as much air can request, a maximum of four boilers can be ments that are contained in this manual. -
Page 7: System Filling
long-term protection against corrosion and system at test pressures equal to or less FLUES/CHIMNEYS deposits, the use of inhibitors is recom- than 1/2 psi (3.5 kPa). The boiler shall be mended after cleaning the system. It is installed such that the gas ignition system The flue or chimney used to release the important to check the concentration of components are protected from water... - Page 8 TABLE 2 (Accessories PVC or CPVC) VENT ACCESSORIES Ø 3” VENT ACCESSORIES Ø 4” Load loss mm H O (“W.C.) Load loss mm H O (“W.C.) Intake Outlet Intake Outlet 45° curve MF 0.25 (0.00984) 0.30 (0.0118) 0. 1 0 (0,00394) 0.
-
Page 9: Positioning Of Outlet Terminals
POSITIONING 50 mm (2 in) at least from the outstide Table 1 shows approximate, non-binding OF OUTLET wall (fig. 5/a). minimum distances to be met for a building TERMINALS (fig. 5) of the type shown in fig. 5. Outlet terminals for forced draft systems The outlet terminal must be flush with the may be located on the outer walls of the Please refer to local codes for minimum... - Page 10 2.8. 1 Installation Methods for IPEX System 636 Type BH PVC or CPVC Gas Venting Systems (for Canada Only) System 636 PVC or CPVC Type BH Gas ceilings, and roof penetrations. regulatory authority. Venting Systems are third party certified to The venting system must be supported All fire stopping of venting shall be com- ULC S636.
- Page 11 of condensate. Reference the appliance tically at a maximum of every 5 feet (1.5 supporting structure to allow for free manufacturers' instructions regarding m). This maximum recommendation movement due to expansion and con- installation of necessary condensate should always be referenced against traction of the venting system.
- Page 12 8. Solvent Cementing shall be used to connect System 636 mer, or by the use of both primer and CPVC pipe and fittings. cement. For certain materials and in cer- (a) Gas Venting Applications Installation of tain situations, it is necessary to use a pri- plastic pipe and fittings for gas venting appli- (c) In instances where transitions between mer.
- Page 13 sdiction’s authorities. piece of scrap before you start the instal- been softened. More applications may be lation or if the weather changes during needed for hard surfaces and cold 1. Assemble proper materials for job (pro- the day. Using a knife or other sharp weather conditions.
- Page 14 13. Cementing; stir the System 636 ble, twist the pipe a 1/4 turn as you ly until initial set has taken place. cement or shake can before using. insert it. Follow IPEX set andcure times before Using the proper size applicator for the handling or testing pipe system.
- Page 15 2. Pipe must be cut as square as possible. cure times before handling or testing necessary. A diagonal cut reduces bonding area in the piping system. Our cure schedules allow a margin for the most effective part of the joint. safety, but for colder weather more time 14.
- Page 16 flame in working or storage areas. Be approved positive pressure self-contained when using welding torches or other equip- sure to work only in a well ventilated breathing apparatus. Do not smoke, eat or ment where sparks may be involved. space and avoid unnecessary skin con- drink while using these products.
- Page 17 Average Number of Joints/Qt. Of IPEX Cement* * These figures are estimates based on our laboratory tests. Due to the many variables in the field, these figures should be used as a gene- ral guide only. used “as received” in original containers. should be taken to avoid contact with 10.
- Page 18 2.8.2 Instructions special stainless your area as well as National codes: USA - system to appliance, including maximum steel venting system for use National fuel gas code ANSI-Z223. 1 CANA- horizontal length, maximum height, and with Category II, III, IV appliances DA -CAN\CGA-B149.
- Page 19 incorporates a silicone sealing gasket. monoxide poisoning. que of 40 in/lbs. and a maximum of 50 Examine all components to insure that 1. Align pipes and push them together as in/lbs. gasket integrity has remained during ship- far as they will go (to indent or at least NOTE: Some flue collars may require the ping.
- Page 20 Side wall venting installation through the thimble (attach the termi- collection of condensate at any location (see figure 6/a below) nation first - note “UP” arrow) and then in the assembly. Fasteners must not back to the appliance as per illustration penetrate the components of the 1.
- Page 21 Vertical venting the framed opening and secure with pipe. Seal as required using high tem- (see figure 6/b - 6/d) nails or screws as required. perature silicone. NOTE: The vent termination must be at 3. Refer to JOINT PROCEDURE (figure 6) 6.
- Page 22 Above the roof system. cable with a minimum rated capacity of (see figure 6/c) 500 lbs (227 kgf) to each of the four 1. Install the Guy Band below the Rain Cap anchor holes. NOTE: When Z-Vent must be extended using the 10-24 screw and nut provi- 3.
- Page 23 Existing masonry chimney up with opening in chimney (A rope may 4. The rain cap may now be installed using (See figure 6/e) be used to facilitate lowering of pipe). the JOINT PROCEDURE (figure 6). NOTE: A masonry chimney flue may be used 2.
-
Page 24: Electrical Connection
The electrical plant must comply with local cables of section 0.5 mm . To gain access SIME shall not be held liable for injury or standards and all cables must comply with to boiler connector (3) remove the control damage resulting from failure to ground low safety voltage requirements. - Page 25 2.9.4 Wiring diagram Fig. 9...
-
Page 26: Logica Remote Control
2. 1 0 LOGICA REMOTE CONTROL – Holiday programme: the programme is – Anti-bacterial. interrupted for the holiday period and All the boiler's functions can be managed automatically restarted on returning by a optional digital multifunctional device home. 2. 1 0. 1 Installation code 8092204 for the remote of the boi- –... - Page 27 Maximum limit of delivery The delivery temperature is limited to the maximum set value. temperature Variation of the maximum speed of the The increase per minute of the prescribed delivery temperature value sent delivery temperature in °C is limited to the imposed value. Activation of adaptation With the activation of the adaptation, the pre-set value transmitted to the boiler regulator is adapted to the effective heat need.
- Page 28 Input function terminal 3-4 The freely programmable input (terminals 3-4) allows three different functions to be activated. The parameter has the following significance: 1 = If an external sensor is connected, the display will show the temperature of the external sensor ( _ _ = no sensor connected, function disabled). 2 = With an external contact, it is possible to switch-over to "reduced pre- set value of the ambient temperature".
-
Page 29: Characteristics
CHARACTERISTICS 3. 1 ELECTRONIC BOARD achieve a burner pressure of approxi- tion of a bridge will cancel both the mately 6.5 mm H O (0.26 “W.C.) for programmed technical delay and Electronic components are guaran- NATURAL GAS and 9.5 mm H the minimum pressure operating teed to operate in a temperature (0.37 “W.C.) for PROPANE GAS. -
Page 30: Electronic Ignition
1 Ignition electrode earth faston 3 Fuse (1,6 AT) 5 “ANN. RIT.” connector 6 “POT. ACC.” trimmer 8 D.H.W. potentiometer 9 Detector electrode faston 10 “POT. RISC.” trimmer 11 C.H. potentiometer 12 Selector REMOTE/OFF/ /SUMMER/WINTER/RESET 13 DIP SWITCH 14 Connector “Modureg Sel.” 15 Connector “Albatros”... -
Page 31: Smoke Pressure Switch
SMOKE PRESSURE SWITCH SYSTEM AVAILABLE HEAD “FOOT” 26.8 The pressure switch signal value is measured by a specific tool connec- ted to the positive and negative pres- sure ixtures. The pressure switch is 20. 1 factory set to 35-45 Pa (0. 1 4-0. 1 8 “W.C.). - Page 32 1 Gas valve 2 Condensation drain siphon 3 Boiler pump (not supplied) 4 Fan 5 Heating probe (SM) 6 Safety thermostat 95°C 7 Exhaust thermostat CONNECTIONS 8 Primary exchanger M C.H. flow 9 Diaphragm C.H. return 10 Differential pressure switch 11 Water pressure transducer S3 Condensation drain 12 Air relief valve...
-
Page 33: Use And Maintenance
USE AND MAINTENANCE 4. 1 GAS CONVERSION (fig. 23) – Close the gas cock. – Replace the injector (pos. 30) and the relevant gasket (pos. 45). – Test for soundness all the gas connections using soapy water or appropriate products. DO NOT USE NAKED FLAMES. - Page 34 Single modules are calibrated in heating position. “∆p air” ADJUSTMENT “∆p air-gas” ADJUSTMENT To measure “∆p air” simply con- To measure “∆p air-gas” simply Air pressure switch Pressostato aria Air pressure switch Pressostato aria nect the differential pressure connect the positive socket on gauge, equipped with a decimal the differential pressure gauge to scale in mmH...
-
Page 35: Dismantling The Casing
DISMANTLING THE CASING For easy boiler maintenance the shell can be completely removed by following these instructions (fig. 19): - Pull the front panel forward to unhook it from the pegs on the sides. - Unscrew the two screws that secure the instrument panel to the sides - Unscrew the four screws that secure the side to the instrument panel sup-... - Page 36 periodically inspected the intake and Any dirt within the vent shall be remo- 4.4.3 Fan and pump the exhaust terminal for debris or ved with a soft brush. snow removed from blocking the ter- As common vent can not be used in The pump and fan don’t need any lubri- mination.
- Page 37 Manuel de montage, d'utilisation et d'entretien Planet Dewy 60 BFR des chaudières murales à gaz TABLES DES MATIÈRES AVERTISSEMENT: En ne suivant pas scrupu- leusement les informations contenues dans DESCRIPTION DE LA CHAUDIÈRE ce manuel vous risquez de provoquer une 1.
-
Page 38: Description De La Chaudière
DESCRIPTION DE LA CHAUDIERE 1. 1 INTRODUCTION Ils sont conformes aux normes ANSI Z21 tions sur le PLANET DEWY 60 BFR à 13 et CSA 4.9 CHAUDIÈRE À GAZ DE PRO- modulation et allumage électroniques, à Appareils thermiques à gaz servant à le DUCTION D'EAU CHAUDE SANITAIRE ET DE tirage forcé... - Page 39 DONNEES TECHNIQUES DISTANCES DES MATÉRIAUX Modèle PLANET DEWY 60 BFR Unités Gaz naturel Propane COMBUSTIBLES : Bas: 0 mm (0”) Puissance nominale 61. 1 61. 1 Côtés: 10 mm (0.4”) But/h 210,000 210,000 Évent: 10 mm (0.4”) Devant: 0 mm (0”) Puissance minimale 24.3...
-
Page 40: Montage
Il est indi- de par Sime, il est possible de gérer un maximum qualifié, le SAV ou la compagnie de gaz, connais- spensable que les pièce dans lesquelles se trou- de quatre chaudières. -
Page 41: Remplissage De L'installation
tretien, en suivant les indications du fabricants le fonctionnement ou les opérations d'entretien l'atmosphère utilisez un conduits d'évacuation, (des tests spécifiques sont en vente chez votre de la chaudière (remplacement des circulateurs ou une cheminée, conforme au normes en et revendeur). - Page 42 TABLEAU 2 (Accessoires PVC ou CPVC) ACCESSOIRES Ø 3” ACCESSOIRES Ø 4” Perte de charge mm H O (“W.C.) Perte de charge mm H O (“W.C.) Aspiration Aspiration Evacuation Evacuation Coude à 45° MF 0.25 (0.00984) 0.30 (0.0118) 0. 1 0 (0,00394) 0.
- Page 43 POSITIONNEMENT (2”) au moins du mur extérieur (fig. 5/a). rieurs d'immeubles. DES TERMINAUX DE SORTIE (fig. 5) Le Tableau 1 illustre les distances minimum Les terminaux de sortie des systèmes à tirage appropriées, non obligatoires, sur les immeu- Le terminal de sortie doit dépasser de 50 mm forcé...
- Page 44 2.8. 1 Méthodes d’installation pour les Système d’Evacuation des Gaz de Type BH en CPVC du Système IPEX 636 (seulement pour Canada) Les Systèmes d’Evacuation des Gaz de Combustion en PVC/CPVC du Système 636TM sont cer- tifiés par des tiers et classés au ULC S636 conformément au Code d’Installations au Gaz Naturel <...
- Page 45 descente vers l’appareil de 20 mm (0.8”) par (b) Les systèmes en PVC ou CPVC du Système librement le mouvement d’expansion et de 1000 mm (40”) pour éviter tout dépôt de la 636 doivent être soutenus aussi bien hori- contraction du système d’évacuation. Dans condensation.
- Page 46 8. Cimentage au Solvant tuyaux et raccords en PVC. Seuls IPEX dement que le ciment tout seul. En plus, l’utilisa- Système 636 CPVC colle à solvant (de cou- tion d’un apprêt peut représenter un facteur de (a) Applications d’Evacuation des Gaz. leur orange) doit être utilisé...
- Page 47 Enrobage de ciment d’épaisseur suffisante deur du système de tuyauterie à raccorder). pouvez racler ou gratter quelques millimètres sur l’extrémité du tuyau à 13 mm (1/2") au- de la surface apprêtée. A cause des condi- dessus de la profondeur de la cavité du rac- 2.
- Page 48 moyenne de ciment dans la cavité du rac- excès du tuyau et du raccord, y compris de la l’applicateur indiqué aux dimensions du tuyau cord; éviter tout dépôt de ciment dans la bague ou du collier, car il assouplira inutile- et des raccords à...
- Page 49 prise rapide). que contiennent des solvants à haute résistance lieu plus chaud lorsqu’ils ne sont pas utilisés qui s’évaporent plus rapidement à des tempéra- ou entres les assemblages pour qu’ils restent 6. Contrôler la pénétration et l’assouplissement tures élevées, en particulier en cas de vent fluides (Pas inférieur à...
- Page 50 Mesures de sécurité Ne pas fumer, manger ou boire durant l’utilisa- raient produire des étincelles. tion de ces produits. Eviter tout contact avec la Des vapeurs inflammables en provenance de Pour plus de 40 ans, des millions d’assemblage peau, les yeux et les vêtements. joints cimentés restent à...
- Page 51 Nombre moyen de Joints/Qt. Du ciment d'IPEX * Diamètre du tuyau (pouces) Nombre d’articulations * Ces chiffres sont des estimations basées sur nos tests de laboratoire. Etant donné les nombreuses variables dans ce domaine, ces chiffres ne doivent être utilisés que comme guidages généraux. emballage original.
- Page 52 2.8.2 Instructions spéciales pour et les Contrôles des Installations de votre ventage à l’appareil y compris la longueur système dìéventage en acier région Code national USANational fuel gas horizontale maximale, la hauteur maximale, et inoxydable pour les Catégories code ANSI Z2231 CANADA CAN/CGA les espaces libres (espaces d’air) de l’instal- d’Equipements II, III, IV.
- Page 53 d’évacuation Z comprend un joint d’étanchéité de monoxyde de carbone qui est un poison. in/lbs. au silicone. 1. Aligner les tuyaux et les pousser aussi loin Vérifier tous les éléments pour s’assurer de que possible (jusqu’au renfoncement ou au NB: Pour certains colliers de tuyaux il peut leur intégrité...
- Page 54 Installation évacuation sur mur latéraux travers les cosses, (fixer d’abord la terminai- les 12 pouces (305 mm) pour éviter l’accu- (voir fig. 6/a ci-dessous) son remarquer la flèche HAUT.) et ensuite mulation de condensation dans toute portion vers l’installation voir PROCEDURE D’AS- de l’assemblage.
- Page 55 Evacuation verticale rière l’ouverture encadrée et fixer à l’aide de 6. Installer le support supérieur autour du tuyau (vour figure 6/b- 6/d) clous ou de vis. et contre le collier de solin (fig. 6/b -6/d- 6/e- 6/c). N.B. La terminaison de l’évacuation doit être au 3.
- Page 56 AU-DESSUS DU TOIT hauban pour tenir le système. vanisé d’une portée minimum de 500 lbs (voir figure 6/c) (227 kgf) à chacun des quatre trous 1. Installer le hauban au-dessous du cha- d’ancrage. NB: Lorsque l’évacuation Z doit être peau d’évacuation à l’aide de la vis 10-24 3.
- Page 57 Cheminée en maçonnerie existante de tuyau qui descendent le long de la che- 4. On peut maintenant installer le chapeau (voir fig. 6/e) minée jusqu’à l’extrémité de l’ouverture d’évacuation en suivant la PROCEDURE de la cheminée (on peut utiliser une D’ASSEMBLAGE (fig.6).
-
Page 58: Câblage Électrique
(fig. 8 - pos. C) REMARQUE: La chaudière doit être branchée sur un système de mise à la terre efficace. Les câbles doivent être placés dans le SIME décline toute responsabilité en cas de 2.9.2 Branchement “Logica respect des spécifications pour la basse préjudice personnel ou de dégât matériel... - Page 59 2.9.4 Schéma électrique Fig. 9...
-
Page 60: Logica Remote Control
2. 1 0 LOGICA REMOTE CONTROL – Fonction de copie pour un transfert aisé tionnement au moyen du réseau télépho- du programme de chauffage au jour sui- nique avec contact externe ou d’un Toutes les fonctions de la chaudière peu- vant ou au précédent. - Page 61 Limitation de la La température départ chauffage est limitée à la valeur programmée. température départ Variation de la température de La variation à la minute de la température départ en °C est limitée à la valeur départ chauffage programmée. Activation de l’adaptation En activant la correction ambiante, la valeur prescrite transmise au régula- teur de la chaudière est adaptée aux besoins de chaleur effectifs.
-
Page 62: Sonde Exterieure
Mode d’action du contact externe Si l’entrée D3/D4 est reliée à un contact externe à potentiel zéro (paramètre 64 = 2 ou 3) on peut déterminer le mode d’action du contact (télérupteur du téléphone ou bien contact fenêtre). Le mode d’action spécifie l’état du contact dans lequel la fonction désirée est active. -
Page 63: Caractéristiques
CARACTERISTIQUES 3. 1 CARTE ELECTRONIQUE de façon à obtenir au brûleur une se positionnera, pendant 1 minute pression d’environ 6,5 mmH environ, sur la pression minimum de Les composants électroniques sont (0.26 “W.C.) pour GAZ NATUREL et modulation pour retourner ensuite garantis pour fonctionner au sein de 9,5 mmH O (0.37 “W.C.) pour... -
Page 64: Sondes Depart Et Capteur Pression Eau
LEGENDE 1 Faston de terre électrode allumage 3 Fusible (1,6 AT) 5 Connecteur “ANN. RIT” 6 Trimmer “POT. ACC.” 8 Potentiomètre sanitaire 9 Faston électrode de détection 10 Trimmer “POT. RISC.” 11 Potentiomètre chauffage 12 Sélecteur À DISTANCE/OFF/ÉTÉ/HIVER/REARMEMENT 13 DIP SWITCH 14 Connecteur “Modureg Sel.”... -
Page 65: Pressostat De Fumée
3500 4000 débit, sur le graphique de la fig. 14. DEBIT (l/h) Pour la tuyaterie hydronic typique pour a PORTATA (l/h) Planet Dewy 60 BFR utilisant un hydrau- 13.21 17.66 US gal/min lique compensateur, voyez l’arrangement dans la figure 14/a. - Page 66 LÉGENDE 1 Vanne gaz 2 Siphon d’évacuation condensation RACCORDS 3 Pompe bouilleur (non fournie) Départ installation 4 Ventilateur Retour installation 5 Sonde départ (SM) 6 Thermostat sécurité 95°C Evacuation condensats 7 Thermostat fumées Remplissage installation 8 Échangeur primaire Entrée primaire préparateur ECS 9 Diaphragme Retour primaire préparateur ECS 10 Pressostat différentiel...
-
Page 67: Utilisation Et Entretien
UTILISATION ET ENTRETIEN 4. 1 CHANGEMENT INJECTEUR GAZ (fig. 16) – Fermer le robinet gaz. – Remplacer l’injecteur (pos. 30) et le joint (pos. 45) avec ceux qui sont fournis dans le kit de transformation. – Vérifier l’étanchéité en utilisant de l'eau savonneuse ou des produits spéciaux, en évitant de recourir à... - Page 68 La réglage se fait sur une chaudière en position chauffage. REGLAGE “∆p air” REGLAGE “∆p air-gaz” Pressostat air Pressostato aria Pressostat air Pour mesurer le “∆p air”, il suffit Pressostato aria Pour mesurer le “∆p air-gaz”, il de brancher le manomètre dif- suffit de relier la prise positive du feréntiel, équipé...
-
Page 69: Demontage De La Jaquette
DEMONTAGE DE LA JAQUETTE Pour un entretien aisé de la chaudière, on peut démonter complètement les jaquettes en se conformant aux instruc- tions suivantes (fig. 19): – Tirer en avant le panneau frontal de manière à le décrocher des tétons à encastrement placés sur les côtés. - Page 70 4.4.2 Entretien de la ventilation vacuation contre les résidus formés pression positive. suite au blocage de l’appareil. Le système de ventilation devrait être Le nettoyage devrait s’effectuer au 4.4.3 Ventilateur et pompe contrôler tous les 6 mois contre les moyen d’une brossemoelleuse. dommages et les dépôts éventuels ainsi En tant que buse commune, elle ne peut La pompe et le ventilateur n’ont pas...
- Page 72 Fonderie Sime S.p.A - Via Garbo, 27 - 37045 Legnago (Vr) Tel. + 39 0442 631111 - Fax +39 0442 631292 - www.sime.it...