Table des Matières
Publicité
Les langues disponibles
Les langues disponibles
Liens rapides
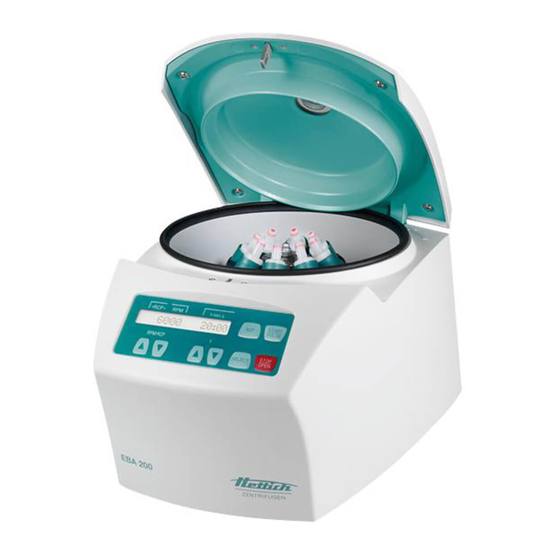
EBA 200
Bedienungsanleitung...................................................... 9
DE
Operating Manual............................................................ 43
EN
Mode d'emploi ................................................................. 77
FR
Istruzioni per l'uso .......................................................... 111
IT
Rev. 05 / 05.2020
Andreas Hettich GmbH & Co. KG
EBA 200 S
AB1800DEENFRIT
Publicité
Chapitres
Table des Matières

Manuels Connexes pour Hettich EBA 200


Sommaire des Matières pour Hettich EBA 200
- Page 1 EBA 200 EBA 200 S Bedienungsanleitung............9 Operating Manual............43 Mode d'emploi ..............77 Istruzioni per l'uso ............111 Rev. 05 / 05.2020 Andreas Hettich GmbH & Co. KG AB1800DEENFRIT...
- Page 2 +49 (0)7461 / 705-1125 info@hettichlab.com, service@hettichlab.com www.hettichlab.com © 2014 by Andreas Hettich GmbH & Co. KG All rights reserved. No part of this publication may be reproduced without the prior written permission of the copyright owner. Änderungen vorbehalten! , Modifications reserved! , Sous réserve de modifications ! , Con riserva di modifiche! AB1800DEENFRIT / Rev.
- Page 3 Herstellers / of the manufacturer / du fabricant / del costruttore Andreas Hettich GmbH & Co. KG Föhrenstraße 12 D-78532 Tuttlingen Germany Hiermit erklären wir in alleiniger Verantwortung, dass das bezeichnete Gerät, inklusive dem mit dem Gerät konformitätsbewertetem Zubehör laut Zubehörliste der technischen Dokumentation dieses Geräts, der Richtlinie über...
- Page 4 The following additional European directives and ordinances have been applied: Machinery Directive 2006/42/EU EMC directive 2014/30/EU Low voltage directive 2014/35/EU RoHS II Directive 2011/65/EU (without involvement of a notified body) Ordinance (EC) No. 1907/2006 (REACH) (without involvement of a notified body) Applied standards: According to the list of applied standards, which is part of the product file.
- Page 5 Für dieses Gerät gültige Normen und Vorschriften Das Gerät ist ein Produkt mit einem sehr hohen technischen Niveau. Es unterliegt umfangreichen Prüf- und Zertifizierungsverfahren gemäß folgenden Normen und Vorschriften in deren jeweils gültigen Fassung: Elektrische und mechanische Sicherheit für Konstruktion und Endprüfung: Normbaureihe: IEC 61010 (entspricht der Normenreihe DIN EN 61010) ...
- Page 6 Standards and regulations which apply to this device The device is a high-end technical product. It is subject to extensive testing and certification procedures according to the following standards and regulations in their respectively valid version: Electrical and mechanical safety for design and final testing: Standard series: IEC 61010 (conform to standards of DIN EN 61010) ...
-
Page 7: Normes Et Règles En Vigueur Pour Cet Appareil
Normes et règles en vigueur pour cet appareil Cet appareil est un produit avec un très haut niveau technique. Il est soumis à des vastes procédures de vérification et de certification, d'après les normes et prescriptions suivantes, dans leur version actuelle : Sécurité... - Page 8 Norme e direttive valide per questo apparecchio L'apparecchio è un dispositivo di elevatissimo livello tecnico. È sottoposto a numerosi procedimenti di collaudo e certificazione, in conformità alle seguenti norme e direttive nella corrispondente versione di validità: Sicurezza elettrica e meccanica per la costruzione ed il collaudo finale: Serie di norma: IEC 61010 (corrisponde alla serie di norma DIN EN 61010) ...
-
Page 9: Table Des Matières
Deckel öffnen und schließen ..........................17 11.1 Deckel öffnen .............................17 11.2 Deckel schließen............................17 Ein- und Ausbau des Rotors..........................18 12.1 EBA 200..............................18 12.2 EBA 200 S ..............................18 Beladen des Rotors............................19 Bedien- und Anzeigeelemente ..........................20 14.1 Angezeigte Symbole ..........................20 14.2 Tasten des Bedienfeldes..........................20 14.3 Einstellmöglichkeiten..........................21 Zentrifugations–Parameter eingeben ........................22... - Page 10 19.6 Die Betriebsstunden und die Anzahl der Zentrifugationsläufe abfragen ............35 19.7 Zyklenzähler auf Null zurücksetzen ......................36 Relative Zentrifugalbeschleunigung (RCF)......................37 Zentrifugation von Stoffen oder Stoffgemischen mit einer höheren Dichte als 1,2 kg/dm ........37 Notentriegelung..............................37 Pflege und Wartung ............................38 23.1 Zentrifuge (Gehäuse, Deckel und Schleuderraum)..................38 23.1.1 Oberflächenreinigung und -pflege.......................38 23.1.2...
-
Page 11: Anwendung Dieser Bedienungsanleitung
Anwendung dieser Bedienungsanleitung Vor Benutzung der Zentrifuge ist die Bedienungsanleitung zu lesen und zu beachten. Die Bedienungsanleitung ist Teil des Gerätes. Sie muss stets griffbereit aufbewahrt werden. Wird das Gerät an einem anderen Ort aufgestellt, muss die Bedienungsanleitung mitgegeben werden. Bedeutung der Symbole Symbol am Gerät: Achtung, allgemeine Gefahrenstelle. -
Page 12: Bestimmungsgemäße Verwendung
Die Zentrifuge ist nur für diesen Verwendungszweck bestimmt. Eine andere oder darüber hinausgehende Benutzung gilt als nicht bestimmungsgemäß. Für hieraus entstehende Schäden haftet die Firma Andreas Hettich GmbH & Co. KG nicht. Zur bestimmungsgemäßen Verwendung gehört auch das Beachten aller Hinweise aus der Bedienungsanleitung und die Einhaltung der Inspektions- und Wartungsarbeiten. -
Page 13: Technische Daten
Technische Daten Andreas Hettich GmbH & Co. KG Hersteller D-78532 Tuttlingen Modell EBA 200 EBA 200 S 1800 1800-01 1802 1802-01 Netzspannung ( 10%) 200 - 240 V 1 100 - 127 V 1 200 - 240 V 1 100 - 127 V 1... -
Page 14: Sicherheitshinweise
Sicherheitshinweise Werden nicht alle Hinweise in dieser Bedienungsanleitung befolgt, kann beim Hersteller kein Gewährleistungsanspruch geltend gemacht werden. Die Zentrifuge ist so aufzustellen, dass sie standsicher betrieben werden kann. Vor Benutzung der Zentrifuge unbedingt den Rotor auf festen Sitz prüfen. ... -
Page 15: Transport Und Lagerung
Gehängen und Zubehörteilen beeinträchtigen können, ist nicht erlaubt. Reparaturen dürfen nur von einer vom Hersteller autorisierten Person ausgeführt werden. Es dürfen nur Originalersatzteile und zugelassenes Originalzubehör der Firma Andreas Hettich GmbH & Co. KG verwendet werden. Es gelten die folgenden Sicherheitsbestimmungen: EN / IEC 61010-1 und EN / IEC 61010-2-020 sowie deren nationalen Abweichungen. -
Page 16: Transportsicherung Entfernen
Transportsicherung entfernen Die Transportsicherung muss unbedingt entfernt werden. Die Transportsicherung aufbewahren, da sie vor dem Transport des Gerätes, wieder eingebaut werden muss. Das Gerät darf nur mit eingebauter Transportsicherung transportiert werden. Um das Gerät während des Transports vor Beschädigungen zu schützen, wird der Motor fixiert. Diese Transportsicherung muss bei der Inbetriebnahme des Gerätes entfernt werden. -
Page 17: Deckel Öffnen Und Schließen
Deckel öffnen und schließen 11.1 Deckel öffnen Der Deckel lässt sich nur öffnen, wenn die Zentrifuge eingeschaltet ist und der Rotor stillsteht. Sollte dies nicht möglich sein, siehe Kapitel "Notentriegelung". Wenn der Zyklenzähler aktiviert ist, wird nach einem Zentrifugationslauf, während dem Öffnen des Deckels, kurzzeitig die verbleibende Anzahl der Laufzyklen (Zentrifugationsläufe) angezeigt. -
Page 18: Ein- Und Ausbau Des Rotors
Druckpunkts löst sich der Rotor vom Konus der Motorwelle. Die Spannmutter drehen, bis sich der Rotor von der Motorwelle abheben lässt. Den Rotor von der Motorwelle abheben. 12.2 EBA 200 S Der Rotor darf nur vom Kundendienst ein- und ausgebaut werden. 18/146 Rev. 05 / 05.2020 AB1800DEENFRIT... -
Page 19: Beladen Des Rotors
Beladen des Rotors Standard-Zentrifugiergefäße aus Glas sind belastbar bis RZB 4000 (DIN 58970 Teil 2). Den Rotor auf festen Sitz prüfen. Die Rotoren dürfen nur symmetrisch beladen werden. Die Zentrifugiergefäße müssen gleichmäßig auf alle Plätze des Rotors verteilt werden. Zugelassene Kombinationen siehe Kapitel "Anhang/Appendix, Rotoren und Zubehör/Rotors and accessories". -
Page 20: Bedien- Und Anzeigeelemente
Bedien- und Anzeigeelemente >RCF< t/min:s START PULSE RPM/RCF STOP SELECT OPEN 14.1 Angezeigte Symbole Deckel entriegelt. Deckel verriegelt. Rotationsanzeige. Die Rotationsanzeige leuchtet rotierend gegen den Uhrzeigersinn auf, solange sich der Rotor dreht. 14.2 Tasten des Bedienfeldes Die Drehzahl direkt eingeben. RPM/RCF Bei Gedrückthalten der Taste ändert sich der Wert mit zunehmender Geschwindigkeit. -
Page 21: Einstellmöglichkeiten
14.3 Einstellmöglichkeiten t/min Laufzeit. Einstellbar von 1 - 99 min, in 1 Minuten-Schritten. t/sec Laufzeit. Einstellbar von 1 - 59 s, in 1 Sekunden-Schritten. Dauerlauf "--:--". Parameter t/min und t/sec auf Null stellen. Drehzahl Einstellbar ist ein Zahlenwert von 200 RPM bis zur maximalen Drehzahl des Rotors. Einstellbar in 10er Schritten. -
Page 22: Zentrifugations-Parameter Eingeben
Zentrifugations–Parameter eingeben 15.1 Direkte Eingabe der Zentrifugations–Parameter Die Drehzahl (RPM), die relative Zentrifugalbeschleunigung (RCF), der Zentrifugierradius (RAD) und die Laufzeit SELECT können direkt mit den Tasten eingegeben werden, ohne dass zuvor die Taste gedrückt werden muss. Die eingestellten Zentrifugations–Parameter werden erst nach Start des Zentrifugationslaufes gespeichert. 15.1.1 Drehzahl (RPM) Beispiel:... -
Page 23: Eingabe Der Zentrifugations-Parameter Mit Der Taste "Select
15.2 Eingabe der Zentrifugations–Parameter mit der Taste "SELECT" Die Laufzeit kann in Minuten und Sekunden eingestellt werden (Parameter t/min und t/sec). Um den Dauerlauf einzustellen müssen die Parameter t/min und t/sec auf Null gestellt werden. In der Zeit- Anzeige (t/min:s) erscheint "--:--". Beispiel: >RCF<... - Page 24 Beispiel: Beispiel: RPM-Anzeige (RPM) RCF-Anzeige ( RCF ) Die Taste drücken. >RCF< t/min:s >RCF< t/min:s SELECT RPM : Drehzahl. RAD/mm : Zentrifugierradius. Die Anzeige und Eingabe des Zentrifu- gierradius ist nur möglich, wenn die RCF- Anzeige ( RCF ) angewählt ist. ...
-
Page 25: Zentrifugation
Während eines Zentrifugationslaufes dürfen sich gemäß EN / IEC 61010-2-020, in einem Sicherheitsbereich von 300 mm um die Zentrifuge herum, keine Personen, Gefahrstoffe und Gegenstände befinden. Nach jedem Zentrifugationslauf, während dem Entriegeln des Deckels, wird kurzzeitig die verbleibende Anzahl der Laufzyklen (Zentrifugationsläufe) angezeigt (nur bei EBA 200). Beispiel: >RCF<... -
Page 26: Dauerlauf
Beispiel: Beispiel: RPM-Anzeige (RPM) RCF-Anzeige ( RCF ) Nach Ablauf der Zeit oder bei Abbruch des >RCF< t/min:s >RCF< t/min:s Zentrifugationslaufes durch Drücken der Taste STOP OPEN , erfolgt der Auslauf mit der eingestellten Bremsstufe. Die Bremsstufe wird angezeigt. Beispiel 16.2 Dauerlauf Beispiel:... -
Page 27: Kurzzeitzentrifugation
16.3 Kurzzeitzentrifugation Beispiel: Beispiel: RPM-Anzeige (RPM) RCF-Anzeige ( RCF ) Bei Bedarf die Taste drücken, um die >RCF< t/min:s >RCF< t/min:s RPM-Anzeige (RPM) oder die RCF- Anzeige ( RCF ) anzuwählen. Die gewünschten Zentrifugations–Parameter >RCF< t/min:s >RCF< t/min:s eingeben (siehe Kapitel "Zentrifugations–Parameter eingeben"). -
Page 28: Zyklenzähler
Nachdem der Rotor ausgetauscht wurde, muss der Zyklenzähler wieder auf "0" zurückgesetzt werden (siehe Kapitel "Zyklenzähler auf "0" zurücksetzen"). 18.2 EBA 200 S Die Verwendungsdauer des Rotors ist nicht begrenzt. Aus diesem Grund wird der Zyklenzähler nicht benötigt und ist deshalb ausgeschaltet. -
Page 29: System-Informationen Abfragen
19.1 System-Informationen abfragen Folgende System-Informationen können abgefragt werden: Geräte-Modell, Programmversion des Gerätes, Typ-Nummer des Gerätes, Herstellungsdatum des Gerätes, Seriennummer des Gerätes, Typ des Frequenzumrichters, Programmversion des Frequenzumrichters Die Abfrage kann, bei Stillstand des Rotors, wie folgt durchgeführt werden: STOP OPEN Der Vorgang kann jederzeit durch Drücken der Taste... - Page 30 Die Taste drücken. Beispiel: SELECT Seriennummer des Gerätes. >RCF< t/min:s Die Taste drücken. Beispiel: Beispiel: SELECT Typ des Frequenzumrichters. >RCF< t/min:s >RCF< t/min:s Die Taste drücken. Beispiel: SELECT Programmversion des Frequenzum- >RCF< t/min:s richters. ...
-
Page 31: Akustisches Signal
19.2 Akustisches Signal Das akustische Signal ertönt: nach Auftreten einer Störung im 2 s-Intervall. nach Beendigung des Zentrifugationslaufes und Stillstand des Rotors im 30 s-Intervall. Durch Drücken einer beliebigen Taste wird das akustische Signal beendet. Das akustische Signal kann, bei Stillstand des Rotors, wie folgt eingestellt werden: STOP OPEN Der Vorgang kann jederzeit durch Drücken der Taste... -
Page 32: Optisches Signal Nach Beendigung Des Zentrifugationslaufes
Die Taste drücken, um die Einstellung zu START >RCF< t/min:s PULSE speichern. >RCF< t/min:s Die Taste einmal drücken, um das Menü Beispiel: STOP OPEN " Settings" zu verlassen oder zweimal >RCF< t/min:s >RCF< t/min:s drücken, um das " MACHINE MENU " zu verlassen. -
Page 33: Automatisches Entriegeln Des Deckels Nach Dem Zentrifugationslauf
19.4 Automatisches Entriegeln des Deckels nach dem Zentrifugationslauf Es kann eingestellt werden, ob der Deckel, nach dem Zentrifugationslauf, automatisch entriegelt oder nicht. Bei Stillstand des Rotors kann dies wie folgt eingestellt werden: STOP OPEN Der Vorgang kann jederzeit durch Drücken der Taste abgebrochen werden. -
Page 34: Hintergrundbeleuchtung Der Anzeige
19.5 Hintergrundbeleuchtung der Anzeige Zum Einsparen von Energie kann eingestellt werden, dass nach einem Zentrifugationslauf, die Hintergrund- beleuchtung der Anzeige nach 2 Minuten ausschaltet. Bei Stillstand des Rotors kann dies wie folgt eingestellt werden: STOP OPEN Der Vorgang kann jederzeit durch Drücken der Taste abgebrochen werden. -
Page 35: Die Betriebsstunden Und Die Anzahl Der Zentrifugationsläufe Abfragen
19.6 Die Betriebsstunden und die Anzahl der Zentrifugationsläufe abfragen Die Betriebsstunden sind in interne und externe Betriebsstunden aufgeteilt. Interne Betriebsstunden: Gesamte Zeit, die das Gerät eingeschaltet war. Externe Betriebsstunden: Gesamte Zeit der bisherigen Zentrifugationsläufe. Die Abfrage kann, bei Stillstand des Rotors, wie folgt durchgeführt werden: STOP OPEN Der Vorgang kann jederzeit durch Drücken der Taste... -
Page 36: Zyklenzähler Auf Null Zurücksetzen
19.7 Zyklenzähler auf Null zurücksetzen Nachdem der Rotor ausgetauscht wurde, muss der Zyklenzähler wieder auf Null zurückgesetzt werden. Der Zyklenzähler darf nur auf Null zurückgesetzt werden, wenn zuvor der Rotor gegen einen neuen Rotor ausgetauscht wurde. Der Zyklenzähler kann, bei Stillstand des Rotors, wie folgt zurückgesetzt werden: STOP OPEN Der Vorgang kann jederzeit durch Drücken der Taste... -
Page 37: Relative Zentrifugalbeschleunigung (Rcf)
Relative Zentrifugalbeschleunigung (RCF) Die relative Zentrifugalbeschleunigung (RCF) wird als Vielfaches der Erdbeschleunigung (g) angegeben. Sie ist ein einheitsfreier Zahlenwert und dient zum Vergleich der Trenn- und Sedimentationsleistung. Die Berechnung erfolgt nach der Formel: ... -
Page 38: Pflege Und Wartung
Pflege und Wartung Das Gerät kann kontaminiert sein. Vor der Reinigung den Netzstecker ziehen. Bevor ein anderes als das vom Hersteller empfohlene Reinigungs- oder Dekontaminationsverfahren angewandt wird, hat sich der Benutzer beim Hersteller zu vergewissern, dass das vorgesehene Verfahren das Gerät nicht schädigt. ... -
Page 39: Rotor Und Zubehör
23.2 Rotor und Zubehör Bei der EBA 200 S darf der Rotor, aus Sicherheitsgründen, nur vom Kundendienst ein- und ausgebaut werden. 23.2.1 Reinigung und Pflege Um einer Korrosion und Materialveränderungen vorzubeugen muss der Rotor und das Zubehör regelmäßig mit Seife oder einem milden Reinigungsmittel und einem feuchten Tuch gereinigt werden. -
Page 40: Autoklavieren
Autoklavieren Bei der EBA 200 S darf der Rotor nicht autoklaviert werden. Bei der EBA 200 darf der Rotor bei 121°C / 250°F (20 min) autoklaviert werden. Nach 10 Autoklavierungen muss der Rotor aus Sicherheitsgründen ausgetauscht werden. Nach dem Autoklavieren muss gewartet werden, bis der Rotor auf Umgebungstemperatur abgekühlt ist, bevor er wieder verwendet werden darf. -
Page 41: Störungen
Störungen Lässt sich der Fehler laut Störungstabelle nicht beheben, so ist der Kundendienst zu benachrichtigen. Bitte den Zentrifugentyp und die Seriennummer angeben. Beide Nummern sind auf dem Typenschild der Zentrifuge ersichtlich. Einen NETZ-RESET durchführen: Den Netzschalter ausschalten (Schalterstellung "0"). ... -
Page 42: Netzeingangssicherungen Wechseln
Vor der Rücksendung des Gerätes muss die Transportsicherung eingebaut werden. Wird das Gerät oder dessen Zubehör an die Firma Andreas Hettich GmbH & Co. KG zurückgesandt, so muss dieses, zum Schutz von Personen, Umwelt und Material, vor dem Versand dekontaminiert und gereinigt werden. - Page 43 Opening the lid ............................51 11.2 Closing the lid ............................51 Installation and removal of the rotor ........................52 12.1 EBA 200..............................52 12.2 EBA 200 S ..............................52 Loading the rotor ...............................53 Operating and display elements ........................54 14.1 Displayed symbols .............................54 14.2 Control panel keys .............................54 14.3...
- Page 44 19.6 Querying the hours of operation and the number of centrifugation runs ............69 19.7 Resetting the cycle counter to zero......................70 Relative centrifugal force (RCF) ........................71 Centrifugation of materials or mixtures of materials with a density higher than 1.2 kg/dm .......71 Emergency unlocking ............................71 Maintenance and servicing..........................72 23.1...
-
Page 45: How To Use These Operating Instructions
How to use these operating instructions Before using the centrifuge, read the operating instructions and observe them. The operating instructions are a part of the device. They must always be kept readily available. If the device is set up at a different location, the operating instructions must be provided with it. Symbol meanings Symbol on the device: Attention, general hazard area. -
Page 46: Intended Use
The centrifuge is only meant for this purpose. Another use or one which goes beyond this, is considered to be non-intended. The company Andreas Hettich GmbH & Co. KG is not liable for damage resulting from this. -
Page 47: Technical Specifications
Technical specifications Andreas Hettich GmbH & Co. KG Manufacturer D-78532 Tuttlingen Model EBA 200 EBA 200 S Type 1800 1800-01 1802 1802-01 Mains voltage ( 10%) 200 - 240 V 1 100 - 127 V 1 200 - 240 V 1... -
Page 48: Notes On Safety
Notes on safety No claim of warranty will be considered by the manufacturer unless ALL instructions in this manual have been followed. The centrifuge should be installed on a good, stable base. Before using the centrifuge absolutely check the rotor for firm placement. ... -
Page 49: Transport And Storage
Repairs must only be carried out by personnel authorised to do so by the manufacturer. Only original spare parts and original accessories licensed by the Andreas Hettich GmbH & Co. KG company are allowed to be utilised. -
Page 50: Removing The Transport Securing Device
Removing the transport securing device It is imperative that the transport securing device be removed. Keep the transport securing device in a safe place since it must be installed again before transporting the device. The device may only be transported with the transport securing device installed. To protect the device from damage during transport, the motor is fixed in place. -
Page 51: Opening And Closing The Lid
Opening and closing the lid 11.1 Opening the lid The lid can only be opened if the centrifuge is switched on and the rotor is stationary. If this shouldn't be possible, see the "Emergency unlock" chapter. When the cycle counter is activated, after a centrifugation run, while opening the lid, the remaining number of running cycles (centrifugation runs) is briefly displayed. -
Page 52: Installation And Removal Of The Rotor
Turn the clamping nut until the rotor can be lifted up from the motor shaft. Lift up the rotor from the motor shaft. 12.2 EBA 200 S The rotor may only be installed and removed by Customer Service. 52/146 Rev. 05 / 05.2020 AB1800DEENFRIT... -
Page 53: Loading The Rotor
Loading the rotor Standard centrifuge containers of glass will not stand RCF values exceeding 4000 (DIN 58970, pg. 2). Check the rotor for firm seating. The rotors must be loaded symmetrically. The centrifuge containers have to be distributed evenly on all rotor positions. -
Page 54: Operating And Display Elements
Operating and display elements >RCF< t/min:s START PULSE RPM/RCF STOP SELECT OPEN 14.1 Displayed symbols Lid unlocked. Lid locked. Rotation display. The rotation display lights up, rotating counterclockwise, as long as the rotor is turning. 14.2 Control panel keys Input the speed directly. RPM/RCF If the key is kept pressed, the value changes with increasing speed. -
Page 55: Setting Options
14.3 Setting options t/min Runtime. Adjustable from 1 - 99 min, in steps of 1 minute. t/sec Runtime. Adjustable from 1 - 59 s, in steps of 1 second. Continuous run "--:--". Set the parameters t/min and t/sec to zero. Speed A number value from 200 rpm to the maximum speed of the rotor can be set. -
Page 56: Entering Centrifugation Parameters
Entering centrifugation parameters 15.1 Direct input of the centrifugation parameters The speed (RPM), the relative centrifugal force (RCF), the centrifuging radius (RAD) and the runtime can be input SELECT directly with the keys without previously having to press the key. The set centrifugation parameters are only stored after starting the centrifugation run. -
Page 57: Input Of The Centrifugation Parameters With The "Select" Key
15.2 Input of the centrifugation parameters with the "SELECT" key The runtime can be set in minutes and seconds (parameters t/min and t/sec). In order to set the continuous run, the parameters t/min and t/sec must be set to zero. In the time display (t/min:s), "--:--"... - Page 58 Example: Example: RPM display (RPM) RCF display ( RCF ) Press the key. >RCF< t/min:s >RCF< t/min:s SELECT RPM : Speed. RAD/mm : Centrifuging radius. It is only possible to display and input the centrifuging radius if the RCF display ( RCF ) is activated.
-
Page 59: Centrifugation
In accordance with EN / IEC 61010-2-020, no persons, hazardous substances or objects may be within a safety range 300 mm around the centrifuge during a centrifugation run. After each centrifugation run, while the lid is unlocking, the remaining number of running cycles (centrifugation runs) will be briefly displayed (only on the EBA 200). Example: >RCF<... -
Page 60: Continuous Run
Example: Example: RPM display (RPM) RCF display ( RCF ) After the time elapses or if the centrifugation run is >RCF< t/min:s >RCF< t/min:s STOP OPEN aborted by pressing the key, the run-out occurs with the set brake stage. The brake stage is displayed. -
Page 61: Short-Term Centrifugation
16.3 Short-term centrifugation Example: Example: RPM display (RPM) RCF display ( RCF ) Press the key to activate the RPM display >RCF< t/min:s >RCF< t/min:s (RPM) or the RCF display ( RCF ) as needed. Enter the desired centrifugation parameters (see the >RCF<... -
Page 62: Cycle Counter
After the rotor has been exchanged, the cycle counter must be reset to "0" (see chapter "Resetting the cycle counter to '0' "). 18.2 EBA 200 S The period of use of the rotor is not limited. For this reason, the cycle counter is not required and is therefore switched off. -
Page 63: Querying System Information
19.1 Querying system information The following system information can be queried: Device model and its maximum speed, Program version of the device, Type number of the device, Device date of manufacture, Device serial number, Frequency converter type ... - Page 64 Press the key. Example: SELECT Device serial number. >RCF< t/min:s Press the key. Example: Example: SELECT Frequency converter type. >RCF< t/min:s >RCF< t/min:s Press the key. Example: SELECT Frequency converter program version. >RCF< t/min:s ...
-
Page 65: Acoustic Signal
19.2 Acoustic signal The acoustic signal sounds: after a malfunction occurs in a 2-second interval. after ending the centrifugation run and the rotor is at a standstill in a 30-second interval. The acoustic signal is ended by pressing any key. If the rotor is at a standstill, the acoustic signal can be set as follows: STOP OPEN... -
Page 66: Optical Signal After Ending The Centrifugation Run
Press the button to save the setting. START >RCF< t/min:s >RCF< t/min:s PULSE Press the key once to exit the " Example: STOP OPEN Settings" >RCF< t/min:s >RCF< t/min:s menu or press twice to exit the " MACHINE MENU ". -
Page 67: Automatic Unlocking Of The Lid After The Centrifugation Run
19.4 Automatic unlocking of the lid after the centrifugation run It can be set whether the lid should automatically unlock or not after the centrifugation run. With the rotor at a standstill, this can be set as follows: STOP OPEN The procedure can be aborted at any time by pressing the key. -
Page 68: Backlighting Of The Display
19.5 Backlighting of the display To save energy, it can be set that, after a centrifugation run, the backlighting of the display switches off after 2 minutes. With the rotor at a standstill, this can be set as follows: STOP OPEN The procedure can be aborted at any time by pressing the key. -
Page 69: Querying The Hours Of Operation And The Number Of Centrifugation Runs
19.6 Querying the hours of operation and the number of centrifugation runs The hours of operation are divided into internal and external hours of operation. Internal hours of operation: Total time the device was switched on. External hours of operation: Total time of the previous centrifugation runs. With the rotor at a standstill, the query can proceed as follows: STOP OPEN... -
Page 70: Resetting The Cycle Counter To Zero
19.7 Resetting the cycle counter to zero After the rotor has been exchanged, the cycle counter must be reset to zero again. The cycle counter may only be reset to zero if the rotor has been exchanged for a new rotor first. With the rotor at a standstill, the cycle counter can be reset as follows: STOP OPEN... -
Page 71: Relative Centrifugal Force (Rcf)
Relative centrifugal force (RCF) The relative centrifugal force (RCF) is given as a multiple of the acceleration of gravity (g). It is a unit-free value and serves to compare the separation and sedimentation performance. These values are calculated using the formula below: ... -
Page 72: Maintenance And Servicing
Maintenance and servicing The device can be contaminated. Pull the mains plug before cleaning. Before any other cleaning or decontamination process other than that recommended by the manufacturer is applied, the user has to check with the manufacturer that the planned process does not damage the device. ... -
Page 73: Rotor And Accessories
23.2 Rotor and accessories On the EBA 200 S, the rotor may only be installed and removed by Customer Service for safety reasons. 23.2.1 Cleaning and care To avoid corrosion and changes to the materials, the rotor and accessories have to be cleaned regularly with soap or a mild cleaning agent and a moist cloth. -
Page 74: Autoclaving
Autoclaving On the EBA 200 S, the rotor must not be autoclaved. On the EBA 200, the rotor may be autoclaved at 121°C / 250°F (20 min). After 10 autoclaving cycles, the rotor must be exchanged for safety reasons. After autoclaving, it must be waited until the rotor has cooled down to the ambient temperature before it may be used again. -
Page 75: Faults
Faults If the fault cannot be eliminated with the help of the fault table, please inform Customer Service. Please specify the type of centrifuge and the serial number. Both numbers can be found on the name plate of the centrifuge. Perform a MAINS RESET: ... -
Page 76: Change Mains Input Fuses
Before returning the device, a transport securing device has to be installed. If the device or its accessories are returned to Andreas Hettich GmbH & Co. KG, in order to provide protection for people, the environment and materials, it has to be decontaminated and cleaned before being shipped. - Page 77 Ouvrir le couvercle .............................85 11.2 Fermer le couvercle ...........................85 Montage et démontage du rotor ........................86 12.1 EBA 200..............................86 12.2 EBA 200 S ..............................86 Chargement du rotor ............................87 Eléments de commande et d'affichage......................88 14.1 Pictogrammes ............................88 14.2 Touches du champ de commande ......................88 14.3...
- Page 78 19.6 Demander les heures de fonctionnement et le nombre de cycles de centrifugation ........ 103 19.7 Remettre le compteur de cycles à zéro....................104 Accélération centrifuge relative (RCF)......................105 Centrifugation de matières et de mélanges d'une densité supérieure à 1,2 kg/dm ........
-
Page 79: Utilisation De Ce Mode D'emploi
Utilisation de ce mode d'emploi Lisez et respectez impérativement les consignes et indications contenues dans le mode d'emploi avant d'utiliser la centrifugeuse. Le mode d'emploi fait partie intégrante de l'appareil. Vous devez le conserver de manière à toujours être à portée de main. -
Page 80: Utilisation Conforme
Toute utilisation en dehors ou au delà de ce cadre est considérée comme non conforme. L'entreprise Andreas Hettich GmbH & Co. KG décline toute responsabilité pour tout dommage en résultant. L'utilisation conforme comprend également le respect de toutes les indications contenues dans le mode d'emploi et des travaux d'inspection et d'entretien. -
Page 81: Données Techniques
Données techniques Andreas Hettich GmbH & Co. KG Fabricant D-78532 Tuttlingen Modèle EBA 200 EBA 200 S Type 1800 1800-01 1802 1802-01 Tension du réseau ( 10%) 200 - 240 V 1 100 - 127 V 1 ... -
Page 82: Consignes De Sécurité
Consignes de sécurité Aucune demande garantie ne pourra être revendiquée auprès du fabricant si les indications données dans ce mode d'emploi ne sont pas toutes respectées. Veiller à la stabilité de la centrifugeuse. Avant d’utiliser la centrifuge, il est indispensable de vérifier la fixation correcte du rotor. ... -
Page 83: Transport Et Stockage
Etendue de la livraison Les accessoires suivants sont fournis avec la centrifugeuse: 1 câble de raccordement 2 fusibles 8 réducteurs 1059 (uniquement EBA 200 S) 1 clé mâle six-pans 1 mode d'emploi 1 fiche de notes concernant la sécurité du transport 1 fiche de notes concernant le déverrouillage de secours... -
Page 84: Retirer Les Dispositifs De Sécurité Pour Le Transport
Retirer les dispositifs de sécurité pour le transport Retirez impérativement les dispositifs de sécurité pour le transport. Conservez ces dispositifs de sécurité afin de les réutiliser lors du transport ultérieur de l'appareil (leur montage est obligatoire). Le transport de l'appareil est exclusivement autorisé avec les dispositifs de sécurité correspondants. Pour protéger l'appareil pendant le transport, on fixe le moteur. -
Page 85: Ouvrir Et Fermer Le Couvercle
Ouvrir et fermer le couvercle 11.1 Ouvrir le couvercle Vous ne pouvez ouvrir le couvercle que si la centrifugeuse est en marche et le rotor à l'arrêt. Si cela n'est pas possible, consulter le chapitre "Déverrouillage d'urgence". Si le compteur de cycles est activé, le nombre de cycles de centrifugation restants s'affiche brièvement, après un cycle de centrifugation, pendant l'ouverture du couvercle. -
Page 86: Montage Et Démontage Du Rotor
Tourner l'écrou jusqu'à pouvoir soulever le rotor de l'arbre moteur. Ôter le rotor de l'arbre moteur. 12.2 EBA 200 S Seul le service après-vente est habilité à monter et démonter le rotor. 86/146 Rev. 05 / 05.2020 AB1800DEENFRIT... -
Page 87: Chargement Du Rotor
Chargement du rotor Des récipients standard de centrifugation en verre sont résistants jusqu' à un ACR de 4000 (DIN 58970, partie 2). Vérifier la stabilité d'assise du rotor. Les rotors doivent uniquement être chargés de manière symétrique. Les conteneurs de centrifugation doivent être uniformément répartis sur toutes les positions du rotor. -
Page 88: Eléments De Commande Et D'affichage
Eléments de commande et d'affichage >RCF< t/min:s START PULSE RPM/RCF STOP SELECT OPEN 14.1 Pictogrammes Couvercle déverrouillé. Couvercle verrouillé. Affichage de la rotation. L'affichage de rotation brille en tournant dans le sens inverse des aiguilles d'une montre tant que le rotor tourne. 14.2 Touches du champ de commande ... -
Page 89: Réglages Possibles
14.3 Réglages possibles t/min Durée de fonctionnement . Réglable de 1 à 99 min, en étapes de 1 minute. t/sec Durée de fonctionnement . Réglable de 1 à 59 s, en étapes de 1 seconde. Fonctionnement continu " --:-- ". Mettre les paramètres t/min et t/sec sur zéro. Vitesse de rotation Vous pouvez saisir une valeur numérique pour paramétrer un régime de 200 RPM jusqu'à... -
Page 90: Saisir Les Paramètres De Centrifugation
Saisir les paramètres de centrifugation 15.1 Saisie directe des paramètres de centrifugation Vous pouvez saisir directement la vitesse de rotation (RPM), l'accélération centrifuge relative (RCF), le rayon de centrifugation (RAD) et la durée de fonctionnement avec les touches sans devoir appuyer préalablement la SELECT touche Les paramètres de centrifugation réglés ne sont enregistrés qu'après démarrage du cycle de centrifugation. -
Page 91: Saisie Des Paramètres De Centrifugation Avec La Touche "Select
15.2 Saisie des paramètres de centrifugation avec la touche "SELECT" Vous pouvez régler la durée de fonctionnement en minutes et secondes (paramètres t/min et t/sec ). Pour tourner en fonctionnement continu il faut mettre les paramètres t/min et t/sec sur zéro. L'affichage temps (t/min:s) indique "... - Page 92 Exemple : Exemple : affichage RPM (RPM) affichage RCF ( RCF ) Appuyez la touche. >RCF< t/min:s >RCF< t/min:s SELECT RPM : vitesse de rotation (rotation par minute). RAD/mm : rayon de centrifugation. L'affichage et la saisie du rayon de centrifugation n'est possible que si l'affichage RCF ( RCF ) est sélectionné.
-
Page 93: Centrifugation
300 mm autour de la centrifugeuse. Après le cycle de centrifugation, pendant le déverrouillage du couvercle, le nombre de cycles de centrifugation restants s’affiche brièvement (uniquement sur le modèle EBA 200). Exemple : >RCF<... -
Page 94: Fonctionnement Continu
Exemple : Exemple : affichage RPM (RPM) affichage RCF ( RCF ) A échéance du temps paramétré ou en cas d'arrêt du >RCF< t/min:s >RCF< t/min:s STOP OPEN cycle de centrifugation avec la touche , l'arrêt se déclenche avec le niveau de freinage paramétré. Le niveau de freinage s'affiche. -
Page 95: Cycle De Centrifugation Court
16.3 Cycle de centrifugation court Exemple : Exemple : affichage RPM (RPM) affichage RCF ( RCF ) Au besoin, appuyez la touche pour >RCF< t/min:s >RCF< t/min:s sélectionner l'affichage RPM (RPM) ou l'affichage RCF ( RCF ). Saisir les paramètres de centrifugation souhaités (voir >RCF<... -
Page 96: Compteur De Cycles
Après remplacement du rotor, remettre le compteur de cycles sur "0" (voir chapitre "Remettre compteur de cycles à "0"). 18.2 EBA 200 S La durée d'utilisation du rotor n'est pas limitée. C'est pourquoi le compteur de cycles est inutile et donc désactivé. -
Page 97: Demander Des Informations Sur Le Système
19.1 Demander des informations sur le système Vous pouvez demander les informations-système suivantes: Modèle d'appareil et sa vitesse de rotation maximale, Version du programme de l'appareil, numéro du type de l'appareil, Date de fabrication de l'appareil, ... - Page 98 Die Taste drücken. Exemple: SELECT Numéro de série de l'appareil. >RCF< t/min:s Appuyez la touche. Exemple : Exemple : SELECT Type du convertisseur de fréquence. >RCF< t/min:s >RCF< t/min:s Appuyez la touche. Exemple : SELECT Version du programme du convertisseur >RCF<...
-
Page 99: Signal Sonore
19.2 Signal sonore Le signal sonore retentit: en intervalles de 2 secondes en cas de dérangement. en intervalles de 30 secondes une fois le cycle de centrifugation terminé et le rotor arrêté. Appuyez n'importe quelle touche pour arrêter le signal sonore. Lorsque le rotor est à... -
Page 100: Signal Optique À La Fin Du Cycle De Centrifugation
Appuyez la touche pour enregistrer le START >RCF< t/min:s PULSE réglage. >RCF< t/min:s Appuyez cette touche une fois pour quitter Exemple : STOP OPEN le menu >RCF< t/min:s >RCF< t/min:s " Settings" ou deux fois pour quitter le "... -
Page 101: Déverrouillage Automatique Du Couvercle Après Le Cycle De Centrifugation
19.4 Déverrouillage automatique du couvercle après le cycle de centrifugation Vous pouvez paramétrer si le couvercle doit se déverrouiller automatiquement ou pas après le cycle de centrifugation. Lorsque le rotor est à l'arrêt, vous pouvez procéder comme suit pour ce faire: STOP OPEN Vous pouvez à... -
Page 102: Eclairage D'arrière-Plan De L'affichage
19.5 Eclairage d'arrière-plan de l'affichage Pour économiser de l'énergie, vous pouvez paramétrer si, après un cycle de centrifugation, l'éclairage d'arrière-plan de l'affichage doit s'éteindre au bout de 2 minutes. Lorsque le rotor est à l'arrêt, vous pouvez procéder comme suit pour ce faire: STOP OPEN Vous pouvez à... -
Page 103: Demander Les Heures De Fonctionnement Et Le Nombre De Cycles De Centrifugation
19.6 Demander les heures de fonctionnement et le nombre de cycles de centrifugation Les heures de fonctionnement sont répartie en heures de service internes et externes. Heures de service internes: durée totale pendant laquelle l'appareil était enclenché. Heures de service externes: durée totale des cycles de centrifugation effectués jusque maintenant. Lorsque le rotor est à... -
Page 104: Remettre Le Compteur De Cycles À Zéro
19.7 Remettre le compteur de cycles à zéro Après remplacement du rotor, il faut remettre le compteur de cycles à zéro. Ne remettez le compteur de cycles à zéro qu'après remplacement de l'ancien rotor par un neuf. Lorsque le rotor est à l'arrêt, vous pouvez réinitialiser le compteur de cycles comme suit: STOP OPEN Vous pouvez à... -
Page 105: Accélération Centrifuge Relative (Rcf)
Accélération centrifuge relative (RCF) L'accélération centrifuge relative (RCF) est indiqué en tant que multiple de l'accélération gravitationnelle (g). Il s'agit d'une valeur dépourvue d'unité, qui sert à la comparaison entre la puissance de séparation et de sédimentation. Le calcul s’effectue à l’aide de la formule suivante: ... -
Page 106: Entretien Et Maintenance
Entretien et maintenance L'appareil est peut-être contaminé. Retirer la prise de secteur avant de nettoyer. Avant d'utiliser une procédure de nettoyage ou de décontamination autre que celle recommandée par le fabricant, l'utilisateur vérifiera auprès du fabricant que la procédure prévue n'endommage pas l'appareil. ... -
Page 107: Rotor Et Accessoires
23.2 Rotor et accessoires Pour des raisons de sécurité, le montage et démontage du rotor sur le modèle EBA 200 S doit exclusivement être réalisé par le service après-vente. 23.2.1 Nettoyage et entretien Afin de prévenir la corrosion et toute modification des matériaux, il faut nettoyer régulièrement le rotor et lesaccessoires avec du savon ou un détergent doux et un chiffon humide. -
Page 108: Autoclave
Sur le modèle EBA 200 S, la stérilisation du rotor en autoclave n'est pas autorisée. Sur le modèle EBA 200, le rotor peut être stérilisé en autoclave à 121°C / 250°F (20 min). Pour des raisons de sécurité, il faut remplacer le rotor après 10 stérilisations par autoclave. -
Page 109: Défauts
Défauts Si l'erreur ne peut pas être éliminée d'après le tableau des défauts, il faut alors avertir le service après-vente. Veuillez indiquer le type de centrifuge et le numéro de série. Les deux numéros sont indiqués sur la plaque signalétique de la centrifugeuse. Effectuer une RÉINITIALISATION DU SECTEUR : ... -
Page 110: Changer Les Fusibles D'entrée De Secteur
Avant de renvoyer l'appareil, il faut monter le dispositif de fixation pour le transport. Dans le cas où l'appareil ou ses accessoires doivent être retournés à la société Andreas Hettich GmbH & Co. KG, il faut les décontaminer et les nettoyer avant expédition, dans le but d'assurer la protection des personnes, de l'environnement et du matériel. - Page 111 11.2 Chiudere il coperchio ..........................119 Montaggio e smontaggio del rotore .........................120 12.1 EBA 200..............................120 12.2 EBA 200 S ...............................120 Carico del rotore..............................121 Elementi di comando e di visualizzazione .......................122 14.1 Simboli esposti ............................122 14.2 Tasti del campo di comando ........................122 14.3...
- Page 112 19.6 Consultazione delle ore di funzionamento e della quantità di processi di centrifugazione ....... 137 19.7 Resettare su zero il contatore cicli ......................138 Accelerazione centrifuga relativa (RCF)......................139 Centrifugazione di sostanze o di miscele di sostanze con densità maggiore di 1,2 kg/dm ......
-
Page 113: Impiego Di Queste Istruzioni Per L'uso
Impiego di queste istruzioni per l'uso Prima della messa in funzione della centrifuga leggere ed osservare le istruzioni per l'uso. Le istruzioni per l'uso sono una componente dell'apparecchiatura. Devono essere custodite in modo da essere sempre accessibili. Se l'apparecchiatura viene installata in un altro luogo, questa deve venire accompagnata dalle istruzioni per l'uso. -
Page 114: Conformità Di Impiego
Le centrifuga è destinata solo a questo scopo d'impiego. Un diverso od ulteriore tipo di impiego non è regolamentare. La ditta Andreas Hettich GmbH & Co. KG non si prende carico di alcuna responsabilità nel caso di danni da ciò derivanti. -
Page 115: Dati Tecnici
Dati tecnici Andreas Hettich GmbH & Co. KG Costruttore D-78532 Tuttlingen Modello EBA 200 EBA 200 S Tipo 1800 1800-01 1802 1802-01 Tensione di rete ( 10%) 200 - 240 V 1 100 - 127 V 1 ... -
Page 116: Indicazioni Inerenti La Sicurezza
Indicazioni inerenti la sicurezza Se non vengono rispettate tutte le avvertenze riportate in queste istruzioni per il funzionamento, non può essere accettata da parte del costruttore alcuna richiesta di garanzia. La centrifuga deve venire posizionata in modo sicuro. Prima di utilizzare la centrifuga, è... -
Page 117: Trasporto Ed Immagazzinaggio
Con la centrifuga vengono forniti i seguenti accessori: 1 cavo di allacciamento 2 fusibili 8 riduzioni 1059 (solo EBA 200 S) 1 chiave a brugola esagonale 1 Istruzioni per l'uso 1 foglio delle istruzioni per il dispositivo di sicurezza per il trasporto 1 foglio delle istruzioni per lo sbloccaggio di emergenza La centrifuga viene fornita completa con rotore ad angolo (8x15 ml). -
Page 118: Rimuovere Il Dispositivo Di Sicurezza Per Il Trasporto
Rimuovere il dispositivo di sicurezza per il trasporto Il dispositivo di sicurezza per il trasporto deve venire assolutamente rimosso. Conservare il dispositivo di sicurezza per il trasporto, poiché prima di un ulteriore trasporto deve venire reinstallato. Il trasporto dell'apparecchiatura è ammesso solo con dispositivo di sicurezza per il trasporto installato. Per proteggere l’apparecchiatura durante il trasporto, il motore viene fissato. -
Page 119: Aprire E Chiudere Il Coperchio
Aprire e chiudere il coperchio 11.1 Aprire il coperchio Il coperchio si lascia aprire solo, quando la centrifuga è inserita ed il rotore è fermo. Se ciò non dovesse essere possibile, vedere al capitolo "Sbloccaggio di emergenza". Quando il contatore cicli è attivato, dopo ogni operazione di centrifugazione e durante l'apertura del coperchio, viene esposta per breve tempo la quantità... -
Page 120: Montaggio E Smontaggio Del Rotore
Girare il dado di bloccaggio, fino a quando il rotore si lascia sollevare dall'albero motore. Sollevare il rotore dall'albero motore. 12.2 EBA 200 S Il montaggio e lo smontaggio del rotore è consentito solo al personale di servizio di assistenza clienti. 120/146 Rev. 05 / 05.2020 AB1800DEENFRIT... -
Page 121: Carico Del Rotore
Carico del rotore Lo standard dei recipienti di vetro centrifugati sono da caricare fino a RCF 4000 (DIN 58970 capoverso 2). Verificare che il rotore sia fissato. I rotori devono essere caricati esclusivamente in modo simmetrico. I recipienti di centrifuga devono essere distribuiti uniformemente su tutti i posti del rotore. -
Page 122: Elementi Di Comando E Di Visualizzazione
Elementi di comando e di visualizzazione >RCF< t/min:s START PULSE RPM/RCF STOP SELECT OPEN 14.1 Simboli esposti Coperchio sbloccato. Coperchio bloccato. Indicazione di rotazione. L'indicazione di rotazione si illumina e ruota senso antiorario, per il tempo in cui il rotore è in rotazione. 14.2 Tasti del campo di comando ... -
Page 123: Possibilità Di Regolazione
14.3 Possibilità di regolazione t/min Tempo di funzionamento . Regolabile da 1 - 99 min, in passi di 1 minuto. t/sec Tempo di funzionamento . Regolabile da 1 - 59 s, in passi di 1 secondo. Funzionamento continuo " --:-- ". Impostare il parametro t/min e t/sec su zero. Regime di rotazione Può... -
Page 124: Immettere Il Parametro Di Centrifugazione
Immettere il parametro di centrifugazione 15.1 Inoltro diretto del parametro di centrifugazione Il regime di rotazione (RPM), la accelerazione relativa di centrifuga (RCF), il raggio di centrifugazione (RAD) ed il tempo di funzionamento possono venire immessi direttamente con i tasti , senza dover premere in SELECT precedenza il tasto... -
Page 125: Inoltro Del Parametro Di Centrifugazione Con Il Tasto "Select
15.2 Inoltro del parametro di centrifugazione con il tasto "SELECT" Il tempo di funzionamento può venire impostato in minuti ed in secondi (parametri t/min e t/sec ). Per impostare il funzionamento continuo, i parametri t/min e t/sec devono venir impostati su zero. Nell'indicatore del tempo (t/min:s) compare "... - Page 126 Esempio: Esempio: Indicazione RPM (RPM) Indicazione RCF ( RCF ) Premere il tasto. >RCF< t/min:s >RCF< t/min:s SELECT RPM : Regime di rotazione. RAD/mm : Raggio di centrifugazione. La visualizzazione e l'inoltro del raggio di centrifugazione è possibile solo, se viene scelta l'indicazione RCF ( RCF ).
-
Page 127: Centrifugazione
300 mm attorno alla centrifuga. Dopo ogni processo di centrifugazione , durante lo sbloccaggio del coperchio, viene esposta per breve tempo la quantità dei cicli operativi rimanenti (processi di centrifugazione) (solo con EBA 200). Esempio: >RCF<... -
Page 128: Funzionamento Continuo
Esempio: Esempio: Indicazione RPM (RPM) Indicazione RCF ( RCF ) Una volta decorso il tempo o dopo l'interruzione del >RCF< t/min:s >RCF< t/min:s STOP OPEN processo di centrifugazione premendo il tasto avviene l'arresto con il livello di frenate impostato. Viene esposto il livello di frenata. -
Page 129: Centrifugazione Breve
16.3 Centrifugazione breve Esempio: Esempio: Indicazione RPM (RPM) Indicazione RCF ( RCF ) In caso di necessità premere il tasto, per >RCF< t/min:s >RCF< t/min:s selezionare l'indicazione RPM (RPM) oppure l'indicazione RCF ( RCF ). Immettere il parametro di centrifugazione desiderato >RCF<... -
Page 130: Contatore Cicli
Dopo che il rotore è stato sostituito, il contatore cicli deve venire rassettato su "0" (vedere al capitolo "Resettare contatore cicli su "0""). 18.2 EBA 200 S La durata di impiego del rotore non ha limiti. Per questo motivo il contatore cicli non è necessario ed è disinserito. -
Page 131: Consultare Informazioni Di Sistema
19.1 Consultare informazioni di sistema Possono venir consultate le seguenti informazioni di sistema: Modello dell'apparecchiatura e suo massimo regime di rotazione, Versione del programma dell'apparecchiatura, Numero del tipo di apparecchiatura, Data di produzione dell'apparecchiatura, Numero di serie dell'apparecchiatura, ... - Page 132 Premere il tasto.. Esempio: SELECT Numero di serie dell'apparecchiatura. >RCF< t/min:s Premere il tasto . Esempio: Esempio: SELECT Tipo di convertitore di frequenza. >RCF< t/min:s >RCF< t/min:s Premere il tasto . Esempio: SELECT Versione di programma del convertitore di >RCF<...
-
Page 133: Segnale Acustico
19.2 Segnale acustico Suona il segnale acustico: dopo che si è presentata un'anomalia, in intervalli di 2 s. dopo che è terminato il processo di centrifugazione e con l'arresto del rotore, in intervalli di 30 s. Il segnale acustico viene disinserito premendo un tasto piacere. Il segnale acustico può... -
Page 134: Segnale Ottico Dopo La Fine Del Processo Di Centrifugazione
Premere il tasto per memorizzare START >RCF< t/min:s PULSE l'impostazione. >RCF< t/min:s Premere una volta il tasto, per abbandonare il Esempio: STOP OPEN menu " Settings" oppure prendere due >RCF< t/min:s >RCF< t/min:s volte, per abbandonare il menu " MACHINE MENU "... -
Page 135: Sbloccaggio Automatico Del Coperchio Dopo Il Processo Di Centrifugazione
19.4 Sbloccaggio automatico del coperchio dopo il processo di centrifugazione Può avvenire l'impostazione, se dopo il processo di centrifugazione il coperchio si sblocca o meno. Ciò può venire impostato, durante l'arresto del rotore, come segue: STOP OPEN Il processo può sempre venire interrotto premendo il tasto . -
Page 136: Illuminazione Di Sfondo Della Videata
19.5 Illuminazione di sfondo della videata Per risparmiare energia può venire impostato, che dopo un processo di centrifugazione l'illuminazione di sfondo della videata si spenga dopo due minuti. Ciò può venire impostato, durante l'arresto del rotore, come segue: STOP OPEN Il processo può... -
Page 137: Consultazione Delle Ore Di Funzionamento E Della Quantità Di Processi Di Centrifugazione
19.6 Consultazione delle ore di funzionamento e della quantità di processi di centrifugazione Le ore di funzionamento sono suddivise in ore di funzionamento interne ed esterne. Ore di funzionamento interne: Tempo complessivo, nel quale l'apparecchiatura era inserita. Ore di funzionamento esterne: Tempo complessivo dei processi di centrifugazione avvenuti fino ad ora. La consultazione può... -
Page 138: Resettare Su Zero Il Contatore Cicli
19.7 Resettare su zero il contatore cicli Dopo che il rotore è stato sostituito, il contatore cicli deve venir resettato su zero. Il resettaggio su zero del contatore cicli è ammesso solo, se il rotore è stato sostituito in precedenza con un rotore nuovo. -
Page 139: Accelerazione Centrifuga Relativa (Rcf)
Accelerazione centrifuga relativa (RCF) L’accelerazione centrifuga relativa (RCF) è indicata come un multiplo dell’accelerazione terrestre (g). È un valore numerico privo di unità e funge per paragonare le prestazioni di separazione de sedimentazione. Il calcolo viene eseguito in base alla formula: ... -
Page 140: Pulizia E Manutenzione
Pulizia e manutenzione L'apparecchiatura può essere contaminata. Prima della pulizia, staccare la presa di corrente. Prima di iniziare un procedimento di pulizia e decontaminazione diverso da quello consigliato dal produttore, l’utilizzatore deve accertarsi presso il produttore che tale procedimento previsto non rechi danno all’apparecchio. -
Page 141: Rotore E Accessori
23.2 Rotore e accessori Con EBA 200 S, l'installazione e lo smontaggio del rotore è consentito, per motivi di sicurezza, solo al servizio di assistenza. 23.2.1 Pulizia e cura Per prevenire corrosione e modifiche dei materiali il rotore e l'accessorio devono essere regolarmente puliti con sapone o con un detergente delicato e con un panno umido. -
Page 142: Trattamento In Autoclave
Con la EBA 200 S non è ammesso il trattamento in autoclave del rotore. Con la EBA 200 il trattamento in autoclave del rotore è ammesso a 121°C / 250°F (20 min). Dopo 10 trattamenti in autoclave, per motivi di sicurezza il rotore deve venire sostituito. -
Page 143: Guasti
Guasti Se non si riesce a eliminare l’errore seguendo le indicazioni della tabella guasti, informare il servizio assistenza clienti. Si prega di indicare il tipo di centrifuga e il numero di serie. Entrambi i numeri sono visibili sulla targhetta di modello della centrifuga. -
Page 144: Sostituzione Fusibili Entrata Rete
Prima di rispedire un apparecchio deve essere montata la protezione per il trasporto. Se l'apparecchio o uno dei suoi accessori viene rispedito alla ditta Andreas Hettich GmbH & Co. KG, esso deve essere prima decontaminato e pulito per la tutela di persone, ambiente e materiale. -
Page 145: Anhang / Appendix
Anhang / Appendix 28.1 Rotoren und Zubehör / Rotors and accessories EBA 200: E3694 EBA 200 S: E1624 Winkelrotor 8-fach / Angle rotor 8-times 0509 33° EBA 200: 6000 RPM EBA 200S: 8000 RPM 4,5 - 5 7,5 – 8,5 9 –... - Page 146 EBA 200: E3694 EBA 200 S: E1624 Winkelrotor 8-fach / 1063 Angle rotor 8-times 1063-8 6305 SK 1/89 SK 19/85-4 0518 33° EBA 200: 6000 RPM EBA 200S: 8000 RPM 8,5 - 10 4 – 5,5 4 – 7 Kapazität / capacity Maße / dimensions ...