Publicité
Liens rapides
T0376
INSTRUCTION MANUAL • GEBRUIKSAANWIJZING • ANLEITUNG • INSTRUCTIONS DE MONTAGE
WARNING !
This R/C kit and the model you
will build is not a toy.
LET OP !
Deze bouwdoos van
een radiobestuurd vliegtuig
is geen speelgoed.
2
68,8 dm
3800 g.
ACHTUNG !
Ein Dieser Bausatz
ferngesteuertes Modell
ist kein Spielzeug.
ATTENTION !
Ce modèle R/C à assembler
n'est pas un jouet.
Publicité

Manuels Connexes pour protech Nemesis 90


Sommaire des Matières pour protech Nemesis 90
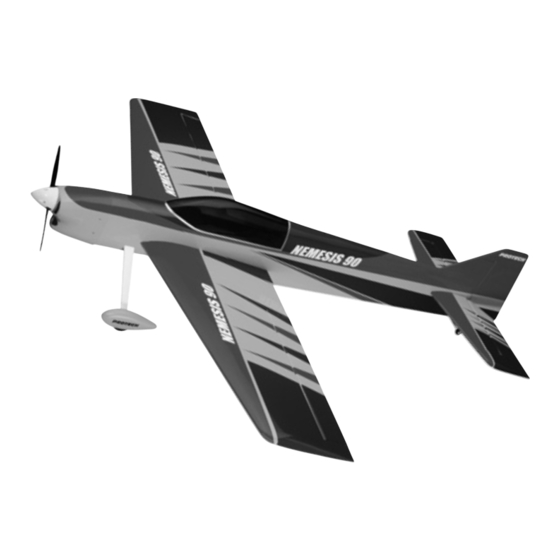
- Page 1 T0376 INSTRUCTION MANUAL • GEBRUIKSAANWIJZING • ANLEITUNG • INSTRUCTIONS DE MONTAGE WARNING ! This R/C kit and the model you will build is not a toy. LET OP ! Deze bouwdoos van een radiobestuurd vliegtuig is geen speelgoed. 68,8 dm 3800 g.
- Page 2 Specifi cations / Specifi caties Technische Daten / Spécifi cations Lengte: 1750 mm Length: 1750 mm Länge: 1750 mm Longueur: 1750 mm Spanwijdte: 14577mm Wing span: 1770 mm Spannweite: 1770 mm Envergure: 1770 mm Vleugelopp.: 65,8 dm Wing area: 65,8 dm Tragfl...
- Page 3 Tools & items / Gereedschap & benodigdheden Werkzeuge und alle Notwendigkeiten / Outils et équipements MICRO RECEIVER 7-CH FM HIGH TORQUE SERVO Ball bearing Metal gears PROTECH std servo #B515 14gr Weight: Torque: 7,5kg/cm PRO7.35 7-CH micro receiver Speed: 0,17s / 60°...
- Page 4 Important Safety Notes. Be sure to read right through the instructions covering assembly and operation of your model before you at tempt to operate it for the fi rst time. You are the only person who is responsible for the safe operation of your radio-con trol led model. Young people should only be permitted to build and fl y these mod els under the instruction and su per vi sion of an adult who is aware of the hazards involved in this activity.
- Page 5 Wichtige Sicherheitshinweise Vor dem Versuch der ersten Inbetriebnahme muß die gesamte Betriebs- und Montageanleitung sorgfältig gelesen werden. Sie allein sind verantwortlich für den sicheren Betrieb Ihres RC-Flugmodells. Bei Jugendlichen muß der Bau und Betrieb von einem Erwachsenen, der mit den Gegebenheiten und möglichen Gefahren eines RC-Flugmodells vertraut ist, verantwortlich überwacht werden.
- Page 6 Installing the ailerons / Montage van de rolroeren Montierung des Querrudern / Montage des ailerons Fig. 1 Fig. 2 Fig. 3 Steek een speldje door het mid- Fixieren Sie eine Stoßnadel im Retirez l'aileron et insérez une Insert a modelling pin through the den van de scharnieren zodat Mitte des Scharnieres so dass es épingle au milieu de chaque...
- Page 7 Secure the leads with some tape. (PL013.25) von 25 cm. Fixieren Bevestig de verlengkabel aan het servo (PROTECH PL013.25) de Connect the extension lead with Sie die Verbindung mit ein wenig draadje in de vleugel en trek de 25cm aux servos d'aileron.
- Page 8 Installing the control horns on the ailerons / Montage van de roerhoornen op de rolroeren Montierung von die Hörner auf die Querrudern / Installation des guignols d'aileron Fig. 16 Fig. 17 Fig. 18 Fig. 19 Fig. 20 Connect the clevis to the push- Bevestig de kwiklink op de stuur- Konnektieren Sie den Gabelkopf Assemblez la commande avec...
- Page 9 Assembling the wings / Samenstellen van de vleugel Zusammenstellen des Flügelfl ächen / Assemblage des ailes Fig.21 Fig. 22 Fig. 23 WING WOOD WOOD GLUE GLUE Fig. 24 Apply wood glue into the holes Doe een beetje houtlijm in de ga- Bringen Sie ein wenig Holz- Appliquez de la colle à...
- Page 10 Fixing the wing / Monteren van de vleugel / Fixierung des Flügels / Fixation de l'aile Fig. 25 Fig. 26 Drw. 3 Fig. 27 Fig. 28 Fig. 29 Fig. 30 Fig. 31 Fig. 32 Screw the 2 screws into the Draai de 2 schroeven in de Schrauben Sie die 2 Schrauben Installez les 2 vis sur le fuselage.
- Page 11 Fixing the belly pan to the wing / Monteren van het bodemdeksel op de vleugel / Fixierung des Deckels auf den Flügel / Fixation du capot d'aile sur l'aile Fig. 33 Fig. 34 Fig. 35 Fig. 36 Fig. 37 Fig. 38 botom Fig.
- Page 12 Assembling the stabilizer / Samenstellen van het hoogteroer Zusammenstellen vom Höhenruder / Assemblage du stabilisateur Fig. 41 Fig. 42 Fig. 43 Fig. 45 Fig. 44 90° Fig. 46 Fig. 47 Fix one elevator on the stabi- Monteer een hoogteroer op de Montieren Sie ein Höhenruder Montez une gouverne sur le sta- lizer.
- Page 13 Installing the vertical fi n / Montage van het richtingsroer Montierung des Seitenruders / Montage de la dérive Fig. 48 Fig. 49 Fig. 50 Fig. 41 Fig. 51 Put the vertical fi n in the fuselage Plaats het kielvlak in de romp en Schieben Sie die vertikale Fläche Installez la dérive sur le fuselage et and mark the outlines of the fu-...
- Page 14 Installing the control cables / Monteren van de stuurdraden / Installation des commandes de direction / Montieren von Gestänge Fig. 54 Fig.55 Fig.56 Fig.57 Fig. 57 Fig. 58 Fig. 59 Fig. 62 Fig. 61 Fig.60 Snij een gaatje door de folie om Entfernen Sie die Bespannfolien Cut the hole in the covering to put Percez l’entoilage sur le fuselage...
- Page 15 Installing the control horns / Installeren van roerhoornen / Installation des guignols de la dérive / Installieren von Ruderhörner Fig. 63 Fig. 64 Fig. 65 Fig. 67 Fig. 68 Fig. 66 Drw. 11 Plaats de roerhoorn op het hoog- Montieren Sie der Ruderhorn, Place the control horn on the el e - Positionnez le guignol sur la teroer zonder aan de stuurstang...
- Page 16 Installing the elevator control unit / Monteren van de kontrole eenheid voor het hoogteroer / Installation du module de commande de profondeur / Montierung von Ansteuerung von Höhenleitwerk Fig. 69 Fig. 70 Fig. 71 Fig. 72 Fig. 73 Fig. 74 Fig.
- Page 17 Installing the pushrods for the elevator / Monteren van de stuurstangen voor het hoogteroer / Installation des commandes de profondeur / Montieren von Gestänge von Höhenleitwerk Fig. 83 Fig. 84 Fig. 85 Fig. 95 Fig. 97 Fig. 86 Fig. 87 Fig.
- Page 18 Assembling the fuel tank / Monteren van de brandstoftank / Assemblage du réservoir / Zusammenbau von Kraftstoftank M3X20 Drw. 14 Fig. 93 Fig. 92 Fig. 91 Monteer de brandstoftank zoals Assemble the fuel tank as shown Assemblez le réservoir comme Bauen Sie den Kraftstofftank zu- afgebeeld (Fig.
- Page 19 Installing the landing gear / Monteren van het landingsgestel / Installation du train d’attérissage / Montierung von Hauptfahrwerk Fig. 104 Fig. 94 Fig. 95 Fig. 96 Fig. 97 Fig. 98 Fig. 99 Bepaal de positie van de bevestig- Locate the landing gear fixing Repérez les trous de fi...
- Page 20 Installing the wheels / Monteren van de wielen / Installation des roues / Montieren von Räder Fig. 100 Fig. 101 Fig. 111 Fig. 102 Fig. 103 Fig. 104 Fig. 105 Fig. 106 Fig. 107 Drw. 13 Monteer de as en het wiel (Fig. Mount the wheelaxle and wheel Montieren Sie die Räder wie Après sèchage, percez le caré-...
- Page 21 Installing the tailwheel / Bevestig het staartwiel / Fixation de la roulette de queue / Montieren von Hecksporn Fig. 108 Fig. 109 Fig. 110 Fig. 111 Fig. 112 Monteer het staartwiel en het wiel Mount and install the tailwheel Montez et installez la roulette de Bringen Sie das Spornrad auf das zoals getoond.
- Page 22 Installing the engine / Monteren van de motor / Installation du moteur / Montieren von Motor Fig. 115 Fig. 116 Fig. 117 Fig. 120 Fig. 118 Fig. 119 Trek een centerlijn op de vuur- Draw the center line on the fi re- Tracez l’axe central sur le couple Benützen Sie die Spezielle Müt- spant (Fig.
- Page 23 Installing the receiver and battery pack / Monteren van de ontvanger en batterijpack / Installation de la batterie de réception et du récepteur / Montieren von Empfängerbatterie und Empfänger Fig. 124 Fig. 125 Plaats de ontvangerbatterij voor Placez la batterie de réception Place the receiver batterypack in Positionieren Sie den Empfänger de servo’s en blokker de positie...
- Page 24 Installing the canopy / Bevestigen van het cockpit venster / Installation de la verrière / Montieren von Kabinenhaube Fig. 126 Fig. 127 Fig. 128 Fig. 129 Fig. 130 Snij het venster van de cockpit Follow the marked line to cut the Schneiden Sie die Kabinenhaube Découpez la verrière suivant uit, positioneer deze op de cock-...
- Page 25 Centre of gravity / Zwaartepunt / Centre de gravité / Schwerpunkt 176 - 194 mm Control movements / Roeruitslagen / Débattements des commandes / Ruderausschlägen 15 mm 15 mm 20 mm 15 mm...
- Page 26 Adjustments / Afregelingen / Réglages / Abtrimmen The correct adjustment of your aircraft is very important. Check carefully that all control surfaces move in the correct direction. If they do not move in the correct direction, you can reverse the servo direction on your trans mit ter. It is very important that you check the position of the CG.
- Page 27 Ad just ments / Afregelingen / Contrôle / Abtrimmen You stand behind the aircraft You move the rudder stick to the left Rudder and nosewheel must go to the left You move the rudder stick to the right Rudder and nosewheel must go to the right You pull back your elevator stick The elevator panel will move upwards You push forward your elevator stick...
- Page 28 All you need is inside … The PROTECH CATALOG Ask your local R/C model shop ® is a registered trademark PROTECH Lammerdries 23B • B-2250 Olen Tel.: +32 (0)14 25 92 83 • Fax: +32 (0)14 25 92 89 info@protech.be • http://www.protech.be...