Publicité
T0367
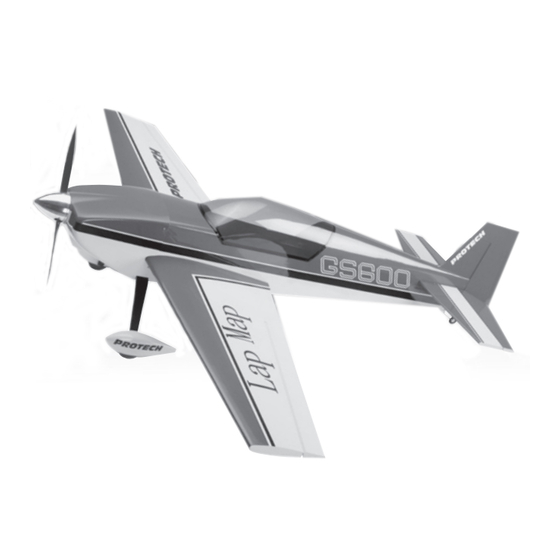
almost ready to fl y sports aerobatic aircraft
INSTRUCTION MANUAL • BOUWHANDLEIDING • INSTRUCTIONS DE MONTAGE • BAUANLEITUNG
WARNING !
ACHTUNG !
This R/C kit and the model you
Dieser Bausatz eines
will build is not a toy.
ferngesteuerten Modells
ist kein Spielzeug.
LET OP !
ATTENTION !
Deze bouwdoos van een
Cet avion R/C
radiobestuurd model is geen
n'est pas un jouet.
speelgoed.
version: 12/09/2005 • T0367
Publicité
Table des Matières

Manuels Connexes pour protech GS 600


Sommaire des Matières pour protech GS 600
- Page 1 T0367 almost ready to fl y sports aerobatic aircraft INSTRUCTION MANUAL • BOUWHANDLEIDING • INSTRUCTIONS DE MONTAGE • BAUANLEITUNG WARNING ! ACHTUNG ! This R/C kit and the model you Dieser Bausatz eines will build is not a toy. ferngesteuerten Modells ist kein Spielzeug.
- Page 2 Specifi cations / Specifi caties / Spécifi cations / Technische daten Length: 1650 mm Lengte: 1650 mm Longueur: 1650 mm Länge: 1650 mm Wing span: 1830 mm Spanwijdte: 1830 mm Envergure: 1830 mm Spannweite: 1830 mm Wing area: 60,0 dm Vleugelopp.: 60,0 dm Surface alaire:...
-
Page 3: Important Safety Notes
Important Safety Notes Be sure to read right through the instructions covering assembly and operation of your model before you at tempt to operate it for the fi rst time. You are the only person who is respon- sible for the safe operation of your radio-con trol led model. Young people should only be permitted to build and fl y these mod els under the instruction and su per vi sion of an adult who is aware of the hazards involved in this activity. -
Page 4: Belangrijke Veiligheidsinstructies
Belangrijke Veiligheidsinstructies Lees de instructies betreffende montage en werking van uw model vooraleer u het de eerste maal in gebruik neemt. U alleen bent verantwoordelijk voor de veilige werking van uw radio- bestuurd model. Kinderen mogen deze modellen slechts bouwen en vliegen onder het toeziend oog van een volwassene, die zich bewust is van de gevaren die dit met zich meebrengt. Gebruik enkel passende gepolariseerde verbindingsstukken. - Page 5 Tools & items / Gereedschap & benodigdheden / Werkzeuge und alles Erforderliche / Equipements et outillage • To assemble this model some tools are needed. 1. • Solder iron 6. • Sharp hobby knife • Voor het samenstellen van het model zijn er enkele gereedschappen nodig. •...
- Page 6 Fixing the vertical fi n / Monteren van het richtingsroer / Installation de la dérive et de son gouvernail / Montieren von Seitenleitwerk fi g. 1 fi g. 2 fi g. 3 Cut out the covering of the slots. Verwijder de folie aan de voorge- Découpez l’entoilage à...
- Page 7 Installing the elevator / Monteren van het hoogteroer / Installation du gouvernail de profondeur / Montieren von Höhenruder fi g. 7 fi g. 8 Entfernen Sie die Bespannfolie an Cut out the covering of the slots. Verwijder de folie aan de voor- Découpez l’entoilage à...
- Page 8 Installing the aileron / Monteren van de rolroeren / Installation des ailerons / Montieren von Querruder fi g. 12 Cut out the covering of the slots. Verwijder de folie aan de voor- Découpez l’entoilage à l’endroit Entfernen Sie die Bespannfolie an Glue the hinges with epoxy.
- Page 9 Assembling the landinggear / Monteren van het landingsgestel / Montage du train d’atterissage / Montieren van Hauptfahrwerk fi g. 16 fi g. 17 fi g. 18 fi g. 19 Drill a 4mm hole in each leg of the Boor een gaatje ø4mm in elke steun Percez un trou de 4mm dans chaque Bohren Sie ein Ø4mm Loch in das landinggear, see fi...
- Page 10 Installing the cockpit / bevestigen van de cockpit / Fixation de la verrière / Befestigung von Kabinehaube fi g. 23 fi g. 24 Mark the trim line with marking tape Duidt de snijlijn aan met een kleef- Marquez le contour de la verrière à Markieren Sie die Konture und and cut out the canopy, see fi...
- Page 11 Installing the wing / Monteren van de vleugels / Mise en place des ailes / Montieren von Flächen fi g. 29 fi g. 30 fi g. 31 Make sure the tail plane and wing Controleer of de vleugel- en staartv- Assurez-vous que le stabilisateur et Überprüfen Sie ob die horizontale are parallel.
- Page 12 Installing the engine / Monteren van de motor / Installation du moteur / Montieren von Motor fi g. 35 fi g. 36 We recommend that you install the Wij raden voor de meeste 2T moto- Nous recommandons l’installation Wir empfehlen die 2T Motoren in most 2T engines in 90°...
- Page 13 Installing the motorcowling / Bevestigen van de motorkap / Installation du capot moteur / Montieren von Motorhaube fi g. 37 fi g. 38 Drill out the air intake and holes, Boor de luchtinlaat en gaatjes, om Percez le contour des prises d’air Bohren Sie der Lufteinlass und for the motoradjustment, in the de motor afregeling, in de motorkap...
- Page 14 Decals / Decals / Autocollants / Dekor fi g. 41 fi g. 42 fi g. 43 fi g. 44 Use marking tape to mark the decal Gebruik kleefband om de positie Utilisez des bandes d’adhésives Markieren Sie die Position des position.
- Page 15 Fuel tank / Brandstoftank / Réservoir / Kraftstofftank fi g. 47 Stellen Sie die Kraftstofftank Assemble the fuel tank as Monteer de brandstoftank zoals Assemblez le réservoir comme zusammen wie abgebilded auf Abb. shown on fi g. 47. Install the fuel op fi...
- Page 16 Bestandteile zu, die abused, damaged, modifi ed and aangepast en gebruikt. utilisés ou qui ont été endommagés. unsachgemäß installiert worden, used. angefaßt worden, mißbraucht worden, beschädigt worden, geändert worden und benutzt worden sind. © Copyright PROTECH 16 - GS600...