SOMFY GDK 700 Notice D'installation Et D'utilisation
Masquer les pouces
Voir aussi pour GDK 700:
- Notice d'installation et d'utilisation (34 pages) ,
- Notice d'installation et d'utilisation (35 pages) ,
- Notice d'installation et d'utilisation (36 pages)

Manuels Connexes pour SOMFY GDK 700


Sommaire des Matières pour SOMFY GDK 700
- Page 1 Motorisation pour porte de garage Motorisation for garage door Notice d’installation et d’utilisation Installation and operating guide 5130194D...
-
Page 3: Table Des Matières
- Description des touches de programmation - Réalisation de l’auto-apprentissage 2.2 Paramètres avancés 2.3 Verrouillage/Déverrouillage du menu des paramètres 2.4 Mémorisation des télécommandes Nous vous recommandons d’être au moins deux personnes pour installer ce produit. FR - Notice d’installation et d’utilisation GDK - SOMFY... -
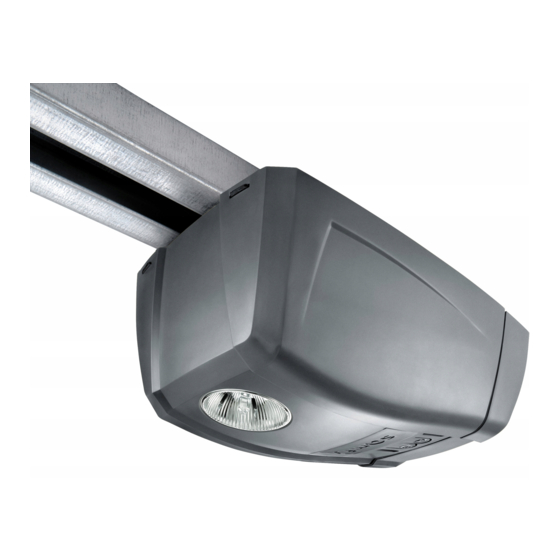
Page 4: Présentation Du Produit
Vis auto-formeuse Ø 4x8 (tête moteur) Dispositif de débrayage manuel Rail en 3 parties Bras de liaison Manchon Vis auto-formeuse Ø 4x8 2 x 4 (manchons) Vis auto-perceuse TCB-H 4,2x13 zn Cordon d’alimentation FR - Notice d’installation et d’utilisation GDK - SOMFY... -
Page 5: Encombrement
Type de cable Cellules photoélectriques 4 x 0,5 mm (RX cellule réceptrice) 2 x 0,5 mm (TX cellule émettrice) Feu clignotant 2 x 0,5 mm Antenne Contact à clé 2 x 0.5 mm² FR - Notice d’installation et d’utilisation GDK - SOMFY... -
Page 6: Domaine D'application
Porte basculante débordante et porte sectionnelle GDK 700 GDK 1100 2.35 2.35 Surface max. = 7 m Surface max. = 11 m Poids max. = 120 kg Poids max. = 150 kg FR - Notice d’installation et d’utilisation GDK - SOMFY... -
Page 7: Pré-Requis Pour L'installation
Pré-requis pour l’installation > Béton Acier Béton Acier Ø 10 mm Ø 3 mm > Linteau Plafond Porte FR - Notice d’installation et d’utilisation GDK - SOMFY... -
Page 8: Installation
à la porte du garage. “H” en retirant 10 à 200 mm à “D”. Puis reporter cette valeur sur le linteau depuis le plafond. La marque indique la position du bas de la chape linteau. FR - Notice d’installation et d’utilisation GDK - SOMFY... -
Page 9: Fixation Des Chapes Linteau Et Porte
• Centrer la chape linteau par rapport à la porte du garage. • Centrer la chape porte par rapport à la partie haute • de la porte. au plafond. • Fixer la chape. FR - Notice d’installation et d’utilisation GDK - SOMFY... -
Page 10: Assemblage
• Aligner les 3 tronçons du rail. • Assembler 2 tronçons du rail avec un manchon et laisser le 3ème tronçon dans l’alignement des deux premiers. • Centrer le manchon sur la jonction des tronçons. FR - Notice d’installation et d’utilisation GDK - SOMFY... - Page 11 • Centrer le manchon sur la jonction des tronçons. • Serrer les manchons au rail à l’aide des vis SANS PERCER LE RAIL. doivent pas percer le rail. Le corps de vis doit rester apparent. FR - Notice d’installation et d’utilisation GDK - SOMFY...
-
Page 12: Assemblage Du Rail À La Tête Moteur
• Engager l’axe du moteur dans le pignon du rail puis • Serrer l’écrou pour tendre la courroie. • Le caoutchouc s’écrase lorsque l’on serre. Pour une bonne tension, le caoutchouc doit mesurer entre 18 et 20 FR - Notice d’installation et d’utilisation GDK - SOMFY... -
Page 13: Fixation De L'ensemble Au Plafond
> Cas n°1 : Motorisation collée au plafond Ø8 x 50 • Fixer le rail au plafond. > Cas n°2 : Motorisation décollée du plafond • Fixer l’ensemble au niveau de la tête moteur. FR - Notice d’installation et d’utilisation GDK - SOMFY... -
Page 14: Fixation Du Bras De Liaison Sur La Porte Et Sur Le Chariot
• Débrayer le chariot à l’aide du • Amener le chariot au niveau • Fixer le bras à la chape porte dispositif de débrayage manuel. de la porte. et au chariot. FR - Notice d’installation et d’utilisation GDK - SOMFY... -
Page 15: Fixation Du Bras De Liaison Sur La Porte Et Sur Le Chariot (Suite)
• Fixer la butée avec les vis auto-perceuse > Le caoutchouc de tension ne doit jamais être totalement mesurer entre 18 et 20 mm (voir page 10). • Si nécessaire, ajuster la tension de la courroie. FR - Notice d’installation et d’utilisation GDK - SOMFY... -
Page 16: Montage/Démontage Du Capot
• Raccorder le moteur au secteur. L’éclairage intégré clignote 3 fois : le moteur est sous tension. Le voyant ”B” clignote 2 fois en continu : le moteur est en attente d’auto-apprentissage. FR - Notice d’installation et d’utilisation GDK - SOMFY... -
Page 17: Programmation
• Appuyer 3 fois sur la touche ”A” pour accéder au paramètre • Appuyer sur la touche ”B” pour entrer en mode auto- auto-apprentissage. apprentissage. Le voyant ”B” clignote 2 fois Le voyant ”A” clignote 3 fois. moteur est en attente d’auto-apprentissage. FR - Notice d’installation et d’utilisation GDK - SOMFY... - Page 18 Dans ce cas, relancer un nouveau cycle d’auto- Fermeture complet. apprentissage à l’aide de la ”B”. Pendant le cycle d’auto-apprentissage : Si la porte est en mouvement, l’appui sur n’importe quelle touche stoppe le mouvement et interrompt l’auto-apprentissage. FR - Notice d’installation et d’utilisation GDK - SOMFY...
- Page 19 Très peu sensible Peu sensible Standard (valeur par défaut) Très sensible AVERTISSEMENT norme EN 12 453. Le non respect de cette consigne pourrait gravement blesser des personnes, par exemple écrasées par la porte. FR - Notice d’installation et d’utilisation GDK - SOMFY...
- Page 20 ”B” indique la valeur du paramètre Appuyer 1 fois sur la touche A” (voir tableau ci-dessous). pour sortir du menu des paramètres. Voyant A Type d’alimentation Voyant B Alimentation secteur (type d’alimentation par défaut) Alimentation solaire FR - Notice d’installation et d’utilisation GDK - SOMFY...
- Page 21 En cas d’appui involontaire sur la touche ”B”, passer à l’étape ”Déverrouillage du menu des paramètres”. A ce niveau de l’installation, la motorisation est prête à fonctionner. Les télécommandes livrées dans le kit sont déjà mémorisées. FR - Notice d’installation et d’utilisation GDK - SOMFY...
-
Page 22: Verrouillage/Déverrouillage Du Menu Des Paramètres
• Appuyer pendant 2 secondes sur la ”B”. • Appuyer sur la de la télécommande L’éclairage intégré s’allume. • L’éclairage intégré clignote pendant 5 secondes. La touche de la télécommande est mémorisée. FR - Notice d’installation et d’utilisation GDK - SOMFY... -
Page 23: Réinitialisation Des Réglages
”prog” au dos de la L’éclairage intégré s’allume. télécommande. • L’éclairage intégré clignote pendant 5 secondes. La télécommande est mémorisée. • Appuyer pendant 7 secondes sur la ”B”. L’éclairage 2.6 Réinitialisation des réglages FR - Notice d’installation et d’utilisation GDK - SOMFY... -
Page 24: Utilisation
• Pendant l’ouverture de la porte, un nouvel appui sur la touche de la télécommande entraîne l’arrêt de la porte. • Un nouvel appui sur la touche de la télécommande provoque la fermeture de la porte. FR - Notice d’installation et d’utilisation GDK - SOMFY... -
Page 25: Utilisation D'une Télécommande 3 Touches
• Pendant l’ouverture ou la fermeture de la porte, un appui sur la touche centrale de la télécommande entraîne l’arrêt de la porte. • vers le bas provoque la fermeture de la porte. FR - Notice d’installation et d’utilisation GDK - SOMFY... -
Page 26: Fonctionnement De La Détection D'obstacle
• L’éclairage intégré s’allume à chaque mise en route de la motorisation. du mouvement de la porte. Une utilisation répétitive donnant lieu à un allumage continu de l’éclairage intégré, peut conduire à une extinction automatique due à une protection thermique. FR - Notice d’installation et d’utilisation GDK - SOMFY... -
Page 27: Fonctionnement Du Dispositif De Débrayage Manuel
”ouverture totale”. Laisser la porte s’ouvrir jusqu’à sa position ”ouverture • Lancer une ouverture totale de la porte depuis une totale”. télécommande mémorisée. • La porte s’ouvre avec une vitesse dégradée. FR - Notice d’installation et d’utilisation GDK - SOMFY... -
Page 28: Accessoires
Si suppression des cellules, refaire impérativement le pont entre les bornes ”1” et ”2”. 4.2 Raccordement du feu clignotant Le feu clignotant est activé lors de tout mouvement de la porte avec une pré-signalisation de 2 s avant le début du mouvement. FR - Notice d’installation et d’utilisation GDK - SOMFY... -
Page 29: Raccordement De L'antenne Déportée
Pour une durée de vie optimale de la batterie, il est recommandé de couper l’alimentation principale et de faire fonctionner la motorisation sur batterie pendant quelques cycles, 3 fois par an. > Raccordement FR - Notice d’installation et d’utilisation GDK - SOMFY... -
Page 30: Raccordement Du Contact À Clé
4.5 Raccordement du contact à clé Le contact à clé permet de commander la manœuvre et l’éclairage de la porte de garage motorisée. 4.6 Raccordement du kit solaire Se référer à la notice du panneau solaire. FR - Notice d’installation et d’utilisation GDK - SOMFY... -
Page 31: Plan De Câblage Général Des Accessoires
4.7 Plan de câblage général des accessoires DANGER Couper l’alimentation électrique du moteur avant toute installation d’un périphérique. Repère Désignation Contact à clé Antenne déportée Batterie de secours Cellules photoélectriques Feu clignotant Kit solaire FR - Notice d’installation et d’utilisation GDK - SOMFY... -
Page 32: Entretien Et Dépannage
Si la panne persiste ou pour tout autre problème ou demande de renseignement sur votre motorisation, rendez-vous sur notre forum.somfy.fr Vous pouvez également prendre contact auprès d’un conseiller Somfy par téléphone au (0.15€ la minute), disponibilité du service sur 0 820 055 055 www.somfy.fr... -
Page 33: Changement De La Pile De La Télécommande
• Dévisser l’arrière de • Retirer les vis. • Retirer l’arrière de la • Remplacer la pile • Remettre puis la télécommande. télécommande. (3 V CR 2430). visser l’arrière de la télécommande. FR - Notice d’installation et d’utilisation GDK - SOMFY... -
Page 34: Caractéristiques Techniques
Détection d’obsacle intégrée Fonctionnement en cas de détection d’obstacle Réouverture totale Démarrage progressif Vitesse d’ouverture Vitesse de fermeture Vitesse d’accostage en fermeture ralentissement courte (20 cm), zone de ralentissement longue (50 cm) FR - Notice d’installation et d’utilisation GDK - SOMFY... - Page 35 - Checking the mechanical setting of the door 2.2 Advanced settings 2.3 Locking/unlocking the parameters menu 2.4 Memorising the remote controls We recommend you have at least two people to install this product. EN - GDK installation and operating guide - SOMFY...
-
Page 36: Product Presentation
Thread-forming screws Ø 4x8 (motor head) Manual back release device 3-part rail Connecting arm Sleeve End limit stop Thread-forming screws Ø 4x8 2 x 4 (sleeves) TCB-H 4.2x13 zn self-tapping screws Power supply cord EN - GDK installation and operating guide - SOMFY... -
Page 37: Space Requirements
Type of cable Photoelectric cells 4 x 0.5 mm (RX receptor cell) 2 x 0.5 mm (TX emitter cell) Flashing light 2 x 0.5 mm Aerial Key lock 2 x 0.5 mm² EN - GDK installation and operating guide - SOMFY... -
Page 38: Area Of Application
Up-and-over door and sectional door GDK 700 GDK 1100 2.35 2.35 Max. surface area = 7 m Max. surface area = 11 m Max. weight = 120 kg Max. weight = 150 kg EN - GDK installation and operating guide - SOMFY... -
Page 39: Prerequisites For Installation
Prerequisites for installation > Concrete Steel Béton Acier Ø 10 mm Ø 3 mm > Lintel Ceiling Door Select the type of fastening according to the support material screw EN - GDK installation and operating guide - SOMFY... -
Page 40: Installation
“D” has been measured, determine “H” by subtracting 10 from 200 mm from “D”. Then mark this value on the lintel from the ceiling. The mark indicates the lower position of the lintel bracket. EN - GDK installation and operating guide - SOMFY... -
Page 41: Fastening The Lintel And Door Brackets
• Centre the door bracket in relation to the top of the • The bracket can be fastened either to the lintel or directly to door. the ceiling. • Attach the bracket. EN - GDK installation and operating guide - SOMFY... -
Page 42: Assembly
• Attach the bracket. 1.2 Assembly > Assembling the rail in 3 sections • Align the 3 sections of the rail. • • Align the sleeve on the section joins. EN - GDK installation and operating guide - SOMFY... - Page 43 • Align the sleeve to the join of the sections. • Tighten the sleeves to the rail using screws WITHOUT DRILLING THE RAIL. The mounting screws must not drill the rail. The body of the screw must remain visible. EN - GDK installation and operating guide - SOMFY...
-
Page 44: Assembling The Rail To The Motor Head
• Tighten the nut to tauten the belt. mount the assembly using engine head screws • The rubber squashes when tightened. To obtain the correct tension, the rubber should measure between 18 and 20 mm. EN - GDK installation and operating guide - SOMFY... -
Page 45: Fastening The Unit To The Ceiling
> Case 1: Drive against ceiling Ø8 x 50 • Fasten the rail to the ceiling. > Case 2: Drive not against ceiling • Fasten the unit at the motor head. EN - GDK installation and operating guide - SOMFY... -
Page 46: Fastening The Link Arm To The Door And The Carriage
If the back release handle is higher than 1.80 m, it will be necessary to extend the cable to make it accessible to all users. • Release the carriage using the • Bring the carriage level • Secure the arm to the door bracket manual back release device. with the door. and carriage. EN - GDK installation and operating guide - SOMFY... -
Page 47: Settings
• Fix the stop using the self-tapping screws > Checking the tension of the belt obtain the correct tension, the rubber should measure between 18 and 20 mm (see page 10). • If necessary, adjust the belt tension. EN - GDK installation and operating guide - SOMFY... -
Page 48: Electrical Connection To The Power Supply
1.6 Electrical connection to the power supply DANGER Connect the power supply cable to a socket which complies with electrical requirements (see safety instructions, chapter 4). • Connect the motor to the power supply. EN - GDK installation and operating guide - SOMFY... -
Page 49: Programming
> Performing auto-programming > Case 1: • Press button “A” 3 times to access the auto-programming • Press button “B” to enter auto-programming mode. parameter. Indicator light “B” waiting for auto-programming. EN - GDK installation and operating guide - SOMFY... - Page 50 The door performs a complete using “B”. Opening-Closing cycle. During the auto-programming cycle: If the door is moving, the movement is stopped and auto-programming is interrupted if any of the buttons are pressed. EN - GDK installation and operating guide - SOMFY...
-
Page 51: Checking The Mechanical Setting Of The Door
If this parameter is changed, it is essential to check that the obstacle detection complies with appendix A of standard EN 12 453. Failure to follow this instruction may result in serious injury, e.g. due to crushing by the gate. EN - GDK installation and operating guide - SOMFY... - Page 52 Press the button A” once to exit the parameter, see table below). the settings menu. Indicator light A Power supply type Indicator light B Mains power supply (default type of power supply) Solar power EN - GDK installation and operating guide - SOMFY...
-
Page 53: Locking/Unlocking The Parameters Menu
If button B is pressed accidentally, move on to the “Unlocking the parameters menu” step At this stage in the installation, the drive is operational. The remote controls supplied in the kit have already been memorised. EN - GDK installation and operating guide - SOMFY... -
Page 54: Memorising The Remote Controls
• Press “B” for 2 seconds. • Press the on the remote control The integrated lighting comes on. • The remote control button has been memorised. EN - GDK installation and operating guide - SOMFY... -
Page 55: Clearing The Remote Controls
“B” for 7 seconds. The integrated lighting All the remote controls and all the settings are now cleared. 2.6 Reinitialising the settings To reinitialise all settings, simply run a new auto-programming process (see page 15). EN - GDK installation and operating guide - SOMFY... -
Page 56: Operation
• Pressing the remote control button again when the door is opening causes the door to stop. • Pressing the remote control button again causes the door to close. EN - GDK installation and operating guide - SOMFY... -
Page 57: Using The Remote Control With Door Open
• Pressing the central remote control button when the door is opening or closing causes the door to stop. • Pressing the arrow down button causes the door to close. EN - GDK installation and operating guide - SOMFY... -
Page 58: Obstacle Detection Mode
3.4 Integrated lighting operation • The integrated lighting comes on each time the drive is switched on. after 30 seconds. due to thermal protection. EN - GDK installation and operating guide - SOMFY... -
Page 59: Manual Back Release Mode
“fully open” position again. Allow the door to open to its “fully open” position. • Open the door fully using a memorised remote control. • The door will open at a reduced speed. EN - GDK installation and operating guide - SOMFY... -
Page 60: Accessories
“1” and “2” of the motor electronics. 24 V 24 V AC/DC AC/DC If the cells are disconnected, it is essential to recreate the bridge between terminals “1” and “2”. EN - GDK installation and operating guide - SOMFY... -
Page 61: Connecting The Remote Antenna
• Reduced speed. • The lighting does not work. • the safety devices are inactive. • • • battery for several cycles, three times a year. > Connection EN - GDK installation and operating guide - SOMFY... -
Page 62: Connecting The Key Contact
4.5 Connecting the key contact The key contact serves to control the moving and lighting of the motorised garage door. 4.6 Connecting the solar kit Refer to the solar panel guide. EN - GDK installation and operating guide - SOMFY... -
Page 63: Accessories General Wiring Diagram
Accessories 4.7 Accessories general wiring diagram DANGER Mark Designation Key lock Backup battery Photoelectric cells Flashing light Solar kit EN - GDK installation and operating guide - SOMFY... -
Page 64: Maintenance And Repairs
Product has reached operating limit. programming phase. 5.3 Assistance If the fault remains or for any other problem or enquiry relating to your drive, visit www.somfy.com EN - GDK installation and operating guide - SOMFY... -
Page 65: Changing The Remote Control Battery
The service life of the battery is generally 2 years. • Unscrew the rear of • Remove the screws. • Remove the rear of the • • the remote control. remote control. rear of the remote control. EN - GDK installation and operating guide - SOMFY... -
Page 66: Technical Data
Before opening With (ADMAP) Integrated obstacle detection Operation in the event of obstacle detection Total reopening Gradual starting Opening speed Closing speed Docking speed when closing long slow zone (50 cm) EN - GDK installation and operating guide - SOMFY... - Page 68 023 56 23 752 800827151 www.somfy.nl www.somfy.it Somfy Belux NV. 02 712 07 70 www.somfy.be Somfy Ltd. (+44) 0113 391 3030 www.somfy.co.uk Somfy Sp. z o.o 810377199 www.somfy.pl SOMFY ACTIVITES SA 50 avenue du Nouveau Monde 74300 CLUSES FRANCE www.somfy.com...