
Manuels Connexes pour Sonnenkonig FRESCO 1000


Sommaire des Matières pour Sonnenkonig FRESCO 1000
- Page 1 FRESCO 1000 / 1200 KLIMAGERÄT MOBIL Bedienungsanleitung Artikelnr. FRESCO 1000: 10000162 Artikelnr. FRESCO 1200: 10000262...
-
Page 2: Table Des Matières
Inhaltsverzeichnis 1 Sicherheitshinweise ....................3 2 Vorteile ........................5 3 Auspacken ........................5 4 Geräteeigenschaften ....................6 5 Bedienfeld und Funktionsbeschreibung ..............7 6 Fernbedienung......................9 7 Wichtige Hinweise ...................... 9 8 Instandhaltung ......................10 9 Nützliche Hinweise ....................11 10 Installieren des Abluftschlauches .................12 11 Betrrieb ........................13 12 Codes ........................13 13 Eigenschaften ......................14... -
Page 3: Sicherheitshinweise
WICHTIG: Warten Sie mindestens 12 Stunden nach dem Auspacken des Gerätes, bevor Sie es verwenden! Installieren oder verwenden Sie die mobile Klimaanlage nicht, bevor Sie die Gebrauchsanwei- sung gelesen haben. Bewahren Sie die Gebrauchsanweisung und Verpackung zum Nachschla- gen und für den Garantieanspruch gut auf. 1 Sicherheitshinweise Bitte lesen Sie vor erster Inbetriebnahme die Gebrauchsanweisung genau durch und beachten Sie die Sicherheitshinweise, um Schäden durch falsche oder unsachgemässe Bedienung sowie... - Page 4 • Wenn das Gerät ausgeschaltet wird, warten Sie bitte mindestens 3.5 Minuten vor dem Neustart, damit der Kompressor nicht beschädigt wird. • Das Gerät muss mindestens 7 Ampere Strom für den Kompressorbetrieb haben. Benutzen Sie kein Verlängerungskabel, um eine Überlastung des Netzes zu vermeiden. •...
-
Page 5: Vorteile
2 Vorteile Diese Klimaanlage wurde nach den höchsten Standards der modernen Technik entworfen und gefertigt. Unser Produkt bietet Ihnen nicht nur eine Fernbedienung, mit der man alle Funktio- nen einfach und bequem bedienen kann, sondern hat auch folgende Vorteile: • Kann dank Leichtlauf-Lenkrollen einfach von Raum zu Raum bewegt werden. -
Page 6: Geräteeigenschaften
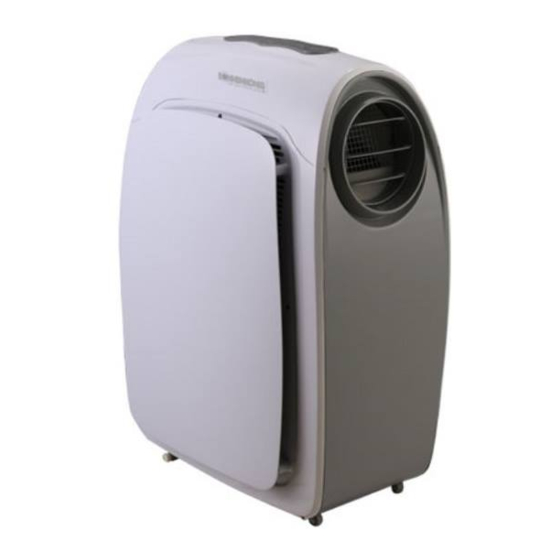
4 Geräteeigenschaften 1. Bedienfeld 8. Oberes Ablaufloch 2. Fernbedienungsempfänger 9. Unteres Ablaufloch 3. Rohrverbindung 10. Prallblech 4. Lufteinlass Kalt 11. Warmluftaustritt 5. Filter aus EVA 12. Kühlluftaustritt 6. Filter von COND 7. Heisslufteinlass... -
Page 7: Bedienfeld Und Funktionsbeschreibung
5 Bedienfeld und Funktionsbeschreibung 1. POWER Drücken Sie den Knopf, um das Gerät Ein- oder Auszuschalten. 2. FUNCTION Diese Taste drücken, um die Kühlung, Heizung oder Entfeuchtung auszuwählen. 3. TEMPERATUR REGULIERUNG (nach oben) Während der Kühlfunktion: Diese Taste erhöht die voreingestellte Temperatur jedes Mal um 1°... - Page 8 7. PROGRAMMIERBARER TIMER Schalten Sie den programmierbaren Timer mit der ON-/OFF-Taste ein. TIMER ON: das Gerät schaltet nach Ablauf der Zeit automatisch ein. 1. Drücken Sie die „TIMER“-Taste im Stand-by-Modus, um die Zeit nach Wunsch einzustellen. 2. Nach Ablauf der eingestellten Zeit wird das Gerät automatisch eingestellt. 3.
-
Page 9: Fernbedienung
6 Fernbedienung 1. POWER – Ein-/Ausschalter 2. FUNC – Funktion „MODE“ 3. TIMER – Zeiteinstellung 4. AUTO – Automatische Ventilationsstufe 5. HI – Hohe Ventilationsstufe 6. MID – Mittlere Ventilationsstufe 7. LOW – Niedrigste Ventilationsstufe 8. SLEEP – Nachtmodus 9. TEMP – Temperatureinstellung 7 Wichtige Hinweise Dieses Gerät kann die Kondensation verdampfen und automatisch durch den Abluftschlauch verteilen. -
Page 10: Instandhaltung
8 Instandhaltung Trennen Sie das Stromkabel, bevor Sie das Gerät reinigen. LUFTFILTER Bei der Reinigung der Filter entfernen Sie die Prallplatte bitte in Pfeilrichtung. Entfernen Sie den oberen Filter (1) und den unteren Filter (2) wie auf dem Bild. Verwechseln Sie die Filter nicht. -
Page 11: Nützliche Hinweise
9 Nützliche Hinweise Das Gerät ist mit einem speziellen Überlastungsschutz ausgestattet. Bitte stellen Sie sicher, dass das Gerät nicht gegen Objekte, die den Lufteinlass behindern könnten, gestellt werden darf (Möbel, Vorhänge etc.), da dies sonst drastische Auswirkungen auf die Leistungen haben kann. -
Page 12: Installieren Des Abluftschlauches
10 Installieren des Abluftschlauches 1. Drehen Sie den Abluftschlauch in die Richtung wie die Pfeilspitze (1) zeigt und verbinden Sie ihn dann mit dem Gerät. 2. Drehen Sie den Abluftschlauch in die Richtung wie die Pfeilspitze (2) zeigt, dann kann der Abluftschlauchaus der Einheit herausgenommen werden. -
Page 13: Betrrieb
D DE 11 Betrrieb Betrieb der Kühlfunktion 1. Packen Sie das Gerät aus und fixieren Sie Teil A und B zusammen (Abb. 1). Drehen Sie den Abluftschlauch im Uhrzeigersinn in die Rohrverbindung. 2. Fixieren Sie die Rohrverbindung auf dem Gerät (Abb. 2) und drehen Sie den Abluftschlauch im Uhrzeigersinn in die Rohrverbindung. -
Page 14: Eigenschaften
13 Eigenschaften Modell Nr. FRESCO 1000 FRESCO 1200 Spannung 220-240V~50Hz Leistung (EN60335) Kühlen 1153 W 1346 W Heizen 967 W 1129 W Kühlkapazität 3000 W 3500 W Heizkapazität 3000 W 3500 W Entfeuchtungsleistung 50 Liter/Tag 60 Liter/Tag Kältemittel R410A Masse... - Page 15 ENTSORGUNGSHINWEISE FÜR DEN ELEKTRISCHEN TEIL DES PRODUKTS Gemäss Artikel 26 des Gesetzeserlass vom 14. März 2014 zur Umsetzung der Richtlinie 2012/19/ EG und des Erlasses vom 4. März 2014 zur Umsetzung der Richtlinie 2011/65/EG zur Verringerung der Verwendung gefährlicher Stoffe in Elektro- und Elektronikgeräten und zur Abfallentsorgung. Das Symbol der durchgestrichenen Mülltonne auf dem Gerät oder der Verpackung weist darauf hin, dass das Gerät am Ende seiner Lebensdauer getrennt von anderen Abfällen über entsprechende Sammelstellen zu entsorgen ist.
- Page 16 Firma Armin Schmid Olensbachstrasse 9–15 CH-9631 Ulisbach Tel. Int. +41 71 987 60 60 Tel. Nat. 0848870850 info@sonnenkoenig.ch www.sonnenkoenig.ch Firma Armin Schmid Peter-Henlein-Strasse 5 D-89331 Burgau Tel: 0180 500 64 35 info@sonnenkoenig.ch www.sonnenkoenig.ch Festnetz 14 Cent/Minute Mobilnetz bis 42 Cent/Minute...
-
Page 17: Climatiseur Mobil
FRESCO 1000 / 1200 CLIMATISEUR MOBIL Manuel de l‘utilisateur Ar ticle-nr. FRESCO 1000: 10000162 Ar ticle-nr. FRESCO 1200: 10000262... - Page 18 SOMMAIRE 1 Consignes de sécurité ....................19 2 Avantages .........................21 3 Pour retirer l‘emballage ...................21 4 Caractéristiques de l‘appareil ................. 22 5 Panneau de contrôle et description des fonctions ...........23 6 Télécommande ......................25 7 Informations importantes ..................25 8 Maintenance ......................26 9 Mentions utiles ......................27 10 Installation du tuyau d‘évacuation de l‘air ............
-
Page 19: Important
IMPORTANT: Attendez avant d‘utiliser au moins 2 heures après le déballage de l‘équipement N’installez pas ou n’utilisez pas ce climatiseur portable avant d’avoir lu la notice d’utilisation. Conservez la notice d’utilisation pour une consultation ultérieure ou pour toute demande de garantie. - Page 20 • Nettoyez régulièrement le filtre à air pour pouvoir profiter du refroidissement le plus efficace possible. • Lorsque l’appareil est éteint, merci de patienter au moins 3,5 minutes avant de le remettre en marche afin de ne pas endommager le compresseur. •...
-
Page 21: Avantages
2 Avantages Ce climatiseur a été conçu selon les plus hauts standards de la technique moderne. Outre sa télécommande vous permettant d‘activer toutes les fonctions confortablement et en toute simplicité, notre appareil présente également les avantages suivants: • Il peut être déplacé d’une pièce à l’autre en toute simplicité grâce à ses roulettes pivotantes montées sur roulement à... -
Page 22: Caractéristiques De L'appareil
4 Caractéristiques de l‘appareil 1. Panneau de contrôle 8. Orifice d‘évacuation supérieur 2. Récepteur de la télécommande 9. Orifice d‘évacuation inférieur 3. Raccord de tuyauterie 10. Déflecteur 4. Entrée d‘air froid 11. Sortie d‘air chaud 5. Filtre en EVA 12. Sortie d‘air froid 6. -
Page 23: Panneau De Contrôle Et Description Des Fonctions
5 Panneau de contrôle et description des fonctions 1. POWER Appuyez sur ce bouton pour mettre en marche et éteindre l’appareil. 2. FUNCTION Appuyez sur cette touche pour choisir entre refroidissement, chauffage ou déshumidification. 3. REGULATION DE LA TEMPÉRATURE (vers le haut) Lorsque la fonction refroidissement est activée: cette touche permet d’augmenter la tempéra- ture préprogrammée d’... -
Page 24: Minuterie Programmable
7. MINUTERIE PROGRAMMABLE Appuyez sur la minuterie programmable avec la touche ON/OFF. TIMER ON: l’appareil s’arrête automatiquement après écoulement de la durée réglée. 1. Appuyez sur la touche TIMER en mode veille pour régler la durée souhaitée. 2. Après écoulement de la durée réglée, l’appareil s’arrête automatiquement. 3. -
Page 25: Télécommande
6 Télécommande 1. POWER – Interrupteur marche / arrêt 2. FUNC – Fonction „MODE“ 3. MINUTERIE – Réglage de la durée 4. AUTO – Force de ventilation automatique 5. HI – Force de ventilation élevée 6. MID – Force de ventilation moyenne 7. -
Page 26: Maintenance
8 Maintenance Débranchez le câble réseau avant de nettoyer l’appareil. FILTRE À AIR Lors du nettoyage des filtres, retirez la plaque d’impact dans la direction indiquée par la flèche. Retirez le filtre du haut (1) et le filtre du bas (2) tel que cela est indiqué sur l’image. Ne changez pas le filtre. -
Page 27: Mentions Utiles
9 Mentions utiles L’appareil est équipé d’un dispositif spécial anti-surcharge. Veuillez vous assurer que l’appareil n’est pas installé contre des objets qui pourraient obstruer l’entrée d’air (meubles, rideaux, etc.), cela pouvant avoir des effets négatifs sur sa performance. Alimentation électrique 1. -
Page 28: Installation Du Tuyau D'évacuation De L'air
10 Installation du tuyau d‘évacuation de l‘air 1. Tournez le tuyau d’évacuation de l’air dans la direction indiquée par la flèche (1) et raccor- dez-le ensuite à l’appareil. 2. Tournez le tuyau d’évacuation de l’air dans la direction indiquée par la flèche (2), il peut ensuite être retiré... -
Page 29: Fonctionnement
11 Fonctionnement Activation de la fonction refroidissement 1. Retirez l’appareil de son emballage et fixez les parties A et B ensemble (fig. 1). Tournez le tuyau d’évacuation de l’air dans le sens des aiguilles d’une montre dans le raccord de tuyauterie. -
Page 30: Caractéristiques
13 Caractéristiques N° de modèle FRESCO 1000 FRESCO 1200 Voltage 220-240V~50Hz Performance (EN60335) Refroidissement 1153 W 1346 W Chauffage 967 W 1129 W Capacité de refroidissement 3000 W 3500 W Capacité de chauffage 3000 W 3500 W Capacité de 50 litres / jour 60 litres / jour déshumidification... -
Page 31: Instructions D'élimination Des Composants Électriques Du Produit
INSTRUCTIONS D‘ÉLIMINATION DES COMPOSANTS ÉLECTRIQUES DU PRODUIT Conformément à l’article 26 du décret-loi du 14 mars 2014 portant application de la directive 2012/19/CE et de la loi du 4 mars 2014 portant application de la directive 2011/65/CE concernant la réduction de l’utilisation de substances dangereuses dans les équipements électriques et élec- troniques et la gestion des déchets. - Page 32 Maison Armin Schmid Olensbachstrasse 9–15 CH-9631 Ulisbach Tel. Int. +41 71 987 60 60 Tel. Nat. 0848870850 info@sonnenkoenig.ch www.sonnenkoenig.ch Maison Armin Schmid Peter-Henlein-Strasse 5 D-89331 Burgau Tel: 0180 500 64 35 info@sonnenkoenig.ch www.sonnenkoenig.ch Festnetz 14 Cent/Minute Mobilnetz bis 42 Cent/Minute...
-
Page 33: Manuale Dell'utente
FRESCO 1000 / 1200 CLIMATIZZATORE MOBILE Manuale dell‘utente Nr. articolo FRESCO 1000: 10000162 Nr. articolo FRESCO 1200: 10000262... - Page 34 INDICE 1 Avvertenze per la sicurezza ..................35 2 Vantaggi ........................37 3 Istruzioni per lo spacchettamento ................37 4 Nome delle parti .......................38 5 Bedieningspaneel en functiebeschrijving ..............39 6 Telecomando ......................41 7 Informazioni importanti ...................41 8 Manutenzione ......................42 9 Indicazioni utili ......................43 10 Installazione del tubo di scarico ................
-
Page 35: Avvertenze Per La Sicurezza
IMPORTANTE: Attendere almeno 2 ore dopo aver disimballato l‘apparecchio prima di utilizzarlo! Non installare e utilizzare il vostro condizionatore portatile senza prima aver letto attentamen- te queste istruzioni per l’uso. Conservare questo manuale per la garanzia e come riferimento futuro. 1 Avvertenze per la sicurezza Prima di mettere in funzione per la prima volta il deumidificatore, si raccomanda di leggere con cura le istruzioni d’uso e di rispettare le avvertenze di sicurezza al fine di evitare un utilizzo im-... - Page 36 • Quando l’apparecchio è spento, attendere almeno 3.5 minuti prima di riavviarlo per evitare che il compressore venga danneggiato. • Questa unità ha bisogno di almeno 7 Ampere di energia elettrica per far funzionare il compressore. Per evitare il blocco di energia elettrica, si prega di non utilizzare alcun cavo di prolunga per questa unità.
-
Page 37: Vantaggi
2 Vantaggi Questo condizionatore d’aria è stato progettato e realizzato secondo i più alti standard di mo- derna ingegneria. Il nostro prodotto non solo si fornisce un comando a distanza per aiutare l’utente ad azionare tutte le funzioni in modo semplice e conveniente, ma ha anche i seguenti vantaggi: •... -
Page 38: Nome Delle Parti
4 Nome delle parti 1. Pannello di controllo 8. Foro di scarico superiore 2. Ricevitore del telecomando 9. Foro di scarico inferiore 3. Raccordo 10. Deflettore 4. Ingresso di aria fredda 11. Uscita dell’aria calda 5. Filtro del deumidificatore 12. Uscita dell`aria fredda 6. -
Page 39: Pannello Di Controllo E Descrizione Delle Funzioni
5 Pannello di controllo e descrizione delle funzioni 1. INTERRUTTORE PRINCIPALE Premere questo pulsante per accendere e spegnere il prodotto. 2. FUNZIONI Premere questo pulsante per selezionare una delle tre modalità: raffreddamento, riscaldamento, deumidificazione. 3. REGOLAZIONE DELLA TEMPERATURA (verso l‘alto) Durante la funzione di raffreddamento questo tasto aumenta la temperatura preimposta- ta di 1°... -
Page 40: Timer Off
7. TIMER PROGRAMMABILE Accendere il timer programmabile con il tasto ON / OFF. TIMER ON: è usato per accendere automaticamente l’unità in una determinata ora preimpostata. 1. Premere il tasto „TIMER“-in modalità Stand-by, per impostare l`orario desiderato. 2. Una volta esaurito il tempo impostato l’unità si spegnerà automaticamente. 3. -
Page 41: Telecomando
6 Telecomando 1. POWER – Accensione-spegnimento 2. FUNC – Selezionare la modalità „MODE“ 3. TIMER – Programmazione oraria 4. AUTO – Velocità automatica della ventola 5. HI – Alta velocità di ventilazione 6. MID – Media velocità di ventilazione 7. LOW – Bassa velocità di ventilazione 8. -
Page 42: Manutenzione
8 Manutenzione Scollegare il cavo di alimentazione prima di effettuare la pulizia. FILTRO DELL‘ARIA Durante la pulizia dei filtri, si prega di sfilare il deflettore nella direzione mostrata della freccia. Estrarre il filtro superiore (1) ed il filtro inferiore (2) come mostrato nell’immagine. Non invertire l’ordine. -
Page 43: Indicazioni Utili
9 Indicazioni utili Il prodotto dispone di un dispositivo termico di protezione. Assicurarsi di non posizionare il prodotto davanti ad oggetti o muri che ne possano ostruire la presa d’aria diminuendone drammaticamente le prestazioni. Alimentazione elettrica 1. Verificare che la presa di corrente elettrica sia appropriata alla tensione indicata nell’eti- chetta del prodotto. -
Page 44: Installazione Del Tubo Di Scarico
10 Installazione del tubo di scarico 1. Avvitare il tubo di scarico nella direzione indicata nell’immagine (1) per connettere il tubo all’unità. 2. Ruotate il tubo nella direzione mostrata nell’immagine (2) per disconnettere il tubo dall’unità. Come godersi le funzioni di raffreddamento e riscaldamento:... -
Page 45: Funzionamento
11 Funzionamento Quando si vuole attivare la funzione di raffreddamento 1. Spacchettare il prodotto e fissare la parte A e B insieme (fig. 1). Ruotare in senso orario il tubo di scarico al giunto. 2. Fissare il raccordo al prodotto (fig. 2) Ruotare in senso orario il tubo di scarico al giunto. 3. -
Page 46: Specifiche
13 Specifiche Nome del modello FRESCO 1000 FRESCO 1200 Voltaggio 220-240V~50Hz Performance (EN60335) Raffreddamento 1153 W 1346 W Riscaldamento 967 W 1129 W Capacitá di raffreddamento 3000 W 3500 W Capacitá di riscaldamento 3000 W 3500 W Capacitá di deumidificazione... - Page 47 INFORMATIVA SMALTIMENTO RELATIVA ALLA PARTE ELETTRICA DEL PRODOTTO Ai sensi del D.L. del 14 marzo 2014 art. 26, di attuazione della direttiva 2012/19/EU e del D.L. 27 del 4 marzo 2014, di attuazione della direttiva 2011/65/EU relativa alla riduzione dell‘uso di sostanze pericolose nelle apparecchiature elettriche ed elettroniche, nonché allo smaltimento dei rifiuti.
- Page 48 Ditta Armin Schmid Olensbachstrasse 9–15 CH-9631 Ulisbach Tel. Int. +41 71 987 60 60 Tel. Nat. 0848870850 info@sonnenkoenig.ch www.sonnenkoenig.ch Ditta Armin Schmid Peter-Henlein-Strasse 5 D-89331 Burgau Tel: 0180 500 64 35 info@sonnenkoenig.ch www.sonnenkoenig.ch Telefono fisso 14 Cent/Minute Telefono mobile bis 42 Cent/Minute...
-
Page 49: Mobiele Airconditioner
FRESCO 1000 / 1200 MOBIELE AIRCONDITIONER Gebruiksaanwijzing Artikelnr. FRESCO 1000: 10000162 Artikelnr. FRESCO 1200: 10000262... - Page 50 INDEX 1 Veiligheidsmaatregelen ....................51 2 Voordelen .........................53 3 Uitpakken ........................53 4 Kenmerken van het apparaat .................. 54 5 Pannello di controllo e descrizione delle funzioni ..........55 6 Afstandsbediening ....................57 7 Belangrijke aanwijzingen ..................57 8 Onderhoud ....................... 58 9 Praktische aanwijzingen ..................59 10 Installeren van de ontluchtingsslang ..............
-
Page 51: Veiligheidsmaatregelen
BELANGRIJK: Wacht minstens 2 uur na het uitpakken van het apparaat alvor- ens het te gebruiken! Installeer of gebruik de mobiele airconditioning niet voordat u de gebruikershandleiding hebt gelezen. Bewaar de gebruikershandleiding om deze ook later te kunnen raadplegen en voor eventuele garantievorderingen. - Page 52 • Wanneer het apparaat wordt uitgeschakeld, moet u minstens 3,5 minuten wachten tot u het opnieuw start, om beschadiging van de compressor te voorkomen. • Het apparaat moet minstens 7 ampère voeding krijgen voor het gebruik van de compressor. Gebruik geen verlengsnoer, om overbelasting van het stroomnet te vermijden.
-
Page 53: Voordelen
2 Voordelen Deze airconditioning is ontwikkeld en geproduceerd volgens de hoogste normen van de mo- derne techniek. Bij ons product ontvangt u niet alleen een afstandsbediening waarmee alle functies eenvoudig en makkelijk te bedienen zijn, maar ook de volgende voordelen: •... -
Page 54: Kenmerken Van Het Apparaat
4 Kenmerken van het apparaat 1. Bedieningspaneel 8. Bovenste uitlaatopening 2. Ontvanger voor afstandsbediening 9. Onderste uitlaatopening 3. Buisverbinding 10. Stootplaat 4. Luchtinvoer koud 11. Uitlaat warme lucht 5. Filter van EVA 12. Uitlaat ventilatielucht 6. Filter van COND 7. Invoer warme lucht... - Page 55 5 Bedieningspaneel en functiebeschrijving 1. POWER Druk deze knop in om het apparaat AAN of UIT te zetten. 2. FUNCTION Deze toets dient om koeling, verwarming of ontvochting te selecteren. 3. TEMPERATUURREGELING (naar boven) Tijdens het koelen: door deze toets in te drukken, verhoogt u de vooraf ingestelde temperatuur in stappen van 1°...
-
Page 56: Timer Off
7. PROGRAMMEERBARE TIMER U kunt de programmeerbare timer bedienen met de ON-/OFF-toets. TIMER ON: het apparaat schakelt na verstrijken van de ingestelde tijd automatisch in. 1. Druk op de TIMER-toets in de stand-by modus om de gewenste tijd in te stellen. 2. -
Page 57: Afstandsbediening
6 Afstandsbediening 1. POWER – Aan-/uit-schakelaar 2. FUNC – Functie MODE 3. TIMER– Tijdinstelling 4. AUTO – Automatische ventilatiesnelheid 5. HI – Hoge ventilatiesnelheid 6. MID – Gemiddelde ventilatiesnelheid 7. LOW – Lage ventilatiesnelheid 8. SLEEP – Nachtmodus 9. TEMP – Temperatuurregeling 7 Belangrijke aanwijzingen Dit apparaat kan de condensatie verdampen en automatisch via de ontluchtingsslang vers- preiden. -
Page 58: Onderhoud
8 Onderhoud Neem de stekker uit het stopcontact voordat u het apparaat reinigt. LUCHTFILTER Bij het reinigen van de filters verwijdert u de stootplaat in de richting van de pijl. Verwijder het bovenste (1) en onderste (2) filter zoals afgebeeld. Verwissel de filters niet. CONDENSATOR / VERDAMPER Gebruik de borstel van uw stofzuiger voor het reinigen. -
Page 59: Praktische Aanwijzingen
9 Praktische aanwijzingen Het apparaat is voorzien van een speciale beveiliging tegen overbelasting. Denk eraan dat het apparaat niet mag worden opgesteld tegen bepaalde objecten die de luchtinvoer kunnen belemmeren (meubels, gordijnen e.d.), want dit zou drastische effecten op de werking kunnen hebben. -
Page 60: Installeren Van De Ontluchtingsslang
10 Installeren van de ontluchtingsslang 1. Draai de ontluchtingsslang in de richting die de pijl (1) aangeeft en verbindt hem dan met het apparaat. 2. Draai de ontluchtingsslang in de richting die de pijl (2) aangeeft om hem uit de eenheid te nemen. -
Page 61: Gebruik
11 Gebruik Gebruik van de koelfunctie 1. Pak het apparaat uit en maak deel A en B aan elkaar vast (afb. 1). Draai de ontluchtingss- lang rechtsom in de buisverbinding. 2. Maak de buisverbinding vast op het apparaat (afb. 2) en draai de ontluchtingsslang recht- som in de buisverbinding. - Page 62 13 Kenmerken Model nr. FRESCO 1000 FRESCO 1200 Spanning 220-240V~50Hz Capaciteit (EN60335) Koelen 1153 W 1346 W Verwarmen 967 W 1129 W Koelcapaciteit 3000 W 3500 W Verwarmingscapaciteit 3000 W 3500 W Ontvochtigingscapaciteit 50 liter / dag 60 liter / dag...
- Page 63 INFORMATIE OVER DE VERWIJDERING VAN HET ELEKTRISCHE GEDEELTE VAN HET PRODUCT In overeenstemming met artikel 26 van de besluitwet van 14 maart 2014 tot uitvoering van Richtlijn 2012/19/EU en de wet van 4 maart 2014 tot uitvoering van Richtlijn 2011/65/EU betreffende de ver- mindering van het gebruik van gevaarlijke stoffen in elektrische en elektronische apparatuur en de verwijdering van afvalstoffen.
- Page 64 Firma Armin Schmid Olensbachstrasse 9–15 CH-9631 Ulisbach Tel. Int. +41 71 987 60 60 Tel. Nat. 0848870850 info@sonnenkoenig.ch www.sonnenkoenig.ch Firma Armin Schmid Peter-Henlein-Strasse 5 D-89331 Burgau Tel: 0180 500 64 35 info@sonnenkoenig.ch www.sonnenkoenig.ch Festnetz 14 Cent/Minute Mobilnetz bis 42 Cent/Minute...
-
Page 65: Mobile Air Conditioner
FRESCO 1000 / 1200 MOBILE AIR CONDITIONER User manual Article-Nr. FRESCO 1000: 10000162 Article-Nr. FRESCO 1200: 10000262... - Page 66 INDEX 1 Safety Information ....................67 2 Vantage ........................69 3 Unpacking instructions ................... 69 4 Name of the parts .....................70 5 Control panel & description of function ..............71 6 Remote control ......................73 7 Important informations....................73 8 Maintenance ......................74 9 Helpful hints ......................75 10 Exhaust hose install ....................76 11 Use ...........................77...
-
Page 67: Safety Information
VERY IMPORTANT! Wait at least 2 hours after unpacking the device before using it! Do not install or use your portable air conditioner unit before carefully reading these instruc- tions. Please retain this manual brochure for your product warranty and future reference. 1 Safety Information Please read before first commissioning the safety instructions carefully and observe the safety instructions to prevent damage due to misuse, improper operation, and improper environmental... - Page 68 • After the unit is switched on, to operate the fan, the compressor will start up after the cooling alarm has flashed for three minutes. • In heating mode, the heating alarm will flash for 3.5 minutes before the compressor and fan start up. •...
-
Page 69: Unpacking Instructions
2 Vantage This air conditioner has been designed and manufactured to the highest standards of modern engineering. Our product not only provides you with a remote control for easy and convenient use of all functions but also has the following benefits: •... -
Page 70: Name Of The Parts
4 Name of the parts 1. Control panel 8. Upper drainage hole 2. Remote control receiver 9. Lower drainage hole 3. Adapter 10. Baffle plate 4. Cool air inlet 11. Hot air outlet 5. EVA filter 12. Cool air outlet 6. -
Page 71: Control Panel & Description Of Function
5 Control panel & description of function 1. POWER BUTTON Press to turn the unit ”ON” or ”OFF”. 2. FUNCTION Press this button to select cooling, heating, or dehumidifying. 3. TEMPERATURE ADJUSTMENT BUTTON (up) In cooling mode: This button raises the preset temperature by 1° C each time it is pressed, the maximum limit is 30°... -
Page 72: Sleep Function
TIMER ON: The unit switches on. 1. Press the “TIMER“ button in stand-by mode to set the time you desire. 2. Once the set time has elapsed, the unit will turn on automatically. 3. If you press the “POWER“ button before the time has elapsed, the timer setting will be canceled and the unit will turn on. -
Page 73: Remote Control
6 Remote control 1. POWER – On/Off switch 2. FUNC – “MODE” selector 3. TIMER– Timer programming 4. AUTO – Automatic fan speed 5. HI – High fan speed 6. MID – Medium fan speed 7. LOW – Low fan speed 8. -
Page 74: Maintenance
8 Maintenance Please disconnect the power cord before cleaning. AIR FILTER When cleaning the filters, please take out the baffle plate in the direction indicated by the arrow. Take out filter (1) by sliding upward and filter (2) by sliding downward as shown in the image. -
Page 75: Helpful Hints
9 Helpful hints The unit is fitted with a special thermal cut off device. Please ensure that the unit is not placed against objects which may obstruct the air intake e.g. furniture or curtains as this will dramatically affect it’s performance. Power supply 1. -
Page 76: Exhaust Hose Install
10 Exhaust hose install 1. Turn the exhaust hose in the direction indicated by arrow (1) and then connect it to the unit. 2. Turn the exhaust hose in the direction indicated by arrow (2) and then the exhaust hose can be took outdetached from the unit. -
Page 77: Use
11 Use When using the cooling function: 1. Unpack the unit and fix part a and part b together as schown in Fig. 1 Rotate the exhaust hose clockwise to attach to the adapter. 2. Fix the adapter to the unit as schown in Fig. 2, rotate the exhaust hose clockwise to attach to the adapter. -
Page 78: Specification
13 Specification Model nr. FRESCO 1000 FRESCO 1200 Power Supply 220-240V~50Hz Rated Power (EN60335) Cooling 1153 W 1346 W Heating 967 W 1129 W Cooling Capacity 3000 W 3500 W Heating Capacity 3000 W 3500 W Moisture Removed 50 liters/day... - Page 79 DISPOSAL INSTRUCTIONS FOR THE ELECTRICAL PART OF THE PRODUCT In accordance with Article 26 of the Decree-Law of 14 March 2014 implementing Directive 2012/19/EC and the Law of 4 March 2014 implementing Directive 2011/65/EC on the reduction of the use of hazardous substances in electrical and electronic equipment and on waste management.
- Page 80 Company Armin Schmid Olensbachstrasse 9-15 CH-9631 Ulisbach Tel. Int. +41 71 987 60 60 Tel. Nat. 0848870850 www.sonnenkoenig.ch Company Armin Schmid Peter-Henlein-Strasse 5 D-89331 Burgau Tel: 0180 500 64 35 info@ sonnenkoenig.ch www.sonnenkoenig.ch 0.14 Cent/Minute...