
Manuels Connexes pour Staufenbiel Hyperion HSF0314092E


Sommaire des Matières pour Staufenbiel Hyperion HSF0314092E
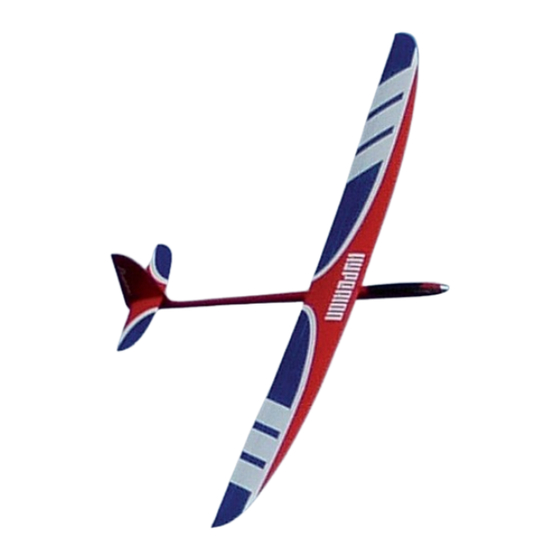
- Page 1 MONTAGEANLEITUNG INSTRUCTION MANUAL INSTRUCTIONS DE MONTAGE HSF0314092E / HSF0314092P...
-
Page 2: Sicherheitshinweise
Installation, der Betrieb, die Verwendung und Wartung der mit dem Modell zusammenhängenden Komponenten können von der Firma Staufenbiel nicht überwacht werden. Daher übernimmt die Firma Staufenbiel keinerlei Haftung für Verluste, Schäden oder Kosten, die sich aus dem fehlerhaften Betrieb, aus fehlerhaften Verhalten bzw. in irgendeiner Weise mit dem vorgenannten zusammenhängend er- geben. -
Page 3: Technische Daten
TECHNISCHE DATEN 3400 mm (134 in) 1250 mm (49 in) 85,0 dm² (1317.5 in²) 3000 g (106 oz) ZUBEHÖR PNP-VERSION ARF-VERSION Eingebaut: Benötigt: X-Max X42-L oder GTX-3546 (650KV) GTX-3546 (650KV) (4x) DS 1800 MG (4x) DS 1800 MG (2x) DS 1700 MG (2x) DS 1700 MG CAM Carbon 14x8“... - Page 4 VORWORT Herzlichen Glückwunsch zum Erwerb des Staufenbiel Hyperion. Es handelt sich um ein Voll-GFK-Hochleistungs-Segelflugmodell, welches in Schalenbauweise herge- stellt wurde. Durch das Thermikprofil in Verbindung mit dem 4-Klappenflügel ist der Hyperion prädesti- niert für den Thermikflug. Durch das Verwölben der Flächen sind zu jedem Zeitpunkt die gewünschten Flugeigenschaften einfach einzustellen.
- Page 5 Stellen Sie die Länge der Schubstange des Seitenruders durch Auf- oder Abschrauben der Gabelköpfe korrekt ein und kontern Sie diese mit den Muttern. Benutzen Sie außer- dem Schraubensicherungslack. Hängen Sie das Gestänge anschließend wie auf dem Bild zu sehen in das Ruderhorn ein. Stellen Sie nun auch die benötigte Länge des Höhenrudergestänges ein und sichern Sie die Gabelköpfe in der gleichen Weise wie beim...
- Page 6 Anschließend mit Pattex Stabilit oder Endfest einkleben. Der Vorteil dieser Bauweise ist auf diesem Bild ersichtlich. Der Regler kann unter dem Brett verlegt werden. Das Akkubrett kann nun komfortabel einge- schraubt und bei Bedarf wieder entfernt wer- den. Der Regler ist nicht mehr zu sehen. Die Arbeiten am Rumpf sind nach dem Einschrau- ben des Motors bereits abgeschlossen.
- Page 7 NUR ARF VERSION: Schleifen Sie die Auflagefläche des Servos gut an und entfernen Sie den Schleifstaub. NUR ARF VERSION: Kleben Sie einen Servorahmen mit Sekunden- kleber in den Schacht. NUR ARF VERSION: Schrauben Sie das Servo in den Rahmen und hängen Sie das Gestänge ein.
- Page 8 NUR ARF VERSION: Wie bei der Wölbklappe schon geschehen die Klebefläche anschleifen und einen Ser- vorahmen einkleben. NUR ARF VERSION: Das Servo in den Rahmen schrauben. Das Gestänge montieren und die Gabelköpfe und Kontermuttern mit etwas Schraubensiche- rung versehen. Die Muttern mit einer Zange leicht anziehen.
-
Page 9: Der Schwerpunkt
Die Schaumstoffstückchen werden mit Se- kundenkleber am Servokabel festgeklebt. Das Kabel kann nun in die Fläche eingezo- gen werden. Durch den Schaumstoff wird ein Klappern und ein eventuelles Aufscheuern des Kabels wirksam verhindert. Am Ende Kabel ein Multiplexstecker anlöten. Entsprechendes Gegenstück für den Rumpf anfertigen. - Page 10 RUDERAUSSCHLÄGE FUNKTION NORMAL THERMIK STRECKE ▲ 20 mm ▲ 2 mm Querruder ▼ 14 mm ▼ 3 mm (Bremse: ▲ 18 mm) ▲ 5 mm Höhenruder ▼ 5 mm (Bremse: ▼ 5 mm) ▲ 8 mm ▲ 3 mm Wölbklappen ▼...
-
Page 11: Konformitätserklärung
KONFORMITÄTSERKLÄRUNG Horizon Hobby GmbH erklärt hiermit, dass dieses Produkt konform zu den essentiellen Anforderungen der EMC Direktive. Eine Kopie der Konformitätserklärung ist online unter folgender Adresse verfügbar : http://www.horizonhobby.com/content/support-render-compliance HINWEISE ZUM UMWELTSCHUTZ Entsorgung in der Europäischen Union Dieses Produkt darf nicht über den Hausmüll entsorgt werden. Es ist die Verantwortung des Benutzers, dass Produkt an einer registrierten Sammelstelle für Elektroschrott abzugeben diese Verfahren stellt sicher, dass die Umwelt geschont wird und... -
Page 12: Safety Precautions And Warnings
Do not use with incompatible compo- nents or alter this product in any way outside of the instructions provided by Gustav Staufenbiel GmbH. This manual contains instructions for safety, operation and maintenance. It is essential to read and follow all the instructions and warnings in the manual, prior to assembly, setup or use, in order to operate correctly and avoid damage or serious injury. -
Page 13: Accessories
SPECIFICATIONS 3400 mm (134 in) 1250 mm (49 in) 85,0 dm² (1317.5 in²) 3000 g (106 oz) ACCESSORIES PNP-VERSION ARF-VERSION built-in: needed: X-Max X42-L oder GTX-3546 (650KV) GTX-3546 (650KV) (4x) DS 1800 MG (4x) DS 1800 MG (2x) DS 1700 MG (2x) DS 1700 MG CAM Carbon 14x8“... - Page 14 PREFACE Congratulations on purchasing the Staufenbiel Hyperion, a full-composite thermal glider. The construction of the model and the detailed solutions related subject to a certain taste dependency. Therefore, the solutions to these instructions are to be understood as a suggestion. There are certainly other options and approaches.
- Page 15 Adjust the length of the rudder-linkage by screwing or unscrewing the clevis to the linka- ge. Use the M2 nut to tighten the clevis. Addi- tionally we recommend using thread lock. Af- terwards mount the clevis to the rudder horn like shown in the picture.
- Page 16 Glue the ridges with Pattex Stabilit or Uhu En- fest. (If not available use 15 min Epoxy) With this kind of installation the ESC will be be ins- talled under the tray. The battery tray will be srewed in the fuselage and if needed easily removed.
- Page 17 ARF VERSION ONLY: Use sandpaper to lightly sand the surface were the servos will be installed. Remove any dirt. ARF VERSION ONLY: Glue the servotray with CA glue in the ope- ning. ARF VERSION ONLY: Secure the servo in the mount using the screws provided with the servo.
- Page 18 ARF VERSION ONLY: Pepare the opening for the Aileron servo mount as described in the flaps installation. Glue the servotray in the wing. ARF VERSION ONLY: Secure the servo in the mount using the screws provided with the servo. Assemble the pushrods with clevis and nuts. Tighten the nuts with pliers and secure it with thread lock.
-
Page 19: Center Of Gravity
CG. The CG can be moved back until around 105 mm in order to gain higher performance of the model. The longitudinal dihedral should be set to a value between 1,5° (CG 90 mm) and 1,0° (CG 100 mm). We wish you many happy landings with you new Staufenbiel Hyperion. -
Page 20: Control Throws
CONTROL THROWS FUNCTION STANDARD THERMAL SPEED ▲ 20 mm ▲ 2 mm Ailerons ▼ 14 mm ▼ 3 mm (Brake: ▲ 18 mm) ▲ 5 mm Elevator ▼ 5 mm (Brake: ▼ 5 mm) ▲ 8 mm ▲ 3 mm Flaps ▼... -
Page 21: Declaration Of Confirmity
DECLARATION OF CONFIRMITY EU Compliance Statement: Horizon Hobby, LLC hereby declares that this product is in compliance with the essential requirements and other relevant provisions of the EMC Directive. A copy of the EU Declaration of Conformity is available online at: http://www.horizonhobby.com/content/support-render-compliance. -
Page 22: Précautions Et Avertissements Liés À La Sécurité
N’essayez pas de modifi er ou d’utiliser ce produit avec des composants incompatibles hors des ins- tructions fournies par Gustav Staufenbiel GmbH. Ce manuel comporte des instructions relatives à la sécurité, au fonctionnement et à l’entretien. Il est capital de lire et de respecter la totalité des instructions et avertissements du manuel avant l’assemblage, le réglage et l’utilisation, ceci afi n de manipuler cor-... -
Page 23: Caracteristiques
CARACTERISTIQUES 3400 mm (134 in) 1250 mm (49 in) 85,0 dm² (1317.5 in²) 3000 g (106 oz) ACCESSOIRES VERSION PNP VERSION ARF Installé: Requis : X-Max X42-L oder GTX-3546 (650KV) GTX-3546 (650KV) (4x) DS 1800 MG (4x) DS 1800 MG (2x) DS 1700 MG (2x) DS 1700 MG CAM Carbon 14x8“... -
Page 24: Uniquement Sur Version Arf
PREAMBULE Félicitations pour l’acquisition de votre Hyperion Staufenbiel. Hyperion est un planeur de grandes performances thermiques de la classe F5J tout plastique. L’aile d’une envergure de 3 m 40 est en 3 parties et son profil la prédestine au vol thermique. Mais ses volets de courbure positionnés en négatif lui permettent à... - Page 25 Règlez la longueur optimale de la comman- de de direction en vissant ou en dévissant les chapes, puis serrez les contre-écrous.Utilisez du frein filet pour assurer ces derniers. Bran- chez la commande sur le palonnier comme illustré. Règlez également la longueur optimale de la commande de profondeur en procédant de la même manière que pour la direction.
-
Page 26: Les Ailes
Puis renforcer le collage avec de la Pattex Stabilit ou UHU 300. L‘avantage de cettte façon de faire transparaît sur la photo : L‘on peut palcer le variateur sous ce plancher... Le plancher peut ainsi être aisément dévissé et ôté à la demande. Le variateur disparaît totalement sous celui-ci. - Page 27 UNIQUEMENT SUR VERSION ARF : Poncez la surface de collage dédiée aux servos et nettoyer celle-ci en aspirant la pous- sière générée. UNIQUEMENT SUR VERSION ARF : Collez un support de servo en place à l‘aide de cyano. UNIQUEMENT SUR VERSION ARF : Vissez le servo sur son support,puis branchez la commande sur son palonnier.
- Page 28 UNIQUEMENT SUR VERSION ARF : Procéder de même que ci-dessus pour les ser- vos de volets et leur fixation. UNIQUEMENT SUR VERSION ARF : Visser le servo sur son support. Monter en place les commandes et les chapes. Serrer les contre-écrous à l‘aide d‘une pince et assurer avec du frein-filet.
- Page 29 Coller les bandelettes en mousse au câb- le rallonge à l‘aide de cyano puis l‘insérer dans l‘aile. Cette façon de procéder permet d‘éviter que le cable ne bouge et ne frotte à l‘intérieur de l‘aile. A l‘autre extrémité du câble, souder une pri- se Multiplex et préparer son pendant pour le fuselage.
- Page 30 DEBATTEMENTS FUNKTION NORMAL THERMIK STRECKE ▲ 20 mm ▲ 2 mm Aileron ▼ 14 mm ▼ 3 mm (Brake: ▲ 18 mm) ▲ 5 mm Profondeur ▼ 5 mm (Brake: ▼ 5 mm) ▲ 8 mm ▲ 3 mm Wölbklappen ▼...
-
Page 31: Déclaration De Conformité Ce
DÉCLARATION DE CONFORMITÉ CE Ce produit respecte les critères de sécurité essentiels déterminés dans la directive du Conseil de l‘ Union européenne relative à l‘harmonisation des dispositions légales des États membres sur la compatibilité électromagnétique (2004/108/CE). Une déclaration de conformité est dis- ponible. - Page 32 © 2016 Gustav Staufenbiel GmbH...