Table des Matières
Publicité
Les langues disponibles
Les langues disponibles
Liens rapides
Publicité
Table des Matières

Manuels Connexes pour Staufenbiel Epsilon XL V3


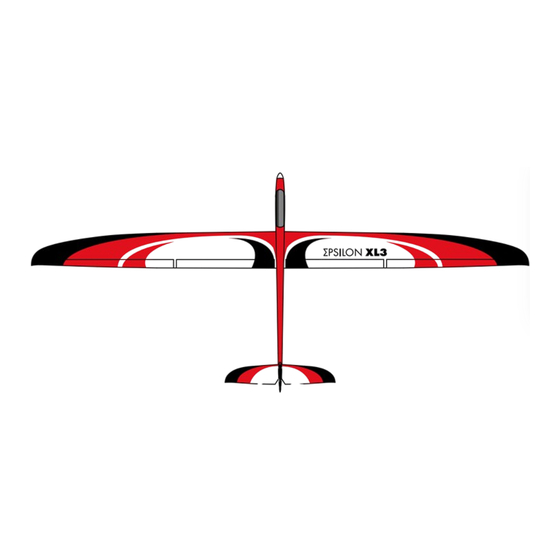
Sommaire des Matières pour Staufenbiel Epsilon XL V3
- Page 1 MONTAGEANLEITUNG INSTRUCTION MANUAL INSTRUCTIONS DE MONTAGE...
-
Page 2: Sicherheitshinweise
Installation, der Betrieb, die Verwendung und Wartung der mit dem Modell zusammenhängenden Komponenten können von der Firma Staufenbiel nicht überwacht werden. Daher übernimmt die Firma Staufenbiel keinerlei Haftung für Verluste, Schäden oder Kosten, die sich aus dem fehlerhaften Betrieb, aus fehlerhaften Verhalten bzw. in irgendeiner Weise mit dem vorgenannten zusammenhängend er- geben. -
Page 3: Technische Daten
TECHNISCHE DATEN 90,0 dm² 4400 g 4000 mm ZUBEHÖR PNP-VERSION ARF-VERSION Eingebaut: Benötigt: Himax C 4260 570 kV Dymond V-Max V-42L 4x D 260 4x D 260 2x DS 1550 MG 2x DS 1550 MG 16x8“ 16x8“ 41mm Spinner 41mm Spinner Smart 60 BEC Benötigt: Smart 60 BEC... -
Page 4: Lieferumfang
VORWORT Herzlichen Glückwunsch zum Erwerb des Epsilon XL V3! Der Epsilon XL V3 ist die größte Variante der beliebten Servos, Kabelbaum und Multilock. Als Akku kommt ein 4S Epsilon-Familie. Das Konzept und das tolle Preis/Leis- LiPo zum Einsatz. Der Epsilon XL V3 verfügt im Gegen- tungsverhältnis überzeugen jeden Segelflug-Begeisterten. - Page 5 DER RUMPF NUR ARF VERSION Bringen Sie im ersten Schritt das Höhen- und Seiten- ruderservo auf Neutralstellung und montieren Sie die Servohörner. Verschrauben Sie die Servos anschlie- ßend im Rumpf. NUR ARF VERSION Fertigen Sie zwei Kabelbäume mit MPX-Steckern für Wölbklappen und Querruder für die Verbindung zum Empfänger und verkleben Sie die MPX-Stecker im Rumpf.
- Page 6 Ziehen Sie die Stahldrähte für die Anlenkung des Sei- ten- und Höhenruders aus dem Rumpf. Fertigen Sie den Gestängeanschluss gemäß Abbildung. Fädeln Sie den Stahldraht anschließend von hinten durch den Rumpf. Richten Sie den Stahldraht bei neu- traler Ruderstellung am Seitenruder exakt aus. Markieren Sie auf dem Stahldraht die Position des Lochs am Servohorn.
- Page 7 Stecken Sie die CFK Rohre für das Pendelleitwerk durch den Rumpf und richten Sie diese mittig aus. Bringen Sie die Pendelmechanik in Neutralstellung, sodass am Höhenleitwerk ein Einstellwinkel von 0° anliegt. Fertigen Sie den Gestängeanschluss gemäß Abbildung. Fädeln Sie den Stahldraht anschließend von hinten durch den Rumpf.
- Page 8 Korrigieren Sie ggf. die Gestängelänge am Gabel- kopf und hängen Sie diesen dann am Umlenkhebel ein. Montieren Sie im nächsten Schritt die beiden Höhen- leitwerke. Grundsätzlich sollten sich diese durch die Reibungskräfte an den CFK Rohren selber sichern. Sofern dies nicht der Fall sein sollte, kann auf die Roh- re ein wenig dünnflüssiger Sekundenkleber gegeben werden, der als zusätzliches Material dient.
- Page 9 Bei PNP-Version: Kontrollieren Sie den festen Sitz der Motorschrauben und verwenden Sie ggf. Locti- te Schraubensicherung. Montieren Sie Spinner und Luftschraube. Fixieren Sie die Schachtabdeckung über der Pendel- mechanik mit Tesafilm, sodass diese weiterhin zugän- gig bleibt. Steckern Sie den Flächenverbinder durch den Rumpf und richten Sie diesen mittig aus.
- Page 10 DIE TRAGFLÄCHE Schleifen Sie im ersten Schritt die Klebeflächen der Randbögen leicht an. Verkleben Sie die Randbögen mit angedicktem Harz oder Sekundenkleber. Fixieren Sie diese ggf. zum Aushärten mit Tesafilm. Entfernen Sie das Styropor im Bereich des Wölbklap- pendurchbruchs mit einem Schraubendreher. Um später einen möglichst großen Ausschlag der Wölbklappen erreichen zu können, muss der Durch- bruch mit einer Feile erweitert werden.
- Page 11 NUR ARF VERSION Fertigen Sie zwei Kabelbäume mit MPX-Steckern für Wölbklappen und Querruder. Folgende Kabellängen Sind erforderlich: Stecker-->Querruderservo: 130cm Stecker-->Wölbklappenservo: 50cm Beachten Sie unbedingt die zuvor notierte Stecker- belegung! NUR ARF VERSION Fädeln Sie die Kabelbäume durch die Tragfläche. NUR ARF VERSION Verkleben Sie den MPX-Stecker in den Tragflächen passend zum Gegenstück im Rumpf.
- Page 12 NUR ARF VERSION Verkleben Sie anschließend den Servo-Einbaurah- men für das Querruder. Nachdem das Querruderservo auf Neutralstellung gesetzt wurde, montieren Sie das im Zubehör beilie- gende Servohorn am Dymond DS1550, welches den längsten und breitesten Servoarm. Bohren Sie das äußere Loch auf 1,6mm auf. Fertigen Sie das Gestänge gemäß...
- Page 13 NUR ARF VERSION Verkleben Sie nun den Servo-Einbaurahmen für die Wölbklappen. Nachdem das Wölbklappenservo auf Neutralstel- lung gesetzt wurde, montieren Sie das im Zubehör beiliegende Servohorn. Bohren Sie das zweite Loch von Außen auf 1,6mm auf. Fertigen Sie das Gestänge gemäß Abbildung. Die Länge sollte in der Grundeinstellung etwa 66mm be- tragen.
- Page 14 Verkleben Sie die Schachtabdeckung an der Ober- seite. Verschrauben Sie das Servo mit der Sicherungsla- sche in der Tragfläche. Verkleben Schachtabdeckung Wölbklappenservo(unten). Fädeln Sie nun den Kabelbaum in die äußere Trag- fläche und verbinden Sie diesen mit dem Querruder- servo.
-
Page 15: Der Schwerpunkt
Wir empfehlen, die äußeren Tragflächen lediglich mit Tesafilm zu fixieren, damit diese abnehmbar bleiben. Alternativ können die Hälften natürlich auch mit an- gedicktem Harz verklebt werden. Verstauen Sie im letzten Schritt das Servokabel im Schacht und verkleben Sie die Schachtabdeckung vom Querruder. - Page 16 Dennoch ist eine gute Idee fon +49 (0)40 30061950 oder per E-Mail an beim ersten Start einen Clubkameraden zu bit- info@modellhobby.de ten, das Modell zu werfen. Freuen Sie sich auf viele schöne Flugstunden mit Ihrem neuen Epsilon XL V3!
-
Page 17: Konformitätserklärung
KONFORMITÄTSERKLÄRUNG Dieses Produkt entspricht den wesentlichen Schutzanforderungen gemäß den EU-Richtlinien zur elektromagnetischen Verträglichkeit. Eine Konformitätserklärung liegt vor. HINWEISE ZUM UMWELTSCHUTZ Dieses Produkt darf nicht mit anderem Abfall seinem Receycling die menschliche Gesundheit entsorgt werden. Stattdessen obliegt es dem und die Umwelt geschützt werden. Weiter Infor- Benutzer, das Altgerät an einer designierten mationen, wo Sie Ihr Altgerät zum Receycling Receycling-Sammelstelle für elektrische und... -
Page 18: Safety Precautions And Warnings
Do not use with incompatible compo- nents or alter this product in any way outside of the instructions provided by Gustav Staufenbiel GmbH. This manual contains instructions for safety, operation and maintenance. It is essential to read and follow all the instructions and warnings in the manual, prior to assembly, setup or use, in order to operate correctly and avoid damage or serious injury. -
Page 19: Accessoires
SPECIFICATIONS 90,0 dm² 4400 g 4000 mm ACCESSOIRES PNP-VERSION ARF-VERSION Included / build in: Required: Himax C 4260 570 kV Dymond V-Max V-42L 4x D 260 4x D 260 2x DS 1550 MG 2x DS 1550 MG 16x8“ 16x8“ 41mm Spinner 41mm Spinner Smart 60 BEC Required:... - Page 20 PREFACE Congratulations to buying the Epsilon XL V3! The Epsilon XL V3 is the biggest model of the popular The PNP version includes a built-in motor, servos, cable set Epsilon-family. The concept and the value you get for the and a wing lock system. The motor of the PNP version is money brings joy to every sailplane enthusiast.
- Page 21 THE FUSELAGE ARF VERSION ONLy Bring the servo for rudder and elevator into middle positon with a servo tester and mount the servo horns. Screw the servos to the servo tray. ARF VERSION ONLy Create two cable beams with MPX-plug for aileron and flap.
- Page 22 Pull the pushrods out of the fuselage. Create a linka- ge end like shown in the picture. Insert the pushrod into the fuselage from the back. Bring the Rudder in neutral position and align the the pushrod exactly. Make a mark where the pushrod meets the servo horn.
- Page 23 Slide the carbon elevator connectors into the desig- nated holes in the tail. Bring the elevator rocker arm lever to neutral position, which is 0° angle. Create a linkage connection like shown in the picture. Insert the pushrod into the fuse- lage from the back.
- Page 24 Adjust the length of the pushrod if necessary and con- nect the clevis to the elevator horn. Slide the elevator halves to the carbon connectors. Take care that they have a tight fit. If they are too loose, apply a very small amount of CA to the car- bon connector and let it dry completely.
- Page 25 Check the tight fit of the motor screws. Add some Loc- tite before tightening. Mount the spinner and propel- ler. Mount the servo cover. Use clear tape to fix it. Slide the wing connector into the fuselage. Slide the canopy onto the fuselage. Take care that it fits correctly.
- Page 26 THE WINGS Sand the surface of the winglets where the glue will be applied. Glue the winglets to the wing with CA or epoxy glue. You can fix it with clear tape until the glue has dried completely. Remove the foam where the linkage for the flap will be placed.
- Page 27 ARF VERSION ONLy Create two cable beams for flap and aileron with MPX-plugs. The needed length are as follows: Aileron: 130 cm Flap: 50 cm ARF VERSION ONLy Pull the cables through the wing. ARF VERSION ONLy Glue the MPX-plug to the the wing as well as the round wing lock pin.
- Page 28 ARF VERSION ONLy Glue a servo frame to the servo hole. Bring the aileron servo to middle position with a servo tester and mount the servo horn. Drill the outer hole with a 1,6 mm drill. Create a linkage like shown in the picture. The inital length should be around 68 mm.
- Page 29 ARF VERSION ONLy Glue a servo frame to the servo hole. After bringing the servo to neutral position, mount the servo horn which you can find in the acessory bag. Drill the second hole with a 1,6 mm drill. Create a linkage like shown in the picture. The inital length should be around 66 mm.
- Page 30 Glue the linkage hood to the upper side of the wing. Screw the latch to the servo frame to fix the servo. Glue the servo hood to the underside of the wing by using clear tape. Pull the wire through the outer wing and connect it to the aileron servo.
-
Page 31: Center Of Gravity
We recommend to fix the outer wings only with clear tape to be able to disassemble it again later if nee- ded. If you don‘t need it, you can of course glue the wing parts together by using epoxy resin. Glue the servo hood to the wing by using clear tape. -
Page 32: Control Throws
If you have any question we will help you via By applying the recommendations of this ma- Phone +49 (0)40 30061950 or by Mail at info@modellhobby.de dy throw the model. We wish you many happy landings with your new Epsilon XL V3. -
Page 33: Declaration Of Confirmity
DECLARATION OF CONFIRMITY This product complies with the essential protection requirements of EU directives regarding elec- tromagnetic compatibility. A Declaration of Conformity is available. INSTRUCTIONS FOR DISPOSAL OF WEEE BY USERS IN THE EU This Product must not be disposed of with other waste. Instead, it is the user`s responsibility to dispose of their waste equipment by handing it over to a designated collections point for the re- ceycling of waste electrical and electronic equipment. -
Page 34: Précautions Et Avertissements Liés À La Sécurité
N’essayez pas de modifi er ou d’utiliser ce produit avec des composants incompatibles hors des ins- tructions fournies par Gustav Staufenbiel GmbH. Ce manuel comporte des instructions relatives à la sécurité, au fonctionnement et à l’entretien. Il est capital de lire et de respecter la totalité des instructions et avertissements du manuel avant l’assemblage, le réglage et l’utilisation, ceci afi n de manipuler cor-... -
Page 35: Caracteristiques
CARACTERISTIQUES 90,0 dm² 4400 g 4000 mm ACCESSOIRES PNP-VERSION ARF-VERSION encastré: nécessaire: Himax C 4260 570 kV Dymond V-Max V-42L 4x D 260 4x D 260 2x DS 1550 MG 2x DS 1550 MG 16x8“ 16x8“ 41mm Spinner 41mm Spinner 1x Variateur Dymond Smart 60 BEC nécessaire:... - Page 36 PROLOGUE Félicitations pour l‘acquisition de votre Epsilon XL V3! L’Epsilon XL V3 est la plus grande version de la famille ges. L‘accu de propulsion devra être un 4S Lipo. L‘Epsilon très appréciée des Epsilon. Leur concept et leur très bon XL V3 possède 1°...
- Page 37 LE FUSELAGE SEULEMENT VERSION ARF Positionnez les servos de profondeur et de direction au neutre puis vissez en place les palonniers. Mon- tez ensuite les servos dans le fuselage. SEULEMENT VERSION ARF Préparez les deux câblages avec les prises MPX pour les servos d‘ailerons et de volets de courbure, puis collez les prises MPX dans le fuselage.
- Page 38 Retirez les CAP de commande de profondeur et direc- tion du fuselage. Façonnez les commandes comme illustré. Puis insérez les commandes dans le fuselage par l‘arrière de celui-ci puis réglez les pour qu‘elles soient exactement au neutre. Marquez la position du trou du palonnier sur la CAP. Utilisez une pince en „Z“...
- Page 39 Positionnez les clés en carbone du stabilisateur pen- dulaire à travers le fuselage de façon équidistante. Placez le mécanisme pendulaire en position neutre de telle sorte que le stabilisateur soit calé à 0°. Con- fectionnez la commande comme illustré. Insérez en- suite la CAP dans le fuselage par l’arrière.
- Page 40 Ajustez la longueur de la commande avec la chape réglable puis fixez la au palonnier. Montez maintenant les deux empennages sur les clés. En principe, les empennages doivent se monter légèrement en force sur les clés carbone. Si ceci ne devait pas être le cas, on peut ajouter de la cya- no liquide sur les clés.
- Page 41 Sur les versions PNP vous vérifierez le bon serrage des vis du moteur et assurez-les à l‘aide de Loctite frein-filet. Montez ensuite le cône et l‘hélice. Fixez le couvercle de trappe du levier pendulaire de la profondeur à l‘aide de ruban adhésif, de telle sor- te qu‘il soit encore démontable.
- Page 42 L‘AILE Ponçez légèrement la surface de collage des sau- mons. Collez les saumons en place à l‘aide d‘époxy épais- se ou de cyano. Fixez les à l‘aide de ruban adhésif en attendant le séchage. Retirez le Styropor du passage de la commande des volets à...
- Page 43 SEULEMENT VERSION ARF Préparez les deux câblages avec les prises MPX pour les servos d‘ailerons et de volets de courbure. Les tail- les suivantes sont nécessaires : Prise -->Servo d‘ailerons: 130cm Prise-->Servo de volets : 50cm Prenez soin de bien noter les affectations des fils sur les prises.
- Page 44 SEULEMENT VERSION ARF collez maintenant en place les supports de servos d‘ailerons. Après avoir positionné les servos d‘ailerons au neut- re, montez le palonnier le plus long et le plus large fourni sur le servo Dymond DS1550 et percez le trou le plus extérieur à...
- Page 45 SEULEMENT VERSION ARF Montez maintenant le support de servo de volets. Après avoir positionné le servo de volets au neutre, montez le palonnier fourni et percez le second trou en partant de l’extérieur à 1,6 mm. Façonnez la commande comme illustré. La longueur de celle-ci devrait être d‘environ 66 mm.
- Page 46 Collez en place le cache de trappe supérieure de servo. Vissez en place la plaquette de sécurisation du servo dans l‘aile. Collez en place le cache de trappe inférieure de servo. Enfilez ensuite le câblage dans la partie extérieure de l‘aile et reliez le au servo d‘ailerons.
-
Page 47: Centre De Gravité
Nous recommandons de sécuriser les ailes extérieu- res avec du ruban adhésif afin qu‘elles puissent res- ter démontables. Mais bien entendu il est également possible de les fixer à demeure à l‘aide de colle époxy. Pour finir rangez le câble de servo dans la trappe et collez en place le cache du servo d‘ailerons. -
Page 48: Conseils De Pilotage
0314054V3/1 HSF0000491 CONSEILS DE PILOTAGE Toutefois, il peut être de bon ton de faire lan- re EPSILON XL V3. Avec les réglages recom- cer le modèle par un camarade de club lors mandés dans cette notice, vous n‘aurez pas des premiers essais. Nous vous souhaitons de méchantes surprises durant le premier vol. -
Page 49: Déclaration De Conformité Ce
DÉCLARATION DE CONFORMITÉ CE Ce produit respecte les critères de sécurité essentiels déterminés dans la directive du Conseil de l‘ Union européenne relative à l‘harmonisation des dispositions légales des États membres sur la compatibilité électromagnétique (2004/108/CE). Une déclaration de conformité est dis- ponible. - Page 50 © 2016 Gustav Staufenbiel GmbH...