Table des Matières
Publicité
Les langues disponibles
Les langues disponibles
Liens rapides
Publicité
Table des Matières

Manuels Connexes pour Staufenbiel RED COUGAR


Sommaire des Matières pour Staufenbiel RED COUGAR
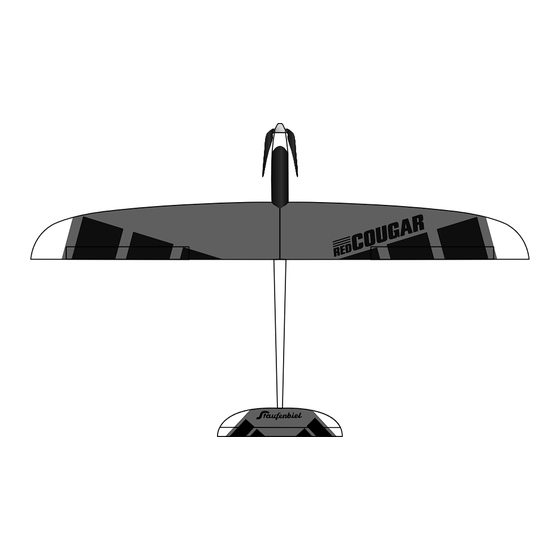
- Page 1 BAUANLEITUNG INSTRUCTION MANUAL INSTRUCTIONS DE MONTAGE 0314064RP...
-
Page 2: Warnungen Und Sicherheitshinweise
Betriebsanleitungen im Zusammenhang mit dem Modell sowie die Installation, der Betrieb, die Verwendung und Wartung der mit dem Modell zusammenhängenden Komponenten können von der Firma Staufenbiel nicht überwacht werden. Daher übernimmt die Firma Staufenbiel keinerlei Haftung für Verluste, Schäden oder Kosten, die sich aus dem fehlerhaften Betrieb, aus fehler- haften Verhalten bzw. -
Page 3: Technische Daten
INHALTSÜBERSICHT Vorwort Schwerpunkt Der Rumpf Konformitätserklaärung Die Tragflächen Ruderausschläge TECHNISCHE DATEN Tragfflächen-Profil: MH-43 8,5% 1400 mm (55 in) 21,0 dm² 830 g (flugfertig) (325.5 in²) (29 oz) EINGEBAUTES ZUBEHÖR LiPo 2200mAh 3S (separat) Himax C2816 (1100KV) LiPo Ladegerät (separat) 30 A (separat erhältlich) min. - Page 4 VORWORT Herzlichen Glückwunsch zum Erwerb des Red Cougar. Es handelt sich um einen Motorsegler von hoher Qualität. Die Bauausführung eines solchen Modells und damit verbundene Detaillösungen unterliegen einer gewissen Geschmacksabhängigkeit. Daher sind die Lösungen dieser Bauanleitung als Vorschlag zu verstehen, es gibt sicher hier und da andere Möglichkeiten und Herangehensweisen.
- Page 5 Es folgt die Montage des Höhenruders, wobei die Befestigungsschrauben mit Loctite gesi- chert werden sollten. Anschließend wird die Seitenruderanlenkung montiert. Dabei wird das Ruderhorn fluchtend zum Bowdenzug mit leichtem Druck gegen das Seitenruder gedrückt, um die Bohrlöcher zu markieren, welche dann mit einem 2mm Bohrer gebohrt werden können.
- Page 6 DIE TRAGFLäCHEN Im ersten Schritt wird mit einem Messer vor- sichtig die Folie über den Servoschächten entfernt. Anschließend werden die Balsa-Versteifungen in die Schächte eingeklebt. Hier darauf ach- ten, dass die Holzmaserungen zur Versteifung senkrecht zueinander stehen. Die Servos werden in Schrumpfschlauch ein- geschrumpft und die Servoverlängerungskabel aufgesteckt.
- Page 7 Es folgt das Ausschneiden der Schachtverklei- dungen. Die Servos werden über den Sender wieder in neutralstellung gebracht und das Servohorn aufgeschraubt. Anschließend werden sie an- hand der Schachtverkleidungen ausgerichtet und mit Sekundenkleber in die Flächen einge- klebt. Die Querrudergestänge werden angebracht und zum Querruder ausgerichtet.
- Page 8 Es folgt das Entfernen der Folie sowie das Ein- kleben der Hörner mit Sekundenkleber. Die Sicherungshülsen werden über die Gestän- ge gesteckt und die Gestänge in neutralstellung abgelängt. Anschließend werden die Siche- rungshülsen über die Drahtenden gesteckt. Die Schachtverkleidungen werden mit tesaFilm oder doppelseitigem klebeband über die Öff- nungen geklebt, sodass die Servos zugänglich bleiben.
- Page 9 Stellen Sie den Schwerpunkt auf 55 mm hinter der Nasenleiste ein. ABSCHLUSS Genießen Sie nun den Erstflug mit Ihrem neuen Red Cougar. Mit den Angaben aus dieser Anleitung hält das Modell keine bösen Überraschungen parat. Trotzdem ist eine gute Idee, wenn beim ersten Start z.B.
-
Page 11: Konformitätserklärung
Entsorgungsdienst oder bei der Verkaufsstelle Ihres Proukts. Text: M.F. Bilder: M.F. Layout: M.P.M. STAUFENBIEL Gustav Staufenbiel GmbH, Hanskampring 9, 22885 Barsbüttel, Deutschland Geschäftsführer: Klaus Breer, Jörg Schamuhn Tel.: +49 40-30061950, eMail: info@modellhobby.de, Webseite: www.modellhobby.de Copyright © Gustav Staufenbiel GmbH, 2015... -
Page 12: Safety Precautions And Warnings
Do not use with incompatible compo- nents or alter this product in any way outside of the instructions provided by Gustav Staufenbiel GmbH. This manual contains instructions for safety, operation and maintenance. It is essential to read and follow all the instructions and warnings in the manual, prior to assembly, setup or use, in order to operate correctly and avoid damage or serious injury. -
Page 13: Included Accessories
TABLE OF CONTENTS Preface Center of Gravity The Fuselage Declaration of comfirmity The Wings Control Throws SPECIFICATIONS Airfoil: MH-43 8,5% 1400 mm (55 in) 21,0 dm² 830 g (325.5 in²) (29 oz) INCLUDED ACCESSORIES LiPo 2200mAh 3S (separately) Himax C2816 (1100KV) LiPo Charger (separately) 30 A (sold separately) min. -
Page 14: Preface
PREFACE Thanks for purchasing the Staufenbiel Red Cougar. The construction of the model and the detailed solutions related subject to a certain taste dependen- cy. Therefore, the solutions to these instructions are to be understood as a suggestion. There are certainly other options and approaches. - Page 15 Install the elevator and secure the screws with threadlock. Ad light pressure to the pushrod and bend them towards the rudder and mark the position of the rudderhorn. Use a 2mm drill for the holes and remove the cover before you glue the servo- horn with CA.
-
Page 16: The Wings
THE WINGS Use a hobby knife with #11 Blade to cut the covering from the area above the aileron servo mounting position. Glue the balsa bracing in the opening. Please note that the fiberline of the bracing must be vertical to the horizontal lines in the wing. - Page 17 Use hobbyscissors to to trim the servocover. Set the servo with the radio to neutral and ins- tall the servohorn. Align the servoarm to the servo cover and aile- ron and glue it with CA in the wing. Install the aileron pushrod and align it to the aileron.
- Page 18 Remove the covering and glue the aileron horn with CA. Fix the retainerclip and cut the pushrod with the servo on neutral position. Tape the servocover with clear tape. The servo is still accessible for further adjustments. Use a knife or soldering iron to open the holes for the wing mount screws.
-
Page 19: Control Throws
▲ 15 mm, ▼ 15 mm CENTER OF GRAVITY 55 mm behind the leading edge against the fuselage. THE END Now enjoy the first flight with your new RED COUGAR. Look forward to many hours with your new RED COUGAR. -
Page 21: Declaration Of Conformity
Text: M.F. Translation: C.H. Pictures: M.F. Layout: M.P.M. STAUFENBIEL Gustav Staufenbiel GmbH, Hanskampring 9, 22885 Barsbüttel, Germany CEO: Klaus Breer, Jörg Schamuhn Tel.: +49 40-30061950, eMail: info@modellhobby.de, Webside: www.staufenbiel.co.uk Copyright © Gustav Staufenbiel GmbH, 2015... -
Page 22: Précautions Et Avertissements Liés À La Sécurité
N’essayez pas de modifi er ou d’utiliser ce produit avec des composants incompatibles hors des instructions fournies par Gustav Staufenbiel GmbH. Ce manuel comporte des instructions relatives à la sécurité, au fonctionnement et à l’entretien. Il est capital de lire et de respecter la totalité... -
Page 23: Caractéristiques
TABLE DES MATIÈRES Préface Centre de gravité Le fuselage Déclaration de conformité Les ailes Débattements des gouvernes CARACTÉRISTIQUES Profil: MH-43 8,5% 1400 mm (55 in) 21,0 dm² 830 g (325.5 in²) (29 oz) ACCESSOIRES LiPo 2200mAh 3S (non inclus) Himax C2816 (1100KV) Chargeur LiPo (non inclus) 30 A (non inclus) 4 voies mini (non inclus) - Page 24 PRÉFACE Nous vous remercions pour l‘achat du Red Cougar Staufenbiel. L‘assemblage du modèle et les solutions détaillées rapportées sont à adapter suivant vos préféren- ces. Les solutions présentées dans les instructions sont à considérer comme étant des suggestions. Il y a certainement d‘autres solutions et approches possibles. Certaines alternatives sont apparues durant la rédaction du cahier des charges, mais ne sont pas représentées sur les photos.
- Page 25 Installez le stabilisateur et sécurisez la liaison à l‘aide de frein filet. Appuyez légèrement sur la tringlerie de dérive pour l‘aligner par rapport au guignol et marquez la position du guignol. Utilisez un foret de 2mm pour percer les trous de fixation et retirez la platine du guignol avant de le coller à...
-
Page 26: Les Ailes
LES AILES Utilisez un scalpel muni d‘une lame #11 pour découper l’entoilage recouvrant les emplace- ments des servos des ailerons. Collez le renfort en balsa dans l‘ouverture. Prenez soin d‘orienter les fibres du renfort à la perpendiculaire des fibres de l‘aile. Recouvrez les servos de gaine thermos-rétrac- table et connectez les servos à... - Page 27 Utilisez des ciseaux à Lexan pour ajuster les carénages des servos. Placez les servos au neutre à l‘aide de la radio, puis installez les palonniers. Alignez les palonniers des servos par rapport aux carénages des servos, puis collez les ser- vos dans les ailes à...
- Page 28 Retirez la partie de l‘entoilage qui sera recou- verte par le guignol, puis collez le guignol à l‘aileron à l‘aide de colle cyano. Coudez et coupez la tringlerie à la longueur appropriée, le servo doit être au neutre, puis insérez le clips de fixation. Fixez le carénage à...
- Page 29 55 mm en arrière du bord d‘attaque au niveau de l‘emplanture de l‘aile. Vous êtes maintenant prêt à effectuer les premiers vols de votre RED COUGAR. Nous vous souhai- tons de très nombreuses heures de vol avec votre RED COUGAR.
-
Page 31: Déclaration De Conformité
Texte: M.F. Traduction: A.C. Photos: M.F. Disposition: M.P.M. STAUFENBIEL Gustav Staufenbiel GmbH, Hanskampring 9, 22885 Barsbüttel, Allemagne Directeur général: Klaus Breer, Jörg Schamuhn Tel.: 0 811 040 802, eMail: info@modellhobby.fr, Webseite: www.modellhobby.fr Copyright © Gustav Staufenbiel GmbH,2015... - Page 32 © 2015 Gustav Staufenbiel GmbH...