Table des Matières
Publicité
Les langues disponibles
Les langues disponibles
Liens rapides
Caldaia a pellet Kp
MaNUale di iNStallaZiONe, USO e MaNUteNZiONe
Il presente manuale è parte integrante del prodotto.
Si raccomanda di leggere attentamente le istruzioni prima
dell'installazione, manutenzione o utilizzo del prodotto.
Istruzioni originali
iNStallatiON, USe aNd MaiNteNaNCe MaNUal
This manual is an integral part of the product.
Read the instructions carefully before installing, servicing or
operating the product.
Translation of the original instructions
MaNUel d'iNStallatiON, d'UtiliSatiON et de MaiNteNaNCe
Le présent manuel fait partie intégrante du produit.
Il est conseillé de lire attentivement les consignes avant
l'installation, l'entretien ou l'utilisation du produit.
Traduction des instructions originales
Publicité
Chapitres
Table des Matières

Manuels Connexes pour Palazzetti KP 20


Sommaire des Matières pour Palazzetti KP 20
- Page 1 Caldaia a pellet Kp MaNUale di iNStallaZiONe, USO e MaNUteNZiONe Il presente manuale è parte integrante del prodotto. Si raccomanda di leggere attentamente le istruzioni prima dell’installazione, manutenzione o utilizzo del prodotto. Istruzioni originali iNStallatiON, USe aNd MaiNteNaNCe MaNUal This manual is an integral part of the product. Read the instructions carefully before installing, servicing or operating the product.
- Page 2 Gentile cliente, desideriamo innanzitutto ringraziarLa per la preferenza che ha voluto accordarci acquistando il nostro prodotto e ci congratuliamo con Lei per la scelta. Per consentirLe di utilizzare al meglio il suo prodotto, la invitiamo a seguire attentamente quanto descritto nel presente manuale.
-
Page 3: Table Des Matières
ITALIANO ENGLISH FRANÇAIS iNdiCe Utente e installatore installatore 1 PREMESSA GENERALE Simbologia Destinazione d’uso Scopo e contenuto del manuale Conservazione del manuale Aggiornamento del manuale Generalità Conformità Responsabilità del costruttore Assistenza tecnica e manutenzione 1.10 Parti di ricambio 1.11 Targhetta matricola 1.12 Consegna dell’apparecchio 2 AVVERTENZE PER LA SICUREZZA Avvertenze per l’installatore... - Page 4 6 PREPARAZIONE DEL LUOGO DI INSTALLAZIONE Considerazioni generali 6.2 Precauzioni per la sicurezza 6.3 Luogo d’installazione 6.4 Aria comburente 6.5 Raccordo fumi 6.6 Camino 7 INSTALLAZIONE Considerazioni generali 7.2 Livellamento dell’apparecchio 7.3 Impianto idraulico 7.4 Carico / scarico impianto 7.5 Collegamento elettrico 7.6 Ottimizzazione della combustione 8 CONFIGURAZIONE INIZIALE Configurazione 1 - Termostato ambiente...
-
Page 5: Premessa Generale
Palazzetti. Il manuale d’installazione è parte integrante Palazzetti si riserva il diritto di modificare spe- dell’apparecchio. cifiche e caratteristiche tecniche e/o funzionali Deterioramento o smarrimento del prodotto in qualsiasi momento senza darne preavviso. -
Page 6: Conformità
UE 2015/1187 (ECOLABELLING) La responsabilità delle opere eseguite per l’in- stallazione dell'apparecchio non può essere con- EU 2015/1187 siderata a carico della Palazzetti; essa è e rimane EU/1189 a carico dell’installatore, al quale è demandata EN 303-5-2012: Riguardante caldaie per riscal- l’esecuzione delle verifiche relative alla canna... -
Page 7: Assistenza Tecnica E Manutenzione
L’apparecchio viene consegnato perfettamente imballato e fissato ad una pedana in legno che Palazzetti mette a disposizione una fitta rete di ne permette la movimentazione mediante car- centri di assistenza con tecnici specializzati, for- relli elevatori e/o altri mezzi. -
Page 8: Avvertenze Per La Sicurezza
aVVeRteNZe peR la Verificare che le predisposizioni SiCUReZZa della canna fumaria e della presa d’aria siano conformi al tipo d’installazione. avvertenze per l’installatore Osservare le prescrizioni indicate nel Non effettuare collegamenti elettrici presente manuale. volanti con cavi provvisori o non isolati. Verificare che la messa a terra dell’im- Le istruzioni di montaggio e pianto elettrico sia efficiente. -
Page 9: Avvertenze Per Il Personale Tecnico Addetto Alla Manutenzione
ITALIANO ENGLISH FRANÇAIS 2.2 avvertenze per il personale 2.3 avvertenze per l'utilizzatore tecnico addetto alla manutenzione Per il corretto uso del prodotto e delle Le operazioni di manutenzione devono apparecchiature elettroniche ad essa essere eseguite solo da personale auto- collegate e per prevenire incidenti si devono sempre osservare le indicazioni rizzato e qualificato. - Page 10 Prima di iniziare qualsiasi operazione, to ad ancoraggio di qualunque tipo. l’utente o chiunque si appresti ad È vietato utilizzare il prodotto come operare sul prodotto dovrà aver letto scala o struttura di appoggio. e compreso l’intero contenuto del presente manuale di installazione e Non pulire l'apparecchio fino a comple- utilizzo.
- Page 11 ITALIANO ENGLISH FRANÇAIS danneggiati. È vietato mettere nel serbatoio combu- stibili diversi da pellet di legno. Qualsiasi tipo di manomissione o di so- stituzione non autorizzata di particolari Alcuni consigli per evitare fenomeni di non originali del prodotto può essere corrosione: pericoloso per l’incolumità...
-
Page 12: Caratteristiche Del Combustibile
CaRatteRiStiCHe del II pellet umido e/o freddo (5 °C) riduce la poten- zialità termica del combustibile ed obbliga ad COMBUStiBile effettuare maggiore manutenzione di pulizia del braciere (materiale incombusto) e del focolare. Caratteristiche del combustibile Porre particolare attenzione nello stoc- caggio e movimentazione dei sacchi di II pellet (Fig. -
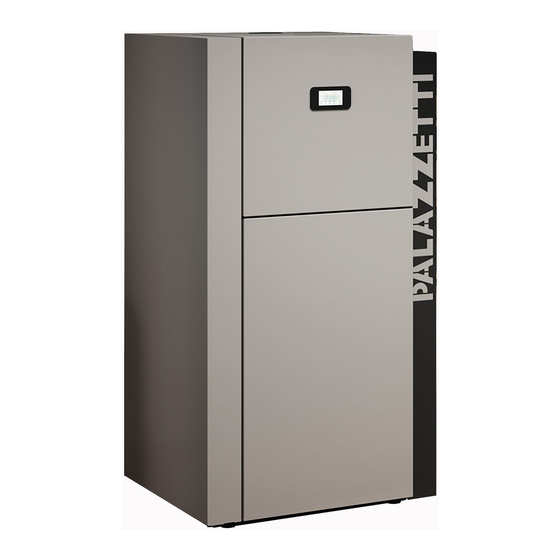
Page 13: Conoscere Il Prodotto
ITALIANO ENGLISH FRANÇAIS CONOSCeRe il pROdOttO 4.1 descrizione Fig. 3 Coperchio serbatoio Cassetto cenere Manometro Braciere Pulizia turbolatori Vaso d'espansione Display Pressostato Porta focolare Sistema di pulizia automatica braciere Vetro porta Scheda elettronica Porta estetica Sensore riserva pellet Leva di apertura Serbatoio pellet Porta cassetto cenere Coperchio caldaia... - Page 14 Fig. 4 Termostato acqua Termostato pellet Connettore RJ11 Presa alimentazione elettrica Interruttore di accensione Morsettiera Aspirazione aria Tubo di mandata impianto Tubo di ritorno impianto Ventilatore Circolatore Valvola di sfiato 004778640 - 10/02/2021...
-
Page 15: Dimensioni
ITALIANO ENGLISH FRANÇAIS 4.2 dimensioni Kp 20 - Kp 25 Dimensioni in mm Fig. 5 004778640 - 10/02/2021... - Page 16 Kp 30 - Kp 35 Dimensioni in mm Fig. 6 004778640 - 10/02/2021...
- Page 17 ITALIANO ENGLISH FRANÇAIS Dimensioni in mm Fig. 7 1) Uscita fumi 2) Tubo di ritorno 3) Tubo di mandata 004778640 - 10/02/2021...
-
Page 18: Caratteristiche Tecniche
4.3 Caratteristiche tecniche Dati tecnici KP 20 KP 25 Classe caldaia EN 303-5 : 2012 Combustibile Pellet Potenza Termica Nominale al focolare (QB) 20,3 25,5 Potenza Termica Minima al focolare (QBmin) Potenza Termica Nominale Utile (QN) 20,0 25,3 Potenza Termica Minima Utile (Qmin) - Page 19 ITALIANO ENGLISH FRANÇAIS Dati Idraulici KP 20 KP 25 Contenuto d'acqua Pressione idraulica max d’esercizio Perdita di carico caldaia (ΔT 10 K) mbar Perdita di carico caldaia (ΔT 20 K) mbar Prevalenza utile impianto (ΔT 20 K) mbar Prevalenza utile impianto (ΔT 15 K) mbar Volume vaso d’espansione...
- Page 20 Dati tecnici KP 30 KP 35 Classe caldaia EN 303-5 : 2012 Combustibile Pellet Potenza Termica Nominale al focolare (QB) 27,7 31,9 Potenza Termica Minima al focolare (QBmin) Potenza Termica Nominale Utile (QN) 27,4 31,7 Potenza Termica Minima Utile (Qmin) Rendimento Potenza Termica di combustione Nominale 93,2 92,3...
- Page 21 ITALIANO ENGLISH FRANÇAIS Dati Idraulici KP 30 KP 35 Contenuto d'acqua Pressione idraulica max d’esercizio Perdita di carico caldaia (ΔT 10 K) mbar Perdita di carico caldaia (ΔT 20 K) mbar Prevalenza utile impianto (ΔT 20 K) mbar Prevalenza utile impianto (ΔT 15 K) mbar Volume vaso d’espansione Attacchi idraulici impianto...
- Page 22 Grafico prevalenza lato impianto OTMSL (7) VMAX OTMSL (7) VMOY OTMSL (7) VMIN OTMSL 15/ 7 (7 mH2O) 1000 1200 1400 1600 1800 2000 Q (L/h) 004778640 - 10/02/2021...
- Page 23 ITALIANO ENGLISH FRANÇAIS 4.4 targhetta matricola Palazzetti Lelio Spa - via Roveredo,103 - 33080 Porcia (PN) Combustibile Pellet Potenza termica nominale utile Pmax Potenza termica minima utile Pmin Temperatura max di esercizio °C Contenuto d'acqua Classe di efficienza secondo EN 303-5:2012...
-
Page 24: Schema Elettrico
4.5 Schema elettrico UI/PC ext 1-2 POSITIVE +16V I04 GND F03 F02 +5V I03 GND CN12 CN10 220÷240Vac ext 5-6 clean comb NOTE:phase protection,added by customer.Do not change polarity! 220-240Vac 00 472 6707 - 19/11/2020 * Solo per i modelli con microinterruttore di sicurezza sul coperchio del serbatoio Fig. -
Page 25: Movimentazione E Trasporto
ITALIANO ENGLISH FRANÇAIS MOViMeNtaZiONe e tRaSpORtO L'apparecchio viene consegnato completo di tutte le parti previste. Fare attenzione alla tendenza allo sbilanciamen- to dell'apparecchio. II baricentro dell'apparecchio è spostato verso la parte anteriore. Tenere ben presente quanto sopra anche du- rante lo spostamento dell'apparecchio sul sup- porto di trasporto. -
Page 26: Verifica Piano D'appoggio
trasporto Accertarsi che il carrello sollevatore abbia una portata superiore al peso dell’apparecchiatura da sollevare. Al manovratore dei mezzi di sollevamen- to spetterà tutta la responsabilità del sollevamento dei carichi. Porre particolare attenzione a proteg- gere adeguatamente i pavimenti in legno o parquet per evitare che il peso dell’apparecchio possa rovinarli duran- Fig. -
Page 27: Preparazione Del Luogo Di Installazione
Fig. 14 Si raccomanda di accertarsi della loro qualifica e delle loro reali capacità. Modello Kp 20 - 25 800 Per l’Italia tali tecnici devono essere in possesso di abilitazione alla lettera “C” Kp 30 - 35 800 rilasciata dalla camera di commercio in base al D.M. -
Page 28: Aria Comburente
Fig. 16 Se la parete posteriore dell'apparecchio è una parete esterna, realizzare un foro per l'aspirazione Fig. 15 dell'aria comburente ad una altezza dal suolo di circa 20-30 cm rispettando le indicazioni dimen- Prevedere l'arrivo della linea elettrica in prossimi- sionali riportate nel paragrafo "4.3 Caratteristiche tà... -
Page 29: Raccordo Fumi
ITALIANO ENGLISH FRANÇAIS 6.5 Raccordo fumi Se non fosse possibile realizzare la presa d'aria esterna nel locale, è possibile realizzare il foro L'apparecchio funziona con la camera di combu- esterno in un locale adiacente purché comu- stione in depressione è pertanto indispensabile nicante in maniera permanente con griglia di assicurarsi che lo scarico dei fumi sia a tenuta transito (Fig. - Page 30 6.6 Camino Il camino per lo scarico dei fumi deve essere rea- lizzato da personale qualificato in osservanza alle norme UNI 10683- EN 1856-1-2- EN 1857-EN 1443- EN 13384-1-3- EN 12391-1 sia per quanto riguarda le dimensioni che per i materiali utilizzati nella sua costruzione.
- Page 31 ITALIANO ENGLISH FRANÇAIS iNStallaZiONe In caso di passaggio dei tubi attraverso tetti o pareti in legno si consiglia di uti- lizzare appositi kit di attraversamento, Considerazioni generali certificati, reperibili in commercio. Nei paragrafi successivi sono riportate alcune indicazioni da rispettare per ottenere il massimo rendimento dal prodotto acquistato.
-
Page 32: Impianto Idraulico
7.3 impianto idraulico Svitare le due viti posteriori (C) e sollevare il fianco sinistro (d) per liberare i ganci di fissaggio (Fig. Il collegamento all’impianto idraulico e l’impian- 24). to stesso devono essere eseguiti, da personale qualificato, nel rispetto delle leggi e delle norme vigenti nel paese d’installazione. - Page 33 ITALIANO ENGLISH FRANÇAIS Fig. 26 Nel caso in cui l’impianto domestico è dotato di un reintegro manuale o automatico si potrà cari- care l'apparecchio attraverso i tubi di mandata e ritorno. Per far ciò: • Aprire quindi la valvola di sfiato (B) (Fig. 23), aprire il rubinetto di bypass presente nella valvola anticondensa (O), facendo così...
-
Page 34: Collegamento Elettrico
Fig. 28 Fig. 30 Scarico impianto: È obbligatorio che l'impianto sia prov- 1) Svitare le viti (i) e rimuovere la protezione (J) visto di messa a terra e di interruttore (Fig. 29). differenziale in ottemperanza alle leggi vigenti. Il condotto di scarico fumi deve essere dotato di un proprio collegamento a terra. -
Page 35: Configurazione Iniziale
ITALIANO ENGLISH FRANÇAIS CONFiGURaZiONe iNiZiale In funzione della tipologia di installazione è necessario impostare la configurazione ideale per il cor- retto funzionamento. È possibile scegliere quattro diverse configurazioni: Descrizione Configurazione Termostato ambiente Sonda ambiente (default) Accumulo con serpentino Accumulo senza serpentino 004778640 - 10/02/2021... - Page 36 Configurazione 1 - termostato ambiente 22.15 20.3 °C °C 20,0 ARIA 25,8 °C Termostato esterno Componenti compresi nella caldaia Fig. 31 Nella configurazione 1 l'apparecchio viene co- In questa configurazione l'apparecchio mandato da un termostato (o cronotermostato) si spegne quando il termostato esterno esterno che accende e spegne l'apparecchio in è...
- Page 37 ITALIANO ENGLISH FRANÇAIS 8.1.1 allacciamento elettrico ad un termostato ambiente II termostato esterno deve essere collegato ai due morsetti utilizzati per la sonda ambiente, presen- ti sul posteriore dell'apparecchio. Scollegare la sonda e collegare i due contatti del termostato (Fig. 32). 22.15 20.3 °C Fig.
-
Page 38: Configurazione 2 - Sonda Ambiente
8.2 Configurazione 2 - Sonda ambiente Sonda temperatura ambiente Componenti compresi nella caldaia Fig. 33 8.2.1 allacciamento elettrico sonda ambiente La configurazione 2 è la configurazio- L'apparecchio esce di fabbrica con la sonda am- ne di default per questo apparecchio. biente già... -
Page 39: Configurazione 3 - Accumulo Con Serpentino
ITALIANO ENGLISH FRANÇAIS 8.3 Configurazione 3 - accumulo con serpentino Pannello solare Sonda accumulo Componenti compresi nella caldaia Fig. 35 8.3.1 allacciamento elettrico ad un accumulo Impostare la configurazione 3 quando si intende con serpentino collegare l'apparecchio ad un accumulo con serpentino. -
Page 40: Configurazione 4 - Accumulo Senza Serpentino
8.4 Configurazione 4 - accumulo senza serpentino Sonda accumulo Componenti compresi nella caldaia Fig. 37 Impostare la configurazione 4 quando si intende 8.4.1 allacciamento elettrico ad un accumulo collegare l'apparecchio ad un accumulo senza senza serpentino serpentino. In questo caso è sufficiente spostare la sonda di L'apparecchio si accende in funzione della tem- temperatura ambiente a bordo dell'apparecchio peratura letta dalla sonda dell’accumulo, e si... -
Page 41: Primo Avvio
ITALIANO ENGLISH FRANÇAIS 8.5 primo avvio Potenza Collegare l'apparecchio alla rete elettrica, agire sull’interruttore di accensione posto sul retro dell'apparecchio posizionandolo su “I”. TIMER STATS IMPOST. SUGG. START Fig. 41 Fig. 39 Premere per scorrere tra l'elenco parametri. Se il collegamento è corretto l'apparecchio Impostare la lingua: emette una serie di segnali acustici intermittenti e si accende il display. - Page 42 8.5.1 impostazione software Impostare l’ora: Accedere al menu configurazione d'impianto: Impostazioni Impostazioni Data Menù installatore Combustibile Menu di servizio Blocco schermo Modalità Eco Lingua Antigelo Info Fig. 44 Fig. 48 Premere su ON: compare la password, impostare 54 e premere OK per confermare. Password Fig.
-
Page 43: Display Reset
ITALIANO ENGLISH FRANÇAIS Il display si resetta per qualche secondo. Configurazioni Termostato amb. Nel display appare il logo e una barra verde di avanzamento: Sonda ambiente Accumulo serpentino Accumulo NO serp. Fig. 51 Configu- Descrizione Default razione Termostato ambiente Fig. 54 Sonda ambiente A questo punto si visualizza la schermata iniziale Accumulo con... -
Page 44: Manutenzione Del Sistema Fumario
MaNUteNZiONe Le operazioni di manutenzione devono essere effettuate da parte di un centro di assistenza tecnico autorizzato. Prima di effettuare qualsiasi operazione di manutenzione adottare le seguenti precauzioni: • Assicurarsi che tutte le parti dell'apparecchio siano fredde. • Accertarsi che le ceneri siano completamente spente. •... -
Page 45: Programma Di Pulizia E Manutenzione
ITALIANO ENGLISH FRANÇAIS 9.3 programma di pulizia e manutenzione 9.3.1 Utente OGNI 2/3 1 MESE 1 ANNO GIORNI Cassetto/Vano cenere Turbolatori Camera di combustione Serbatoio pellet 9.3.2 Centro di assistenza tecnico abilitato 1 ANNO (*) Guarnizioni porta Condotto di evacuazione fumi Collettore fumi Ventilatori (*) Almeno una volta all‘anno oppure ogni 40 quintali di pellet bruciati. -
Page 46: Apertura Porte
9.4 apertura porte Si raccomanda di effettuare la pulizia a caldaia spenta e fredda. • Aprire le porte focolare e cassetto cenere utiliz- zando l'apposita chiave (a). Fig. 58 9.6 pulizia turbolatori Si raccomanda di effettuare la pulizia a caldaia spenta e fredda. -
Page 47: Pulizia Camera Di Combustione
ITALIANO ENGLISH FRANÇAIS 9.7 pulizia camera di combustione 9.8 pulizia serbatoio pellet Si raccomanda di effettuare la pulizia a caldaia Si raccomanda di effettuare la pulizia a caldaia spenta e fredda. spenta e fredda. • Effettuare la pulizia delle parete interne della Disconnettere l'alimentazione elettrica. -
Page 48: Pulizia Del Collettore Fumi
9.10 pulizia del collettore fumi • Rimuovere il coperchio e l'isolamento (e). Si raccomanda di effettuare la pulizia a caldaia spenta e fredda. Disconnettere l'alimentazione elettrica. • Svitare le quattro viti (a) e rimuovere i due pan- nelli laterali (B). Fig. - Page 49 ITALIANO ENGLISH FRANÇAIS • Rimuovere il blocco (G) composto dal: cielo cal- • Da entrambe i lati, rimuovere le viti (H) e (i), le daia, isolante e dai turbolatori. molle (J) e i tappi (K). Fig. 69 Fig. 67 • Utilizzare una spazzola per pulire la camera fumi superiore.
-
Page 50: Sistema Di Pulizia Automatico
9.11 Sistema di pulizia automatico 9.12 Carico pellet L'apparecchio è dotato di un sistema di pulizia • Aprire lo sportello per il carico dei pellet. automatica (a) del braciere. Questo permette di evitare la pulizia del braciere quotidiana o ad ogni accensione dell'apparecchio. -
Page 51: Demolizione E Smaltimento
ITALIANO ENGLISH FRANÇAIS 10 deMOliZiONe e SMaltiMeNtO La responsabilità per eventuali danni a persone La demolizione e lo smaltimento dell'apparec- ed animali ricade sempre sul proprietario. All’atto chio sono ad esclusivo carico e responsabilità del della demolizione la marcatura CE, il presente proprietario che dovrà... - Page 52 taBle OF CONteNtS User and installer installer GENERAL INTRODUCTION Symbols Intended use Purpose and content of the manual Preservation of the manual Update of this manual Overview Compliance Responsibility of the manufacturer Technical assistance and maintenance 1.10 Spare parts 1.11 Serial plate 1.12 Delivery of the appliance SAFETY WARNING...
- Page 53 ITALIANO ENGLISH FRANÇAIS PREPARING THE PLACE OF INSTALLATION General considerations 6.2 Safety Precautions 6.3 Place of installation 6.4 Combustion air 6.5 Flue gas fitting 6.6 Chimney flue INSTALLATION General considerations 7.2 Levelling of the appliance 7.3 Hydraulic system 7.4 System filling / emptying 7.5 Electrical connection 7.6 Fuel optimisation INITIAL CONFIGURATION...
-
Page 54: General Introduction
Palazzetti specialised personnel. The installation manual is an integral part of the Palazzetti reserves the right to change specifi- appliance. cations and technical and/or functional charac- Deterioration or loss teristics of the product at any time without prior notice. -
Page 55: Compliance
Responsibility for the works carried out for the in- ulations have been applied: stallation of the appliance cannot be considered to be taken on by Palazzetti; it is and remains the EU 2015/1189 (ECODESIGN) responsibility of the installer, who is responsible... -
Page 56: Technical Assistance And Maintenance
1.12 delivery of the appliance Palazzetti has a dense network of service centres The appliance is delivered perfectly packaged with specialised, trained and skilled technicians. and fixed to a wooden platform which allows handling it using fork lift trucks and/or other The headquarters and our sales network is at your means. -
Page 57: Safety Warning
ITALIANO ENGLISH FRANÇAIS SaFetY WaRNiNG Do not carry out on-the-fly electrical connections with temporary or uninsu- lated cables. Warnings for the installer Check that the earthing of the electri- Observe the prescriptions contained in cal system is efficient. this manual. Before starting the assembly or dis- The instructions for assembly assembly phases of the appliance,... -
Page 58: Warnings For Technical Maintenance Personnel
2.2 Warnings for technical maintenance 2.3 Warnings for users personnel To ensure correct use of the product Maintenance operations must be car- and electronic appliances connected ried out only by authorised and quali- thereto and to prevent accidents, it is important to always follow the instruc- fied personnel. - Page 59 ITALIANO ENGLISH FRANÇAIS understood the contents of this instal- Do not clean the appliance until the lation and use manual. Errors or bad structure and ashes have completely settings may cause hazardous condi- cooled. tions and/or irregular operation. Only touch the door when the appli- Unskilled users must be protected from ance is cold.
- Page 60 • do not use solvents, acids, detergents It is prohibited to manually load or aggressive products for direct pellets into the burn pot; this cleaning; type of incorrect behaviour may generate an abnormal amount • avoid leaving the product in unfavour- of unburned gas, giving rise to able ambient conditions (humidity, the risk of explosion inside the...
-
Page 61: Fuel Characteristics
ITALIANO ENGLISH FRANÇAIS FUel CHaRaCteRiStiCS 3.2 pellet storage Pellets must be kept in a dry place, not Fuel characteristics too cold and the bags must be kept sealed. The pellet (Fig. 2) is a compound made from various types of wood pressed together with mechanical procedures in compliance with envi- It is advisable to keep a number of bags of pellets ronment protection regulations, and it is the only... -
Page 62: Becoming Familiar With The Product
BeCOMiNG FaMiliaR WitH tHe pROdUCt 4.1 description Fig. 3 Tank lid Ash drawer Pressure gauge Burn pot Cleaning the turbulators Expansion tank Display Pressure switch Fire box door Automatic burn pot cleaning system Door glass Faulty Aesthetic door Pellet reserve sensor Opening lever Pellet hopper Ash drawer door... - Page 63 ITALIANO ENGLISH FRANÇAIS Fig. 4 Water thermostat Pellet thermostat RJ11 connector Electrical power socket Power switch Terminal board Air intake System flow pipe System return pipe Circulator Relief valve 004778640 - 10/02/2021...
-
Page 64: Dimensions
4.2 dimensions Kp 20 - Kp 25 Dimensions in mm Fig. 5 004778640 - 10/02/2021... - Page 65 ITALIANO ENGLISH FRANÇAIS Kp 30 - Kp 35 Dimensions in mm Fig. 6 004778640 - 10/02/2021...
- Page 66 Dimensions in mm Fig. 7 1) Flue gas outlet 2) Return pipe 3) Flow pipe 004778640 - 10/02/2021...
-
Page 67: Technical Features
ITALIANO ENGLISH FRANÇAIS 4.3 technical features Technical data KP 20 KP 25 Boiler class EN 303-5 : 2012 Fuel Pellets Rated burner thermal power (QB) 20.3 25.5 Minimum burner thermal power (QBmin) Effective rated thermal power (QN) 20.0 25.3 Effective rated thermal power (Qmin) Rated combustion thermal efficiency 94.5... - Page 68 Hydraulic data KP 20 KP 25 Water content Max operating hydraulic pressure Boiler pressure drop (ΔT 10 K) mbar Boiler pressure drop (ΔT 20 K) mbar System effective head (ΔT 20 K) mbar System effective head (ΔT 15 K) mbar...
- Page 69 ITALIANO ENGLISH FRANÇAIS Technical data KP 30 KP 35 Boiler class EN 303-5 : 2012 Fuel Pellet Rated burner thermal power (QB) 27,7 31,9 Minimum burner thermal power (QBmin) Effective rated thermal power (QN) 27,4 31,7 Effective rated thermal power (Qmin) Rated combustion thermal efficiency 93,2 92,3...
- Page 70 Hydraulic data KP 30 KP 35 Water content Max operating hydraulic pressure Boiler pressure drop (ΔT 10 K) mbar Boiler pressure drop (ΔT 20 K) mbar System effective head (ΔT 20 K) mbar System effective head (ΔT 15 K) mbar Expansion tank volume System hydraulic connections inch...
- Page 71 ITALIANO ENGLISH FRANÇAIS Head graph system side OTMSL (7) VMAX OTMSL (7) VMOY OTMSL (7) VMIN OTMSL 15/ 7 (7 mH2O) 1000 1200 1400 1600 1800 2000 Q (L/h) 004778640 - 10/02/2021...
-
Page 72: Serial Plate
4.4 Serial plate Palazzetti Lelio Spa - via Roveredo,103 - 33080 Porcia (PN) Combustibile Pellet Potenza termica nominale utile Pmax Potenza termica minima utile Pmin Temperatura max di esercizio °C Contenuto d'acqua Classe di efficienza secondo EN 303-5:2012 Depressione camino richiesta... -
Page 73: Wiring Diagram
ITALIANO ENGLISH FRANÇAIS 4.5 Wiring diagram UI/PC ext 1-2 POSITIVE +16V I04 GND F03 F02 +5V I03 GND CN12 CN10 220÷240Vac ext 5-6 clean comb NOTE:phase protection,added by customer.Do not change polarity! 220-240Vac 00 472 6707 - 19/11/2020 * Solo per i modelli con microinterruttore di sicurezza sul coperchio del serbatoio Fig. -
Page 74: Handling And Transportation
HaNdliNG aNd tRaNSpORtatiON The appliance is delivered complete with all the parts required. Pay attention to the tendency for the appliance to become unbalanced. The centre of gravity of the appliance is carried towards the front. Bear in mind the above also when moving the appliance on the transport stand. -
Page 75: Checking The Floor Where The Appliance Will Be Placed
ITALIANO ENGLISH FRANÇAIS transportation Make sure that the lifting carriage has a payload higher than the weight of the appliance to be lifted. The full responsi- bility of the lifting of loads lies with the person handling the lifting equipment. Ensure wood or timber floors are prop- erly protected in order to prevent the weight of the appliance from damag-... -
Page 76: Preparing The Place Of Installation
For Italy, these technicians must be in Model possession of the letter "C" qualifica- Kp 20 - 25 800 tion issued by the chamber of com- merce based on the Ministerial Decree. Kp 30 - 35 800 37/08. -
Page 77: Combustion Air
ITALIANO ENGLISH FRANÇAIS Fig. 16 If the rear wall of the appliance is an external wall, create a hole for the intake of combustion Fig. 15 air at a height off the ground of about 20-30 cm, in accordance with the dimensional instructions Set up the electricity supply line to arrive near the reported in the section “4.3 Technical features"... -
Page 78: Flue Gas Fitting
6.5 Flue gas fitting If it is not possible to create the fresh air intake in the room, an external hole can be created in The appliance works with the combustion cham- an adjacent room provided it is permanently ber at negative pressure. It is therefore essential interconnected by means of a transfer grille (Fig. -
Page 79: Chimney Flue
ITALIANO ENGLISH FRANÇAIS 6.6 Chimney flue The chimney for the evacuation of flue gases must be made by qualified personnel in compli- ance with standards UNI 10683- EN 1856-1-2- EN 1857-EN 1443- EN 13384-1-3- EN 12391-1 both in terms of the dimensions and the materials used in its construction. -
Page 80: Installation
iNStallatiON In case of pipes that pass through wooden roofs or walls, it is recommend- ed to use special certified ducting kits General considerations commonly available on the market. In the following paragraphs some indications are provided to be respected in order to obtain the maximum performance from the purchased product. -
Page 81: Hydraulic System
ITALIANO ENGLISH FRANÇAIS 7.3 Hydraulic system Unscrew the two rear screws (C) and lift the left side (d) to free the fixing hooks (Fig. 24). Connection to the hydraulic system and the system itself must be performed by qualified personnel, in compliance with the laws and reg- ulations in force in the country of installation. -
Page 82: System Filling / Emptying
Fig. 26 In the event that the domestic system is equipped with a manual or automatic top-up system, the appliance can be loaded through the flow and return pipes. To achieve this: • Open the relief valve (B) (Fig. 23), open the by- pass tap in the anti-condensation valve (O), thus making the water flow from the system until the boiler is completely filled (Fig. -
Page 83: Electrical Connection
ITALIANO ENGLISH FRANÇAIS Fig. 30 Fig. 28 System emptying: It is mandatory that the system is equipped with an earth connection 1) Unscrew the screws (i) and remove the pro- and a differential switch in compliance tection (J) (Fig. 29). with the laws in force. -
Page 84: Initial Configuration
iNitial CONFiGURatiON Depending on the type of installation it is necessary to set up the ideal configuration for correct operation. It is possible to choose from four different configurations: Description Configuration Room thermostat Room probe (default) Accumulator with coil Accumulator without coil 004778640 - 10/02/2021... -
Page 85: Configuration 1 - Room Thermostat
ITALIANO ENGLISH FRANÇAIS Configuration 1 - Room thermostat °C 22.15 20.3 °C 20,0 ARIA 25,8 °C External thermostat Fig. 31 Parts included in the boiler In configuration 1 the appliance is controlled by In this configuration the appliance an external thermostat (or chronothermostat) turns off when the external thermo- which turns the appliance on and off according stat is satisfied, or it will modulate the... - Page 86 8.1.1 electrical connection to a room thermostat The external thermostat must be connected to the two terminals used for the room probe, located on the rear of the appliance. Disconnect the probe and connect the two contacts of the thermostat (Fig. 32). 22.15 20.3 °C Fig.
-
Page 87: Configuration 2 - Room Probe
ITALIANO ENGLISH FRANÇAIS 8.2 Configuration 2 - Room probe Temperature probe room Parts included in the boiler Fig. 33 8.2.1 Room probe electrical connection Configuration 2 is the default configu- The appliance leaves the factory with the room ration for this appliance. In this case it probe already connected to the terminals and is not necessary to make any changes. -
Page 88: Configuration 3 - Storage Tank With Serpentine
8.3 Configuration 3 - Storage tank with serpentine Solar panel Storage tank probe Parts included in the boiler Fig. 35 8.3.1 Storage tank with serpentine electrical Set configuration 3 when you intend to connect connection the appliance to a storage tank with serpentine. The appliance is controlled (switched on and In this case simply move the room temperature off) by the temperature read by the storage tank... -
Page 89: Configuration 4 - Storage Tank Without Serpentine
ITALIANO ENGLISH FRANÇAIS 8.4 Configuration 4 - Storage tank without serpentine Storage tank probe Parts included in the boiler Fig. 37 Set configuration 4 when you intend to con- 8.4.1 Storage tank without serpentine nect the appliance to a storage tank without electrical connection serpentine. -
Page 90: First Start Up
8.5 First start up Power Connect the appliance to the mains, operate the power switch on the back of the appliance by turning it to "I". TIMERS STATS SETTINGS TIPS START Fig. 41 Fig. 39 Press to scroll down the list of If the connection is correct, the appliance emits parameters. - Page 91 ITALIANO ENGLISH FRANÇAIS 8.5.1 Software setting Set time: Access the system configuration menu: Settings Settings Time Date Installer menu Fuel Service menu Screen lock Eco mode Language Antifreeze Info Fig. 44 Fig. 48 Time Press ON: the password appears, set 54 and press OK to confirm.
-
Page 92: Reset Display
The display re-sets for a few seconds. Configurations Room thermostat The logo and a green progress bar appear on the display: Room sensor Coil accumulator Non-coil accumulator Fig. 51 Configu- Description Default ration Room thermostat Fig. 54 Room sensor At this point the home screen of the configura- Accumulator with coil tion chosen is shown. -
Page 93: Maintenance
ITALIANO ENGLISH FRANÇAIS MaiNteNaNCe Maintenance operations must be performed by an authorised technical assistance centre. Before performing any maintenance operation, take the following precautions: • Ensure that all appliance parts are cold. • Make sure that the ashes are completely extinguished. •... -
Page 94: Cleaning And Maintenance Program
9.3 Cleaning and maintenance program 9.3.1 User EVERY 2/3 1 MONTH 1 YEAR DAYS Ash drawer/compartment Turbulators Combustion chamber Pellet hopper 9.3.2 authorised technical service centre 1 YEAR (*) Door seals Smoke exhaust duct Flue manifold Fans (*) At least once a year or every 4 tonnes of pellets burned. 004778640 - 10/02/2021... -
Page 95: Door Opening
ITALIANO ENGLISH FRANÇAIS 9.4 door opening It is recommended to carry out cleaning with the boiler switched off and cold. • Open the fire box door and ash drawer using the dedicated key (a). Fig. 58 9.6 Cleaning the turbulators It is recommended to carry out cleaning with the boiler switched off and cold. -
Page 96: Cleaning The Combustion Chamber
9.7 Cleaning the combustion chamber 9.8 Cleaning the pellet hopper It is recommended to carry out cleaning with the It is recommended to carry out cleaning with the boiler switched off and cold. boiler switched off and cold. • Clean the internal walls of the combustion Disconnect the electrical power supply. -
Page 97: Cleaning The Flue Manifold
ITALIANO ENGLISH FRANÇAIS 9.10 Cleaning the flue manifold • Remove the cover and insulation (e). It is recommended to carry out cleaning with the boiler switched off and cold. Disconnect the electrical power supply. • Unscrew the four screws (a) and remove the side panels (B). - Page 98 • Remove the block (G) made up of: boiler top • Remove the screws (H) and (i), springs (J) and panel, insulation and turbulators. caps (K) from both sides. Fig. 69 Fig. 67 • Use a brush to clean the upper flue gas cham- ber.
-
Page 99: Automatic Cleaning System
ITALIANO ENGLISH FRANÇAIS 9.11 automatic cleaning system 9.12 pellet loading The appliance is equipped with an automatic • Open the pellet loading hatch. burn put cleaning system (a) . This makes it possible to avoid daily cleaning of the burn pot or each time the appliance is switched on. -
Page 100: Demolition And Disposal
10 deMOlitiON aNd diSpOSal The demolition and disposal of the appliance are the sole liability and responsibility of the owner Any liability for damage to people and animals who must act in compliance with the laws in always falls on the owner. Upon demolition, the force in their country regarding safety, respect EC marking, this manual and other documents and protection of the environment. - Page 101 ITALIANO ENGLISH FRANÇAIS taBle deS MatiÈReS Utilisateur et installateur installateur INTRODUCTION Symboles utilisés Destination d’emploi Objet et contenu du manuel Conservation du manuel Mise à jour du manuel Généralités Conformité Responsabilité du fabricant Assistance technique et entretien 1.10 Pièces détachées 1.11 Plaque signalétique 1.12 Livraison de l’appareil...
- Page 102 PRÉPARATION DU LIEU D’INSTALLATION Considérations générales 6.2 Précautions pour la sécurité 6.3 Lieu d’installation 6.4 Air de combustion 6.5 Raccord fumée 6.6 Cheminée INSTALLATION Considérations générales 7.2 Mise à niveau de l’appareil 7.3 Installation hydraulique 7.4 Remplissage / vidage de l’appareil 7.5 Branchement électrique 7.6 Optimisation de la combustion CONFIGURATION INITIALE...
-
Page 103: Introduction
Le manuel d’installation fait partie intégrante de spécialisé Palazzetti. l’appareil. Palazzetti se réserve le droit de modifier les spé- Perte ou détérioration cifications et les caractéristiques techniques et/ ou fonctionnelles du produit à tout moment sans Si nécessaire, demander un autre exemplaire à... -
Page 104: Conformité
La responsabilité des travaux exécutés pour l’ins- UE 2015/1187 (ECOLABELLING) tallation de l’appareil ne peut pas être considérée à la charge de la société Palazzetti ; en effet, celle- EU 2015/1187 ci est et reste à la charge de l’installateur qui est EU/1189 tenu d’effectuer les contrôles relatifs au conduit... -
Page 105: Assistance Technique Et Entretien
ENGLISH FRANÇAIS assistance technique et entretien 1.12 livraison de l’appareil Palazzetti met à disposition un réseau dense de L'appareil est livré parfaitement emballé et fixé centres d’assistance avec des techniciens spécia- à une palette en fois permettant de le déplacer lisés, formés et préparés. -
Page 106: Avertissements Pour La Sécurité
aVeRtiSSeMeNtS pOUR la Vérifier que les prédispositions SÉCURitÉ du conduit de fumée et de l'ar- rivée d'air soient conformes au type d'installation. avertissements pour l'installateur Respecter les consignes indiquées Ne pas effectuer de branchements dans le présent manuel. électriques volants avec des câbles provisoires ou non isolés. -
Page 107: Avertissements Pour Les Techniciens Préposés À La Maintenance
ITALIANO ENGLISH FRANÇAIS 2.2 avertissements pour les techniciens 2.3 avertissements pour l’utilisateur préposés à la maintenance Pour une utilisation correcte du pro- Les opérations de maintenance doivent duit et des équipements électroniques être effectuées exclusivement par un qui y sont connectés et pour prévenir les accidents, les instructions données personnel autorisé... - Page 108 fectué par l'utilisateur ne doit pas être Ne pas s’appuyer sur la porte ouverte, confié à des enfants sans surveillance. cela pourrait compromettre la stabilité de l’appareil. Avant toute intervention, l’utilisateur ou quiconque s’apprête à intervenir Ne pas utiliser l’appareil comme sup- sur l’appareil devra avoir lu et compris port ou ancrage d'aucune sorte.
- Page 109 ITALIANO ENGLISH FRANÇAIS le fabricant de toute responsabilité Il est interdit d'utiliser de l'essence, du civile et pénale. combustible pour lampe, du kérosène, du liquide allume-feu pour bois, de l'al- Il est interdit de faire fonctionner cool éthylique ou des liquides similaires l'appareil avec la porte ouverte.
-
Page 110: Caractéristiques Du Combustible Caractéristiques Du Combustible
CaRaCtÉRiStiQUeS dU chaleur. Les granulés humides et/ou froids (5 °C) réduisent COMBUStiBle la puissance thermique du combustible et oblige à effectuer plus fréquemment l’entretien du bra- Caractéristiques du combustible sier (matériau non brûlé) et du foyer. Les granulés de bois (Fig. 2) sont un composé Faire particulièrement attention au constitué... -
Page 111: Connaître Le Produit
ITALIANO ENGLISH FRANÇAIS CONNaÎtRe le pROdUit 4.1 description Fig. 3 Couvercle réservoir Tiroir à cendres Manomètre Brasero Nettoyage turbulateurs Vase d’expansion Afficheur Pressostat Porte du foyer Système de nettoyage automatique brasier Vitre porte Carte électronique Porte décorative Capteur réserve granulés Levier d'ouverture Réservoir granulés Porte tiroir à... - Page 112 Fig. 4 Thermostat eau Thermostat pellet Connecteur RJ11 Prise alimentation électrique Interrupteur d’allumage Bornier Aspiration air Tuyau de refoulement appareil Tuyau de retour appareil Ventilateur Circulateur Reniflard 004778640 - 10/02/2021...
-
Page 113: Dimensions
ITALIANO ENGLISH FRANÇAIS 4.2 dimensions Kp 20 - Kp 25 Fig. 5 004778640 - 10/02/2021... - Page 114 Kp 30 - Kp 35 Fig. 6 004778640 - 10/02/2021...
- Page 115 ITALIANO ENGLISH FRANÇAIS Fig. 7 1) Sortie fumée 2) Tuyau de retour 3) Tuyau de refoulement 004778640 - 10/02/2021...
-
Page 116: Caractéristiques Techniques
4.3 Caractéristiques techniques Données Techniques KP 20 KP 25 Classe chaudière EN 303-5 : 2012 Combustible Pellet Puissance Thermique Nominale au foyer (QB) 20,3 25,5 Puissance Thermique Minimale au foyer (QBmin) Puissance Thermique Nominale Utile (QN) 20,0 25,3 Puissance Thermique Minimale Utile (Qmin) - Page 117 ITALIANO ENGLISH FRANÇAIS Données hydrauliques KP 20 KP 25 Contenu d’eau Pression hydraulique max de fonctionnement Perte de charge chaudière (ΔT 10 K) mbar Perte de charge chaudière (ΔT 20 K) mbar Hauteur manométrique utile appareil (ΔT 20 K) mbar Hauteur manométrique utile appareil (ΔT 15 K)
- Page 118 Données Techniques KP 30 KP 35 Classe chaudière EN 303-5 : 2012 Combustible Pellet Puissance Thermique Nominale au foyer (QB) 27,7 31,9 Puissance Thermique Minimale au foyer (QBmin) Puissance Thermique Nominale Utile (QN) 27,4 31,7 Puissance Thermique Minimale Utile (Qmin) Rendement Puissance Thermique de combustion Nominale 93,2 92,3 Rendement Puissance Thermique de combustion Minimale...
- Page 119 ITALIANO ENGLISH FRANÇAIS Données hydrauliques KP 30 KP 35 Contenu d’eau Pression hydraulique max de fonctionnement Perte de charge chaudière (ΔT 10 K) mbar Perte de charge chaudière (ΔT 20 K) mbar Hauteur manométrique utile appareil (ΔT 20 K) mbar Hauteur manométrique utile appareil (ΔT 15 K) mbar Volume vase d’expansion...
- Page 120 Graphique hauteur manométrique côté appareil OTMSL (7) VMAX OTMSL (7) VMOY OTMSL (7) VMIN OTMSL 15/ 7 (7 mH2O) 1000 1200 1400 1600 1800 2000 Q (L/h) 004778640 - 10/02/2021...
-
Page 121: Plaque Signalétique
ITALIANO ENGLISH FRANÇAIS 4.4 plaque signalétique Palazzetti Lelio Spa - via Roveredo,103 - 33080 Porcia (PN) Combustibile Pellet Potenza termica nominale utile Pmax Potenza termica minima utile Pmin Temperatura max di esercizio °C Contenuto d'acqua Classe di efficienza secondo EN 303-5:2012... -
Page 122: Schéma Électrique
4.5 Schéma électrique UI/PC ext 1-2 POSITIVE +16V I04 GND F03 F02 +5V I03 GND CN12 CN10 220÷240Vac ext 5-6 clean comb NOTE:phase protection,added by customer.Do not change polarity! 220-240Vac 00 472 6707 - 19/11/2020 * Solo per i modelli con microinterruttore di sicurezza sul coperchio del serbatoio Fig. -
Page 123: Manutention Et Transport
ITALIANO ENGLISH FRANÇAIS MaNUteNtiON et tRaNSpORt L’appareil est livré avec toutes les parties prévues. Attention au risque de déséquilibrage de l’appareil. Le barycentre de l’appareil est déplacé vers l’avant. Tenir compte de cette indication même lors du déplacement de l’appareil sur son support de transport. -
Page 124: Contrôle Du Plan D'appui
transport S’assurer que le chariot élévateur a une capacité supérieure au poids de l’appareil à soulever. Le conducteur de l’engin de levage sera responsable du levage des charges. Faire particulièrement attention à pro- téger adéquatement les sols en bois ou parquet afin d’éviter que le poids de l’appareil ne les abime lors de son déplacement. -
Page 125: Préparation Du Lieu D'installation
Pour l’Italie, ces techniciens doivent Modèle posséder une habilitation « C » remise Kp 20 - 25 800 par la chambre de commerce, confor- mément au Décret Ministériel 37/08. Kp 30 - 35 800 Les planchers faits de matériaux inflammables comme le bois, le parquet, le linoléum, le stratifié... -
Page 126: Air De Combustion
Fig. 16 Si le mur au dos de l’appareil est un mur extérieur, réaliser un trou pour l’aspiration de l’air combu- Fig. 15 rant à une hauteur du sol d’environ 20-30 cm en respectant les indications dimensionnelles indi- Prévoir l’arrivée de la ligne électrique à proxi- quées dans le paragraphe « 4.3 Caractéristiques mité... -
Page 127: Raccord Fumée
ITALIANO ENGLISH FRANÇAIS 6.5 Raccord fumée S'il est impossible de réaliser la prise d’air exté- rieur dans le local, il est possible de réaliser le trou L’appareil fonctionne avec la chambre de com- extérieur dans un local adjacent à condition qu'il bustion sous vide ;... -
Page 128: Cheminée
6.6 Cheminée La cheminée pour l’évacuation de la fumée doit être réalisée par un personnel qualifié et selon les normes UNI 10683- EN 1856-1-2- EN 1857- EN 1443- EN 13384--1--3- EN 12391--1 aussi bien en ce qui concerne les dimensions que pour les maté- riaux employés pour sa construction. -
Page 129: Installation
ITALIANO ENGLISH FRANÇAIS iNStallatiON En cas de passage des tubes à tra- vers des toits ou des murs en bois, il est conseillé d’utiliser des kits spé- Considérations générales ciaux, certifiés, disponibles dans le commerce. Les paragraphes suivants fournissent des indi- cations à... -
Page 130: Installation Hydraulique
7.3 installation hydraulique Dévisser les deux vis arrière (C) et soulever le pan- neau latéral gauche (d) pour libérer les crochets Le raccordement à l’installation hydraulique et de fixation (Fig. 24). l’installation-même doivent être effectués par un personnel qualifié, dans le respect des lois et des normes en vigueur dans le pays d’installation du poêle. -
Page 131: Remplissage / Vidage De L'appareil
ITALIANO ENGLISH FRANÇAIS Fig. 26 Si l’installation domestique est munie d’une ré- intégration manuelle ou automatique, il est pos- sible de remplir l’appareil à travers les tubes d’ali- mentation et de retour. Pour cela : • Ouvrir ensuite le purgeur évent (B) (Fig. 23), ou- vrir le robinet de bypass présent sur la vanne anti-condensat (O), et laisser couler l'eau du cir- cuit jusqu'au remplissage de la chaudière (Fig. -
Page 132: Branchement Électrique
Fig. 28 Fig. 30 Vidage de l’appareil : Il est obligatoire que l’installation soit 1) Dévisser les vis (i) et retirer la protection (J) munie d’une mise à la terre et d’un in- (Fig. 29). terrupteur différentiel, conformément aux lois en vigueur. Le conduit d'évacuation de la fumée doit être doté... -
Page 133: Configuration Initiale
ITALIANO ENGLISH FRANÇAIS CONFiGURatiON iNitiale En fonction du type d’installation, il est nécessaire de programmer la configuration idéale pour le bon fonctionnement. Il est possible de choisir parmi quatre configura- tions différentes : Description Configuration Thermostat ambiant Sonde ambiante (par défaut) Accumulation avec serpentin Accumulation sans serpentin 004778640 - 10/02/2021... -
Page 134: Configuration 1 - Thermostat Ambiant
Configuration 1 - thermostat ambiant °C 22.15 20.3 °C 20,0 ARIA 25,8 °C Thermostat externe Fig. 31 Composants compris dans la chaudière Dans la configuration 1, l’appareil est commandé Dans cette configuration, l’appareil par un thermostat (ou programmateur) externe s’éteint quand le thermostat externe qui allume et éteint l’appareil en fonction de la est satisfait ou modulera la puissance température définie. -
Page 135: Branchement Électrique À Un Thermostat Ambiant
ITALIANO ENGLISH FRANÇAIS 8.1.1 Branchement électrique à un thermostat ambiant Le thermostat extérieur doit être branché aux deux bornes utilisées pour la sonde ambiante, situées au dos de l’appareil. Débrancher la sonde et raccorder les deux contacts du thermostat (Fig. 32). 22.15 20.3 °C Fig. -
Page 136: Configuration 2 - Sonde Ambiante
8.2 Configuration 2 - Sonde ambiante Sonde température ambiante Composants compris dans la chaudière Fig. 33 8.2.1 Branchement électrique sonde ambiante La configuration 2 est la configuration L’appareil sort de l’usine avec la sonde d’am- programmée par défaut pour cet ap- biance déjà... -
Page 137: Configuration 3 - Accumulation Avec Serpentin
ITALIANO ENGLISH FRANÇAIS 8.3 Configuration 3 - accumulation avec serpentin Panneau solaire Sonde accumulation Composants compris dans la chaudière Componenti compresi nella caldaia Fig. 35 8.3.1 Branchement électrique à une Programmer la configuration 3 quand on désire accumulation avec serpentin brancher l’appareil à... -
Page 138: Configuration 4 - Accumulation Sans Serpentin
8.4 Configuration 4 - accumulation sans serpentin Sonde accumulation Composants compris dans la chaudière Fig. 37 Programmer la configuration 4 quand on désire 8.4.1 Branchement électrique à une brancher l’appareil à une accumulation sans accumulation sans serpentin serpentin. Dans ce cas, il suffit de déplacer la sonde de L’appareil s’allume en fonction de la température température ambiante à... -
Page 139: Premier Démarrage
ITALIANO ENGLISH FRANÇAIS 8.5 premier démarrage Puissance Brancher l'appareil au réseau électrique, posi- tionner l’interrupteur d'allumage situé au dos de l'appareil sur « I ». CHRONO STATS RÉGL. SUGG. START Fig. 41 Fig. 39 Appuyer sur pour se déplacer parmi la Si la connexion est correcte, l'appareil émet une liste des paramètres. - Page 140 8.5.1 programmation logiciel Programmer l’heure : Accéder au menu de configuration de l’installation : Paramètres Paramètres Heure Date Menu installateur Combustible Menu de service Verrouillage écran Mode Éco Langue Hors gel Info Fig. 44 Fig. 48 Heure Appuyez sur ON : le mot de passe apparaît, pro- grammer 54 et appuyer sur OK pour confirmer.
- Page 141 ITALIANO ENGLISH FRANÇAIS L’afficheur se remet à zéro pendant Configurations quelques secondes. Thermostat d’amb. L’afficheur visualise le logo et une barre verte d’avancement : Sonde d’ambiance Accumulation serpentin Accumulation SANS serp. Fig. 51 Configu- Description ration défaut Thermostat ambiant Fig. 54 Sonde ambiante À...
-
Page 142: Maintenance
MaiNteNaNCe Les opérations de maintenance doivent être effectuées par un centre d’assistance technique autorisé. Avant d’effectuer toute opération d’entretien, prendre les précautions suivantes : • S'assurer que toutes les parties de l’appareil soient froides. • S'assurer que les cendres soient complètement éteintes. •... -
Page 143: Programme De Nettoyage Et D'entretien
ITALIANO ENGLISH FRANÇAIS 9.3 programme de nettoyage et d’entretien 9.3.1 Utilisateur TOUS LES 2/3 TOUS LES MOIS TOUS LES ANS JOURS Tiroir/compartiment cendre Turbulateurs Chambre de combustion Réservoir granulés 9.3.2 Centre d’assistance technicien autorisé 1 AN (*) Joints porte Conduit d’évacuation de la fumée Collecteur fumées Ventilateurs (*) Au moins une fois par an ou toutes les 40 tonnes de granulés brûlés. -
Page 144: Ouverture Portes
9.4 Ouverture portes Il est recommandé d’effectuer le nettoyage avec la chaudière éteinte et froide. • Ouvrir la porte du foyer et le tiroir à cendres en utilisant la clé (a). Fig. 58 9.6 Nettoyage turbulateurs Il est recommandé d’effectuer le nettoyage avec la chaudière éteinte et froide. -
Page 145: Nettoyage De La Chambre De Combustion
ITALIANO ENGLISH FRANÇAIS 9.7 Nettoyage de la chambre de 9.8 Nettoyage du réservoir à granulés combustion Il est recommandé d’effectuer le nettoyage avec la chaudière éteinte et froide. Il est recommandé d’effectuer le nettoyage avec la chaudière éteinte et froide. Déconnecter l’alimentation électrique. -
Page 146: Nettoyage Du Collecteur De Fumées
9.10 Nettoyage du collecteur de fumées • Retirer le couvercle et l’isolation (e). Il est recommandé d’effectuer le nettoyage avec la chaudière éteinte et froide. Déconnecter l’alimentation électrique. • Dévisser les quatre vis (a) et retirer les deux panneaux latéraux (B). Fig. - Page 147 ITALIANO ENGLISH FRANÇAIS • Retirer le bloc (G) composé du : plafond de la • Retirer des deux côtés les vis (H) et (i), les res- chaudière, de l’isolant et des turbulateurs. sorts (J) et les bouchons (K). Fig. 69 Fig.
-
Page 148: Système De Nettoyage Automatique
9.11 Système de nettoyage automatique 9.12 Chargement des granulés de bois L’appareil est doté d'un système de nettoyage • Ouvrir la porte pour le chargement des granu- automatique (a) du brasier. Cela permet d'éviter lés. le nettoyage quotidien du brasier ou à chaque allumage de l'appareil. -
Page 149: Démolition Et Élimination
ITALIANO ENGLISH FRANÇAIS 10 dÉMOlitiON et ÉliMiNatiON Le propriétaire est le seul responsable en cas La démolition et l'élimination de l’appareil sont d’éventuels dommages à des personnes et des exclusivement à la charge du propriétaire qui animaux. Lors de la démolition, le marquage devra agir conformément aux lois en vigueur CE, le mode d’emploi et les autres documents dans son pays en matière de sécurité... - Page 152 Eigenschaften zu beeinträchtigen. Palazzetti se réserve le droit de modifi er ses produits à tout moment et sans préavis afi n de les améliorer sans en compromettre les caractéristiques essentielles.