
Manuels Connexes pour Alliance Bio Expertise DistriWEL


Sommaire des Matières pour Alliance Bio Expertise DistriWEL
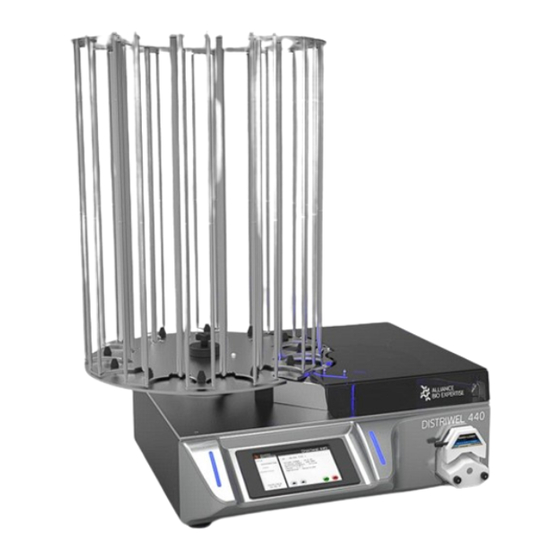
- Page 1 Distriwel 30 – Dec 2018 DistriWEL Automate de distribution de milieux Automated Media Pourer Stacker Manuel d’utilisation • User’s Manual alliance-bio-expertise.com...
- Page 2 Accompagnement du manuel d’utilisation Rédaction Version Rédacteur Correcteur P.Laroche/P.Le Saux N.Cherotzky P. Le Saux D.Taugain A.Blanchard D. Taugain A.Blanchard D. Taugain A.Blanchard D. Taugain...
-
Page 3: Sommaire De Langues
Sommaire de langues Français ........... 1 English ..........21... -
Page 4: Table Des Matières
Table des matières – FR Préambule ....................9 Identification de la machine ................9 Plaque constructeur ....................9 Conformité aux normes .................... 10 Documents justificatifs .................... 11 Usage de la machine ..................11 Usage de la documentation ................11 Obligation de formation ................... - Page 5 Caractéristiques techniques ................26 Utilisation de l’appareil ................27 Principe de fonctionnement ................27 Utilisation de l’équipement ................27 Gestion des programmes................... 27 Gestion des opérateurs .................... 32 Réglage ....................... 32 Maintenance ......................33 ...
- Page 6 Supporting documents ..................... 25 Use of the machine ..................25 Use of the documentation ................25 Training obligation ....................25 Available documentation ..................25 Use of the user's manual ................... 25 Assistance ....................27 Troubleshooting .....................
- Page 7 Running a cycle ...................... 46 Blood addition option .................. 52 Create the program ..................52 Tubing set-up ....................55 Start the program ..................56 Servicing and maintenance ................63 Summary table ..................... 63 Regular checks ..................... 63 Cleaning .....................
- Page 8 Guide de démarrage rapide A partir de l’écran d’accueil, une fois vos programmes enregistrés, dérouler les séquences : Choix du programme Choix de l’opérateur Enregistrement du N° de lot Choix du volume total à Distribuer en ml Choix du nombre de boites à...
-
Page 9: Préambule
Ce DISTRIWEL a fait l’objet de tests poussés pour vous garantir qualité et fiabilité. Au-delà de son potentiel technique, le DISTRIWEL a été développé dans un souci constant de confort et de sécurité pour l’utilisateur. Toute l’équipe d’Alliance Bio Expertise est à votre service au +33 (0)2 40 51 79 53 ... -
Page 10: Conformité Aux Normes
Conformité aux normes Alliance Bio Expertise certifie que le DISTRIWEL est conforme aux directives et normes européennes suivantes : DIRECTIVES Directive 89/336/CEE (Compatibilité Electromagnétique) • Mise à jour par les directives 92/31/CEE et 93/68/CEE Directive 73/23/CEE (Sécurité appareils électriques) •... -
Page 11: Documents Justificatifs
Documents justificatifs Usage de la machine Le DISTRIWEL doit être utilisé uniquement s'il est en parfait état et dans le strict respect des instructions décrites dans le présent manuel. Usage de la documentation Obligation de formation ... -
Page 12: Compréhension Des Symboles
Compréhension des symboles SYMBOLE DE SECURITE Le pictogramme ci-contre est un symbole d'avertissement général. Il est utilisé pour prévenir l'utilisateur d'un risque potentiel de blessures physiques, mais aussi de dommages pour l'équipement, le matériel et l'environnement. Tous les messages de sécurité qui suivent ce symbole doivent impérativement être respectés pour empêcher un éventuel dommage. -
Page 13: Assistance
Les machines sont garanties contre les vices de fabrication et de composants pour une durée de douze mois à partir de la date de l’expédition. ALLIANCE BIO EXPERTISE prend en charge dans ses locaux les éventuelles réparations de pièces pendant la période de garantie. Toute pièce ou appareil présentant un problème quelconque de mauvais fonctionnement devra être retourné... -
Page 14: Sécurité Et Environnement
Sécurité et environnement Consignes générales de sécurité AVERTISSEMENT Le DISTRIWEL est un équipement mécanique. De ce fait, il est indispensable de suivre les consignes de sécurité dans le présent mode d’emploi. • Ne pas modifier l’appareil. • Le DISTRIWEL doit obligatoirement faire l’objet d’un maintenance préventive annuelle, assurée par du personnel formé... -
Page 15: Installation - Mise En Service
Installation – Mise en service La mise en place du DISTRIWEL doit être effectuée dans la mesure du possible par un technicien de la société Alliance Bio Expertise. Il est conseillé d’installer notre matériel sur une paillasse capable de supporter 30 kg. Celle-ci doit être plane et si possible d’une hauteur d’environ 80cm pour faciliter l’accès au... -
Page 16: Pièces Et Accessoires
Attention : les boites ne doivent pas toucher les bords du guide (uniquement le plat). Pièces et accessoires • DISTRIWEL muni de la croix de transfert des boites • Plateau du carrousel • Carrousel de chargement et de déchargement comprenant 12 colonnes soit 440 boites •... -
Page 17: Mise En Service
La consommation de l’appareil est de 500 Watts. Il doit être obligatoirement branché à une prise de terre. Alliance Bio Expertise dégage toute responsabilité en cas de problèmes électriques si les points ci–dessus ne sont pas respectés lors de la mise sous tension. -
Page 18: Présentation
Présentation Le DISTRIWEL (Automatic Media Pourer Stacker) est un automate de remplissage et de stockage des boites de Pétri d’un diamètre de 90mm* *Les dimensions des boites de Pétri compatibles au DISTRIWEL : Diamètre maximum de 87,5 mm pour la boite. -
Page 19: Description De L'appareil
Description de l’appareil Face avant Carrousel de chargement et déchargement des boites. Ce carrousel est composé de 9 colonnes. Il peut contenir jusqu’à 320 boites réparties sur 8 colonnes, la neuvième devant toujours rester vide pour permettre le transfert des boites Le capot altuglas. -
Page 20: Pompe Péristaltique
Tuyau de distribution (4,8 X 8,1 mm) Présentation de l’écran de contrôle Ecran d’accueil L’écran du DISTRIWEL est un écran tactile. Témoins lumineux Au-delà de l’écran tactile, la face avant est munie également de témoins lumineux Témoins lumineux... -
Page 21: Principe D'utilisation De Lecture
Vert Allumé Fin de cycle validée par l'utilisateur en Fixe distribution Description des écrans L’utilisateur peut choisir entre 2 modes différents : DISTRIWEL Cycle Paramétrage Distribution boites Création Programme distribution Pompe Création Programme Pompe Création opérateur Réglage... -
Page 22: Utilisation Pompe
Il procédera également au déchargement s’il y a lieu et au chargement des boites de pétri. Enfin , vous pourrez procéder à l’amorçage et à la calibration de la pompe. Utilisation pompe A partir de ce menu, l’utilisateur peut se servir de la pompe pour ses propres applications en mode automatique ou manuel et créer des programmes (comme en 1). -
Page 23: Utilisation De L'appareil
Principe de fonctionnement Le DISTRIWEL est un équipement destiné à remplir de gélose des boites de Pétri stériles. Relié à un préparateur de milieux ou à une bouteille par un tuyau en silicone stérile, la gélose est distribuée par une pompe péristaltique fixée à l’avant du DISTRIWEL. - Page 24 La vitesse de rotation de la pompe, à décider suivant la viscosité du liquide : Dans le cadre d’une distribution avec 2 pompes, cette séquence se renouvèle (Il s’agit d’une option. Non livré en standard). Activation ou non du refroidissement : Si activation du refroidissement, choisir le temps de pause du disque sur la plaque de refroidissement : Dans le cadre de l’option agitation, déclencher ou non l’agitateur (Option en cours de développement) :...
-
Page 25: Modification / Suppression D'un Programme
Modification / suppression d’un programme Aller dans le mode paramétrage. Appuyer dans la barre du programme à modifier ou supprimer. Un écran s’affiche automatiquement avec les différentes options. Si le choix de supprimer un programme est sélectionné, l’écran ci-dessous apparait : Création d’un programme «... - Page 26 En appuyant sur la barre bleu, l’écran tactile s’affiche : Ensuite, choisir le volume à distribuer : Choisir la vitesse de la pompe :...
- Page 27 Choisir le mode de distribution, automatique ou manuel. Dans la case « automatique », une dose est déclenchée suivant un temps donné. Dans le cas « manuel », c’est à l’utilisateur d’appuyer pour lancer la distribution de chaque dose. Choisir le nombre de doses à distribuer : Dans le cadre d’une distribution automatique, choisir le temps de pause entre chaque dose :...
-
Page 28: Gestion Des Opérateurs
Gestion des opérateurs Création d’un opérateur Le mode opérateur permet d’enregistrer les noms des différents utilisateurs, les modifier et les supprimer. Le premier N°d’opérateur disponible s’affiche : Appuyer dans la barre afin de faire apparaitre le clavier tactile : Pour quitter , enregistrer avec la touche verte. -
Page 29: Maintenance
Gestion de la Langue, la Date et l’heure CYCLE DATE - HEURE Jour Mois Année PARAMETRAGE 2016 Heures Minutes Secondes PROGRAMMES OPERATEURS LANGUE REGLAGES Français MAINTENANCE 24/03/2016 16:46:35 Maintenance L’accès au modes Maintenance et notamment aux menu Service 1 & 2 impose l’enregistrement du code d’accès pour entrer : Menu Service 1 : Le menu «... - Page 30 En appuyant sur les flèches correspondantes, vous provoquez le déplacement correspondant : Menu Service 2 : Le menu « service 2 » permet la calibration des différents capteurs.
-
Page 31: Réalisation D'un Cycle
Distriwel – Août 2017 Réalisation d’un cycle Préparation Avant tout démarrage de cycle, il est impératif d’installer correctement le tuyau de distribution. Merci de suivre la procédure ci-dessous en veillant à ne pas écraser le tuyau. 1. Placer le tuyau entre les galets L’installation du tuyau est... -
Page 32: Lancement D'un Programme
Distriwel – Août 2017 Lancement d’un programme Tout commence par le choix du programme. Appuyer sur les flèches pour faire défiler les programmes disponibles : Une fois le programme choisi, sélectionné l’opérateur avec les flèches. Inscrire le numéro de lot :... - Page 33 Distriwel – Août 2017 Choisir le nombre de boites à distribuer : Procéder au déchargement du carrousel si nécessaire : Procéder au chargement du carrousel avec les boites de pétri stériles. Commencez par le chargement de la colonne A.
- Page 34 Distriwel – Août 2017 Puis chargez la colonne B. Procéder à l’amorçage de la pompe : Procéder ensuite à la calibration de la pompe :...
- Page 35 Distriwel – Août 2017 Inscrire le volume mesuré : Vous pouvez démarrer le cycle :...
-
Page 36: Interruption D'un Cycle
Distriwel – Août 2017 Interruption d’un cycle Ci-dessous l’écran de de cycle en cours. Pour interrompre le cycle, il suffit d’appuyer sur le bouton rouge : S’affiche alors l’écran ci-dessous vous permettant de faire un choix : Fin du cycle et distribution Une fois la fin de cycle sélectionnée (cf écran ci-dessous), c’est un retour à... -
Page 37: Option Ajout De Sang (Option Non Livrée En Standard)
Distriwel – Août 2017 Option ajout de sang (option non livrée en standard) Création d’un programme La création d’un nouveau programme est très facile. Il suffit de se laisser guider par les différentes séquences qui s’affichent sur l’écran tactile. - Page 38 Distriwel – Août 2017 La vitesse de rotation de la pompe, à décider suivant la viscosité du liquide : Dans le cadre de l’ajout de sang, la distribution s’effectue avec 2 pompes, la séquence précédente se renouvèle. Il convient alors de renseigner les mêmes informations pour la pompe N°2.
- Page 39 Distriwel – Août 2017 Dans le cadre de l’option agitation, déclencher ou non l’agitateur (option non disponible sur appareil standard) :...
-
Page 40: Installation Des Tuyaux De Distribution
Distriwel – Août 2017 Installation des tuyaux de distribution Effectuer la mise en place des tubulures en suivant le schéma ci-dessous : Le raccord en « T » doit être placé avant la pompe N°1. Légende : 1. DISTRIWEL 2. -
Page 41: Lancer Le Programme
Distriwel – Août 2017 Lancer le programme Une fois les tubulures connectées (voir précédemment), sélectionner le programme paramétré pour l'ajout de sang. Sélectionner le menu CYCLE, puis POMPE et appuyer sur le bouton vert pour valider : Choisir ou saisir l’opérateur (facultatif) puis valider :... - Page 42 Distriwel – Août 2017 Renseigner le numéro de lot (facultatif) puis valider : Renseigner le volume total à distribuer puis valider :...
- Page 43 Distriwel – Août 2017 Renseigner le nombre total de boites à distribuer puis valider : Vider toutes les colonnes du carrousel, utiliser les flèches pour le faire tourner si nécessaire puis valider :...
- Page 44 Distriwel – Août 2017 Charger la première colonne du carrousel, utiliser les flèches pour le faire tourner si nécessaire puis valider : Compléter le chargement du carrousel :...
- Page 45 Distriwel – Août 2017 L’écran d'amorçage de la pompe N°1 apparaît : Appuyez sur la flèche pour amorcer la pompe N°1 (rotation de la pompe). Une fois le tuyau rempli, appuyer sur valider, la fenêtre suivante apparaît :...
- Page 46 Distriwel – Août 2017 Appuyer sur valider pour passer cette étape. Appuyez sur la flèche pour effectuer la calibration de la pompe N°1. Utilisez une éprouvette graduée ou une balance pour mesure le volume de liquide distribué. Renseigner le volume distribué, recommencer l’opération si nécessaire.
- Page 47 Distriwel – Août 2017 Maintenez la touche appuyée pour faire tourner la pompe et amorcer le sang jusqu’à l’embout de distribution. Une fois fait, appuyer sur la touche verte pour valider la fenêtre suivante apparaît :...
- Page 48 Distriwel – Août 2017 Appuyer sur valider pour passer la calibration. Appuyez sur la flèche pour effectuer la calibration de la pompe N°2. Utilisez une éprouvette graduée ou une balance pour mesure le volume de liquide distribué. Renseigner le volume distribué, recommencer l’opération si nécessaire.
-
Page 49: Entretien Et Maintenance
Distriwel – Août 2017 Entretien et maintenance Tableau récapitulatif Fréquence Elément Opération Après chaque Journalier Variable Cycle Démontage et Appareil Nettoyage Piston Nettoyage Lampe UV Remplacement 400 heures Gobelet jetable Remplacement plastique Nettoyage / Autoclavage Tuyau de distribution Remplacement... -
Page 50: Du Piston
Distriwel – Août 2017 Laver l’appareil ainsi que tous les éléments avec de l’eau chaude et de l’alcool à 70°C. Fig. 2 Fig. 1 Fig. 3 Fig. 4 Du piston Vous devez également nettoyer et laver le piston de façon journalière. Il est composé d’une crémaillère (1), d’une tête (2) . -
Page 51: Autoclavage Des Tuyaux
L’appareil peut alors être rallumé et utilisé à nouveau. Autoclavage des tuyaux Le DISTRIWEL permet de distribuer de façon stérile des milieux de culture en boîtes de pétri sous ambiance UV. Il est nécessaire d’autoclaver les tuyaux de distribution : •... -
Page 52: Lubrification
Le raccord silicone, situé sur le rotor de la pompe pendant la distribution, doit être changé toutes les 100 heures d’utilisation pour garantir un volume et un débit régulier. N’utiliser que le tuyau fourni par Alliance Bio Expertise Ref ? Des gobelets en plastique... -
Page 53: Dépannage
Ce calibrage doit être effectué dans les conditions d'éclairage dans lesquelles l'appareil sera utilisé, Ce calibrage s'effectue de façon très simple par l'intermédiaire de l'interface utilisateur, La procédure est la suivante : • Retirer toutes les boîtes de Petri du DISTRIWEL 440. • Mettre sous tension si ce n'est pas déjà fait. •... - Page 54 Distriwel – Août 2017 • Fermer le capot altuglass transparent (important) - vérifier que le tube UV s'allume correctement • Sur l'interface utilisateur, appuyer sur le bouton "calibrage AVEC boîtes" - les témoins lumineux en face avant émettent UN flash vert indiquant que les valeurs des signaux ont bien été acquises •...
-
Page 55: Garantie
Les problèmes liés à la fabrication et aux composants de nos machines sont garantis pour une durée de douze mois à compter de la date d’expédition Pendant cette période, Alliance Bio Expertise prend en charge, dans ses bureaux, les éventuelles réparations de pièces. Toute pièce ou appareil présentant un problème quelconque de mauvais fonctionnement devra être retourné à l’usine aux frais du distributeur local. -
Page 56: Annexes
Distriwel – Août 2017 Annexes Réglages interface Pièces détachées Consommables Plan appareil Glossaire... -
Page 57: English Version
Distriwel – Août 2017 ENGLISH VERSION... - Page 58 Distriwel – Août 2017 Quick start guide In the home screen, once you have recorded your programs, scroll down the sequences: Choice of program Choice of operator Recording of the batch No. Choice of total volume to be dispensed in ml...
-
Page 59: Introduction
Distriwel – Août 2017 Introduction Thank you for purchasing this DISTRIWEL. The Alliance Bio Expertise teams have taken great care in the design of this automated dispensing system so as to meet your needs. Its operating principle and technical characteristics have been tried and tested and are conform to EC standards. -
Page 60: Compliance With Standards
Distriwel – Août 2017 Compliance with standards Alliance Bio Expertise certifies that the DISTRIWEL is conform to the following European directives and norms: DIRECTIVES Directive 89/336/CEE (Electromagnetic Compatibility) • Updated according to Directives 92/31/EEC and 93/68/EEC Directive 73/23/CEE (Electrical equipment - safety) •... -
Page 61: Supporting Documents
Use of the user's manual The user's manual must have been read in its entirety before using the DISTRIWEL for the first time. It must be consulted should an error message be displayed. The preventive maintenance operations set out in this manual must be carried out at the frequency stipulated in this manual. - Page 62 Distriwel – Août 2017 An explanation of symbols SAFETY SYMBOL This pictogram is a general warning symbol. It is used to alert the user to potential personal injury hazards, as well as hazards for machinery, materials and the environment. All safety messages following this sign must be obeyed to avoid possible harm.
-
Page 63: Assistance
Warranty ALLIANCE BIO EXPERTISE hereby certifies that the device displays the characteristics set out in this manual on delivery. Machines are guaranteed against manufacturing defects and defective components for a period of twelve months from the dispatch date. -
Page 64: Safety And The Environment
Distriwel – Août 2017 Safety and the environment General safety instructions WARNING The DISTRIWEL is a mechanical device. For this reason, it is essential to follow the safety instructions in this user's manual. • Do not modify the device. •... -
Page 65: Installation - Commissioning
Distriwel – Août 2017 Installation – Commissioning Wherever possible, the DISTRIWEL should be installed by an Alliance Bio Expertise technician. It is advised to install our equipment on a bench capable of bearing a 30 kg load. This bench should be perfectly flat and, if possible, have a height of approx. -
Page 66: Parts And Accessories
Warning: make sure that the dishes do not hit the edges of the guide. Parts and accessories • DISTRIWEL fitted with the dish transfer cross • Carousel plate • Loading and unloading carousel containing12 columns, i.e. 440 dishes •... -
Page 67: Initial Commissioning
The device has an electrical consumption of 500 Watts. The device must be plugged into a grounded electrical outlet. Alliance Bio Expertise shall not be held liable for any electrical issues if the above points have not been complied with when switching the device on. -
Page 68: Presentation
Distriwel – Août 2017 Presentation The DISTRIWEL (Automatic Pourer Stacker) is an automated device for filling and stacking Petri dishes with diameter 90mm*. *The compatible Petri dishes have the following dimensions : Maximum diameter of the bottom part of Petri dish : 87.5 mm Lid diameter : between 91.5 and 93 mm. -
Page 69: Description Of The Device
Distriwel – Août 2017 Description of the device Front Dish loading and unloading carousel. This carousel comprises 9 columns. It can contain up to 320 dishes distributed among 8 columns; the ninth column is always left empty to enable dish transfer Altuglas lid. -
Page 70: Peristaltic Pump
Distriwel – Août 2017 Peristaltic pump Cam closing handle Pump rotor Dispensing hose (4.8 X 8.1 mm) -
Page 71: Presentation Of The Control Screen
Presentation of the control screen Home screen The DISTRIWEL is fitted with a touchscreen. Just press on the menus to access the various parameter settings. Lights In addition to the touchscreen, the front face also has indicator lights... -
Page 72: Description Of Screens
Distriwel – Août 2017 Description of screens The user can choose between 2 different modes: DISTRIWEL Cycle Parameters settings Dish dispensing Creation of a dispensing program Pump Creation of a pump program Creation of a user Settings Maintenance Cycle menu ... -
Page 73: Technical Characteristics
Distriwel – Août 2017 Technical characteristics Carousel capacity: up to 440 dishes Max. dispensing speed (for 15ml/dish): 750 dishes per hour Programmable dish volume: 00.0 to 99.9ml Programmable tube or bottle volume: 00.0 to 99.9ml Dispensing precision: 0.25ml (<20ml) 2% (>20ml) -
Page 74: Using The Device
Operating principle The DISTRIWEL is a device designed to fill sterile Petri dishes with agar. Connected to a media preparation system or to a bottle by a sterile silicone hose, the agar is dispensed by a peristaltic pump attached to the front of the DISTRIWEL. - Page 75 Distriwel – Août 2017 Volume to be dispensed in ml: Pump rotation speed, to be decided depending on the viscosity of the liquid: This sequence repeats for dual-pump dispensing (this option is not delivered as a standard). Cooling activated or deactivated:...
- Page 76 Distriwel – Août 2017 If there is a stirring option, activate or deactivate the stirrer (soon available option) Modification / deletion of a program Go to the parameter settings mode. Press the bar of the program you wish to modify or delete. A screen displays automatically showing the various options.
- Page 77 Distriwel – Août 2017 Creation of a "pump" program: This starts be displaying the next available programme No.: Pressing on the blue bar displays the touchscreen: Next, select the dispensing volume:...
- Page 78 Distriwel – Août 2017 Select pump speed: Select the dispensing mode, automatic or manual. For the "automatic" mode, a dose is triggered after a given time. For the "manual" mode, the user has to press to start the dispensing of each dose.
-
Page 79: User Management
Distriwel – Août 2017 For automatic dispensing, select the pause time between each dose: User management Creation of an operator The operator mode lets you record, modify and delete the names of the various users. The first available operator No. is displayed: Press the bar to display the touchscreen: Use the green button to save and then quit the screen. -
Page 80: Adjustment
Distriwel – Août 2017 Adjustment Management of the Language, Date and Time CYCLE DATE - TIME Month Year PARAMETER 2016 Hours Minutes Seconds SETTINGS PROGRAMS LANGUAGE OPERATORS French SETTINGS MAINTENANCE 24/03/2016 16:46:35 Maintenance You have to enter the access code in order to access Maintenance modes and, in... - Page 81 Distriwel – Août 2017 Service 1 menu: The "service 1" menu lets you access the various movements of the carousel, disk and piston. Pressing on the corresponding arrows triggers the corresponding movement: Service 2 menu: The "service 2" menu lets you calibrate the various sensors.
-
Page 82: Running A Cycle
Distriwel –August 2017 Running a cycle Preparation Before any cycle start, it is vital to correctly install the dispensing hose. Please follow the procedure below, taking care not to crush the hose. 1. Place the hose between the Hose installation is an... - Page 83 Distriwel –August 2017 Launching a program Start by selecting the programme. Press on the arrows to scroll through the various available programs: Once the program has been selected, use the arrows to select the operator. Enter the batch number:...
- Page 84 Distriwel –August 2017 Indicate the total dispensing volume: Select the number of dishes to be dispensed: Unload the carousel if necessary:...
- Page 85 Distriwel –August 2017 Load the carousel with the sterile Petri dishes. Start by loading column A. Then load column B.
- Page 86 Distriwel –August 2017 Prime the pump: Calibrate the pump: Enter the measured volume:...
- Page 87 Distriwel –August 2017 You can now start the cycle: Interrupting a cycle The screen for the current cycle is shown below. To interrupt the cycle, just press the red button: The following screen is then displayed allowing you to select: End of the cycle and dispensing Once the cycle end has been selected, the display goes back to the home screen.
-
Page 88: Blood Addition Option
Select the next available program number: Press on the program's name displayed on the touchscreen: The DISTRIWEL will guide you to enter the parameters predefined for the blood addition program: • The volume to be dispensed in ml: •... - Page 89 Distriwel –August 2017 Be careful : for blood addition, dispensing is done through 2 pumps, so the previous sequence will have to be done twice. Enter the same parameters for pump n°1 and 2. For your information, here are the values to be used to dispense a 5% blood agar* :...
- Page 90 Distriwel –August 2017 • The stirring option can be activated or desactivated (not available on the standard DISTRIWEL) :...
-
Page 91: Tubing Set-Up
Distriwel –August 2017 Tubing set-up Proceed to the tubing connection following the below scheme (the T-connector must be placed before pump N°1) : Legend : 1. DISTRIWEL 2. Pump N°1 3. Pump N°2 4. Autoclavable and flexible tubing set (Ø 1.6mm) 5. -
Page 92: Start The Program
Distriwel –August 2017 Start the program Once the tubes set (see previous chapter), select the blood addition program previously saved (see : Create the blood addition program). Select CYCLE menu, PUMP, and press the green button to start the program... - Page 93 Distriwel –August 2017 Enter the batch number (optional) and press the green button : Enter the total volume to be dispensed and press the green button :...
- Page 94 Distriwel –August 2017 Enter the number of plates to be dispensed and press the green button : Unload the first column of the carrousel (column A) if there is any plates in it, arrows can be used to make the carrousel turn. Once empty, press the green button to validate :...
- Page 95 Distriwel –August 2017 Load the column A, using the arrows to make the carrousel turn if necessary and press the green button to validate : Confirm that the carrousel is loaded by pressing the green button : Pump N°1 priming screen appears :...
- Page 96 Distriwel –August 2017 Press the arrow to prime the pump n°1. Once the tube filled, press the green button, the calibration screen appears : Press the green button to continue without calibration, or press the arrow to calibrate the pump n°1.Use a measuring cylinder or a scale to compare the dispensed to the set up volume.
- Page 97 Distriwel –August 2017 Keep pressing to prime the blood up to the distribution nozzle. Once done, press the green button, the following screen appears :...
- Page 98 Distriwel –August 2017 Calibrate the pump as seen for pump N°1 (previous chapter), and press the green button. Press the green button to continue without calibration, or press the arrow to calibrate pump n°2. Use a measuring cylinder or a scale to compare the dispensed to the set up volume.
-
Page 99: Servicing And Maintenance
Distriwel –August 2017 Servicing and maintenance Summary table Frequency Component Operation After each Daily Variable Cycle Dismantling and Device Cleaning Piston Cleaning UV lamp Replacement 400 hours Disposable plastic cup Replacement Cleaning / Autoclaving Dispensing hose Replacement Each week... - Page 100 Distriwel –August 2017 Fig. 2 Fig. 1 Fig. 3 Fig. 4 Piston You must also clean and wash the piston on a daily basis. The piston comprises a hook (1), and one head (2) . The piston has to be in the raised position in order to get access to underneath it.
-
Page 101: Autoclaving The Hoses
The device is now ready to be switched on and used again. Autoclaving the hoses The DISTRIWEL is used for sterile dispensing of culture media into Petri dishes under UV light. The dispensing hoses have to be autoclaved: •... -
Page 102: Lubrication
The silicone connection, located on the pump rotor during the dispensing operation, must be changed after every 100 hours of use in order to guarantee a regular volume and flow rate. Only use the hose supplied by Alliance Bio Expertise Ref. ? -
Page 103: Plastic Cups
Distriwel –August 2017 Plastic cups Disposable plastic cups are used to recover the agar when priming the pump, and if there are any leaks due to a broken dish. These cups must be changed every day to prevent any risk of contamination. - Page 104 Distriwel –August 2017 Place a petri dish at the position 3 (filling position) (the bottom should stand on the black plastic disk and the lid at the top of the transfer disk, • Close the UV protection altuglass lid (very important) – make sure that the UV lamp is on, •...
-
Page 105: Warranty
During this warranty period, Alliance Bio Expertise shall carry out possible repairs of components, at its premises. All components or devices experiencing any kind of malfunction must be returned to the Alliance Bio Expertise factory at the cost of the local distributor. -
Page 106: Glossary
Distriwel – Août 2017 Appendices Interface settings Spare parts Consumables Device drawing Glossary... - Page 107 Contact us: Tel: +33(0)2 40 51 79 53 Email: contact@abioexpertise.com “Empowered from our people’ skills and experiences, we, ALLIANCE BIO EXPERTISE, together with our customers and partners decided to manufacture Microbiology automated equipment around essential values: Customer Focus, Service, Loyalty, Innovations”...