SOMFY HOME MOTION J4 io Notice Installateur
Masquer les pouces
Voir aussi pour HOME MOTION J4 io:
- Notice installateur et utilisateur (84 pages) ,
- Notice d'installation (45 pages) ,
- Notice installateur (41 pages)

Manuels Connexes pour SOMFY HOME MOTION J4 io


Sommaire des Matières pour SOMFY HOME MOTION J4 io
- Page 1 J4 io Notice installateur Installationsanleitung Guida d’installazione Installer Guide...
-
Page 2: Table Des Matières
Pour plus d’information veuillez consulter le site internet www.io-homecontrol.com. io-homecontrol repose sur une technologie avancée, sécurisée et sans-fil, facile à ® installer. Les produits io-homecontrol communiquent entre eux pour offrir plus de ® confort, de sécurité et d’économies d’énergie. www.io-homecontrol.com © 2011 Somfy SAS. All rights reserved. 11/2011... -
Page 3: Sécurité
2.1. Sécurité et responsabilité - Le moteur, le couple et le temps de fonctionnement doivent être ajustés en fonction de l‘installation complète. - Seuls les accessoires d‘origine SOMFY doivent être utilisés (adaptateurs, supports, connecteurs, câble d’ali- mentation, ...). - La mise en place, le contrôle, la mise en service et le dépannage de l‘installation ne doivent être effectués que par le personnel qualifié. -
Page 4: Montage
• Insérer le moteur dans le caisson (4). • À l’aide des clips (5), fixer le moteur dans le caisson (4) par-dessus les bandes acoustiques (6a). • L’axe peut être fixé dans l’adaptateur avec une vis sans tête (7). © 2011 Somfy SAS. All rights reserved. 11/2011... -
Page 5: Caisson 57 X 51 Mm Ouvert En Haut
(4). • L’axe peut être fixé dans l’adaptateur avec une vis sans tête (7). Les clips intérieurs ne sont pas utilisables avec les moteurs J418 (moteurs J4 à couple de 18 N.m). © 2011 Somfy SAS. All rights reserved. 11/2011... -
Page 6: Caisson 78 X 67 Mm Ouvert En Bas
• Insérer le moteur dans le caisson (4). • À l’aide du clip (5), fixer le moteur dans le caisson (4). • L’axe peut être fixé dans l’adaptateur avec une vis sans tête (7). © 2011 Somfy SAS. All rights reserved. 11/2011... - Page 7 (4) + moteur. • Visser l’étrier (9) sur le moteur avec une vis M5 x 10 mm. Couple de vissage = 4 N.m maximum. La vis doit être comprimée sur l’étrier (9). © 2011 Somfy SAS. All rights reserved. 11/2011...
-
Page 8: Caisson 67 X 66 Mm Ouvert En Bas
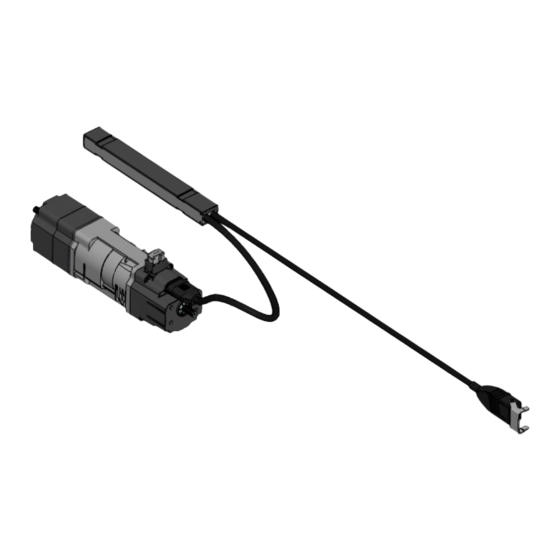
3.6 Platine J4 io La platine J4 io est livrée branchée au moteur, elle doit être intégrée dans ou à l’extérieur du caisson. En cas d’utilisation d’un capteur Somfy, la platine J4 io doit être fixée à l’extérieur du caisson. -
Page 9: Câblage
• Un maximum de 3 moteurs, avec une longueur totale Commun de câble de 50 m, peuvent être connectés en paral- Neutre Terre lèle. Les phases et les neutres doivent être connec- tés ensemble respectivement. © 2011 Somfy SAS. All rights reserved. 11/2011... -
Page 10: Mise En Service
5. MISE EN SERVICE La notice ne décrit que la mise en service à l’aide d’un point de commande local io Somfy de type Situo mobile io VB qui apporte une meilleure précision lors de l’inclinaison des lames. Pour une mise en service à l’aide de tout autre point de commande io, se référer à la notice corres- pondante. -
Page 11: Vérification Du Sens De Rotation Du Moteur
• Appuyer sur la touche Montée pendant 3s. Le B.S.O. tourne dans le sens montée. • Arrêter le B.S.O. en utilisant l’arrêt sur le «champignon». Les fins de courses sont réglées. La fin de course haute est enregistrée sur le champignon. © 2011 Somfy SAS. All rights reserved. 11/2011... -
Page 12: Enregistrement Du Premier Point De Commande Local Io Somfy
: le B.S.O. effectue un bref mouvement, le point de commande est enregistré. Contrôle des réglages 5.6. Contrôler le réglage des fins de course haute et basse à l’aide du point de commande local io Somfy. © 2011 Somfy SAS. All rights reserved. 11/2011... -
Page 13: Utilisation
B.S.O.. 6.2. Fonctionnement avec un capteur ou automatisme Somfy Se référer à la notice du capteur io Somfy correspondante. 7. MODIFICATION DES RéGlAGES 7.1. Position favorite (my) 7.1.1. Modification de la position favorite (my) •... -
Page 14: Ajout/Suppression De Points De Commande Io Et Capteurs Io Somfy
7.2. Ajout/Suppression de points de commande io et capteurs io Somfy Se référer à la notice correspondante. 7.3. Modification des fins de course 7.3.1. Modification de la fin de course haute • Placer le B.S.O. en position médiane. • Appuyer pendant 5 secondes sur les touches Montée et Descente : le B.S.O. -
Page 15: Modification De La Course Angulaire
Montée du point de commande. • Appuyer en même temps sur les touches Montée et «my» du point de commande jusqu’au mouvement du B.S.O.. © 2011 Somfy SAS. All rights reserved. 11/2011... -
Page 16: Astuces Et Conseils
L’appairage ou le réglage n’a pas et reprendre si besoin la procédure ne réagissent pas été exécuté correctement. d’appairage / réglage depuis le début. comme ce qui est décrit dans le guide d’installation. © 2011 Somfy SAS. All rights reserved. 11/2011... -
Page 17: Remplacement D'un Point De Commande Io Somfy Perdu Ou Cassé
8.2. Remplacement d’un point de commande io Somfy perdu ou cassé Se référer à la notice correspondante. 8.3. Remplacement d’un composant de l’actionneur En cas de nécessité, il est possible de remplacer physiquement le moteur J4 io, la platine J4 io, ou les deux. -
Page 18: Données Techniques
Pour des informations techniques détaillées, se référer aux fiches caractéristiques et plans d’interface dédiés. 20 mini Inclinaison moteur Le moteur J4 io a été conçu pour fonctionner à l’horizontale : 10° maxi © 2011 Somfy SAS. All rights reserved. 11/2011... - Page 19 © 2011 Somfy SAS. All rights reserved. 11/2011...
-
Page 20: Einleitung
Weitere Informationen hierzu finden Sie auf der Internetseite www.io-homecontrol.com io-homecontrol bietet eine fortschrittliche und sichere Radio-Funktechnologie, die einfach ® zu installieren ist. io-homecontrol gekennzeichnete Produkte kommunizieren miteinander, ® wodurch Komfort, Sicherheit und Energieeinsparungen sichergestellt werden. www.io-homecontrol.com © 2011 Somfy SAS. All rights reserved. 11/2011... -
Page 21: Sicherheit
- Der Antrieb, das Drehmoment und die Betriebsdauer müssen auf den Betrieb der gesamten Anlage angepasst sein. - Es dürfen nur Original-Zubehörteile von Somfy verwendet werden (Adapter, Halter, Verbinder, Stromversorgungskabel, ...). - Einbau, Überprüfung, Inbetriebnahme und Reparatur der Anlage dürfen nur von fachlich qualifiziertem Personal durchgeführt werden. -
Page 22: Montage
• Unterlegen Sie den Antrieb mit kleinen Schalldämm- streifen (6a) und fixieren Sie ihn dann mit Hilfe der Halteklammern (5) in der Kopfschiene (4). • Die Welle kann mit einem Gewindestift (7) im Adapter fixiert werden. © 2011 Somfy SAS. All rights reserved. 11/2011... -
Page 23: Kopfschiene 57 X 51 Mm, Oben Offen
• Die Welle kann mit einem Gewindestift (7) im Adapter fixiert werden. Die Fixierung mit innenliegenden Halteklammern ist in Verbindung mit den Antrieben J418 (Antriebe J4 mit 18 Nm Drehmoment) nicht möglich. © 2011 Somfy SAS. All rights reserved. 11/2011... -
Page 24: Kopfschiene 78 X 67 Mm, Unten Offen
• Schieben Sie den Antrieb in die Kopfschiene (4). • Fixieren Sie den Antrieb mit Hilfe der Halteklammer (5) in der Kopfschiene (4). • Die Welle kann mit einem Gewindestift (7) im Adapter fixiert werden. © 2011 Somfy SAS. All rights reserved. 11/2011... - Page 25 • Den Zusatzbügel (9) an der Einheit Kopfschiene (4) + Antrieb montieren. • Den Bügel (9) mittels Schraube M5 x 10 mm am Antrieb festschrauben. Anzugsmoment = max. 4 Nm. Die Schraube muss vollständig am Bügel (9) anliegen. © 2011 Somfy SAS. All rights reserved. 11/2011...
-
Page 26: Kopfschiene 67 X 66 Mm, Unten Offen
3.6 J4 io Plate Die J4 io Plate wird mit Anschluss am Antrieb ausgeliefert, Ihre Montage erfolgt innerhalb oder außerhalb der Kopfschiene. Bei Verwendung eines Somfy Sensors muss die J4 io Plate außer- halb der Kopfschiene angebracht werden. 191 mm... -
Page 27: Elektrischer Anschluss
J4 io-Plate Antrieb • Es können maximal 3 Antriebe mit einer Gesamtka- Phase bellänge von 50 m parallel angeschlossen werden. Neutralleiter Schutzleiter Die Phasen- und Neutralleiter müssen jeweils zusam- men angeschlossen werden. © 2011 Somfy SAS. All rights reserved. 11/2011... -
Page 28: Inbetriebnahme
5. INbETRIEbNAHME Diese Anleitung beschreibt die Inbetriebnahme mit Hilfe eines lokalen Somfy io-Funksenders vom Typ Situo mobile io VB, welcher für eine präzisere Ausrichtung der Lamellen sorgt. Für die Inbetriebnahme mit Hilfe einer anderen io-Bedieneinheit ziehen Sie die entsprechende Anleitung zurate. -
Page 29: Testen Der Drehrichtung Des Antriebs
• Drücken Sie 3 Sek. lang die AUF-Taste. Die Jalousie fährt in Auffahrrichtung. • Lassen Sie die Jalousie auf den Schaltfühler fahren. Sie stoppt automatisch. Die Endlagen sind eingestellt. Die obere Endlage wird durch den Kontakt mit dem Schaltfühler bestimmt. © 2011 Somfy SAS. All rights reserved. 11/2011... -
Page 30: Speichern Des Ersten Lokalen Somfy Io-Funksenders
Lamellen von der Position oder Lamellen geschlossen bis zur Position Lamellen vollständig gedreht bewegen. • Gleichzeitig auf die Tasten AUF und «my» des Somfy io-Funksenders drücken, bis die Jalousie eine kurze Bewegung ausführt. Speichern des ersten lokalen Somfy io-Funksenders 5.5. -
Page 31: Bedienung
Ein langer Druck der AUF- oder Ab-Taste veranlasst die Jalousie komplett auf- oder abzufahren. 6.2. Funktionsweise mit einem Somfy Sensor oder Automatiksystem Siehe die Anleitung des entsprechenden Somfy io Sensors. 7. ÄNDERUNG DER EINSTEllUNGEN 7.1. lieblingsposition („my“-Position) 7.1.1. Ändern der lieblingsposition („my“-Position) •... -
Page 32: Verknüpfen/Löschen Von Somfy Io-Funksendern Und Io-Sensoren
Hinweis: Wenn die neue Endlage unter die vorhan- dene Endlage hinaus eingestellt werden soll, hält die Jalousie selbstständig bei der alten Endlagenposition an. Um die aktuelle Endlage zu überfahren ist eine erneute betätigung an der bedieneinheit erforderlich. © 2011 Somfy SAS. All rights reserved. 11/2011... -
Page 33: Änderung Der Lamellenwendung
Lamellen von der Position Lamellen geschlossen bis zur Position Lamellen vollständig geöffnet bewegen. • Gleichzeitig auf die Tasten AUF und «my» des Somfy io-Funksenders drücken, bis die Jalousie eine kurze Bewegung ausführt. © 2011 Somfy SAS. All rights reserved. 11/2011... -
Page 34: Tipps Und Hinweise
Führen Sie eine einfache einer Einstellung Die Verknüpfung oder Einstellung Spannungsunterbrechnung durch und oder Verknüpfung wurde nicht korrekt ausgeführt. wiederholen Sie wenn nötig die Prozedur. durch den Handsender nicht wie beschrieben. © 2011 Somfy SAS. All rights reserved. 11/2011... -
Page 35: Austausch Eines Verlorenen Oder Beschädigten Somfy Io-Funksenders
8.2. Austausch eines verlorenen oder beschädigten Somfy io-Funksenders Lesen Sie in der entsprechenden Gebrauchsanleitung nach. 8.3. Austausch einer Komponente des Antriebs Bei Bedarf kann der J4 io Antrieb, die J4 io Plate oder beides ausgetauscht werden. Führen Sie anschließend folgende Prozeduren durch, um die Funktionsfähigkeit der Anlage zu gewährleisten:... -
Page 36: Technische Daten
Ausschnitt an der Kopfschiene Für detaillierte technische Informationen ziehen Sie die Datenblätter und spezifischen Schnittstellenpläne zurate. min. 20 Neigung des Antriebs Der J4 io Antrieb wurde für den waagerechten Betrieb konzipiert: 10° max. © 2011 Somfy SAS. All rights reserved. 11/2011... - Page 37 © 2011 Somfy SAS. All rights reserved. 11/2011...
- Page 38 ® installare. Tutti i prodotti contraddistinti dal marchio io-homecontrol si interfacciano ® automaticamente tra loro per offrire maggiore comfort, sicurezza e risparmio energetico. www.io-homecontrol.com © 2011 Somfy SAS. All rights reserved. 11/2011...
-
Page 39: Avvertenze
2.1. Sicurezza e responsabilità - Il motore, la coppia e il tempo di funzionamento devono essere regolati in funzione dell'impianto completo. - Utilizzare esclusivamente gli accessori originali Somfy (adattatori, supporti, connettori, cavo di alimentazione, ecc.). - Il montaggio, il controllo, la messa in servizio e la manutenzione dell'impianto devono essere eseguiti esclusi- vamente da personale qualificato. -
Page 40: Montaggio
• Inserire il motore nel cassonetto (4). • Usando delle clip (5), fissare il motore nel cassonetto (4) sopra i nastri acustici (6a). • L'asse può essere fissato nell'adattatore usando una vite senza testa (7). © 2011 Somfy SAS. All rights reserved. 11/2011... -
Page 41: Cassonetto 57 X 51 Mm Aperto In Alto
• Usando delle clip (5), fissare il motore nel cassonetto (4). • L'asse può essere fissato nell'adattatore usando una vite senza testa (7). Le clip interne non sono utilizzabili con i motori J418 (motori J4 con coppia di 18 N.m). © 2011 Somfy SAS. All rights reserved. 11/2011... -
Page 42: Cassonetto 78 X 67 Mm Aperto In Basso
• Montare i due adattatori del cassonetto (8) sul motore. • Inserire il motore nel cassonetto (4). • Usando la clip (5), fissare il motore nel cassonetto (4). • L'asse può essere fissato nell'adattatore usando una vite senza testa (7). © 2011 Somfy SAS. All rights reserved. 11/2011... - Page 43 (4) + motore. • Avvitare la staffa (9) sul motore con una vite M5 x 10 mm. Coppia di serraggio = 4 N.m max. La vite deve essere premuta sulla staffa (9). © 2011 Somfy SAS. All rights reserved. 11/2011...
-
Page 44: Cassonetto 67 X 66 Mm Aperto In Basso
3.6 Ricevitore J4 io Il ricevitore J4 io è fornito collegato al motore, e deve essere integrato all’interno o all’esterno del cassonetto. In caso di utilizzo di un sensore somfy, il ricevitore deve essere fissato all’esterno del cassonetto. 191 mm... -
Page 45: Cablaggio
• Possono essere collegati in parallelo fino a 3 motori, Comune con una lunghezza totale di cavo di 50 m. Le fasi e Neutro Terra i neutri devono essere collegati insieme rispettiva- mente. © 2011 Somfy SAS. All rights reserved. 11/2011... -
Page 46: Messa In Servizio
5. MESSA IN SERVIZIO Il manuale descrive la messa in servizio effettuata esclusivamente con un trasmettitore locale io Somfy di tipo Situo mobile io VB che garantisce una precisione migliore nel momento dell'inclina- zione delle lamelle. Per una messa in servizio effettuata con altri tipi di trasmettitori io, consultare il manuale corrispondente. -
Page 47: Verifica Del Senso Di Rotazione Del Motore
• Fermare il frangisole orientabile usando l’arresto sul fungo di sicurezza. I fine corsa sono regolati. Il fine corsa alto è programmato sul fungo di sicurezza. © 2011 Somfy SAS. All rights reserved. 11/2011... -
Page 48: Programmazione Del Primo Trasmettitore Locale Io Somfy
• Premere brevemente il pulsante PROG di questo trasmettitore: il frangisole orientabile effettua un breve movimento, il trasmettitore è programmato. Controllo delle regolazioni 5.6. Controllare la regolazione dei fine corsa alto e basso usando il trasmettitore locale io Somfy. © 2011 Somfy SAS. All rights reserved. 11/2011... -
Page 49: Utilizzo
6.2. Funzionamento con un sensore o automatismo Somfy Consultare il manuale del sensore io Somfy corrispondente. 7. MODIFICA DEllE REGOlAZIONI 7.1. Posizione preferita (my) 7.1.1. Modifica della posizione preferita (my) •... -
Page 50: Aggiunta/Eliminazione Di Trasmettitori Io E Sensori Io Somfy
7.2. Aggiunta/Eliminazione di trasmettitori io e sensori io Somfy Consultare il manuale corrispondente. 7.3. Modifica dei fine corsa 7.3.1. Modifica del fine corsa alto • Posizionare il frangisole orientabile in posizione intermedia. • Premere per 5 secondi i pulsanti Salita e Discesa: il frangisole orientabile effettua un breve movimento. -
Page 51: Modifica Dell'angolo Di Orientamento
Salita del trasmettitore. • Premere simultaneamente i pulsanti Salita e "my" del trasmettitore fino al movimento del frangisole orientabile. © 2011 Somfy SAS. All rights reserved. 11/2011... -
Page 52: Consigli E Raccomandazioni
La registrazione o la connessione Troncate la tensione una volta e ripetete lo come scritto nel non è stata eseguita corretta. svolgimento all’evenienza. manuale durante la registrazione o la connessione. © 2011 Somfy SAS. All rights reserved. 11/2011... -
Page 53: Sostituzione Di Un Trasmettitore Io Somfy Perso O Guasto
8.2. Sostituzione di un trasmettitore io Somfy perso o guasto Consultare il manuale corrispondente. 8.3. Sostituzione di un componente del motore In caso di necessità, è possibile sostituire fisicamente il motore J4 io, il ricevitore J4 io, oppure entrambi. In tutte queste situazioni, per fare in modo che l'installazione sia di nuovo operativa, dovete eseguire la seguente procedura: •... -
Page 54: Dati Tecnici
Sezione del cassonetto Per informazioni tecniche dettagliate, consultare le schede caratteristiche e piani di interfaccia dedicati. 20 min. Inclinazione motore Il motore J4 io è stato progettato per funzionare in posizione orizzontale: 10° max. © 2011 Somfy SAS. All rights reserved. 11/2011... - Page 55 © 2011 Somfy SAS. All rights reserved. 11/2011...
-
Page 56: Introduction
8. Tips and recommendations 5. Commissioning 8.1. Questions on the J4 io? 5.1. Identifying setting steps already 8.2. Replacing a lost or broken Somfy io completed control point 5.2. Pre-programming the Somfy io local 8.3. Replacing a component of the actuator 71 control point 8.4. -
Page 57: Safety
- The motor, torque and operating time must be adjusted according to the complete installation. - Only Somfy original accessories should be used (adapters, brackets, connectors, power cable, etc.). - Fitting, testing, commissioning and repair of the installation must only be carried out by qualified personnel. -
Page 58: Installation
• Using the clips (5), attach the motor in the head rail (4) above the acoustic tapes (6a). • The shaft can be fitted into the adapter using a headless screw (7). © 2011 Somfy SAS. All rights reserved. 11/2011... -
Page 59: 57 X 51 Mm Head Rail, Open Above
• The shaft can be fitted into the adapter using a head- less screw (7). The internal clips cannot be used with J418 motors (J4 motors with a torque of 18 Nm). © 2011 Somfy SAS. All rights reserved. 112011... -
Page 60: 67 Mm Head Rail, Open Below
• Insert the motor into the head rail (4). • Using the clip (5), attach the motor in the head rail (4). • The shaft can be fitted into the adapter using a head- less screw (7). © 2011 Somfy SAS. All rights reserved. 11/2011... - Page 61 • Screw the calliper (9) to the motor with an M5 x 10 mm bolt. Tightening torque = 4 N.m maximum. The bolt must be compressed against the calliper (9). © 2011 Somfy SAS. All rights reserved. 112011...
-
Page 62: 66 Mm Head Rail, Open Below
The J4 io plate is supplied connected to the motor; it must be integrated into or on the outside of the head rail. If Somfy sensor is being used, the plate must be fixed to the outside of the head rail. -
Page 63: Wiring
Plate Motor • A maximum of 3 motors, with a total cable length of Shared 50 m, can be connected in parallel. Live and neutral Neutral Earth must be connected together respectively. © 2011 Somfy SAS. All rights reserved. 112011... -
Page 64: Commissioning
5. COMMISSIONING The guide only describes commissioning using a Situo mobile io VB type Somfy io local control point which provides greater precision when tilting the slats. For commissioning using any other io control point, refer to the corresponding guide. -
Page 65: Checking The Motor's Direction Of Rotation
• Press the Up button for 3 seconds. The blind rotates in the up direction. • Stop the blind using the stop on the "mushroom" button. The end limits are set. The upper end limit is stored on the mushroom. © 2011 Somfy SAS. All rights reserved. 112011... -
Page 66: Programming The First Somfy Io Local Control Point
• Briefly press the PROG button on this control point: the blind moves briefly; the control point has been programmed. Checking the settings 5.6. Check the settings of the upper and lower end limits using the Somfy io local control point. © 2011 Somfy SAS. All rights reserved. 11/2011... -
Page 67: Operation
A long press on the Up or Down buttons will cause the blind to raise or lower completely. 6.2. Operating with a Somfy sensor or automatic function Refer to the corresponding manual for the Somfy io sensor. 7. MODIFICATION OF THE SETTINGS 7.1. Favourite position (my) 7.1.1. -
Page 68: Adding/Deleting Somfy Io Control Points And Io Sensors
7.2. Adding/Deleting Somfy io control points and io sensors Refer to the corresponding guide. 7.3. Modifying the end limits 7.3.1. Modifying the upper end limit • Place the blind in the intermediate position. • Press the Up and Down buttons for 5 seconds the blind moves briefly. -
Page 69: Modifying The Angular Travel
Up button on the control point. • Press the Up and "my" buttons on the control point at the same time, until the blind moves. © 2011 Somfy SAS. All rights reserved. 112011... -
Page 70: Tips And Recommendations
Pairing or setting has been not Only cut shortly the power and repeat the react as described executed correctly. procedure if necessary. in the manual during pairing or setting. © 2011 Somfy SAS. All rights reserved. 11/2011... -
Page 71: Replacing A Lost Or Broken Somfy Io Control Point
8.2. Replacing a lost or broken Somfy io control point Refer to the corresponding guide. 8.3. Replacing a component of the actuator If necessary it is possible to physically replace the J4 io motor, the J4 io plate, or both. -
Page 72: Technical Data
6 minutes. Head rail breakdown For detailed technical information, refer to the specifications sheets and dedicated interface plans. 20 min Motor tilt The J4 io motor has been designed to operate horizontally: 10° © 2011 Somfy SAS. All rights reserved. 11/2011... - Page 73 © 2011 Somfy SAS. All rights reserved. 112011...
- Page 74 SOMFY Predstavništvo United Arab Emirates: Jeddah : Tel: +61 (2) 8845 7200 Somfy France Tel: 00381 (0)25 841 510 Somfy Gulf Jebel Ali Free Tel: +966 2 69 83 353 Tel. : +33 (0) 820 374 374 Zone Austria: Singapore:...