
Manuels Connexes pour X-Rite i1 Pro


Sommaire des Matières pour X-Rite i1 Pro
- Page 1 User Manual Benutzerhandbuch Manuel de l‘utilisateur Manuale dell‘utente Manual de uso Manual do Usuário ユーザーマニュアル 用户手册...
- Page 2 Safety Information Safety Information EQUIPMENT INFORMATION CE Declaration Use of this equipment in a manner other than that specified by X-Rite, Incorporated may compromise Manufacturer’s Name: X-Rite, Incorporated Authorized Representative: X-Rite, Incorporated design integrity and become unsafe. Siemensstraße 12b • 63263 Neu-Isenburg • Germany This equipment is intended for use only with UL listed ITE equipment.
-
Page 3: Table Des Matières
User Manual Table of contents English Package Contents Device Overview Installation Deutsch Device Status Indicators Calibrating the Device Français Scan Measurement Single Pass Scan Measurement Italiano Spot Measurement Display Measurement General Maintenance Español Troubleshooting Warranty Português Service and Support Specification 日本語... -
Page 4: Package Contents
Package Contents Carrying Case Certificate of Performance Display Holder Positioning Target Calibration Plate Backup Board USB Cable Measurement Device Ruler User Manual Application DVD... -
Page 5: Device Overview
Device Overview Spectrophotometer Limiting Aperture Measurement Button Status Indicators Type Label with Serial Number Reference Gap for Ruler Mount Mounting Interface for Accessories USB Connector... -
Page 6: Installation
USB port. If connected successfully both status indicators light up solid white. The X-Rite i1Pro will not work if it is connected to the USB port on your keyboard or to a USB hub without external power supply. i1Pro power rating: 5 V... -
Page 7: Device Status Indicators
Device Status Indicators The i1Pro device is equipped with two device status indicators on its top housing. The device status indicators provide feedback on the current status of the device and guide you through the measurement process. General device status: The device is either not connected to your computer, the software is not running, or the latest software to control the device is not installed on your computer. -
Page 8: Calibrating The Device
Calibrating the Device Before you start measuring, please calibrate the device. If you own multiple devices make sure that the serial number on the back of the calibration plate matches the serial number of your i1Pro device. Refer to the user guide of your measurement software for additional information on the calibration process. -
Page 9: Scan Measurement
Scan Measurement Virtual aperture technology Measurement conditions The i1Pro measurement device is equipped with a fixed UVcut filter and supports only a single measurement condition. Single Pass Measurement is required for measurement condition • ISO 13655 M2 | Illumination with UV excluded (UVcut) Status Indicators on the i1Pro device guides you through the measurement process. - Page 10 The distance between the i1Pro device and the surface of the printing substrate is critical for the accuracy of your measurements. If the limiting aperture of the device or the edge of the ruler‘s guide rail is worn out you should replace them. Spare parts can be ordered through X-Rite‘s Service Centers.
-
Page 11: Single Pass Scan Measurement
Single Pass Scan Measurement 2x green flash the row was measured successfully. 2x red flash the row was not measured successfully because not all patches could be recognized. Measure the row again, but reduce your measurement speed and make sure that the device starts and ends the measurement before and after the patches of the test chart. -
Page 12: Spot Measurement
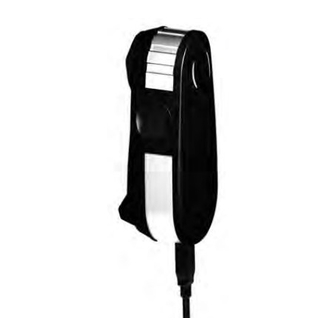
Spot Measurement To prepare your i1Pro device for spot measurement you need to mount the i1Pro device on the positioning target. Make sure your device is calibrated and the status indicators are pulsating white before you mount it. Refer to the user guide of your measurement software for further details on the spot measurement process. -
Page 13: Display Measurement
Display Measurement To prepare your i1Pro device for a display measurement you need to mount the i1Pro device on the display holder. Make sure your device is calibrated and the status indicators are pulsating white before you mount it. 1. You can adjust the length of the counter weight of the display holder for the size of your screen. -
Page 14: General Maintenance
General Maintenance • The protection glass in the limiting aperture of the i1Pro device may become dusty after some time. You can remove the protective glass to clean it and the inside of the limiting aperture: 1. To remove the limiting aperture turn it clockwise until the arrow points to the “unlocked”... -
Page 15: Troubleshooting
2. Perform a functionality check by following the instructions given from the i1Diagnostics Software. 3. If i1Diagnostics software reports an error store the test report and contact your nearest X-Rite Support Center. As an alternative you can also take a look at our online support resources www.xrite.com/support/i1Profiler to troubleshoot your issue. -
Page 16: Warranty
Because of this we are making the of a warranty. X-Rite shall in no event be liable for losses or costs to Buyer in manufacturing, or for Buyer‘s overhead, following on-line and free support tools available to registered users. -
Page 17: Specification
Inter-Instrument-Agreement: Spectral reporting: 380 nm ... 730 nm in 10 nm steps (deviation from X-Rite manufacturing standard at a temperature of 23ºC (73.4ºF) on 12 BCRA tiles (D50, 2º)) Measurement frequency in scanning 0.1 ∆E94* on white (D50,2°, mean of 10 measurements every 3 s on... -
Page 18: Minimum System Requirements
Allgemeine Wartung Fehlerbehebung The X-Rite i1Pro instrument can be used with older versions of the i1Pro software development kit (SDK) which were Garantie und Gewährleistung developed for older revisions of the i1Pro. In this case the new i1Pro operates in a downwards compatibility mode as Service und technischer Kundendienst an ISO 13655 measurement mode M2 (UVcut Filter) device and new functions like the status indicator lights won‘t be... -
Page 19: Lieferumfang
Lieferumfang Tragekoffer Zertifikat Monitorhalterung Positionsblende Kalibrierplatte Messunterlage USB-Kabel Messgerät Lineal Benutzerhandbuch Software-DVD... -
Page 20: Geräteübersicht
Geräteübersicht Spektralfotometer Spectrophotometer Limiting Aperture Tubus Messtaste Measurement Button Statusanzeige Status Indicators Typenschild mit Seriennummer Type Label with Serial Number Referenzpunkte für Linealbefestigung Reference Gap for Ruler Mount Anschlussstelle für Zubehör Mounting Interface for Accessories USB Connector USB-Verbindung... -
Page 21: Installation
Ihres Computers an. Bei korrekter Verbindung leuchten nun beide Status-LEDs in weiß. Betreiben Sie das X-Rite i1Pro nur an der USB-Schnittstelle Ihres Computers und nicht an einem USB-Hub oder USB-Schnittstellen, die nicht über eine eigene Stromversorgung verfügen. Das i1Pro benötigt für den Betrieb einen USB-Anschluss mit 5 V 500 mA. -
Page 22: Gerätestatusanzeige
Gerätestatusanzeige Auf der Oberseite des i1Pro-Gehäuses befinden sich zwei Status-LEDs. Diese LEDs zeigen die verschiedenen Gerätezustände an, und leiten Sie durch den Messvorgang. Gerätestatus: Gerät ist nicht an den Computer angeschlossen ODER Software wurde nicht gestartet ODER Software ist nicht auf dem aktuellsten Stand. -
Page 23: Gerätekalibrierung
Gerätekalibrierung Bitte kalibrieren Sie zuerst Ihr Gerät, ehe Sie anfangen zu messen. Falls Sie mehrere Geräte besitzen, dann überprüfen Sie bitte vor der Messung, ob die Seriennummer auf der Rückseite der Kalibrierkachel mit der des i1Pros übereinstimmt. Weitere Informationen zum Kalibriervorgang finden Sie im Handbuch Ihrer Software. 1. -
Page 24: Streifenmessung
Streifenmessung Virtuelle Blende Messbedingungen Das Messgerät i1Pro ist mit einem fest verbauten UVcut-Filter ausgestattet und virtuelle Blende ist abhängig von unterstützt daher nur eine Messbedingung. der Messfeldgröße Einfache Streifenmessung für: • ISO 13655 M2 | Beleuchtung mit UVCut Statusanzeige des i1Pro leitet Sie durch den Messvorgang. gültige Messung (geeignet für die Mittelwertbildung) ungültige Messung Das i1Pro führt während einer Streifenmessung bis zu 200 Messungen pro Sekunde aus. - Page 25 5. Gerätetubus muss während des Scans glatt und problemlos über die Führungsschiene gleiten. Der Abstand zwischen dem i1Pro und der Oberfläche des Bedruckstoffs ist für die Messgenauigkeit sehr wichtig. Gerätetubus oder Führungsschiene sollten ausgetauscht werden, falls sie Abnutzungserscheinungen zeigen. Sie erhalten Ersatzteilen von Ihrem X-Rite Servicecenter.
-
Page 26: Einfache Streifenmessung
Einfache Streifenmessung 2x rot blinken Zeilenmessung fehlerhaft, einige Messfelder wurden nicht erkannt. Bitte messen Sie die Zeile neu, diesmal langsamer und achten Sie darauf, dass das Gerät auf dem Testchart vor dem ersten Messfeld startet und nach dem letzten Messfeld endet. -
Page 27: Einzelmessung
Einzelmessung Vor der Einzelmessung müssen Sie das i1Pro auf der Positionsblende befestigen. Bitte achten Sie darauf, dass das Gerät kalibriert ist, und dass die Statusanzeige vor der Installation weiß pulsiert. Weitere Informationen zur Einzelmessung finden Sie im Handbuch Ihrer Software. 1. -
Page 28: Monitormessung
Monitormessung Vor der Monitormessung müssen Sie das i1Pro auf der Monitorhalterung befestigen. Bitte achten Sie darauf, dass das Gerät kalibriert ist, und dass die Statusanzeige vor der Installation weiß pulsiert. 1. Länge des Gegengewichts an der Halterung ist variabel und kann an das Monitorformat angepasst werden. -
Page 29: Allgemeine Wartung
Allgemeine Wartung • Das Schutzglas im Gerätetubus kann mit der Zeit verstauben. Entfernen Sie für die Reinigung das Schutzglas, und säubern Sie Glas und Tubus. des i1Pro zeigen. 1. Tubus im Uhrzeigersinn drehen. Pfeil muss auf das Symbol 2. Tubus vom Gerät entfernen. Bitte Optik nicht berühren. 3. -
Page 30: Fehlerbehebung
2. Funktionstest gemäß Anweisungen aus der Software i1Diagnostics durchführen. 3. Wenn der i1Diagnostics-Bericht Fehler ausgibt, dann speichern Sie den Bericht, und wenden Sie sich damit an die für Sie zuständige X-Rite Kundendienststelle. Alternativ können Sie die Lösung für mögliche Probleme auf unserer Webseite unter... -
Page 31: Garantie Und Gewährleistung
Austausch von Teilen verpflichtet, wenn der Defekt innerhalb des Garantiezeitraums zur Sie werden an Ihrem neuen X-Rite Produkt viel Freude haben. Wir möchten Ihnen hiermit jedoch zusätzlich Support und hin reichenden Zufriedenheit von X-Rite nachgewiesen wurde. Die Garantiefrist wird durch Reparatur oder Aust ausch Training für die komplexen Workflows und häufig wechselnden Prozesse anbieten, die Sie bedarfsgesteuert abrufen... -
Page 32: Technische Daten
0,4 ∆E94* im Mittel, max. 1,0 ∆E94* Messgeräteübereinstimmungt Optische Auflösung 10 nm (Abweichung vom X-Rite Fertigungsstandard bei 23 °C im Einzelmessmo- dus bei 12 BCRA-Kacheln (D50/2°)) Spektrale Auflösung 380 nm ... 730 nm mit 10 nm Intervall 0,1 ∆E94* auf weiß (D50/2°, Mittel aus 10 Messungen auf weiß alle 3 s ) -
Page 33: Minimalvoraussetzungen
WICHTIG: Garantie Service et support Das X-Rite i1Pro kann mit Versionen des i1Pro SDK (Software Development Kit) verwendet werden, die für ältere Versionen von i1Pro entwickelt wurden. Das i1Pro wird dann im Kompatibilitätsmodus als ISO 13655-Gerät (M2, Spécifications UVcut Filter) betrieben, und neuere Funktionen wie Status-LEDs funktionieren nicht. Um den vollen Funktionsumfang Configuration système requise... -
Page 34: Contenu Du Coffret
Contenu du coffret Sacoche de transport Certificat de performance Support pour écran Semelle de visée Plaque d'étalonnage Panneau de support Câble USB Instrument de mesure Règle Manuel de l’utilisateur DVD Applications... -
Page 35: Vue D´ensemble De L´instrument
Vue d´ensemble de l´instrument Spectrophotomètre Spectrophotometer Limiting Aperture Ouverture de limitation de faisceau Measurement Button Bouton de mesure Status Indicators Indicateurs d’état Type Label with Serial Number Étiquette du type d’instrument avec numéro de série Emplacement de référence pour le montage de la règle Reference Gap for Ruler Mount Emplacement de fixation pour les accessoires Mounting Interface for Accessories... -
Page 36: Installation
émettent une lumière blanche continue. L’i1Pro de X-Rite ne fonctionne pas s’il est connecté au port USB de votre clavier ou à un concentrateur USB sans alimentation externe. La puissance nominale de l’i1Pro est de 5 V... -
Page 37: Indicateurs D´état De L´instrument
Indicateurs d´état de l´instrument L’i1Pro est équipé de deux indicateurs d’état situés sur la partie supérieure de l’instrument. Ceux-ci fournissent des informations sur l’état actuel de l’instrument et vous guident tout au long du processus de mesure. État général de l’instrument : Désactivé... -
Page 38: Étalonnage De L´instrument
Étalonnage de l´instrument Avant de commencer à prendre des mesures, vous devez étalonner votre instrument. Si vous possédez plusieurs instruments, assurez-vous que le numéro de série figurant à l’arrière de la plaque d’étalonnage correspond bien au numéro de série de votre i1Pro. -
Page 39: Mesure De Balayage
Mesure de balayage Technologie d’ouverture virtuelle Conditions de mesure L'instrument de mesure i1Pro est équipé d'un filtre UVcut fixe et ne prend en charge Ouverture virtuelle lors d’un balayage en qu'une seule condition de mesure. fonction de la longueur du patch Une mesure de balayage en une seule passe est requise pour la condition de mesure suivante : •... - Page 40 Si l’ouverture de limitation de faisceau de l’instrument ou le bord du rail de guidage de la règle est usé, vous devez procéder à leur remplacement. Pour obtenir des pièces de rechange, contractez un centre de services X-Rite.
-
Page 41: Mesure De Balayage En Une Seule Passe
Mesure de balayage en une seule passe 2 lumières vertes La ligne a été mesurée correctement. 2 lumières rouges La ligne n’a pas été mesurée correctement, car tous les patchs n’ont pas été reconnus. Remesurez la ligne, mais cette fois en réduisant la vitesse de mesure et en vous assurant de démarrer la mesure avant le premier patch de la charte test et de terminer la mesure après le dernier patch. -
Page 42: Mesure D´accompagnement
Mesure d´accompagnement Pour prendre une mesure d’accompagnement, vous devez tout d’abord monter l’i1Pro sur la semelle de visée. Assurez-vous que votre instrument est étalonné et que les indicateurs d’état émettent une lumière pulsatoire blanche avant de le monter. Reportez- vous au guide de l’utilisateur de votre logiciel de mesure pour obtenir davantage d’informations sur le processus de mesure d’accompagnement. -
Page 43: Mesure D´écran
Mesure d´écran Pour prendre une mesure d’écran, vous devez tout d’abord monter l’i1Pro sur le support pour écran. Assurez-vous que votre instrument est étalonné et que les indicateurs d’état émettent une lumière pulsatoire blanche avant de le monter. 1. Vous pouvez régler la longueur du contrepoids du support en fonction de la taille de votre écran. -
Page 44: Maintenance Générale
Maintenance générale • Avec le temps, il est possible que des poussières s’accumulent sur le verre de protection de l’ouverture de limitation de faisceau. Vous pouvez ôter le verre de protection pour le nettoyer et accéder à l’intérieur de l’ouverture de limitation de faisceau : 1. -
Page 45: Dépannage
3. Si le logiciel i1Diagnostics signale une erreur, enregistrez le rapport de test et contactez le centre de services X-Rite le plus proche de chez vous. Vous pouvez également consulter diverses ressources en ligne, accessibles à l’adresse www. xrite.com/support/i1Profiler pour tenter de trouver une solution à votre problème. -
Page 46: Garantie
Ceux-ci sont gratuits et disponibles en ligne à tout moment. garantie expirée et ne prolonge pas la durée d’une garantie en cours. X-Rite ne pourra en aucun cas être tenue pour responsable de pertes ou de dommages de fabrication encourus par l’Acquéreur, de frais généraux ou autres dépenses, Ces solutions de support technique sont accessibles à... -
Page 47: Spécifications
380 nm ... 730 nm par échelons de 10 nm Accord inter-instrument : (déviation par rapport au standard de fabrication X-Rite à une tempéra- ture de 23 °C [73,4 °F] sur 12 carreaux BCRA [D50, 2°]) Fréquence de mesure en mode de... -
Page 48: Configuration Système Requise
Garanzia Assistenza e supporto Il est possible d'utiliser l'instrument i1Pro de X-Rite avec des versions antérieures du Kit de développement logiciel (SDK) i1Pro qui ont été développées pour d'anciennes révisions de l'i1Pro. Dans ce cas, le nouvel i1Pro fonctionne en Specifica mode de compatibilité... -
Page 49: Contenuto Della Confezione
Contenuto della confezione Valigetta trasporto Certificato di Prestazioni Supporto per display Target di posizione Placca di calibrazione Base di appoggio Cavo USB Strumento di misurazione Righello Manuale utente DVD delle applicazioni... -
Page 50: Panoramica Del Dispositivo
Panoramica del dispositivo Spettrofotometro Spectrophotometer Limiting Aperture Apertura misurazione Pulsante misurazione Measurement Button Indicatori di stato Status Indicators Etichetta del tipo con numero di serie Type Label with Serial Number Spazio di riferimento per montaggio del righello Reference Gap for Ruler Mount Interfaccia di montaggio degli accessori Mounting Interface for Accessories USB Connector... -
Page 51: Installazione
USB del computer. Se collegato con successo, entrambi indicatori di stato si accendono bianco fisso. Il dispositivo X-Rite i1Pro non funzionerà se è connesso alla porta USB sulla tastiera o a un hub USB senza alimentazione elettrica esterna. Energia nominale di i1Pro: 5 V... -
Page 52: Indicatori Di Stato Del Dispositivo
Indicatori di stato del dispositivo Il dispositivo i1Pro è dotato di due indicatori di stato sul suo corpo superiore. Gli indicatori di stato del dispositivo forniscono un feedback sullo stato attuale del dispositivo e guidano l’utente attraverso il processo di misurazione. Stato generale del dispositivo: Il dispositivo non viene collegato al computer, il software non è... -
Page 53: Calibrazione Del Dispositivo
Calibrazione del dispositivo Prima di iniziare la misurazione è necessario calibrare il dispositivo. Se si dispone di più dispositivi, assicurarsi che il numero di serie sul retro della piastra base di calibrazione corrisponde al numero di serie del dispositivo i1Pro. Per ulteriori informazioni sul processo di calibrazione, vedere il manuale d’uso del software di misurazione. -
Page 54: Misurazione Da Scansione
Misurazione da scansione Tecnologia di apertura virtuale Condizioni di misurazione Il dispositivo di misurazione i1Pro è dotato di un filtro fisso UVcut e accetta solo una Apertura virtuale durante la scansione condizione di misurazione. secondo la lunghezza dei patch La misurazione singola è necessaria per la condizione di misurazione: •... - Page 55 è fondamentale per la precisione delle misurazioni. Se l’apertura di misurazione del dispositivo o il bordo del binario guida del righello sono usurati, si consiglia di sostituirli. È possibile acquistare i pezzi di ricambio tramite i Centri di Servizi X-Rite.
-
Page 56: Misurazione Da Scansione Singola
Misurazione da scansione singola 2 x verde lampeggiante Misurazione della riga riuscita. 2 x rosso lampeggiante Misurazione della riga non riuscita perché non tutti i patch potrebbero essere riconosciuti. Misurare di nuovo la riga, ma ridurre la velocità di misurazione e assicurarsi che il dispositivo inizia e finisce la misurazione prima e dopo i patch del diagramma di prova. -
Page 57: Misurazione Spot
Misurazione spot Per preparare il dispositivo i1Pro per una misurazione spot, è necessario montare il dispositivo i1Pro sul target di posizione. Accertarsi che il dispositivo sia calibrato e gli indicatori di stato pulsano in bianco prima di montare il dispositivo. Per ulteriori informazioni sul processo di misurazione spot, vedere il manuale d’uso del software di misurazione. -
Page 58: Misurazione Display
Misurazione display Per preparare il dispositivo i1Pro per una misurazione display, è necessario montare il dispositivo i1Pro sul supporto per display. Accertarsi che il dispositivo sia calibrato e gli indicatori di stato pulsano in bianco prima di montare il dispositivo. 1. -
Page 59: Manutenzione Generale
Manutenzione generale • Il vetro di protezione nell’apertura di misurazione del dispositivo i1Pro può impolverarsi dopo qualche tempo. È possibile rimuovere il vetro di protezione per pulirlo e l’interno dell’apertura di misurazione: 1. Per rimuovere l’apertura di misurazione, ruotarla in senso orario fino a quando la freccia indichi la marcatura “unlocked”... -
Page 60: Soluzione Dei Problemi
2. Eseguire il controllo delle funzionalità seguendo le istruzioni fornite dal software i1Diagnostics. 3. Se il software i1Diagnostics riporta un errore, conservare il rapporto del test e contattare il centro assistenza di X-Rite più vicino. Come alternativa, si può consultare nostre risorse di supporto online in www.xrite.com/support/i1Profiler per risolvere il problema. -
Page 61: Garanzia
X-Rite come garanzia o altro. Per usufruire del servizio di garanzia è necessario portare o • Accesso gratuito al call center e al supporto via e-mail di X-Rite nel corso del periodo di garanzia per i problemi che derivano dall’uso generale del prodotto, subordinatamente ai requisiti seguenti:... -
Page 62: Specifica
0.4 ∆E94*, massima di 1.0 ∆E94* Rapporto spettrale: 380 nm ... 730 nm in passi di 10 nm Concordanza interstrumentale: (deviazione dallo standard di fabbricazione X-Rite a 23 °C (73.4 °F) su 12 ceramiche BCRA (D50, 2°)) Frequenza di misurazione in modalità di scansione: 200 misurazioni per secondo 0.1 ∆E94* su bianco (D50, 2°... -
Page 63: Requisiti Minimi Di Sistema
Nota importante Garantía Servicio y asistencia È possibile utilizzare il dispositivo X-Rite i1Pro con versioni anteriori del software development kit (SDK) di i1Pro sviluppate per revisioni precedenti del dispositivo i1Pro. In questo caso, il nuovo i1Pro funziona in modalità di Especificación compatibilità... -
Page 64: Contenido Del Paquete
Contenido del paquete Maletín de transporte Certificado de rendimiento Soporte para pantalla Marcador de posicionamiento Placa de calibración Tablero de respaldo Cable USB Dispositivo de medición Dispositivo de medición Dispositivo de medición Dispositivo de medición Regla Manual de uso DVD de las aplicaciones... -
Page 65: Visión General Del Dispositivo
Visión General Del Dispositivo Spectrophotometer Espectrofotómetro Limiting Aperture Abertura de medición Botón de medición Measurement Button Indicadores de estado Status Indicators Etiqueta del tipo con número de serie Type Label with Serial Number Espacio de referencia para montaje de la regla Reference Gap for Ruler Mount Interfaz de montaje para accesorios Mounting Interface for Accessories... -
Page 66: Instalación
El dispositivo X-Rite i1Pro no funciona si está conectado al puerto USB del teclado de la computadora o a un concentrador USB sin suministro de energía externo. Energía nominal de i1Pro: 5 V... -
Page 67: Indicadores De Estado Del Dispositivo
Indicadores de estado del dispositivo El dispositivo i1Pro está equipado con dos indicadores de estado en la parte superior de su cuerpo. Los indicadores de estado del dispositivo le proporcionan información sobre el estado actual del dispositivo y le guiarán a lo largo del proceso de medición. Estado general del dispositivo: Apagado El dispositivo no está... -
Page 68: Calibrar El Dispositivo
Calibrar el dispositivo Antes de comenzar, debe calibrar el dispositivo. Si tiene varios dispositivos, asegúrese de que el número de serie en la parte posterior de la placa base de calibración coincide con el número de serie del dispositivo i1Pro. Consulte el manual del usuario del software de medición para obtener más información sobre el proceso de calibración. -
Page 69: Medición Por Digitalización
Medición por digitalización Tecnología de abertura virtual Condiciones de medición El dispositivo de medición i1Pro está equipado con un filtro fijo de recorte de UV (UVcut) La abertura virtual durante la digitalización es en y sólo es compatible con una condición de medición. función de la longitud de los parches La medición por digitalización única es necesaria en el caso de la condición de medición. - Page 70 Si la abertura de medición del dispositivo o el borde del riel de guía de la regla estén desgastados, usted deberá reemplazarlos. Las piezas de repuesto se pueden pedir por medio de los Centros de Servicios de X-Rite.
-
Page 71: Medición Por Digitalización Única
Medición por digitalización única 2x verde parpadeante La fila se midió correctamente. 2x rojo parpadeante La fila no se ha medido correctamente, ya que no ha sido posible reconocer todos los parches. Mida la fila de nuevo, pero reduzca la velocidad de medición y asegúrese de que el dispositivo inicia y finaliza la medición antes y después de los parches del gráfico de prueba. -
Page 72: Medición De Punto
Medición de punto Para preparar el dispositivo i1Pro para una medición de punto, es necesario montarlo en el objetivo de posicionamiento. Asegúrese de que el dispositivo esté calibrado y que los indicadores de estado estén pulsando en color blanco antes de montarlo. Consulte el manual del usuario del software de medición para obtener más información sobre el proceso de medición de punto. -
Page 73: Medición De Pantallas
Medición de pantallas Para preparar el dispositivo i1Pro para una medición de pantalla, es necesario montarlo en el soporte para pantalla. Asegúrese de que el dispositivo esté calibrado y que los indicadores de estado estén pulsando en color blanco antes de montarlo. 1. -
Page 74: Mantenimiento General
Mantenimiento general limpiarlo y el interior de la abertura de medición: 1. Para sacar la abertura de medición, gírela en sentido horario hasta que la flecha señale la marca “unlocked” en el dispositivo i1Pro. 2. Quite la abertura de medición del dispositivo. Evite tocar la óptica del instrumento. -
Page 75: Solución De Problemas
3. Si el software i1Diagnostics comunica un error, guarde el informe de prueba y póngase en contacto con el Centro de Soporte X-Rite más próximo. Como alternativa, también se puede consultar nuestros recursos de soporte en línea:... -
Page 76: Garantía
X-Rite. Para obtener más información, consulte el todas las solicitudes de garantía. Póngase en contacto con el Soporte o el Centro de Soporte de X-Rite más próximo si sitio Web www.xrite.com/i1Profiler/Supportoptions... -
Page 77: Especificación
380 nm ... 730 nm en pasos de 10 nm Correlación entre instrumentos: 0.4 ∆E94* promedio, 1.0 ∆E94* máximo (desviación del estándar de fabricación de X-Rite a 23 °C (73.4°F) basado en 12 cerámicas BCRA (D50, 2°)) Frecuencia de medición en el modo de digitalización:... -
Page 78: Requisitos Mínimos Del Sistema
Manutenção e Suporte Técnico Es posible utilizar el dispositivo i1Pro de X-Rite con versiones anteriores del kit de desarrollo de software (SDK) de i1Pro que fueron desarrolladas para versiones más antiguas del dispositivo i1Pro. En este caso, el nuevo dispositivo i1Pro Especificações... -
Page 79: Conteúdo Da Embalagem
Conteúdo da Embalagem Maleta de Transporte Certificado de Desempenho Suporte de Telas Alvo de Posicionamento Placa de Calibração Prancheta de Apoio Cabo USB Dispositivo de Medição Esquadro Manual do Usuário DVD com o aplicativo... -
Page 80: Visão Geral Do Dispositivo
Visão Geral do Dispositivo Spectrophotometer Espectrofotômetro Limiting Aperture Abertura de Medição Botão de Medição Measurement Button Indicadores de Estado Status Indicators Etiqueta de Tipo com Número de Série Type Label with Serial Number Espaço de Referência para a Montagem em Esquadro Reference Gap for Ruler Mount Interface de Montagem para Acessórios Mounting Interface for Accessories... -
Page 81: Instalação
O dispositivo X-Rite i1Pro não funcionará se for conectado à porta USB do teclado ou a um concentrador de portas USB sem fornecimento externo de energia. Especificação elétrica do i1Pro: 5 V... -
Page 82: Indicadores De Estado Do Dispositivo
Indicadores de Estado do Dispositivo O dispositivo i1Pro vem equipado com dois indicadores de estado na parte de cima do corpo do aparelho. Estes indicadores fornecem informações sobre o estado atual do dispositivo e orientações no decorrer do processo de medição. Estado geral do dispositivo: Apagado O dispositivo não está... -
Page 83: Calibrar O Dispositivo
Calibrar o Dispositivo Calibre o dispositivo antes de começar a medir. Caso você tenha vários dispositivos, certifique-se de que o número de série na parte de trás da placa de calibração combina com o número de série do seu dispositivo i1Pro. Consulte o guia do usuário do seu aplicativo de medição para obter informações adicionais sobre o processo de calibração. -
Page 84: Medição De Digitalização
Medição de Digitalização Tecnologia de abertura virtual Condições de medição Abertura virtual durante a digitalização, O dispositivo de medição i1Pro está equipado com um filtro fixo de corte de UV e é dependendo do comprimento das compatível somente com uma condição de medição. seções de cores A medição com digitalização única é... - Page 85 Se a abertura de medição do dispositivo ou a borda do trilho-guia do esquadro estiverem gastas, você deverá substituí-las. Solicite as peças de reposição por meio dos Centros de Assistência Técnica da X-Rite.
-
Page 86: Medição De Digitalização Única
Medição de Digitalização Única 2 verdes piscantes A fileira foi medida com êxito. 2 vermelhos piscantes A fileira não foi medida com êxito porque não foi possível reconhecer todas as seções de cores. Meça a fileira novamente, mas reduza a velocidade de medição e certifique-se que o dispositivo começa e termina a medição antes e depois das seções de cores do gráfico de prova. -
Page 87: Medição Pontual
Medição Pontual Para preparar o dispositivo i1Pro para uma medição pontual, você precisará montá-lo sobre o alvo de posicionamento. Certifique-se de que o dispositivo esteja calibrado e que os indicadores de estado estejam pulsando na cor branca antes de montá-lo. Consulte o guia do usuário do seu aplicativo de medição para obter informações adicionais sobre o processo de medição pontual. -
Page 88: Medição De Telas
Medição de Telas Para preparar o dispositivo i1Pro para a medição de uma tela você precisará montá-lo sobre o suporte de telas. Certifique-se de que o dispositivo esteja calibrado e que os indicadores de estado estejam pulsando na cor branca antes de montá-lo. 1. -
Page 89: Manutenção Geral
Manutenção Geral • O vidro de proteção na abertura de medição do dispositivo i1Pro pode ficar sujo após algum tempo. É possível retirar o vidro protetor para limpá-lo bem como o interior da abertura de medição: 1. Para remover a abertura de medição, gire-a em sentido horário até que a seta aponte para a marcação “unlocked”... -
Page 90: Solução De Problemas
3. Se o aplicativo i1Diagnostics identificar algum erro, salve o relatório do teste e entre em contato com a Assistência Técnica da X-Rite mais próxima. Como opção, você poderá também consultar nossos recursos de suporte técnico virtual em www. -
Page 91: Garantia
Visite nosso sítio eletrônico do i1Pro em www.xrite.com para localizar o Centro de Serviços da X-Rite mais próximo ou A X-Rite dá garantia de 12 (doze) meses para este produto (contados a partir da data da venda) quanto a defeitos em entre em contato com o seu representante de vendas da X-Rite para obter mais informações. -
Page 92: Especificações
Média de 0.4 ∆E94*, máximo de 1.0 ∆E94* (desvio do padrão de Resolução óptica: 10 nm fabricação da X-Rite a uma temperatura de 23 °C (73.4 °F) para 12 cerâmicas BCRA (D50, 2°)) Registro espectral: 380 nm ... 730 nm em passos de 10 nm Repetibilidade a curto prazo: 0.1 ∆E94* sobre branco (D50, 2°, média de 10 medições a cada 3... -
Page 93: Requisitos Mínimos De Sistema
Nota importante 製品保証 サービス/サポート O dispositivo X-Rite i1Pro pode ser utilizado com versões mais antigas do conjunto de desenvolvimentos do aplicativo (SDK) para o i1Pro, as quais foram desenvolvidas para versões anteriores do dispositivo i1Pro. Neste caso, o novo i1Pro 仕様... - Page 94 パッケージ内容 ケース 性能証明書 ディスプレイホルダー ポジショニング ターゲッ ト キャリブレーションプレート バッキングボード USBケーブル 測定器 ルーラー 使用説明書 アプリケーションDVD...
- Page 95 装置の概要 分光測色計 Spectrophotometer 測定アパーチャー Limiting Aperture 測定ボタン Measurement Button ステータスインジケータ Status Indicators モデル名、 シリアル番号の表示ラベル Type Label with Serial Number ルーラー取付用リファレンスギャップ Reference Gap for Ruler Mount アクセサリ取付用インターフェース Mounting Interface for Accessories USBコネクタ USB Connector...
- Page 96 インストール 装置を使用またはステータスを表示する前に、 ソフトウェアをコンピュータ にインストールする必要があります。 DVDからソフトウェアをインストールす るまで、 装置のUSBケーブルをコンピュータに挿入しないでください。 1. DVDからソフトウェアのアプリケーションをPCまたはMacintosh ® にイ ンストールします。 2. 新しい装置を使用する前に、 本ユーザーマニュアルにある手順をお読み ください。 詳細は同梱ソフトウェアのDVDをご参照ください。 3. 装置から 「初めて使用する前にソフトウェアをインストールし説明書をお 読みください」 の警告シールを取り外してください。 4. ソフトウェアのインストールが終了後、 i1Pro装置をコンピュータのUSBポ ートに接続してください。 正常に接続すれば両方のステータスインジケ ータ が白で点灯します。 エ ッ ク ス ラ イ ト 社 の i 1 P r o が キ ー ボ ー ド の U S B ポ ー...
- Page 97 装置のステータスインジケータ i1Pro装置は本体上部に2つの装置ステータスインジケータが備わっています。 装置のステータスインジケータは、 装置の現在の状態を表示し測定プロセス をガイドします。 装置の一般ステータス OFF (1)装置がコンピュータに接続されていないか、 (2)ソフト ウェアが実行されていない、 または(3)装置を管理する最 新ソフトウェアがコンピュータにインストールされていま せん。 3番目の場合、 装置はソフトウェアと互換モードで そのまま使用でき、 ソフトウェアがサポートするi1Pro装置 の旧バージョンで動作します。 白の点灯 機器は接続されていますが、 キャリブレーションが必要 です。 白の点滅 装置が接続されており、 測手の準備が完了しています。 赤の点灯 装置のキャリブレーションに失敗しました。 ( 詳しくはトラ ブルシューティングのセクションをご覧ください。 ) 装置ステータスインジケータの測定への影響を避けるめに、 測定中は装置 ステータスのインジケータがOFFに切り替わります。...
- Page 98 装置のキャリブレーション 測定を開始する前に、 装置のキャリブレーションを実行してください。 複数の装置を 保有する場合は、 キャリブレーションプレート裏のシリアル番号がi1Pro装置のシリア ル番号と一致することを確認してください。 キャリブレーション手順については、 測 定ソフトウェアの説明書をご参照ください。 1. キャリブレーションプレートの中央には、 ホワイトキャリブレーションタイルを 保護するスライダーがあります。 この保護スライダーをカチッと音がするまで開 き、 キャリブレーションプレートの白色リファレンスセラミックタイルにアクセス します。 2. i1Pro測定器をキャリブレーションプレートにセッ トします。 装置をキャリブレー ションプレートに安定させてセッ トしてください。 3. ソフトウェアを装置のキャリブレーションにセットし、 測定ボタンを押します。 キャリブレーション中は、 ステータスインジケータの照明がOFFに切り替わり ます。 装置のキャリブレーションが終了したら、 ステータスインジケータの照明 は白で点滅します。 キャリブレーションに失敗した場合、 ステータスインジ ケータ (アイコン) は赤で点滅し、 白の点灯に変わります。 4. キャリブレーションの終了後、 白色セラミックタイルの保護スライダーを閉じて ください。...
- Page 99 スキャン測定 バーチャルアパーチャー技術 測定条件 i1Pro測定器は、 固定式のUVカッ トフィルターが備わっており、 シングル測 スキャニング中のバーチャルアパーチャーの 定条件のみをサポートします。 サイズはパッチの長さに依存します。 次の測定条件にはシングル (1回) 測定が必要です。 • ISO 13655 M2 | UV除去の照明 (UVカッ ト) ステータスインジケータは、 測定プロセスをガイドしま i1Pro装置の す。 平均処理に使用される有効な測定 無効な測定 i1Pro装置は、 スキャン測定において1秒間に200回の測定を行います。 装置 の自動パッチ検出機能は、 パッチの有効な測定値とパッチ間の無効な測 定値を判別します。 パッチの有効な測定値は平均化され、 装置は平均測定 結果をソフトウェアに出力します。 この技術により、 i1Pro装置のバーチャル アパーチャーはパッチの長に対して適応することが可能です。 最良の測定 結果を得るには、 テストチャートのパッチ長をプリンタの解像度に基づい て選択してください。 低解像度または粗い線数のプリンタには、 テストチャ ートのパッチ長を長く取るように設定してください。...
- Page 100 スキャン測定 i1Pro装置でスキャン測定を行うには、 i1Pro装置をルーラーに取り付ける必 要があります。 取り付け前に、 装置がキャリブレーションされており、 ステ ータスインジケータの照明 が白で点滅していることを確認してくださ い。 1. バッキングボードを開きます。 2. 留め金を使い、 テストチャートをバッキングボードに固定します。 3. ルーラーをバッキングボードにセッ トします。 4. i1Pro装置をルーラーの専用台にセッ トします。 専用台のポジショニン グピンがi1Pro装置底のリファレンスギャップに挿入されていることを 確認してください。 i1Pro装置が専用台に固定されていることを再度確 認してください。 5. スキャニング測定を行う際、 装置の測定アパーチャーがルーラーのガ イドレールにしっかり挿入されることを確認してください。 i1Pro装置およびプリント用紙の表面との距離は、 測定精度にとっ て重要です。 装置の測定アパーチャーまたはルーラーのガイドレ ールの端が消耗されている場合は交換してください。 交換部品は エックスライト社サービスセンターまでお問い合わせください。...
- Page 101 シングルスキャン測定 2x 緑の点滅 列の測定が成功しました。 2x 赤の点滅 全てのパッチを認識することができなかったため、 列の 測定に失敗しました。 測定速度を下げて再度列を測定 してください。 測定がテストチャートのパッチ前後の白 色用紙上で開始および停止していることを確認してくだ さい。 4x 赤の点滅 タングステンフィラメントランプがウォームアップする 1. 取り付け前に、 装置がキャリブレーションされており、 ステータスイン 前にパッチの測定を開始したため、 列の測定に失敗し ジケータの照明 が白で点滅していることを確認してください。 ました。 i1Pro装置を動かす前に、 ランプのウォームアッ プ時間を十分に考慮してから再度列を測定してくださ 2. 装置がテストチャートの1列目横の紙端の白色用紙上にく るように、 ル い。 ーラーをセッ トしてください。 列をスキャンする際は、 左右どちらから でもかまいません。 1x 緑、 2x 赤の点滅 列が正常に測定されましたが、 ソフトウェアは別の列を 3. ソフトウェアをシングルスキャニングモードに設定します。...
- Page 102 スポッ ト測定 i1Pro装置でスポッ ト測定の準備を行うには、 i1Pro装置をポジショニングタ ーゲッ トに取り付ける必要があります。 取り付け前に、 装置がキャリブレー ションされており、 ステータスインジケータの照明が白で点滅していること を確認してください。 スポッ ト測定手順については、 測定ソフトウェアの説 明書をご参照ください。 1. i1Pro測定器をポジショニングターゲッ トに取り付けるには、 ポジショニ ングターゲッ ト上の取付コネクタをi1Pro装置後方の取付インターフェー スに挿入します。 2. スポッ ト測定を行うようソフトウェアを設定します。 3. 装置を測定するパッチにセッ トします。 4. 装置の測定ボタンを押します。 ステータスインジケータの照明は測定 中OFFに切り替わり、 測定が成功すると緑の点滅 に変わります。 5. i1Pro装置をポジショニングターゲッ トから取り外すには、 ポジショニン グターゲッ トがi1Pro装置後方の取付インターフェースを外した状態で 取付コネクタをゆっく...
- Page 103 ディスプレイの測定 i1Pro装置でディスプレイ測定を行うには、 i1Pro装置をディスプレイホルダ ーに取り付ける必要があります。 取り付け前に、 装置がキャリブレーション されており、 ステータスインジケータの照明が白で点滅していることを確 認してください。 1. スクリーンのサイズに合わせて、 ディスプレイホルダーのバランスウェ イトの長さを調整することが可能です。 バランスウェイトは両端にマジ ックテープが付いており、 ディスプレイホルダーを正しい長さに調整す ることが可能です。 2. i1Pro測定器をディスプレイホルダーに取り付けるには、 ディスプレイホ ルダー上の取付コネクタをi1Pro装置後方の取付インターフェースに挿 入します。 i1Pro装置の先がディスプレイホルダーに固定されていること を確認してください。 3. i1Pro測定器をスクリーン中央に固定します。 4. ソフトウェアをディスプレイ測定に設定し、 アプリケーション内で測定 を開始してください。 測定中は、 ステータスインジケータの照明がOFF に切り替わります。 5. i1Pro装置をディスプレイホルダーから取り外すには、 ディスプレイホル ダーがi1Pro装置後方の取付インターフェースを外した状態で取付コネ クタをゆっく り引き抜きます。...
- Page 104 メンテナンス 1. 測定アパーチャーを取り外すには、 矢印がi1Pro装置の 「ロック解除」 マーク を指すまで時計方向に回してください。 2. 装置から測定アパーチャーを取り外します。 オプチク スには触れないで く ださい。 3. 保護ガラスのスライダーを測定アパーチャーのからスライドして取り 外します。 4. 保護ガラスおよび測定アパーチャーの内側をイソプロピルアルコー ルを付けた柔らかい布で拭いてください。 5. 保護ガラスのスライダーを測定アパーチャーにセッ トします。 スライ ダーが元の位置にカチッと音がするまではめ込みます。 6. 矢印がi1Pro装置の 「ロック解除」 マーク を指す位置で、 測定アパ i1Proの測定性能を維持するには、 使用上のルールを守り、 測定の性能に重 ーチャーを再度取り付けます。 要となる部品を定期的に清掃することが重要です。 7. 測定アパーチャーをロックするには、 矢印がi1Pro装置の 「ロック」 マ ーク を指すまで反時計方向に回してください。...
- Page 105 トラブルシューティング 診断ソフトウェア (Diagnostic Software) 診断ソフトウェア (Diagnostic Software) i1Proが正常に機能していないと思われる場合は、 i1診断ソフトウェアをご 使用ください。 キャリブレーション後にステータスインジケータ が赤で 点灯した場合、 i1Proのセンサー診断が問題を検出したことを表します。 その際は、 次の手順に沿ってください。 1. i1ソフトウェアを起動します。 2. i1診断ソフトウェアから指示される手順に従って機能チェックを実行し ます。 3. エラーが報告された場合、 テストレポートを保存し、 エックスライト社 の東京サービスセンターまでお問い合わせください。 トラブルシューテ ィングはwww.xrite.com/support/i1Profilerもご利用ください。...
- Page 106 サービス/サポート 製品保証 限定保証 証明書再発行 テクニカルサポート、 製品保証、 最新のソフトウェアアップデートや製品ニュースをご希望の方 エックスライト社では、 i1Pro分光測色計を毎年再校正されることをお勧めしています。 証明書の再発 は、 www.xrite.com/registerでi1Proシステムの製品登録を行ってください。 行に関しては、 エックスライト社のサービスセンターまでお問い合わせください。 限定保証 サービスセンター エックスライト社は、 本製品に対して購入日から12ヶ月の構成および製造の保証を提供します。 保証 i1Proの製品情報はwww.xrite.com をご参照ください。 期間内は欠陥部品を無償で交換または修理いたします。 ( 消耗品は除外。 ) この保証は、 出荷による損 害、 改造、 不注意な取り扱いによる製品には適用しません。 上記保証の破損に対するエックスライト サポートオプション 社の限定義務は、 いかなる部品の無償修理または交換とし、 保証期間内に欠陥品と証明され、 かつエ ックスライト社が合理的に納得できるものに限ります。 エックスライト社による修理または交換により 弊社では、 今日の複雑で変化し続けるワークフローに対するためにサポートおよびトレーニングが 保証期間は回復されず、 また保証期間は延長されません。 エックスライト社はお客様の製造の損失 ・ 不可欠と考えています。...
- Page 107 仕様 分光エンジン : i1® 技術 (128ピクセルのダイオード アレー付きホログラフィ キャリブレーション : 付属の白色セラミック校正板による手動キャリブレーション ック回折格子) 測定バッキング : 白色、 ISO 13655:2009; バッキングボード上の測定 測定波長範囲: 380 ~ 730 nm 最大の用紙の厚さ : バッキングボード上で3 mm サンプリング間隔 : 3.5 nm スキャニングモードにおける 10 x 10 mm (幅 x 高さ) 光学分解能 : 10 nm 最少パッチサイズ : 分光出力 : 10 nm ステップで 380 nm ~ 730 nm 器差 : 0.4 ∆E94* 平均、 1.0 ∆E94* 最大 (23゜C環境下でのBCRAタ イル12色 (D50、 2゜) のエックスライト社基準値からの偏差) スキャニングモードにおける...
- Page 108 用户手册 システム必要条件 Macintosh 目录 ® Intel® CPU、 Mac OS X 10.5.8、 10.6.8、 10.7 [最新のアップグレードがインストールされたもの]、 1 GB RAM、 2 GBのディスク空き容量、 1024 x 600ピクセル以上のモニタ解像度、 電源付きUSBポート、 ソ フトウェアをダウンロード、 インストール、 更新するためのDVDドライブまたは高速インターネッ ト接 包装内容 続。 デュアルディスプレイのサポートは、 2つのビデオカードまたはデュアルビデオLUTをサポートす 设备概览 るデュアルヘッ ドのビデオカードを必要とします。 アプリケーションをインストールおよびアンインス 安装 トールするには管理者の権限が必要です。 设备状态指示灯 Windows ®...
-
Page 109: 包装内容
包装内容 手携箱 性能认证书 显示器支架 定位目标 校准板 垫板 USB 电缆 测量设备 标尺 用户手册 应用程序 DVD... -
Page 110: 设备概览
设备概览 Spectrophotometer 分光光度仪 Limiting Aperture 限制孔径 测量按钮 Measurement Button Status Indicators 状态指示灯 定位传感器 Type Label with Serial Number 标尺安装的参考空隙 Reference Gap for Ruler Mount 配件安装接口 Mounting Interface for Accessories USB Connector USB 接头... - Page 111 安装 在使用本设备或查看其状态之前,您需要在您的电脑上安装该软件应用 程序。安装 DVD 光盘中的软件之前,切勿将设备的 USB 电缆连接至计 算机。 ® 1. 通过 DVD 光盘将该软件应用程序安装于 PC 或 Macintosh 电 脑。 2. 开始使用新设备前,请先阅读本《用户手册》中的所有说明。若需 更多详细信息,请参阅软件 DVD 光盘内容。 3. 从设备上移除 "Install software and read manual before first use"(首次使用前安装软件并阅读手册)警示标贴。 4. 完成软件安装程序后,将 i1Pro 设备接入到计算机的 USB 接口。如 果连接成功,那么两个 状态指示灯都会亮起稳定的白色。 若将爱色丽 i1Pro 连接至无外接电源之键盘上的 USB 端口或 USB 集线器,它将无法运行。 i1Pro 的额定电源为:5 V 500 mA.
-
Page 112: 设备状态指示灯
设备状态指示灯 i1Pro 设备的顶壳装有两个设备状态指示灯。设备状态指示灯将会对设 备的状态做出反馈并引导您完成测量过程。 常规设备状态: 关闭 或者该设备没有连接到您的电脑,或者软件没有运 行,或者您的电脑没有安装最新版本的设备驱动软 件。如果是第三种情况,本设备仍然可以与 i1Pro 设 备的低版本软件在兼容模式下使用。 稳定白光 该设备已连接,但需要校准。 跳动白光 该设备已连接并已作好测量准备。 稳定红光 由于硬件问题,设备校准失败(请查看“故障排除” 章节以获取详细信息)。 在测量期间,为避免测量过程对设备指示灯的干扰,设备指示灯将被 关闭。... -
Page 113: 校准设备
校准设备 开始测量前,请校准设备。如果有多台设备,那么请确保校准板背面的 序列号与 i1Pro 设备的序列号相匹配。有关校准过程的详情,请参阅测 量软件用户指南。 1. 校准板的中心位置是一个滑块,用来保护白色校准片。打开保护滑 块直到它卡入校准板上的白色参考陶瓷片。 2. 将 i1Pro 测量设备放到校准板上。该设备必须固定在校准板上。 3. 设置好校准设备的软件后,按下测量按钮。校准过程中,状态指示 灯将会关闭。如果设备校准成功,那么 两个状态指示灯都会跳动 白光。如果校准失败, 状态指示灯会跳动红色然后变回纯白色。 4. 当校准结束后,您应当关闭保护参考白色陶瓷片的滑块。 一块白色干净的参考陶瓷片对于获得精确的测量结果至关重 要。当白色的参考陶瓷片不使用时,防护罩应当一直处于关闭 状态。如有需要,您可以使用异丙醇和柔软的布清洁白色的参 考陶瓷片。... -
Page 114: 扫描测量
扫描测量 虚拟孔径技术 测量条件 使用固定 UVcut 滤镜安装 i1Pro 测量设备,该设备只支持单一测量条件。 扫描时虚拟孔径的大小取决 于色块的长度 测量条件需要单一通道测量: • ISO 13655 M2 | 不带 UV 的照明 (UVcut) i1Pro 设备上的状态指示灯将引导您完成整个测量过程。 有效测量(用于计算平均值) 无效测量 在扫描测量中,i1Pro 设备每秒执行 200 次测量。设备的自动色块检测功 能会辨认一块色块上的可用测量值和在两块色块之间不可用的测量值。 将平均计算一块色块上的有效测量值,然后设备将该平均值发送到软 件。凭借这项技术,i1Pro 设备的虚拟孔径得以适应色块的长度。为了得 到最佳测量结果,测试图表上的色块长度应根据打印机的分辨率做出选 择。针对分辨率或筛选粒度较低的打印机,您应当增加测试图表上色块 的长度。... - Page 115 扫描测量 为了使 i1Pro 设备准备用于扫描测量,您需要在标尺上安装 i1Pro 设 备。在安装之前,请确保设备已经过校准并且 状态指示灯跳动 白光。 1. 展开垫板。 2. 使用夹具紧固垫板上的测试图表。 3. 将标尺放在垫板上。 4. 将 i1Pro 设备放到标尺的支架上。确保支架滑道上的定位针已进入 i1Pro 设备底部的参考空隙中。再次确认 i1Pro 设备是否已固定在支 架上。 5. 在扫描测量期间,确保设备的限制孔径在标尺的导轨上滑动自如。 i1Pro 设备和打印底材表面的距离对于测量值精确与否非常关 键。如果设备的限制孔径或是标尺的导轨边缘破损,您应该 更换它们。可以通过爱色丽服务中心订购备用配件。...
-
Page 116: 单一通道扫描测量
单一通道扫描测量 2x 闪烁红光 该行测量失败,因为不能识别所有的色块。重新测 量该行,但降低测试速度,并确保设备在测试图表 的色块前面和后面开始和结束测量。 4x 闪烁红光 该行测量失败,由于您过早地开始读取色块,没有 给钨丝灯留足时间让它完全亮起来。再次读取该 行,但是在移动 i1Pro 设备之前,先让钨丝灯有充足 时间亮起来。 1x 绿光; 1. 请确保设备已经过校准并且 状态指示灯跳动白光。 2x 闪烁红光 该行测量成功,但是软件预期的是对另一行进行测 量。检查您刚才测量的那一行是否和软件期望相同。 2. 将标尺和设备置于测试图表第一行前面的白纸上。从左到右或从右 到左扫描这一行都无关紧要。 5. 将标尺和设备置于测试图表的下一行前,并测量该行。 3. 将软件设置为单一通道扫描模式。 4. 按下设备上的测量按钮,等待一秒钟,然后可以开始移动设备到标 尺的另一端。一直按住测量按钮,直到到达测试图表的最末端。在 测量过程开始之前,需要暂短延迟,以便钨丝灯亮起来。 设备 上的状态指示灯将会对测量是否成功做出反馈: 2x 闪烁绿光 该行测量成功... -
Page 117: 专色测量
专色测量 为了使 i1Pro 设备准备用于专色测量,您需要在定位目标上安装 i1Pro 设 备。在安装之前,请确保设备已经过校准并且状态指示灯闪烁白光。有 关专色测量过程的详情,请参阅测量软件用户指南。 1. 将定位目标上的安装接头插入 i1Pro 设备后面的安装接口,借此在定 位目标上安装 i1Pro 测量设备。 2. 配置软件以便进行专色测量。 3. 将设备放到您要测量的色块上。 4. 按下设备上的测量按钮。测量过程中状态指示灯将关闭,测量成功 完成后, 状态指示灯将跳动绿光。 5. 要将 i1Pro 设备从定位目标上卸下,只需轻轻拔出定位目标的安装接 头,使其脱离 i1Pro 设备后面的安装接口即可。... -
Page 118: 显示器测量
显示器测量 为了使 i1Pro 设备准备用于显示器测量,您需要在显示器支架上安装 i1Pro 设备。在安装之前,请确保设备已经过校准并且状态指示灯跳动白 光。 1. 根据屏幕尺寸调整显示器支架的平衡锤的长度。平衡锤两端装备有 钩环扣件,允许缩短和加长显示器支架以将其调整到合适的长度。 2. 将显示器支架上的安装接头插入 i1Pro 设备后面的安装接口,借此在 显示器支架上安装 i1Pro 测量设备。确保 i1Pro 设备的机头牢牢固定在 显示器支架上。 3. 将 i1Pro 测量设备固定到屏幕中间位置。 4. 设置显示器测量软件,在应用程序中开始测量过程。测量过程中, 状态指示灯将会关闭。 5. 要将 i1Pro 设备从显示器支架上卸下,只需轻轻拔出显示器支架的安 装接头,使其脱离 i1Pro 设备后面的安装接口即可。... -
Page 119: 一般维护
一般维护 1. 取下限制孔径,顺时针旋转直到箭头指到 i1Pro 设备上的“ 解锁”位置。 2. 从设备上取下限制孔径。避免接触任何光学器件。 3. 将带有防护玻璃的滑块滑出限制孔径。 4. 用蘸有异丙醇的软布清洁防护玻璃和限制孔径的内部。 5. 使用防护玻璃滑块重新组装限制孔径。确保滑块回到其原始 位置。 6. 要将限制孔径组装回设备上,箭头应当指向 i1Pro 设备上 的“解锁”位置。 7. 要锁定限制孔径,逆时针旋转直到箭头指到 i1Pro 设备上 的“锁定”位置。 若要使 i1Pro 在使用寿命内保持其测量性能,必须遵守一些规则,并定期 清洁一些对于测量性能很关键的零件。 • 始终保持白色的参考陶瓷片清洁干净。如有需要,您可以使用 异丙醇和柔软的布清洁白色的参考陶瓷片。 • i1Pro 设备对于机械震动很敏感。为避免运输过程中受到损坏,i1Pro 在运输期间不得拆封。 • 不得在肮脏、油腻或满是灰尘的环境中存放或操作 i1Pro 设备。不得 在温度高于 35°C 或低于 10°C 的环境下使用 i1Pro。不得在温度 高于 50°C 或低于 -10°C 的环境下存放 i1Pro。如有必要,设备的 塑料外壳可以用湿布沾肥皂水清洁。 • 经过一段时间后,i1Pro 设备的限制孔径内的防护玻璃可能会落有灰 尘。您可以取下防护玻璃进行清洁,并清洁限制孔径的内部:... -
Page 120: 故障排除
故障排除 诊断软件 如果您认为 i1Pro 工作不正常,请使用 i1 诊断软件。如果 i1Pro 的内 部传感器诊断发现问题时,状态指示灯变成稳定的红色。 在此情况下,请执行以下步骤: 1. 启动 i1 诊断软件。 2. 遵循 i1 诊断软件给出的说明,执行功能检查。 3. 如果 i1 诊断软件发现错误,请保存此测试报告,然后联系最近的爱 色丽支持中心。或者您可以访问我们的在线支持网址 www.xrite.com/ support/i1Profiler ,以排除您遇到的故障。... -
Page 121: 服务和支持
服务和支持 保修 保修注册 重新鉴定 要想获取技术支持、保修服务及最新软件更新和产品新闻,请登录:www.xrite.com/register,注册 爱色丽建议每年对 i1Pro 分光光度计进行一次重新校验。有关更多关于重新校验的信息,请联系您 您的 i1Pro 新系统。 的爱色丽经销商或距附近的爱色丽服务中心。 服务中心请访问 i1Pro 网站:wwxrite.com ,查询附近的爱色丽服务中心或联系您的爱色丽经销商 保修条款 以获取详细信息。 除非本地法规另行规定,自购买之日起十二 (12) 个月内,如果此产品发生物料和工艺上的缺陷, 支持选项 爱色丽承担保修义务。在保修期间,爱色丽将自行判断免费更换或者免费维修有缺陷的产品部 件。(消耗品不在保修范围内。)本保修条款不适用于交付后出现的损坏、任何方式的更改或因 我们相信,对于您新购买的爱色丽产品,您一定相当满意。同时,我们深谙按需支持和培训在当 忽视处置而造成损坏的任何产品。对于违反上述保修条款的情况,爱色丽全权负责免费维修或替 今快速发展的复杂工作流程中的必要性。因此,我们将向注册用户提供以下在线和免费支持工 换在此保修期内被合理证明为存在缺陷的任何部件。爱色丽所作的任何维修或更换,不会使其它 具。 过期的保修承诺重新生效,也不会使同一保修期限的相应顺延。在任何情况下,对于因违背前述 任何保修条款而对买方的制造成本、管理费用、其它花费、利益损失、信誉损失、或对于任何其 支持工具网址:www.xrite.com/support/i1Profiler 它人身或财产造成的特殊、间接、继发、偶然或其它损失,爱色丽概不负责。这里所规定的保修 • 可无限次免费访问 i1Profiler 互动培训视频;也可通过 i1Profiler 软件访问培训视频。 承诺不衍生任何其它明示或暗示的保修条款。此处明确阐述的保修条款将替代所有其它明示或暗 • 可无限次免费访问爱色丽在线服务台,该服务台提供了与常见问题有关的帮助支持文章。 示的保修条款,包括但不限于暗示的保修条款或针对特殊目的或应用的适销性和适用性条款。此 • 如满足下述条件,可在保修期间免费访问爱色丽的电邮支持和电话服务中心,从而咨询常见 处未明确规定之任何表述或声明不可视为爱色丽的保修担保。若要获得保修服务,您必须使用产 的产品使用问题: 品原始包装或能够提供同等保护的包装携带产品将其送至或预先支付运费将其运至爱色丽的授权 - 您是本产品的初始注册用户 维修中心。必须提交可证明产品仍处于保修期内的产品售货单或购方发票等购买证明方能获得保 - 您正在使用当前版本的 i1Profiler 软件 修服务。 - 您正在使用当前支持的硬件和支持平台(操作系统) 无论由于何种原因,请勿尝试拆卸爱色丽 i1Pro。未经授权的拆卸不享受任何保修服务。若您认为 本设备无法工作或工作不正常,请联系爱色丽支持部门或附近的爱色丽服务中心。 我们意识到,在各种工作流程中使用 i1Profiler 及爱色丽产品时需要相关的高级支持,保修期过后 同样也需要技术支持,鉴此,我们欣然通过爱色丽经验丰富的色彩专家为您提供以下付费支持项... -
Page 122: 技术规格
技术规格 光谱引擎: i1®技术(全息衍射光栅,采用 128 像素二极管阵列) 扫描模式下的最小色块尺寸: 10 x 10 mm (0.39” x 0.39”)(宽 x 长) 光谱范围: 380 - 730 纳米 仪器间协定值: 平均 0.4 ∆E94最大1.0 ∆E94(23°C(73,4°F)时, 在爱色丽生产标准条件下,使用 12 块 BCRA 色板 (D50, 2°) 产生的偏差) 物理取样间隔: 3.5 纳米 短期重复性: 0.1 ∆E94白色(D50,2°,意味着每隔 3 秒测量一次白色, 光学分辨率: 10 纳米 取 10 次的平均值) 反射光谱曲线报告: 380 纳米 ...730 纳米(10 纳米步进) 辐射测量: 光谱辐射亮度 [mW/nm/m /sr],亮度 [cd/m 扫描模式下的测量频率: 200 次/秒 测量范围: 0.2 - 1200 cd/m 在典型 LCD 显示器上 光学特性: 测量几何设备: 45°/0° 环形照明光学元件,ISO 13655:2009 短期重复性: x,y ±0.002 typ.(5000 K, 80 cd/m 测量光圈: 4.5 毫米 (0.18")直径(扫描时有效测量光圈取决于色块的 尺寸和测量速度) 周围光源测量: 光谱辐射照度 [mW/nm/m ],照度 [lux] 余弦校正光线 散射测量头 光斑大小:... -
Page 123: 最低系统要求
China RoHS Disclosure Table 最低系统要求 Macintosh ® Intel® CPU,Mac OS X 10.5.8、10.6.8 或 10 [安装有最新升级],1GB 可用 RAM,2GB 可用硬 盘空间,1024 x 600 或更高像素的显示屏分辨率,通电 USB 端口,需要通过 DVD 驱动器或高速 联网来下载、安装以及更新软件。双显示支持需要 2 张视频卡或 1 个支持所载入的 LUT 双视频的 双头视频卡。用户必须拥有管理员权限才能安装和卸载应用程序。 Windows ® Intel® Pentium® 4 或 AMD Athlon XP™ 或以上 CPU、Microsoft® Windows® XP®、Windows Vista®、Windows 7®(所有均为 32 或 64 位并安装有最新服务包),1GB 可用 RAM,2GB 可 用硬盘空间,1024 x 600 或更高像素的显示屏分辨率,通电 USB 端口,已安装网络适配器并已加 载驱动程序,需要通过 DVD 驱动器或高速联网来下载、安装以及更新软件。双显示支持需要 2 张视频卡或 1 个支持所载入的 LUT 双视频的双头视频卡。用户必须拥有管理员权限才能安装和卸 载应用程序。 重要提示 爱色丽 i1Pro 仪器可以与 i1Pro 软件开发工具包 (SDK) 的低版本兼容,该工具包用于 i1Pro 低版本 的修订。在此情况下,新型 i1Pro 可作为 ISO 13655 测量模式 M2(UVcut 滤镜)设备运行于向下兼 !"# 容模式,但一些新功能,如状态指示灯则不可用。 为确保仪器功能的完备,请咨询您的软件供应 商,查看您的 SDK 软件的更新版本以及最新 SDK 是否可用。 EU RoHS COMPLIANCE - The Product(s), Parts, and Assemblies disclosed in this table comply to the threshold limits defined by the European Directive 2002/95/EC and exemptions listed in the Annex. - Page 124 Phone (+852) 2 568 6283, Fax (+852) 2 885 8610 Please visit www.xrite.com for a local office near you. Please visit www.xrite.com for a local office near you. TM Trademark of X-Rite. Part No. xxxxxxxx (08/2010) TM Trademark of X-Rite. Part No. EO2UV-QSG (05/2012)