X-Rite i1 Manuel De Demarrage Rapide
Masquer les pouces
Voir aussi pour i1:
- Manuel de demarrage rapide (38 pages) ,
- Manuel de référence (38 pages) ,
- Guide de démarrage rapide (18 pages)

Manuels Connexes pour X-Rite i1


Sommaire des Matières pour X-Rite i1
- Page 1 Quick Start Guide Kurzanleitung Manuel de démarrage Guida introduttiva Guía de inicio rápido...
-
Page 2: Important Notices
CE Declaration EQUIPMENT INFORMATION Manufacturer’s Name: X-Rite, Incorporated Use of this equipment in a manner other than that specified by X-Rite, Incorporated may compromise Authorized Representative: X-Rite GmbH design integrity and become unsafe. Siemensstraße 12b • 63263 Neu-Isenburg • Germany This equipment is intended for use only with UL listed ITE equipment. -
Page 3: Package Contents
Kurzanleitung Bras du i1iO Plaque d’appui du i1iO Alimentation électrique Cordon d’alimentation secteur Câble USB DVD du logiciel i1 Anneau de glissement de rechange Ce manuel de démarrage Braccio i1iO Piastra della base i1iO Alimentatore di corrente Cavo di alimentazione... -
Page 4: Device Overview
Device Overview Panoramica del dispositivo Visión general del dispositivo 装置の概要 设备概览 Geräteübersicht Vue d´ensemble de l´instrument tant de verrouiller la connexion entre le bras du i1iO et la plaque d’appui du i1iO Indicateur d´état Bouton-poussoir i1iO è un sistema di misurazione automatica per la prima e seconda generazione del dispositivo i1Pro per misurazione di colori. - Page 5 Installation 組み立て 安装 Installation Installation Installazione Instalación Veuillez lire attentivement ces instructions avant de commencer à utiliser votre i1iO. Pour de plus amples informations, consultez le CD. 1. Placez le bras i1iO sur la plaque d’appui i1iO. 2. Tournez la manette du bras dans le sens des aiguilles d’une montre pour fixer le bras sur la plaque d’appui.
- Page 6 Installation 組み立て 安装 Installation Installation Installazione Instalación 3. Retirez la bande adhésive de protection pour le transport avant de mettre l‘unité sous tension. Veillez à replacer la bande adhésive pour le transport. Une bande adhésive supplémentaire est fournie dans l‘emballage. 4.
- Page 7 Installation 組み立て 安装 Installation Installation Installazione Instalación 5. Déplacez la glissière de verrouillage jusqu'à ce que la croix devienne clairement visible pour ver- rouiller l'i1Pro. 6. Branchez le i1iO sur l’alimentation secteur au moyen du cordon d’alimentation (1), puis raccordez le câble USB au i1iO (2).
- Page 8 Installation 組み立て 安装 Installation Installation Installazione Instalación 7. Installez l’application i1iO sur votre PC ou votre Macintosh à l’aide du CD. 8. Branchez le i1iO sur votre ordinateur à l’aide du câble USB. Le i1iO ne fonctionnera pas si vous le branchez sur un concentrateur USB qui n’est pas alimenté...
-
Page 9: Height Adjustment
Height Adjustment Regolazione dell’altezza Ajuste de la altura 高さ調整 高度调节 Höheneinstellung Réglage de la hauteur Vous devez régler la hauteur du bras du i1iO lors de chaque première utilisation et à chaque modifi- cation de substrat. 1. Tournez la molette de réglage de la hauteur dans le sens contraire des aiguilles d’une montre jusqu’à... - Page 10 Height Adjustment Regolazione dell’altezza Ajuste de la altura 高さ調整 高度调节 Höheneinstellung Réglage de la hauteur 4. Assurez-vous que l’anneau de glissement est en contact permanent avec le substrat lors de la numérisation. Pour les substrats d’une épaisseur maximale d’1 mm, le bras doit être réglé sur la position la plus basse possible.
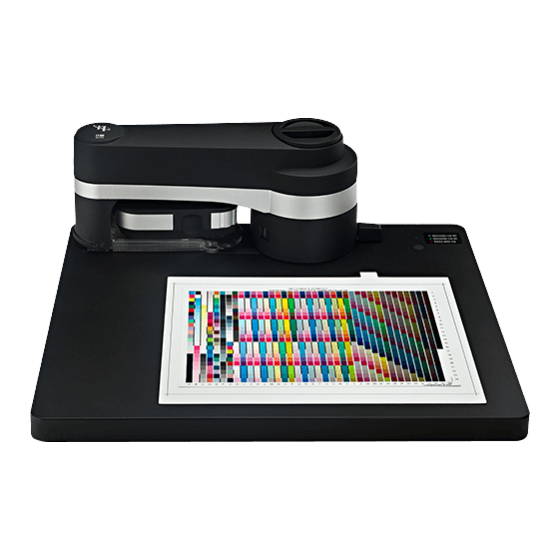
- Page 11 Chart Positioning Positionieren des Charts Positionnement de la charte Posizionamento del diagramma Colocación del gráfico チャートのセット 测试图定位 1. Placez la charte à lire sur la surface électrostatique de façon à ce qu’elle ne dépasse pas les repères noirs. Remarque: • L’alignement de la charte importe peu, car le logiciel compense toute asymétrie. •...
- Page 12 Chart Positioning Positionieren des Charts Positionnement de la charte Posizionamento del diagramma Colocación del gráfico チャートのセット 测试图定位 2. Press the button on the upper right of the base plate to stick the chart to the measuring table. Normally no supplementary adhesive is required for the chart. Ensure that the chart is flat and that there are no bubbles.
-
Page 13: Status Indicators
Status Indicators Indicadores de estado 装置のステータスインジケータ 设备状态指示灯 Statusanzeige Indicateurs d´état Indicatori di stato Indicatore LED sulla base: «Spento» Mat elettrostatico spento: È possibile rimuovere la chart o posizionarla sul tavolo di misurazione. «Verde» Mat elettrostatico acceso: La chart è fissata sul tavolo di misurazione. «Lampeggiante rosso»... - Page 14 (circa 750 chart IT8.7/3) è indicato dal LED rosso lampeggiante nell‘angolo in alto a sinistra sulla base. Per ordinare nuovi anelli di scivolamento per i1iO, contattare il rivenditore X-Rite più vicino o visitare il negozio on-line sul nostro sito www.xrite.com.
- Page 15 Extraiga el anillo deslizante gastado del soporte del instrumento i1Pro. 1. i1iO電源ケーブルをi1iOから外します。i1iOからi1Pro測定器を外します。 2. 装置底のグライダーリングが緩くなるまで、反時計方向に回してください。古い グライダーリングをi1 Proマウントから持ち上げます。 1. 断开 i1iO 的电源。从 i1iO 测量台上移除 i1Pro。 1. Disconnect the i1iO power supply from the i1iO and remove the i1Pro from the i1iO table. 2. 逆时针转动仪器支架底部的磨损滑环,直到滑环变松。将滑环从 i1Pro 支架中向...
- Page 16 3. Coloque el anillo deslizante nuevo en el soporte del instrumento i1Pro. 4. Para bloquear el anillo deslizante nuevo presione hacia abajo en su enchufe y gírelo en sentido contrario a las agujas del reloj. 3. 新しいグライダーリングをi1 Proマウントにセットします。 4. 新しいグライダーリングをロックするには、ソケットに押し込み、反時計方向に 回してください。...
- Page 17 グライダーリング Remplacement de Sostituzione dell‘anello Cambiar el anillo Glider Ring Exchange 滑环更换说明 Gleitringwechsel の交換手順 l’anneau de glissement di scivolamento deslizante 5. Montez le i1Pro sur le i1iO. 6. Pour réinitialiser le témoin d’indication, appuyez sur le bouton dans la partie supérieure droite de la base et branchez la prise secteur de l’unité...
-
Page 18: General Maintenance
General Maintenance Manutenzione generale Mantenimiento general メンテナンス 一般维护 Allgemeine Wartung Maintenance générale To maintain the measurement performance of your i1iO over its life time, it is important to • Das i1iO ist stoß- und schlagempfindlich. Vermeiden Sie Transportschäden, und transportieren und versenden Sie deshalb das i1iO immer nur in der originalen Verpackung. - Page 19 General Maintenance Manutenzione generale Mantenimiento general メンテナンス 一般维护 Allgemeine Wartung Maintenance générale utilizzare il dispositivo i1iO negli ambienti in cui le temperature superano i 35 °C o scendono • Veillez à ne pas ranger et à ne pas utiliser l’i1iO dans des environnements sales, graisseux ou poussiéreux.
- Page 20 General Maintenance Manutenzione generale Mantenimiento general メンテナンス 一般维护 Allgemeine Wartung Maintenance générale • i1iOには、i1Pro装置に付属する白色基準板に対し、第2の基準板として使用する dispositivo con paño humedecido en agua y solución jabonosa suave, si es necesario. 長期間安定した素材のセラミック白色リファレンスタイルが備わっています。白 色基準板は常にきれいな状態で保管してください。必要であれば、白色基準板の • La zona electrostática del i1iO debe limpiarse con un paño limpio humedecido con alcohol セラミックタイルをイソプロピルアルコールを付けた柔らかい布で拭いてくださ...
- Page 21 Use the i1Diagnostics software if you believe your i1iO is not functioning properly. In this case please perform the following steps: 诊断软件 1. Launch i1Diagnostics Software. 如果您认为 i1Pro 工作不正常,请使用 i1 诊断软件。 Verwenden Sie das Programm i1Diagnostics, wenn Sie befürchten, dass das i1iO nicht richtig 在此情况下,请执行以下步骤: funktioniert. Gehen Sie bitte folgendermaßen vor: 启动...
- Page 22 2. Perform a functionality check by following the instructions given from the i1Diagnostics su problema específico. Software. 3. If i1Diagnostics software reports an error store the test report and contact your nearest X-Rite 2. i1診断ソフトウェアから指示される手順に従って機能チェックを実行します。 3. エラーが報告された場合、テストレポートを保存し、エックスライト社の東 Support Center. As an alternative you can also take a look at our online support resources 京サービスセンターまでお問い合わせください。トラブルシューティングは...
-
Page 23: Minimum System Requirements
Requisiti minimi di Requisitos míni- Configuration Minimum System Requirements Minimalvoraussetzungen 最低系统要求 システム必要条件 système requise sistema mos del sistema Macintosh ® für Updates. Für die Verwendung von zwei Monitoren werden entweder zwei separate Grafikkarten oder eine Karte, die auf beiden Anschlüssen LUT unterstützt, benötigt. Für die Installation und Deinstallation der Software muss der Intel CPU, Mac OS X 10.5.8, 10.6.8 or 10.7 (with latest upgrades installed), 1 GB of available RAM, 2 GB ®... - Page 24 Requisiti minimi di Requisitos míni- Configuration Minimum System Requirements Minimalvoraussetzungen 最低系统要求 システム必要条件 système requise sistema mos del sistema Windows Macintosh ® ® Intel® CPU、 Mac OS X 10.5.8、 10.6.8、 10.7 [最新のアップグレードがインストールされたもの]、 1 GB RAM、 2 Processore Intel ® Pentium ® 4 o AMD Athlon XP ™...
-
Page 25: Service And Support
• Free and unlimited access to the X-Rite on-line Help Desk, which includes detailed and helpful support articles of a warranty. X-Rite shall in no event be liable for losses or costs to Buyer in manufacturing, or for Buyer‘s overhead, related to frequently asked questions. - Page 26 X-Rite bietet eine zwölfmonatige (12) Gewährleistungsfrist ab Kaufdatum für Material- und Verarbeitungsmängel, es sei Sie werden an Ihrem neuen X-Rite Produkt viel Freude haben. Wir möchten Ihnen hiermit jedoch zusätzlich Support und denn, es gelten anders lautende nationale Gesetze und Bestimmungen. Während dieser Zeit werden defekte Teile nach Training für die komplexen Workflows und häufig wechselnden Prozesse anbieten, die Sie bedarfsgesteuert abrufen...
-
Page 27: Service Et Support
Pour bénéficier du support technique, des services couverts par la garantie et recevoir les dernières mises à jour Visitez le site Web de l’i1iO à l’adresse http://xrite.com pour localiser le centre de services X-Rite le plus proche de chez logicielles et des bulletins d’informations sur le produit, vous devez enregistrer votre nouveau système i1iO à l’adresse vous ou contactez votre revendeur X-Rite pour plus d’informations. -
Page 28: Assistenza E Supporto
• Accesso gratuito al call center e al supporto via e-mail di X-Rite nel corso del periodo di garanzia per i problemi qualsiasi delle garanzie precedenti. Non ci sono garanzie che estendono, in modo esplicito o implicito, quando espresso che derivano dall’uso generale del prodotto, subordinatamente ai requisiti seguenti:... -
Page 29: Servicio Y Asistencia
Por ningún motivo intente desmontar el dispositivo i1iO de X-Rite. El desmontaje no autorizado del instrumento anulará todas las solicitudes de garantía. Póngase en contacto con el Soporte o el Centro de Soporte de X-Rite más próximo si considera que el instrumento ya no funciona o bien no funciona correctamente. - Page 30 サービス/サポート 製品保証 限定保証 サービスセンター テクニカルサポート、 製品保証、 最新のソフトウェアアップデートや製品ニュースをご希望の方 i1iOの製品情報はwww.xrite.com をご参照ください。 は、 www.xrite.com/registerでi1iOシステムの製品登録を行ってください。 サポートオプション 限定保証 弊社では、 今日の複雑で変化し続けるワークフローに対するためにサポートおよびトレーニングが エックスライト社は、 本製品に対して購入日から12ヶ月の構成および製造の保証を提供します。 保証 不可欠と考えています。 そこで、 登録されたユーザーの皆様には、 次のオンラインの無償サポートツ 期間内は欠陥部品を無償で交換または修理いたします。 ( 消耗品は除外。 ) この保証は、 出荷による損 ールをご用意しています。 害、 改造、 不注意な取り扱いによる製品には適用しません。 上記保証の破損に対するエックスライト社 の限定義務は、 いかなる部品の無償修理または交換とし、 保証期間内に欠陥品と証明され、 かつエッ これらのサポートツールの詳細は次のリンクをご覧ください-> www.xrite.com/support/i1Profiler クスライト社が合理的に納得できるものに限ります。 エックスライト社による修理または交換により保 •...
- Page 31 服务和支持 保修 保修注册 重新鉴定 服务中心请访问 i1iO 网站:http://xrite.com ,查询附近的爱色丽服务中心或联系您的爱色丽经销商 要想获取技术支持、保修服务及最新软件更新和产品新闻,请登录:www.xrite.com/register,注册 您的 i1iO 新系统。 以获取详细信息。 保修条款 支持选项 除非本地法规另行规定,自购买之日起十二 (12) 个月内,如果此产品发生物料和工艺上的缺陷, 我们相信,对于您新购买的爱色丽产品,您一定相当满意。同时,我们深谙按需支持和培训在当 爱色丽承担保修义务。在保修期间,爱色丽将自行判断免费更换还是免费维修有缺陷的产品部 今快速发展的复杂工作流程中的必要性。因此,我们将向注册用户提供以下在线和免费支持工 件。(消耗品不在保修范围内。)本保修条款不适用于交付后出现的损坏、任何方式的更改或因 具。 忽视处置而造成损坏的任何产品。对于违反上述保修条款的情况,爱色丽全权负责免费维修或替 换在此保修期内被合理断定为存在缺陷的任何部件。爱色丽所作的任何维修或更换,不会使其它 支持工具网址:www.xrite.com/support/i1Profiler 过期的保修承诺重新生效,也不会使同一保修期限的相应顺延。在任何情况下,对于因违背前述 • 可无限次免费访问 i1Profiler 互动培训视频;也可通过 i1Profiler 软件访问培训视频。 任何保修条款而对买方的制造成本、管理费用、其它花费、利益损失、信誉损失、或对于任何其 • 可无限次免费访问爱色丽在线服务台,该服务台提供了与常见问题有关的帮助支持文章。 它人身或财产造成的特殊、间接、继发、偶然或其它损失,爱色丽概不负责。这里所规定的保修 • 如满足下述条件,可在保修期间免费访问爱色丽的电邮支持和电话服务中心,从而咨询常见 承诺不衍生任何其它明示或暗示的保修条款。此处明确阐述的保修条款将替代所有其它明示或暗 的产品使用问题:...
- Page 32 Specification China RoHS Disclosure Table Technische Daten Spécifications Specifica Especificación 仕様 技术规格 Test chart: i1iO supports optimized testcharts for high-speed scanning measurement and standard testcharts for patch-mode measurement Media length: 230 mm (9”) Media width: 320 mm (12.6”) Media thickness: max.
- Page 33 Phone (+41) 44 842 24 00, Fax (+41) 44 842 22 22 Corporate Headquarters 36/F, 169 Electric Road, Hong Kong, China Asia Phone (+852) 2 568 6283, Fax (+852) 2 885 8610 Please visit www.xrite.com for a local office near you. TM Trademark of X-Rite. Part No. 421394 [02/2012]...