Table des Matières
Publicité
Les langues disponibles
Les langues disponibles
Liens rapides
INFORMAZIONI COMMERCIALI PER I CONSUMATORI
COMMERCIAL INFORMATION FOR THE CONSUMER
INFORMATIONS COMMERCIALES POUR LE CLIENT
INFORMACIONES COMERCIALES PARA EL CLIENTE
HANDELSINFORMATIONEN FÜR DEN KUNDEN
COMMERCIËLE INFORMATIES VOOR DE KLANT
ISTRUZIONI PER L'USO S-DD2
IT
INSTRUCTIONS FOR USE S-DD2
EN
INSTRUCTIONS POUR L'EMPLOI S-DD2
FR
ISTRUCCIÓNES DE USO S-DD2
ES
BEDIENUNGSANLEITUNG S-DD2
DE
GEBRUIKSAANWIJZIGING S-DD2
NL
ENERGY LABEL
INFORMAZIONI TECNICHE
TECHNICAL INFORMATION
INFORMATION TECHNIQUES
INFORMACIONES TÉCNICAS
TECHNISCHE INFORMATIONEN
TECHNISCHE INFORMATIES
TYPE: FSEE
Publicité
Table des Matières

Manuels Connexes pour Sirius S-DD2 FSEE


Sommaire des Matières pour Sirius S-DD2 FSEE
- Page 1 INFORMAZIONI COMMERCIALI PER I CONSUMATORI COMMERCIAL INFORMATION FOR THE CONSUMER INFORMATIONS COMMERCIALES POUR LE CLIENT INFORMACIONES COMERCIALES PARA EL CLIENTE HANDELSINFORMATIONEN FÜR DEN KUNDEN COMMERCIËLE INFORMATIES VOOR DE KLANT ISTRUZIONI PER L’USO S-DD2 INSTRUCTIONS FOR USE S-DD2 INSTRUCTIONS POUR L’EMPLOI S-DD2 ISTRUCCIÓNES DE USO S-DD2 BEDIENUNGSANLEITUNG S-DD2 GEBRUIKSAANWIJZIGING S-DD2...
- Page 3 Il simbolo sul prodotto o sulla confezione indica che il prodotto non deve essere con- siderato come un normale rifiuto domestico, ma deve essere portato nel punto di raccolta ap- propriato per il riciclaggio di apparecchiature elettriche ed elettroniche. Provvedendo a smaltire questo prodotto in modo appropriato, si contribuisce a evitare potenziali conseguenze negative per l’ambiente e per la salute, che potrebbero derivare da uno smaltimento inadeguato del prodotto.
- Page 4 NL Het symbool op het product of op de verpakking wijst erop dat dit product niet als huishoudafval mag worden behandeld. Het moet echter naar een plaats worden gebracht waar elektrische en elektronische apparatuur wordt gerecycled. Als u ervoor zorgt dat dit product op de correcte manier wordt verwijderd, voorkomt u mogelijk voor mens en milieu negatieve gevol- gen die zich zouden kunnen voordoen in geval van verkeerde afvalbehandeling.
-
Page 5: Table Des Matières
INDICE 1/ ALL’ATTENZIONE DELL’UTENTE - Istruzioni di sicurezza - Descrizione dell’apparecchio 2 / COME INSTALLARE LA CAPPA - Smontaggio del filtro cartuccia alluminio - Montaggio del filtro carbone - Connessione elettrica della cappa 3 / COME FUNZIONA LA CAPPA 4 / COME PULIRE LA CAPPA 5 / ANOMALIE DI FUNZIONAMENTO 6 / SERVIZIO DI ASSISTENZA POST VENDITA... -
Page 6: 1/ All'attenzione Dell'utente
1/ ALL’ATTENZIONE DELL’UTENTE Importante: conservare le presenti istruzioni d’uso con l’apparecchio. Se l’apparecchio dovesse essere venduto o ceduto ad altri, assicurarsi che esso sia accompagnato dalle presenti istruzioni. Vi ringraziamo di prendere nota di questi consigli prima di installare e utilizzare l’apparecchio. -
Page 7: Descrizione Dell'apparecchio
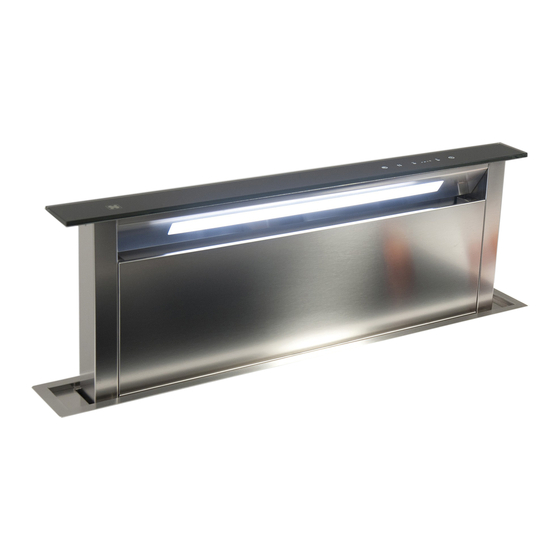
1/ ALL’ATTENZIONE DELL’UTENTE - DESCRIZIONE DELL’APPARECCHIO... -
Page 8: Come Installare La Cappa
2/ COME INSTALLARE LA CAPPA 1) Prima di procedere nell’installazione dell’apparecchio verificare che tutti i componenti non sia- no danneggiati, in caso contrario contattare il rivenditore e non proseguire con l’installazione. Inoltre leggere attentamente tutte le istruzioni di seguito riportate. - Utilizzare un tubo di evacuazione aria che abbia la lunghezza massima non superiore a 5 metri. -
Page 9: Smontaggio Del Filtro Antigrasso - Montaggio Del Filtro Carbone
Premere il tasto ON/1 (Fig. 22B per SDD2 e 15H per SDD2 TC), inizia l’estrazione dell’unità filtran- te, raggiunti i 18 cm di altezza dell’unità filtrante, premere il tasto ON/1 (SDD2) OFF (SDD2 TC) per arrestare la salita; successivamente premere il tasto TIMER ed entro due secondi il tasto OFF. A questo punto il Downdraft esegue la calibrazione dell’unità... -
Page 10: Connessione Elettrica Della Cappa
- CONNESSIONE ELETTRICA DELLA CAPPA AVVERTIMENTO: Posizionare la scatola metallica contenente i componenti elettronici ad una distanza non inferiore a 65 cm dal piano cottura a gas o comunque a 65 cm dal punto di aspirazione della cappa. RACCOMANDAZIONE: Vi raccomandiamo di installare la scatola metallica contenente i componenti elettronici almeno a 10 cm dal suolo e ad una distanza sufficente da tutte le fonti di calore (es: lato di un forno, o piano cottura). -
Page 11: Come Funziona La Cappa
3/ COME FUNZIONA LA CAPPA Modello SDD2 VERSIONE STANDARD (Fig. 22) A: Interruttore discesa pannello aspirante / OFF Ha la funzione di chiusura del pannello aspirante sia in forma totale che su posizioni interme- die al di sopra di 180mm dal piano cottura. Durante la chiusura il pannello aspirante rimane in funzione alla velocità... - Page 12 Altre funzioni: - Dopo 30 ore di funzionamento dell’apparecchio la pulsantiera evidenzia la saturazione dei filtri antigrasso mediante il lampeggio dei led, per il reset premere il tasto timer. - Dopo 4 ore di funzionamento continuo dall’ultima impostazione l’apparecchio si spegne e si chiude automaticamente.
-
Page 13: Come Pulire La Cappa
4/ COME PULIRE LA CAPPA Una manutenzione accurata è una garanzia di buon funzionamento e buona resa di un appa- recchio nel corso del tempo. La cappa dovrà essere scollegata dall’alimentazione elettrica, sia quando si stacca la presa, sia quando si attiva il salvavita, prima di rimuovere i filtri metallici. Dopo la puli- zia, bisogna ricollocare i filtri metallici come da istruzioni. -
Page 14: Anomalie Di Funzionamento
5/ ANOMALIE DI FUNZIONAMENTO SINTOMO SOLUZIONE Verificate che: • non vi sia un black out di corrente • sia stata effettivamente selezionata una certa velocità. • Il pannello sia correttamente agganciato. La cappa non • La connessione a 9 poli sia ben inserita. funziona... • Il tasto rosso di reset posizionato sopra la scatola impianto elettri- co sia premuto. • Nella connessione 9 polo accertarsi che i fili siano ben inseriti nel connettore stesso. (In fase di collegamento la troppa pressione esercitata potrebbe piegare i contatti) Verificate che: • la velocità motore selezionata sia sufficiente per la quantità di fumi e di vapori presenti... - Page 15 CONTENTS 1/ TO THE ATTENTION OF THE USER -Safety instructions - Description of the applianc 2 / INSTALLING THE HOOD - Mounting the hood - Removal of the filter cartridge - Mounting the filter cartridge - Electrical hook-up of the hood 3 / HOW THE HOOD WORKS 4 / CLEANING THE HOOD 5 / OPERATIONAL ANOMALIES...
-
Page 16: 1/ To The Attention Of The User
1/ TO THE ATTENTION OF THE USER Important: keep these instructions for use with the appliance. If the appliance should be sold or passed on to others, make sure that the instructions are passed on with it. We thank you for taking note of these suggestions before installing and using the appliance. They have been written for your personal safety and the safety of others. -
Page 17: Description Of The Applianc
1/ TO THE ATTENTION OF THE USER - DESCRIPTION OF THE APPLIANCE... -
Page 18: Installing The Hood
2/ INSTALLING THE HOOD 1) Before starting the appliance installation, please check that all components are not dam- aged, in such a case contact your retailer and do not carry out installation. Furthermore, please read carefully all of the following installation instructions. - Use an exhausting pipe whose maximum length does not exceed 5 meters. -
Page 19: Utilisation
Pushing the ON/1 button (Fig. 22B for SDD2 and 15H for SDD2 TC) the aspiration panel rises. After it has reached a height of 180 mm from the cooketop, press OFF, to stop the extraction then the Timer and after 2 sec. the OFF button. The downdraft will carry out the calibration of its aspiration panel rising and retracting for some centimeters. -
Page 20: Electrical Hook-Up Of The Hood
- ELECTRIAL HOOK UP OF THE HOOD WARNING: Place the metal box containing the electronic components at a distance of no less than 65 cm from gas-operated cook tops or in any case, 65 cm from the extraction point of the hood. RECOMMENDATION: We recommend installing the metal box containing the electronic components at least 10 cm above floor level and at a suitable distance from all heat sources (e.g. -
Page 21: How The Hood Works
3/ HOW THE HOOD WORKS Model S.DD2 STANDARD VERSION (Fig. 22) A: Extraction panel down/OFF switch This serves to close the extraction panel either completely or in intermediate positions above 180 mm from the cook top. When the extraction panel is being closed, it will remain in opera- tion until it reaches 180 mm above the cook top. - Page 22 Other functions: - After 30 hours of appliance operation, the push button panel indicates saturation of the grease filters by the buttons flashing. To reset, press the timer button. - After 4 hours of continuous operation from the last setting, the appliance turns off and closes automatically.
-
Page 23: Cleaning The Hood
4/ CLEANING THE HOOD Careful maintenance helps guarantee proper operation and good results from an appliance over time. The hood must be unplugged from the electrical power source, both by unplugging the appliance from the socket as well as de-activating the breaker, before removing the metal filters. -
Page 24: Operational Anomalies
5/ OPERATIONAL ANOMALIES SYMPTOM SOLUTION Check that: • there is not a power outage. • a specific speed has actually been selected. • The panel is hung properly. The hood does not • The 9 pole connection is inserted properly. work... • The red reset key, found over the electric system box, is pushed. • Make sure that the wires are inserted properly in the 9 pole con- nection, in the connector itself. (During the connection phase, an excessive pressure could bend the contacts.) Check that: • the motor speed selected is sufficient for the quantity of fumes steam present. - Page 25 SOMMAIRE 1/ A L’ATTENTION DE L’UTILISATEUR - Consignes de sécurité - Description de votre appareil 2 / COMMENT INSTALLER VOTRE HOTTE - Montage de votre hotte - Montage et démontage des filtre cassette - Montage et démontage des filtres charbon - Raccordement de votre hotte 3 / COMMENT FONCTIONNE VOTRE HOTTE 4 / COMMENT NETTOYER VOTRE HOTTE...
-
Page 26: 1/ A L'attention De L'utilisateur
1/ A L’ATTENTION DE L’UTILISATEUR Important: Conservez cette notice d’utilisation avec votre appareil. Si l’appareil devait être vendu ou cédé à une autre personne, assurez-vous que la notice d’utilisation l’accompagne. Merci de prendre connaissance de ces conseils avant d’installer et d’utiliser votre appareil. Ils ont été... -
Page 27: Description De Votre Appareil
1/ A L’ATTENTION DE L’UTILISATEUR - DESCRIPTION DE VOTRE APPAREIL... -
Page 28: Comment Installer Votre Hotte
2/ COMMENT INSTALLER VOTRE HOTTE 1) Avant de commencer l’installation de l’appareil vérifier si tous les composants ne sont pas endommagés; dans le cas contraire, contacter le revendeur et ne pas poursuivre l’installation. En outre, lire attentivement toutes les instructions suivantes : - Utiliser un tuyau d’évacuation d’une longueur maximale de 5 mètres. -
Page 29: Démontage Du Filtre Anti-Graisse - Montage Et Demontage Filtres Charbon
Frapper la touche ON/1 (Fig. 22B pour SDD2 et 15 pour SDD2 TC), l’extraction de l’unité de fil- trage démarre; après avoir atteint les 18 cm de hauteur de l’unité de filtrage, frapper à nouveau la touche ON/1 (SDD2) OFF (SDD2 TC) pour interrompre la montée; frapper ensuite la touche TIMER (Fig. -
Page 30: Raccordement De Votre Hotte
- RACCORDEMENT DE VOTRE HOTTE AVERTISSEMENT: Positionner la boîte métallique contenant les composants électroniques à une distance supérieure à 65 cm par rapport au plan de cuisson à gaz ou, dans tous les cas, à 65 cm du point d’aspiration de la hotte. RECOMMANDATION : Nous conseillons d’installer la boîte métallique contenant les com- posants électroniques à... -
Page 31: Comment Fonctionne Votre Hotte
3/ COMMENT FONCTIONNE VOTRE HOTTE Modèle S.DD2 VERSION STANDARD (Fig. 22) A: Interrupteur descente panneau aspirant / OFF Il a la fonction de fermeture du panneau aspirant , soit sous forme totale, soit sur des posi- tions intermédiaires à plus de 180 mm au dessus du plan de cuisson. Pendant la fermeture, le panneau aspirant demeure en fonction, à... -
Page 32: Temporisateur
Autres fonctions: - Après 30 heures de fonctionnement de l’appareil, le clavier à poussoirs signale la saturation des filtres anti-graisse à travers le clignotement des voyants lumineux; pour le reset, frapper la touche minuterie. - Après 4 heures de fonctionnement continu depuis la dernière programmation, l’appareil s’éteint et se ferme automatiquement. -
Page 33: Comment Nettoyer Votre Hotte
4/ COMMENT NETTOYER VOTRE HOTTE Un entretien soigné est une garantie de bon fonctionnement et de bon rendement de votre appareil dans le temps. La hotte doit être mise hors tension, soit en retirant la prise, soit en actionnant le disjoncteur, avant que les filtres métalliques soient enlevés. Après le nettoyage, les filtres métalliques doivent être de nouveau fixés conformément aux instructions. -
Page 34: Anomalies De Fonctionnement
5/ ANOMALIES DE FONCTIONNEMENT SYMPTOMES SOLUTIONS Vérifiez que: • il n’y a pas de coupure de courant. • une vitesse a été effectivement sélectionnée. • Le panneau n’est pas correctement accroché. La hotte ne fonc- • La connexion à 9 pôles n’est pas correctement insérée. tionne pas... • La touche rouge de reset positionnée sur la boîte installation élec- trique n’a pas été pressée. • S’assurer que dans la connexion à 9 pôles les fils du connecteur sont bien insérés. - Page 35 ÍNDICE 1/ A LA ATENCIÓN DE LOS SEÑORES USUARIOS - Instrucciones de seguridad - Descripción del aparato 2 / CÓMO INSTALAR LA CAMPANA - Montaje de la campana - Desmontaje del filtro de cartucho - Montaje del filtro de carbono - Enlaces eléctricos de la campana 3 / CÓMO FUNCIONA LA CAMPANA 4 / CÓMO LIMPIAR LA CAMPANA...
-
Page 36: 1/ A La Atención De Los Señores Usuarios
1/ A LA ATENCIÓN DE LOS SEÑORES USUARIOS Importante: conservar estas instrucciones de uso junto con el aparato. Si el aparato se tuviera que vender o ceder a otras personas, asegurarse de que vaya acompañado de estas instrucciones. Agradecemos que tome nota de estos consejos antes de instalar y utilizar el aparato. -
Page 37: Descripción Del Aparato
1/ A LA ATENCIÓN DE LOS SEÑORES USUARIOS - DESCRIPCIÓN DEL APARATO... -
Page 38: Cómo Instalar La Campana
2/ COMO INSTALAR LA CAMPANA 1) Antes de instalar el equipo, comprobar que todos los componentes no esten dañados, de lo contrario póngase en contacto con el vendedor y no seguir la instalación. También, por favor, lea todas las instrucciones que aqui se encuentran. - Utilice un tubo de evacuación de aire que tenga una longitud máxima de no más de 5 metros - Limite el número de curvas en la canalización ya que cada curva reduce la eficacia de... - Page 39 Apretar el botón ON/1 (Fig. 22B para SDD2 e 15H para SDD2 TC), inicia la extracción de la unidad filtrante, alcanzados los 18 cm de altura de la unidad filtrante, apretar de nuevo el botón OFF para detener la subida; sucesivamente apretar el botón TIMER (Fig. 15) y antes de dos segundos la tecla OFF.
-
Page 40: Conexión Eléctrica De La Campana
- CONEXIÓN ELÉCTRICA DE LA CAMPANA ADVERTENCIA: Colocar la caja metálica que contiene los componentes electrónicos a una distancia no inferior a 65 cm desde la superficie de cocción con gas o en cualquier caso a 65 cm desde el punto de aspiración de la campana. RECOMENDACIÓN: Aconsejamos instalar la caja metálica que contiene los componentes electrónicos por lo menos a 10 cm desde el suelo y a una distancia suficiente de todas las fuentes de calor (Ej.: lado de un horno, o superficie de cocción). -
Page 41: Cómo Funciona La Campana
3/ COMO FUNCIONA LA CAMPANA Modelo S.DD2 VERSIÓN ESTÁNDAR (Fig. 22) A: Interruptor descenso panel aspirante / OFF Tiene la función de cierre del panel aspirante tanto de forma total como en posiciones interme- dias por encima de 180mm respecto a la encimera. Durante el cierre, el panel aspirante sigue en funcionamiento a la velocidad configurada hasta la altura de 180mm respecto a la encimera. - Page 42 Otras funciones: - Después de 30 horas de funcionamiento del aparato la botonera muestra la saturación de los filtros antigrasa mediante el parpadeo de los led, para el reset apretar el botón tempori- zador. - Después de 4 horas de funcionamiento continuado desde la última programación el aparato se apaga y se cierra automáticamente.
-
Page 43: Cómo Limpiar La Campana
4/ CÓMO LIMPIAR LA CAMPANA Un mantenimiento cuidadoso es una garantía de buen funcionamiento y buen rendimento de un aparato a lo largo del tiempo. La campana se tendrá que desconectar de la alimentación eléctrica, ya sea cuando se desconecte el enchufe, que cuando se acciona el interruptor diferencial, antes de quitar los filtros metálicos. -
Page 44: Defectos De Funcionamiento
5/ DEFECTOS DE FUNCIONAMIENTO SÍNTOMA SOLUCIÓN Compruebe que: • No haya un black out de corriente • haya sido efectivamente seleccionada una cierta velocidad. • El panel estè correctamente enganchado. campana • La conexión a 9 polos esté totalmente inserida. funciona... • La tecla de reinicio roja situada sobre el cuadro de sistema eléctrico sea presionada. • En la conexión a 9 polos, asegurarse de que los cables estén bien inseridos en el mismo conector. (En fase de conección demasiada presión ejercida podría doblar los contactos) Compruebe que: • la velocidad motor seleccionada sea suficiente para la cantidad de humos y vapores presentes... - Page 45 INHALT 1/ ALLGEMINE HINWEISE - Sicherheitshinweise - Gerätebeschreibung 2 / INSTALLATION DER DUNSTABZUGSHAUBE - Einbau der Dunstabzugshaube - Herausnehmen der Filterpatrone - Einsetzen der Kohlefilter - Stromanschluss der Dunstabzugshaube 3 / FUNKTIONSWEISE DER DUNSTABZUGSHAUBE 4 / REINIGUNG DER DUNSTABZUGSHAUBE 5 / UNREGELMÄSSIGKEITEN IN DER FUNKTIONSWEISE 6 / KUNDENDIENST...
-
Page 46: 1/ Allgemine Hinweise
1/ ALLGEMINE HINWEISE Wichtig: Bewahren Sie die vorliegende Bedienungsanleitung mit dem Gerät auf. Sollte das Gerät verkauft oder abgegeben werden, vergewissern Sie sich, dass die mit der vorliegenden Be- dienungsanleitung geschieht. Wir danken Ihnen dafür, dass Sie die Hinweise vor der Installation und Inbetriebnahme des Gerätes beachten. -
Page 47: Gerätebeschreibung
1/ ALLGEMINE HINWEISE - GERÄTEBESCHREIBUNG... -
Page 48: Installation Der Dunstabzugshaube
2/ INSTALLATION DER DUNSTABZUGSHAUBE 1) Vor dem Einbau des Geräts vergewissern Sie sich, dass alle Bestandteile nicht beschädigt sind. Anders- falls, bitte den Verkäufer kontaktieren und den Einbau abbrechen. Bitte alle folgenden Anweisungen sorgfältig lesen. - Ein Abluftrohr verwenden, dass nicht länger als 5 Meter ist. - Die Zahl der Rohrbögen im Abluftkanal vermeiden, da jeder Rohrbogen die Leistungsfähigkeit um ein linear Meter senkt (z.B. -
Page 49: Entfernung Des Fettfilters - Montage Du Filtre Charbon
Ausfahren der Filtereinheit. Wenn diese 18 cm Höhe überschritten hat, die Taste OFF betätigen (Abb. 15), um das Hochlaufen zu stoppen. Danach die Timer-Taste (Abb. 8) und innerhalb von zwei Sekunden die Taste OFF (Abb. 15) drücken. Nun führt die Versenkklappe die Kalibrierung der Filtereinheit aus, indem sie sie um einige Zentimeter nach oben und unten verfährt. -
Page 50: Elektroanschluss
- SROMANSCHLUSS DER DUNSTABZUGSHAUBE HINWEIS: Positionieren Sie das Metallgehäuse mit den elektronischen Bauteilen in einem Abstand von mindestens 65 cm von der Gasherdplatte bzw. von Absaugpunkt der Haube. EMPFEHLUNG: Wir empfehlen Ihnen, das Metallgehäuse mit den elektronischen Bauteilen mindestens 10 cm über dem Boden und in ausreichender Entfernung von Wärmequellen jeglicher Art (z.B. -
Page 51: Funktionsweise Der Dunstabzugshaube
3/ FUNKTIONSWEISE DER DUNSTABZUGSHAUBE Modell S.DD2 STANDARDAUSFÜHRUNG (Abb. 22) A: Schalter Herunterfahren Absaugtafel / OFF Dieser hat die Aufgabe, die Absaugtafel sowohl ganz als auch in Zwischenstufen oberhalb von 180 mm ab Kochplatte zu schließen. Während des Schließvorgangs läuft die Absaugung mit der voreingestellten Geschwindigkeit bis auf 180 mm über der Kochplatte weiter. - Page 52 Weitere Funktionen: - Nach 30 Betriebsstunden des Geräts wird am Bedienfeld die Sättigung des Fettfilters durch Blinken der Leds angezeigt. Zum Rücksetzen ist die Timer- Taste zu betätigen. - Nach 4 Stunden Dauerbetrieb nach der letzten Einstellung wird das Gerät automatisch abge- schaltet und eingefahren.
-
Page 53: Reinigung Der Dunstabzugshaube
4/ REINIGUNG DER DUNSTABZUGSHAUBE Eine sorgfältige Pflege garantiert auf Dauer eine gute Leistung und Funktionstüchtigkeit des Geräts. Die Dunstabzugshaube muss vom Stromnetz getrennt werden, bevor die Metallfilter entnommen werden können. Nach der Reinigung sind die Metallfilter wie in der Anlei- tung beschrieben wieder einzusetzen. -
Page 54: Unregelmässigkeiten In Der Funktionsweise
5/ UNREGELMÄSSIGKEITEN IN DER FUNKTIONSWEISE ANZEICHEN LÖSUNG Versichern Sie sich, dass: • kein Stromausfall besteht, • die gewünschte Betriebsstufe wirklich ausgewählt wurde. • Die Schutzplatte ist nicht richtig eingesetzt. Die Abzugshaube • Der 9-polige Steckverbinder ist nicht richtig angeschlossen. funktioniert nicht. • Die rote Reset-Taste, die sich über dem Elektrokästchen befindet, ist nicht gedrückt worden. • Die Innenkontakte des 9-poligen Steckverbinders sind nicht richtig miteinander verbunden. (Während des Anschlusses kann der aus- geübte Druck die Kontakte biegen). Versichern Sie sich, dass: • die Motorgeschwindigkeit für die Rauch- und Dampfmenge hoch genug gewählt ist,... - Page 55 INHOUD 1/ TER ATTENTIE VAN DE KLANT - Veiligheidsnormen - Beschrijving van het apparaat 2 / INSTALLEREN VAN DE AFZUIGKAP - Monteren van de afzuigkap - Loshalen van het filter - Monteren van het koolstoffilter - Elektrische aansluiting van de afzuigkap 3 / WERKING VAN DE AFZUIGKAP 4 / REINIGEN VAN DE AFZUIGKAP 5 / EVENTUELE STORINGEN...
-
Page 56: 1/ Ter Attentie Van De Klant
1/ TER ATTENTIE VAN DE KLANT Belangrijk: bewaar altijd deze gebruiksaanwijzing samen met de afzuigkap. Als het ap- paraat wordt verkocht of afgestaan aan anderen moet ze altijd vergezeld gaan van deze ge- bruiksaanwijzing. Wij bedanken u dat u deze aanwijzingen doorleest voordat u het apparaat gaat installeren en gebruiken. -
Page 57: Beschrijving Van Het Apparaat
1/ TER ATTENTIE VAN DE KLANT - BESCHRIJVING VAN HET APPARAAT... - Page 58 2/ INSTALLING THE HOOD 1) Voordat u het apparaat installeert, controleert u of er geen beschadigde componenten zijn. Als dit toch het geval is, neemt u contact op met de verkoper en installeert u het apparaat niet. Lees bovendien aandachtig alle hierna volgende instructies. - Gebruik voor de luchtafvoer een buis die niet langer is dan 5 meter - Beperk het aantal bochten in de buisleiding want elke bocht vermindert de afzuigefficiëntie met een waarde gelijk aan een strekkende meter pijp.
-
Page 59: Vetfilter Uit Het Apparaat Halen - Monteren Van Het Recirculatiefilter
seconden op de toets OFF. Op dit moment voert de Downdraft het kalibreren van de filtereenheid uit door het enkele centimeters naar boven en naar beneden te verplaatsen. Tijdens deze fase knipperen de toetsen van het toetsenbord. Aan het einde van het zelf kalibreren keert de filtereenheid terug naar de vorige positie en de toetsen stoppen met het knipperen. -
Page 60: Elektrische Aansluiting Van De Afzuigkap
- LEKTRISCHE AANSLUITING VAN DE AFZUIGKAP WAARSCHUWING: Zet de metalen doos waarin de elektronische componenten zijn ge- plaatst op een afstand niet minder dan 65 cm van de gaskookplaat of in iedere geval op 65 cm afstand van het zuigpunt van de afzuigkap. AANBEVELING: Het wordt aanbevolen om de catola metaal met elektronische componen- tenop tenminste 10 cm afstand van de vloer te plaatsen en op voldoende afstand van warmtebronnen (bijv: zijkant van de oven of kookplaat). -
Page 61: Werking Van De Afzuigkap
3/ WERKING VAN DE AFZUIGKAP Model S.DD2 STANDAARD VERSIE (Fig. 22) A: Schakelaar dalen zuigpaneel / OFF Heeft als functie het zuigpaneel te sluiten, helemaal of in een tussenpositie boven 180mm afstand van de kookplaat. Tijdens het sluiten blijft het zuigpaneel in werking op de ingestelde snelheid tot 180mm afstand van de kookplaat. - Page 62 Andere functies: - Na 30 werkuren van het apparaat geeft het toetsenbord de verzadiging van de anti-vetfilters aan door het knipperen van de leds, voor de reset druk op de toets timer. - Na 4 werkuren zonder onderbrekingen na de laatste instelling van het apparaat gaat het ap- paraat vanzelf uit en zakt het automatisch.
-
Page 63: Reinigen Van De Afzuigkap
4/ REINIGEN VAN DE AFZUIGKAP Goed onderhoud is een garantie voor de goede werking en een goede efficiëntie van het ap- paraat in de loop van de tijd. De kap moet afgekoppeld worden van de stroomtoevoer, zowel als de stekker uit het stopcontact wordt getrokken als wanneer de herstelzekering wordt aangezet, voordat de metalen filters worden verwijderd. -
Page 64: Serviceafdeling
5/ FUNCTIONERINGSTORINGEN SYMPTOOM OPLOSSING Controleren of: • er een stroom black-out is • er werkelijk een snelheid gekozen is. • Controleer of het paneel goed vastgemaakt is. De afzuigkap werkt • Controleer of de connector met 9 pinnen goed aangesloten is. niet... • Controleer of de rode resettoets op de contactdoos ingedrukt is. • Controleer in de connector met 9 pinnen of de draden goed in de connector zitten. (Tijdens het aansluiten kan een te hoge druk- kracht de contacten verbuigen). Controleren of: • de gekozen motorsnelheid voldoende is voor de hoeveelheid rook en dampen die aanwezig zijn • de keuken voldoende gelucht wordt zodat lucht opgenomen kan De afzuigkap levert... - Page 67 14 bis...