Publicité
Les langues disponibles
Les langues disponibles
Liens rapides
DRE
DRE PLUS
DRE
DRE PLUS
Electric Commercial Water Heater
Electric Commercial Water Heater
Scalda Acqua Elettrico
Scalda Acqua Elettrico
Electrische Commerciele Boiler
Electrische Commerciele Boiler
Elektryczny Przemysłowy Podgrzewacz Wody
Elektryczny Przemysłowy Podgrzewacz Wody
Chauffe-eau Tertiaire Électrique
Chauffe-eau Tertiaire Électrique
DRE 52/80
DRE PLUS 52/80
DRE 52/80
DRE PLUS 52/80
Installation, User and Service Manual
Manuale Installazione, d'uso e manutenzione
Installation, User and Service Manual
Manuale Installazione, d'uso e manutenzione
Installatie-, Gebruikers- en Servicehandleiding
Instrukcja Serwisu, Obsługi I Montazu
Installatie-, Gebruikers- en Servicehandleiding
Instrukcja Serwisu, Obsługi I Montazu
Manuel d'installation, d'utilisation et d'entretien
Manuel d'installation, d'utilisation et d'entretien
Publicité
Chapitres

Manuels Connexes pour AO Smith DRE 52


Sommaire des Matières pour AO Smith DRE 52
- Page 1 Electrische Commerciele Boiler Elektryczny Przemysłowy Podgrzewacz Wody Elektryczny Przemysłowy Podgrzewacz Wody Chauffe-eau Tertiaire Électrique Chauffe-eau Tertiaire Électrique DRE PLUS 52/80 DRE 52/80 DRE PLUS 52/80 DRE 52/80 Manuale Installazione, d’uso e manutenzione Installation, User and Service Manual Manuale Installazione, d’uso e manutenzione Installation, User and Service Manual Instrukcja Serwisu, Obsługi I Montazu...
- Page 2 Data is subject to change / Gegevens onderhevig aan verandering / Données sujettes à révision ˛ A.O. Smith Europe A.O. Smith Europe A.O. Smith Europe A.O. Smith Hoofdkantoor Europa A.O. Smith siège social Europe De Run 5305 De Run 5305 De Run 5305 De Run 5305 T : +31 (0)40 294 2500...
-
Page 3: Table Des Matières
English Preface..................3 About this manual............... 7 User part............13 Introduction................15 Safety..................17 Operation.................. 19 Use.................... 21 Installation, Maintenance and Service part..23 Introduction................25 Safety..................27 Water heater................33 Installation................35 Maintenance................45 Troubleshooting................ 49 Warranty................... 51 Index..................53 Nederlands Voorwoord.................. 3 Informatie over deze handleiding..........7 Gedeelte voor de gebruiker........13 Inleiding..................15... - Page 4 Fonctionnement................ 19 Utilisation..................21 Partie Installation et entretien......23 Introduction................25 Sécurité..................27 Chauffe-eau................33 Installation................35 Entretien................... 45 Pannes..................49 Garantie..................51 Index..................53 Common appendices Appendices................55...
-
Page 5: Preface
Preface Copyright Copyright © 2021 A.O. Smith Water Products Company All rights reserved. Nothing from this publication may be copied, reproduced and/or published by means of printing, photocopying or by whatsoever means, without the prior written approval of A.O. Smith Water Products Company. A.O. -
Page 6: Compliance
Supplier The DRE water heater is designed in accordance with the applicable regulations. The water heater is delivered with compliancy–marking and all necessary documentation to obey these regulations. See the compliance section. A.O. Smith accepts no liability for claims from third parties when: •... -
Page 7: Contact Information
Contact information If you have any comments or questions, please contact: A.O. Smith Water Products Company Adress: PO Box 70 5500 AB Veldhoven The Netherlands Telephone: 0800 - AOSMITH (free) 0800 - 267 64 84 General: +31 40 294 25 00 E-mail: info@aosmith.com Website:... -
Page 9: About This Manual
About this manual Scope This manual gives information about safe and correct use of the water heater and how installation, maintenance and service activities have to be done correctly. You must obey the instructions in this manual. Caution Read this manual carefully before you start the water heater. It can cause personal injury and damage to the water heater when you do not read the manual and/or do not obey the instructions. -
Page 10: Document Identification
Caution Obey the caution instructions to prevent damage of the water heater. Warning Obey the warning instructions to prevent danger of personal injury, and serious damage to the water heater. Document identification Article number Language Version 0313851... - Page 11 Table of Contents Preface..................3 Copyright................3 Trademarks............... 3 Warranty................3 Liability................3 Compliance............... 4 Regulations............... 4 Contact information............5 About this manual............... 7 Scope................7 Target group..............7 Notation conventions............7 Document identification............8 User part..............13 Introduction................15 Safety..................17 Operation.................. 19 Control components............19 Operating modes..............
- Page 12 Installation, Maintenance and Service part....23 Introduction................25 About the water heater............. 25 Working principle..............25 Safety..................27 Safety instructions............27 Instructions on the water heater.........28 Safety devices..............29 Environmental aspects............31 6.4.1 Recycling.................31 6.4.2 Disposal................31 Water heater................33 Structure of the water heater..........33 Installation................
- Page 13 Water-side maintenance............ 45 9.2.1 Inspect the anode.............45 9.2.2 Descale the tank.............. 46 Performance check............47 Finalization..............48 Troubleshooting................ 49 10.1 General errors..............49 Warranty................... 51 Index..................53 0313851_DRE_NLUKFR, 30-03-2022...
-
Page 15: User Part
User part 0313851_DRE_NLUKFR, 30-03-2022... -
Page 17: Introduction
Introduction The DRE water heater stores and heats water for sanitary purposes. Cold water enters the tank through the water inlet (2). The heated water leaves the tank at the top through the hot water outlet (1). When hot water is used, the tank of the water heater is filled with the same amount of cold water. - Page 18 User part...
-
Page 19: Safety
Safety A.O. Smith cannot be held responsible for damages or injuries which can be lead back to: • Failure to follow the instructions provided in this manual. • Carelessness during use or maintenance of the water heater. Every user must study the user part of this manual and must follow the instructions in this part of the manual strictly. - Page 20 User part...
-
Page 21: Operation
Operation Control components Each row of 3 electric heating elements has a control thermostat, placed above the center heating element, with a control knob. Warning Only qualified service engineers are allowed to change the set temperature. Fig. Control components 1. Temperature control knob Operating modes The DRE has 2 operating modes:... - Page 22 3.2.2 ON mode In the ON mode the water heater continuously responds to the heat demand. The electric heating elements are activated when there is a heat demand. User part...
-
Page 23: Use
Turn on the water heater Caution Make sure that the water heater is filled with water before you turn on the water heater. Switch the isolator between the water heater and the mains power supply on to start the water heater. 4.1.1 Temperature setting Warning... - Page 24 User part...
-
Page 25: Installation, Maintenance And Service Part
Installation, Maintenance and Service part 0313851_DRE_NLUKFR, 30-03-2022... - Page 26 User part...
-
Page 27: Introduction
Introduction About the water heater The DRE water heater is intended for heating water for sanitary purposes. The DRE is an electric storage water heater. The electric heating elements transfer their heat directly to the water. Working principle Cold water enters the bottom of the tank through the water inlet (1). The heating elements (2) transfer their heat directly to the water and the hot water leaves the tank through the water outlet (3) at the top of the tank. - Page 28 temperature drops beneath the set temperature, the heating elements are activated and the water is heated. Fig. DRE water heater 1. Water inlet 2. Heating elements 3. Water outlet Installation, Maintenance and Service part...
-
Page 29: Safety
Safety Safety instructions For safety instructions on the use of the water heater, refer to Safety (see 2) in the User part of this manual. Warning Installation, maintenance and service must be carried out by a qualified engineer in compliance with the general and local regulations imposed by the water and power supply companies and the fire brigade. -
Page 30: Instructions On The Water Heater
Caution The heater is intended to be connected to the water mains permanently. Do not use a hose set to connect the heater. Note Any leakage from the tank and/or connections can cause damage to the immediate environment or floors below the level of the boiler room. Install the water heater above a waste water drain or in a suitable metal leak tray. -
Page 31: Safety Devices
Safety devices Fig. Main safety thermostat 1. Main Safety thermostat - body 2. Main Safety thermostat - probe Fig. Row safety thermostat 3. Row Safety thermostat 0313851_DRE_NLUKFR, 30-03-2022... - Page 32 Safety devices of the water heater: Main Safety thermostat The main safety thermostat (G1) breaks the (G1) control circuit when the water temperature is too high (>92°C ±3°C). The main safety thermostat also protects the heating elements when the water heater is activated when it is not filled with water.
-
Page 33: Environmental Aspects
Environmental aspects 6.4.1 Recycling The packaging material is environmentally friendly, recyclable and relatively easy to discard. 6.4.2 Disposal Old end-of-life appliances contain materials that need to be recycled. When you discard devices at the end of their service life, you must obey local legislation related to waste disposal. - Page 34 Installation, Maintenance and Service part...
-
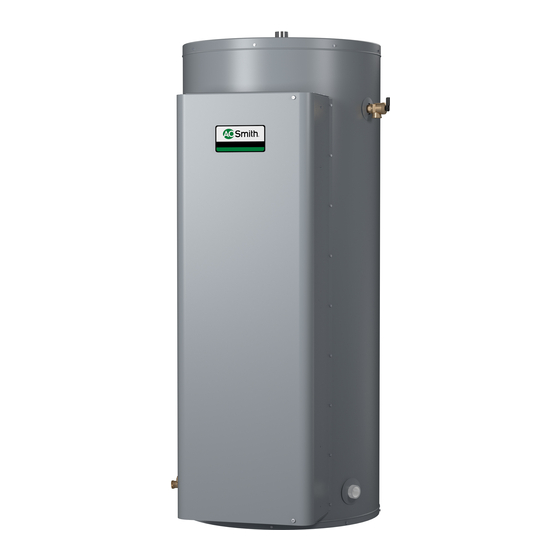
Page 35: Water Heater
Water heater Structure of the water heater The water heater has the following main components: Tank (1) The water is stored and heated up in the tank. Heating elements (4) The water is heated by the heating elements. Fig. Components water heater 1. - Page 36 Installation, Maintenance and Service part...
-
Page 37: Installation
Installation Warning The installation must be done by a qualified person, in compliance with general and local applicable regulations (on page 4). Caution The water heater may not be used in rooms where chemical substances are stored or used because of the risk of explosion and corrosion of the water heater. Some propellants, bleaching agents and degreasing agents etc. -
Page 38: Water Composition
8.2.3 Water composition The water must comply with the regulations for drinking water for human consumption. Water composition Water hardness > 1.00 mmol/l: German hardness > 5.6° dH French hardness > 10.0° fH English hardness > 7.0° e CaCO > 100 ppm Conductivity >... -
Page 39: Installation Diagram
Installation diagram Fig. Installation diagram 1. Pressure reducing valve 14 14 (mandatory if the mains water pressure is too high) 3. T&P valve (mandatory) 4. Stop valve (recommended) 5. Non-return valve 6. Circulation pump (optional) 9. Drain valve 11. Service stop valve 12. -
Page 40: Hot Water Connection
Install the cold water connection: When the mains water supply pressure is too high, install a pressure relief valve (1), refer to the Technical details. Install a non-return valve (5). Install an expansion valve (15). Connect the overflow connection of the expansion valve, to an open waste water pipe. -
Page 41: Preparation
8.5.1 Preparation Open the door of the water heater to make the electrical section and the terminal block visible. Warning Live cables inside! Switch off the power supply completely (on local isolator) before opening the outer door to access the electrical components. Fig. -
Page 42: Mains Power
8.5.2 Mains power Note The water heater is supplied without a power cable and isolator. Use a power cable with wires of a suitable diameter based on the cable length and the current. Note Select and install an overvoltage category III, all–pole isolator with a contact gap of at least 3 mm. -
Page 43: Commissioning
Commissioning To commission the water heater: Fill the water heater (see 8.6.1) Turn on the water heater 8.6.1 Filling Refer to the installation diagram when you fill the water heater: If applicable, open the stop valves (4) of the circulation pipe (C). Make sure that the drain valve (9) is closed. -
Page 44: Decommisioning
1. Temperature control knob To start the water heater: Make sure that the water heater is not connected to the mains power supply. Open the door of the water heater. Warning Live cables inside! Switch off the power supply completely (on local isolator) before opening the outer door to access the electrical components. - Page 45 Close the stop valve (4) in the cold water supply. Open the drain valve (9). Aerate the entire installation of air until the water heater is completely drained. If the water heater needs to be drained completely, disconnect and tilt the water heater in the direction of the drain valve.
- Page 46 Installation, Maintenance and Service part...
-
Page 47: Maintenance
Maintenance The water heater needs maintenance at least once a year. The maintenance interval is determined by the water quality, the average operation hours each day and the set water temperature. To determine the correct interval, A.O. Smith recommends to do a system check three months after installation. -
Page 48: Descale The Tank
Inspect the volume of the anode. When the anode is consumed for 60 % or more, replace the anode. Note If the anode needs to be replaced, always use an anode of the same type. Please refer to the type and the serial number on the data plate. Place the anode in the water heater. -
Page 49: Performance Check
Remove the lowest heating element: Loosen electrical wires earth (A) and live (L) on the element. Loosen the heating element. Take the heating element out of the water heater. Carefully store the heating element. Inspect the tank on limescale through the opening. When there is lime scale: Remove the following heating elements. -
Page 50: Finalization
Replace the heating element when the resistance value is not correct. Decommision the water heater (see 8.7). Loosen electrical wires earth (A) and live (L) on the element. Loosen the heating element. Take the heating element out of the water heater. Place a new element in the tank. -
Page 51: Troubleshooting
Troubleshooting 10.1 General errors Note For the coding of the connections, refer to the Electrical wiring diagram. Indication Cause Measure Water leakage There is a leakage from a threaded Tighten the threaded connection. water connection. There is a leakage from another nearby Trace the leakage. - Page 52 Indication Cause Measure A safety device is The main safety thermostat (G1) is Make sure the water heater is activated activated completely filled. Tap off water, so the temperature drops in the water heater. Make sure all connections are connected correctly (refer to the wiring diagram (see A.5)).
-
Page 53: Warranty
Warranty To register your water heater, you can complete and return the enclosed warranty card. You can also register your water heater on-line through the A.O. Smith website. Article 1: General warranty If, after verification and at the sole discretion of A.O. Smith, a component or part (with exclusion of the glass lined steel tank) of a water heater supplied by A.O. - Page 54 Article 4: Exclusions The warranty set out in Articles 1 and 2 will not apply in the event of: • damage to the water heater caused by an external factor; • misuse, neglect (including frost damage), modification, incorrect and/or unauthorised use of the water heater and any attempt to repair leaks;...
-
Page 55: Index
Index Installation diagram......37 Installation, Maintenance and Service part..........23 About the water heater...... 25 Instructions on the water heater..28 About this manual....... 7 Introduction........ 15, 25 Ambient conditions ......35 Liability ..........3 Circulation connection ....... 38 Cold water connection......37 Commissioning........41 Compliance........ - Page 56 Target group ........7 Temperature setting......21 Trademark..........3 Trademarks........3 Troubleshooting.........49 Turn off for a long period ....21 Turn off for a short period ....21 Turn off the water heater....21, 42 Turn on the water heater....41 Use..........21 User part..........13 Warranty..........
-
Page 57: Voorwoord
Voorwoord Copyright Copyright © 2021 A.O. Smith Water Products Company Alle rechten voorbehouden. Niets uit deze uitgave mag gekopieerd, verveelvoudigd en/of openbaar worden gemaakt door middel van afdrukken, kopiëren of op welke ander wijze dan ook zonder de voorafgaande schriftelijke toestemming van A.O. Smith Water Products Company. A.O. - Page 58 Leverancier De DRE-boiler is ontworpen in overeenstemming met de geldende voorschriften. De boiler wordt geleverd met conformiteits–markering en alle noodzakelijke documentatie voor het voldoen aan deze voorschriften. Zie het gedeelte Conformiteit. A.O. Smith aanvaardt geen aansprakelijkheid voor claims van derde partijen wanneer: •...
-
Page 59: Contactinformatie
Conformiteit Om op een veilige manier warm water voor huishoudelijk gebruik te produceren, zijn het ontwerp en de constructie van de DRE-boilers in overeenstemming met: • de Europese Laagspanningsrichtlijn 2014/35/EU (LVD) • de Europese EMC-richtlijn 2014/30/EU (Elektromagnetische compatibiliteit ) • de Europese RoHS II-richtlijn 2011/65/EU en RoHS III- richtlijn 2015/863/EU •... - Page 60 Installation, Maintenance and Service part...
-
Page 61: Informatie Over Deze Handleiding
Informatie over deze handleiding Inhoud Deze handleiding geeft informatie over een veilig en juist gebruik van de boiler en hoe deze op een goede manier moet worden geïnstalleerd en onderhouden. De instructies in deze handleiding dienen te worden nageleefd. Let op Lees deze handleiding eerst zorgvuldig door voordat u de boiler start. - Page 62 Deze handleiding bevat de volgende tekststijlen/symbolen om situaties aan te geven die gevaarlijk kunnen zijn voor gebruikers/monteurs, schade aan apparatuur kunnen veroorzaken of wanneer extra moet worden opgelet: Opmerking Een opmerking geeft meer informatie over een onderwerp. Let op Neem de let op instructies in acht om beschadiging van de boiler te voorkomen. Waarschuwing Neem de waarschuwing in acht om persoonlijk letsel en ernstige beschadiging van de boiler te voorkomen.
- Page 63 Inhoudsopgave Voorwoord.................. 3 Copyright................3 Handelsmerken..............3 Garantie................3 Aansprakelijkheid............... 3 Conformiteit..............5 Voorschriften..............5 Contactinformatie...............5 Informatie over deze handleiding..........7 Inhoud................7 Doelgroep................. 7 Notatieconventies...............7 Documentaanduiding............8 Gedeelte voor de gebruiker........13 Inleiding..................15 Veiligheid.................. 17 Werking..................19 Besturingscomponenten............ 19 Bedrijfsmodi..............19 3.2.1 OFF-modus..............19 3.2.2 ON-modus...............
- Page 64 Gedeelte over de installatie en het onderhoud..23 Inleiding..................25 Informatie over de boiler........... 25 Werkingsprincipe.............. 25 Veiligheid.................. 27 Veiligheidsinstructies............27 Instructies op de boiler............28 Veiligheidsvoorzieningen............29 Milieu-aspecten..............31 6.4.1 Recyclen................31 6.4.2 Afvoeren................. 31 Boiler..................33 Opbouw van de boiler............33 Installatie..................35 Verpakking..............35 Omgeving................35 8.2.1 Omgevingsomstandigheden..........
- Page 65 Waterzijdig onderhoud............45 9.2.1 Inspecteer de anode............45 9.2.2 De tank ontkalken............46 Prestatie controleren............47 Afronden................. 48 Storingen.................. 49 10.1 Algemene storingen............49 Garantie..................51 Index..................53 0313851_DRE_NLUKFR, 30-03-2022...
- Page 66 Installation, Maintenance and Service part...
-
Page 67: Gedeelte Voor De Gebruiker
Gedeelte voor de gebruiker 0313851_DRE_NLUKFR, 30-03-2022... - Page 68 Installation, Maintenance and Service part...
-
Page 69: Inleiding
Inleiding De DRE-boiler slaat water op en verwarmt water voor sanitaire doeleinden. Koud water stroomt via de waterinlaat (2) de tank binnen. Het verwarmde water verlaat de tank aan de bovenzijde via de warmwateruitlaat (1). Wanneer heet water wordt gebruikt, wordt de tank van de boiler gevuld met dezelfde hoeveelheid koud water. De boiler wordt bediend met de bedieningsthermostaat op elke rij met verwarmingselementen. - Page 70 Gedeelte voor de gebruiker...
-
Page 71: Veiligheid
Veiligheid A.O. Smith kan niet aansprakelijk worden gesteld voor schade of letsel veroorzaakt door: • Het niet opvolgen van de instructies in deze handleiding. • Onzorgvuldig handelen tijdens het gebruik of het onderhouden van de boiler. Iedere gebruiker moet het gedeelte voor de gebruiker in deze handleiding bestuderen en de instructies die in dit gedeelte van de handleiding worden gegeven strikt naleven. - Page 72 Gedeelte voor de gebruiker...
-
Page 73: Werking
Werking Besturingscomponenten Elke rij van drie elektrische verwarmingselementen is voorzien van een regelthermostaat met regelknop. Deze vindt u boven het middelste verwarmingselement. Waarschuwing De ingestelde temperatuur mag alleen door gekwalificeerde onderhoudsmonteurs worden gewijzigd. Afb. Besturingscomponenten 1. Temperatuurknop Bedrijfsmodi De DRE beschikt over 2 bedrijfsmodi: •... -
Page 74: On-Modus
3.2.2 ON-modus In de ON-modus reageert de boiler voortdurend op de warmtevraag. De elektrische verwarmingselementen worden geactiveerd wanneer er warmtevraag is. Gedeelte voor de gebruiker... -
Page 75: Gebruik
Gebruik De boiler inschakelen Let op Zorg dat de boiler is gevuld met water voordat u deze aanzet. Schakel de schakelaar tussen de boiler en de stroomvoorziening in om de boiler te activeren. 4.1.1 Temperatuurregeling Waarschuwing De ingestelde temperatuur mag alleen door gekwalificeerde onderhoudsmonteurs worden gewijzigd. - Page 76 Gedeelte voor de gebruiker...
-
Page 77: Gedeelte Over De Installatie En Het Onderhoud
Gedeelte over de installatie en het onderhoud 0313851_DRE_NLUKFR, 30-03-2022... - Page 78 Gedeelte voor de gebruiker...
-
Page 79: Inleiding
Inleiding Informatie over de boiler De DRE-boiler is bedoeld om water te verwarmen voor sanitaire doeleinden. De DRE is een elektrische boiler. De elektrische verwarmingselementen brengen hun warmte direct over op het water. Werkingsprincipe Koud water stroomt via de waterinlaat (1) de onderzijde van de tank binnen. De verwarmingselementen (2) brengen hun warmte rechtstreeks over op het water en het hete water verlaat de tank via de wateruitlaat (3) aan de bovenzijde van de tank. - Page 80 de tank. Wanneer de watertemperatuur lager is dan de ingestelde temperatuur, worden de verwarmingselementen geactiveerd en wordt het water verwarmd. Afb. DRE-boiler 1. Waterinlaat 2. Verwarmingselementen 3. Wateruitlaat Gedeelte over de installatie en het onderhoud...
-
Page 81: Veiligheid
Veiligheid Veiligheidsinstructies Raadpleeg Veiligheid (zie 2) in het gedeelte voor de gebruiker in deze handleiding voor veiligheidsinstructies voor het gebruik van de boiler. Waarschuwing De installatie en het onderhoud moet worden uitgevoerd door een gekwalificeerde monteur en volgens de algemene en lokale voorschriften van de water- en stroomleveringsbedrijven en de brandweer. -
Page 82: Instructies Op De Boiler
Let op De boiler heeft een vaste aansluiting op de waterleiding nodig. Sluit de boiler niet aan met een waterslang. Opmerking Eventuele lekkages van de tank en/of de aansluitingen kunnen schade veroorzaken aan de direct omgeving of de vloeren onder het niveau van de opstellingsruimte. Installeer de boiler boven een afvoer voor afvalwater of in een geschikte metalen lekbak. -
Page 83: Veiligheidsvoorzieningen
Veiligheidsvoorzieningen Afb. Hoofdveiligheidsthermostaat 1. Hoofdveiligheids- thermostaatbehuizing 2. Hoofdveiligheids- thermostaatsensor Fig. Rij-veiligheidsthermostaat 3. Rij-veiligheids- thermostaat 0313851_DRE_NLUKFR, 30-03-2022... - Page 84 Veiligheidsvoorzieningen van de boiler: Hoofdveiligheids- De hoofdveiligheidsthermostaat (G1) onderbreekt thermostaat (G1) het regelcircuit wanneer de watertemperatuur te hoog is (>92°C ±3°C). De hoofdveiligheidsthermostaat beschermt ook de verwarmingselementen als de boiler geactiveerd wordt terwijl deze niet met water is gevuld. De sensor van de hoofdveiligheidsthermostaat (G1) is boven het middenelement van de hoogste rij gemonteerd.
-
Page 85: Milieu-Aspecten
Milieu-aspecten 6.4.1 Recyclen Het verpakkingsmateriaal is milieuvriendelijk, recyclebaar en relatief eenvoudig af te voeren. 6.4.2 Afvoeren Oude toestellen die niet meer gebruikt worden, bevatten materialen die moeten worden gerecycled. Leef de lokale voorschriften voor het afvoeren van oude apparaten die niet meer gebruikt worden na. - Page 86 Gedeelte over de installatie en het onderhoud...
-
Page 87: Boiler
Boiler Opbouw van de boiler De boiler heeft de volgende hoofdonderdelen: Tank (1) Het water wordt opgeslagen in de tank en daarin verwarmd. Verwarmingselementen Het water wordt door verwarmingselementen verwarmd. Afb. Onderdelen van de boiler 1. Tank 2. Hoofdveiligheidsthermostaat 3. Rij-Regelthermostaat 4. - Page 88 Gedeelte over de installatie en het onderhoud...
-
Page 89: Installatie
Installatie Waarschuwing De installatie moet worden uitgevoerd door een hiertoe gekwalificeerd persoon en in overeenstemming met algemene en lokale voorschriften (op pagina 5) hiervoor. Let op De boiler mag niet worden gebruikt in ruimtes waarin chemische stoffen zijn opgeslagen of worden gebruikt vanwege het risico op een explosie en corrosie van de boiler. Sommige drijfgassen, bleekmiddelen en ontvettingsmiddelen enzovoort kunnen explosieve dampen afgeven en/of de boiler sneller doen roesten. -
Page 90: Watersamenstelling
8.2.3 Watersamenstelling Het water moet voldoen aan de voorschriften voor drinkwater. Watersamenstelling Waterhardheid > 1,00 mmol/l: Duitse hardheid > 5,6° dH Franse hardheid > 10,0° fH Engelse hardheid >7,0° e CaCO > 100 ppm Geleidbaarheid > 125 µS/cm Zuurgraad (pH-waarde) 7,0 - 9,5 Opmerking De waterkwaliteit kan een negatieve invloed hebben op de efficiëntie, prestaties en... -
Page 91: Aansluitschema
Aansluitschema Afb. Aansluitschema 1. Drukreduceerventiel (verplicht wanneer de druk van de waterleiding te hoog is) 2. Inlaatcombinatie 3. T&P-ventiel (verplicht) 4. Afsluiter (aanbevolen) 5. Terugslagklep 6. Circulatiepomp (optioneel) 9. Aftapkraan 11. Service-afsluiter 12. Temperatuurmeter (optioneel) 14. Tappunt A. Koudwatertoevoer B. Warmwateruitlaat C. -
Page 92: Warmwateraansluiting
Installeer een inlaatcombinatie (2). Sluit de overstroomaansluiting van de inlaatcombinatie aan op een open leiding voor afvalwater. 8.4.2 Warmwateraansluiting Opmerking Isoleer lange warmwaterleidingen om onnodig energieverlies te voorkomen. Opmerking Het gebruik van een T&P-ventiel is verplicht. De warmwateraansluiting installeren: Installeer een afsluiter (11) in de warmwateruitlaatleiding voor onderhoudswerkzaamheden. -
Page 93: Voorbereiding
8.5.1 Voorbereiding Open de deur van de boiler om het elektrische gedeelte en het aansluitblok te kunnen zien. Waarschuwing Spanningvoerende delen aanwezig! Maak het toestel volledig spanningsloos (met de werkschakelaar) alvorens de buitendeur te openen om toegang te krijgen tot de elektrische componenten. -
Page 94: Netvoeding
8.5.2 Netvoeding Opmerking De boiler wordt zonder voedingskabel en hoofdschakelaar geleverd. Gebruik een voedingskabel met draden met de geschikte diameter op basis van de kabellengte en de stroom. Opmerking Selecteer en installeer een meerpolige schakelaar (overspanningscategorie III) met een contactopening van minstens 3 mm. De meerpolige– schakelaar moet overeenkomstig de bedradingsvoorschriften in de vaste bedrading worden verwerkt. -
Page 95: Inbedrijfstelling
Inbedrijfstelling De boiler in bedrijf stellen: Vul de boiler (zie 8.6.1) Schakel de boiler in 8.6.1 Vullen Raadpleeg het Aansluitschema wanneer u de boiler vult: Open de afsluiters (4) van de circulatieleiding (C), indien van toepassing. Controleer of de aftapkraan (9) is gesloten. Open het dichtstbijzijnde tappunt van de warmwaterleiding (14). -
Page 96: Buitengebruikstelling
1. Temperatuurknop De boiler starten: Zorg ervoor dat de boiler niet is aangesloten op de netvoeding. Open de deur van de boiler. Waarschuwing Spanningvoerende delen aanwezig! Maak het toestel volledig spanningsloos (met de werkschakelaar) alvorens de buitendeur te openen om toegang te krijgen tot de elektrische componenten. - Page 97 Sluit de afsluiters (4) van de circulatieleiding (C), indien van toepassing. Sluit het ventiel (2) van de inlaatcombinatie (A). Open de aftapkraan (9). Belucht de hele installatie totdat de boiler volledig is afgetapt. Als de boiler volledig moet worden afgetapt, koppel het toestel dan los en kantel het in de richting van de aftapkraan.
- Page 98 Gedeelte over de installatie en het onderhoud...
-
Page 99: Onderhoud
Onderhoud De boiler moet minimaal een keer per jaar worden onderhouden. Het onderhoudsinterval wordt bepaald door de waterkwaliteit, de gemiddelde bedrijfsuren per dag en de ingestelde watertemperatuur. Om de juiste interval te bepalen, adviseert A.O. Smith om drie maanden na installatie een systeemcontrole uit te voeren. -
Page 100: De Tank Ontkalken
Inspecteer het volume van de anode. Als de anode voor 60 % of meer is opgebruikt, vervangt u de anode. Opmerking Gebruik in dat geval altijd een anode van hetzelfde type. Raadpleeg het typeplaatje voor het type en serienummer van de anode. Plaats de anode in de boiler. -
Page 101: Prestatie Controleren
Verwijder het isolatiemateriaal. Verwijder het onderste verwarmingselement: Maak de elektrische aardingsdraad (A) en de spanningvoerende draad (L) op het element los. Maak het verwarmingselement los. Verwijder het verwarmingselement uit de boiler. Zet het verwarmingselement voorzichtig ergens neer. Inspecteer de tank via de opening op kalkaanslag. Bij kalkaanslag: Verwijder de volgende verwarmingselementen. -
Page 102: Afronden
Vervang het verwarmingselement als de weerstandswaarde niet correct is. Stel de boiler buiten gebruik (zie 8.7). Maak de elektrische aardingsdraad (A) en de stroomvoerende draad (L) op het element los. Maak het verwarmingselement los. Verwijder het verwarmingselement uit de boiler. Plaats een nieuw element in de tank. -
Page 103: Storingen
Storingen 10.1 Algemene storingen Opmerking Raadpleeg Elektrisch schema voor de codering van de aansluitingen. Indicatie Oorzaak Maatregel Waterlekkage Er lekt water uit een wateraansluiting Aansluiting met schroefdraad aandraaien. met schroefdraad. Een andere boiler, of pijpsegment in de Lekkage opsporen. buurt lekt. De tank van de boiler lekt. - Page 104 Indicatie Oorzaak Maatregel Er is een De hoofdveiligheidsthermostaat (G1) is Zorg dat de boiler volledig gevuld is. veiligheidsvoorziening geactiveerd Water aftappen zodat de temperatuur geactiveerd in de boiler zakt. Let erop dat alle aansluitingen correct zijn aangesloten (zie het aansluitschema (zie A.5)). Gebruik de witte knop om de thermostaat handmatig te resetten.
-
Page 105: Garantie
Garantie U kunt de bijgesloten garantiekaart invullen en retourneren om uw boiler te registreren. U kunt uw boiler ook online registreren via de website A.O. Smith. Artikel 1: Algemene garantie Wanneer, na controle en na goeddunken van A.O. Smith, een onderdeel of gedeelte (met uitzondering van de staal-geëmailleerde tank) van een boiler geleverd door A.O. - Page 106 • De boiler is aangesloten op een beschermde koudwatertoevoer die door de betreffende instantie is goedgekeurd; met voldoende vermogen voor dit doel; die een waterdruk levert die niet hoger is dan de bedrijfsdruk vermeld op de boiler; en waar van toepassing door een gelijke goedgekeurde temperatuur- en drukreduceerventiel;...
-
Page 107: Index
Index Aansluitschema......... 37 Trademark..........3 Aansprakelijkheid........ 3 Handelsmerken........3 Afronden........40, 48 Aftappen.......... 42 Afvoeren.......... 31 Algemene storingen......49 Inbedrijfstelling.........41 Informatie over de boiler....25 About this manual....... 7 Inhoud..........7 Bedrijfsmodi........19 Inleiding........15, 25 Besturingscomponenten..... 19 Inspecteer de anode......45 Boiler..........33 Installation........ - Page 108 Schakel de boiler in......41 Troubleshooting.........49 Temperatuurregeling......21 Veiligheid........17, 27 Veiligheidsinstructies......27 Veiligheidsvoorzieningen.....29 Verpakking........35 Voorbereiding......39, 45 Voorschriften........5 Preface..........3 Vullen..........41 Warmwateraansluiting......38 Wateraansluitingen......37 Watersamenstelling......36 Waterzijdig onderhoud....... 45 Werking........... 19 Werkingsprincipe....... 25 Gedeelte over de installatie en het onderhoud...
-
Page 109: Préface
Préface Copyright Copyright © 2021 A.O. Smith Water Products Company Tous droits réservés. Aucune partie de cette publication de peut être copiée, reproduite et/ou publiée, par voie d’impression, de photocopie, ou par tout autre moyen que ce soit, sans l’approbation écrite préalable de A.O. -
Page 110: Fournisseur
Fournisseur Le chauffe-eau DRE est conçu conformément à la réglementation en vigueur. Le chauffe- eau est livré avec le marquage–CE et toute la documentation nécessaire au respect de cette réglementation. Voir la section sur la conformité. A.O. Smith n'accepte aucune responsabilité pour les réclamations de tiers lorsque : •... -
Page 111: Conformité
Conformité Pour produire en toute sécurité de l’eau chaude domestique, la conception et la construction des chauffe-eau DRE sont conformes : • la Directive européenne 2014/35/UE relative aux appareils à basse tension (ABT), • la Directive européenne 2014/30/UE sur la compatibilité électromagnétique (CEM), •... - Page 112 Gedeelte over de installatie en het onderhoud...
-
Page 113: À Propos De Ce Manuel
À propos de ce manuel Étendue Ce manuel fournit des informations concernant l’utilisation sûre et correcte du chauffe-eau et indique comment effectuer correctement les opérations d’installation et d’entretien. Vous devez respecter les instructions fournies dans ce manuel. Attention Veuillez lire ce manuel avec attention avant de démarrer le chauffe-eau. La non-lecture du manuel et/ou le non-respect des instructions peuvent entraîner des blessures personnelles et des dommages au niveau du chauffe-eau. -
Page 114: Identification Du Présent Document
Ce manuel contient les styles de texte et les symboles suivants pour les situations susceptibles de présenter des dangers pour les utilisateurs ou les techniciens et de causer des dommages aux équipements, ou qui nécessitent une attention spéciale : Note Une remarque donne davantage d'informations sur un sujet. - Page 115 Table des matières Préface..................3 Copyright................3 Marques commerciales............3 Garantie................3 Responsabilité..............3 Conformité................ 5 Réglementations..............5 Coordonnées de contact............5 À propos de ce manuel..............7 Étendue................7 Groupe ciblé..............7 Conventions d’annotations...........7 Identification du présent document........8 Partie Utilisateur............13 Introduction................
- Page 116 Partie Installation et entretien......... 23 Introduction................25 À propos du chauffe-eau............25 Principe de fonctionnement..........25 Sécurité..................27 Instructions de sécurité............. 27 Instructions concernant le chauffe-eau........ 28 Dispositifs de sécurité............29 Aspects environnementaux..........30 6.4.1 Recyclage................ 30 6.4.2 Mise au rebut..............31 Chauffe-eau................33 Structure du chauffe-eau...........
- Page 117 Entretien du côté eau............45 9.2.1 Inspecter l'anode..............45 9.2.2 Détartrer le réservoir............46 Vérification des performances..........47 Finalisation..............48 Pannes..................49 10.1 Pannes générales..............49 Garantie..................51 Index..................53 0313851_DRE_NLUKFR, 30-03-2022...
- Page 118 Gedeelte over de installatie en het onderhoud...
-
Page 119: Partie Utilisateur
Partie Utilisateur 0313851_DRE_NLUKFR, 30-03-2022... - Page 120 Gedeelte over de installatie en het onderhoud...
-
Page 121: Introduction
Introduction Le chauffe-eau DRE accumule et chauffe l’eau pour les besoins sanitaires. L’eau froide pénètre dans le réservoir, via l’admission d’eau (2). L’eau chauffée quitte le réservoir par le haut, via la sortie eau chaude (1). Lorsque l'on utilise de l'eau chaude, le réservoir du chauffe-eau est rempli de la même quantité... - Page 122 Partie Utilisateur...
-
Page 123: Sécurité
Sécurité A.O. Smith ne saurait être tenu pour responsable des dommages ou blessures résultant des points suivants : • le non-respect des instructions fournies dans ce manuel • négligence pendant l’utilisation ou l’entretien du chauffe-eau. Tous les utilisateurs doivent étudier la partie Utilisateur de ce manuel et respecter à la lettre les instructions présentes dans cette partie du manuel. - Page 124 Partie Utilisateur...
-
Page 125: Fonctionnement
Fonctionnement Composants de commande Chaque rangée de 3 éléments chauffants électriques dispose d'un thermostat de contrôle, placé au-dessus de l'élément chauffant central, avec un bouton de commande. Avertissement Seuls les techniciens de maintenance qualifiés sont autorisés à modifier la température de consigne. -
Page 126: Mode Marche
3.2.2 Mode MARCHE En mode MARCHE, le chauffe-eau répond en permanence à la demande de chaleur. Les éléments chauffants électriques sont activés lorsqu'il y a une demande de chaleur. Partie Utilisateur... -
Page 127: Utilisation
Utilisation Mettre le chauffe-eau en marche Attention Assurez-vous que le chauffe-eau est rempli d'eau avant d'allumer le chauffe-eau. Mettez en marche le sectionneur entre le chauffe-eau et l'alimentation secteur pour démarrer le chauffe-eau. 4.1.1 Réglage de la température Avertissement Seuls les techniciens de maintenance qualifiés sont autorisés à modifier la température de consigne. - Page 128 Partie Utilisateur...
-
Page 129: Partie Installation Et Entretien
Partie Installation et entretien 0313851_DRE_NLUKFR, 30-03-2022... - Page 130 Partie Utilisateur...
-
Page 131: Introduction
Introduction À propos du chauffe-eau Le chauffe-eau DRE est prévu pour chauffer l’eau pour les besoins sanitaires. Le DRE est un chauffe-eau électrique à accumulation. Les éléments chauffants électriques transfèrent leur chaleur directement à l'eau. Principe de fonctionnement L’eau froide pénètre dans la partie inférieure du réservoir, via l’admission d’eau (1). Les éléments chauffants (2) transfèrent leur chaleur directement à... - Page 132 la cuve. Lorsque la température de l'eau descend en dessous de la température de consigne, les éléments chauffants sont activés et l'eau est chauffée. Illustration : chauffe-eau DRE 1. Admission d’eau 2. Éléments chauffants 3. Sortie d'eau Partie Installation et entretien...
-
Page 133: Sécurité
Sécurité Instructions de sécurité Pour obtenir les instructions de sécurité concernant l’utilisation du chauffe-eau, reportez- vous à la section Sécurité (voir 2), dans la partie Utilisateur de ce manuel. Avertissement Les tâches d’installation et d’entretien doivent être réalisées par des techniciens qualifiés, conformément aux règlementations générales et locales imposées par les sociétés de distribution de l’eau et de l’électricité... -
Page 134: Instructions Concernant Le Chauffe-Eau
Avertissement N’installez jamais un obturateur ou un clapet anti-retour entre le groupe de sécurité d’ensemble d’admission et le chauffe-eau. Attention Le chauffe-eau est destiné à être raccordé au réseau d'eau de façon permanente. N'utilisez pas de jeu de tuyaux pour raccorder le chauffe-eau. Note Toute fuite présente au niveau du réservoir et/ou des raccordements peut endommager l’environnement immédiat ou les étages situés sous la chaufferie. -
Page 135: Dispositifs De Sécurité
Dispositifs de sécurité Illustration Thermostat de sécurité principal 1. Thermostat de sécurité principal - corps 2. Thermostat de sécurité principal - sonde Illustration Thermostat de sécurité de rangée 3. Thermostat de sécurité de rangée 0313851_DRE_NLUKFR, 30-03-2022... -
Page 136: Dispositifs De Sécurité Du Chauffe-Eau
Dispositifs de sécurité du chauffe-eau : Thermostat de sécurité Le thermostat de sécurité principal (G1) coupe le principal (G1) circuit de commande lorsque la température de l'eau est trop élevée (>92°C ±3°C). Le thermostat principal de sécurité protège également les éléments chauffants lorsque le chauffe-eau est mis en marche alors qu'il n'est pas rempli d'eau. -
Page 137: Mise Au Rebut
6.4.2 Mise au rebut Les vieux appareils en fin de vie contiennent des matériaux devant être recyclés. Lorsque vous mettez au rebut des appareils arrivés à la fin de leur durée de vie utile, vous devez respecter la législation locale se rapportant à la mise au rebut des déchets. Ne mettez jamais votre ancien appareil au rebut avec les déchets ménagers. - Page 138 Partie Installation et entretien...
-
Page 139: Chauffe-Eau
Chauffe-eau Structure du chauffe-eau Le chauffe-eau comporte les composants principaux suivants : Réservoir (1) L’eau est stockée et chauffée dans le réservoir. Éléments chauffants (4) L’eau est chauffée par les éléments chauffants. Illustration : Composants du chauffe-eau 1. Réservoir 2. Thermostat de Sécurité Principal 3. - Page 140 Partie Installation et entretien...
-
Page 141: Installation
Installation Avertissement L’installation doit être réalisée par une personne qualifiée, conformément aux règlementations (à la page 5) générales et locales en vigueur. Attention N’utilisez pas le chauffe-eau dans des pièces où sont stockées ou utilisées des substances chimiques, car il y a alors un risque d’explosion ou de corrosion du chauffe-eau. Certains gaz propulseurs, agents de blanchiment et agents de dégraissage, etc., émettent des vapeurs explosives et/ou entraînent une accélération de la corrosion. -
Page 142: Composition De L'eau
8.2.3 Composition de l'eau L’eau doit être conforme aux réglementations en matière d’eau potable pour la consommation humaine. Composition de l'eau Dureté de l'eau > 1,00 mmol/l : Dureté allemande > 5,6° dH Dureté française > 10,0° fH Dureté anglaise > 7,0° eH CaCO >... -
Page 143: Schéma D'installation
Schéma d’installation Illustration : Schéma d’installation 1. Réducteur de pression (obligatoire si la pression d’alimentation en eau est trop élevée) 2. Groupe de sécurité de l’ensemble d’admission 3. Soupape TP (obligatoire) 4. Obturateur (recommandé) 5. Clapet anti retour 6. Pompe de circulation (option) 9. -
Page 144: Raccord D'eau Chaude
Installer le raccord d’eau froide Si la pression d'alimentation en eau est trop élevée, installez un clapet de décharge (1). Reportez-vous à la section Détails techniques. Installez un groupe de sécurité d’ensemble d’admission (2). Raccordez le raccord de débordement du groupe de sécurité d’ensemble d’admission à... -
Page 145: Préparation
8.5.1 Préparation Ouvrez la porte du chauffe-eau pour rendre visibles la section électrique et le bloc de raccordement électrique. Avertissement Câbles sous tension à l'intérieur ! Mettez l'appareil complètement hors tension (par l'isolateur local) avant d'ouvrir la porte extérieure pour accéder aux composants électriques. -
Page 146: Alimentation Secteur
8.5.2 Alimentation secteur Note Le chauffe-eau est fourni sans câble d'alimentation et sans sectionneur. Utilisez un câble d'alimentation avec des fils d'un diamètre approprié en fonction de la longueur du câble et du courant. Note Choisissez et installez un sectionneur omnipolaire de catégorie III avec un espace de contact d'au moins 3 mm. -
Page 147: Mise En Service
Mise en service Pour mettre le chauffe-eau en service : Remplissez le chauffe-eau (voir 8.6.1) Mettre le chauffe-eau en marche 8.6.1 Remplissage Reportez-vous au schéma d’installation lors du remplissage du chauffe-eau : Si présente, ouvrez les vannes d'arrêt (4) dans la conduite de circulation (C). Assurez-vous que le robinet de vidange (9) est fermé. -
Page 148: Mise Hors Service
1. Bouton de commande de la température Pour mettre le chauffe-eau en marche : Vérifiez que le chauffe-eau n’est pas raccordé à l’alimentation secteur. Ouvrez la porte du chauffe-eau. Avertissement Câbles sous tension à l'intérieur ! Mettez l'appareil complètement hors tension (par l'isolateur local) avant d'ouvrir la porte extérieure pour accéder aux composants électriques. -
Page 149: Purge
8.7.2 Purge Reportez-vous au schéma d’installation lors de la purge du chauffe-eau : Le cas échéant, fermez l’obturateur d’entretien (11) dans le tuyau d’alimentation en eau chaude. Si présente, fermez les vannes d'arrêt (4) dans la conduite de circulation (C). Fermez la vanne (2) du groupe de sécurité... - Page 150 Partie Installation et entretien...
-
Page 151: Entretien
Entretien Le chauffe-eau doit être entretenu au moins une fois par an. L’intervalle d’entretien est déterminé en fonction de la qualité de l’eau, des heures de fonctionnement moyennes par jour et de la température d’eau réglée. Pour déterminer l'intervalle correct, A.O. Smith recommande d'effectuer un contrôle du système trois mois après l'installation. -
Page 152: Détartrer Le Réservoir
Contrôlez le volume de l'anode. Lorsque l'anode est consommée à 60 % ou plus, remplacez l'anode. Note Si l'anode doit être remplacée, utilisez toujours une anode du même type. Veuillez vous référer au type et au numéro de série sur la plaque signalétique. Placez l'anode dans le chauffe-eau. -
Page 153: Vérification Des Performances
Ouvrez la porte du chauffe-eau. Avertissement Câbles sous tension à l'intérieur ! Mettez l'appareil complètement hors tension (par l'isolateur local) avant d'ouvrir la porte extérieure pour accéder aux composants électriques. Retirez le matériau isolant. Retirez l’élément chauffant le plus bas : Desserrez les fils électriques de terre (A) et de phase (L) sur l'élément. -
Page 154: Finalisation
Retirez le matériau isolant. Mesurez la valeur de la résistance entre les deux connexions de chaque élément chauffant.. La valeur doit être d'environ 19 +/- 4 Ohms pour des éléments de 3 kW 10 +/- 2 Ohms pour des éléments de 6 kW . Remplacez l'élément chauffant si la valeur de la résistance n'est pas correcte. -
Page 155: Pannes
Pannes 10.1 Pannes générales Note Pour le codage des raccordements, reportez-vous au schéma de câblage électrique. Indication Cause Mesure Fuite d’eau Il y a une fuite provenant d’un raccord Serrez le raccord fileté. d’eau fileté. Il y a une fuite provenant d’un autre Établissez l’origine de la fuite. - Page 156 Indication Cause Mesure Le disjoncteur de fuite Il n'y a pas assez d'eau dans le Assurez-vous que le chauffe-eau est à la terre s’est réservoir. rempli d’eau. déclenché L'un des éléments chauffants est Mesurez la valeur de la résistance défectueux. entre chaque connexion d'élément chauffant et l'extérieur du réservoir.
-
Page 157: Garantie
Garantie Pour enregistrer votre chauffe-eau, vous pouvez remplir et renvoyer la carte de garantie ci-jointe. Vous pouvez également l’enregistrer en ligne via le site Web A.O. Smith. Article 1 : Garantie générale Si, après vérification et à l’entière discrétion de A.O. Smith, un composant ou une pièce (sauf le réservoir en acier à... -
Page 158: Article 5 : Étendue De La Garantie
• Le chauffe-eau est raccordé à un système d’alimentation en eau froide protégé approuvé par l’autorité concernée, et disposant d’une puissance suffisante pour remplir cette tâche. Il doit apporter une pression d’eau n’étant pas supérieure à la pression d’exploitation indiquée sur le chauffe-eau et, le cas échéant, disposer d’une soupape TP approuvée, installée conformément aux instructions d'installation d’A.O. -
Page 159: Index
Index Alimentation secteur......40 Trademark..........3 Aspects environnementaux....30 Marques commerciales......3 Mettre le chauffe-eau en marche..41 Mettre le chauffe-eau à l’arrêt..21, 42 Mettre l’appareil à l’arrêt pour une courte durée..........21 Mettre l’appareil à l’arrêt pour une longue Charge maximum au sol.....35 Chauffe-eau ........33 durée..........21 Composants de commande.... - Page 160 Vérification des performances..... 47 À About this manual....... 7 À propos du chauffe-eau....25 É Étendue ..........7 Partie Installation et entretien...
-
Page 161: Technical Details/Technische Details/Détails Techniques Dre
Appendices Technical details/Technische details/Détails techniques DRE 52 Description Unit DRE 52-9 DRE 52-18 DRE 52-36 Omschrijving Eenheid Description Unité General/Algemeen/Général Contents Inhoud Contenu Empty weight Ledig gewicht Poids à vide Maximum floor load Maximale vloerbelasting Charge maximum au sol Maximum operating pressure... - Page 162 Description Unit DRE 52-9 DRE 52-18 DRE 52-36 Omschrijving Eenheid Description Unité Power 16,8 33,6 Vermogen Puissance Load Belasting Intensité Number of electric heating elements Aantal elektrische verwarmingselementen Nombre d’éléments chauffants Number of control thermostats Aantal regelthermostaten Nombre de thermostats de contrôle...
- Page 163 Technical details/Technische details/Détails techniques DRE 80 Description Unit DRE 80-9 DRE 80-18 DRE 80-36 DRE 80-54 Omschrijving Eenheid Description Unité General/Algemeen/Général Contents Inhoud Contenu Empty weight Ledig gewicht Poids à vide Maximum floor load Maximale vloerbelasting Charge maximum au sol Maximum operating pressure kPa (bar) 800 (8)
- Page 164 Description Unit DRE 80-9 DRE 80-18 DRE 80-36 DRE 80-54 Omschrijving Eenheid Description Unité Number of control thermostats Aantal regelthermostaten Nombre de thermostats de contrôle Number of fuses Aantal zekeringen Nombre de fusibles IP class IP X1 IP-klasse Classe IP Installation, Maintenance and Service part...
- Page 165 Dimensions/Afmetingen/Dimensions Size Description Unit DRE 52-9 DRE 80-9 Afm. Omschrijving Eenheid DRE 52-18 DRE 80-18 Description Unité DRE 52-36 DRE 80-36 DRE 80-54 Dimensions water heater/Afmetingen boiler/Dimensions du chauffe-eau Overall height 1460 1580 Totale hoogte Hauteur totale Appliance diameter Toestel diameter Diamètre de l'appareil...
- Page 166 IMD-0298b R1 Installation, Maintenance and Service part...
-
Page 167: Energy Labeling/Energielabel/Étiquette Énergétique
Energy labeling/Energielabel/Étiquette Énergétique Description Unit DRE 52-9 DRE 52-18 DRE 52-36 Omschrijving Eenheid Description Unité Declared load profile/Aangegeven capaciteitsprofiel/Profil de charge déclaré Load profile Capaciteitsprofiel Profil de charge Energy efficiency class (Energy label) Klasse energie-efficiëntie (energielabel) Classe d’efficacité énergétique (Étiquette Énergétique) Energy efficiency 38.4... - Page 168 Description Unit DRE 80-9 DRE 80-18 DRE 80-36 DRE 80-54 Omschrijving Eenheid Description Unité Declared load profile/Aangegeven capaciteitsprofiel/Profil de charge déclaré Load profile Capaciteitsprofiel Profil de charge Energy efficiency class (Energy label) Klasse energie-efficiëntie (energielabel) Classe d’efficacité énergétique (Étiquette Énergétique) Energy efficiency 38.7 39.1...
- Page 169 Electrical wiring diagram/Elektrisch schema/ Schéma de câblage électrique Fig. Electrical wiring diagram - 3 elements 0313851_DRE_NLUKFR, 30-03-2022...
- Page 170 Fig. Electrical wiring diagram - 6 elements Installation, Maintenance and Service part...
- Page 171 Fig. Electrical wiring diagram - 9 elements 0313851_DRE_NLUKFR, 30-03-2022...
- Page 172 Cable colors/Kabelkleuren/Couleurs des câbles Brown Bruin Marron Black Zwart Noir Gray Grijs Gris Blue Blauw Bleu White Blanc Rood Rouge Orange Oranje Orange Pink Roze Rose Purple Paars Violet Yellow Geel Jaune Terminal block connections/Aansluitingen aansluitingenblok/Bloc de raccordement électrique de terminaux Earth Aarde...
-
Page 173: Ce Declaration Of Conformity
Electric Storage Water Heater Product family name: Product models: DRE 52-9, DRE 52-18, DRE 52-36, DRE 80-9, DRE 80-18, DRE 80-36, DRE 80-54 on the assumption that the installation instructions have been followed are compliant to: Low Voltage Directive (LVD) - 2014/35/EU... -
Page 174: Uk - Declaration Of Conformity
Product family name: Product models: DRE 52-9, DRE 52-18, DRE 52-36, DRE 80-9, DRE 80-18, DRE 80-36, DRE 80-54 on the assumption that the installation instructions have been followed are compliant to: Electrical Equipment (Safety) Regulations 2016 (UK SI 2016 No. 1101) - Page 175 Elektrisch Warmwater Voorraadtoestel Product familienaam: Product naam: DRE 52-9, DRE 52-18, DRE 52-36, DRE 80-9, DRE 80-18, DRE 80-36, DRE 80-54 op de veronderstelling dat de installatie instructies zijn opgevolgd, voldoen aan de onderstaande Europese Richtlijnen: Laagspanningsrichtlijn (LVD) - 2014/35/EU...
-
Page 176: Ce-Déclaration De Conformité
Chauffe-eau Électrique Nom de famille de produit: Modèles de produit: DRE 52-9, DRE 52-18, DRE 52-36, DRE 80-9, DRE 80-18, DRE 80-36, DRE 80-54 sur l’hypothèse que les instructions d’installation ont été suivessont conformes à: Directive Basse Tension (LVD) - 2014/35/UE...