Table des Matières
Publicité
Les langues disponibles
Les langues disponibles
Liens rapides
JAX-T10U
JAX-T18U
For household use
Electric Rice Cooker
OPERATING INSTRUCTIONS
Thank you for purchasing this TIGER rice cooker/warmer.
Please read these instructions carefully before use and observe them during use.
Pour usage domestique
Cuiseur à riz électrique
MODE D'EMPLOI
Nous vous remercions d'avoir fait l'achat d'un cuiseur à riz/chauffe-riz de marque TIGER.
Veuillez lire attentivement ces instructions avant d'utiliser l'appareil et respectez-les
attentivement.
家庭用
炊飯電子鍋
使用說明書
感謝您購買TIGER(虎牌)炊飯電子鍋。
使用前請務必仔細閱讀本操作說明的全部內容。
가정용
전기밥솥
취급 설명서
타이거 전기밥솥을 구매해주셔서 감사합니다.
사용하기 전에 본 취급 설명서를 자세히 읽고 설명에 따르십시오.
家庭用
炊飯ジャー
取扱説明書
このたびは、 タイガー炊飯ジャーをお買い上げいただきまことにありがとうございます。
ご使用になる前に、 この取扱説明書を最後までお読みください。
JAX-T
Publicité
Chapitres
Table des Matières
Dépannage

Manuels Connexes pour Tiger JAX-T Série


Sommaire des Matières pour Tiger JAX-T Série
- Page 1 Please read these instructions carefully before use and observe them during use. Pour usage domestique Cuiseur à riz électrique MODE D'EMPLOI Nous vous remercions d'avoir fait l'achat d'un cuiseur à riz/chauffe-riz de marque TIGER. Veuillez lire attentivement ces instructions avant d'utiliser l'appareil et respectez-les attentivement. 家庭用...
-
Page 5: Table Des Matières
Contents Safety Instructions ..................... 6 Names and Functions of Component Parts ............11 Menu options and features ..................13 Tips on making delicious rice ................. 14 Before Cooking Rice ....................16 How to Cook Rice ....................18 Cooking time guidelines ..................19 Once the Rice Is Done Cooking ................ -
Page 6: Safety Instructions
Safety Instructions Read and follow all safety instructions before using the rice cooker. • The precautions described here are intended to protect the user and other individuals from physical harm and to safeguard against damage to property. Be sure to follow the instructions since they are important safeguards. - Page 7 Warning Who should use the rice cooker Power cord and plug Do not allow children to use the rice Do not use a damaged power cord. cooker unsupervised. Keep out of Also, be careful not to damage the reach of infants. power cord yourself.
- Page 8 Warning Handling the rice cooker During and after cooking Never open the lid during cooking. Do not immerse the rice cooker in or splash it with water. Doing so may result in burns. Doing so may result in short-circuiting or electric shock.
- Page 9 Caution Handling the rice cooker Do not use the rice cooker near a heat source or where it may be splashed Only use the inner pot made with water. exclusively for this rice cooker. Doing so may result in electric shock, short-circuiting, fire, or deformation or Using any other pot may result in overheating or malfunction.
- Page 10 Caution Cleaning the rice cooker Wait until the rice cooker has cooled down before cleaning it. Failure to do so may result in burns. Do not wash the entire rice cooker. Do not wash the entire rice cooker or pour water into the rice cooker or its bottom section.
-
Page 11: Names And Functions Of Component Parts
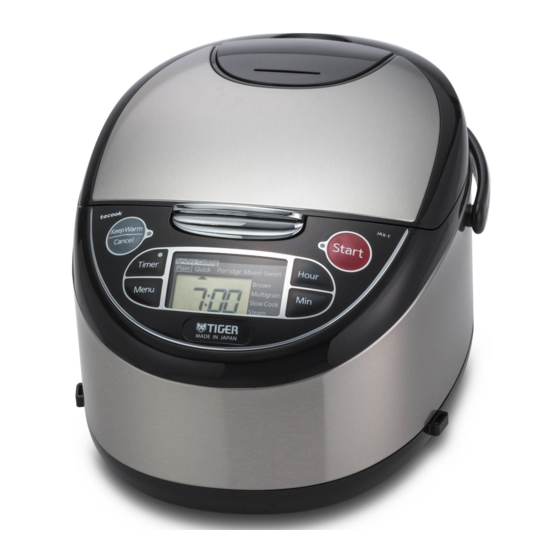
Names and Functions of Component Parts Steam cap (See p.35 to 36.) Steam vent Lid gasket This gasket is not removable; do not attempt to remove it. Open/lock button Push to open the lid. Upper casing Inner pot Carrying handle Use when carrying the rice cooker. - Page 12 Operation panel Keep Warm lamp Start lamp Timer lamp Lit when the Keep Warm Lit or blinks during Lit or blinks when the cooking, etc. function is on. Timer function is set. [Keep Warm/Cancel] key Press to turn on the Keep Warm function or to cancel [Start] key the current operation. Press to start cooking, etc.
-
Page 13: Menu Options And Features
Menu options and features Timer Menu function Feature availability Select when cooking white rice. ○ Plain/Synchro-Cooking Also select when using the cooking plate to cook rice and side dishes together. Quick Select when quickly cooking white rice. ○ Porridge Select when making porridge. Mixed • Sweet Select when cooking seasoned rice or steamed glutinous rice. -
Page 14: Tips On Making Delicious Rice
Read p.16 to 17 for preparations before cooking rice, and p.18 to 22 Tips on making delicious rice for how to cook rice. Select high quality rice and store it in a Adding other ingredients to the rice cool location. The total amount of ingredients should be no Choose freshly polished, glossy rice with a more than 2.5 oz (70 g) per cup of rice. - Page 15 Cooking brown rice and/or multi-grain Cooking grains together with brown rice rice mixed in with white rice • Always use the “Brown” menu. • If the rice to be cooked includes more brown • The maximum acceptable amount for the rice and/or multi-grain rice than white rice, use combination of brown rice and grains is 3.5 the “Brown”...
-
Page 16: Before Cooking Rice
Before Cooking Rice Adjust the water level. Measure the rice. Always use the measuring cup supplied with Place the inner pot on a level surface and the rice cooker. adjust the water level to the appropriate line A level filling of rice in the supplied measuring of the corresponding scale on the inside of cup equals about 0.18 L. - Page 17 Connect the power plug to an Caution outlet. ● Be sure to remove any rice or other material adhering to and around the heating plate, center sensor, upper casing, and the open/lock button. (See p.33.) Adhering material can prevent the lid from closing, allow steam to leak out during cooking, or enable the lid to open and the contents to spray out, resulting in burns or other injury.
-
Page 18: How To Cook Rice
How to Cook Rice Press the [Menu] key to Press the [Start] key. select the desired menu. The Start lamp will turn on. If you selected the “Plain” menu, Each time the [Menu] key is a one-short, one-long beep alarm pressed, the selected menu will will sound. Otherwise, only a change in the order shown below. one-beep alarm will sound. The menu cursor will blink while the menu is being selected. -
Page 19: Cooking Time Guidelines
Appropriate amounts See p.14 to 15 for the appropriate amounts of grains and ingredients. Cooking time guidelines Type of rice Mixed • Sweet Plain/Synchro-Cooking Quick Brown Multigrain Unit size 1.0 L (5.5-cup) type 44 to 59 min. 25 to 45 min. 39 to 60 min. 67 to 79 min. -
Page 20: Once The Rice Is Done Cooking
Once the Rice Is Done Cooking Once the final steaming process Stir and loosen the cooked rice. Be sure to stir and loosen the rice as soon as begins, the remaining time will cooking is complete. be displayed. Always wear a kitchen mitten, etc., to hold The time until steaming is completed will be the pot while stirring. -
Page 21: Setting The Timer
Setting the Timer Check the present time. • See p.44 for the procedure to set the present time. Press the [Menu] key to select the desired menu. 3, 5 The menu cursor will blink while the menu is being selected. Using the Timer function (Timer 1 / Timer 2) You can preset the time that you want cooking Blinks... - Page 22 Press the [Timer] key to Use the [Hour] and [Min] Blinks select either “Timer 1” keys to set the desired or “Timer 2”. completion time. The selected setting will switch back and forth between “Timer 1” and “Timer 2” each time the [Timer] key is Press the [Hour] key to change the set time pressed.
-
Page 23: Keeping The Rice Warm
Keeping the Rice Warm The Keep Warm function will especially maintain „ Elapsed Keep Warm time display the shiny, delicious taste of white rice. The Keep Warm function will automatically engage Hold down the [Hour] key to display the elapsed Keep Warm time. The elapsed time will be displayed when cooking is completed. in 1-hour increments up to 24 hours (“24h”). If more than 12 hours has elapsed, the time on the „ Turning off the Keep Warm display will blink up to 24 hours. -
Page 24: Reheating Cooked Rice
Reheating Cooked Rice For piping hot rice, reheat the rice that is being kept Press the [Start] key. Blinks warm before serving it. The Start lamp will blink and reheating will start. Note The remaining time will be displayed and an alarm (3 long ● Rice will not be fully heated if more than half of beeps) will sound when the the inner pot is full. -
Page 25: Cooking Rice And Side Dishes Together ("Synchro-Cooking" Menu)
Cooking Rice and Side Dishes Together (“Synchro-Cooking” Menu) You can use the cooking plate to cook side dishes Place the cooking plate inside described in the supplied “COOKBOOK” at the the inner pot and close the lid. same time as you cook rice. You can also add water to the inner pot and cook side dishes without making rice. - Page 26 Press the [Start] key. Cooking without making rice The Start lamp will turn on and concurrent cooking will start. See “Steaming Food (“Steam” Menu)” (p.29 to 31). Once cooking is completed, an Note alarm (8 beeps) will sound (the ● Set the cooking time to between 20 and 30 minutes, according to the type of food being Start lamp will turn off).
-
Page 27: Slow Cooking ("Slow Cook" Menu)
Slow Cooking (“Slow Cook” Menu) Refer to the supplied “COOKBOOK” for directions. Connect the power plug to an outlet. With this menu, food is first brought to near boiling, the heat is then lowered to about 197°F (92°C) and the food left to simmer. The temperature is Note then lowered even further to about 186°F (86°C) ●... - Page 28 4. Repeat the procedure from step on p.27. Press the [Start] key. ● If you want food that is being kept warm to be The Start lamp will turn on and piping hot before serving it, press the [Start] cooking will start. key when the Keep Warm lamp is on in order to ”Ready in” will appear on the reheat that food.
-
Page 29: Steaming Food ("Steam" Menu)
Steaming Food (“Steam” Menu) Add water to the inner pot and Press the [Menu] key to place the cooking plate inside. select the “Steam” menu. Refer to the following guideline on the The menu cursor will blink while the amount of water to add. menu is being selected. - Page 30 Remove the cooking plate. Once steaming is completed, an alarm (8 beeps) will sound (the Start lamp will turn off). The Keep Warm lamp will turn on. • To steam the food further, use the [Hour] and [Min] keys to set the additional steaming time and then press the [Start] key. The steaming time can be extended up to 15 minutes, a maximum of 3 times. • Be careful when removing the cooking plate after cooking, as it will be hot.
- Page 31 „ Guidelines for steaming times Ingredients Amount Approx. time Hints for steaming 1 fillet Make several small cuts in the Chicken 20 to 30 min (1/2 to 3/4 lbs [200 to 300 g]) chicken. Fillet to a thickness of 3/4 inches 2 to 3 fillets White fish 20 to 25 min...
-
Page 32: Cleaning And Maintenance
Cleaning and Maintenance Perform cleaning and maintenance procedures as described on the following p.32 to 37. Any other servicing should be performed by an authorized service representative. Clean all parts by hand. Do not use a dishwasher/dryer. To maintain cleanliness, always clean the rice cooker on the same day it is used. Also clean the rice cooker at regular intervals as well. The rice cooker should also be cleaned on the day that it is used in order to remove any odors that remain from cooking. - Page 33 „ Parts to wash when dirty Inside and outside the rice cooker Wet a towel or cloth, wring out excess water, and wipe. gasket Power cord Wipe with a dry cloth. Upper casing Heating plate, center sensor Center Remove burned rice and any other adhering grains of rice. Heating If adhering objects are hard to remove, use commercially sensor plate available sandpaper (around #320), then wet a towel or cloth, Power plug Open/lock wring out excess water, and wipe.
- Page 34 Removing and attaching the inner lid Pull the inner lid towards you to remove it. To reattach, align the inner lid gasket with the shaft on the main lid. Inner lid gasket Inner lid „ Attaching the inner lid gasket If the inner lid gasket is loose, press it firmly back into place. Inner lid gasket...
- Page 35 Removing and attaching the steam cap „ Removing the steam cap „ Attaching the steam cap Insert your finger into the hole Set the inside portion of the in the lid and lift the steam cap assembly on top of the cap upwards.
- Page 36 „ Installing the steam cap gaskets If the gaskets are loose, refer to the illustration and set them securely into place. If the gaskets are not set securely, they can become loose and may result in problems due to steam leaking out, etc. O-ring Steam vent gasket Cleaning the lower heating plate Water drops may fall from the inner lid during cooking and cause the surface of the lower heating plate to become dirty. This will not affect the performance of the rice cooker but, if you would like, you can clean the heating plate using the following procedure. Add a bit of standard kitchen Wipe clean with a damp paper cream cleanser to a nylon towel or cloth.
- Page 37 Removing odors (When odors remain in the rice cooker and/or cooking plate) The following procedure should be performed each time after cooking, or if odors become bothersome. „ Rice cooker „ Cooking plate Immerse the cooking plate in hot water and allow it Fill the inner pot to about 70 to soak for about 1 hour. to 80% with water, select the “Plain”...
-
Page 38: If Rice Does Not Cook Properly
If Rice Does Not Cook Properly Check the following points if you experience a problem with the cooked rice or with the operation of the rice cooker, etc. Check point Problem ● ● ● ● ● ● ● ● Is too hard ●... - Page 39 Problem Cause There is a thin film covering A thin, tissue-like film is formed by melted and dried starch. This is not harmful to your the rice. health. Rice sticks to the inner pot. Soft rice and sticky rice can easily stick to the pot. Check point Problem ● ● ● ● ● ● ● Has an odor ● ● ● ●...
-
Page 40: If Synchro-Cooking Does Not Go As Expected
If Synchro-Cooking Does Not Go As Expected Check the following points when you experience a problem with food cooked concurrently using the cooking plate. Check point Problem ● ● ● ● Is too hard ● ● ● ● Is too soft Is not cooked ●... -
Page 41: If Slow Cooking Does Not Go As Expected
If Slow Cooking Does Not Go As Expected Check the following points when you experience a problem with the cooked food. Check point Problem ● ● ● ● ● ● Does not boil ● ● ● Boils over ● ● ●... -
Page 42: Troubleshooting
Troubleshooting Check the following before requesting repair service. Reference Problem Check point Action page The rice or other foods are not Is the power plug properly Insert the power plug fully into an connected to an outlet? cooked at all. outlet. Rice was not cooked completely by Does the display show the correct Set the correct present time. -
Page 43: If These Indications Appear
Nothing happens when a key is Is the power plug properly Insert the power plug fully into an connected to an outlet? pressed. outlet. Is the Keep Warm lamp on? Press the [Keep Warm/Cancel] key to turn off the Keep Warm function, then try the operation again. Such smells may occur when the rice cooker is first used, but they There is a smell of plastic. – should go away over time as the rice cooker gets used. There are stripes or waves on plastic Such stripes and waves are produced when the resin is being molded. -
Page 44: Setting The Present Time
Setting the present time The present time is displayed in a 24-hour format. The time cannot be set during cooking, when the Keep Warm function is on, when the Timer function is in use, or during reheating. „ Example: Changing the present time from “9:30” to “9:35” Connect the power plug to an Set the present time. outlet. Set the hour with the [Hour] key and the minute with the [Min] key. -
Page 45: Specifications
Specifications Unit size 1.0 L (5.5-cup) type 1.8 L (10-cup) type 120 V, 60 Hz Power source Rated power (W) Plain 0.18 to 1.0 0.36 to 1.8 (1 to 5.5 cups [5.29 to 29.10 oz]) (2 to 10 cups [10.58 to 52.91 oz]) Quick 0.18 to 1.0 0.36 to 1.8 (1 to 5.5 cups [5.29 to 29.10 oz]) (2 to 10 cups [10.58 to 52.91 oz]) - Page 47 Table des matières Consignes de sécurité ..................... 48 Noms des pièces et fonctions ................53 Options du menu et fonctions ................55 Comment faire du riz délicieux ................56 Avant de cuire le riz ....................58 Comment faire cuire le riz ..................60 Directives sur les temps de cuisson ..............
-
Page 48: Consignes De Sécurité
Consignes de sécurité Lisez et suivez toutes les consignes de sécurité avant d’utiliser le cuiseur à riz. • Les précautions décrites ici sont destinées à protéger l’utilisateur et d’autres personnes contre des dommages physiques et matériels. Soyez certain de suivre les consignes, car elles sont des mesures de protection importantes. • Ne pas enlever les étiquettes de sécurité fixées au cuiseur à riz. Les consignes de sécurité sont classées et décrites comme illustrées ci-dessous, selon le niveau des dangers et des dommages Description des symboles utilisés susceptibles d’être causés par une utilisation inappropriée du cuiseur... - Page 49 Avertissement Qui devrait utiliser le cuiseur à riz Le cordon d’alimentation et la fiche électrique Ne pas permettre aux enfants d’utiliser Ne pas utiliser un cordon le cuiseur à riz sans surveillance. Garder d’alimentation endommagé. En même temps, veillez à ne pas endommager hors de la portée des jeunes enfants.
- Page 50 Avertissement Manipuler le cuiseur à riz Pendant et après la cuisson Ne jamais ouvrir le couvercle pendant Ne pas plonger le cuiseur à riz dans l’eau ou l’éclabousser avec de l’eau. la cuisson. Cela peut entraîner un court-circuit ou Cela peut entraîner des brûlures. un choc électrique. Ne pas mettre votre visage ou vos mains près du bouchon vapeur ou Ne pas insérer d’épingles, d’aiguilles des évents de vapeur.
- Page 51 Mise en garde Manipuler le cuiseur à riz Ne pas utiliser le cuiseur à riz à proximité d’une source de chaleur ou N’utilisez que le récipient intérieur conçu à un endroit exposé à l’eau. exclusivement pour ce cuiseur à riz. Cela peut entraîner un choc électrique, Utiliser tout autre récipient peut entraîner un court-circuit, un incendie ou...
- Page 52 Mise en garde Nettoyer le cuiseur à riz Attendez que le cuiseur à riz soit refroidi avant de le nettoyer. Sinon, il peut entraîner des brûlures. Ne plongez pas le cuiseur à riz dans l’eau pour le laver. Ne plongez pas le cuiseur à riz dans l’eau pour le laver et ne laissez pas d’eau pénétrer à...
-
Page 53: Noms Des Pièces Et Fonctions
Noms des pièces et fonctions Bouchon vapeur (Voir p.77 à 78.) Évents de vapeur Joint de couvercle Ce joint n’est pas amovible, ne pas essayer Couvercle de l’enlever. Bouton de verrouillage Poussez pour ouvrir le couvercle. Partie supérieure du boîtier Récipient intérieur Poignée Utilisez-la pour transporter le cuiseur à... - Page 54 Tableau de commande Témoin Keep Warm Témoin Start Témoin de la minuterie Allumé quand la fonction de Allumé ou clignoté S’allume ou clignote pendant la cuisson, etc. maintien au chaud est activée. lorsque la minuterie est activée. Touche [Keep Warm/Cancel] Appuyez sur la touche pour activer la fonction de Touche [Start] maintien au chaud ou pour...
-
Page 55: Options Du Menu Et Fonctions
Options du menu et fonctions Disponibilité Menu de la Fonctions minuterie Sélectionnez ce menu lors de la cuisson du riz blanc. ○ Plain/Synchro-Cooking Sélectionnez également ce menu lorsque vous utilisez le plateau de cuisson pour cuire du riz avec d’autres aliments. Quick Sélectionnez ce menu lorsque vous désirez cuire du riz blanc rapidement. -
Page 56: Comment Faire Du Riz Délicieux
Lisez p.58 à 59 pour les préparations avant la cuisson de riz, et p.60 à 64 Comment faire du riz délicieux pour savoir comment faire cuire le riz. Sélectionnez un riz de haute qualité et Ajouter d’autres ingrédients au riz conservez-le dans un endroit frais. La quantité totale des ingrédients ne devrait pas être supérieure à 2,5 oz (70 g) par tasse de riz. Incorporez Choisissez un riz fraîchement poli, brillant et avec bien tous les assaisonnements (le cas échéant), puis... - Page 57 • Lors de la cuisson du riz brun germé, du riz mauvais résultats de cuisson. complet ou du riz blanc demi-poli, utilisez Cuisson de mélanges grains/riz brun l’échelle « Plain » comme référence. • Utilisez toujours le menu « Brown ». • Si la quantité d’eau à ajouter est spécifiée sur • La quantité maximale acceptable pour la le paquet de riz brun germé ou de riz multigrain combinaison de riz brun et de grains est de 3,5 que vous utilisez, suivez ces directives et tasses pour le cuiseur de 1,0 L et 6 tasses pour...
-
Page 58: Avant De Cuire Le Riz
Avant de cuire le riz Ajustez le niveau d’eau. Mesurez le riz. Utilisez toujours la tasse à mesurer fournie Placez le récipient intérieur sur une surface avec le cuiseur à riz. plane et ajustez le niveau d’eau jusqu’à Une tasse comble de riz dans la tasse à la ligne appropriée de l’échelle graduée mesurer correspond à environ 0,18 L. - Page 59 Branchez la fiche électrique à Mise en garde une prise. ● Assurez-vous d’enlever tout le riz et toute autre matière susceptibles d’être collés sur et autour de la plaque chauffante, du capteur central, de la partie supérieure du boîtier et du bouton de verrouillage. (Voir p.75.) Les matières collées peuvent empêcher le couvercle de fermer, ce qui permettrait à la vapeur de s’échapper pendant la cuisson, Fiche électrique pourrait entraîner l’ouverture du couvercle et le débordement du contenu, ce qui pourrait causer L’appareil sera sous tension et le curseur du...
-
Page 60: Comment Faire Cuire Le Riz
Comment faire cuire le riz Appuyez sur la touche Appuyez sur la touche Marche [Menu] pour sélectionner [Start]. Le témoin Start s’allumera. le menu désiré. Si vous avez sélectionné le menu À chaque pression de la touche [Menu], le « Plain », un bip court et un bip menu sélectionné changera dans l’ordre long se feront entendre. Sinon, indiqué ci-dessous. un seul bip retentira. -
Page 61: Directives Sur Les Temps De Cuisson
Quantités appropriées Voir p.56 à 57 pour connaître les quantités de grains et d’ingrédients appropriées. Directives sur les temps de cuisson Type de riz Mixed • Sweet Plain/Synchro-Cooking Quick Brown Multigrain Dimension du cuiseur Cuiseur de 1,0 L 44 à 59 min. 25 à 45 min. 39 à 60 min. 67 à 79 min. 42 à... -
Page 62: Lorsque La Cuisson Est Terminée
Lorsque la cuisson est terminée Le temps restant à la cuisson Remuez et égrainez le riz une à la vapeur s’affichera après le fois cuit. début de processus de cuisson. Assurez-vous de bien remuer et d’égrainer le riz dès que la cuisson est terminée. Jusqu’à la fin de la cuisson à la vapeur, le Portez toujours une mitaine ou un gant temps restant s’affichera et s’écoulera par... -
Page 63: Réglage De La Minuterie
Réglage de la minuterie Vérifiez l’heure actuelle. • Voir p.86 pour des détails sur la façon d’ajuster l’horloge à l’heure actuelle. Appuyez sur la touche [Menu] pour sélectionner le menu désiré. 3, 5 Le curseur du menu clignotera pendant que le menu est sélectionné. Utilisation de la minuterie (Timer 1 / Timer 2) Vous pouvez programmer l’heure à... - Page 64 Appuyez sur la touche Utilisez les touches [Hour] Clignote [Timer] pour sélectionner et [Min] pour régler l’heure de fin de cuisson souhaitée. « Timer 1 » ou « Timer 2 ». Le réglage sélectionné basculera entre « Timer 1 » et « Timer 2 » chaque fois que vous appuierez sur la touche Appuyez sur la touche [Hour] pour régler l’heure de fin de cuisson par intervalles de...
-
Page 65: Maintenir Le Riz Au Chaud
Maintenir le riz au chaud „ Afficher le temps de maintien au chaud écoulé La fonction de maintien au chaud permettra de conserver la brillance et le goût délicieux du riz Maintenez enfoncée la touche [Hour] pour afficher blanc. le temps de maintien au chaud écoulé. Ce temps La fonction de maintien au chaud s’active sera affiché en intervalles de 1 heure jusqu’à 24 automatiquement lorsque la cuisson est terminée. -
Page 66: Réchauffer Le Riz
Réchauffer le riz Si vous désirez servir un riz très chaud, réchauffez Appuyez sur la touche Clignote le riz qui a été maintenu au chaud avant de le servir. [Start]. Le témoin Start clignotera et le Remarque réchauffage commencera. Le temps restant sera affiché et ● Le riz ne sera pas entièrement chauffé si le un signal sonore (3 longs bips) récipient intérieur est rempli plus qu’à... -
Page 67: Cuire Ensemble Du Riz Et D'autres Aliments (Menu « Synchro-Cooking »)
Cuire ensemble du riz et d’autres aliments (Menu « Synchro-Cooking ») Vous pouvez utiliser le plateau de cuisson pour faire Placez le plateau de cuisson à cuire le riz simultanément avec d’autres aliments l’intérieur du récipient intérieur tel que décrit dans le « COOKBOOK » fourni. Vous et refermez le couvercle. - Page 68 Appuyez sur la touche [Start]. Marche Cuisson d’aliments sans riz Le témoin Start s’allumera et la cuisson simultanée démarrera. Voir « Cuire à la vapeur (Menu « Steam ») » (p.71 à 73). Lorsque la cuisson est terminée, Remarque un signal sonore (8 bips) retentira ●...
-
Page 69: Cuisson Lente (Menu « Slow Cook »)
Cuisson lente (Menu « Slow Cook ») Branchez la fiche électrique à Reportez-vous au « COOKBOOK » fourni pour plus de détails. une prise. En activant cette fonction, le cuiseur chauffera les ingrédients jusqu’au point d’ébullition, puis réduira leur température à environ 197 °F (92 °C) de façon Remarque à les faire mijoter pendant un certain temps. Par la suite, le cuiseur réduira sa température de mijotage ●... - Page 70 4. Répétez la procédure de l’étape décrite à la Appuyez sur la touche [Start]. Marche p.69. Le témoin Start s’allumera et la ● Si vous désirez que les aliments qui sont maintenus cuisson commencera. au chaud soient réchauffés avant d’être servis, « Ready in » apparaîtra sur appuyez sur la touche [Start] lorsque le témoin l’afficheur.
-
Page 71: Cuire À La Vapeur (Menu « Steam »)
Cuire à la vapeur (Menu « Steam ») Versez de l’eau dans le récipient Appuyez sur la touche [Menu] pour intérieur et placez le plateau de sélectionner le menu « Steam ». cuisson à l’intérieur du récipient. Le curseur du menu clignotera pendant que le menu est sélectionné. - Page 72 Lorsque la cuisson à la vapeur est Retirez le plateau de cuisson. terminée, un signal sonore (8 bips) retentira (le témoin Start s’éteindra). Le témoin Keep Warm s’allumera. Marche • Pour prolonger la cuisson des aliments à la vapeur, utilisez les touches [Hour] et [Min] pour régler un temps de cuisson à la vapeur supplémentaire, puis appuyez sur la touche [Start].
- Page 73 „ Guide des temps de cuisson à la vapeur Temps Ingrédients Quantité Trucs pour la cuisson à la vapeur approximatif 1 filet Faites plusieurs petites entailles dans Poulet 20 à 30 min (1/2 à 3/4 lbs [200 à 300 g]) le poulet. Les filets de 3/4 po (2 cm) ou moins 2 à 3 filets d’épaisseur.
-
Page 74: Nettoyage Et Entretien
Nettoyage et entretien Vous pouvez effectuer vous-mêmes les procédures de nettoyage et d’entretien décrites aux pages p.74 à 79. Tout autre travail d’entretien doit être réalisé par un technicien autorisé. Nettoyez toutes les pièces à la main. Ne les lavez pas au lave-vaisselle. Pour conserver la propreté de votre cuiseur à riz, nous vous conseillons de le nettoyer le jour même qu’il a été... - Page 75 „ Pièces à nettoyer dès qu’elles deviennent sales Intérieur et extérieur du cuiseur à riz Joint de Mouillez une serviette ou un chiffon, essorez l’excès d’eau, couvercle puis essuyez. Partie Cordon d’alimentation supérieure du boîtier Essuyez avec un chiffon sec. Plaque Capteur Plaque chauffante et capteur central chauffante central Retirez le riz brûlé...
- Page 76 Retrait et fixation du couvercle intérieur Tirez le couvercle intérieur vers vous pour le retirer. Pour le remettre en place, alignez le joint de couvercle intérieur avec l’axe du couvercle principal. Joint de couvercle intérieur Couvercle intérieur „ Fixation du joint de couvercle intérieur Si le joint de couvercle intérieur est lâche, appuyez fermement sur lui pour le remettre en place. Joint de couvercle intérieur...
- Page 77 Retrait et fixation du bouchon vapeur „ Retrait du bouchon vapeur „ Fixation du bouchon vapeur Insérez votre doigt dans Posez la partie intérieure de l’ouverture du couvercle et l’assemblage sur le bouchon. soulevez le bouchon vapeur. Bouchon vapeur Tournez la partie intérieure de l’assemblage comme illustré...
- Page 78 „ Installation des joints du bouchon vapeur Si les joints du bouchon vapeur sont lâches, fixez-les en vous reportant aux illustrations ci-dessous. Si ces joints ne sont pas solidement fixés, ils peuvent devenir lâches et entraîner des anomalies causées entre autres par la libération de vapeur. Joint torique Joint de l’évent de vapeur Nettoyage de la plaque chauffante inférieure Des gouttes d’eau peuvent tomber du couvercle intérieur pendant la cuisson et salir la surface de la plaque chauffante inférieure. Cela n’affecte pas le rendement du cuiseur à riz, mais, si vous le souhaitez, vous pouvez nettoyer la plaque chauffante en utilisant la procédure suivante.
- Page 79 Élimination des odeurs (si des odeurs persistent dans le cuiseur à riz et/ou le plateau de cuisson) La procédure suivante devrait être effectuée après chaque cuisson, ou si des odeurs deviennent gênantes. „ Cuiseur à riz „ Plateau de cuisson Remplissez le récipient intérieur Plongez le plateau de cuisson dans l’eau chaude et laissez tremper pendant environ 1 heure. avec de l’eau à...
-
Page 80: Si Le Riz Est Mal Cuit
Si le riz est mal cuit Vérifiez les éléments suivants si votre riz n’est pas bien cuit ou si vous éprouvez des problèmes avec le fonctionnement du cuiseur à riz. Élément à vérifier Problème ● ● ● ● ● ● ● ● Est trop dur ● ● ● ● ● ● ● ● Est trop mou ● ● ● ● ●... - Page 81 Problème Cause Un mince film recouvre le riz. De l’amidon fondu et séché a formé un film mince comme du papier. Cela n’est pas nocif pour votre santé. Le riz colle au récipient Le riz mou et le riz collant peuvent facilement coller au récipient. intérieur. Élément à vérifier Problème ● ● ● ● ● ● ● A une odeur ● ● ● ●...
-
Page 82: Lorsque « Synchro-Cooking » Donne Pas De Mauvais Résultats
Lorsque « Synchro-Cooking » donne pas de mauvais résultats Vérifiez les points suivants lorsque vous éprouvez un problème avec la cuisson simultanée d’aliments en utilisant le plateau de cuisson. Élément à vérifier Problème ● ● ● ● Est trop dur ● ● ● ● Est trop mou ● ● ● Pas assez cuit ● ● ● Dur au centre ●... -
Page 83: Lorsque « Slow Cooking » Donne De Mauvais Résultats
Lorsque « Slow Cooking » donne de mauvais résultats Vérifiez les points suivants si vous éprouvez un problème avec les aliments cuits. Élément à vérifier Problème ● ● ● ● ● ● Ne bout pas ● ● ● Le contenu déborde Tout le liquide s’est ● ● ● évaporé Page de référence 58, 74–79 59, 74–78... -
Page 84: Dépannage
Dépannage Vérifiez les points suivants avant de faire appel au service de réparation. Page de Élément à vérifier Problème Mesure à prendre référence Est-ce que la fiche électrique est Insérez la fiche électrique Le riz ou d’autres aliments ne sont pas cuits du tout. branchée correctement à une complètement dans la prise. prise? Est-ce que l’afficheur indique la Le riz n’était pas complètement Réglez l’horloge à l’heure actuelle. bonne heure actuelle? cuit après le temps de cuisson programmé. -
Page 85: Lorsque Ces Indications S'affichent
L’heure actuelle, les réglages Est-ce que « 0:00 » clignote sur La pile au lithium est épuisée. préprogrammés de la minuterie, l’afficheur quand le cuiseur est Contactez votre détaillant. rebranché? et le temps de maintien au chaud écoulé sont perdus lorsque la fiche électrique de l’appareil sera débranché. Le couvercle ne s’ouvrira pas ou Des grains de riz sont-ils collés Enlevez tout le riz restant. -
Page 86: Réglage De L'heure
Réglage de l’heure L’heure actuelle est affichée en format 24 heures. L’heure ne peut pas être réglée pendant la cuisson, lorsque la fonction de maintien au chaud est activée, lorsque la minuterie est utilisée ou pendant le réchauffage. „ Exemple : changer l’heure actuelle de « 9:30 » à « 9:35 » Branchez la fiche électrique à Réglez l’horloge à l’heure une prise. actuelle. -
Page 87: Spécifications Techniques
Spécifications techniques Cuiseur de 1,0 L (5,5 tasses) Cuiseur de 1,8 L (10 tasses) Dimension du cuiseur 120 V, 60 Hz Source d’alimentation Puissance nominale (W) 0,18 à 1,0 0,36 à 1,8 Plain (1 à 5,5 tasses [5,29 à 29,10 oz]) (2 à 10 tasses [10,58 à 52,91 oz]) 0,18 à 1,0 0,36 à 1,8 Quick (1 à 5,5 tasses [5,29 à 29,10 oz]) (2 à 10 tasses [10,58 à 52,91 oz]) 0,09 à 0,18 0,09 à 0,36 Porridge Hard (0,5 à 1 tasses [2,65 à 5,29 oz]) (0,5 à 2 tasses [2,65 à 10,58 oz]) 0,09 0,09 à 0,27 Soft (0,5 tasse [2,65 oz]) (0,5 à 1,5 tasses [2,65 à 7,94 oz]) Mélangé • 0,18 à 0,54 0,36 à 1,08 Mixed (1 à 3 tasses [5,29 à 15,87 oz]) (2 à 6 tasses [10,58 à 31,74 oz]) Sucré 0,18 à 0,54 0,36 à 0,9 Sweet (1 à 3 tasses [5,29 à 15,87 oz]) - Page 89 目錄 ............................90 安全注意事項 ..........................94 各部名稱及用途 ......................96 從選單可選的功能與特點 ......................97 煮出美味可口米飯的秘訣 ............................99 煮飯前的準備 ............................101 煮飯方法 ..........................102 煮飯所需的時間 ............................103 米飯煮好後 ......................104 定時煮飯的預約煮熟方法 ..............................106 保溫 ..........................107 再次加熱的方法 Synchro-Cooking ............108 米飯與料理同時烹調 ( “ ” 功能選單) Slow Cook ..................110 烹調方法...
-
Page 90: 安全注意事項
安全注意事項 使用前請仔細閱讀並遵守。 • 此處所顯示的注意事項旨在防止對使用者或他人造成人身傷害或財產損害。屬於有關安全方面的重要內容, 請務必遵守。 • 請勿撕下主體上黏貼的有關注意事項的貼紙。 透過以下內容,將因疏忽注意事項而錯誤操作,導致的危害及損 圖形符號的說明 害程度,加以區分說明。 符號表示警告、注意。具體 注意內容會在圖形符號裡或者 旁邊用圖片或文字表示。 表示進行假設錯誤操作時,可能導致使 警 告 用者死亡或重傷 的內容。 符號表示該行為屬於禁止行 表示進行假設錯誤操作時,可能會造成 為。具體禁止內容會在圖形符 注 意 使用者受到傷害 ,或者出現物資損害 號裡或者旁邊用圖片或文字表 的內容。 示。 所謂重傷是指由於失明、受傷、燙傷 (高溫、低溫) 、觸電、骨 符號表示強制行為或指示行 折、中毒等留下後遺症,以及需要住院治療甚至長期複診。 為的內容。具體指示內容會在 所謂傷害是指不需要入院治療或長期複診的燙傷或觸電等。 圖形符號裡或者旁邊用圖片或 所謂物資損害是指波及到房屋、家產以及家畜、寵物等的擴大 文字表示。 性損害。 警 告 一般安全注意事項... - Page 91 警 告 電源 操作本產品時 120V 請勿使用交流電 以外的電源。 請勿用水浸泡或淋濕本產品。 會造成火災或觸電。 否則可能引起短路或觸電。 請單獨使用額定 以上的插座。 請勿在空隙間插入異物,例如別針、鐵 如果與其他器具並用,多孔插座可能出 絲等金屬物體。 現異常發熱現象,恐導致著火。 否則可能由於觸電或異常情況對人身產 生傷害。 電源線、電源線插頭 開始烹調時 電源線如果出現破損,禁止繼續使用。 未安裝內鍋的情況下不可使用料理盤。 此外,請勿破壞電源線。 可能造成著火、冒煙或燙傷。 (加工、過度彎曲、靠近高溫部位、拉 扯、扭動、捆束、裝載重物、夾入物體 等) 烹調中、烹調後 會造成火災或觸電。 中 電源線插頭如果附著了灰塵,請立即擦 煮飯過程中 請勿打開鍋蓋。 拭乾淨。 否則可能會造成燙傷。 可能造成火災發生。 文 將電源線插頭牢固地插入到根部。 請勿將臉或手靠近蒸氣孔蓋或蒸氣孔。 可能會導致觸電、短路、冒煙或著火。...
- Page 92 注 意 一般安全注意事項 電源線、電源線插頭 請小心操作。 必須握住電源線插頭拔下。 如果跌落或加諸較強撞擊,可能造成傷 否則可能導致觸電或短路,從而導致起 害或故障。 火。 請勿在其他產品上使用本產品的料理盤。 可能造成火災或燙傷。 本產品的用途 禁止同時使用多孔插座。 本商品為一般家庭用。 否則可能會導致火災。 也可使用於下列所述場所。 • 店家或辦公室工作人員用廚房 • 農家 • 飯店、汽車旅館及其他住宿設施等 使用環境 請勿使用較長的電源線 有可能被電源線纏繞絆倒發生危險,請使用 請勿在不穩定場所、耐熱性差的桌子或 較短的電源線。 地毯上面使用。 也可以使用延長線,但請小心使用。 可能導致火災,或傷到桌子、地毯。 使用延長線時,請務必遵守下列使用方法。 請勿在靠近牆壁或家具的位置使用。 延長線所標示的電器額定值大於本產品所 蒸 氣 或 者 熱 度 可 能 會 造 成 損 傷 、 變 標示的電器額定值。...
- Page 93 注 意 搬運主體時,不要觸摸開蓋按鍵。 請勿在煮飯過程中 移動電子鍋。 否則鍋蓋打開,可能會造成受傷或燙傷。 否則會導致燙傷或米湯溢出。 烹調中、烹調後 清潔保養時 使用中或使用後請勿碰觸高溫部位。 待主體冷卻後再進行清潔保養。 可能導致燙傷。 觸摸高溫部位會造成燙傷。 使用中觸摸內鍋時,要使用連指手套, 請勿整機清洗。 而不要用手直接觸摸。 請勿進行整機清洗或讓主體內部、底部 因為已經變成高溫,會造成燙傷。 進水。否則可能引起短路或觸電。 內鍋 中 文 ● 內鍋的氟素塗層出現膨脹或剝落會導致變形, „ 今後使用時的注意事項 因此請務必遵守下列使用方法。 ● 請清除本體所附著之燒焦飯粒、米粒等。 • 請勿將內鍋直接放置於瓦斯爐上加熱,或在電 否則可能導致蒸氣外洩、米湯溢出或發生故障、飯 磁爐、微波爐等器具中使用。 • 請勿將 (免洗米) 白米以外的米飯 (什錦飯等) 不美味等。 進行保溫。...
-
Page 94: 各部名稱及用途
各部名稱及用途 蒸氣孔蓋 P.118 (參照 ∼ ) 蒸氣孔 上蓋密封圈 由於無法自行拆卸,請勿 過度拉扯。 鍋蓋 開蓋按鍵 按壓後鍋蓋開啟。 上框 內鍋 提把 搬移電子鍋時使用。 電熱板 內蓋 P.117 電源線 (參照 ) 主體 120V ( ) 電源線插頭 中央感應器... - Page 95 操作面板 保溫燈 預約燈 煮飯燈 保溫時點亮。 使用預約定時煮飯時點 煮飯過程中點亮或閃爍。 亮或閃爍。 [Keep Warm/ Cancel] 鍵 用於取消保溫或操作時。 [Start] 鍵 用於開始煮飯等功能 時。 [Timer] 鍵 用於選擇預約種類時。 [Hour] [Min] 、 鍵 用於設定現在時間 或定時。 [Menu] 鍵 用於選擇煮飯選單時。 顯示螢幕 顯示選單三角標或現在時間等。 ˙[Start] [Keep Warm/Cancel] 鍵、 鍵中央的凸出部分 ( ) 是為視障者而設計的。 中 ...
-
Page 96: 從選單可選的功能與特點
從選單可選的功能與特點 選單 預約選擇 特點 炊煮白米時選擇。 Plain/Synchro-Cooking ○ 另外,使用蒸盤可同時烹煮米飯與料理。 Quick - 想要快速煮白米時選擇。 Porridge ○ 炊煮粥時選擇。 Mixed・Sweet - 炊煮什錦飯和糯米飯時選擇。 Brown ○ 煮糙米、什穀米 (糙米與什穀雜糧混合的米) 時選擇。 Multigrain ○ 麥子、小米、稗子、紫米、紅米等什穀雜糧與白米一起炊煮時選擇。 當使用料理盤時,請勿進行炊煮預約設定。 P.127 煮飯容量請參照... -
Page 97: 煮出美味可口米飯的秘訣
P.99 煮飯前準備請參照 ∼ ,煮飯 方法請參照 P.101 ∼ 。 煮出美味可口米飯的秘訣 選擇優質大米,保存在陰涼處 根據米的種類或個人喜好加減水量 請選擇碾米日較近,顆粒飽滿有光澤的大米。請保 ●加減水量的標準表 存在通風良好、陰暗涼爽處。 加減水量 (依照內鍋的水量刻度線按 米飯種類 照個人喜好調整) 使用隨附的量杯正確量米 Plain/Synchro- Cooking 0.18L 1杯大約 。免洗米也 Plain “ ” 的水量刻度 Quick 可 以 用 隨 附 的 量 杯 進 行 計 Multigrain 量。... - Page 98 什穀雜糧加入白米中一起炊煮時 炊煮長米時 • 請 將 什 穀 雜 糧 的 量 控 制 在 白 米 的 • 炊煮長米時請選擇 “ 成 之 內 。 Quick ” 進行炊煮。 1.0L Mixed 白米與什穀雜糧的合計量最多為 型: 或者是用長米炊煮什錦飯時請選擇“ ・ 1.8L Sweet 杯、 型: 杯。 ” 進行炊煮。 • 請將什穀雜糧鋪在白米上進行炊煮。如果混在一...
-
Page 99: 煮飯前的準備
煮飯前的準備 量米 加減水量 必須使用隨附的量杯量米。 請將內鍋水平放置,對照內鍋內側的水量刻度 0.18L 隨附的量杯平口呈滿一杯約為 。 加減水量。 ● 如下圖所示,以量米杯 ( 0.18L ● 確認米的種類、選單後根據喜好加減水量。 (請參 ) 平口呈滿 杯為 P.97 標準進行量米。 照 ( 的標準表) 正確的測量範例 錯誤的測量範例 煮 杯白米時,要對 Plain 準 “ ” 水量刻度 位置 Note ● 請勿超過規定煮飯量標準 (請參照 P.127 擦拭乾淨水滴、米粒等 的規格... - Page 100 將內鍋放置在主體中 將電源線插頭插入插座 請確保正確放置,不要使其傾斜 關閉鍋蓋 內鍋 關閉 電源線插頭 內蓋 電源接通,選單三角標閃爍。 閃爍 安裝 Note ● 保溫燈點亮時,請按下 [Keep Warm/Cancel] 鍵使 Note 其熄滅。 ● 請確保正確地安裝內鍋。 熄滅 亮燈 內鍋...
-
Page 101: 煮飯方法
煮飯方法 [Menu] [Start] 按下 鍵,選擇想要 按下 鍵 亮燈 煮飯的選單 煮飯燈點亮。 Plain 使用 “ ” 選單時,會發出 “嗶 每按一下,選單就會依次切換。 嗶 ” 的響聲,如果是 “ Plain ” 以 在選擇選單的過程中,選單三角標 外時,會發出 “嗶 ” 的響聲。 一直閃爍。 閃爍 開始煮飯。 • 如果已經選擇了想要煮飯的選單,就無需再次 選擇選單。 中 Porridge [Hour] 選擇 “ ”... -
Page 102: 煮飯所需的時間
分量 P.97 配料或什穀雜糧的分量請參照 ∼ 。 煮飯所需的時間 米飯種類 Plain/Synchro-Cooking Quick Mixed・Sweet Brown Multigrain 尺寸 1.0L 型 ( 杯) ∼ 分鐘 ∼ 分鐘 ∼ 分鐘 ∼ 分鐘 ∼ 分鐘 1.8L 型 ( 杯) ∼ 分鐘 ∼ 分鐘 ∼ 分鐘 ∼ 分鐘 ∼ 分鐘... -
Page 103: 米飯煮好後
米飯煮好後 開始燜飯時,會顯示剩餘時間 攪拌米飯 顯示螢幕會以分為單位,顯示到燜好飯為止的 煮好後,請立刻將米飯攪拌均勻。 剩餘時間。 請用隔熱手套等按住內鍋攪拌。 亮燈 蒸氣水存 內鍋 留部分 (上框) • 選單不同,燜飯時間也不同。 煮好飯後會自動開始保溫 (煮飯燈 熄滅) 保溫燈點亮,同時發出 次 “嗶 ” 的提示音。 亮燈 Note ● 如果在煮飯後或保溫過程中打開鍋蓋,蒸氣水流到 上框或外面時,請擦拭乾淨。 中 • “ Porridege ” 中添加食材,炊煮時間不足時, 文 電子鍋使用完畢後… [Hour] 請在保溫燈點亮的狀態下,按 鍵. [Min] [Start] 鍵。調整追加炊煮時間後,再按... -
Page 104: 定時煮飯的預約煮熟方法
定時煮飯的預約煮熟方法 確認現在時間 • 要調整時間時,請參照 P.126 。 [Menu] 按下 鍵,選擇想要 煮飯的選單 、 在選擇選單的過程中,選單三角標 一直閃爍。 炊煮預約設定 (預約 、 ) 可以按照就餐的時間煮好米飯。 閃爍 • 選擇 “ Timer1 Timer2 ” 或 “ ” 後預約時刻,便可在 預約的時刻煮好米飯。 • “ Timer1 Timer2 ” 、 “ ”的 段時刻均可記憶。例 Timer1 Timer2 如,... - Page 105 閃爍 [Timer] [Hour] [Min] 按下 鍵,選擇 按下 鍵或 鍵 Timer1 Timer2 “ ” 或 “ ” 調整想要煮好飯的時間 Timer1 每按下一次,即會在“ ”與 Timer2 “ ” 之間切換一次。 Timer1 Timer2 [Hour] [Min] 預約燈與 “ ” 或 “ ” 閃 鍵為 小時單位, 鍵 爍。 為 分鐘單位,可透過以上調整時...
- Page 106 保溫 „ 保溫經過時間的顯示 保持白米的光澤與美味。 煮飯結束後會自動切換為保溫。 [Hour] 鍵被按下時,保溫經過時間在 小時 ( ) 內以 小時為單位顯示。 „ 停止保溫時 若超過 小時,則在到達 小時會一直顯示閃 爍。保溫時間超過 小時以後, “ ” 會閃爍以提 [Keep Warm/Cancel] 醒。 按下 鍵 保溫燈熄滅。 亮燈 熄滅 Note ● 請勿進行如下形式的保溫,以免造成米飯出現異 味、變乾、變色、變質或內鍋腐蝕等。 • 保溫冷飯 • 添加冷飯 • 放入飯匙一起保溫 • 拔掉電源線插頭保溫...
-
Page 107: 再次加熱的方法
再次加熱的方法 食用之前將保溫中的米飯重新加熱,便可吃到熱騰 [Start] 按下 鍵 閃爍 騰的米飯。 煮飯燈閃爍,開始再次加熱。 會顯示剩餘時間,加熱結束後會 發出 次 “嗶 ” 提示音。 Note ● 如果米飯超過內鍋一半以上,則由於米飯的量太 多,可能無法充分加熱。 ● 在下列狀況下如果再次加熱,米飯就會變得乾硬。 • 在剛煮完飯後或米飯還很溫熱的時候。 • 未滿米飯的最小炊煮量 ( 1.0L 1.8L 型為 杯、 型為 杯) 時。 • 次以上重複加熱時。 • 要 停 止 再 加 熱 時 , 請 按 下 [ K e e p W a r m / 攪拌保溫中的米飯... - Page 108 米飯與料理同時烹調 Synchro-Cooking ( “ ” 功能選單) COOKBOOK 將料理盤安裝到內鍋上,關閉鍋蓋 使用料理盤,可同時烹煮米飯與隨附 上 記載的料理。不煮米飯時,也可直接在內鍋中裝水烹 煮料理。 COOKBOOK 料理的烹飪方法請參照隨附的 。 ③ Note 料理盤 ● 請勿烹調隨附 COOKBOOK 記載的食譜以外的料 手把 理。 ② ● 烹調量請勿超過隨附 COOKBOOK 上規定的標準。 以免發生食物溢出或烹調的食物不夠美味。 ① ● 使用料理盤時,請注意以下事項。 內鍋 • 如果烹調氣味較重的食物,則料理盤上可能殘留 氣味。 • 如果烹調顏色較深的食物,則湯汁等可能使料理 盤染色,安全性沒有問題可繼續使用。 • 請勿在料理盤內使用菜刀、刀叉等銳利的器具。...
- Page 109 [Start] 按下 鍵 亮燈 不煮飯,只進行烹調時 煮飯燈點亮,開始同時烹煮。 Steam 請參照“蒸煮烹調方法( “ ”功能選單) ” P.112 ( ∼ ) 。 煮好後,發出 次“嗶 ” 提示音 (煮飯燈熄滅) Note 保溫燈點亮。 ● 根據料理種類,請將烹調時間設為 ∼ 分鐘。 亮燈 電子鍋使用完畢後… [Keep Warm/Cancel] 按下 鍵取消保溫 取出料理盤,攪拌米飯 保溫燈熄滅。 亮燈 熄滅 中 文 從插座上拔下電源線插頭,並從主體上...
- Page 110 烹調方法 Slow Cook ( “ ” 功能選單) COOKBOOK 料理的烹飪方法請參照隨附的 。 [Menu] 按下 鍵,選擇 Slow Cook “ ” 選單 Slow Cook “ ” 選單最初在接近沸騰溫度的高溫下炊 煮後,待溫度降至約 ℉ ( ℃) 時再燜煮一段時 在選擇選單的過程中,選單三角標 間。然後,待降至 ℉ ( ℃)左右時再進行燉 一直閃爍。 煮。透過慢慢地降低加熱溫度進行燉煮後,不僅食物 會更加入味,即便長時間加熱,也無需擔心湯汁煮 乾。 Note ● 烹調所隨附 COOKBOOK 上未記載的食物時,請注...
- Page 111 煮好後, 發出 次“嗶 ”提示音 烹調結束後… (煮飯燈熄滅) 保溫燈點亮,在顯示螢幕顯示 “ ” 。 [Keep Warm/Cancel] 按下 鍵取消保溫 保溫燈熄滅。 亮燈 亮燈 熄滅 • 再次燉煮時,請按下 [Hour] [Min] 鍵、 鍵調 [Start] 整好追加的烹調時間,然後按下 鍵。 最多可追加 次,每次可追加 分鐘。 P.120 清除異味 (參照 ) Note Note ● 烹調時間不足時,請不要在追加烹調時間前按下 [Keep Warm/Cancel] 鍵。保溫燈熄滅了就無法繼 ●...
- Page 112 蒸煮烹調方法 Steam ( “ ” 功能選單) 在內鍋內裝入水後安裝料理盤 [Menu] 按下 鍵,選擇 請按照以下標準加入水量。 Steam “ ” 選單 • 1.0L 3 1/2 630mL [21oz] 型 ( 杯) : 杯 ( ) 在選擇選單的過程中,選單三角標 • 1.8L 4 1/2 810mL [28oz] 型 ( 杯) : 杯 ( )...
- Page 113 蒸煮好後,發出 次 “嗶 ” 提示音 取出料理盤 (煮飯燈熄滅) 保溫燈點亮。 亮燈 • 繼續蒸煮時,請按下 [Hour] [Min] 鍵與 鍵設 [Start] 定蒸煮時間,然後按下 鍵。最多可以 追加 次,每次追加 分鐘。 注意 ● 打開鍋蓋時請注意避免被蒸氣燙傷。 • 蒸煮後取出料理盤時,請注意料理盤高溫。 • 料理蒸煮好後,請立刻取出。如果不及時取 出,會因料理沾濕而導致味道變淡。 Note • 取出料理盤時不要使其傾斜。以免湯汁等溢出 造成燙傷。 ● 蒸煮時間不足時,請務必加水,以免空燒。 中 ● 蒸煮時間不足時,請不要在追加烹調時間前按下 [Keep Warm/Cancel] 鍵。如果保溫燈熄滅則無法 烹調結束後… 繼續蒸煮。如果已按下該鍵,請按照以下步驟蒸 文...
- Page 114 „ 蒸煮時間標準表 食材 用量 蒸煮時間標準 蒸煮方法要點 塊 雞肉 ∼ 分鐘 劃開幾處刀口。 ( ∼ 3/4lbs [200 ∼ 300g] ) 3/4inch 刀口 ∼ 處 切成 ( ) 以下的薄片。 白身魚 ∼ 分鐘 ( ∼ 7.0oz [150 ∼ 200g] ) 務必使用鋁箔紙裹住進行蒸煮。 ∼ 只 蝦 ∼...
-
Page 115: 清潔保養方法
清潔保養方法 P.115 清潔保養的方法,請參照 ∼ 所記載的方法進行清潔保養。 其他的保養服務請經認可的保養服務負責人員進行操作。 所有的部件請用手洗。請勿使用洗碗機。 使用後,為了保持鍋體乾凈,請務必在當天進行清潔保養。此外,還要定期進行清潔保養。 在烹調完成後,容易留下異味,因此請在當天去除異味。 (參照 P.120 ) Note ● 請務必拔掉電源線插頭,等待主體、內鍋、內蓋、蒸氣孔蓋冷卻後再進行清潔保養。 ● 使用清潔劑進行清潔保養時,要使用廚房專用的清潔劑 (餐具用、廚具用) 。 ● 請使用海綿或布等柔軟的工具。 ● 如果殘留清潔劑成分的話,會造成樹脂劣化、變色。請確實將清潔劑沖洗乾淨。 „ 使用後每次都需清洗的物品 用海綿沾水或溫水進行清洗 用乾布擦拭乾淨水分,並充分乾燥 Note 料理盤 ● 請勿用菜瓜布面清洗內鍋。以免導致氟素塗層脫落。 內鍋 請勿使用菜瓜布 中 面進行清洗。 文 ● 請勿講餐具類放入內鍋中,及把內鍋當做洗碗池使用。此外在 晾乾內鍋時,請勿與餐具重疊放置。以免劃傷氟素塗層,或造 飯匙... - Page 116 „ 髒污後每次都要清潔保養的部位 主體外側、內側 上蓋 請用擰乾水的布擦拭。 密封圈 電源線 請用乾布擦拭。 上框 電熱板、中央感應器 中央 當沾有燒焦的飯粒、米粒等時,請擦拭乾淨。 電熱板 感應器 無法順利清除時,可使用市面上銷售的砂紙( 號左右)擦 拭,再用擰乾水的布擦拭。 電源線插頭 開蓋按鍵 上框及開蓋按鍵附近、上蓋密封圈 當沾有飯粒、米粒時,請擦拭乾淨。 電源線 Note ● 主機內部嚴禁進水。 ● 請勿將電源線浸入水中或沾上水。以免導致短路、觸電及故 障。 ● 請勿拉扯上蓋密封圈。 電源線插頭、電源線 用乾布擦拭。 Note ● 為了防止變質或產生異味,請保持內鍋及鍋蓋的清潔。 ● 請勿使用稀釋劑、去污粉類、漂白劑、化學抹布、金屬鏟、尼龍清潔球等。 ● 請務必拆卸各零部件後再進行清潔保養。 ● 請勿將蒸氣孔蓋、量杯、飯匙、勺子浸入熱水。以免發生變形。 ●...
- Page 117 安裝或拆卸內蓋 請將內蓋向前拉下削除拆卸。 安裝時請將內蓋中央的密封圈與鍋蓋的突起部對準安裝。 內蓋密封圈 內蓋 中 文 „ 內蓋密封圈的安裝方法 內蓋密封圈脫落時,請牢牢地嵌入裡面。 內蓋密封圈...
- Page 118 安裝或拆卸蒸氣孔蓋 „ 拆卸方法 „ 安裝方法 將手指伸進鍋蓋的坑凹處,向上拉 將罩蓋蓋到蒸氣孔蓋主體上 起蒸氣孔蓋 蒸氣孔蓋 旋轉擰鬆蒸氣孔蓋主體 旋轉擰緊蒸氣孔蓋主體 將蒸氣孔蓋抬起拆除主體 對準刻印 將蒸氣孔蓋恢復為原狀...
- Page 119 „ 蒸氣孔蓋上密封圈的安裝方法 請按照圖示,確定安裝好所拆除的密封圈。如果未能安裝牢固,則有可能導致發生密封圈脫落或蒸氣外洩等故 障。 圓形密封圈 蒸氣口密封圈 中 文...
- Page 120 電熱板髒污的清除方法 煮飯過程中鍋蓋掉落的水滴使電熱板表面髒污。雖然不會對電子鍋的性能造成影響,但如果在意髒污時,可以 使用以下方法進行清除。 用尼龍清潔刷沾上少量強效清潔劑 用沾濕的廚具清潔紙、抹布清除髒 清潔表面髒污 污 尼龍清潔刷 電熱板 異味的去除方法 (當電子鍋或料理盤上殘留異味時) 當感覺有異味或在烹調之後,請使用以下方法去除異味。 „ 主體 „ 料理盤 在 內 鍋 內 裝 入 ∼ 成 水 , 在 請將料理盤放入熱水中,浸泡約 小時。 Plain [Start] “ ” 功能選單下按下 鍵 [Keep Warm/ 切換至保溫後按下 Cancel] 鍵 Note ●...
-
Page 121: 無法將飯煮好時
無法將飯煮好時 如果感到炊煮出來的米飯或者電子鍋作業異常,請確認以下幾點。 減 白 炊 進 使 飯 使 選 使 就 使 器 內 內 沒 長 調查 水 米 煮 行 用 單 用 直 用 內 鍋 鍋 有 時 用 量 時 煮 選 了 接 沾... - Page 122 有下述情況時 理 由 產生一層薄膜 米紙狀薄膜是澱粉融解乾燥後形成的,對人體無害。 米飯粘內鍋 偏柔軟一些的米飯和有粘性的米飯有時會很容易沾到上面。 米 上 內 沒 沾 密 未 進 持 內 長 調查 量 粘 鍋 有 有 封 充 行 小 續 鍋 時 或 有 攪 米 分 了 時 保 放 間 內...
-
Page 123: 覺得 " Synchro-Cooking " 做不好時
Synchro-Cooking 覺得 “ ” 做不好時 使用料理盤進行同時烹煮的食物出現異常時,請確認以下幾點。 加 上 未 煮 選 使 所 烹 調查 , 飯 單 記 用 調 將 入 ﹁ 而 量 以 載 的 食 的 是 超 外 的 料 材 食 重 出 的... -
Page 124: 覺得 " Slow Cook " 做不好時
Slow Cook 覺得 “ ” 做不好時 食物出現異常時請確認以下幾點。 食 放 放 烹 烹 沒 長 等 密 調查 材 入 入 調 調 封 有 時 圈 種 的 的 時 時 確 間 類 類 食 食 間 間 實 停... -
Page 125: 出現故障時
出現故障時 在委託維修前請確認。 參照 症 狀 確 認 處 理 頁面 米飯未煮好 是否已把電源線插頭插入插座。 請將電源線插頭牢固地插入插座裡。 無法烹調 未在設定好的時間煮好 設定的現在時間是否正確 請正確設定時間。 確認 “無法將飯煮好時” 的 “煮飯時間長” ,並進行適當處理。 無法進行炊煮預約設定 設定的現在時間是否正確 請正確設定時間。 顯示時間在 “ : ” 是否閃爍。 請設定現在的時間。 Q u i c k M i x e d 是 否 已 選 擇“ ”... -
Page 126: 出現故障時
出現故障時 參照 顯 示 症 狀 頁面 顯 示 螢 幕 將 顯 示 下 面 的 畫 面 , 持 續 鳴 電子鍋主體發出異常聲響。此時請在拔下電源線插頭後,請洽詢原購買 “嗶 ” 音,或者 “嗶嗶嗶嗶嗶嗶…” 音 處委託維修。 - 有關樹脂密封圈零件 如果樹脂或密封圈零件受熱或沾了蒸氣,可能因長期使用出現老化、損傷。請洽詢原購買處。 時間的調整方法 時間以 小時制顯示。 煮飯過程中 、保溫期間、預約定時期間、再次加熱期間無法進行時間調整。 „ 例如:將 “ : ”... - Page 127 規格 1.0L 1.8L 尺寸 型 ( 杯) 型 ( 杯) 120V 60Hz 電源 額定功率 ( ) Plain 0.18 0.36 ∼ ∼ ( ∼ 杯 [5.29 ∼ 29.10oz] ) ( ∼ 杯 [10.58 ∼ 52.91oz] ) Quick 0.18 0.36 ∼ ∼ (...
-
Page 128: 停電時
停電時 即使發生停電,待電力恢復後也不會影響各部功能的正常運作。 停電時的狀態 通電後的運行 定時設定中 定時器會繼續工作。 (如果長時間停電,且已過了設定時間,則立即開始煮飯。 ) 繼續煮飯。 煮飯過程中 有時無法將飯煮好。 [Keep Warm/Cancel] 保溫中 停止保溫。此時,請按下 鍵。 消耗品與另售品的購買方法 密封圈之類的零件屬於消耗性零件,根據使用方法的不同,其磨損程度會有差異。但都會隨著使用年限而損 耗。當髒污、異味或破損嚴重時,請洽詢原購買處。 煮飯過程中也包括烹調執行中。... - Page 129 목차 안전상의 주의사항 ....................130 각부의 명칭과 기능 ....................134 메뉴별 기능과 특징 ....................136 밥을 맛있게 짓기 위한 비결 ..................137 밥을 짓기 전의 준비 ....................139 밥 짓는 방법 ......................141 취사시간의 기준 ....................... 142 취사가 완료되면 ....................... 143 취사...
-
Page 130: 안전상의 주의사항
안전상의 주의사항 사용하시기 전에 잘 읽어 보시고 반드시 지켜 주십시오 . • 여기에 나타낸 주의사항은 사용하실 사람이나 다른 사람들에 대한 위해 및 재산피해를 미연에 방지하기 위 한 것입니다 . 안전에 관한 중요한 내용이므로 반드시 지켜 주시기 바랍니다 . • 본체에 부착되어 있는 주의에 관한 스티커는 떼지 마십시오 . 표시... - Page 131 경 고 전원에 대하여 기구를 취급할 때는 교류 120V 이외에서는 사용하지 마십시 물에 담그거나 물을 끼얹지 마십시오 . 오 . 쇼트 및 감전의 우려가 있습니다 . 화재 및 감전의 원인이 됩니다 . 정격 15A 이상의 콘센트를 단독으로 사 틈새기에 핀이나 철사와 같은 금속물 등 , 용하십시오...
- Page 132 주 의 일반적인 안전상의 주의사항에 대하여 전원코드 및 플러그에 대하여 조심스럽게 취급하십시오 . 반드시 삽입플러그를 잡고 당겨 뽑으십 떨어뜨리거나 강한 충격을 가하면 부상 시오 . 및 고장의 원인이 됩니다 . 감전 또는 쇼트되어 발화할 우려가 있습 니다 . 쿠킹플레이트는 이 제품 이외에는 사용 하지...
- Page 133 주 의 손질할 때는 본체를 들고 이동할 때는 후크버튼이 눌 리지 않도록 하십시오 . 본체가 식은 후에 손질하십시오 . 뚜껑이 열려 부상 또는 화상을 입을 우 고온부에 닿으면 화상의 우려가 있습니 려가 있습니다 . 다 . 조리중 · 조리후에는 통째로 씻지 마십시오 . 본체를...
-
Page 134: 각부의 명칭과 기능
각부의 명칭과 기능 스팀캡 (P.158 ∼ 159 참조 ) 증기 배출구 뚜껑 고무패킹 떼어낼 수 없으므로 무리 하게 잡아당기지 마십시 뚜껑 오 . 후크버튼 누르면 뚜껑이 열립니다 . 테두리 내솥 손잡이 들고 이동할 때 사용합니다 . 열판 내솥뚜껑 (P.157 참조 ) 전원코드... - Page 135 조작패널 보온램프 예약램프 취사램프 보온중에 점등됩니다 . 예약 타이머 사용시에 취사중 등에 점등 및 점등 및 점멸됩니다 . 점멸됩니다 . [Keep Warm/ Cancel] 버튼 보온 및 조작 취소에 [Start] 버튼 사용합니다 . 취사 등을 시작할 때 사 용합니다 . [Timer] 버튼 예약의...
-
Page 136: 메뉴별 기능과 특징
메뉴별 기능과 특징 메뉴 예약선택 특징 백미를 지을 때 선택합니다 . Plain/Synchro-Cooking ○ 또한 , 쿠킹플레이트를 사용해서 밥과 반찬을 동시에 만들 때 선택합니 다 . Quick ― 백미를 빨리 짓고자 할 때 선택합니다 . Porridge ○ 죽을 만들 때 선택합니다 . Mixed・Sweet ―... -
Page 137: 밥을 맛있게 짓기 위한 비결
짓기 전의 준비는 P.139 ∼ 140, 짓는 방법은 P.141 ∼ 145 를 읽어 주십시오 . 밥을 맛있게 짓기 위한 비결 좋을 쌀을 골라 서늘한 장소에 보관 쌀의 종류와 기호에 따라 물의 양을 조절 정미한 날이 가깝고 , 알갱이의 형태와 크기가 같 ●... - Page 138 잡곡을 백미와 함께 지을 때 장립미를 지을 때 • 잡곡은 백미의 2 할 이내의 분량으로 하여 주십 • 장립미를 지을 때는 “Quick” 을 선택해서 밥을 시오 . 지으십시오 . 백미와 잡곡을 합친 최대의 양은 1.0L 타입 : 또한 , 장립미로 영양밥을 지을 때는 “Mixed • 5.5 컵...
-
Page 139: 밥을 짓기 전의 준비
밥을 짓기 전의 준비 쌀을 계량합니다 물의 양을 조절합니다 반드시 부속된 계량컵으로 계량하십시오 . 내솥을 수평으로 두고 , 내솥 안쪽의 눈금에 부속된 계량컵의 맨 윗면을 기준해서 평평하 맞추어 물의 양을 조절합니다 . 게 담으면 약 0.18L 입니다 . ● 쌀의 종류 및 메뉴를 확인하고 기호에 따라 물의 ●... - Page 140 내솥을 본체에 설치합니다 삽입플러그를 콘센트에 꽂습니다 (1) 기울지 않도록 올바르고 확실하게 설치합 니다 (2) 뚜껑을 닫습니다 내솥 삽입플러그 (2) 닫습니다 내솥뚜껑 전원이 들어오고 메뉴 커서가 점멸됩니다 . 점멸 (1) 설치합니다 Note ● 보온램프가 점등되어 있는 경우는 [Keep Warm/ Note Cancel] 버튼을 눌러 소등시켜 주십시오 . 소등...
-
Page 141: 밥 짓는 방법
밥 짓는 방법 [Menu] 버튼을 누르고 짓고 [Start] 버튼을 누릅니다 점등 자 하는 메뉴를 선택합니다 취사램프가 점등됩니다 . “Plain” 인 경우는 「삐삐」 하는 소 누를 때마다 메뉴가 순서대로 바뀝 리가 나고 , “Plain” 이외인 경우는 니다 . 「삐」 하는 소리가 납니다 . 메뉴... -
Page 142: 취사시간의 기준
분량에 대하여 부재료와 잡곡의 분량에 대해서는 P.137 ∼ 138 를 참조해 주십시오 . 취사시간의 기준 밥의 종류 Plain/Synchro-Cooking Quick Mixed・Sweet Brown Multigrain 사이즈 1.0L(5.5 컵 ) 타입 44 ∼ 59 분 25 ∼ 45 분 39 ∼ 60 분 67 ∼ 79 분 42 ∼... -
Page 143: 취사가 완료되면
취사가 완료되면 뜸들이기가 되면 남은 시간이 표시 밥을 섞어 줍니다 됩니다 취사가 완료되면 반드시 곧바로 밥을 전체적 으로 섞어 주십시오 . 표시부에 뜸들이기가 완료될 때까지의 남은 내솥을 미튼 등으로 누르고 섞어 주십시오 . 시간이 1 분 단위로 표시됩니다 . 점등 응결수가... -
Page 144: 취사 예약 타이머 기능
취사 예약 타이머 기능 현재시간을 확인합니다 • 현재시간을 맞출 경우는 P.166 를 참조하십 시오 . [Menu] 버튼을 누르고 짓고 자 하는 메뉴를 선택합니다 3 · 5 메뉴 선택중에는 메뉴 커서가 점멸 됩니다 . 취사 예약 타이머 ( 예약 1 · 2) 에 대하여 식사를... - Page 145 点滅 [Timer] 버튼을 누르고 , [Hour] 버튼 또는 [Min] 버 「Timer1」 또는 「Timer2」 튼을 눌러 취사가 완료되기 를 선택합니다 를 원하는 시간에 맞춥니다 누를 때마다 「Timer1」 과 「Timer2」 가 교대로 바뀝니다 . 예약램프와 「Timer1」 또는 「Timer2」 표시가 [Hour] 버튼은 1 시간 단위 , [Min] 버튼은 10 점멸됩니다...
-
Page 146: 보온에 대하여
보온에 대하여 백미의 윤기와 맛을 유지합니다 . „ 보온경과시간의 표시에 대하여 취사가 종료되면 자동적으로 보온으로 바뀝니다 . [Hour] 버튼을 누르고 있는 동안에 보온경과시간이 24 시간 (24h) 까지 1 시간 단위로 표시됩니다 . „ 보온을 중지할 때 12 시간을 초과하면 24 시간까지 점멸 표시됩니다 . 24 시간을... -
Page 147: 재가열 기능
재가열 기능 보온중인 밥은 드시기 전에 재가열하면 따끈따끈한 [Start] 버튼을 누릅니다 점멸 밥이 됩니다 . 취사램프가 점멸되고 재가열이 시작됩니다 . 남은 시간이 표시되고 , 가열이 끝 Note 나면 「삐」 하는 소리가 3 번 울려 ● 밥이 내솥의 반 이상 있을 때는 양이 너무 많아서 알려줍니다... -
Page 148: 밥과 반찬을 동시에 만들기 ( " Synchro-Cooking" 메뉴 )
밥과 반찬을 동시에 만들기 ( “ Synchro-Cooking” 메뉴) 쿠킹플레이트를 사용해서 부속된 COOKBOOK 에 내솥에 쿠킹플레이트를 설치하고 기재된 반찬과 밥을 동시에 만들 수 있습니다 . 밥을 뚜껑을 닫습니다 짓지 않고 내솥에 물을 넣어 조리할 수도 있습니다 . 요리를 만드는 방법은 부속된 COOKBOOK 을 참조 하십시오... - Page 149 [Start] 버튼을 누릅니다 점등 밥을 짓지 않고 조리할 때 취사램프가 점등되고 동시조리가 시작됩니다 . 「찜 조리 기능 ( “Steam” 메뉴 )」 (P.152 ∼ 154) 을 참조하십시오 . 완료되면 「삐」 하는 소리가 8 번 울 Note 리면서 알려줍니다 ( 취사램프가 소 ●...
-
Page 150: 조리 기능 ( " Slow Cook" 메뉴 )
조리 기능 ( “ Slow Cook” 메뉴 ) 요리를 만드는 방법은 부속된 COOKBOOK 을 참조 [Menu] 버튼을 누르고 하십시오 . “Slow Cook” 을 선택합니 처음에는 비등온도에 가까운 온도에서 익인 후 약 다 197° F(92° C) 로 온도를 낮추고 잠시 끓입니다 . 그 메뉴... - Page 151 완료되면 「삐」 하는 소리가 8 번 울 조리가 끝나면… 리면서 알려줍니다 ( 취사램프가 소 [Keep Warm/Cancel] 버튼을 눌러 보온 등 ) 을 취소합니다 보온램프가 점등되고 표시부에 「0h」 가 표시 보온램프가 소등됩니다 . 됩니다 . 점등 소등 점등 • 좀 더 끓일 경우는 [Hour] 버튼 · [Min] 버튼 을...
-
Page 152: 11 찜 조리 기능 ( " Steam" 메뉴 )
찜 조리 기능 ( “ Steam” 메뉴 ) 내솥에 물을 넣고 쿠킹플레이트를 [Menu] 버튼을 누르고 설치합니다 “Steam” 을 선택합니다 물의 양은 아래를 기준으로 하십시오 . 메뉴 선택중에는 메뉴 커서가 점멸 • 1.0L(5.5 컵 ) 타입 : 3 1/2 컵 (630mL[21oz]) 됩니다 . • 1.8L(10 컵... - Page 153 찜이 완료되면 「삐」 하는 소리가 8 쿠킹플레이트를 꺼냅니다 번 울리면서 알려줍니다 ( 취사램프 가 소등 ) 보온램프가 점등됩니다 . 점등 • 좀 더 찔 경우는 [Hour] 버튼 · [Min] 버튼을 눌러 찌는 시간을 맞추고 [Start] 버튼을 누르 십시오 . 최대 15 분을 3 번까지 추가할 수 있 습니다...
- Page 154 „ 찌는 시간의 기준표 재료 양 찜 시간의 기준 찜 기능의 포인트 1 장 닭고기 20 ∼ 30 분 칼집을 몇 군데 넣는다 . (1/2 ∼ 3/4lbs[200 ∼ 300g]) 3/4 인치 (2cm) 이하의 두께로 자른 2 ∼ 3 토막 흰살 생선 20 ∼...
-
Page 155: 손질 방법
손질 방법 손질은 P.155 ∼ 160 에 기재된 방법으로 하여 주십시오 . 그 밖의 서비스는 인가된 서비스 담당자가 실시합니다 . 부품은 모두 손으로 직접 씻어 주십시오 . 식기세척기는 사용하지 마십시오 . 사용하신 후에는 앞으로도 계속 청결하게 사용하실 수 있도록 반드시 그 날 중으로 손질하십시오 . 또한 , 손 질은... - Page 156 „ 더러워질 때마다 손질할 곳 본체의 외측 및 내측 뚜껑 고무 물기를 꼭 짠 천으로 닦습니다 . 패킹 전원코드 마른 천으로 닦습니다 . 테두리 열판 및 중앙센서 중앙센서 눌어붙은 밥알이나 쌀알 등이 붙어 있는 경우는 제거합니다 . 열판 잘 제거되지 않는 경우는 판매되는 사포 (320 번 정도 ) 로 제거 한...
- Page 157 내솥뚜껑의 분리 및 장착 내솥뚜껑을 앞쪽으로 당겨 떼어내십시오 . 장착시킬 때는 속뚜껑 고무패킹을 뚜껑의 돌기에 맞추어 장착시키십시오 . 속뚜껑 고무패킹 내솥뚜껑 „ 속뚜껑 고무패킹의 장착방법 한 속뚜껑 고무패킹이 빠졌을 때는 안쪽까지 꽉 끼워 넣으십시오 . 국 어 속뚜껑 고무패킹...
- Page 158 스팀캡의 분리 및 장착 „ 분리방법 „ 장착방법 뚜껑의 움푹 팬 곳에 손가락을 넣 캡 뚜껑에 캡 본체를 씌우십시오 고 스팀캡을 위로 당겨서 떼어내십 시오 스팀캡 캡 본체를 돌려서 헐겁게 하십시오 캡 본체를 돌려서 조이십시오 캡 본체를 들어 올려서 떼어내십시 오...
- Page 159 „ 스팀캡용 고무패킹의 장착방법 고무패킹이 빠졌을 때는 그림에 따라 확실하게 장착시키십시오 . 확실하게 장착되지 않으면 빠지거나 증기가 새는 등 고장의 원인이 됩니다 . 링 고무패킹 증기구 고무패킹 한 국 어...
- Page 160 열판의 오염 제거방법 취사중에 뚜겅에서 물방울이 떨어져 열판의 표면이 더러워질 수 있습니다 . 밥솥의 성능에 지장은 없지만 오 염이 신경쓰일 경우는 아래와 같은 방법으로 닦아낼 수 있습니다 . 나일론 수세미에 소량의 부엌용 크 물에 적신 키친타올이나 천으로 오 림클렌저를 묻혀서 표면의 오염을 염을...
-
Page 161: 취사기능에 이상 발생시
취사기능에 이상 발생시 취사가 완료된 밥 또는 밥솥의 동작 등이 이상할 때는 다음과 같은 사항을 체크하십시오 . 곡 쌀 지 최 사 알 을 미 메 예 다 하 밥 등 에 내 내 잘 장 체크할 사항 의 의 었... - Page 162 이러할 때 이 유 얇은 막이 생긴다 오브라이트 모양의 얇은 막은 전분이 녹아 건조된 것으로 인체에는 해가 없습니다 . 밥이 내솥에 달라붙는다 부드러운 밥이나 찰기가 있는 밥은 달라붙기 쉬울 수 있습니다 . 쌀 눌 내 잘 다 솥 고 미 충...
-
Page 163: 14 "Synchro-Cooking" 기능에 이상 발생시
“Synchro-Cooking” 기능에 이상 발생시 쿠킹플레이트를 사용해서 동시조리한 것이 이상할 때는 다음과 같은 사항을 체크하십시오 . 의 넣 게 쿠 다 최 메 외 체크할 사항 었 킹 대 뉴 의 재 나 적 다 플 량 료 란 은 이 레... -
Page 164: 15 "Slow Cook" 기능에 이상 발생시
“Slow Cook” 기능에 이상 발생시 조리한 것이 이상할 때는 다음과 같은 사항을 체크하십시오 . 재 재 재 조 조 뚜 장 밥 고 체크할 사항 료 료 료 리 리 알 무 껑 시 이 패 의 를 를 시 시... -
Page 165: 고장 발생시
고장 발생시 수리를 의뢰하시기 전에 확인하십시오 . 참조 증 상 확인할 사항 조 치 페이지 취사가 안된다 삽입플러그가 콘센트에 꽂혀 있습니 삽입플러그를 콘센트에 확실하게 꽂 조리가 안된다 까 ? 아 주십시오 . 설정한 시간에 밥이 안되었다 현재 시간이 올바르게 설정되어 있 시간을... -
Page 166: 이런 표시가 나타났을 때는
이런 표시가 나타났을 때는 참조 표 시 조 치 페이지 아래의 화면이 표시되면서 「삐 ---」 하 본체의 이상입니다 . 삽입플러그를 뽑은 후 구입하신 판매점으로 수리 는 소리가 계속 울리거나 「삐삐삐삐삐 를 의뢰하시기 바랍니다 . 삐…」 하는 소리가 난다 ― 수지 부품에 대하여 열이나... - Page 167 사양 사이즈 1.0L(5.5 컵 ) 타입 1.8L(10 컵 ) 타입 전 원 120V 60Hz 정격전력 (W) Plain 0.18 ∼ 1.0 0.36 ∼ 1.8 (1 ∼ 5.5 컵 [5.29 ∼ 29.10oz]) (2 ∼ 10 컵 [10.58 ∼ 52.91oz]) Quick 0.18 ∼ 1.0 0.36 ∼...
-
Page 168: 정전이 되었을 때
정전이 되었을 때 만일 정전이 되더라도 다시 통전이 되면 기능은 정상적으로 작동됩니다 . 정전시의 상태 통전후의 동작 그대로 타이머가 작동됩니다 . ( 정전된 시간이 길어 설정시간을 초과한 경우는 곧바로 취사가 시작 타이머 설정중 됩니다 .) 취사를 계속합니다 . 취사중 밥이 잘 지어지지 않을 수 있습니다 . 보온중... - Page 169 目次 1 安全上のご注意 ......................170 2 各部の名前とはたらき ....................174 メニューの選べる機能と特長 ...................176 ごはんをおいしく炊くためのコツ ................177 3 ごはんを炊く前の準備 ....................179 4 ごはんの炊きかた .....................181 炊飯時間の目安 ......................182 5 ごはんが炊きあがったら ..................183 6 炊きあがり予約タイマー炊飯のしかた ..............184 7 保温について ......................186 8 再加熱のしかた ......................187 9 ごはんとおかずを同時に作る ( 「Synchro-Cooking」 メニュー) ......188 10 調理のしかた ( 「Slow Cook」 メニュー) ..............190 11 蒸し調理のしかた...
-
Page 170: 安全上のご注意
安全上のご注意 ご使用前によくお読みの上、必ずお守りください。 • ここに表した注意事項は、お使いになる人や他の人々への危害や財産への損害を未然に防止するためのも のです。安全に関する重要な内容ですので、必ずお守りください。 • 本体に貼付しているご注意に関するシールは、はがさないでください。 表示内容を無視して、誤った使いかたをしたときに生じる危害 図記号の説明 や損害の程度を、以下の表示で区分して説明しています。 記号は、警告、注意を示し ます。具体的な注意内容は図 取り扱いを誤った場合、使用者が死亡 警 告 記号の中や近くに絵や文章で または重傷 を負うことが想定される 表します。 内容を示します。 取り扱いを誤った場合、使用者が傷害 記号は、禁止の行為である 注 意 を負うことが想定されるか、または ことを示します。具体的な禁 物的損害 の発生が想定される内容を 止内容は図記号の中や近くに 示します。 絵や文章で表します。 *1 重傷とは、失明や、けが、やけど (高温・低温) 、感電、骨折、 記号は、行為を強制したり 中毒などで後遺症が残るものおよび治療に入院・長期の通院 指示したりする内容を示しま を要するものをさします。 す。具体的な指示内容は図記 *2 傷害とは、治療に入院・長期の通院を要さないけがややけど、 号の中や近くに絵や文章で表... - Page 171 警 告 電源について 器具を取り扱うときは 交流 120V 以外では使わない。 水につけたり、水をかけたりしない。 火災・感電の原因。 ショート・感電のおそれ。 定格 15A 以上のコンセントを単独で使 すき間にピンや針金などの金属物など、 う。 異物を入れない。 他の器具との併用により、分岐コンセン 感電や異常動作によるけがのおそれ。 ト部が異常発熱して、発火するおそれ。 調理開始のときは 電源コード・プラグについて 内なべを入れずにクッキングプレート 電源コードは、破損したまま使わない。 を使わない。 また、電源コードを傷つけない。 発火・発煙・やけどの原因。 (加工する・無理に曲げる・高温部に近 づける・引っ張る・ねじる・たばねる・ 調理中・調理後は 重いものを載せる・挟み込むなど) 火災・感電の原因。 炊飯中 は、絶対にふたを開けない。 やけどをするおそれ。 差込プラグにほこりが付着している場 合は、よくふき取る。 火災の原因。 スチームキャップ・蒸気孔に顔や手を 近づけない。 差込プラグは根元まで確実に差し込む。 やけどをするおそれ。特に乳幼児には、...
- Page 172 注 意 一般的な安全上の注意事項について 電源コード・プラグについて 取り扱いはていねいに。 必ず差込プラグを持って引き抜く。 落としたり、強い衝撃を加えたりする 感電やショートして発火するおそれ。 と、けがや故障の原因。 クッキングプレートはこの製品以外に は使わない。 火災・やけどのおそれ。 器具の用途について タコ足配線はしない。 火災のおそれ。 この商品は、一般家庭用です。 以下の用途でも同様に使用できます。 • お店や事務所等の従業員用台所 • 農家 • ホテルやモーテル、その他の宿泊施設 等での使用 長いコードを使用しない。 1. からまったり、引っかけたりして危険なた 使用する環境について め、短い電源コードを使用しています。 2. 延長コードも入手・使用可能ですが、取り 不安定な場所や、熱に弱いテーブルや 扱いには注意が必要です。 敷物などの上では使わない。 3. 延長コードを使用する場合は、下記の事項 火災やテーブル・敷物を傷める原因。 をお守りください。 壁や家具の近くでは使わない。 a. 延長コードに表示されている電気定格が、 蒸気や熱で、傷み・変色・変形の原因 機器の電気定格以上であること。 になるため、壁や家具からは...
- Page 173 注 意 お手入れのときは 本体を持ち運ぶ際は、フックボタンに ふれない。 お手入れは、本体が冷えてから行う。 ふたが開いてけがや、やけどをするお 高温部にふれることによるやけどのお それ。 それ。 調理中・調理後は 丸洗いはしない。 本体を丸洗いしたり、本体内部や底部 使用中や使用直後は、高温部にふれな に水を入れたりしない。ショート・感 い。 電のおそれ。 やけどの原因。 使用中、内なべをさわるときはなべつ かみを使用し、直接手をふれない。 高温になっているため、やけどのおそ れ。 内なべ 炊飯中 は本体を移動しない。 やけどや吹きこぼれの原因。 „ 末永くご使用いただくためのご注意 ● 内なべのフッ素加工面のふくれやはがれ、変 形の原因になるため、必ずお守りください。 ● こげついたごはんつぶ・米つぶなどは取り除く。 • 内なべをガス火にかけたり、電磁調理器・電 蒸気もれ・吹きこぼれ・故障やおいしく炊けない 子レンジなどに使用しない。 原因。 • 白米 (無洗米) 以外のごはん (炊込みなど) を 保温しない。...
-
Page 174: 各部の名前とはたらき
各部の名前とはたらき スチームキャップ (P.198~199 参照) 蒸気孔 ふたパッキン 取りはずしできないので 無理にひっぱらない。 ふた フックボタン 押すとふたが 開きます。 上枠 内なべ とっ手 持ち運ぶときに 使います。 熱板 内ぶた (P.197 参照) 電源コード 本体 (120V) 差込プラグ センターセンサー... - Page 175 操作パネル 保温ランプ 予約ランプ 炊飯ランプ 保温中に点灯します。 予約タイマーの使用時 炊飯中などに点灯・ に点灯・点滅します。 点滅します。 [Keep Warm/ Cancel] キー 保温や操作の取り消し [Start] キー に使います。 炊飯などを始めるとき に使います。 [Timer] キー 予約の種類を選ぶときに [Hour] キー・ [Min] 使います。 キー 現在時刻やタイマーの [Menu] キー セットに使います。 炊飯メニューを選ぶとき に使います。 表示部 メニューカーソルや現在時刻などが表示されます。 ・ [Start] キー、 [Keep Warm/Cancel] キーの中央の凸部 ( )...
-
Page 176: メニューの選べる機能と特長
メニューの選べる機能と特長 メニュー 予約選択 特長 白米を炊くときに選びます。 ○ また、クッキングプレートを使って、ごはんとおかずを同時に作るとき Plain/Synchro-Cooking に選びます。 - 白米を早く炊きたいときに選びます。 Quick ○ おかゆを作るときに選びます。 Porridge - 炊込みごはんやおこわを作るときに選びます。 Mixed・Sweet ○ 玄米・雑穀米 (玄米と雑穀が混ざっているお米) を炊くときに選びます。 Brown 麦、あわ、ひえ、黒米、赤米などの雑穀を白米といっしょに炊くときに ○ Multigrain 選びます。 *1 クッキングプレートを使う場合は、炊きあがり予約をしないでください。 炊飯容量は、P.207 参照。... -
Page 177: ごはんをおいしく炊くためのコツ
炊く前の準備は P.179~180、炊きか たは P.181~185 をお読みください。 ごはんをおいしく炊くためのコツ 良いお米を選び、涼しい場所に保存 お米の種類やお好みに合わせて水加減しま しょう 精米日の新しい、粒のそろったつやのあるお米を 選びましょう。風通しの良い、涼しくて暗い場所 ●水加減の目安表 に保存してください。 水加減 (内なべ内側の目盛を目安に ごはんの種類 お好みで調整する) 付属の計量カップで正確にはかる Plain/Synchro- 1カップは約 0.18L です。 Cooking 「Plain」 の目盛 Quick 無洗米も付属の計量カップ Multigrain ではかりましょう。 七分がゆのときは 「Porridge・ Hard」 の目盛 Porridge 五分がゆのときは 「Porridge・Soft」 の目盛 「Mixed」 の目盛 Mixed 洗米は手早く... - Page 178 雑穀を白米といっしょに炊くとき 長粒米を炊くとき • 雑穀は白米の 2 割以内の分量にしてください。 • 長粒米を炊くときは 「Quick」 を選んで炊いてく 白 米 と 雑 穀 を 合 わ せ た 量 は 最 大 で 1.0L タ イ ださい。 プ:5.5 カップ、1.8L タイプ:10 カップです。 ま た、 長 粒 米 で 炊 込 み ご は ん を 炊 く と き は 「Mixed ・ Sweet」...
-
Page 179: ごはんを炊く前の準備
ごはんを炊く前の準備 お米をはかる 水加減する 必ず付属の計量カップではかってください。 内なべを水平に置き、内なべ内側の目盛に合 付 属 の 計 量 カ ッ プ に す り き り 一 杯 で、 約 わせて水加減します。 0.18L です。 ● お米の種類・メニューを確かめてお好みで水加減 ● 下図のように、すりきり一杯にしてください。 します。 (P.177 の目安表を参照) 正しい計量例 間違った計量例 3 カップの白米を炊 く場合は 「Plain」 の 目盛 3 に合わせる Note 水滴・米つぶなどをふき取る... - Page 180 内なべを本体にセットする 差込プラグをコンセントに差し込 む (1) 傾きがないように正しく確実にセットす る (2) ふたを閉める 内なべ (2) 閉める 差込プラグ 内ぶた 電源が入り、 メニューカーソルが点滅します。 (1) セットする 点滅 Note ● 保 温 ラ ン プ が 点 灯 し て い る 場 合 は、 [Keep Note Warm/Cancel] キーを押して消灯させてくださ ● 内なべは正しく確実にセットしてください。 い。 消灯 点灯 内なべ...
-
Page 181: ごはんの炊きかた
ごはんの炊きかた [Menu] キーを押して、炊 [Start] キーを押す 点灯 きたいメニューを選ぶ 炊飯ランプが点灯します。 「Plain」 の場合は 「ピッピー」 と鳴 押すごとに、メニューが順に切り り、 「Plain」 以外の場合は 「ピー」 替わります。 と鳴ります。 メニューの選択中は、メニューカーソルが点 滅します。 点滅 炊飯が開始されます。 • あらかじめ炊きたいメニューが選ばれている 場合は、メニュー選択の必要はありません。 「Porridge」を 選 ん だ と き は [Hour] キーまたは [Min] キーを 押して調理時間を合わせる • [Hour] キ ー を 押 す ご と に 5 分 ず つ 増 え、 [Min]... -
Page 182: 炊飯時間の目安
分量について 具や雑穀の分量については、P.177~178 を参照してください。 炊飯時間の目安 ごはんの種類 Plain/Synchro-Cooking Quick Mixed・Sweet Brown Multigrain サイズ 1.0L (5.5 カップ) 44~59 分 25~45 分 39~60 分 67~79 分 42~58 分 タイプ 1.8L (10 カップ) 50~63 分 26~50 分 42~65 分 67~80 分 45~60 分 タイプ • 上記の時間は、すぐに炊いた場合のむらしあがりまでの時間です。 (電圧 120V、室温 23℃、水温 23℃、 水加減は標準水位)... -
Page 183: ごはんが炊きあがったら
ごはんが炊きあがったら むらしになると、残り時間が表示 ごはんをほぐす される 炊きあがったら、必ずすぐにごはん全体をほ ぐしてください。 表示部にむらしあがるまでの残り時間が 1 分 内なべをミトンなどで押さえて行ってくださ 単位で表示されます。 い。 点灯 つゆが 内なべ たまる 部分 • メニューによってむらし時間が異なります。 (上枠) 炊きあがると、自動的に保温が始 まる (炊飯ランプが消灯) 保温ランプが点灯し、お知らせ音が 「ピー」 と 8 回鳴ります。 点灯 Note ● 炊飯直後や保温中にふたを開けて、つゆが上枠や 外などに流れ落ちた場合は、 ふき取ってください。 • 「Porridge」 で具材を追加したり、調理時間 炊飯ジャーを使い終わったら… が足りない場合は、保温ランプが点灯してい る状態で [Hour] キー・ [Min] キーを押し、 [Keep Warm/Cancel]... -
Page 184: 炊きあがり予約タイマー炊飯のしかた
炊きあがり予約タイマー炊飯のしかた 現在時刻を確認する • 現在時刻を合わせる場合は、P.206 を参照し てください。 [Menu] キーを押して、炊 きたいメニューを選ぶ ・ メニューの選択中は、メニューカー ソルが点滅します。 炊きあがり予約タイマー(予約 1・2) に ついて 食べたい時刻に炊きあげることができます。 点滅 • 「 Timer1」 または 「Timer2」 を選んで、時刻を合 わせてセットすると、合わせた時刻に炊きあがり ます。 • 「 Timer1」 「Timer2」 の 2 通りの時刻が記憶でき • 保温ランプが消灯していることを確認してく ます。例えば 「Timer1」 を朝食用、 「Timer2」 を ださい。 夕食用に設定できます。 消灯... - Page 185 [Timer] キーを押して、 [Hour] キーまたは [Min] 点滅 「Timer1」 または キーを押して、炊きあげた 「Timer2」 を選ぶ い時刻を合わせる 押すごとに、 「Timer1」 と 「Timer2」 が交互に切り替わります。 予 約 ラ ン プ と、 「Timer1」 ま た は 「Timer2」 [Hour] キーは 1 時間単位、 [Min] キーは 10 表示が点滅します。 分単位で合わせることができます。 キーを押し続けると、早送りができます。 点滅 点滅 • 以前に予約時刻を設定していたときは、その...
-
Page 186: 保温について
保温について „ 保温経過時間の表示について 白米のつやつやのおいしさを保ちます。 炊飯が終了すると自動的に保温に切り替わります。 [Hour] キーを押している間、保温経過時間が 24 時間 (24h) まで 1 時間単位で表示されます。 „ 保温を中止するとき 12 時間を超えると 24 時間まで点滅表示されます。 24 時間を超えると 「24」 が点滅してお知らせしま [Keep Warm/Cancel] キーを す。 押す 保温ランプが消灯します。 点灯 消灯 Note ● におい・パサつき・変色・腐敗や内なべの腐食な どの原因になるため、下記のような保温はしない でください。 • 冷やごはんの保温 • 冷やごはんのつぎ足し • しゃもじを入れたままの保温 • プラグを抜いての保温... -
Page 187: 再加熱のしかた
再加熱のしかた [Start] キーを押す 保温中のごはんは、食べる前に再加熱するとあつあ 点滅 つのごはんになります。 炊飯ランプが点滅し、再加熱が 始まります。 残り時間が表示され、加熱が終 Note わると 「ピー」 と音が 3 回鳴って ● ごはんが内なべの半分以上あるときは、量が多す お知らせします。 ぎて、充分にあたためられません。 ● 下記のような状況で再加熱すると、ごはんがパサ つきます。 • 炊きあがり直後など、ごはんが熱いとき。 • ごはんが最小炊飯量 (1.0L タイプは 1 カップ、 1.8L タイプは 2 カップ) 以下のとき。 • 3 回以上くり返して再加熱したとき。 保温中のごはんをほぐす • 再 加 熱 を や め た い 場 合 は、 [Keep Warm/ Cancel]... - Page 188 ごはんとおかずを同時に作る ( 「Synchro-Cooking」 メニュー) 内なべにクッキングプレートを クッキングプレートを使って、付属の COOKBOOK に記載のおかずとごはんを同時に作ることができ セットして、ふたを閉める ます。ごはんを炊かずに、内なべに水を入れて調理 することもできます。 お料理の作りかたは、付属の COOKBOOK をご参 ③ 照ください。 Note クッキング 持ち手 プレート ● 付属の COOKBOOK に記載されているメニュー ② 以外の調理はしないでください。 ● 付属の COOKBOOK に記載されている量を超え て調理しないでください。 ① 吹きこぼれたり、うまく調理できないおそれがあ 内なべ ります。 ● クッキングプレートを使うときは、以下の点にご 注意ください。 • においの強いものを調理した場合は、においが 残るおそれがあります。...
- Page 189 [Start] キーを押す 点灯 ごはんを炊かずに調理するとき 炊飯ランプが点灯し、同時調理が 始まります。 「 蒸 し 調 理 の し か た ( 「Steam」メ ニ ュ ー) 」 (P.192~194) を参照してください。 できあがると、 お知らせ音が 「ピー」 Note と 8 回鳴る (炊飯ランプが消灯) ● 料理に合わせて、調理時間を 20~30 分に 保温ランプが点灯します。 合わせてください。 点灯 炊飯ジャーを使い終わったら… [Keep Warm/Cancel] キ ー を 押 し て保温を取り消す...
- Page 190 調理のしかた ( 「Slow Cook」 メニュー) [Menu] キーを押して お料理の作りかたは、付属の COOKBOOK を参照 してください。 「Slow Cook」 を選ぶ 最初は沸とう温度に近い高温で煮た後、約 197° F メニューの選択中は、メニューカー (92℃) に温度を下げてしばらく煮込みます。その ソルが点滅します。 後さらに約 186° F (86℃) に温度を下げて引き続き 煮込みます。徐々に加熱温度を下げて煮込むことに よって味のしみ込みを良くし、長時間加熱しても煮 詰まる心配がありません。 Note ● 付属の COOKBOOK に記載されているメニュー 点滅 以外の調理をすると、吹きこぼれる場合があるの で注意してください。 [Hour] キーまたは [Min] ● 調味料が内なべの底にたまらないように、よくか きまぜてから調理してください。...
- Page 191 できあがると、 お知らせ音が 「ピー」 調理が終わったら… と 8 回鳴る (炊飯ランプが消灯) [Keep Warm/Cancel] キ ー を 押 し 保温ランプが点灯し、表示部に 「0h」 が表示 されます。 て保温を取り消す 保温ランプが消灯します。 点灯 点灯 消灯 • さらに煮込む場合は、 [Hour] キー・ [Min] キ ー を 押 し て 追 加 の 調 理 時 間 を 合 わ せ、 [Start]...
- Page 192 蒸し調理のしかた ( 「Steam」 メニュー) 内なべに水を入れて、クッキング [Menu] キーを押して プレートをセットする 「Steam」 を選ぶ 水の量は、以下を目安にしてください。 メニューの選択中は、メニューカー • 1.0L (5.5 カップ) タイプ:3 1/2 カップ ソルが点滅します。 (630mL [21oz] ) • 1.8L (10 カップ) タイプ:4 1/2 カップ (810mL [28oz] ) 付属の計量 クッキング カップで水を プレートを 入れる セットする 点滅 [Hour] キーまたは [Min] キーを押して、蒸す時間を 合わせる...
- Page 193 蒸しあがると、 お知らせ音が 「ピー」 クッキングプレートを取り出す と 8 回鳴る (炊飯ランプが消灯) 保温ランプが点灯します。 点灯 • さらに蒸す場合は、 [ Hour] キー・ [Min] キー を押して蒸す時間を合わせ、 [Start] キーを 押してください。最大 15 分を 3 回まで追加 できます。 注意 • 調理後、クッキングプレートを取り出すとき ● ふたを開けるときは、蒸気によるやけどに注意し は熱くなっているので注意してください。 てください。 • 蒸しあがったら、すぐに調理物を取り出して ください。そのままにしておくと、調理物が ぬれて水っぽくなります。 Note • クッキングプレートを取り出すときに傾けな い。煮汁などがこぼれてやけどの原因。 ● 蒸しが足りない場合は、必ず水を足して空だきに ならないように注意してください。 ●...
- Page 194 „ 蒸す時間の目安表 材料 量 蒸し時間の目安 蒸しかたのポイント 1 枚 鶏肉 20~30 分 切れ目を数カ所に入れる。 (1/2~3/4lbs [200~300g] ) 切り身 2~3 切 厚さ 3/4 インチ (2cm) 以下に切る。 白身魚 20~25 分 (5.0~7.0oz [150~200g] ) 必ずアルミホイルで包んで蒸す。 6~10 尾 えび 15~20 分 殻を付けたまま蒸す。 (1/4~1/2lbs [100~200g] ) 1~2 本 にんじん...
-
Page 195: お手入れのしかた
お手入れのしかた お手入れは、P.195~200 に記載の方法でおこなってください。 その他のサービスは認可されたサービス担当者がおこないます。 部品はすべて手洗いしてください。食器洗浄機は使用しないでください。 ご使用後は、いつまでも清潔にご使用いただくために、必ずその日のうちにお手入れしてください。また、 お手入れは定期的に行ってください。 調理後はにおいが残りやすいので、必ずその日のうちににおいを取り除いてください。 (P.200 参照) Note ● 必ず差込プラグを抜き、本体、内なべ、内ぶた、スチームキャップが冷めてからお手入れしてください。 ● 洗剤でお手入れするときは、台所用合成洗剤 (食器用・調理器具用) を使ってください。 ● スポンジ・布はやわらかいものを使ってください。 ● 洗剤分が残っていると、樹脂が劣化、変色する原因になりますので、充分に洗い流してください。 „ 使うたびに洗うもの 水またはぬるま湯で、スポンジを使って洗う 乾いた布で水分をふき取り、充分に乾燥させる Note ● 内なべは、スポンジの研磨粒子部分で洗わないでください。 クッキング フッ素加工面がはがれる原因になります。 内なべ プレート 研磨粒子部分で 洗わない。 ● 内なべに食器類などを入れ、洗いおけとして使わないでくだ さい。また、内なべを乾燥させるときに食器類の上にかぶせ しゃもじ おたま 計量カップ るなどして重ね置きしないでください。フッ素加工面が傷つ... - Page 196 „ 汚れるたびにお手入れする箇所 本体の外側・内側 ふたパッ かたくしぼった布でふく。 キン 電源コード 乾いた布でふく。 上枠 熱板・センターセンサー センター こげついたごはんつぶ・米つぶなどがついている場合は取り除 熱板 センサー く。 取れにくい場合は、市販のサンドペーパー(320 番程度) で取 差込プラグ フック り除き、かたくしぼった布でふき取る。 ボタン 上枠やフックボタン付近・ふたパッキン 電源コード ごはんつぶ・米つぶなどがついている場合は取り除く。 Note ● 本体内部へは、絶対に水が入らないようにしてください。 ● 電源コードを水につけたり、 水をかけたりしないでください。 ショート・感電・故障のおそれがあります。 ● ふたパッキンは、引っぱらないでください。 差込プラグ・電源コード 乾いた布でふく。 Note ● 腐食やにおいを防ぐため、内なべやふたはいつも清潔にしてください。 ● シンナー類・クレンザー・漂白剤・化学ぞうきん・金属へら・ナイロンたわしなどは使わないでください。 ●...
- Page 197 内ぶたの取りはずし・取りつけ 内ぶたを手前に引いてはずしてください。 取り付けるときは、内ぶたパッキンをふたの突起に合わせて取り付けてください。 内ぶたパッキン 内ぶた „ 内ぶたパッキンの取り付けかた 内ぶたパッキンがはずれたときは、奥まできっちりはめ込んでください。 内ぶたパッキン 日 本 語...
- Page 198 スチームキャップの取りはずし・取りつけ „ 取りはずしかた „ 取りつけかた ふたのくぼみに指を入れ、スチー キャップふたにキャップ本体をか ムキャップを引き上げてはずす ぶせる スチームキャップ キャップ本体を回してゆるめる キャップ本体を回してしめる キャップ本体を持ち上げて取りは ずす 刻印を合わせる スチームキャップを元通りに取り つける...
- Page 199 „ スチームキャップ用パッキンの取りつけかた パッキンがはずれたときは、図に従って確実に取りつけてください。確実に取りつけられていないと、はず れたり、蒸気もれなどの故障の原因になります。 リング 蒸気口 パッキン パッキン 日 本 語...
- Page 200 熱板の汚れの取り除きかた 炊飯中にふたから水滴が落ち、 熱板の表面が汚れることがあります。 炊飯ジャーの性能に支障はありませんが、 汚れが気になる場合は、以下の方法でふき取ることができます。 ナイロンたわしに少量の台クリー 水にぬらしたキッチンペーパー・ ムクレンザーをつけて表面の汚れ 布で汚れをふき取る を落とす ナイロンたわし 熱板 においの取り除きかた (炊飯ジャーやクッキングプレートににおいがついた場合) においが気になるときや調理後は、下記の方法で洗浄してください。 „ 本体 „ クッキングプレート 内 な べ に 水 を 7~8 分目入 れ て、 クッキングプレートを熱湯に入れて、約 1 時間つけ おきしてください。 「Plain」 メニューで [Start] キー を押す 保 温 に 切 り 替 わ っ た ら [Keep Warm/Cancel]...
-
Page 201: うまく炊けない?と思ったら
うまく炊けない?と思ったら 炊きあがったごはんや炊飯ジャーの動作などがおかしいときは、次の点をお調べください。 水 お 最 上 ア の ミ メ 予 押 取 炊 つ セ 内 内 よ 長 お調べいただくこと 加 米 大 ) 高 ニ 約 し ぶ ン な な く 時 ル ネ り 飯 を 減... - Page 202 こんなとき 理 由 うすい膜ができる オブラート状のうすい膜は、でんぷんが溶けて乾燥したもので害はありません。 ごはんが内なべにこびりつく やわらかいごはんやねばりけがあるごはんはつきやすいことがあります。 お な ン 内 よ て た パ は 充 再 イ 保 消 ご 長 お調べいただくこと 12 時 米 ど く い 除 加 マ 温 し 時 サ な な ッ 分 は...
-
Page 203: Synchro-Cooking」 がうまく作れない?と思ったら
「Synchro-Cooking」 がうまく作れない?と思ったら クッキングプレートを使って同時調理したものがおかしいときは、次の点をお調べください。 「 材 一 ク な 最 メ 以 お調べいただくこと 料 に い ニ 外 ッ 大 や 並 量 ュ の キ 量 調 べ で ー レ ン を 味 ず 炊 以 シ グ 超 料... -
Page 204: Slow Cook」 がうまく作れない?と思ったら
「Slow Cook」 がうまく作れない?と思ったら 調理したものがおかしいときは、次の点をお調べください。 材 材 材 調 調 ふ 長 は パ お調べいただくこと 料 料 料 理 理 た 時 ん ッ つ キ の を を 時 時 が 間 ぶ ン 種 最 最 間 間 確 の ・... -
Page 205: 故障かな?と思ったら
故障かな?と思ったら 修理を依頼される前に、ご確認ください。 参照 症 状 確認すること 処 置 ページ ごはんが炊きあがらない 差込プラグがコンセントに差し込ま 差込プラグをコンセントに確実に差 調理できない れていますか。 し込んでください。 セットした時刻に炊きあがっていな 現在の時刻が正しくセットされてい 時刻を正しくセットしてください。 い ますか。 「うまく炊けない?と思ったら」 の 「炊飯時間が長い」 の項目を確認して、 処置してください。 炊きあがり予約タイマーのセットが 現在の時刻が正しくセットされてい 時刻を正しくセットしてください。 できない ますか。 表示時間が 「0:00」 で点滅していま 現在時刻をセットしてください。 せんか。 「Quick」 「Mixed・Sweet」 「Slow 左記のメニューはタイマーセットで Cook」 「Steam」 を選択していませ きません。... -
Page 206: こんな表示が出たときは
こんな表示が出たときは 参照 表 示 処 置 ページ 下記の画面が表示され、 「ピーーー」 と 本体の異常です。差込プラグを抜いた後、お買い上げの販売店に修理 音が鳴り続けたり、 「ピピピピピピ…」 をご依頼ください。 という音がする - 樹脂部品について 熱や蒸気にふれる樹脂部品は、ご使用にともない傷んでくる場合があります。お買い上げの販売店までお 問い合せください。 現在時刻の合わせかた 時刻は 24 時間で表示されます。 炊飯中 ・保温中・タイマー予約中・再加熱中は、時刻合わせできません。 „ 例: 「9:30」 を 「9:35」 に合わせる場合 差込プラグをコンセントに差し込 時刻を合わせる む 「時」 は [Hour] キー、 「分」 は [Min] キーを押して合わせます。 押し続けると早送りになります。... - Page 207 仕様 サイズ 1.0L (5.5 カップ) タイプ 1.8L (10 カップ) タイプ 電 源 120V 60Hz 定格電力 (W) Plain 0.18~1.0 0.36~1.8 (1~5.5 合 [5.29~29.10oz] ) (2~10 合 [10.58~52.91oz] ) Quick 0.18~1.0 0.36~1.8 (1~5.5 合 [5.29~29.10oz] ) (2~10 合 [10.58~52.91oz] ) Porridge Hard 0.09~0.18 0.09~0.36 炊...
-
Page 208: 停電があったとき
停電があったとき 万一停電があっても再び通電されると機能は正常に働きます。 停電時の状態 通電後の動作 そのままタイマーが作動します。 (停電している時間が長く、セット時刻を過ぎている場合は、す タイマーセット中 ぐ炊き始めます。 ) 炊飯を続けます。 炊飯中 うまく炊けない場合があります。 保温中 保温を中止します。そのときは、 [Keep Warm/Cancel] キーを押してください。 消耗品・別売品のお買い求めについて パッキン類は消耗品です。使いかたによって差がありますが、ご使用にともなって傷んできます。汚れやに おい、破損がひどくなったときは、お買いあげの販売店にご相談ください。 *1 炊飯中は、調理中も含みます。... - Page 210 U.S.A. 1-866-55-TIGER (84437) Canada 1-866-9090-TCD (823) URL: http://www.japantigercorp.com For All Other Countries Please contact the nearest Tiger Customer Service in your area, or the dealer where the original purchase was made. TIGER CORPORATION Head Office: 3-1 Hayamicho, Kadoma City, Osaka 571-8571, Japan...