Publicité
Table des Matières
- 1 Safety Precautions
- 2 Table des Matières
- 3 Consignes de Sécurité
- 4 Procédure D'installation
- 5 Procédures de Réparation
- 6 Installation des la Vanne D'évacuation et des la Vanne D'alimentation
- 7 Impostazione Della Valvola DI Scarico E Della Valvola DI Carico
- 8 Dimensioni Dettagliate Per Pannello a Parete
- Télécharger ce manuel
TOTO Europe GmbH
Zollhof 2, 40221 Dusseldorf Germany
Phone : 49-211-27308-200 Fax : 49-211-27308-202
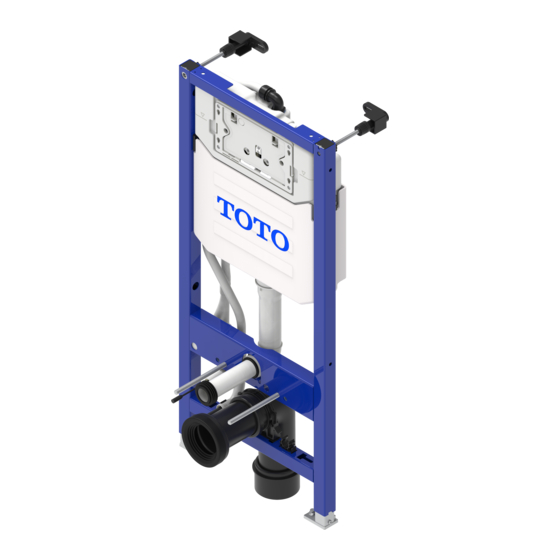
Installation Instruction for Auto-function Concealed Cistern /
Installationsanleitung für den automatischen Unterputzspülkasten /
Instructions d'installation d'une cuvette à fonctionnement automatique /
Istruzioni per l'installazione della cisterna nascosta con funzione automatica /
И
І
WH182EAT
PLEASE KEEP THE INSTRUCTION MANUAL FOR LATER USE /
BITTE BEWAHREN SIE DIESES HANDBUCH ZUM SPÄTEREN GEBRAUCH AUF /
CONSERVEZ LE MODE D'EMPLOI POUR UNE UTILISATION ULTÉRIEURE /
CONSERVARE IL MANUALE DI ISTRUZIONI PER UN UTILIZZO FUTURO /
СОХРАНИТЕ ЭТУ ИНСТРУКЦИЮ ДЛЯ ИСПОЛЬЗОВАНИЯ В ДАЛЬНЕЙШЕМ /
CKB157
ЗБЕРІГАЙТЕ ЦЕЙ ПОСІБНИК ДЛЯ ВИКОРИСТАННЯ В МАЙБУТНЬОМУ
2019.11
а
а а
а
а
а
а
а
а
/
а а
Publicité
Table des Matières

Manuels Connexes pour Toto WH182EAT


Sommaire des Matières pour Toto WH182EAT
- Page 1 CONSERVEZ LE MODE D’EMPLOI POUR UNE UTILISATION ULTÉRIEURE / CONSERVARE IL MANUALE DI ISTRUZIONI PER UN UTILIZZO FUTURO / СОХРАНИТЕ ЭТУ ИНСТРУКЦИЮ ДЛЯ ИСПОЛЬЗОВАНИЯ В ДАЛЬНЕЙШЕМ / TOTO Europe GmbH Zollhof 2, 40221 Dusseldorf Germany CKB157 Phone : 49-211-27308-200 Fax : 49-211-27308-202 ЗБЕРІГАЙТЕ...
-
Page 2: Safety Precautions
Vorsichtsmaßnahmen Safety Precautions (Bitte unbedingt beachten.) (Be sure to follow them for safety sake.) Important: Wichtig: 1. Teile des Unterputzspülkastens: Wasserspeicher, Einlass- und Auslassventil des Behälters, 1. Functions of the concealed cistern: storage water, inlet and outlet calve vessel, frame of wall-hung toilet, Montagerahmen der Hängetoilette, Die in den Anleitungen zur Betätigungsplatte angegebenen Teile. -
Page 3: Table Des Matières
Consignes de sécurité Precauzioni di sicurezza (veillez à les respecter par mesure de sécurité) (accertarsi di seguirle ai fini della sicurezza). Important : Importante: 1. Fonctions de la cuvette : stockage de l'eau, conteneur d'entrée et de sortie, châssis de cuvette suspendue. 1. - Page 4 М П а а (О а а а ’ Ва Ва 1. Ф а а: а а а а а а, а а 1. Ф а а а: а а а а , а а а а. Ф а а а...
-
Page 5: Procédure D'installation
Included Parts / Mitgelieferte Teile / Before Installation / Vor der Installation / Pièces fournies / Parti incluse / Avant l'installation / Prima dell'installazione / К а / К а а П а / П а Check to make sure you have all these parts from the package: Dimensions and Supply Pipe-laying Überprüfen Sie zunächst, ob alle Teile im Paket vorhanden sind: Dimensions are based on toilet rim height 410mm /... - Page 6 Flow of installation / Ablauf der Installation / Installation procedure / Installationsverfahren / Processus d'installation / Procedura di installazione / Procédure d'installation / Procedura di installazione / П а а / П а а П а / П а а Process Process Installing the tank to a wall...
- Page 7 Ø10mm 1 0 0 0 Ø10mm Depth 60 mm / Tiefe 60 mm / Profondeur de 60 mm / Profondità 60 mm / Г а 60 / Г а 60 1 0 0 0 1 0 0 0 Ø10mm Depth 60 mm / Tiefe 60 mm / Profondeur de 60 mm / Profondità...
- Page 8 C105 C105 1 0 0 0 C85 or C105 Do not heat weld the discharge pipe, discharge elbow, DN90 or adjuster. / Das Auslaufrohr, der Auslaufbogen oder das Adapterstück dürfen nicht Verschweißt werden. / DN110 Ne thermosoudez pas le tuyau d'évacuation, le coude de refoulement ou l'ajusteur.
- Page 9 CAUTION This indicates that misoperation could result in injury or physical damage. It is important to reconfirm that there is no water leakage at all connections. I : 3L/6L EN14055 Class1 Incomplete connection could cause foul odor or Required II : 3L/4.5L EN14055 Class1 water to leak.
- Page 10 It must be arranged separately. / Sie müssen getrennt voneinander eingestellt werden. / +10 mm the wall thickness / Il faut en prévoir par ailleurs. / + 10 mm Wanddicke / Disporre separatamente. / à 10 mm du mur / П...
- Page 11 te H o le / P u s h P la n g s p la tt e B e tä ti g u u s s é e / L o c h fü r u e d e p o r la p la q T ro u p o u p re s s io n...
-
Page 12: Procédures De Réparation
Servicing procedures / Wartungsverfahren / Procédures de réparation / Procedure di manutenzione / П а / П а Servicing and / or Replacing the Flush Valve, Replacing the Auto Flush Unit / Wartung und/oder Austausch des Spülventils, Austausch der automatischen Spüleinheit / Réparer et/ou remplacer le robinet de la chasse d'eau, Remplacer l'unité... - Page 13 Cleaning the Filter of the Fill Valve / Reinigung des Füllventilfilters / Nettoyage du filtre de la vanne de remplissage / Pulizia del filtro della valvola di riempimento / О а а а а а а / О а а а а At the other end of the flush valve, the rubber piece can be removed for cleaning or to be replaced.
-
Page 14: Installation Des La Vanne D'évacuation Et Des La Vanne D'alimentation
Drain valve, Fill valve setting / Einstellen des Ablaufventils und Zulaufventils / Detail dimensions for wall Panel / Genaue Abmessungen der Wandplatte / Installation de la vanne d'évacuation et de la vanne d'alimentation / Détails des dimensions du panneau mural / Dimensioni dettagliate per pannello a parete / Impostazione della valvola di scarico e della valvola di carico / М...