Table des Matières

Publicité

Les langues disponibles

Les langues disponibles

Liens rapides

MICROWAVEOVEN1551CH
 GEBRAUCHSANWEISUNG
MODE D'EMPLOI
ISTRUZIONI PER L'USO
INSTRUCTIONS FOR USE
Gebrauchsanweisung ○ Mode d'emploi ○ Istruzioni per l'uso ○ Instruction for use
U1551CH_BED_Rev01_2017-03-03
U1551CH

Publicité

Table des Matières
loading

Sommaire des Matières pour Rotel U1551CH

  • Page 1 MICROWAVEOVEN1551CH U1551CH  GEBRAUCHSANWEISUNG  MODE D’EMPLOI  ISTRUZIONI PER L’USO  INSTRUCTIONS FOR USE Gebrauchsanweisung ○ Mode d’emploi ○ Istruzioni per l’uso ○ Instruction for use U1551CH_BED_Rev01_2017-03-03...
  • Page 2: Schematische Darstellung

    D / F / I / E  SCHEMATISCHE DARSTELLUNG  Vue d’ensemble  Diagramma della struttura  Structure diagram Deutsch Français Italiano English Bedienfeld Panneau de commande Pannello di controllo Control Panel Sichtfenster Hublot Finestra di ispezione Observation window Türelement Porte Modulo sportello...
  • Page 3  TECHNISCHE DATEN  Caractéristiques techniques  Specifiche tecniche  Technical specifications Deutsch Italiano Français English Nennspannung Tensione nominale 220-240 V Tension nominale Rated voltage Nennfrequenz Frequenza nominale 50/60 Hz Fréquence nominale Rated frequency Nenneingangsleistung Potenza di ingresso nominale 1550 W Puissance d’entrée nominale Rated input power Nennausgangsleistung...
  • Page 4: Table Des Matières

    Inhaltsverzeichnis / Table des matières / Indice / Table of contents Deutsch ..............................9  Sicherheitshinweise ......................... 9  Inbetriebnahme des Geräts ......................14  Aufstellung ............................ 14  Wissenswertes zum Mikrowellenbetrieb ..................15  Küchenutensilien ........................... 15  Gebrauch ............................18 Tasten und Funktionen ........................
  • Page 5  Entsorgung............................. 27 Français.............................. 28  Consignes de sécurité ........................28  Mise en service du four ......................... 33  Installation ............................. 33  À savoir ............................34  Ustensiles ............................34  Utilisation ............................37 Touches et fonctions ........................37 Mode d’emploi ..........................
  • Page 6  Élimination ............................. 46 Italiano ............................... 47  Avvertenze di sicurezza ......................... 47  Messa in funzione del forno ......................52  Installazione ........................... 52  Informazioni utili per il funzionamento ..................53  Utensili da cucina .......................... 53  Uso ..............................
  • Page 7  Smaltimento ..........................65 English ............................... 66  Safety instructions ......................... 66  Setting up your oven ........................71  Installation ............................. 71  Things you should know about the microwave................72  Utensils ............................72  Operation ............................75 Control Panel and Features ......................
  • Page 8  Disposal ............................83 D / F / I / E ............................84  Garantie / Garantie / Garanzia / Warranty ................... 84 Gebrauchsanweisung ○ Mode d’emploi ○ Istruzioni per l’uso ○ Instruction for use...
  • Page 9: Deutsch

    Deutsch  SICHERHEITSHINWEISE Lesen Sie erst alle Hinweise, bevor Sie das Gerät in Be- trieb nehmen. o Dieses Gerät kann von Personen mit eingeschränk- ten physischen, sensorischen oder geistigen Fähig- keiten oder einem Mangel an Erfahrung und/oder Wissen verwendet werden, wenn sie beaufsichtigt werden oder bezüglich des sicheren Gebrauchs des Geräts unterwiesen wurden und die daraus resul- tierenden Gefahren verstanden haben.
  • Page 10  Warnung: Wenn die Tür oder die Türdichtung beschädigt sind, darf das Kochgerät nicht be- trieben werden, bevor es von einer dafür aus- gebildeten Person repariert worden ist.  Warnung: Instandhaltungs- oder Reparaturar- beiten dürfen nur von Fachpersonal durchge- führt werden. Beim Entfernen von Schutzabde- ckungen kann gesundheitsschädliche Mikro- wellenstrahlung austreten.
  • Page 11 o Lagern Sie nichts im Garraum. Bewahren Sie keine Artikel wie Brot, Kekse usw. im Gerät auf. o Entfernen Sie alle Metallteile von Papier- oder Plas- tikbehältern/-tüten, bevor Sie sie in den Garraum legen. o Installieren und platzieren Sie das Gerät nur ge- mäss den beiliegenden Anweisungen.
  • Page 12 o Verwenden Sie das Gerät nicht in der Nähe von Wasser, in einem feuchten Keller oder in der Nähe eines Schwimmbeckens. o Während des Betriebs können sich auch benach- barte Oberflächen stark erwärmen. Die Oberflä- chen werden im Betrieb heiss. Halten Sie das Netz- kabel von warmen Flächen fern.
  • Page 13 o Von aussen zugängliche Teile können im Betrieb sehr heiss werden. Kleinkinder sind fernzuhalten. o Dampfstrahler sind zur Reinigung nicht geeignet. o Das Gerät wird während des Betriebs heiss. Achten Sie darauf, dass Sie die Heizelemente im Inneren des Geräts nicht berühren. o Das Mikrowellengerät dient zum Erwärmen von Speisen und Getränken.
  • Page 14: Inbetriebnahme Des Geräts

     INBETRIEBNAHME DES GERÄTS Nehmen Sie das Gerät und alle Materialien aus dem Karton und dem Garraum. Das folgende Zubehör ist im Lieferumfang enthalten:  Bedienungsanleitung  AUFSTELLUNG Wählen Sie eine ebene Unterlage, die ausreichend Platz für die Lüftungsöffnungen bietet. ...
  • Page 15: Wissenswertes Zum Mikrowellenbetrieb

     WISSENSWERTES ZUM MIKROWELLENBETRIEB Ihr Gerät arbeitet mit Mikrowellenstrahlung, welche Wasserteilchen in Speisen in sehr kurzer Zeit erhitzt. Hier gibt es keine Wärmestrahlung und somit auch kaum Bräunung. Somit ist das Gerät nicht zum Trocknen geeignet. Erwärmen Sie mit diesem Gerät nur Lebensmittel. Das Gerät ist nicht zum Backen in schwimmendem Fett geeignet.
  • Page 16 o Mikrowellenfeste Utensilien: Küchenutensilien Bemerkungen Bräunungsgeschirr Anweisungen des Herstellers beachten. Essgeschirr Nur mikrowellenfestes Geschirr. Anweisungen des Herstellers beachten. Kein gesprungenes oder angeschlagenes Geschirr verwenden. Glaskrüge Immer Deckel abnehmen. Nur zum Anwärmen von Speisen ver- wenden. Die meisten Glaskrüge sind nicht hitzebeständig und können zerbrechen.
  • Page 17 o Materialien, die nicht für den Einsatz mit Mikrowellen geeignet sind: Küchenutensilien Bemerkungen Aluminiumblech Es kann zu Funkenschlag kommen. Speisen in mikro- wellenfeste Behälter umfüllen. Kartonverpackungen Es kann zu Funkenschlag kommen. Speisen in mikro- wellenfeste Behälter umfüllen. mit Metallgriff Arbeitsgeräte Metall schirmt die Speisen vor der Mikrowellenstrah- lung ab.
  • Page 18: Gebrauch

     GEBRAUCH Tasten und Funktionen 1. Leistungstasten 2. «Zeiteingabe»-Taste 3. «X2»-Taste 4. «Stop/Reset»-Taste 5. «Start»-Taste 6. Zifferntasten Gebrauchsanleitung Die Mikrowelle verfügt über fünf Leistungsstufen: Stufe High M. High Med. Defrost Hold Leistung 100% / 1000W 70% / 700W 50% / 500W 20% / 200W Anzeige PL10...
  • Page 19: Standardkochzeiten

    Fliegender Wechsel OP:51 Funktion aktiviert OP:60 Tür Rücksetzung deaktiviert Tür Rücksetzung OP:61 Tür Rücksetzung aktiviert OP:70 Max. Kochzeit 60 Minuten Max. Kochzeit OP:71 Max. Kochzeit 10 Minuten OP:80 Manuelle Programmierung deaktiviert Manuelle Programmierung OP:81 Manuelle Programmierung aktiviert OP:90 Ein-Ziffer-Modus – 10 Programme Zwei Ziffern OP:91 Zwei-Ziffern-Modus –...
  • Page 20: Programme Und Modi

     PROGRAMME UND MODI Einschalten o “_ _ _ _” erscheint im Display, wenn das Gerät das erste Mal eingeschaltet wird. Drü- cken Sie die «Stop/Reset» Taste, um in den Standby-Modus zu wechseln. Hinweis: Im Standby-Modus sind alle Tasten funktionslos. Standby-Modus o Aktivierung: Der Standby-Modus wird aktiviert, wenn im betriebsbereiten Modus eine bestimmte Zeit keine Taste gedrückt oder die Tür nicht geöffnet und geschlossen wird.
  • Page 21: Pause-Modus

    Pause-Modus o In diesem Modus wird das Kochprogramm vorübergehend angehalten, damit Sie Spei- sen überprüfen oder umrühren können. o Wenn im manuellen oder voreingestellten Kochmodus die Tür geöffnet oder geschlos- sen, oder die Taste «Stop/Reset» gedrückt wird, geht das Gerät in den Pause-Modus über.
  • Page 22: Voreingestellter Kochmodus

    o Wenn Sie entweder die Benutzereinstellung OP:11 oder OP:12 ausgewählt haben, er- tönt solange ein Signalton, bis Sie die Tür öffnen und schließen oder die Taste drücken. Bei aktivierter Benutzereinstellung OP:10 ertönt 3 Sekunden «Stop/Reset» lang ein Signalton und danach aktiviert das Gerät den betriebsbereiten Modus. Voreingestellter Kochmodus o In diesem Modus haben Sie die Möglichkeit, Speisen mit einem einzigen Tastendruck zuzubereiten.
  • Page 23 o Änderung des Kochfaktors: Drücken Sie die Taste «X2», im Display erscheint die An- zeige „CF:XX“. Die Standardeinstellung ist 80% und wird im Display als „CF:80“ darge- stellt. Wenn Sie den Kochfaktor ändern möchten, können Sie die Einstellung mit den Zifferntasten vornehmen.
  • Page 24: Doppelte Kochzeit

    Doppelte Kochzeit o Mit der Taste «X2» können Sie die programmierte Kochzeit verdoppeln. o Drücken Sie im Pause-Modus die Taste „X2“ und anschließend eine der Zifferntasten 0-9 innerhalb 5 Sekunden. Das Gerät startet mit der voreingestellten Kochzeit. o Wenn Sie die Taste „X2“ drücken, erscheint im Display die Anzeige „doub“. Wenn Sie die Zifferntasten drücken, erscheint im Display die jeweilige voreingestellte Kochzeit.
  • Page 25: Benutzereinstellungen

    Benutzereinstellungen o In diesem Modus haben Sie die Möglichkeit, die unterschiedlichen Benutzereinstel- lungen anzupassen. o Öffnen Sie die Tür und halten Sie die Taste „2“ 5 Sekunden lang gedrückt. Es ertönt ein Signalton und der Modus wird aktiviert. o Im Display erscheint die Anzeige „OP: - -“. o Drücken Sie eine beliebige Zifferntaste, um die entsprechende Einstellung aufzurufen.
  • Page 26: Reinigung

     REINIGUNG Trennen Sie das Gerät von der Stromversorgung. Reinigen Sie den Garraum nach der Benutzung mit einem leicht feuchten Tuch. Reinigen Sie das Zubehör in gewohnter Weise in einem Spülbad. Türrahmen, Dichtung und benachbarte Teile müssen sorgfältig mit einem feuchten Tuch gereinigt werden, wenn sie verschmutzt sind.
  • Page 27: Entsorgung

     ENTSORGUNG Zur ordnungsgemässen Entsorgung geben Sie das Gerät bitte an einen Händler, den Kundendienst oder Rotel AG zurück. Die Richtlinie 2012/19/EU über Elektro- und Elektronik-Altgeräte (WEEE) legt fest, dass Haushaltsgeräte nicht mit dem normalen Hausmüll entsorgt werden dürfen. Alt- geräte sind getrennt zu sammeln, um einerseits Wiederverwertung und Recycling zu...
  • Page 28: Français

    Français  CONSIGNES DE SÉCURITÉ Veuillez lire toutes les instructions avant la mise en ser- vice de l’appareil. o Cet appareil peut être utilisé par des personnes aux capacités physiques, sensorielles ou intellectuelles limitées ou manquant d’expérience ou de connais- sance si elles sont sous surveillance ou ont été...
  • Page 29: Surveillez Le Four Si Vous Réchauffez Des Aliments

     Attention : si la porte ou les joints de la porte sont endommagés, le four ne doit pas être uti- lisé jusqu'à ce qu'il ait été réparé par une per- sonne compétente.  Attention : seule une personne compétente est habilitée à...
  • Page 30 o Ne pas utiliser l'enceinte du four à des fins de ran- gement. Ne pas conserver des articles comme du pain, des biscuits etc. dans l’enceinte du four. o Retirez préalablement tous les liens de serrage à fils métalliques des sacs/conteneurs en papier ou en plastique avant de les placer dans le four.
  • Page 31 o Ne pas utiliser ce four à proximité d’un quelconque récipient contenant de l'eau, dans un sous-sol hu- mide ou à proximité d'une piscine. o La température des surfaces accessibles peut être très élevée lorsque l'appareil est en marche. Gardez le cordon à...
  • Page 32 o L'appareil peut devenir très chaud lors de son utili- sation. Attention de ne pas toucher les éléments chauffants à l'intérieur du four. o Le four à micro-ondes est prévu pour chauffer des aliments et des boissons. Le séchage d'aliments ou de vêtements, et le chauffage de coussins chauf- fants, chaussonschaussures, éponges, chiffons hu- mides ou produits similaires peut entraîner des...
  • Page 33: Mise En Service Du Four

     MISE EN SERVICE DU FOUR Retirez le four du carton et tout le matériel stocké dans l’enceinte du four. Le four est livré avec les accessoires suivants :  Mode d'emploi  INSTALLATION Choisissez une surface plane offrant suffisamment d'espace libre pour les orifices de ventila- tion.
  • Page 34: À Savoir

     À SAVOIR Votre appareil utilise les micro-ondes émises par son magnetron afin de faire vibrer, donc chauffer en un temps très court les molécules d'eau contenues dans les ali- ments. Il n'y a pas d’émission de chaleur ni de brunissement des aliments. Cet appa- reil ne convient donc pas pour le séchage.
  • Page 35 o Ustensiles que vous pouvez utiliser dans un four à micro-ondes : Ustensiles Remarques Plat croustilleur Suivez les instructions du fabricant. Vaisselle Utilisez seulement celle adaptée au four à micro-ondes. Suivez les instruc- tions du fabricant. Ne pas utiliser de la vaisselle fissurée ou ébréchée. Bocaux en verre Toujours retirer le couvercle.
  • Page 36 o Ustensiles à ne pas utiliser dans un four à micro-ondes : Ustensiles Remarques Barquette en aluminium Peut provoquer un arc électrique. Transférez les ali- ments dans un récipient adapté à la cuisson au four à micro-ondes. Boîte en carton avec poignée mé- Peut provoquer un arc électrique.
  • Page 37: Utilisation

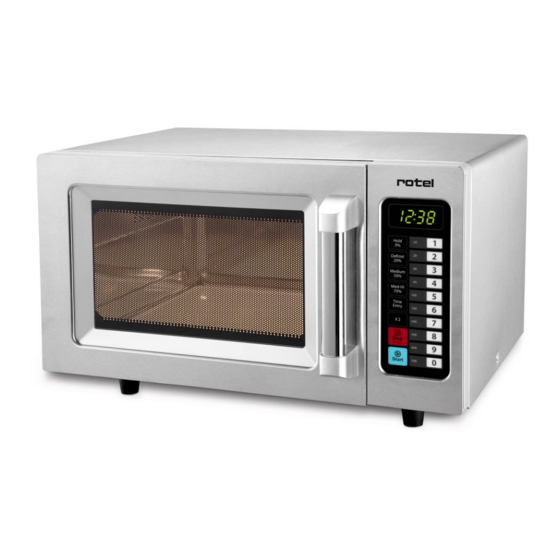
     UTILISATION Touches et fonctions 1. Boutons d'alimentation 2. Bouton de temps de cuisson 3. Bouton X2 4. Bouton arrêt / réinitialisation 5. Bouton de démarrage 6. Bouton numérique Mode d’emploi Cinq puissances sont disponibles: Niveau Elevé Moyennement Moyen Dégivrage Eteint élevé...
  • Page 38: Temps De Cuisson Par Défaut

    OP:43 120 secondes OP:50 Fonction désactivée Affichage des touches OP:51 Fonction activée OP:60 Réinitialisation de la porte désactivée Réinitialiser la porte OP:61 Réinitialisation de la porte activée OP:70 Temps de cuisson max. de 60 minutes Temps maximum OP:71 Temps de cuisson max. de 10 minutes OP:80 Programmation manuelle désactivée Programmation manuelle...
  • Page 39: Programmes Et Modes

     PROGRAMMES ET MODES Mise en marche " _ _ _ _ " s’affiche quand le four s'allume pour la première fois. Appuyez sur le bouton «Stop/Reset» pour passer en mode VEILLE. Note: en mode VEILLE, tous les boutons sont désactivés. Mode VEILLE o Activation: le mode VEILLE s’active pendant le mode marche lorsqu’aucune touche n’est actionnée ou que la porte n’est ni ouverte ni fermée pendant un laps de...
  • Page 40: Mode Pause

    Mode Pause o Ce mode autorise l’utilisateur à arrêter temporairement le cycle de cuisson pour ins- pecter ou remuer l'aliment. o Si la porte est ouverte ou fermée, ou la touche «Stop/Reset» enclenchée pendant le programme de cuisson manuel ou prédéfini, le four passe en mode pause. o En mode pause, la LED affiche le temps de cuisson restant.
  • Page 41: Mode De Cuisson Prédéfini

    Mode de Cuisson prédéfini o Ce mode autorise la cuisson des aliments en une seule pression de touche. En mode fin du cycle de cuisson, appuyez sur une touche numérique du clavier pour sélection- ner le programme prédéfini associé à cette touche. o L’écran affiche le temps de cuisson restant.
  • Page 42 o Quand le programme est enregistré, "ProG" s'affiche. o Si le programme choisi excède le temps maximum autorisé par le réglage utilisateur 7, le four sonne trois fois et affiche “00:00” pour indiquer que le programme de cuis- son est indisponible. L’écrant affiche à nouveau "ProG". Le temps réglé précédem- ment n’a pas été...
  • Page 43: Double Temps De Cuisson

    Double temps de cuisson o La touche X2 permet de doubler le temps de cuisson programmé. o En mode pause, appuyez sur le bouton «X2» puis sur l’une des touches 0-9 dans les 5 secondes. Le four lance le temps de cuisson prédéfini. o Appuyez sur «X2», "doub"...
  • Page 44: Mode Entretien

    o Ouvrez la porte et appuyez sur "2" pendant 5 secondes. Un signal sonore retentit et le mode est activé. o L’écran affiche "OP:--" o Appuyez sur n'importe quel numéro pour afficher le réglage désiré. Exemple: régler le volume du signal sonore sur moyen. Appuyez sur "2", "OP:22" s'af- fiche.
  • Page 45: Nettoyage

     NETTOYAGE Débranchez toujours l'appareil avant nettoyage. L’enceinte du four se nettoie après emploi avec un chiffon légèrement humide. Nettoyer les accessoires utilisés à l'eau savonneuse. Le cadre de la porte, le joint ainsi que les parties adjacentes doivent être soigneuse- ment nettoyés avec un chiffon humide s'ils présentent des salissures.
  • Page 46: Élimination

     ÉLIMINATION Pour une élimination dans les règles de l’art, veuillez remettre l’appareil à un reven- deur, un responsable du service après-vente ou Rotel SA. Selon la directive européenne 2012/19/UE relative aux déchets d’équipements élec- triques et électroniques (DEEE), les appareils électroménagers ne doivent pas être éliminés avec les déchets solides urbains normaux.
  • Page 47: Italiano

    Italiano  AVVERTENZE DI SICUREZZA Prima dell'uso leggere tutte le istruzioni. o Questo apparecchio può essere usato da persone con ridotte capacità fisiche, sensoriali o mentali, o con insufficiente esperienza e/o conoscenza, a con- dizione che siano sotto sorveglianza o che abbiano ricevuto istruzioni sull'uso sicuro dell'apparecchio e siano consapevoli dei rischi connessi.
  • Page 48  Avvertenza: se lo sportello o la guarnizione sono guasti, l'apparecchio di cottura non si deve usare finché non sarà stato riparato da una persona in possesso di formazione speci- fica.  Avvertenza: l’esecuzione di operazioni di ma- nutenzione o riparazione è consentita solo a personale specializzato;...
  • Page 49 o Non usare il vano di cottura del forno a scopi di con- servazione. Non conservare oggetti come pane, bi- scotti ecc. all'interno del forno. o Rimuovere i laccetti metallici che chiudono sac- chetti di carta o di plastica prima di deporli nel vano di cottura.
  • Page 50 o Non usare questo forno vicino ad acqua, in cantine umide o in prossimità di piscine. o Durante il funzionamento dell'apparecchio possono riscaldarsi fortemente anche superfici adiacenti. Durante l'uso, le superfici si riscaldano. Tenere il cavo lontano da superfici riscaldate e non coprire le aperture di ventilazione del forno.
  • Page 51 o Non usare pulitrici a vapore. o Durante l'uso, l'apparecchio diventa molto caldo. Fare in modo di evitare di toccare elementi riscal- danti all'interno del forno. o Il forno a microonde è progettato per riscaldare ali- menti e bevande. L'asciugatura di alimenti o vestiti e il riscaldamento di cuscinetti riscaldanti, panto- fole, spugne, panni umidi e simili può...
  • Page 52: Messa In Funzione Del Forno

     MESSA IN FUNZIONE DEL FORNO Rimuovere il forno dalla scatola e tutti i materiali dal vano di cottura. Il forno viene fornito con i seguenti accessori:  Manuale di istruzioni per l’uso  INSTALLAZIONE Scegliere una superficie piana che offra spazio a sufficienza per le aperture di venti- lazione.
  • Page 53: Informazioni Utili Per Il Funzionamento

     INFORMAZIONI UTILI PER IL FUNZIONAMENTO L’ apparecchio funziona con irradiazioni di microonde che scaldano molto rapida- mente le particelle d'acqua contenute negli alimenti. Non si tratta di un'irradiazione termica e quindi la pietanza praticamente non imbrunisce. L'apparecchio non è per- tanto adatto ad asciugare.
  • Page 54 Utensili adatti all’uso nei forni a microonde: Utensili Osservazioni Piatto crisp Attenersi alle istruzioni del produttore. Servizio da tavola Solo stoviglie idonee all'uso in microonde. Attenersi alle istruzioni del produttore. Non usare piatti danneggiati o rotti. Brocche di vetro Rimuovere sempre il coperchio. Usare solo per riscaldare il cibo finché...
  • Page 55 Materiali da evitare nei forni a microonde: Utensili Osservazioni Vassoi di alluminio Possono rappresentare una fonte di ignizione. Trasfe- rire il cibo in un recipiente idoneo per microonde. Cartoni alimentari con manici in Possono rappresentare una fonte di ignizione. Trasfe- metallo rire il cibo in un recipiente idoneo per microonde.
  • Page 56: Uso

     USO Pulsanti e funzioni 1. Pulsanti della potenza 2. Pulsante del tempo di cottura 3. Pulsante X2 4. Pulsante Stop/ Reset 5. Pulsante di avvio 6. Pulsanti numerici Istruzioni Sono disponibili cinque livelli di potenza: Livello High Med-Hi Medium Defrost Hold Potenza...
  • Page 57: Tempi Di Cottura Predefiniti

    OP:50 Funzione disattivata On the Fly OP:51 Funzione attivata OP:60 Reset sportello disattivato Reset sportello OP:61 Reset sportello attivato OP:70 Tempo di cottura massimo 60 Tempo massimo OP:71 Tempo di cottura massimo 10 OP:80 Programmazione manuale disattivata Programmazione manuale OP:81 Programmazione manuale attivata OP:90 Modalità...
  • Page 58: Programmi E Modalità

     PROGRAMMI E MODALITÀ Accensione o "_ _ _ _" viene visualizzato quando il forno viene acceso per la prima volta. Premere il pulsante per passare in modalità Standby. «Stop/Reset» Nota: in modalità Standby, i pulsanti non sono disponibili. Modalità Standby o La modalità...
  • Page 59: Modalità Di Pausa

    Modalità di pausa o Questa modalità consente agli utenti di interrompere temporaneamente il pro- gramma di cottura per controllare o mescolare gli alimenti. o Se, in modalità di cottura manuale o preimpostata, lo sportello è aperto o chiuso o si preme il pulsante «Stop/ Reset», il forno passa in modalità...
  • Page 60: Modalità Di Cottura Preimpostata

    Reset». Se si seleziona l’impostazione utente OP: 10, viene emesso per 3 secondi un segnale acustico dopo di che l’apparecchio attiva la modalità Ready. Modalità di cottura preimpostata o Questa modalità permette di cucinare prodotti alimentari premendo un solo pulsante. o Nella modalità...
  • Page 61 vuole modificare il fattore di cottura, si potrà eseguire l’impostazione con I pulsanti numerici. o Dopo aver impostato tempo e potenza, premere «Start» e il programma di cottura sarà memorizzato. o Una volta salvato il programma viene visualizzata la scritta "ProG". o Se il tempo totale di cottura supera il tempo di cottura massimo selezionato con l’im- postazione utente 7, quando si preme «Start»...
  • Page 62: Tempo Di Cottura Doppio

    Tempo di cottura doppio o Con il pulsante «X2», l'utente può raddoppiare il tempo di cottura programmato. o In modalità di pausa, premere il pulsante «X2» e poi uno dei pulsanti numerici da 0 a 9 per 5 secondi. Il forno inizia la cottura con il tempo di cottura preimpostato. Se si preme «X2», sul display viene visualizzato "doub".
  • Page 63: Impostazioni Utente

    Impostazioni utente o In questa modalità si ha la possibilità di adattare le varie impostazioni per l’utente. o Aprire lo sportello del forno e tenere premuto il pulsante "2" per 5 secondi. Viene emesso un segnale acustico e attivata la modalità. o Sul display viene visualizzato "OP: - -".
  • Page 64: Pulizia

     PULIZIA Scollegare l'apparecchio dall’alimentazione elettrica. Dopo l’utilizzo, pulire il vano di cottura con un panno leggermente inumidito. Pulire gli accessori con acqua e detersivo, seguendo la procedura consueta. Il telaio e le guarnizioni dello sportello così come le parti adiacenti devono essere puliti minuziosamente con un panno umido se sono sporchi.
  • Page 65: Smaltimento

     SMALTIMENTO Per consentire uno smaltimento corretto, restituire l’apparecchio al rivenditore, a un agente di assistenza tecnica o a Rotel AG. La Direttiva UE 2012/19/CE sui rifiuti di apparecchiature elettriche ed elettroniche (WEEE) sancisce che gli elettrodomestici non possono essere smaltiti usando il nor- male ciclo di rifiuti solidi urbani.
  • Page 66: English

    English  SAFETY INSTRUCTIONS Please read all instructions before using the device. o This appliance can be used by persons with reduced physical, sensory or mental capabilities or lack of ex- perience and knowledge if they have been given su- pervision or instruction concerning use of the appli- ance in a safe way and understand the hazards in- volved.
  • Page 67  Warning: When the door or the door seals are damaged, the microwave oven must not be used until it has been repaired by a qualified specialist.  Warning: It is hazardous for anyone other than a competent person to carry out any service or repair operation that involves the removal of a cover which gives protection against exposure to microwave energy.
  • Page 68 o Do not use the oven cavity for storage purposes. Do not store items, such as bread, biscuits, etc. inside the oven. o Remove wire twist-ties and metal handles from pa- per or plastic containers/bags before placing them in the oven. o Install or locate this oven only in accordance with the installation instructions provided.
  • Page 69 o Do not use this oven near water, in a wet basement or near a swimming pool. o The temperature of accessible surfaces may be high when the appliance is operating. The surfaces are liable to get hot during use. Keep cord away from heated surfaces and do not cover any vents on the oven.
  • Page 70 o During use the appliance becomes hot. Care should be taken to avoid touching heating elements inside the oven. o The microwave oven is intended for heating food and beverages. Drying food or clothing and heating warming pads, slippers, sponges, damp cloth and similar may lead to the risk of injury, ignition or fire.
  • Page 71: Setting Up Your Oven

     SETTING UP YOUR OVEN Remove the oven and all materials from the box and oven cavity. Your oven comes with the following accessories:  Instruction Manual  INSTALLATION Select a level surface that provides enough open space for the intake and/or outlet vents.
  • Page 72: Things You Should Know About The Microwave

     THINGS YOU SHOULD KNOW ABOUT THE MICROWAVE Your appliance works through microwave radiation which heats the water particles in food in a very short time. There is no radiation of heat and therefore hardly any browning. As a result, the appliance is not suitable for drying purposes. Only warm up foodstuff with this appliance.
  • Page 73 o Materials you can use in microwave oven: Utensils Remarks Browning dish Follow the manufacturer’s instructions. Dinnerware Microwave-safe only. Follow the manufacturer's in- structions. Do not use cracked or chipped dishes. Glass jars Always remove the lid. Use only to heat food until just warm.
  • Page 74 o Materials to be avoided in a microwave oven: Utensils Remarks Aluminium tray May cause arcing. Transfer food into microwave-safe dish. Food carton with metal handle May cause arcing. Transfer food into microwave-safe dish. Metal or metal-trimmed utensils Metal shields the food from microwave energy. Metal trim may cause arcing.
  • Page 75: Operation

     OPERATION Control Panel and Features 1. Power Buttons 2. Time cook Button 3. X2 Button 4. Stop/Cancel Button 5. Start Button 6. Number Button Operation Instruction Five Power levels are available: Level High M. High Med. Defrost Hold Power 100% / 1000W 70% / 700W 50% / 500W...
  • Page 76: Default Cook Times

    On the Fly OP:51 On-the-Fly Enable OP:60 Door reset Disable Door Reset OP:61 Door reset Enable OP:70 60 Minute Maximum Cook Time Max time OP:71 10 Minute Maximum Cook Time OP:80 Manual Programming Disable Manual programming OP:81 Manual Programming Enable OP:90 Single Digit Mode-10 programs Double Digit...
  • Page 77: Programs And Modes

     PROGRAMS AND MODES Power Up o “_ _ _ _” displays when the oven is switched on for the first time. If «Stop/Reset» is pressed, the oven will change to Idle Mode. button Note: Under Idle Mode, no button can be pressed. Idle Mode o The oven shall enter Idle Mode after a certain period of time has expired in Ready Mode, without a key pressed nor the door opened or closed.
  • Page 78: Manual Cook Entry Mode

    immediately enter Ready Mode. OR if press «Start» button, the oven will go into work- ing mode. Manual Cook Entry Mode o This mode allows the user to manually enter a cook time and power level. o While the oven is in the Ready Mode, pressing the on the keyboard «Time Entry»...
  • Page 79: On The Fly Cooking

    o When the cooking program is finished, the oven will enter End of Cook Cycle Mode. If you press under this mode, the oven will enter Pause Mode. «Stop/Reset» button On the Fly Cooking o If User Option 5, On the fly, OP:51 is selected, the user may start another cook cycle while the oven is cooking or paused.
  • Page 80: Double Quantity Cooking

    For example: o Set the program as memory cooking; power level PL7 and cooking time is 1 minute and 25 seconds.  Step 1: In Ready Mode, press number button "1" for 5 seconds,"ProG" dis- plays.  Step 2: Press number button "3", the program will be saved for number "3". ...
  • Page 81: Use Option Mode

     Step 3: Press number buttons "1", "2" and "5" to input the cooking time.  Step 4: Press "Med-Hi 70%" button," PL7" displays.  Step 5: Press , LED displays "S-2". «Time Entry» button  Step 6: Press "5", "4","0" button, "5:40" displays. ...
  • Page 82: Cleaning

     CLEANING Be sure to unplug the appliance from the power supply. Clean the cavity of the oven after use with a slightly damp cloth. Clean the accessories in the usual way with soapy water. The door frame and seal and adjacent parts must be cleaned carefully with a damp cloth when they are dirty.
  • Page 83 Close door properly.  DISPOSAL For proper disposal, please return device to a retailer, a service agent or Rotel AG. European Directive 2012/19/EC concerning Waste Electrical and Electronic Equip- ment (WEEE) states that household appliances should not be disposed of using the normal solid urban waste cycle.
  • Page 84 Transport costs are to be borne by the purchaser. Remember to specify your address to your sending, as well as a short decla- ration about the failure, shall the defect not be obvious. Servicestation: Service après-vente: Rotel AG Servizio Assistenza: Parkstrasse 43 Telefon: 062 787 77 00 After-sales service: 5012 Schönenwerd...

Table des Matières