Publicité
Liens rapides
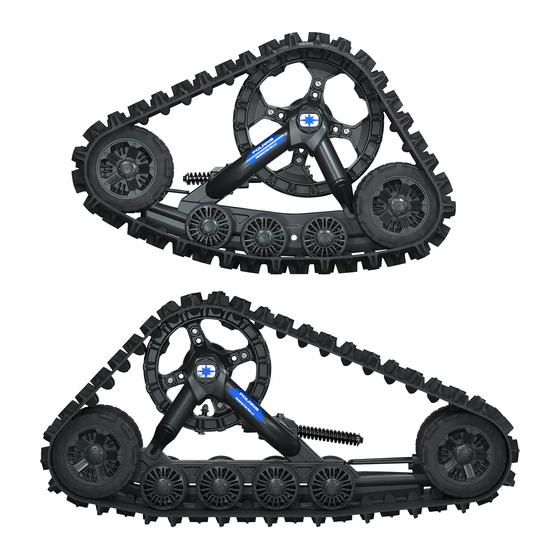
Publicité

Manuels Connexes pour Polaris Prospector Pro ATV


Sommaire des Matières pour Polaris Prospector Pro ATV
- Page 1 Installation Guidelines Directives d’installation No. 9924982 VERSION A...
-
Page 2: Important
IMPORTANT Please read carefully each part of this document as well as the User Manual prior to assembling, installing and using the track systems. Veuillez lire attentivement ce document, en entier, ainsi que le Manuel de l’utilisateur avant d’assembler, d’installer et d’utiliser les systèmes de traction. - Page 3 Page 3 Installation Guidelines / Directives d’installation FRONT ANCHOR BRACKET PARTS LIST / LISTE DE PIÈCES - ANCRAGE AVANT Figure 1 ITEM DESCRIPTION 2205408 FRONT BRACKET KIT / ENSEMBLE ANCRAGE AVANT FRONT LEFT ANCHOR BRACKET / ANCRAGE AVANT GAUCHE FRONT RIGHT ANCHOR BRACKET / ANCRAGE AVANT DROIT FRONT BRACKET COVER / COUVERT ANCRAGE AVANT HEX BOLT / BOULON HEX - HCS, M10-1.5X50, 8.8, ZP, DIN931 NYLON NUT / ÉCROU NYLON - FNN, M10-1.5, 8, ZP, DIN6926...
- Page 4 Page 4 Installation Guidelines / Directives d’installation REAR ANCHOR BRACKET PARTS LIST / LISTE DE PIÈCES - ANCRAGE ARRIÈRE Figure 2 ITEM DESCRIPTION 2205409 REAR BRACKET KIT / ENSEMBLE ANCRAGE ARRIÈRE REAR LEFT ANCHOR BRACKET / ANCRAGE ARRIÈRE GAUCHE REAR RIGHT ANCHOR BRACKET / ANCRAGE ARRIÈRE DROIT REAR BRACKET COVER / COUVERT ANCRAGE ARRIÈRE HEX BOLT / BOULON HEX - HCS, M10-1.5X55, 8.8, ZP, DIN931 HEX BOLT / BOULON HEX - HCS, M10-1.5X65, 8.8, ZP, DIN931...
- Page 5 Page 5 Installation Guidelines / Directives d’installation VERIFICATION / VÉRIFICATION CAUTION : Before beginning the installation, ATTENTION : Avant de débuter l'installation, make sure you received all the components assurez-vous d’avoir reçu toutes included in the parts lists of the preceding pages. composantes incluses dans les listes de pièces aux pages précédentes.
- Page 6 Page 6 Installation Guidelines / Directives d’installation PREPARATION / PRÉPARATION WARNING AVERTISSEMENT Never place body parts under the vehicle unless it Ne jamais exposer des parties de votre corps is securely placed on appropriate stands. Severe sous le véhicule à moins que celui-ci ne repose injuries could occur if the vehicle collapses or sur des supports appropriés.
- Page 7 Page 7 Installation Guidelines / Directives d’installation REAR TRACK SYSTEMS / SYSTÈMES DE TRACTION ARRIÈRE 1. Using a lifting device, raise the rear of the ATV 1. Au moyen d’un dispositif de levage, soulever and install appropriate stands. Ensure that the l’arrière du ATV et installer des cales de sûreté.
- Page 8 Page 8 Installation Guidelines / Directives d’installation 5. Position anchor bracket (8, 9) under lower 5. Positionner l’ancrage anti-rotation (8, 9) sous le suspension arm; C-shaped openings on bracket bras de suspension arrière, les ouvertures en must be located on suspension arm tubes. «...
- Page 9 Page 9 Installation Guidelines / Directives d’installation 7. Secure the undercarriage to the rear hub using 7. Fixer le système de traction au moyeu de roue the nuts (18) provided. Refer to Figure 10 . arrière, utiliser les écrous (18) fournis. Voir la Figure 10.
- Page 10 Page 10 Installation Guidelines / Directives d’installation 8. Attach the stabilizing rod (B) to the anchor 8. Fixer le bras stabilisateur (B) au boulon déjà bracket (A), using the long spacer bushing (15), installé sur l’ancrage de suspension (A) à l’aide the short spacer bushing (C), the flat washer (D) de l’espaceur long (15), de l’espaceur court (C), and nut (E).
- Page 11 Page 11 Installation Guidelines / Directives d’installation FRONT TRACK SYSTEMS / SYSTÈMES DE TRACTION AVANT 1. Using a lifting device, raise the front of the ATV 1. Au moyen d’un dispositif de levage, soulever and install appropriate stands. Ensure that the l’avant du ATV et installer des cales de sûreté.
- Page 12 Page 12 Installation Guidelines / Directives d’installation 5. Position the bottom part of the anchor bracket 5. Positionner la partie inférieure de l’ancrage (2,3) underneath the lower suspension arm. anti–rotation (2, 3) sous le bras de suspension Position the top part (4) over the suspension inférieur.
- Page 13 Page 13 Installation Guidelines / Directives d’installation 7. Attach the stabilizing rod (B) to the anchor 7. Fixer le bras stabilisateur (B) au boulon déjà bracket (A), using the two spacer bushings (C), installé sur l’ancrage de suspension (A) à l’aide flat washer (D) and nut (E).
- Page 14 Page 14 Installation Guidelines / Directives d’installation COMPLETION / COMPLÉTER L’INSTALLATION 1. Verify the suspension settings. If the shock 1. Vérifier l’ajustement de la suspension, si les absorbers are adjustable, they should be adjusted amortisseurs sont réglable, ils doivent être réglés to the firmest level in order to allow for maximum au niveau le plus ferme afin de permettre un clearance between the system and the fender of the...