Publicité
Les langues disponibles
Les langues disponibles
Liens rapides
Publicité

Manuels Connexes pour Omron BP786CANN


Sommaire des Matières pour Omron BP786CANN
- Page 1 English Français 10 series Blood Pressure Monitor Model BP786CANN Instruction Manual 2298848-9B...
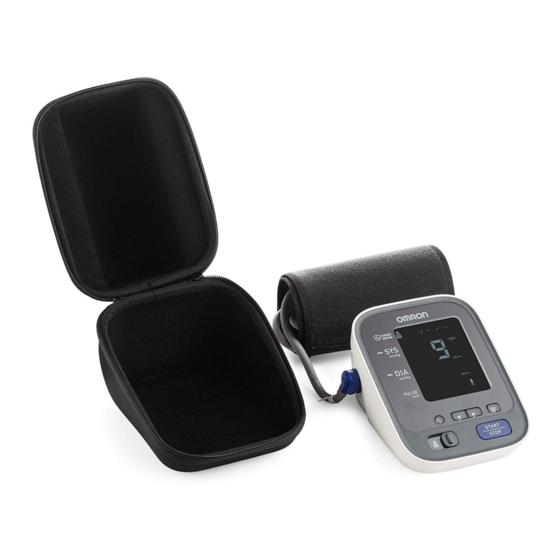
- Page 2 Product includes: El producto incluye: AC Adapter Adaptateur CA ComFit™ Cuff Brassard ComFit™ Monitor Tensiomètre Battery Set Juego de Pilas BP786CANN Instruction Manual Quick Start Guide Guide de l’utilisateur Guide de démarrage rapide...
- Page 4 Contents Thank you for purchasing the OMRON ® P786CANN Blood Pressure Monitor. Your new blood pressure monitor uses the oscillometric method of blood pressure measurement. This means the monitor detects your blood movement through your brachial artery and converts the movements into a digital reading. An oscillometric monitor does not need a stethoscope so the monitor is simple to use.
- Page 5 Important Safety Information Warning: Indicates a potentially hazardous situation which, if not avoided, could result in death or serious injury. (General Usage) DO NOT adjust medication based on measurement results from this blood pressure monitor. Take medication as prescribed by your physician. Only a physician is qualified to diagnose and treat High Blood Pressure. The monitor is not intended to be a diagnostic device.
- Page 6 Important Safety Information Caution: Indicates a potentially hazardous situation which, if not avoided, may result in minor or moderate injury to the user or patient or damage to the equipment or other property. (General Usage) Always consult your physician. Self-diagnosis of measurement results and self-treatment are dangerous. Consult your physician before using the device for any of the following conditions: •...
- Page 7 Wipe the dust off from the power plug. Unplug monitor when not in use. Disconnect the power plug before cleaning. Use only an OMRON AC adapter designed for this device. Use of unsupported adapters may damage and/or may be hazardous to the device. (Battery Usage) Do not insert the batteries with their polarities incorrectly aligned.
- Page 8 1. Know Your Device Open the rear cover page to read the following: The letter identifiers on the rear cover page correspond to those in the body of this page. Monitor Display Air jack Memory symbol Blood pressure color indicator USER ID symbol Connection button Average value symbol...
- Page 9 1. Know Your Device 1.1 Display Symbols Irregular Heartbeat Symbol ( Normal Heartbeat When the monitor detects an irregular rhythm two or more times during the Pulse measurement, the irregular heartbeat symbol will appear on the display with Blood pressure the measurement values.
- Page 10 1. Know Your Device Blood Pressure Color Indicator If your Systolic Blood Pressure is 135 mmHg or above and/or the Diastolic Blood Pressure is 85 mmHg or above, the blood pressure color indicator will light in “orange” when the measurement result is displayed. If the measurements are within the standard range, the blood pressure color indicator will light in “green”.
- Page 11 2. Preparation 2.1 Battery Installation Remove the battery cover. Insert 4 “AA” batteries as indicated in the battery compartment. Replace the battery cover. Notes: • When the low battery symbol ( ) appears on the display, turn the monitor off, then replace all batteries at the same time.
- Page 12 AC Adapter is disconnected. The measurement results will not be deleted. Use only OMRON authorized parts and accessories. Parts and accessories not approved for use with the device may damage the device.
- Page 13 2. Preparation Insert the AC adapter plug into the AC adapter jack on the rear side of the monitor. Plug the AC adapter into an electrical outlet. To disconnect the AC adapter, unplug the AC adapter from the electrical outlet first and then remove the AC adapter plug from the monitor.
- Page 14 2. Preparation 2.3 Setting the TruRead Mode The TruRead Mode takes 3 consecutive measurements. The monitor will inflate, take a measurement, and deflate - 3 times, separated by a short interval between each measurement. The TruRead Mode is set “oFF” by default. Select your USER ID (1 or 2).
- Page 15 2. Preparation Open the rear cover page to read the following: The letter identifiers on the rear cover page correspond to those in the body of this page. 2.4 Setting the Date and Time The date and time will be automatically set when paired with your smartphone. To set manually, follow the instructions below.
- Page 16 • The blood pressure can differ between the right arm and the left arm, and the measured blood pressure values can be different. OMRON recommends to always use the same arm for measurement. If the values between both arms differ substantially, please check with your physician which arm to use for your...
- Page 17 3. Using the Device 3.2 How to Sit Correctly To take a measurement, you need to be relaxed and comfortably seated, at a comfortable room temperature. Avoid bathing, drinking alcohol or caffeine, smoking, exercising or eating 30 minutes before taking a measurement. •...
- Page 18 3. Using the Device 3.3 Taking a Measurement Notes: • To stop a measurement, press the START/STOP button once to deflate the arm cuff. • Remain still and quiet while taking a measurement. The monitor is designed to take measurements and store the measurement values in the memory for 2 people using USER ID 1 and USER ID 2.
- Page 19 3. Using the Device Remove the arm cuff. Press the START/STOP button to turn the monitor off. The monitor automatically stores the measurement result in its memory. It will automatically turn off after 2 minutes. Note: Wait 2-3 minutes before taking another measurement. Waiting between measurements allows the arteries to return to the condition prior to taking a measurement.
- Page 20 3. Using the Device The first measurement is complete, waiting to start the next measurement. The interval will appear on the display. The second measurement is complete, waiting to start the next measurement. The interval will appear on the display. The third measurement is complete, the average for the 3 measurements appears on the display.
- Page 21 3. Using the Device Using the Guest Mode The monitor stores measurement values for 2 users in the memory. The guest mode can be used to take a single measurement for another user. No measurement values are stored in the memory, and the TruRead mode is not available when the guest mode is selected.
- Page 22 3. Using the Device 3.4 Using the Memory Function The monitor automatically stores the results up to 100 readings for each user (1 and It can also calculate an average value based on the last 3 measurement values taken within 10 minutes. Notes: •...
- Page 23 3. Using the Device Press the button to view the values stored in the memory. : To view the older values : To view the more recent values Note: The value with the TruRead symbol is the average for the consecutive 3 measurements. To display the individual measurement values, press the button while the average is displayed.
- Page 24 3. Using the Device To View the Average Value Select your USER ID (1 or 2). Press and hold the button for more than 3 seconds. Notes: • If the previous measurement was taken without setting the date and time, the average value is not calculated.
- Page 25 3. Using the Device To Pair This Device With a Smartphone To begin, download and install the free "Omron Wellness" App onto your smartphone. Open the App on your smartphone and follow set-up and pairing instructions. Note: Please make sure that you do not currently have an active reading screen on. If your reading screen is on, press the START/STOP button to clear the screen to allow you to begin to transfer your readings.
- Page 26 3. Using the Device Open the "Omron Wellness" App on your smartphone and follow the device pairing instructions shown on your smartphone, while the connection symbol is flashing on the device’s display. Confirm if the device is connected successfully. When the device is connected successfully to the smartphone, “OK”...
- Page 27 Clear your reading screen by pressing the "START/ STOP" button on your monitor. Next, tap the "transfer" icon in the Omron Wellness app to start the transfer. * If the data transfer is not starting, refer to “Connection failure. Data cannot be sent.”...
- Page 28 3. Using the Device TO DELETE ALL RESULTS AND SETTINGS To delete all the information stored in your monitor, follow the instructions below. Make sure that the monitor’s power has been off. While holding the button down, press the START/STOP button for more than 5 seconds.
- Page 29 3. Using the Device To Delete All the Values Stored in Memory The values stored in the memory are deleted by USER ID. Select your USER ID (1 or 2). Press the Memory button, while the memory symbol ( ) appears.
- Page 30 3. Using the Device 3.5 Turning “OFF” the Bluetooth ® ® Turn off the Bluetooth of the monitor in the following areas where use of wireless equipment is prohibited. • On aircraft • In hospitals •While abroad Make sure that the power has been off before starting the instructions below. Press and hold the connection button for more than 10 seconds.
- Page 31 3. Using the Device ® To turn “ON” the Bluetooth Make sure that the power has been off before starting the instructions below. Press and hold the connection button for more than 10 seconds. Release the button when “ON” appears on the display. Press the START/STOP button to turn the monitor off.
- Page 32 4. Error Messages and Troubleshooting 4.1 Error Messages Display Cause Solution Remove the arm cuff. Wait 2-3 minutes and then take another measurement. Irregular heartbeats are detected. Repeat the steps in section 3.3. If this error continues to appear, contact your physician. Carefully read and repeat the steps in section Movement during measurement.
- Page 33 4. Error Messages and Troubleshooting Display Cause Solution Insert the air plug securely. Air plug disconnected. Refer to section 3.1. Apply the arm cuff tighter. Arm cuff is applied too loosely. Refer to section 3.1. Replace the arm cuff with a new one. Air is leaking from the arm cuff.
- Page 34 Data cannot be sent. Refer to "To Pair This Device With a Smartphone" in section 3.4 or visit the "Help" section in the Omron Wellness app for further help in pairing your smart device. The blood pressure monitor is not ready, follow the step “1.
- Page 35 5. Maintenance and Storage 5.1 Maintenance To protect your device from damage, please observe the following: • Store the device and the components in a clean, safe location. • Do not use any abrasive or volatile cleaners. • Do not wash the device and any components or immerse them in water. •...
- Page 36 5. Maintenance and Storage 5.2 Storage Unplug the air plug from the air jack. Gently fold the air tube into the arm cuff. Note: Do not bend or crease the air tube excessively. Do not store the device in the following situations: •...
- Page 37 5. Maintenance and Storage 5.3 Optional Medical Accessories Arm Cuff AC Adapter Arm circumference 9” - 17” (22 - 42 cm) HEM-ADPTW5 ComFit Cuff (CFX-WR17) (Model: HEM-FL31)
- Page 38 6. Specifications BP786CANN HEM-7321T-CA Model Display LCD digital display Measurement range Pressure: 0 to 299 mmHg Pulse: 40 to 180 beats / min. Pressure: ±3 mmHg or 2% of reading Accuracy Pulse: ± 5% of display reading Inflation Fuzzy-logic controlled by electric pump...
- Page 39 7. FCC/IC Statement and Trademarks FCC CAUTION Changes or modifications not expressly approved by the party responsible for compliance could void the user's authority to operate the equipment. Note: This equipment has been tested and found to comply with the limits for a Class B digital device, pursuant to part 15 of the FCC Rules.
- Page 40 The Bluetooth Smart word mark and logos are registered trademarks owned by Bluetooth SIG, Inc. and any use of such marks by OMRON HEALTHCARE Co.,Ltd. is under license. Other trademarks and trade names are those of their respective owners. Apple, the Apple logo, iPad, and iPhone are trademarks of Apple Inc., registered in the U.S. and other countries.
- Page 41 8. Limited Warranty Your BP786CANN Automatic Blood Pressure Monitor, excluding the arm cuff and batteries are warranted to be free from defects in materials and workmanship appearing within 5 years from the date of purchase, when used in accordance with the instructions provided with the monitor. The arm cuff is warranted to be free from defects in materials and workmanship appearing within 1 year from the date of purchase when the monitor is used in accordance with the instructions provided with the monitor.
- Page 42 • The MEDICAL ELECTRICAL EQUIPMENT BP786CANN including AC-adapter needs special precautions regarding EMC and needs to be installed and put into service according to the EMC information provided in this documentations. • The Essential Performance of the BP786CANN including AC-adapter is to measure a blood pressure and a pulse rate and using the memory function.
- Page 43 Guidance and manufacturer’s declaration - electromagnetic immunity OMRON BP786CANN including AC-adapter is intended for use in the electromagnetic environment specified below. The customer or the user of this OMRON BP786CANN including AC-adapter should assure that it is used in such environment.
- Page 44 Guidance and manufacturer’s declaration - electromagnetic immunity OMRON BP786CANN including AC-adapter is intended for use in the electromagnetic environment specified below. The customer or the user of this OMRON BP786CANN including AC-adapter should assure that it is used in such environment.
- Page 45 OMRON BP786CANN including AC-adapter OMRON BP786CANN including AC-adapter is intended for use in an electromagnetic environment in which radiated RF disturbances are controlled. The customer or the user of this OMRON BP786CANN including AC-adapter can help prevent electromagnetic interference by maintaining a minimum distance between portable and mobile RF communications equipment (transmitters) and the OMRON BP786CANN including AC-adapter as recommended below, according to the maximum output power of the communications equipment.
- Page 48 Manufactured for/Fabriqué pour : OMRON HEALTHCARE Co., Ltd. 53, Kunotsubo, Terado-cho, Muko, Kyoto, 617-0002 JAPAN Distributed by/Distribué par : OMRON HEALTHCARE, INC. 1925 West Field Court Lake Forest, IL 60045 U.S.A. omronhealthcare.ca © 2015 OMRON HEALTHCARE, INC. Made in China/Fabriqué en Chine...
- Page 49 English Français 10 series Blood Pressure Monitor Model BP786CANN Instruction Manual 2298848-9B...
- Page 50 Product includes: El producto incluye: AC Adapter Adaptateur CA ComFit™ Cuff Brassard ComFit™ Monitor Tensiomètre Battery Set Juego de Pilas BP786CANN Instruction Manual Quick Start Guide Guide de l’utilisateur Guide de démarrage rapide...
- Page 52 Table des matières ® Nous vous remercions d’avoir acheté le tensiomètre OMRON P786CANN. Votre nouveau tensiomètre a recours à la méthode oscillométrique pour la mesure de la tension artérielle. Cela signifie que le tensiomètre capte le mouvement de votre sang dans l’artère brachiale et le convertit en lecture numérique.
- Page 53 Renseignements de sécurité importants Avertissement : indique une situation potentiellement dangereuse qui, si elle n’est pas évitée, pourrait causer la mort ou une blessure grave. (Utilisation générale) Ne PAS effectuer de changements dans les doses de médicaments pris en fonction des résultats de ce tensiomètre. Prendre les médicaments selon l’ordonnance de votre médecin.
- Page 54 Renseignements de sécurité importants Mise en garde : indique une situation potentiellement dangereuse qui, si elle n’est pas évitée, pourrait causer une blessure superficielle ou légère à l’utilisateur ou au patient, ou endommager l’équipement ou d’autres objets. (Utilisation générale) Toujours consulter un médecin. L’autodiagnostic des résultats obtenus et l’automédication sont dangereux. Consulter un médecin avant d’utiliser l’appareil pour l’un des troubles suivants : •...
- Page 55 Essuyer la poussière de la fiche d’alimentation. Débrancher le tensiomètre lorsqu’il n’est pas utilisé. Débrancher la fiche avant de nettoyer l’appareil. Utiliser uniquement l’adaptateur c.a. d’OMRON conçu pour cet appareil. L’utilisation d’adaptateurs incompatibles peut endommager l’appareil ou présenter un danger. (Utilisation des piles) Ne pas insérer les piles en alignant leurs polarités de manière incorrecte.
- Page 56 1. Se familiariser avec l’appareil Consulter la dernière page pour lire ce qui suit : Les lettres d’identification situées sur la page de la couverture arrière correspondent à celles détaillées dans le corps de cette page. Tensiomètre Affichage Prise d’air Symbole de la mémoire Indicateur coloré...
- Page 57 1. Se familiariser avec l’appareil 1.1 Symboles d’affichage Symbole de rythme cardiaque irrégulier ( Rythme cardiaque régulier Lorsque le tensiomètre détecte un rythme irrégulier au moins deux fois lors Pouls de la prise de mesure, le symbole de rythme cardiaque irrégulier s’affiche Tension avec les valeurs de la mesure.
- Page 58 1. Se familiariser avec l’appareil Indicateur coloré de la tension artérielle Si votre tension artérielle systolique est égale ou supérieure à 135 mmHg et/ou si votre tension artérielle diastolique est égale ou supérieure à 85 mmHg, l’indicateur de couleur de la tension artérielle s’allume en «...
- Page 59 2. Préparation 2.1 Installation des piles Retirer le couvercle des piles. Insérer 4 piles « AA », comme indiqué dans le compartiment des piles. Replacer le couvercle des piles. Remarques : • Lorsque l’indicateur de piles faibles ( ) s’affiche à l’écran, éteindre le tensiomètre et remplacer toutes les piles en même temps.
- Page 60 être nécessaire de réinitialiser la date et l’heure dans l’éventualité où l’adaptateur c.a. serait débranché. Les résultats des mesures ne seront cependant pas effacés. Utiliser uniquement les pièces et accessoires Omron autorisés. Les pièces et accessoires incompatibles ne peuvent pas être utilisés avec l’appareil sous peine de l’endommager.
- Page 61 2. Préparation Insérer la fiche mâle de l’adaptateur c.a. dans la prise de l’adaptateur c.a. située à l’arrière du tensiomètre. Brancher l’adaptateur c.a. dans une prise de courant. Pour débrancher l’adaptateur c.a., débrancher d’abord l’adaptateur c.a. de la prise de courant, puis retirer la fiche mâle de l’adaptateur c.a.
- Page 62 2. Préparation 2.3 Utilisation du mode TruRead Le mode TruRead prend trois mesures consécutives. Le tensiomètre se gonfle, relève une mesure et se dégonfle à trois reprises, laissant passer quelques secondes entre chaque prise de mesure. Le mode TruRead est désactivé (OFF) par défaut. Sélectionner l’ID D’UTILISATEUR (1 ou 2).
- Page 63 2. Préparation Consulter la dernière page pour lire ce qui suit : Les lettres d’identification situées sur la page de la couverture arrière correspondent à celles détaillées dans le corps de cette page. 2.4 Réglage de la date et de l’heure La date et l’heure sont automatiquement réglées lors de la connexion à...
- Page 64 • La tension artérielle peut différer selon qu’elle est mesurée sur le bras droit ou le bras gauche; en outre, les valeurs correspondant à la pression artérielle mesurée peuvent être différentes. OMRON recommande de toujours mesurer la tension sur le même bras. Si les valeurs entre les deux bras diffèrent...
- Page 65 3. Utilisation de l’appareil 3.2 Comment s’asseoir correctement Pour prendre une mesure, il faut être détendu et assis dans une position confortable dans une pièce où la température ambiante est agréable. Éviter de prendre un bain, boire de l’alcool ou de la caféine, fumer, faire des exercices et manger pendant au moins 30 minutes avant la prise de mesure.
- Page 66 3. Utilisation de l’appareil 3.3 Prise de mesure Remarques : • Pour arrêter la prise de mesure, appuyer une fois sur la touche marche/arrêt (START/STOP) pour dégonfler le brassard. • Rester immobile et tranquille pendant la prise de mesure. Le tensiomètre est conçu pour prendre des mesures et conserver les valeurs de mesure en mémoire pour deux personnes, à...
- Page 67 3. Utilisation de l’appareil Retirer le brassard. Appuyer sur la touche marche/arrêt (START/STOP) pour éteindre le tensiomètre. Le tensiomètre garde automatiquement le résultat de la mesure en mémoire. Le tensiomètre s’éteint automatiquement au bout de 2 minutes. Remarque : Attendre 2 à 3 minutes, avant de réaliser une autre prise de mesure. La période d’attente permet aux artères de retourner à...
- Page 68 3. Utilisation de l’appareil La première prise de mesure est terminée, en attente de commencer la prochaine prise de mesure. L’intervalle est affiché à l’écran. La deuxième prise de mesure est terminée, en attente de commencer la prochaine prise de mesure. L’intervalle est affiché...
- Page 69 3. Utilisation de l’appareil Utilisation du mode Invité Le tensiomètre conserve les valeurs de mesure relatives à deux utilisateurs en mémoire. Le mode invité permet de prendre une mesure unique pour un autre utilisateur. Aucune valeur de mesure n’est conservée en mémoire et le mode TruRead est indisponible lorsque le mode invité...
- Page 70 3. Utilisation de l’appareil 3.4 Utilisation de la fonction mémoire Le tensiomètre enregistre automatiquement jusqu’à 100 résultats pour chaque utilisateur (1 et 2). Il peut également calculer une valeur moyenne basée sur les valeurs des trois dernières prises de mesure réalisées au cours des 10 dernières minutes. Remarques : •...
- Page 71 3. Utilisation de l’appareil Appuyer sur la touche pour afficher les données enregistrées en mémoire. : Pour visionner les valeurs plus anciennes : Pour visionner les valeurs plus récentes Remarque : La valeur accompagnée du symbole TruRead représente la moyenne des trois mesures consécutives.
- Page 72 3. Utilisation de l’appareil Pour visionner la valeur moyenne Sélectionner l’ID D’UTILISATEUR (1 ou 2). Appuyer sur la touche et la maintenir enfoncée pendant plus de 3 secondes. Remarques : • Si la dernière mesure a été prise sans configurer la date et l’heure, la valeur moyenne n’est pas calculée.
- Page 73 3. Utilisation de l’appareil Pour associer votre appareil à un téléphone intelligent Pour démarrer, télécharger et installer l’application gratuite « Omron Wellness » sur votre téléphone intelligent. Ouvrir l’application sur votre téléphone intelligent et suivre les instructions de configuration et d’appairage.
- Page 74 3. Utilisation de l’appareil Ouvrir l’application « Omron Wellness » sur votre téléphone intelligent et suivre les instructions d’appairage de l’appareil qui apparaissent sur votre téléphone pendant que le symbole de connexion clignote à l’écran. Confirmer que l’appareil est connecté avec succès.
- Page 75 Effacer l’écran de lecture en appuyant sur la touche « START/STOP » (marche/arrêt) du tensiomètre. Appuyer ensuite sur l’icône « transfert » de l’application Omron Wellness pour démarrer le transfert. * Si le transfert des données de démarre pas, consulter la partie « Échec de la connexion. Impossible d’envoyer les données.
- Page 76 3. Utilisation de l’appareil EFFACER TOUS LES RÉSULTATS ET RÉGLAGES Pour effacer tous les renseignements stockés dans le tensiomètre, suivre les instructions ci-dessous. Veiller à ce que l’alimentation du tensiomètre soit hors tension. Tout en maintenant la touche enfoncée, appuyer sur la touche marche/ arrêt (START/STOP) et la maintenir enfoncée pendant plus de 5 secondes.
- Page 77 3. Utilisation de l’appareil Supprimer toutes les valeurs enregistrées en mémoire Les valeurs enregistrées en mémoire sont effacées par identifiant utilisateur. Sélectionner l’ID D’UTILISATEUR (1 ou 2). Appuyer sur la touche mémoire jusqu’à ce que le symbole de la mémoire ( ) s’affiche. En maintenant la touche enfoncée, appuyer sur la touche marche/arrêt...
- Page 78 3. Utilisation de l’appareil 3.5 Désactiver le Bluetooth Désactiver le Bluetooth du tensiomètre dans les zones suivantes, dans lesquelles l’utilisation d’équipement sans fil est interdite. • Dans les avions • Dans les hôpitaux • À l’étranger Veiller à ce que l’alimentation soit hors tension avant de procéder aux instructions ci-dessous.
- Page 79 3. Utilisation de l’appareil Pour activer le Bluetooth Veiller à ce que l’alimentation soit hors tension avant de procéder aux instructions ci-dessous. Appuyer sur le bouton de connexion et le maintenir enfoncé pendant plus de 10 secondes. Relâcher le bouton lorsque le message «...
- Page 80 4. Messages d’erreur et conseils de dépannage 4.1 Messages d’erreur Affichage Cause Solution Retirer le brassard. Attendre 2 à 3 minutes, puis effectuer une autre prise de mesure. Un pouls irrégulier est détecté. Répéter les étapes de la section 3.3. Si cette erreur se reproduit, communiquer avec votre médecin.
- Page 81 4. Messages d’erreur et conseils de dépannage Affichage Cause Solution Insérer solidement le raccord d’air. Le raccord d’air est déconnecté. Consulter la section 3.1. Appliquer le brassard de façon plus serrée. Le brassard est installé de façon trop lâche. Consulter la section 3.1. Remplacer le brassard par un brassard neuf.
- Page 82 Impossible d’envoyer les données. téléphone intelligent » de la section 3.4 ou consulter la section « Aide » de l’application Omron Wellness pour obtenir une aide supplémentaire pour l’appairage de votre appareil intelligent. Le tensiomètre n’est pas prêt, suivre l’étape « 1 ». Appuyer sur le bouton de connexion dans «...
- Page 83 5. Entretien et entreposage 5.1 Entretien Pour protéger votre appareil et éviter de l’endommager : • Ranger l’appareil et ses composants dans un endroit sûr et sec. • Ne pas utiliser de produits nettoyants abrasifs ou volatils. • Ne pas laver l’appareil ou l’un de ses composants, ni les immerger dans de l’eau. •...
- Page 84 5. Entretien et entreposage 5.2 Entreposage Débrancher le raccord d’air de la prise d’air. Ranger le tube à air à l’intérieur du brassard. Remarque : Ne pas plier ou froisser le tube à air de façon excessive. Ne pas entreposer cet appareil dans les situations suivantes : •...
- Page 85 5. Entretien et entreposage 5.3 Accessoires médicaux en option Brassard Adaptateur c.a. Circonférence du bras 22 à 42 cm (9 à 17 po) HEM-ADPTW5 Brassard ComFit (CFX-WR17) (Modèle : HEM-FL31)
- Page 86 6. Spécifications du produit BP786CANN HEM-7321T-CA Modèle Affichage Affichage numérique à cristaux liquides (LCD) Plage de mesure Tension : 0 à 299 mmHg Pouls : 40 à 180 battements/min. Tension : ±3 mmHg ou 2 % de la lecture Précision Pouls : ±...
- Page 87 7. Déclaration de conformité FCC/IC et marques de commerce MISE EN GARDE DE LA FCC Les changements ou modifications non approuvés expressément par l’autorité responsable de la conformité peuvent annuler l’autorisation accordée à l’utilisateur de faire fonctionner cet équipement. Remarque : Cet équipement a été...
- Page 88 Smart sont des marques de commerce déposées appartenant à de la société Bluetooth SIG, Inc. Toute utilisation de ces marques par OMRON HEALTHCARE Co., Ltd est régie par des droits de licence. Les autres marques et dénominations commerciales appartiennent à leurs propriétaires respectifs.
- Page 89 8. Garanties restreintes Votre tensiomètre automatique BP786CANN, à l’exclusion du brassard du tensiomètre et des piles, est garanti contre tout défaut de matériaux et de fabrication durant les 5 années suivant la date d’achat, lorsqu’il est utilisé selon les directives fournies avec le tensiomètre. Le brassard est garanti contre tout défaut de matériaux et vice de fabrication durant l’année suivant la date d’achat, lorsqu’il est utilisé...
- Page 90 être installé et mis en service conformément aux renseignements CEM fournis dans le présent document. • La performance essentielle de l’appareil BP786CANN, y compris son adaptateur c.a., est de mesurer la tension artérielle et le pouls et d’offrir une fonction de mémoire.
- Page 91 Le BP786CANN d’OMRON, y compris son adaptateur c.a., est conçu pour être utilisé dans l’environnement électromagnétique spécifié ci-après. Le client ou l’utilisateur du BP786CANN d’OMRON, y compris son adaptateur c.a., doit vérifier qu’il est utilisé dans un tel environnement. Environnement électromagnétique : Test d’immunité...
- Page 92 Le BP786CANN d’OMRON, y compris son adaptateur c.a., est conçu pour être utilisé dans l’environnement électromagnétique spécifié ci-après. Le client ou l’utilisateur du BP786CANN d’OMRON, y compris son adaptateur c.a., doit vérifier qu’il est utilisé dans un tel environnement. Niveau de test Niveau de Test d’immunité...
- Page 93 Le BP786CANN d’OMRON, y compris son adaptateur c.a., est conçu pour être utilisé dans un environnement électromagnétique dans lequel les perturbations liées aux émissions RF par rayonnement sont contrôlées. Le client ou l’utilisateur du BP786CANN d’OMRON, y compris son adaptateur c.a., peut contribuer à éviter l’interférence électromagnétique en maintenant une distance minimum entre l’équipement de communication RF portable et mobile (les émetteurs) et le BP786CANN d’OMRON, y compris son adaptateur c.a., conformément aux...
- Page 96 Manufactured for/Fabriqué pour : OMRON HEALTHCARE Co., Ltd. 53, Kunotsubo, Terado-cho, Muko, Kyoto, 617-0002 JAPAN Distributed by/Distribué par : OMRON HEALTHCARE, INC. 1925 West Field Court Lake Forest, IL 60045 U.S.A. omronhealthcare.ca © 2015 OMRON HEALTHCARE, INC. Made in China/Fabriqué en Chine...