Table des Matières
Publicité
Les langues disponibles
Les langues disponibles
Liens rapides
Publicité
Table des Matières

Manuels Connexes pour Multiplex Roxxy BL-Smart Control 940-6


Sommaire des Matières pour Multiplex Roxxy BL-Smart Control 940-6
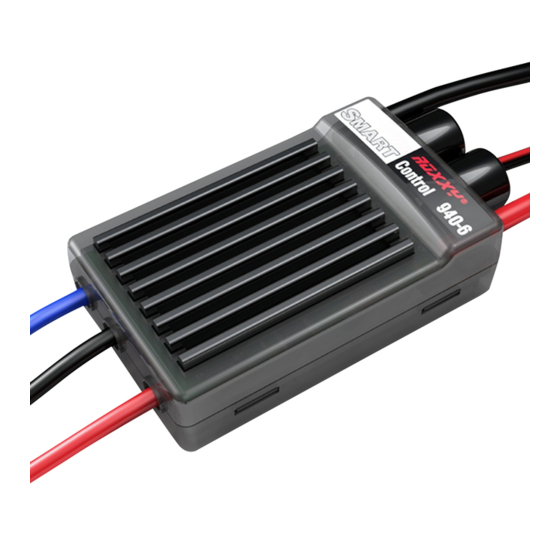
- Page 1 Roxxy ® Bl-SmaRt ContRol 940-6 Bedienungsanleitung # 31 8573...
-
Page 2: Merkmale Und Schutzfunktionen
Bedienungsanleitung Roxxy BL-Smart Control 940-6 # 31 8573 Allgemeines 1. Anschluss und Besonderheiten Die neue ROXXY Smart Control BL-Fahrtreglerserie bietet eine integ- ® Das rote Kabel (plus) und das schwarze Kabel (minus) durch Ver- rierte Telemetriefunktion über die digitale S.BUS2 Schnittstelle. Damit wendung eines ge eigneten Steck sy stems für den Anschluss an den informiert Sie der ROXXY Smart Control Regler immer über den aktuel-... - Page 3 Bedienungsanleitung Roxxy BL-Smart Control 940-6 # 31 8573 5. Programmierung der Knüppelpositionen 3. Einstellen der BEC Spannung 1. Flugakku vom Regler trennen. Über die zwei Microschalter auf der Vorderseite des Reglers (siehe 2. Bei Futaba Sendern den Gas Kanal im Menü „SERVOUMPOL Bild unten) kann die BEC Spannung, für die Empfänger und Ser- auf „Reverse“...
- Page 4 Bedienungsanleitung Roxxy BL-Smart Control 940-6 # 31 8573 In diesem Untermenü werden die verschiedenen Einstellung eben- 6.1 Programmierbeispiel falls in einer Endlosschleife akustisch angezeigt. Im nachfolgenden Beispiel wird die Programmierung des Parame- ters „Akkutyp / LiPo“ erläutert. Um eine Einstellung zu wählen, Gassteuerknüppel in Vollgasposition bringen.
- Page 5 Bedienungsanleitung Roxxy BL-Smart Control 940-6 # 31 8573 7. Anmeldung des Reglers als Sensor am Sender 8. Anschluss des Sensors Für die Sender ohne interne Spannungsstabilisierung wie z.b. T10J, Stecken Sie den Sensor an T14SG und T18MZ) erfolgt der Anschluss direkt an der S.BUS (S.I/F) den S.BUS2-Ausgang Ihres Buchse. Aufgrund der BEC Stromversorgung des Reglers kann auf Telemetrie-Empfängers,...
- Page 6 Bedienungsanleitung Roxxy BL-Smart Control 940-6 # 31 8573 S.BUS2 Kanal ändern am Sender: - Dazu den Empfängeranschluss über die S.BUS Buchse am Sender anschliessen. - Danach muss ein Flugakku (6V-25V / 5 NiXX...6S LiPo) am Anschluss „Antriebsakku“ des Fahrtreglers angeschlossen werden. - Öffnen Sie das Menü „SBUS SERVO“ im System Menü des Senders.
-
Page 7: Sicherheitshinweise
Weitergehende Ansprüche z.B. bei ENTSORGUNG Folge schäden, sind ausgeschlossen. Für Produkte die nicht durch Multiplex Modellsport in den Handel gebracht wurden, übernimmt Dieses Symbol bedeutet, dass elektrische und elektro- die Multiplex Modellsport GmbH & Co.KG keine Gewährleistung. - Page 8 MULTIPLEX Modellsport GmbH & Co.KG Westliche Gewerbestr. 1 · 75015 Bretten Irrtum und technische Änderungen vorbehalten Germany Copyright Multiplex Modellsport 2015 Kopie und Nachdruck, auch auszugsweise, nur mit www.multiplex-rc.de schriftlicher Genehmigung der Multiplex Modellsport Multiplex Service: +49 (0) 7252 - 5 80 93 33 GmbH & Co.KG...
- Page 9 Roxxy ® Bl-SmaRt ContRol 940-6 Operation Instructions # 31 8573...
- Page 10 Operating Instructions Roxxy BL-Smart Control 940-6 # 31 8573 Introduction 1. Connections, special features The new ROXXY® Smart Control BL range of speed controllers of- Prepare the red (positive) wire and the black (negative) wire for con- fers an integral telemetry function via the digital S.BUS2 interface. This necting to the flight battery by fitting matching connectors. Insulate...
- Page 11 Operating Instructions Roxxy BL-Smart Control 940-6 # 31 8573 5. Programming the stick positions 3. Setting the BEC voltage 1. Disconnect the flight battery from the speed controller. The BEC voltage can be adjusted to suit the receiver and the ser- 2. If you are using a Futaba transmitter, set the throttle channel to vos connected to it using the two micro-switches on the front of the "Reverse"...
-
Page 12: Programming Example
Operating Instructions Roxxy BL-Smart Control 940-6 # 31 8573 In this sub-menu the various settings are also available in an end- 6.1 Programming example less loop indicated by the beeper. The following example explains the method of programming the "Battery type / LiPo" parameter. To select a setting, move the throttle stick to the full-throttle position. You will hear a melody (5-6-5) which indicates that the setting has Entering parameter programming mode been stored. - Page 13 Operating Instructions Roxxy BL-Smart Control 940-6 # 31 8573 8. Registering the speed controller as a sensor at the trans- 8. Connecting the sensor mitter Plug the sensor into the For transmitters which lack internal voltage stabilisation, e.g. T10J, S.BUS2 output of your te- T14SG and T18MZ, the controller is connected directly to the S.BUS...
- Page 14 Operating Instructions Roxxy BL-Smart Control 940-6 # 31 8573 Changing the S.BUS2 channel on your transmitter: - First connect the receiver lead to the S.BUS socket on the transmitter. - A flight battery (6V - 25V / 5 NiXX ... 6S LiPo) must now be connected to the speed controller's "Flight battery" socket.
-
Page 15: Safety Notes
• Please include a concise, accurate description of the fault to help If required, you can request MULTIPLEX Modellsport GmbH & us locate the problem. Co.KG to supply a copy of the unit’s Conformity Declaration. Please contact the company using the contact details at the foot of the page... - Page 16 MULTIPLEX Modellsport GmbH & Co.KG Westliche Gewerbestr. 1 · 75015 Bretten Errors and omissions excepted. Technical modifications reserved. Germany Copyright Multiplex Modellsport 2015 www.multiplex-rc.de Duplication and copying of the text, in whole or in part, is only permitted with the prior written approval of Multiplex Service: +49 (0) 7252 - 5 80 93 33 Multiplex Modellsport GmbH & Co.KG...
- Page 17 Roxxy ® Bl-SmaRt ContRol 940-6 Notice D‘Utilisation # 31 8573...
-
Page 18: Caractéristiques Et Fonctions De Protection
Notice de mise en œuvre Roxxy BL-Smart Control 940-6 # 31 8573 Généralités 1. Branchement et particularités La nouvelle série de variateurs ROXXY Smart Control sans balais offre ® Préparez le brin rouge (plus) et le brin noir (moins) à l'aide d'un une fonction télémétrique intégrée via l'interface numérique S.BUS2. - Page 19 Notice de mise en œuvre Roxxy BL-Smart Control 940-6 # 31 8573 5. Programmation de la position des manches 3. Mise au point de la tension BEC 1. Désolidarisez l'alimentation du variateur. À l'aide de deux micro-interrupteurs en façade du variateur (Cf. 2. Sur les émetteurs Futaba disposez la voie des gaz sur inversion illustration ci-dessous) il est possible d'ajuster la tension BEC aux („Reverse“) dans le menu "SERVOUMPOL".
-
Page 20: Exemple De Programmation
Notice de mise en œuvre Roxxy BL-Smart Control 940-6 # 31 8573 6.1 Exemple de programmation Tableau des mises au point L'exemple suivant décrit la programmation du paramètre type d'accu Paramètres bip 1x bip 2x bip 3x LiPo („Akkutyp / LiPo“). Effort de Arrêt 100% Accès à la programmation du paramètre freinage 1. Désolidarisez l'alimentation du moteur du variateur. -
Page 21: Numéro De Série
Notice de mise en œuvre Roxxy BL-Smart Control 940-6 # 31 8573 7. Enregistrement du variateur comme capteur sur l'émetteur 8. Branchement du capteur Sur les émetteurs sans stabilisation interne comme par exemple les Plantez le capteur dans émetteurs T10J, T14SG et T18MZ, intervient la connexion directe- la sortie S.BUS 2 de votre ment sur la douille S.BUS (S.I/F). À cause de l'alimentation BEC du... - Page 22 Notice de mise en œuvre Roxxy BL-Smart Control 940-6 # 31 8573 Changement de la voie S.BUS2 sur l'émetteur : - Pour ce faire, raccordez le branchement du récepteur à l'émetteur via la douille S.BUS.. - Dans le menu „System“ de l'émetteur accédez au menu „S.BUS SERVO“.
-
Page 23: Consignes De Sécurité
Toute autre prétention, par exemple en cas de dommages consécutifs, est exclue. Les produits qui n´ont pas été MiSE AU REBUT livrés par MULTIPLEX Modellsport ne peuvent pas être réparés sous garantie par notre SAV. Le transport doit être assuré jusqu’à Ce symbole signifie que les appareils électriques nous, le retour se ferra jusqu'à... - Page 24 MULTiPLEX Modellsport GmbH & Co.KG Sous réserve d'erreur d'impression et de modification Westliche Gewerbestr. 1 · 75015 Bretten technique Allemagne Copyright Multiplex Modellsport 2015 La copie et la reproduction, même partielles, sont www.multiplex-rc.de soumises à l'autorisation écrite de la Sté Multiplex Modellsport GmbH & Co.KG Multiplex Service: +49 (0) 7252 - 5 80 93 33...
- Page 25 Roxxy ® Bl-SmaRt ContRol 940-6 Istruzione per L‘utilizzo # 31 8573...
- Page 26 • Alta frequenza di impulso per un comando sensibile, p.es. per ma- novre d'avvitamento ("Torque") • Un controllo temperatura integrato protegge da sbalzi difetti ter- mici. • Come tutti i regolatori Multiplex anche i regolatori Smart Control Collegamento Collegamento hanno le funzioni abituali di protezione e di filtro, come la prote-...
- Page 27 Manuale d'uso Roxxy BL-Smart Control 940-6 # 31 8573 5. Programmazione delle posizioni degli stick 3. Impostazione della tensione BEC 1. Separare la batteria di volo dal regolatore Tramite i due interruttori micro , che si trovano sulla parte ante- 2.
-
Page 28: Esempio Di Programmazione
Manuale d'uso Roxxy BL-Smart Control 940-6 # 31 8573 6.1 Esempio di programmazione Tabella Impostazioni Nell'esempio seguente viene spiegata la programmazione del para- Parametri Beep 1x Beep 2x Beep 3x metro „Tipo batteria / LiPo“. Forza frenan- Spento 100% Inizio Programmazione del parametro 1. -
Page 29: Numero Di Serie
Manuale d'uso Roxxy BL-Smart Control 940-6 # 31 8573 7. Registrazione del regolatore alla trasmittente 8. Collegamento del sensore Per le trasmittenti senza stabilizzazione della tensione come a.e. Inserire il sensore nell'usci- T10J, T14SG e T18MZ) il collegamento viene effettuato direttamente ta S.BUS2 della ricevente... - Page 30 Manuale d'uso Roxxy BL-Smart Control 940-6 # 31 8573 Modificare canale S.BUS2 alla trasmittente Collegare il collegamento della ricevente tramite la presa S.BUS alla trasmittente. Successivamente si deve collegare una batteria di volo (6V-25V / 5 NIXX... 6S LiPo) al collegamento "Batteria di funzionamento" del re- golatore.
-
Page 31: Norme Di Sicurezza
I prodotti che non sono stati SMALTIMENTO forniti da MULTIPLEX Modellsport non possono essere riparati in garanzia dal nostro servizio. Il trasporto verso la nostra sede e il Questo simbolo indica che al termine del loro utilizzo gli ritorno al cliente non avviene a nostre spese. - Page 32 Con riserva di modifiche tecniche o eventuali errori. Germany Copyright Multiplex Modellsport 2015 La copia e la ristampa, anche parziali, sono consentite www.multiplex-rc.de solamente sotto autorizzazione della Multiplex Service: +49 (0) 7252 - 5 80 93 33 Multiplex Modellsport GmbH & Co.KG...