Table des Matières
Publicité
Les langues disponibles
Les langues disponibles
Liens rapides
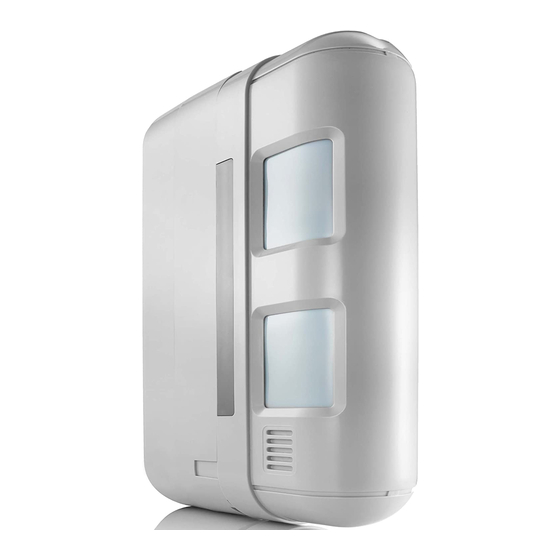
Détecteur
de mouvement
façade
Vous venez d'acheter un détecteur de mouvement façade pour votre système d'alarme Somfy et
nous vous en remercions.
Ce détecteur de mouvement façade est compatible avec une centrale/transmetteur
Somfy :
PROTEXIAL IO (versions 2010 et suivantes)
■ ■
DOMIS (versions 2007 et suivantes)
■ ■
DOMIS IO (versions 2014 et suivantes)
■ ■
Nous vous recommandons :
de lire attentivement ce manuel en suivant très précisément pas à pas les indications de montage
■ ■
et de fonctionnement pour utiliser dans les meilleures conditions votre système d'alarme Somfy,
de bien conserver ce manuel pendant toute la durée de vie du produit.
■ ■
Principe de fonctionnement
Le détecteur de mouvement façade assure la protection d'une grande façade extérieure et permet de
détecter un intrus avant effraction en distinguant un être humain d'un animal domestique.
Ce produit est doté de 2 faisceaux de détection (inférieur et supérieur), de part et d'autre du détecteur,
qui doivent être coupés simultanément pour déclencher une alarme.
Il est possible d'effectuer les réglages suivants :
inclinaison des faisceaux, en cas d'obstacle
■ ■
portée de détection
■ ■
réglage de la sensibilité.
■ ■
Publicité
Chapitres
Table des Matières

Manuels Connexes pour SOMFY 1875108


Sommaire des Matières pour SOMFY 1875108
- Page 1 Détecteur de mouvement façade Vous venez d’acheter un détecteur de mouvement façade pour votre système d’alarme Somfy et nous vous en remercions. Ce détecteur de mouvement façade est compatible avec une centrale/transmetteur Somfy : PROTEXIAL IO (versions 2010 et suivantes) ■...
-
Page 2: Table Des Matières
Tester le fonctionnement du détecteur ............9 Tester le fonctionnement du détecteur avec le système ......9 Maintenance Changement des piles .................. 10 Entretien ......................10 Problèmes rencontrés .................. 11 Précautions d’emploi ..................11 Caractéristiques techniques ............12 Copyright © 2015 Somfy SAS. All rights reserved. -
Page 3: Présentation
Retirer le support arrière : et retirer le capot. Ne pas (b) de l’embase. en l’écartant de l’embase, appuyer sur les lentilles. Ne pas toucher les miroirs. en le faisant glisser vers le bas. Copyright © 2015 Somfy SAS. All rights reserved. -
Page 4: Installation
Si vous choisissez de régler le mode de fonctionnement à l’aide des commutateurs, vous pouvez définir : soit un réglage lié au fonctionnement en mode alarme ■ ■ soit un réglage lié au fonctionnement en mode pré- ■ ■ alarme. Copyright © 2015 Somfy SAS. All rights reserved. -
Page 5: Depuis Un Ordinateur
Fermer le compartiment de piles en respectant le sens de montage : l’embase est présentée avec les vis de fixation ■ ■ vers le bas, le couvercle est monté flèche vers le haut. ■ ■ Copyright © 2015 Somfy SAS. All rights reserved. -
Page 6: Précautions D'emploi
(branches, buissons, linge étendu, drapeaux ou volet battant). Si des objets instables sont inévitables, consulter le paragraphe NON ! Problèmes rencontrés, en fin de notice. Lobe de détection à 0° 12 m 12 m Copyright © 2015 Somfy SAS. All rights reserved. -
Page 7: Fixation
Vérifier que I’encoche latérale, à l’arrière du support de lentille, soit bien dégagée (vide). Ne pas replacer tout de suite le support de Inclinaison d’inclinaison 3° lentille dans le capot avant afin de procéder à l’étape suivante. Copyright © 2015 Somfy SAS. All rights reserved. -
Page 8: Réglage De La Portée De Détection
(X, Y et Z) sur chaque côté du support de lentille avec les trois encoches (X’, Y’ et Z’) sur le capot avant en s’assurant que les 6 clips sont bien en place. Copyright © 2015 Somfy SAS. All rights reserved. -
Page 9: Réglage De La Sensibilité
Mettre le système d’alarme en marche. remettre le couvercle Attendre impérativement 2 minutes sans et serrer la vis. passer devant le détecteur. Le fonctionnement du détecteur doit être conforme au choix du tableau en page 5. Copyright © 2015 Somfy SAS. All rights reserved. -
Page 10: Maintenance
+ et -. Confier les piles usagées à un point de collecte. Refermer le détecteur dans le sens inverse des étapes d’ouverture ci-dessus Entretien Nettoyer les lentilles avec un chiffon sec. Copyright © 2015 Somfy SAS. All rights reserved. -
Page 11: Problèmes Rencontrés
La sensibilité est réglée sur «L» ■ Modifier la Sensibilité sur «M» (faible). (medium) ou «H» (haute). Précautions d’emploi Ne pas arroser avec un jet d’eau ou un nettoyeur à haute pression. Copyright © 2015 Somfy SAS. All rights reserved. -
Page 12: Caractéristiques Techniques
* avec le commutateur 1 en position OFF et le commutateur 2 en position OFF. Ce produit respecte les exigences de la norme européenne EN 50130-4 et est conforme aux exigences essentielles de la directive européenne R&TTE 1999/5/CE. www.somfy.com/ce Consulter tous nos services sur www.somfy.fr Ce produit est garanti 5 ans. - Page 13 Bewegungsmelder Fassade Sie haben einen Bewegungsmelder Fassade für Ihr Somfy-Alarmsystem erworben, wofür wir uns bedanken möchten. Dieser Bewegungsmelder ist mit folgenden Zentralen/Übertragungseinrichtungen von Somfy kompatibel PROTEXIAL IO (Version 2010 und später) Wir empfehlen Ihnen: die vorliegende Anleitung aufmerksam durchzulesen und die Anweisungen für die Montage und ■...
- Page 14 Funktionsweise des Melders testen ............21 Funktionsweise des Melders mit Alarmsystem testen ......21 Wartung Auswechseln der Batterien ................22 Pflege ......................22 Mögliche Probleme ..................23 Vorsichtsmaßnahmen ................... 23 Technische Daten ................... 24 Copyright © 2015 Somfy SAS. All rights reserved.
-
Page 15: Beschreibung
Befestigungsschraube (c) Befestigungsschrauben (b) rückwärtige Halterung ab: und nehmen Sie die des Unterteils. Berühren Sie indem Unterteil Abdeckung ab. Drücken Sie die Spiegel nicht. abheben nicht gegen die Linsen. und nach unten schieben. Copyright © 2015 Somfy SAS. All rights reserved. -
Page 16: Installation
Die per Rechner ausgewählte Zone hat Vorrang vor der Position der Schalter in der Komponente. Mit den Schaltern des Melders: Wenn Sie die Einstellung der Betriebsart mit den Schaltern wählen, können Sie Folgendes definieren: Einstellung der Betriebsart Alarm ■ ■ Einstellung der Betriebsart Voralarm ■ ■ Copyright © 2015 Somfy SAS. All rights reserved. - Page 17 Mit einem Rechner: Switch Schließen Sie das Batteriefach und achten Sie dabei auf die korrekte Ausrichtung: Befestigungsschrauben Unterteils ■ ■ zeigen nach unten. Der Pfeil auf der Abdeckung zeigt nach oben. ■ ■ Copyright © 2015 Somfy SAS. All rights reserved.
-
Page 18: Vorsichtsmaßnahmen
Büsche, Wäsche an der Wäscheleine, Fahnen oder Klappläden) die Detektionszonen schneiden. Wenn dies nicht möglich ist, lesen Sie den Abschnitt NON ! NEIN! „Mögliche Probleme“ am Ende der Anleitung. Sensor bei 0° 12 m 12 m Copyright © 2015 Somfy SAS. All rights reserved. -
Page 19: Montage
Setzen Sie die Halterung der Linse nicht sofort Strahl bei Strahl bei einem Winkel einem Winkel wieder auf der Abdeckung ein, um den nächsten von 0° von 3° Schritt durchführen zu können. Copyright © 2015 Somfy SAS. All rights reserved. -
Page 20: Einstellung Der Reichweite
(X, Y und Z) auf jeder Seite der Halterung der Linse an den drei Aussparungen (X’, Y’ und Z’) auf der vorderen Abdeckung ausrichten und sicherstellen, dass alle 6 Clips vorhanden sind. Copyright © 2015 Somfy SAS. All rights reserved. -
Page 21: Einstellung Der Empfindlichkeit
Schalten Sie das Alarmsystem ein. Abdeckung und Warten Sie 2 Minuten, ohne vor dem Melder ziehen Sie die vorbeizugehen. Schraube an. Die Funktionsweise des Melders muss der gewählten Konfiguration der Tabelle auf Seite 5 entsprechen. Copyright © 2015 Somfy SAS. All rights reserved. -
Page 22: Wartung
Vorschriften im Handel oder bei den kommunalen Sammelstellen. Schließen Sie den Melder, indem Sie die oben genannten Schritte in umgekehrter Reihenfolge ausführen. Pflege Reinigen Sie die Linsen mit einem trockenen Tuch. Copyright © 2015 Somfy SAS. All rights reserved. -
Page 23: Mögliche Probleme
Die Detektion erfolgt nicht immer. Die Empfindlichkeit wurde auf „L“ ■ Stellen Sie die Empfindlichkeit auf (niedrig) eingestellt. „M“ (mittel) oder „H“ (hoch). Vorsichtsmaßnahmen Richten Sie keinen Wasserstrahl oder Hochdruckreiniger auf den Bewegungsmelder. Copyright © 2015 Somfy SAS. All rights reserved. -
Page 24: Technische Daten
Der Bewegungsmelder Fassade wurde konzipiert, um Personen zu detektieren und eine Alarmzentrale zu aktivieren. Da dieser Melder nur ein Teil eines kompletten Systems sind, kann Somfy keine Verantwortung für Schäden oder Konsequenzen, die aus einem Einbruch entstehen, übernehmen. Eine Änderung der technischen Daten und des Designs sind ohne vorherige Ankündigung des Herstellers möglich. -
Page 25: Principio Di Funzionamento
Si raccomanda: di leggere attentamente il presente manuale attenendosi scrupolosamente alle istruzioni di ■ ■ montaggio e funzionamento per garantire un utilizzo ottimale del sistema d’allarme Somfy; di conservarlo per l’intera durata utile del prodotto. ■ ■ Principio di funzionamento... - Page 26 Testare il funzionamento del rilevatore ............33 Testare il funzionamento del rilevatore con il sistema ......33 Manutenzione Sostituzione delle batterie ................34 Manutenzione ....................34 Risoluzione problemi ..................35 Precauzioni d’uso ..................35 Caratteristiche tecniche ..............36 Copyright © 2015 Somfy SAS. All rights reserved.
-
Page 27: Contenuto Della Confezione
Rimuovere le 2 viti di Togliere il supporto fissaggio (c) e togliere il fissaggio (b) della base. Non posteriore. coperchio. Non premere le toccare gli specchi. separandolo dalla base, lenti. facendolo scorrere verso il basso. Copyright © 2015 Somfy SAS. All rights reserved. -
Page 28: Installazione
Se si utilizzano i commutatori per selezionare la modalità di funzionamento, è possibile definire: l’impostazione legata al funzionamento in modalità ■ ■ allarme; l’impostazione legata al funzionamento in modalità ■ ■ pre-allarme. Copyright © 2015 Somfy SAS. All rights reserved. - Page 29 Chiudere il vano batterie rispettando il senso di montaggio: la base deve essere collocata con le viti di ■ ■ montaggio verso il basso e il coperchio deve essere installato con la ■ ■ freccia verso l’alto. Copyright © 2015 Somfy SAS. All rights reserved.
-
Page 30: Precauzioni D'uso
(rami, cespugli, biancheria stesa, tende o scuri). Qualora non fosse possibile evitare oggetti instabili, consultare il paragrafo Risoluzione NON ! problemi, alla fine del documento. Lente di rilevamento a 0° 12 m 12 m Copyright © 2015 Somfy SAS. All rights reserved. -
Page 31: Installazione
Verificare che la tacca laterale, sul retro del supporto della lente, sia libera (vuota). Non reinserire subito il supporto della lente nel Senza Inclinazione inclinazione 3° coperchio anteriore per eseguire il passaggio successivo. Copyright © 2015 Somfy SAS. All rights reserved. -
Page 32: Regolazione Della Portata Di Rilevamento
(X, Y e Z) presenti su ogni lato del supporto della lente alle tre tacche (X’, Y’ e Z’) presenti sul coperchio anteriore, assicurandosi che i 6 clip siano correttamente in posizione Copyright © 2015 Somfy SAS. All rights reserved. -
Page 33: Regolazione Della Sensibilità
Attivare il sistema d’allarme. coperchio e serrare Attendere obbligatoriamente 2 minuti prima la vite di transitare davanti al rilevatore. Il funzionamento del rilevatore deve essere conforme alla scelta effettuata (tabella a pag. 5). Copyright © 2015 Somfy SAS. All rights reserved. -
Page 34: Manutenzione
+ e –. Smaltire le batterie usate presso un apposito centro di raccolta. Richiudere il rilevatore ripetendo al contrario i passaggi appena illustrati. Manutenzione Pulire le lenti con un panno asciutto. Copyright © 2015 Somfy SAS. All rights reserved. -
Page 35: Risoluzione Problemi
A volte il rilevamento è inefficace. La sensibilità è regolata su "L" ■ Portare la sensibilità su "M" (bassa). (media) o "H" (alta). Precauzioni d’uso Non bagnare con un getto d’acqua o un’idropulitrice. Copyright © 2015 Somfy SAS. All rights reserved. -
Page 36: Caratteristiche Tecniche
* con il commutatore 1 in posizione OFF e il commutatore 2 in posizione OFF. Questo prodotto risponde ai requisiti dello standard europeo EN 50130-4, nonché alle esigenze fondamentali della direttiva europea R&TTE 1999/5/CE www.somfy.com/ce Vedi tutti i nostri servizi su www.somfy.it Questo prodotto è garantito 5 anni. - Page 37 Bewegingsmelder voor buitengevel Wij danken u voor de aankoop van een bewegingsmelder voor buitengevel voor uw Somfy- alarmsysteem. Deze bewegingsmelder voor buitengevel is compatibel met een centrale/telefoonkiezer van Somfy: PROTEXIAL IO (versies 2010 en later) ■ ■ DOMIS (versies 2007 en later) ■...
- Page 38 Werkingstest van de detector ..............45 Werkingstest van de detector met het alarmsysteem ....... 45 Onderhoud Batterijen vervangen ..................46 Onderhoud ..................... 46 Probleemoplossing ..................47 Voorzorgsmaatregelen bij gebruik .............. 47 Technische kenmerken ............... 48 Copyright © 2015 Somfy SAS. All rights reserved.
-
Page 39: Inhoud Van De Verpakking
Verwijder de 2 Verwijder de achterste bevestigingsschroeven (c) bevestigingsschroeven (b) steun: en neem de beschermkap af. van de montagesokkel. Raak maak Druk niet op de lenzen. de spiegels niet aan. montagesokkel schuif hem omlaag Copyright © 2015 Somfy SAS. All rights reserved. -
Page 40: Installatie
Als u ervoor kiest de bedrijfsmodus in te stellen met behulp van de schakelaars, kunt u: ofwel de afstelling koppelen aan de werking in alarmmodus ■ ■ ofwel de afstelling koppelen aan de werking in ■ ■ vooralarmmodus. Copyright © 2015 Somfy SAS. All rights reserved. - Page 41 Vanaf een computer: Switch Sluit het batterijvak en let hierbij op de juiste montagerichting: de montagesokkel met de bevestigingsschroeven ■ ■ naar onder, de beschermkap met de pijl naar boven. ■ ■ Copyright © 2015 Somfy SAS. All rights reserved.
-
Page 42: Voorzorgsmaatregelen Bij Gebruik
Als onstabiele voorwerpen niet te vermijden zijn, moet u NON ! NEE! het gedeelte Probleemoplossing aan het einde van deze handleiding raadplegen. Detectiepatroon bij 0° 12 m 12 m Copyright © 2015 Somfy SAS. All rights reserved. -
Page 43: Vastmaken
(leeg) is. Hoek van de Hoek van de Plaats de lenshouder niet meteen terug in de straal is 0° straal is 3° beschermkap, maar voer eerst de volgende stap uit. Copyright © 2015 Somfy SAS. All rights reserved. -
Page 44: Detectiebereik Afstellen
(X, Y en Z) aan elke kant van de lenshouder uit te lijnen met de drie inkepingen (X’, Y’ en Z’) op de beschermkap en de 6 klemmen goed vast te klikken. Copyright © 2015 Somfy SAS. All rights reserved. -
Page 45: Detectiegevoeligheid Afstellen
Wacht twee minuten alvorens te bewegen draai de schroeven vóór de detector. vast. De werking van de detector moet overeenkomen met de keuzes die in de tabel op pagina 5 zijn gemaakt. Copyright © 2015 Somfy SAS. All rights reserved. -
Page 46: Onderhoud
Breng de oude batterijen naar een inzamelpunt. Maak de detector weer dicht door de bovenvermelde stappen om de detector open te maken in omgekeerde volgorde uit te voeren. Onderhoud Maak de lenzen schoon met een droge doek. Copyright © 2015 Somfy SAS. All rights reserved. -
Page 47: Probleemoplossing
Soms reageert de detector niet. De detectiegevoeligheid is ingesteld ■ Stel de detectiegevoeligheid in op op "L" (laag). "M" (middelhoog) of "H" (hoog). Voorzorgsmaatregelen bij gebruik Niet reinigen met een waterstraal of hogedrukreiniger. Copyright © 2015 Somfy SAS. All rights reserved. -
Page 48: Technische Kenmerken
* met schakelaar 1 op OFF en schakelaar 2 op OFF. Dit product voldoet aan de eisen van de Europese norm EN 50130-4 en aan de essentiële eisen in de Europese richtlijn 1999/5/EG betreffende radioapparatuur en telecommunicatie- eindapparatuur. www.somfy.com/ce Dit product heeft 5 jaar garantie. -
Page 49: Descripción Del Funcionamiento
Detector de movimiento para fachada Gracias por comprar un detector de movimiento para fachada para su sistema de alarma Somfy. Este detector de movimiento para fachada es compatible con una central/marcador Somfy: PROTEXIAL IO (versiones 2010 y siguientes) ■ ■... - Page 50 Prueba del funcionamiento del detector con el sistema ......57 Mantenimiento Cambio de las pilas ..................58 Conservación ....................58 Problemas que se pueden plantear ............. 59 Precauciones de empleo ................59 Datos técnicos ..................60 Copyright © 2015 Somfy SAS. All rights reserved.
-
Page 51: Contenido De La Caja
Quite los 2 tornillos de Retire el soporte trasero: (c) y retire la tapa. No fijación (b) de la base. No separándolo de la base, presione las lentes. toque los espejos. deslizándolo hacia abajo. Copyright © 2015 Somfy SAS. All rights reserved. -
Page 52: Instalación
Si decide seleccionar el modo de funcionamiento utilizando los conmutadores, puede definir: o bien un ajuste del funcionamiento en modo alarma ■ ■ o bien un ajuste del funcionamiento en modo ■ ■ prealarma. Copyright © 2015 Somfy SAS. All rights reserved. - Page 53 Cierre el compartimento de las pilas respetando el sentido de montaje: la base debe tener los tornillos de fijación hacia ■ ■ abajo, la tapa se monta con la flecha hacia arriba. ■ ■ Copyright © 2015 Somfy SAS. All rights reserved.
-
Page 54: Precauciones De Empleo
Si no se pueden evitar los objetos inestables, consulte el apartado Problemas NON ! que se pueden plantear, al final de esta guía. Abanico de detección a 0° 12 m 12 m Copyright © 2015 Somfy SAS. All rights reserved. -
Page 55: Fijación
Verifique que la muesca lateral, en la parte trasera del soporte de la lente, está bien despejada (vacía). No vuelva a colocar inmediatamente el soporte Inclinación Inclinación 3° de la lente en la tapa para poder efectuar el paso siguiente. Copyright © 2015 Somfy SAS. All rights reserved. -
Page 56: Ajuste Del Alcance De Detección
(X, Y y Z) a cada lado del soporte de la lente con las tres muescas (X’, Y’ y Z’) de la tapa delantera y asegurándose de que los 6 clips están bien colocados Copyright © 2015 Somfy SAS. All rights reserved. -
Page 57: Ajuste De La Sensibilidad
Es indispensable esperar 2 minutos antes de cubierta y atornille el pasar por delante del detector. tornillo. El funcionamiento del detector debe corresponderse con la selección en la tabla de la página 5. Copyright © 2015 Somfy SAS. All rights reserved. -
Page 58: Mantenimiento
+ y -. Lleve las pilas usadas a un punto de recogida. Cierre el detector siguiendo en sentido inverso los pasos anteriormente descritos para su apertura. Conservación Limpie las lentes con un paño seco. Copyright © 2015 Somfy SAS. All rights reserved. -
Page 59: Problemas Que Se Pueden Plantear
La sensibilidad está configurada en ■ Cambie la Sensibilidad a "M" "L" (baja). (media) o "H" (alta). Precauciones de empleo No rociar con un chorro de agua o un limpiador de alta presión. Copyright © 2015 Somfy SAS. All rights reserved. -
Page 60: Datos Técnicos
* con el conmutador 1 en posición OFF y el conmutador 2 en posición OFF. Este producto respeta los requisitos de la norma europea EN 50130-4 y cumple con los requisitos esenciales de la directiva europea R&TTE 1999/5/CE www.somfy.com/ce Consulte todos nuestros servicios en www.somfy.fr Este producto tiene 5 años de garantía. -
Page 61: How It Works
Read this manual carefully and make absolutely sure that you follow all the mounting and ■ ■ operating instructions in order to get the best possible use from your Somfy alarm system. Keep this manual in a safe place for the entire lifetime of the product. - Page 62 Testing the operation of the detector with the system ......69 Maintenance Replacing the batteries ................. 70 Maintenance ....................70 Troubleshooting .................... 71 Precautions for use ..................71 Technical data ................... 72 Copyright © 2015 Somfy SAS. All rights reserved.
-
Page 63: Pack Contents
Remove the rear mount: (c) and take off the cover. Do screws (b) from the base. Do Separate it from the base not press on the lenses. not touch the mirrors. Slide it downwards Copyright © 2015 Somfy SAS. All rights reserved. -
Page 64: Installation
If you choose to set the operating mode using the switches, you can define: Either a setting for operation in alarm mode ■ ■ Or a setting for operation in pre-alarm mode ■ ■ Copyright © 2015 Somfy SAS. All rights reserved. - Page 65 The base must be held with the fixing screws at ■ ■ the bottom The cover must be fitted with the arrow pointing ■ ■ upwards Copyright © 2015 Somfy SAS. All rights reserved.
-
Page 66: Precautions For Use
(branches, bushes, washing on a line, flags or swinging shutters). If unstable objects cannot be avoided, consult the Troubleshooting section at the NON ! end of this manual. Detection lobe at 0° 12 m 12 m Copyright © 2015 Somfy SAS. All rights reserved. -
Page 67: Fixing
(empty). Do not replace the lens holder in the cover Beam angled Beam angled at 0° at 3° straight away. You must carry out the next step first. Copyright © 2015 Somfy SAS. All rights reserved. -
Page 68: Setting The Detection Range
(X, Y and Z) on each side of the lens holder with the three notches (X’, Y’ and Z’) on the front cover, ensuring that the 6 clips are correctly inserted. Copyright © 2015 Somfy SAS. All rights reserved. -
Page 69: Setting The Sensitivity
Wait for 2 minutes before passing in front of tighten the screw. the detector. The operation of the detector must comply with the choices in the table on page 5. Copyright © 2015 Somfy SAS. All rights reserved. -
Page 70: Maintenance
(+/-). Dispose of the spent batteries at a collection point. Close the detector, reversing the above opening steps. Maintenance Clean the lenses with a dry cloth. Copyright © 2015 Somfy SAS. All rights reserved. -
Page 71: Troubleshooting
■ Change the sensitivity to “M” detected. The sensitivity is set to “L” (low). (medium) or “H” (high). Precautions for use Do not hose with water or use a high-pressure cleaner. Copyright © 2015 Somfy SAS. All rights reserved. -
Page 72: Technical Data
* With switch 1 set to OFF and switch 2 set to OFF. This product complies with the requirements of European Standard EN 50130-4 and conforms to the essential requirements of the European R&TTE Directive 1999/5/EC www.somfy.com/ce Find out about all of our services at www.somfy.fr This product has a 5-year warranty.