Table des Matières
Publicité
Les langues disponibles
Les langues disponibles
Liens rapides
Publicité
Chapitres
Table des Matières

Manuels Connexes pour Fagor RFA-244 DF


Sommaire des Matières pour Fagor RFA-244 DF
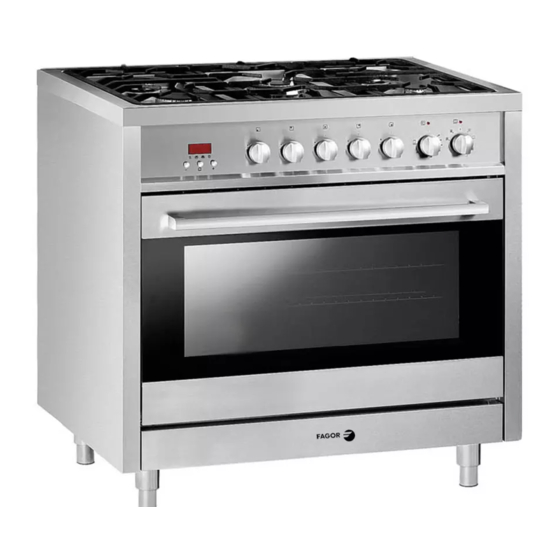
- Page 1 & d’entretien 24” and 36” DUAL FUEL CONVECTION RANGES CUISINIÈRES MIXTES DE 24 PO ET 36 PO À CONVECTION 24” RANGE (RFA-244 DF) / CUISINIÈRE DE 24 PO (RFA-244 DF) 36” RANGE (RFA-365 DF) / CUISINIÈRE DE 36 PO (RFA-365 DF)
- Page 2 NOTE: To avoid any potential accident or unit damage, please read these instructions carefully before operating the appliance. REMARQUE: Pour éviter tout accident ou dégât, veuillez lire les instructions attentivement avant d’utiliser l’appareil.
-
Page 3: Table Des Matières
RANGES CONTENTS THANK YOU ............5 1. -
Page 5: Thank You
THANK YOU Congratulations! You are now the proud owner of a Fagor range and we would like to thank you for the confi dence you have placed in our company and our products. Fagor offers a wide variety of high quality and eco-friendly products that are de- signed to work effi ciently while consuming less energy. -
Page 6: Important Safeguards
We recommend that you install the “Anti-tip Device” which is accompanied with the appliance. Fagor is not responsible for any damage to property or to persons caused by incorrect installation or improper use of the range. The manufacturer has the right to make changes to its products when needed or considered helpful, without affecting the essential safety and operation of the unit. - Page 7 Do not place anything on the oven door while it is open. The oven door is made of glass and can break if loaded with any additional weight. Do not alter or remove any factory applied label, warning indicators or identifi cation plates from this range.
- Page 8 Do not heat unopened food containers in the oven. Build-up of pressure may cause container to burst and result in injury. Keep oven ventilation ducts unobstructed. Always place oven racks in desired location only when the oven is cool. If a rack must be moved or removed while oven is hot, do not let potholder contact the heating element in the oven.
-
Page 9: Installation & Electrical And Gas Connection
2. INSTALLATION & ELECTRICAL AND GAS CONNECTION BEFORE INSTALLATION This range should only be installed according to the manufacturer’s instructions. Installation should only be attempted by an authorized professional. This range must be installed in accordance with the norms and standards of the country where it is being installed. - Page 10 WARNING! Do not use aerosol sprays in the vicinity of this appliance while it is in operation. ROOM VENTILATION: A ventilation hood may be used above this range. The hood should be installed in conformity with the appropriate national and local standards.
-
Page 11: Installation Dimensions
35 ½” (90.2 cm) and 37 ¼” (94.6 cm). The maximum depth of wall cabinets above the range must be 13” (33.0 cm). The oven capacity is as follows: Model RFA-365 DF: 3.7ft3 (105 L) Model RFA-244 DF: 1.97ft3 (56 L) RFA-365DF RFA-244DF... -
Page 12: Installing The Anti-Tip Stability Chain
INSTALLING THE ANTI-TIP STABILITY CHAIN WARNING a) Please use caution in operating the range as it can tip over and cause damage or even death. b) We recommend that you install the anti-tip device to the surrounding cabinets and/or the range. There are two chains at rear left and right side of appliance which can be fastened to the wall or cupboards beside this appliance. -
Page 13: Electrical Connection
For a situation where the appliance is between two cabinets and the anti-tip device cannot be fi tted, we suggest securing the range by screwing through both sides of the cabinets into the sides of the cooker. The installation screws should be fi tted as follows. - Page 14 Connect the black wire to the N (neutral) tab; connect the red wire to the L (live) tab and the green or green/yellow wire to the ground tab. Do not swap connections. ELECTRICAL SPECIFICATIONS Model Volts Watts Amps RFA-244 DF 2.5 KW RFA-365 DF 3.55 KW...
-
Page 15: Gas Connection
Ensure that the kitchen is well ventilated, keep natural ventilation holes open or install a mechanical ventilation device. This range will perform best when used with Fagor ventilation hoods. Prolonged intensive use of the appliance may call for additional ventilation, such as the opening of a window, or more effective ventilation, including but not limited to increasing the level of mechanical ventilation where present. - Page 16 Once the range has been installed, make sure the gas pipe is neither crushed or damaged. Before using the range, check all connections for gas leaks with soap and water by pouring the mixture over the gas line and watching for bubbles. If bubbles are visible a gas leak is present and must be repaired before the unit is used.
- Page 17 GAS BURNER DATA TABLES RFA-244 DF Injector Pressure Rate Burner Position diam. [mm.] Type [i.w.c.] [BTU/h] 1.10 4” 4967 Auxiliary Front R 0.70 LP (Propane) 10” 4879 1.29 4” 7055 Semi-Rapid Rear L & R 0.80 LP (Propane) 10” 6472 0.99*5...
- Page 18 SETTING THE MINIMUM FLAME The fl ame on the lowest output level is regulated by the factory. When the injectors have been replaced or there are conditions of unusual gas pressure, it may be necessary to regulate a minimum size fl ame. Please follow the below directions: •...
-
Page 19: Finishing Your Installation
FINISHING YOUR INSTALLATION FINAL CHECKLIST 1. Is the range properly leveled on it’s legs/feet? 2. Has the anti-tip chain been properly installed? 3. Does the distance from the side cabinets comply with the manufacturers instructions? 4. Is the electrical power source properly grounded? 5. -
Page 20: Using The Gas Cooktop
3. USING THE GAS COOKTOP BURNER LAYOUT RFA-244 DF RFA-365 DF 1. Semi-Rapid 1. Semi-Rapid 2. Semi-Rapid 2. Semi-Rapid 3. Dual Burner 3. Rapid 4. Auxiliary 4. Dual Burner 5. Auxiliary MAIN PARTS OF THE GAS COOKTOP 1. Cast Iron Grate 4. -
Page 21: Ignition And Operation Of The Burners
IGNITION AND OPERATION OF THE BURNERS In order to ignite the range burner, you must push in the knob while rotating it counterclockwise until the top is aligned with the position corresponding to the maximum burner power. When working with models that are equipped with a safety valve, once the fl ame is lit, hold the knob in for about 3-4 seconds till the device keeps the burner automatically lit. -
Page 22: Using The Oven And Practical Tips
4. USING THE OVEN AND PRACTICAL TIPS BEFORE USING THE OVEN FOR THE FIRST TIME Adjusting the Clock We recommend that you set the correct time after connecting the range to the power supply. Getting Started Before using your new range for the fi rst time, make sure you have removed all packing materials and protective plastic. -
Page 23: Control Panel
CONTROL PANEL Cooking Program Selector Your oven offers six (6) different cooking programs and one convection defrost program. With the cooking program selector/knob, you will be able to select the most suitable cooking program for the type of food you wish to cook. Below is a description of some of the functions on the oven. -
Page 24: Temperature Selector
To start the Rotisserie feature, proceed as follows: 1. Place the oven tray on the 1st rack. 2. Insert the special Rotisserie support on the 2nd rack and position the spit by inserting it through the special hole for the rotisserie at the back of the oven. 3. -
Page 25: Accessories
ACCESORIES The oven has four levels on which a cooking rack can be placed. Your oven comes from the factory with some of the accessories described below: Baking Tray Enameled tray ideal for baking. Deep Tray The deep tray is suitable for cooking dishes with a large amount of sauce or gravy, ideal for frozen food and large roasts. - Page 26 Grill with Non-Tip Safety Catch The grill is equipped with non-tip safety catches that enable the grill to slide out of the stove about three Catch quarters of the way without tipping over. This feature easily facilitates removing food from inside the oven. In addition, it gives you the possibility of placing it on any of the 4 levels available in the oven.
-
Page 27: Practical Advice And Cooking Table
PRACTICAL ADVICE AND COOKING TABLE Suggestions and Practical Tips for Baking PROBLEM POSSIBLE REASON SOLUTION Cakes and pastries do •Wrong function •Check the function not rise enough. selected. selected against the temperature shown in the table. •The oven has not been •Check the table pre-heated enough. - Page 28 Traditional Baking Time & Temperature Charts Below is a cooking chart that will help you to adjust your cooking temperature appropriately. Cooking times will vary according to the type and amount of food being cooked. We understand that, after a few attempts, your experience might suggest possible variations to the temperatures on the table.
- Page 29 FOOD PRE- FOOD PROGRAM TEMPERATURE TIME ACCESSORIES POSITION HEATING DESSERTS Brioche 350-400 °F 40-45 min Sponge 350-400 °F 20-30 min Cake Ciambella 325 °F 35-40 min Pastries 350-400 °F 15-20 min FISH According to Roast Fish 350-400 °F dimensions. VARIOUS Pizza 400-450 °F 20-30 min...
- Page 30 FOOD PRE- FOOD PROGRAM TEMPERATURE TIME ACCESSORIES POSITION HEATING MEAT AND POULTRY Veal 300-350 °F 65-90 min Pork 300-325 °F 70-100 min Roasted 325 °F 70-90 min Chicken Roasted 300-325 °F 80-100 min Rabbit Fillet Lamb 275-300 °F 100-130 min Roasted Beef 325-350 °F 65-90 min...
- Page 31 FOOD PRE- FOOD PROGRAM TEMPERATURE TIME ACCESSORIES POSITION HEATING FISH According to Roast Fish 300-350 °F dimensions VARIOUS Pizza 400-450 °F 20-30 min Lasagna 375-400 °F 20-25 min Pasta 375-400 °F 25-30 min...
-
Page 32: Range Cleaning And Maintenance
5. RANGE CLEANING AND MAINTENANCE CLEANING 5.1.1. Range Exterior Clean the exterior of the range with warm water and a mild detergent. Rinse thoroughly and dry the stainless steel components with a soft cloth. If any stains are diffi cult to remove, we recommend that you use products specifi cally designed for stainless steel. -
Page 33: Range Interior
5.1.2. Range Interior In order to maintain the apperance of your range, we recommend that you clean the inside of the oven regularly, preferably every time you use it; this way you can ensure it operates properly and won’t generate smoke or unpleasant odors while cooking. - Page 34 Unhooking The Doors For a more thorough cleaning of the oven, you will need to remove the oven door. Follow the following steps: 1. Completely open the oven door. 2. Lift up the door and turn the small levers located on the two hinges. 3.
-
Page 35: Accessories
REPLACING THE INTERIOR LIGHT BULB To replace the interior light bulb, please follow the below steps. You will need a heat-resistant 25W replacement bulb capable of withstanding 600ºF from Fagor’s technical service department. 1. Interrupt the power supply to the oven at the main circuit breaker panel in your home. -
Page 36: Energy-Saving Tips
6. ENERGY-SAVING TIPS • Pre-heat the oven only when indicated in the recipe. • It is better to use dark colored bakeware, preferably enamelled in black, as these materials absorb heat particularly well. • If you wish to make several cakes at one time, we recommend that you cook one cake after the other. -
Page 37: Stop/Start Digital Timer
7. STOP/START DIGITAL TIMER Decrease Function Increase Time Time... -
Page 38: Clock
7.1 CLOCK When initially installing the range or if there is an interruption in the power supply, the bar above the symbol will fl ash, and the screen will display “12:00”. To set the time: 1. Press the + or – button to increase or decrease time until the correct time is displayed. - Page 39 2. Press the function button repeatedly until the bar above symbol fl ashes and set the fi nish time to 6:00. After the above setting, the current time is displayed and the bars above symbols will fl ash indicating that the automatic cooking feature is set.
- Page 41 CUISINIÈRES TABLE DES MATIÈRES MESSAGE THE BIENVENUE ......... 43 1.
-
Page 43: Message The Bienvenue
MESSAGE DE BIENVENUE Félicitations ! Vous êtes maintenant le fi er propriétaire d’une cuisinière Fagor et nous aimerions vous remercier pour la confi ance que vous avez placée en notre entreprise et en nos produits. Fagor offre une grande variété de produits de haute qualité et respectueux de l’environnement qui sont conçus pour travailler dur tout en consommant moins... -
Page 44: Instructions De Sécurité Importantes
« dispositif anti-basculement » qui est joint à l’appareil. Fagor n’est pas responsable de tout dommage à la propriété ou aux personnes causés par une mauvaise installation ou une mauvaise utilisation de la cuisinière. Le fabricant a le droit d’apporter des modifi cations à ses produits lorsque considéré... - Page 45 Cet appareil a été conçu pour un usage domestique et non-professionnelle uniquement. Assurez-vous que votre appareil est correctement installé et mis à la terre par un technicien qualifi é. Ne pas placer de casseroles ou de poêles sur la porte du four pendant qu’elle est ouverte.
- Page 46 Ne pas couvrir les ouvertures du four avec du papier d’aluminium. Ne pas couvrir la taque de cuisson de papier d’aluminium. Ne rangez pas d’objets infl ammables tels que des cannettes d’aérosols dans le compartiment de stockage. Ne pas entreposer de matériaux dangereux ou infl ammables dans les armoires au-dessus de l’appareil.
-
Page 47: Installation Et Connexion Electrique Et Du Gaz
2. INSTALLATION ET CONNEXION ELECTRIQUE ET DU GAZ AVANT L’INSTALLATION Cet appareil doit être installé conformément aux instructions du fabricant. L’installation ne doit être réalisée que par un professionnel agréé. Cet appareil doit être installé en conformité avec les normes et standards du pays dans lequel il est installé. - Page 48 AVERTISSEMENT ! Ne pas utiliser d’aérosols à proximité de cet appareil pendant que le four fonctionne. VENTILATION DE LA PIÈCE : Un ventilateur d’échappement peut être utilisé au- dessus de cet appareil, dans chaque cas, la hotte doit être installée en conformité avec les normes nationales et locales.
-
Page 49: Mesures Pour L'installation
35 ½ po (90,2 cm) et 37 ¼ po (94,6 cm). La profondeur maximale des armoires murales au-dessus de la cuisinière est de 13 po (33,0 cm). Volume nominal du four: Model RFA-365 DF: 3.7ft3 (105 L) Model RFA-244 DF: 1.97ft3 (56 L) RFA-365DF RFA-244DF... -
Page 50: Installation De La Chaine De Stabilité Anti-Basculement
INSTALLATION DE LA CHAINE DE STABILITÉ ANTI-BASCULEMENT MISE EN GARDE a) Soyez prudent dans l’utilisation de la cuisinière car elle peut basculer et causer des dommages ou même la mort. b) Nous vous recommandons d’installer le dispositif anti-basculement pour les armoires environnantes et/ou la cuisinière. -
Page 51: Branchement Électrique
Dans le cas où l’appareil se trouve entre deux armoires et le dispositif anti- basculement ne peut être aménagé, nous vous proposons de fi xer la cuisinière en vissant à travers les deux côtés des armoires dans les côtés de la cuisinière. Les vis de montage doivent être montées comme suit. - Page 52 Connectez le fi l noir à la borne N (neutre) ; connecter le fi l rouge de la borne L (sous tension) et le fi l vert ou vert/jaune à la borne de terre. Ne pas échanger les connexions. CARACTÉRISTIQUES ÉLECTRIQUES Modèle Volts Watts Amps RFA-244 DF 2.5 KW RFA-365 DF 3.55 KW...
-
Page 53: Raccordement Au Gaz
Gardez les trous de ventilation naturelle ouverts ou installez un dispositif de ventilation mécanique. Cette cuisinière marchera le mieux lorsqu’elle est utilisée avec une hotte de ventilation Fagor. Une utilisation intensive et prolongée de l’appareil peut nécessiter une ventilation supplémentaire, par exemple l’ouverture d’une fenêtre, ou une ventilation plus... - Page 54 Une fois l’appareil installé, assurez-vous que la conduite de gaz n’est ni écrasée, ni endommagée par des parties mobiles. Avant d’utiliser la cuisinière, vérifi ez toutes les connexions pour fuites de gaz en versant le mélange d’eau et de savon sur la conduite de gaz et en surveillant l’apparition de bulles. Si des bulles apparaissent, une fuite de gaz est présente et doit être réparée avant d’utiliser l’appareil.
- Page 55 • Remplacer les injecteurs par les injecteurs fourni correspondant au gaz disponible (voir tableau des caractéristiques des brûleurs et injecteurs) • Replacez les injecteurs et remplacez les capuchons et têtes des brûleurs TABLES DE DONNÉES DES BRULEURS À GAZ RFA-244 DF Injecteur Pression Débit Brûleur...
- Page 56 RÉGLAGE D’UNE FLAMME MINIMUM La fl amme au niveau de sortie le plus faible est réglée en usine. Lorsque les injecteurs ont été remplacés ou s’il y a des conditions de pression de gaz inhabituelles, il peut s’avérer nécessaire de régler une fl amme de taille minimale. Veuillez suivre les instructions ci-dessous : •...
-
Page 57: Finir L'installation
FINIR L’INSTALLATION LISTE DE VÉRIFICATION FINALE 1. La cuisinière est-elle correctement nivelée sur ses pattes/pieds ? 2. La chaîne anti-basculement a-t-elle été correctement installée ? 3. La distance entre les armoires latérales est-elle conforme aux instructions du fabricant ? 4. La source d’alimentation électrique est-elle correctement mise à la terre ? 5. -
Page 58: Utilisation De La Table De Cuisson Au Gaz
3. UTILISATION DE LA TABLE DE CUISSON AU GAZ DISPOSITION DES BRÛLEURS RFA-244 DF RFA-365 DF 1. Semi - Rapide 1. Semi - Rapide 2. Semi - Rapide 2. Semi - Rapide 3. Double Brûleur 3. Rapide 4. Auxiliary 4. Double Brûleur 5. -
Page 59: Allumage Et Fonctionnement Des Brûleurs
ALLUMAGE ET FONCTIONNEMENT DES BRÛLEURS Pour allumer le brûleur de la cuisinière, il faut enfoncer le bouton tout en le tournant dans le sens antihoraire, jusqu’à ce que la partie supérieure s’aligne sur la position correspondant à la puissance maximale du brûleur. Si vous utilisez un modèle équipé... -
Page 60: Utilisation Du Four Et Conseils Pratiques
4. UTILISATION DU FOUR ET CONSEILS PRATIQUES AVANT D’UTILISER LE FOUR POUR LA PREMIÈRE FOIS Réglage de l’heure Nous vous recommandons de mettre la montre à l’heure après avoir branché le four. Nettoyage Préalable Avant la première utilisation du four, chauffez-le à vide pendant 30 minutes environ avec la porte fermée. -
Page 61: Panneau De Contrôle
PANNEAU DE CONTRÔLE Commande de Sélection des Fonctions de Cuisson Votre four offre six (6) programmes de cuisson différents et un programme de décongélation par convection. Avec le sélectionneur de programme de cuisson, vous serez en mesure de sélectionner le programme de cuisson le plus approprié pour le type de nourriture que vous souhaitez préparer. -
Page 62: Commande De Sélection Des Températures
Pour démarrer la fonction Rôtisserie, procédez comme suit : 1. Placez la plaque du four sur le 1er gradin ; 2. Insérez le support spécial de Rôtisserie au 2ème gradin et positionner la broche en l’insérant dans le trou spécial pour la rôtisserie à l’arrière du four. 3. -
Page 63: Accessoires
ACCESSOIRES Le four comporte quatre niveaux sur lequel une grille de cuisson peut être placée. Votre four est livré de l’usine avec quelques des accessoires décrits ci-dessous : Plateau Pour Pâtisserie Plat à four en émail idéal pour la pâtisserie. Plateau Profond Le nouveau plateau profond convient pour la cuisson de plats contenant une grande quantité... -
Page 64: Grille Avec Butoir Sécurité Antichute
Grille Avec Butoir Sécurité Antichute Extractible jusqu’aux trois-quarts de son parcours, la nouvelle grille avec butoir de sécurité antichute reste Butoir stable, ce qui permet de retirer sans risques les aliments du four. De plus, elle est utilisable sur les 4 niveaux du four. -
Page 65: Conseils Pratiques Et Table De Cuisson
CONSEILS PRATIQUES ET TABLE DE CUISSON Suggestions et Conseils Pratiques Pour la Cuisson PROBLÈME CAUSE POSSIBLE SOLUTION La pâtisserie ne monte •Sélection de fonction •Vérifi ez que la fonction pas assez. erronée. sélectionnée correspond à celle de la table de cuisson. •Le four n’a pas été... - Page 66 Tableau des Temps de Cuisson & des Températures Traditionnels Le tableau de cuisson ci-dessous vous aidera à régler la température de cuisson appropriée. Les temps de cuisson peuvent varier selon le type et le volume de nourriture. Nous sommes persuadés qu’après quelques tentatives, votre expérience vous permettra d’éventuelles variations de température par rapport à...
- Page 67 POSITION TEMPÉRA- PRÉ- ALIMENTS PROGRAM TEMPS ACCESSOIRES TURE CHAUFFAGE ALIMENTS DESSERTS Brioche 350-400 °F 40-45 min Gâteau 350-400 °F 20-30 min Éponge Ciambella 325 °F 35-40 min Pâtisseries 350-400 °F 15-20 min POISSON Selon la Poisson Rôti 350-400 °F Taille. VARIOUS Pizza 400-450 °F...
- Page 68 POSITION PRÉ- ALIMENTS PROGRAM TEMPÉRATURE TEMPS ACCESSOIRES CHAUFFAGE ALIMENTS VIANDES ET VOLAILLE Veau 300-350 °F 65-90 min Porc 300-325 °F 70-100 min Poulet Rôti 325 °F 70-90 min Lapin Rôti 300-325 °F 80-100 min Filet de 275-300 °F 100-130 min Mouton Roast-Beef 325-350 °F...
- Page 69 POSITION PRÉ- ALIMENTS PROGRAM TEMPÉRATURE TEMPS ACCESSOIRES CHAUFFAGE ALIMENTS POISSON Selon la Poisson Rôti 300-350 °F taille. DIVERS Pizza 400-450 °F 20-30 min Lasagnes 375-400 °F 20-25 min Pâtes 375-400 °F 25-30 min...
-
Page 70: Nettoyage Et Entretien De La Cuisinière
5. NETTOYAGE ET ENTRETIEN DE LA CUISINIÈRE NETTOYAGE 5.1.1. Extérieur de la Cuisinière Nettoyer l’extérieur de la cuisinière de préférence à l’eau tiède et avec un détergent doux. Rincer abondamment et sécher avec un chiffon doux les parties en acier inoxydable. Si les tâches résistent, nous vous recommandons d’utiliser des produits spécifi ques pour acier inoxydable. -
Page 71: L'intérieur Du Cuisinière
LES GRILLES DE LA TABLE DE CUISSON SONT ÉQUIPÉES DE PATINS EN CAOUTCHOUC DANS LE BUT À LA FOIS DE FOURNIR UNE MEILLEURE STABILITÉ ET D’ÉVITER LES GRIFFES PENDANT L’UTILISATION DE LA SURFACES CUISSON. APRÈS AVOIR ENLEVÉ LA GRILLE POUR NETTOYAGE ET/OU DES BESOINS DE MAINTENANCE, NOUS RECOMMANDONS DE VÉRIFIER QUE LES BLOCS EN CAOUTCHOUC SOIENT BIEN REPOSITIONNÉS ET DE REPLACER LES GRILLES DANS LEUR POSITION CORRECTE, STABLE ET CENTRÉE. - Page 72 Décrocher les portes. Pour un nettoyage plus approfondi du four, vous devrez enlever la porte du four. Suivez les étapes suivantes : 1. Ouvrez complètement la porte. 2. Soulevez la porte et tournez les petits leviers situés sur les deux charnières. 3.
-
Page 73: Les Accessoires
2. Ouvrez complètement la porte et baissez les supports de charnière jusqu’à ce qu’ils soient dans leur position originale. Le montage de la porte est terminé. 5.1.3. Les Accessoires Faites tremper les accessoires après utilisation en utilisant pour cela un produit nettoyant d’usage courant. -
Page 74: Conseils Pour Économiser De L'énergie
6. CONSEILS POUR ÉCONOMISER DE L’ÉNERGIE • Préchauffez le four uniquement si la recette ou la table de cuisson l’indique. • Utilisez de préférence des moules à pâtisserie de couleur foncée, de préférence émaillés noirs, car ces matériaux absorbent particulièrement bien la chaleur. -
Page 75: Minuterie Numérique D'arrêt/Marche
7. MINUTERIE NUMÉRIQUE D’ARRÊT/MARCHE Diminuer Fonction Augmenter le Temps le Temps... -
Page 76: Horloge
7.1 HORLOGE Lors de l’installation initiale du four ou lors d’une panne de courant, la barre au- dessus symbole clignote et l’écran affi che 12 :00. Pour régler l’heure : 1. Appuyez sur le bouton + ou - pour faire avancer ou reculer le temps jusqu’à... - Page 77 2. Appuyez sur la touche de fonction jusqu’à ce que la barre au-dessus clignote et régler l’heure d’arrêt à 18h00. Après le réglage ci-dessus, l’heure actuelle est affi chée et les barres au-dessus clignotera pour indiquer que la fonction de cuisson automatique est réglée.
- Page 78 FAGOR AMERICA, INC. PO BOX 2181 SO. HACKENSACK, NJ 07606 For technical support or repair please call: 1.877.743.2467 For additional support please call: 1.800.207.0806 Email: infoappliances@fagoramerica.com www.fagoramerica.com The manufacturer reserves the right to modify the items described in this manual.