Table des Matières
Publicité
Les langues disponibles
Les langues disponibles
Liens rapides
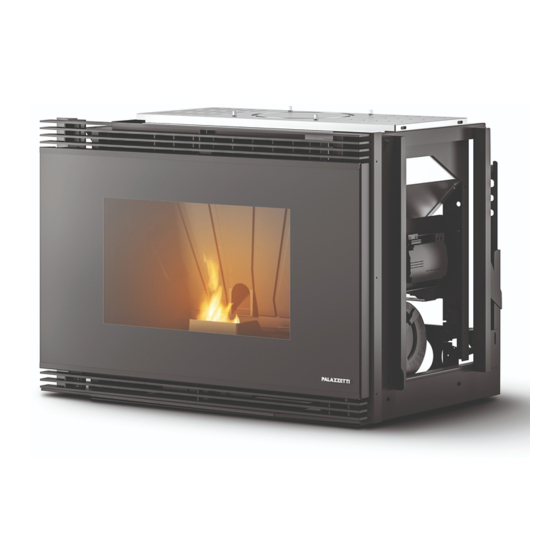
INSERIMENTI A78/AC78
MANUALE DI INSTALLAZIONE, USO E MANUTENZIONE
Il presente manuale è parte integrante del prodotto.
Si raccomanda di leggere attentamente le istruzioni prima
dell'installazione, manutenzione o utilizzo del prodotto.
Istruzioni originali
INSTALLATION, USE AND MAINTENANCE MANUAL
This manual is an integral part of the product.
Read the instructions carefully before installing, servicing or
operating the product.
Translation of the original instructions
MANUEL D'INSTALLATION, D'UTILISATION ET DE MAINTENANCE
Le présent manuel fait partie intégrante du produit.
Il est conseillé de lire attentivement les consignes avant
l'installation, l'entretien ou l'utilisation du produit.
Traduction des instructions originales
Publicité
Chapitres
Table des Matières

Manuels Connexes pour Palazzetti A78


Sommaire des Matières pour Palazzetti A78
- Page 1 INSERIMENTI A78/AC78 MANUALE DI INSTALLAZIONE, USO E MANUTENZIONE Il presente manuale è parte integrante del prodotto. Si raccomanda di leggere attentamente le istruzioni prima dell’installazione, manutenzione o utilizzo del prodotto. Istruzioni originali INSTALLATION, USE AND MAINTENANCE MANUAL This manual is an integral part of the product.
- Page 2 Gentile cliente, desideriamo innanzitutto ringraziarLa per la preferenza che ha voluto accordarci acquistando il nostro prodotto e ci congratuliamo con Lei per la scelta. Per consentirLe di utilizzare al meglio il suo prodotto, la invitiamo a seguire attentamente quanto descritto nel presente manuale.
-
Page 3: Table Des Matières
ITALIANO ENGLISH FRANÇAIS INDICE Utente e Installatore Installatore 1 PREMESSA GENERALE Simbologia Destinazione d’uso Scopo e contenuto del manuale Conservazione del manuale Aggiornamento del manuale Generalità Conformità Responsabilità del costruttore Assistenza tecnica e manutenzione 1.10 Parti di ricambio 1.11 Targhetta matricola 1.12 Consegna dell’apparecchio 2 AVVERTENZE PER LA SICUREZZA Avvertenze per l’installatore... - Page 4 5 MOVIMENTAZIONE E TRASPORTO Rimozione dalla paletta di trasporto 5.2 Trasporto 6 PREPARAZIONE DEL LUOGO DI INSTALLAZIONE Considerazioni generali 6.2 Precauzioni per la sicurezza 6.3 Luogo d’installazione 6.4 Aria comburente 6.5 Raccordo fumi 6.6 Scarico a tetto mediante camino tradizionale 7 INSTALLAZIONE Considerazioni generali 7.2 Configurazioni installative...
-
Page 5: Premessa Generale
Palazzetti. Il manuale d’installazione è parte integrante Palazzetti si riserva il diritto di modificare spe- dell’apparecchio. cifiche e caratteristiche tecniche e/o funzionali Deterioramento o smarrimento del prodotto in qualsiasi momento senza darne preavviso. -
Page 6: Conformità
La responsabilità delle opere eseguite per l’in- zate e/o regolamenti: stallazione dell'apparecchio non può essere con- EMCD: siderata a carico della Palazzetti; essa è e rimane - EN 55014-1:2017 a carico dell’installatore, al quale è demandata - EN 61000-3-2:2015 l’esecuzione delle verifiche relative alla canna fumaria, alla presa d’aria e alla correttezza delle... -
Page 7: Assistenza Tecnica E Manutenzione
L’apparecchio viene consegnato perfettamente imballato e fissato ad una pedana in legno che Palazzetti mette a disposizione una fitta rete di ne permette la movimentazione mediante car- centri di assistenza con tecnici specializzati, for- relli elevatori e/o altri mezzi. -
Page 8: Avvertenze Per La Sicurezza
AVVERTENZE PER LA L’apparecchio dovrà essere installato su pavimenti con adeguata capacità SICUREZZA portante. Avvertenze per l’installatore Verificare che le predisposizioni della canna fumaria e della Osservare le prescrizioni indicate nel presa d’aria siano conformi al presente manuale. tipo d’installazione. Le istruzioni di montaggio e Non effettuare collegamenti elettrici smontaggio... -
Page 9: Avvertenze Per Il Personale Tecnico Addetto Alla Manutenzione
ITALIANO ENGLISH FRANÇAIS 2.2 Avvertenze per il personale 2.3 Avvertenze per l'utilizzatore tecnico addetto alla manutenzione L'apparecchio può essere messo in Le operazioni di manutenzione devono funzione solo ad installazione ultimata essere eseguite solo da personale auto- comprensiva del rivestimento. rizzato e qualificato. - Page 10 purché sotto sorveglianza oppure dopo funzionamento o per spegnere il fuoco che le stesse abbiano ricevuto istruzioni nel braciere. relative all'uso sicuro dell'apparecchio e Non spegnere l'apparecchio scollegan- alla comprensione dei pericoli ad esso do la connessione elettrica di rete. inerenti.
- Page 11 ITALIANO ENGLISH FRANÇAIS giamenti alla verniciatura. Non sostare per un lungo periodo da- vanti al prodotto in funzione. Ogni responsabilità per un uso impro- prio del prodotto è totalmente a carico Un uso errato del prodotto o un interven- dell’utente e solleva il produttore da to di manutenzione scorretto possono ogni responsabilità...
-
Page 12: Caratteristiche Del Combustibile
CARATTERISTICHE DEL 3.2 Stoccaggio del pellet COMBUSTIBILE II pellet deve essere conservato in un ambiente asciutto, non troppo freddo Caratteristiche del combustibile e mantenendo i sacchi chiusi. II pellet (Fig. 2) è un composto costituito da varie Si consiglia di conservare alcuni sacchi di pellet tipologie di legno pressato con procedimenti nel locale di utilizzo dell'apparecchio o in un meccanici nel rispetto delle normative a tutela... -
Page 13: Conoscere Il Prodotto
ITALIANO ENGLISH FRANÇAIS CONOSCERE IL PRODOTTO 4.1 Descrizione INSERIMENTO A78 (FRONTALE) Fig. 3 Porta Tubo uscita fumi Gancio di chiusura Ventilatore fumi Serbatoio pellet Maniglia fredda Termostato temperatura serbatoio pellet Maniglia di apertura Scheda elettronica Camera di combustione Alimentazione Vano cenere... - Page 14 INSERIMENTO AC78 (CANALIZZATO) Fig. 4 Porta Maniglia fredda Gancio di chiusura Maniglia di apertura Serbatoio pellet Camera di combustione Termostato temperatura serbatoio pellet Vano cenere Scheda elettronica Braciere Alimentazione Microinterruttore Sonda ambiente Telaio supporto inserto Sensore livello pellet Tubo ingresso aria comburente Ventilatore ambiente Scheda elettronica Tubo uscita fumi...
-
Page 15: Dimensioni
ITALIANO ENGLISH FRANÇAIS 4.2 Dimensioni INSERIMENTO A78 (FRONTALE) 643,3 390,5 182,5 Ø 42 Ingresso aria comburente Ø 80 uscita fumi Dimensioni in mm Fig. 5 004778890 - 12/11/2021... - Page 16 INSERIMENTO AC78 (CANALIZZATO) 639,5 182,5 Ø 42 Ingresso aria comburente Ø 80 uscita fumi Dimensioni in mm Fig. 6 004778890 - 12/11/2021...
-
Page 17: Caratteristiche Tecniche
ITALIANO ENGLISH FRANÇAIS 4.3 Caratteristiche tecniche A78/AC78 A78/AC78 Potenza termica globale (resa) 12,5 Rendimento 90,2 87,1 Temperatura fumi °C 92,4 212,8 Portata fumi Consumo orario di combustibile kg/h 2,95 Emissioni di CO (al 13% di O2) Uscita fumi Ingresso aria comburente Presa d’aria esterna... -
Page 18: Targhetta Matricola
4.4 Targhetta matricola Palazzetti Lelio S.p.A. - via Roveredo 103 - 33080 Porcia (PN) Combustibile Pellet Potenza termica max introdotta PImax Potenza termica min introdotta PImin Potenza termica nominale Pmax Potenza termica ridotta Pmin Rendimento alla potenza nominale EFFmax Rendimento alla potenza ridotta... -
Page 19: Schema Elettrico
ITALIANO ENGLISH FRANÇAIS 4.5 Schema elettrico t° t° t° UI / ext 1-2 ∆ +16V I03 GND CN12 CN10 L ~220÷240 N exaust Air R NOTE: Phase protection, added by customer. Do not change polarity! 004725238 - 12/07/2021 ~220÷240 Vac Fig. -
Page 20: Movimentazione Etrasporto
• Tagliare le fascette che raggruppano i cavi e 5.1.1 Inserimento A78 (frontale) impediscono l’estrazione della macchina. Per rimuovere l'apparecchio dalla paletta di trasporto: • Sbloccare la porta utilizzando la maniglia fred- da fornita a corredo. -
Page 21: Trasporto
ITALIANO ENGLISH FRANÇAIS 5.1.2 Inserimento AC78 (canalizzato) Per rimuovere l'apparecchio dalla paletta di trasporto: • Togliere dal basamento le viti di fissaggio palet- ta e togliere la paletta. Fig. 11 • Sollevare la macchina e toglierla dalle guide. Fig. 14 5.2 Trasporto Accertarsi che il carrello sollevatore abbia una portata superiore al peso... -
Page 22: Preparazione Del Luogo Di Installazione
Fig. 15. Fig. 16 Prevedere l'arrivo della linea elettrica in prossimi- tà dell'apparecchio per il collegamento del cavo di alimentazione. Fig. 15 Modello A78/AC78 800 004778890 - 12/11/2021... -
Page 23: Aria Comburente
Esternamente deve essere messa una griglia di protezione per- Nel caso di Inserimento A78 (frontale) manente non richiudibile; in zone particolarmen- è indispensabile prelevare l’aria com- te ventose ed esposte alle intemperie, prevedere burente dall’esterno del rivestimento... - Page 24 Solo per AC78 (canalizzato) In funzione delle normative locali vigenti, le con- figurazioni possibili sono: • Fig. 21: griglia inferiore (A) in dotazione sul rive- • Fig. 19: presa d’aria esterna (C) canalizzata fino stimento e presa d’aria esterna (B) per il ricircolo al focolare (D).
-
Page 25: Raccordo Fumi
ITALIANO ENGLISH FRANÇAIS 6.4.2 Tubo ingresso aria comburente 6.5 Raccordo fumi Inserimento A78 (frontale) L'apparecchio funziona con la camera di combu- stione in depressione è pertanto indispensabile assicurarsi che lo scarico dei fumi sia a tenuta (operazione a carico dell'installatore). -
Page 26: Scarico A Tetto Mediante Camino Tradizionale
Ø 8 cm Fig. 25 6.6 Scarico a tetto mediante camino tradizionale Fig. 26 Il camino per lo scarico dei fumi deve essere rea- 1) Comignolo antivento lizzato da personale qualificato in osservanza alle 2) Sigillare norme UNI 10683 - EN 1856-1-2 - EN 1857 - EN 1443 - EN 13384-1-3 - EN 12391-1 sia per quanto riguarda 3) Ispezione le dimensioni che per i materiali utilizzati nella... -
Page 27: Installazione
• canalizzata sul piano di un caminetto con o senza telaio opzionale. 7.2.1 Installazione generatore sul piano di un caminetto (solo A78) Nel caso di installazione in strutture con rivesti- mento in marmo o altro materiale l'inserimento è dotato di guide scorrevoli per agevolare l’estra- zione dell’apparecchiatura per il fissaggio sul... - Page 28 Il piedistallo è fornito di serie nel modello AC78 mentre è opzionale nel modello A78. • Spingere la macchina fino in fondo alla corsa delle guide facendo attenzione alle eventuali •...
-
Page 29: Schema Di Montaggio
ITALIANO ENGLISH FRANÇAIS Fig. 33 7.3 Schema di montaggio 1) Per una corretta installazione la conduttura fumi tra caminetto e canna fumaria va fatta a tenuta stagna sigillando tutti i giunti di Fig. 34 unione. 2) Rivestimento in fibra ceramica ecologica o in 7.3.11 Inserimento sonda ambiente lana di roccia provvisto di foglio di alluminio esterno. -
Page 30: Collegamento Aspirazione Aria Ventilatore Ambiente
7.4 Collegamento aspirazione aria ventilatore ambiente Durante la prova di installazione a secco è opportuno segnare sia sulla parete esterna che sul rivestimento la posizione delle prese d’aria. Solo per il modello AC78 Fig. 37 Soluzione Standard (ambienti da 40÷60 m •... -
Page 31: Realizzazione Fori Tecnici Sul Rivestimento
ITALIANO ENGLISH FRANÇAIS 7.6 Realizzazione fori tecnici sul su doppio condotto. rivestimento Installare una bocchetta nella stessa stanza del caminetto e la seconda in un’altra stanza della Il rivestimento deve essere fatto solo da persona- casa. le qualificato. È possibile collegare la mandata dell’aria calda Sul rivestimento e sulla cappa devono essere con un tubo flessibile fino all’imboccatura dei eseguiti i fori tecnici per:... -
Page 32: Collegamento Al Termostato Ambiente
Collegare il cavo tra i morsetti della scheda elettronica ed il pannello di controllo prima di chiudere le scatole. 7.7.2 Collegamento al termostato ambiente È possibile collegare l'apparecchio ad un termo- stato o cronotermostato esterno che lo accenda e spenga. Per il collegamento far riferimento allo schema elettrico presente tra le caratteristiche tecniche. -
Page 33: Prima Accensione
8.1.1 Optional disponibili A78/AC78 • Sistema di caricamento con tubo metallico flessibile e sportello di caricamento (Fig. 44). • Kit piedistallo (solo per A78) (Fig. 45). • Cornici di finitura per cartongesso (Fig. 46). Fig. 46 004778890 - 12/11/2021... -
Page 34: Primo Avvio
8.2 Primo avvio Durante la prima accensione dell'appa- recchio mantenere i locali ben arieggiati, in quanto si possono generare sgradevo- li odori o fumi causati dall'evaporazione o dall'essiccamento di alcuni materiali utilizzati. Tale fenomeno andrà via via a scomparire. Collegare l'apparecchio alla rete elettrica, agire sull’interruttore di accensione posto sul retro dell'apparecchio posizionandolo su “I”. -
Page 35: Manutenzione
ITALIANO ENGLISH FRANÇAIS MANUTENZIONE Le operazioni di manutenzione devono essere effettuate da parte di un centro di assistenza tecnico autorizzato. Prima di effettuare qualsiasi operazione di manutenzione adottare le seguenti precauzioni: • Assicurarsi che tutte le parti dell'apparecchio siano fredde. •... -
Page 36: Pulizia Ordinaria
9.2 Pulizia ordinaria 9.2.2 Pulizia del vetro Si effettua con un panno umido o con della carta 9.2.1 Pulizia interna del focolare inumidita e passata nella cenere. Quotidianamente oppure prima di ogni accensio- Strofinare finché il vetro è pulito. ne è necessario verificare che il braciere sia pulito Non pulire il vetro durante il funzionamento per assicurare il libero afflusso dell’aria di combu- dell'apparecchio e non utilizzare spugne abrasive. -
Page 37: Manutenzione Ordinaria
ITALIANO ENGLISH FRANÇAIS • Aspirare la cenere residua (Fig. 52). Fig. 53 Fig. 52 • Rimuovere il braciere. • Afferrare la parete di fondo per le maniglie. • Estrarre la parete di fondo spingendola verso 9.3 Manutenzione ordinaria l'alto e poi ruotando la parte bassa verso l'ester- •... - Page 38 9.3.2 Manutenzione del Tee fumi • Rimuovere le viti (A) ed estrarre i refrattari la- terali. È necessario pulire il Tee di evacuazione dei fumi estraendo l'apparecchio dalla sua sede e aspi- rando con un aspiracenere i residui contenuti all’interno del Tee. •...
- Page 39 ITALIANO ENGLISH FRANÇAIS Manutenzione coclea In caso di intasamento del tubo di alimentazione che dal serbatoio porta i pellet alla camera di combustione procedere come segue: • Rimuovere il fermo (A) della piastrina d’ispezio- • Rimuovere la piastrina d’ispezione (B). Fig.
-
Page 40: Manutenzione Della Canna Fumaria
9.3.4 Manutenzione della canna fumaria volta completate operazioni manutenzione: Da effettuarsi almeno una volte all’anno e co- • Rimontare tutti i componenti in ordine contra- munque ogni volta sia necessario. rio. • Resettare eventuali avvisi o allarmi (i termostati a riarmo manuale si trovano sul lato posterio- re dell'apparecchio in prossimità... -
Page 41: Demolizione Esmaltimento
ITALIANO ENGLISH FRANÇAIS 10 DEMOLIZIONE E SMALTIMENTO La responsabilità per eventuali danni a persone La demolizione e lo smaltimento dell'apparec- ed animali ricade sempre sul proprietario. All’atto chio sono ad esclusivo carico e responsabilità del della demolizione la marcatura CE, il presente proprietario che dovrà... - Page 42 TABLE OF CONTENTS User and Installer Installer 1 GENERAL INTRODUCTION Symbols Intended use Purpose and content of the manual Preservation of the manual Update of this manual Overview Compliance Responsibility of the manufacturer Technical assistance and maintenance 1.10 Spare parts 1.11 Serial plate 1.12 Delivery of the appliance...
- Page 43 ITALIANO ENGLISH FRANÇAIS 5 HANDLING AND TRANSPORTATION Removal of the transport pallet 5.2 Transportation 6 PREPARATION OF THE INSTALLATION SITE General considerations 6.2 Safety Precautions 6.3 Place of installation 6.4 Combustion air 6.5 Flue gas fitting 6.6 Roof exhaust with traditional fireplace 7 INSTALLATION General considerations 7.2 Installation configurations...
-
Page 44: General Introduction
Palazzetti specialised personnel. The installation manual is an integral part of the appliance. Palazzetti reserves the right to change specifi- cations and technical and/or functional charac- Deterioration or loss teristics of the product at any time without prior If needed, request an additional copy from notice. -
Page 45: Compliance
Responsibility for the works carried out for the in- stallation of the appliance cannot be considered The following harmonised standards and/or reg- to be taken on by Palazzetti; it is and remains the ulations have been applied: responsibility of the installer, who is responsible... -
Page 46: Technical Assistance And Maintenance
1.12 Delivery of the appliance maintenance The appliance is delivered perfectly packaged and fixed to a wooden platform which allows Palazzetti has a dense network of service centres handling it using fork lift trucks and/or other with specialised, trained and skilled technicians. means. -
Page 47: Safety Warning
ITALIANO ENGLISH FRANÇAIS SAFETY WARNING Check that the chimney flue and air inlet set-ups conform to Warnings for the installer the type of installation. Observe the prescriptions contained in Do not carry out on-the-fly electrical this manual. connections with temporary or uninsu- lated cables. -
Page 48: Warnings For Technical Maintenance Personnel
2.2 Warnings for technical 2.3 Warnings for users maintenance personnel The appliance can only be commis- Maintenance operations must be car- sioned when the installation has been ried out only by authorised and quali- completed including the cover. fied personnel. To ensure correct use of the product and electronic appliances connected Observe the prescriptions contained in... - Page 49 ITALIANO ENGLISH FRANÇAIS have received instructions relating to Do not lean on open doors, this could the safe use of the appliance and to compromise stability understanding the inherent dangers. appliance. Children must not play with the ap- Do not use the appliance as an anchor pliance.
- Page 50 It is prohibited to use benzene, lamp It is prohibited to operate the fuel, kerosene, liquid firelighter for appliance with the door open. wood, ethyl alcohol or similar liquids to light or rekindle a flame in this ap- It is prohibited to use the appliance if pliance.
-
Page 51: Fuel Characteristics
ITALIANO ENGLISH FRANÇAIS FUEL CHARACTERISTICS 3.2 Pellet storage Pellets must be kept in a dry place, not Fuel characteristics too cold and the bags must be kept sealed. The pellet (Fig. 2) is a compound made from various types of wood pressed together with mechanical procedures in compliance with envi- It is advisable to keep a number of bags of pellets ronment protection regulations, and it is the only... -
Page 52: Becoming Familiar With The Product
BECOMING FAMILIAR WITH THE PRODUCT 4.1 Description INSERT A78 (FRONT) Fig. 3 Door Smoke outlet pipe Closing hook Flue gas fan Pellet hopper Cold handle Pellet hopper temperature thermostat Opening handle Faulty Combustion chamber Power supply Ash compartment Room sensor... - Page 53 ITALIANO ENGLISH FRANÇAIS INSERT AC78 (DUCTED) Fig. 4 Door Cold handle Closing hook Opening handle Pellet hopper Combustion chamber Pellet hopper temperature thermostat Ash compartment Faulty Burn pot Power supply Microswitch Room sensor Insert support frame Pellet level sensor Combustion air inlet pipe Room fan Faulty Smoke outlet pipe...
-
Page 54: Dimensions
4.2 Dimensions INSERT A78 (FRONT) 643,3 390,5 182,5 Ø 42 combustion air inlet Ø 80 flue gas outlet Dimensions in mm Fig. 5 004778890 - 12/11/2021... - Page 55 ITALIANO ENGLISH FRANÇAIS INSERT AC78 (CHANNELLED) 639,5 182,5 Ø 42 combustion air inlet Ø 80 flue gas outlet Dimensions in mm Fig. 6 004778890 - 12/11/2021...
-
Page 56: Technical Features
4.3 Technical features A78/AC78 A78/AC78 Overall thermal power (output) 12,5 Yield 90,2 87,1 Flue gas temperature °C 92,4 212,8 Flue gas flow rate Hourly fuel consumption kg/h 2,95 CO emissions (at 13% of O2) Flue gas outlet Ø 80 Combustion air inlet Ø... -
Page 57: Serial Plate
ITALIANO ENGLISH FRANÇAIS 4.4 Serial plate Palazzetti Lelio S.p.A. - via Roveredo 103 - 33080 Porcia (PN) Combustibile Pellet Potenza termica max introdotta PImax Potenza termica min introdotta PImin Potenza termica nominale Pmax Potenza termica ridotta Pmin Rendimento alla potenza nominale... -
Page 58: Wiring Diagram
4.5 Wiring diagram t° t° t° UI / ext 1-2 ∆ +16V I03 GND CN12 CN10 L ~220÷240 N exaust Air R NOTE: Phase protection, added by customer. Do not change polarity! 004725238 - 12/07/2021 ~220÷240 Vac Fig. 8 Hall sensor Loading dispenser External thermostat Safety thermostat... -
Page 59: Handling And Transportation
Fig. 10 report. • Unscrew the six guide fixing bolts located on 5.1.1 Insertion A78 (front) the bottom of the machine. To remove the appliance from the transport • Disconnect the display cable connector, with... -
Page 60: Transportation
5.1.2 Insertion AC78 (ducted) To remove the appliance from the transport pallet: • Remove the pallet fixing screws from the base and remove the pallet. Fig. 11 • Lift the machine and remove it from the guides. Fig. 14 5.2 Transportation Make sure that the lifting carriage has a payload higher than the weight of the Fig. -
Page 61: Preparation Of The Installation Site
Fig. 15. Fig. 16 Set up the electricity supply line to arrive near the appliance for the connection of the power cable. Fig. 15 Model A78/AC78 800 004778890 - 12/11/2021... -
Page 62: Combustion Air
If there is an insert A78 (front), the cidentally obstructed. A non-closable permanent combustion air must be taken from protection grille must be placed externally;... - Page 63 ITALIANO ENGLISH FRANÇAIS For AC78 only (ducted) The following configurations are possible de- pending on the local regulations in force: • Fig. 21: lower grille (A) provided in the cladding • Fig. 19: external air intake (C) ducted as far as and external air intake (B) for the recirculation the firebox (D).
-
Page 64: Flue Gas Fitting
6.4.2 Combustion air inlet pipe 6.5 Flue gas fitting Insertion A78 (front) The appliance works with the combustion cham- ber at negative pressure. It is therefore essential to make sure that the flue gas evacuation is airtight (this is the responsibility of the installer). -
Page 65: Roof Exhaust With Traditional Fireplace
ITALIANO ENGLISH FRANÇAIS Ø 8 cm Fig. 25 6.6 Roof exhaust with traditional fireplace Fig. 26 The flue for flue gas discharge must be carried 1) Wind-proof cowl out by qualified personnel in compliance with 2) Seal the UNI 10683 - EN 1856-1-2 - EN 1857 - EN 1443 - EN 13384-1-3 - EN 12391-1 standards both regard- 3) Inspect ing the dimensions and the materials used in its... -
Page 66: General Considerations
• channelled onto the top of a fireplace with or without optional frame. 7.2.1 Generator installation on top of a fireplace (A78 only) In the event of installation in structures with marble cladding or other materials, the insert has sliding guides to assist with extracting the... -
Page 67: Installation
The stand is supplied in model AC78 while it is cable. optional in model A78. • Push the machine to the end position of the • Once the pallet has been removed (refer to par- guides, paying attention to any interference agraph: “HANDLING AND TRANSPORTATION”) -
Page 68: Assembly Diagram
Fig. 33 7.3 Assembly diagram 1) For correct installation, all the joints of the flue gas ducting between the fireplace and the flue must be sealed. Fig. 34 2) Lining in eco-friendly ceramic fibre or rock wool with external aluminium foil. 7.3.1 Insertion of room sensor 3) Rear external air intake, ensure a minimum The sensor must be installed near the side or... -
Page 69: Room Fan Air Suction Connection
ITALIANO ENGLISH FRANÇAIS 7.4 Room fan air suction connection • Fasten the tube (1) to the collars (2) with the clamps (3). During the dry installation run, the air • Insulate the pipes with insulating material. intake position should be marked both on the external wall and the cladding. -
Page 70: Creating Technical Holes On The Cladding
4) the ventilation of the cladding on the base; dispersion. 5) pellet loading opening. When the fireplace is used to heat two The holes must comply with the measurements or more adjacent rooms, it is essential indicated in the figure: to promote the recirculation of ambient air to even out the temperature in the different rooms, therefore provide the... -
Page 71: Connection To The Room Thermostat
ITALIANO ENGLISH FRANÇAIS closing the boxes. 7.7.2 Connection to the room thermostat The appliance can be connected to an external thermostat or chronothermostat that switches it on and off. For the connection, refer to the wiring diagram in the technical specifications. Fig. -
Page 72: First Ignition
8.1.1 Optionals available Fig. 45 • Loading system with flexible metal pipe and A78/AC78 loading door (Fig. 44). • Stand kit (for A78 only) (Fig. 45). • Finishing frames for plasterboard (Fig. 46). Fig. 46 004778890 - 12/11/2021... -
Page 73: First Start Up
ITALIANO ENGLISH FRANÇAIS 8.2 First start up During the first ignition of the appli- ance, make sure the rooms are prop- erly ventilated as unpleasant odours or fumes may be generated due to the evaporation or drying of certain mate- rials used. -
Page 74: Maintenance
MAINTENANCE Maintenance operations must be performed by an authorised technical assistance centre. Before performing any maintenance operation, take the following precautions: • Ensure that all appliance parts are cold. • Make sure that the ashes are completely extinguished. • Use personal protective equipment provided for by Directive 89/391/EEC. •... -
Page 75: Ordinary Cleaning
ITALIANO ENGLISH FRANÇAIS 9.2 Ordinary cleaning 9.2.2 Cleaning the glass It is carried out with a damp cloth or with damp- 9.2.1 Cleaning the inside of the firebox ened paper that is wiped over the ash. Daily or before each ignition, it is necessary to Rub until the glass is clean. -
Page 76: Ordinary Maintenance
• Remove the ash in the area indicated in (Fig. 52). Fig. 53 • Remove the burn pot. Fig. 52 • Grip the bottom wall by the handles. • Remove the bottom wall by pushing it upwards and then, turning the lower part outwards. 9.3 Ordinary maintenance •... - Page 77 ITALIANO ENGLISH FRANÇAIS 9.3.2 Flue gas T-pipe maintenance • Remove the screws (A) and extract the side panels. The flue gas T-pipe must be cleaned by removing the appliance from its seat and vacuuming the residues contained inside the T-pipe with an ash vacuum cleaner.
- Page 78 9.3.4 Auger maintenance In case the feed pipe that takes the pellets from the hopper to the combustion chamber gets clogged, proceed as follows: • Remove the inspection plate catch (A). • Remove the inspection plate (B). Fig. 59 Fig. 61 9.3.3 Smoke collector maintenance •...
- Page 79 ITALIANO ENGLISH FRANÇAIS 9.3.5 Maintenance of the flue Once the maintenance operations are completed: This should be carried out once a year or when- • Re-fit all the components in reverse order. ever necessary. • Reset any warnings or alarms (the manual re- set thermostats are on the rear of the appliance near the power cable).
-
Page 80: Demolition And Disposal
10 DEMOLITION AND DISPOSAL Any liability for damage to people and animals The demolition and disposal of the appliance are always falls on the owner. Upon demolition, the the sole liability and responsibility of the owner EC marking, this manual and other documents who must act in compliance with the laws in relating to this appliance must be destroyed. - Page 81 ITALIANO ENGLISH FRANÇAIS TABLE DES MATIÈRES Utilisateur et Installateur Installateur 1 INTRODUCTION Symboles utilisés Destination d’emploi Objet et contenu du manuel Conservation du manuel Mise à jour du manuel Généralités Conformité Responsabilité du fabricant Assistance technique et entretien 1.10 Pièces détachées 1.11 Plaque signalétique 1.12 Livraison de l’appareil...
- Page 82 6.5 Raccord fumée 6.6 Évacuation sur le toit à travers un conduit de cheminée traditionnel 104 7 INSTALLATION Considérations générales 7.2 Configurations d’installation A78/AC78 7.3 Schéma de montage 7.4 Raccordement aspiration air ventilateur ambiant 7.5 Raccordement de l’arrivée d’air chaud 7.6 Réalisation de trous techniques sur le revêtement...
-
Page 83: Introduction
Le manuel d’installation fait partie intégrante de spécialisé Palazzetti. l’appareil. Palazzetti se réserve le droit de modifier les spé- Perte ou détérioration cifications et les caractéristiques techniques et/ ou fonctionnelles du produit à tout moment sans Si nécessaire, demander un autre exemplaire à... -
Page 84: Conformité
- EN 55014-1:2017 tallation de l’appareil ne peut pas être considérée - EN 61000-3-2:2015 à la charge de la société Palazzetti ; en effet, celle- - EN 61000-3-3:2014 /EC:2016 ci est et reste à la charge de l’installateur qui est - EN 55014-2:2015 tenu d’effectuer les contrôles relatifs au conduit... -
Page 85: Assistance Technique Et Entretien
ENGLISH FRANÇAIS Assistance technique et entretien 1.12 Livraison de l’appareil Palazzetti met à disposition un réseau dense de L'appareil est livré parfaitement emballé et fixé centres d’assistance avec des techniciens spécia- à une palette en fois permettant de le déplacer lisés, formés et préparés. -
Page 86: Avertissements Pour La Sécurité
AVERTISSEMENTS POUR L’appareil devra être installé sur des planchers ayant une capacité portante LA SÉCURITÉ appropriée. Avertissements pour l'installateur Vérifier que les prédispositions du conduit de fumée et de l'ar- Respecter les consignes indiquées dans rivée d'air soient conformes au le présent manuel. -
Page 87: Avertissements Pour Les Techniciens Préposés À L'entretien
ITALIANO ENGLISH FRANÇAIS 2.2 Avertissements pour les tection thermique ou des systèmes d'ac- techniciens préposés à l’entretien tionnement de type « poignée froide ». Pour cette raison, il est recommandé Les opérations d’entretien doivent d'être extrêmement attentif pendant être effectuées exclusivement par un le fonctionnement, en particulier : personnel autorisé... - Page 88 L’utilisateur non spécialisé doit être pro- Toucher la porte seulement lorsque tégé contre l’accès à n’importe quelle l’appareil est froid. pièce pouvant l’exposer à des dangers. En cas de fuite de fumée dans la pièce Il ne doit par conséquent pas être auto- ou d'explosion endommageant l'appa- risé...
- Page 89 ITALIANO ENGLISH FRANÇAIS décharge l'entreprise de toute respon- une distance sûre de l'appareil pendant sabilité civile et pénale. son fonctionnement. Il est interdit de verser dans le réservoir Il est interdit de charger ma- des combustibles autres que les gra- nuellement les granulés de nulés de bois (pellet).
-
Page 90: Caractéristiques Du Combustible
CARACTÉRISTIQUES DU 3.2 Stockage des granulés de bois COMBUSTIBLE Les granulés de bois doivent être conservés dans un lieu sec, pas trop Caractéristiques du combustible froid et à l’intérieur de sacs fermés. Les granulés de bois (Fig. 2) sont un composé Il est conseillé... -
Page 91: Connaître Le Produit
ITALIANO ENGLISH FRANÇAIS CONNAÎTRE LE PRODUIT 4.1 Description INSERT A78 (FRONTAL) Fig. 3 Porte Tube d’évacuation des fumées Crochet de fermeture Ventilateur fumées Réservoir granulés Poignée froide Thermostat température réservoir Poignée d’ouverture granulés Chambre de combustion Carte électronique Compartiment à cendres... - Page 92 INSERT AC78 (CANALISÉ) Fig. 4 Porte Ventilateur fumées Crochet de fermeture Poignée froide Réservoir granulés Poignée d’ouverture Thermostat température réservoir Chambre de combustion granulés Compartiment à cendres Carte électronique Brasier Alimentation Microrupteur Sonde ambiante Cadre de support insert Capteur niveau granulés Tube arrivée d’air de combustion Ventilateur ambiant Carte électronique...
-
Page 93: Dimensions
ITALIANO ENGLISH FRANÇAIS 4.2 Dimensions INSERTION A78 (FRONTALE) 643,3 390,5 182,5 Ø 42 arrivée de l’air de combustion Ø 80 évacuation des fumées Dimensions en mm Fig. 5 004778890 - 12/11/2021... - Page 94 INSERT AC78 (CANALISÉ) 639,5 182,5 Ø 42 arrivée de l’air de combustion Ø 80 évacuation des fumées Dimensions en mm Fig. 6 004778890 - 12/11/2021...
-
Page 95: Caractéristiques Techniques
ITALIANO ENGLISH FRANÇAIS 4.3 Caractéristiques techniques A78/AC78 A78/AC78 Puissance thermique globale (délivrée) 12,5 Rendement 90,2 87,1 Température des fumées °C 92,4 212,8 Débit des fumées Consommation horaire de combustible kg/h 2,95 Émissions de CO (à 13% de O2) Sortie fumée Ø... -
Page 96: Plaque Signalétique
4.4 Plaque signalétique Palazzetti Lelio S.p.A. - via Roveredo 103 - 33080 Porcia (PN) Combustibile Pellet Potenza termica max introdotta PImax Potenza termica min introdotta PImin Potenza termica nominale Pmax Potenza termica ridotta Pmin Rendimento alla potenza nominale EFFmax Rendimento alla potenza ridotta... -
Page 97: Schéma De Câblage
ITALIANO ENGLISH FRANÇAIS 4.5 Schéma de câblage t° t° t° UI / ext 1-2 ∆ +16V I03 GND CN12 CN10 L ~220÷240 N exaust Air R NOTE: Phase protection, added by customer. Do not change polarity! 004725238 - 12/07/2021 ~220÷240 Vac Fig. -
Page 98: Manutention Et Transport
éventuellement la déclaration. • Dévisser les six boulons de fixation des rails po- sitionnés sur le fond de la machine. 5.1.1 Insertion A78 (frontale) • Débrancher le connecteur du cordon de l’écran, Pour retirer l’appareil de la palette de transport : avec la masse respective, de la carte et le câble... -
Page 99: Insertion Ac78 (Canalisée)
ITALIANO ENGLISH FRANÇAIS 5.1.2 Insertion AC78 (canalisée) Pour retirer l’appareil de la palette de transport : • Retirer les vis de fixation palette de la base et enlever la palette. Fig. 11 • Soulever la machine et la retirer des rails. Fig. -
Page 100: Préparation Du Lieu D'installation
Fig. 15. Fig. 16 Prévoir l’arrivée de la ligne électrique à proxi- mité de l’appareil pour brancher le cordon d’alimentation. Fig. 15 Modèle A78/AC78 800 004778890 - 12/11/2021... -
Page 101: Air De Combustion
à risque d'incendie. l'extérieur, une grille de protection permanente et non obturable doit être installée ; dans les Dans le cas de l'insertion A78 (frontale), zones particulièrement exposées aux intempé- il est indispensable de prélever l'air de ries et au vent, elle assure une protection contre combustion à... - Page 102 Seulement pour AC78 (canalisé) En fonction des réglementations locales en vigueur, les configurations possibles sont les • Fig. 21 : grille inférieure (A) fournie sur le re- suivantes : vêtement et prise d’air extérieure (B) pour le • Fig. 19 : prise d’air extérieure (C) canalisée recyclage de l’air ambiant à...
-
Page 103: Tube Arrivée D'air De Combustion
ENGLISH FRANÇAIS 6.4.2 Tube arrivée d’air de combustion 6.5 Raccord fumée Insertion A78 (frontale) L’appareil fonctionne avec la chambre de com- bustion sous vide ; il est donc essentiel de s'assu- rer que la sortie de fumée est étanche (opération à effectuer par l'installateur). -
Page 104: Évacuation Sur Le Toit À Travers Un Conduit De Cheminée Traditionnel
Ø 8 cm Fig. 25 6.6 Évacuation sur le toit à travers un conduit de cheminée traditionnel Fig. 26 La cheminée pour l’évacuation de la fumée doit 1) Chapeau anti-vent être réalisée par du personnel qualifié et selon 2) Sceller les normes UNI 10683- EN 1856-1-2- EN 1857- EN 1443- EN 13384-1-3- EN 12391-1 aussi bien en ce qui 3) Inspection... -
Page 105: Installation
• canalisée sur le plan d’une cheminée avec ou sans châssis optionnel. 7.2.1 Installation du générateur sur le plan d’une cheminée (seulement A78) En cas d'installation dans des structures avec revêtement en marbre ou autre matériau, l’in- sert est doté de rails coulissants pour faciliter... - Page 106 • Pousser la machine jusqu’au bout de la course Le socle est fourni dans la version standard dans des rails en faisant attention aux éventuelles le modèle AC78 tandis que le modèle A78 est interférences causées par les câbles. Attacher fourni en option.
-
Page 107: Schéma De Montage
ITALIANO ENGLISH FRANÇAIS expansion robustes en acier Ø 8 mm (C). Fig. 33 7.3 Schéma de montage 1) Pour installer correctement le tuyau entre la cheminée et le conduit de fumée doit être Fig. 34 étanche avec le scellage de tous les joints de raccordement. -
Page 108: Raccordement Aspiration Air Ventilateur Ambiant
7.4 Raccordement aspiration air ventilateur ambiant Pendant le test d'installation à sec, il est conseillé de marquer la position des entrées d'air sur le mur extérieur et sur le revêtement. Seulement pour le modèle AC78 Fig. 37 Solution Standard (ambiances de 40÷60 m •... -
Page 109: Réalisation De Trous Techniques Sur Le Revêtement
ITALIANO ENGLISH FRANÇAIS 7.6 Réalisation de trous techniques Installer une bouche dans la même pièce que la cheminée et la seconde dans une autre pièce de sur le revêtement la maison. Le revêtement doit être fait uniquement par du Il est possible de raccorder l’arrivée de l’air chaud personnel qualifié. -
Page 110: Connexion Au Thermostat D'ambiance
de fermer les boîtiers. 7.7.2 Connexion au thermostat d’ambiance Il est possible de connecter l’appareil à un ther- mostat ou à un chronothermostat externe qui l’allume et l’éteint. Pour la connexion, faire référence au schéma électrique présent dans les caractéristiques techniques. -
Page 111: Premier Allumage
8.1.1 Options disponibles A78/AC78 • Système de chargement avec tuyau métallique flexible et volet de chargement (Fig. 44). • Kit de montage socle (seulement pour A78) (Fig. 45). • Cadres de finition pour plaques de plâtre (Fig. 46). Fig. 46... -
Page 112: Premier Démarrage
8.2 Premier démarrage Lors du premier allumage de l’appa- reil, veiller à ce que les pièces soient bien ventilées, car des odeurs ou des fumées désagréables peuvent être gé- nérées par l'évaporation ou le séchage de certains des matériaux utilisés. Ce phénomène diminuera jusqu'à... -
Page 113: Entretien
ITALIANO ENGLISH FRANÇAIS ENTRETIEN Les opérations d’entretien doivent être effectuées par un centre d’assistance technique autorisé. Avant d’effectuer toute opération d’entretien, prendre les précautions suivantes : • S'assurer que toutes les parties de l’appareil soient froides. • S'assurer que les cendres soient complètement éteintes. •... -
Page 114: Nettoyage Ordinaire
9.2 Nettoyage ordinaire 9.2.2 Nettoyage de la vitre Le nettoyage doit être effectué à l’aide d’un chif- 9.2.1 Nettoyage de l'intérieur du foyer fon humide ou avec du papier humidifié et passé dans les cendres. Tous les jours ou avant chaque allumage, il est nécessaire de vérifier que le brasier est propre Frotter jusqu’à... -
Page 115: Entretien Ordinaire
ITALIANO ENGLISH FRANÇAIS • Aspirer les cendres dans l’endroit comme indi- qué dans l’image (). Fig. 53 • Extraire le brasier. Fig. 52 • Saisir la paroi réfractaire arrière par les poi- gnées. • Extraire la paroi réfractaire arrière en le pous- 9.3 Entretien ordinaire sant vers le haut puis en tournant la partie basse vers l’extérieur. -
Page 116: Entretien Du Raccord En T Des Fumées
9.3.2 Entretien du raccord en T des fumées Nettoyer le raccord en T d’évacuation des fumées en retirant l'appareil de son siège et en aspirant les résidus contenus à l'intérieur du té à l’aide d’un aspirateur à cendres. • Ouvrir la porte. •... -
Page 117: Entretien De La Vis Sans Fin
ITALIANO ENGLISH FRANÇAIS 9.3.4 Entretien de la vis sans fin En cas d’engorgement du tuyau d’alimentation qui, du réservoir transporte les granulés vers la chambre de combustion, procéder comme suit : • Retirer le loquet (A) de la plaque d’inspection. • Extraire la plaque d’inspection (B). Fig. -
Page 118: Entretien Du Conduit D'évacuation Des Fumées
9.3.5 Entretien du conduit d'évacuation des fois opérations maintenance fumées terminées: Cette opération doit être effectuée une fois par • Remonter tous les composants en commen- an et quoi qu’il en soit chaque fois que cela est çant par le dernier retiré. nécessaire. -
Page 119: Démolition Et Élimination
ITALIANO ENGLISH FRANÇAIS 10 DÉMOLITION ET ÉLIMINATION Le propriétaire est le seul responsable en cas La démolition et l'élimination de l’appareil sont d’éventuels dommages à des personnes et des exclusivement à la charge du propriétaire qui animaux. Lors de la démolition, le marquage devra agir conformément aux lois en vigueur CE, le mode d’emploi et les autres documents dans son pays en matière de sécurité... - Page 120 Palazzetti se réserve le droit de modifier ses produits à tout moment et sans préavis afin de les améliorer sans en compromettre les caractéristiques essentielles.