Table des Matières
Publicité
Les langues disponibles
Les langues disponibles
Liens rapides
IMPULSION/ IMPULSE
AFNOR
Manuel d'installation et de mise en service
Installation and operation manual
www.bodet-time.com
S'assurer à réception que le produit n'a pas été endommagé durant le transport pour réserve au transporteur.
When receiving goods please check nothing is broken otherwise make a claim near shipping company.
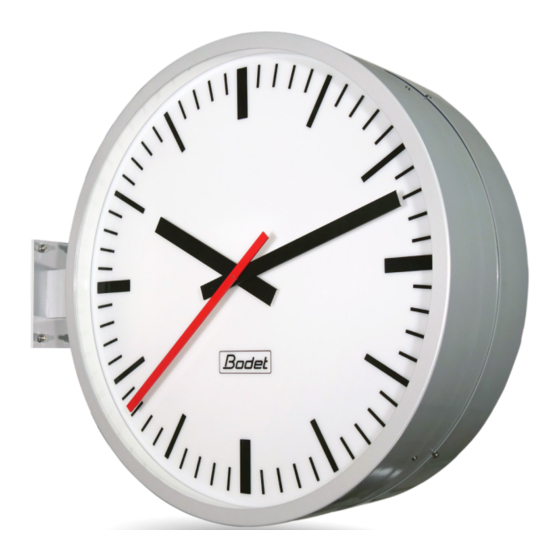
HORLOGES ANALOGIQUES
ANALOGUE CLOCKS
Profil 750 - Profil 760
BODET Time & Sport
1 rue du Général de Gaulle
49340 TREMENTINES I France
Tel. support France: 02.41.71.72.99
Tel. support export: +33 241 71 72 33
1
Publicité
Table des Matières

Manuels Connexes pour Bodet Time Profil 750


Sommaire des Matières pour Bodet Time Profil 750
- Page 1 HORLOGES ANALOGIQUES ANALOGUE CLOCKS Profil 750 - Profil 760 IMPULSION/ IMPULSE AFNOR Manuel d’installation et de mise en service Installation and operation manual BODET Time & Sport 1 rue du Général de Gaulle 49340 TREMENTINES I France Tel. support France: 02.41.71.72.99 www.bodet-time.com...
-
Page 2: Table Des Matières
Table des matières Informations relatives à la sécurité 1. Vérification initiale Déballage de l’horloge Nettoyage Consignes de sécurité - précautions à l'installation 1.3.1 Utilisation de la notice 1.3.2 Sécurité - Installation électrique 1.3.3 Sécurité - Installation mécanique 1.3.4 Sécurité - Ouverture de l'horloge 2. - Page 3 Table of contents Safety informations and protective measures 1. Initial checks Unpacking the clock Cleaning 1 Safety instructions – Precautions for installation 1.3.1 Using the guide 1.3.2 Safety - Electrical installation 1.3.3 Safety - Mechanical installation 1.3.4 Safety - Opening the clock 2.
-
Page 4: Informations Relatives À La Sécurité
Informations relatives à la sécurité Les pictogrammes ci-dessous permettent d’illustrer des risques ou des sources de danger lors de l’installation, de l’utilisation et de la maintenance de ce produit. Symbole Description IEC60417 - 1641 Manuel d’utilisation IEC60417 - 5002 Positionnement de la pile IEC60417 - 5019 Connexion de terre de protection IEC60417 - 5031... -
Page 5: Vérification Initiale
1. Vérification initiale Nous vous remercions d’avoir choisi une horloge Bodet. Ce produit a été conçu avec soin pour votre satisfaction selon les règles de notre système qualité ISO9001 et ISO14001. Nous vous recommandons de lire attentivement ce manuel avant l'installation du produit. Conserver ce manuel pendant toute la durée de vie de votre produit afin de pouvoir vous y reporter à... -
Page 6: Sécurité - Installation Électrique
- Pour les horloges double face, chacune des 4 vis M8 doit être capable de supporter une traction de : 270 kg (pour une Profil 780) ou 150 kg (pour une Profil 750 ou 760). 1.3.4 Sécurité - Ouverture de l'horloge L’intérieur de cet équipement ne possède pas de pièces réparables par l’utilisateur : contacter... -
Page 7: Installation
2. Installation 2.1 Installation murale - Horloge simple face 2.1.1 Installation mécanique A l’endroit où l’horloge doit être installée, percer 3 trous dans le mur suivant la disposition et les cotes dimensionnelles suivantes en fonction de votre modèle : Dans le cas d’un montage standard sur un mur en béton, insérer les chevilles dans les perçages. Pour installer l’horloge sur le mur, celle-ci doit impérativement être ouverte préalablement. - Page 8 - Retirer le calage en carton entre le mouvement et le cadran, - Visser les goujons dans les chevilles (3 goujons sont livrés avec l’horloge dans un colis séparé), - Anticiper l’ajustement des écrous et des rondelles pour laisser suffisamment d’espace (25 mm minimum) entre le mur et le dos de l’horloge pour permettre le passage des câbles et les presse- étoupes, 25 mm...
-
Page 9: Installation Électrique
2.1.2 Installation électrique Il existe différentes versions d’horloge : IMPULSION MIN 24V, MIN 1V5 ou AFNOR. Consulter l’étiquette du produit pour déterminer votre version. L’alimentation de l’éclairage (si option choisie) est toujours assurée via une alimentation reliée au secteur. 2.1.2.1 Installation électrique - Modèle IMPULSION MIN 24V - MIN 1V5 - Avec option éclairage : passer le câble secteur par le presse-étoupe de gauche puis connecter ce câble sur le bornier dans les bornes L-N-... -
Page 10: Installation Électrique - Modèle Afnor
2.1.2.2 Installation électrique - Modèle AFNOR - Avec option éclairage : passer le premier câble secteur par le presse-étoupe de gauche puis connecter ce câble sur le bornier dans les bornes L-N- dédiées à l’éclairage - Passer le deuxième câble secteur par le presse étoupe de droite puis connecter ce câble sur le bornier dans les bornes L-N- dédiées à... -
Page 11: Installation Murale - Horloge Double Face
2.2 Installation murale - Horloge double face 2.2.1 Installation mécanique Attention : ce type d’horloge dans sa version double face peut peser jusqu’à 29 Kg. A cela il faut ajouter les contraintes mécaniques lors du verrouillage, c’est pourquoi nous recommandons d’installer cette horloge double face de préférence sur un mur béton. - Dévisser et retirer la vis d'entrée d'air située sous le bras de potence l’horloge (clé... -
Page 12: Installation Électrique
2.2.2 Installation électrique Il existe différentes versions d’horloge : IMPULSION MIN 24V, MIN 1V5 ou AFNOR. Consulter l’étiquette du produit pour déterminer votre version. L’alimentation de l’éclairage (si option choisie) est toujours assurée via une alimentation reliée au secteur. 2.2.2.1 Installation électrique - Modèle IMPULSION MIN 24V - MIN 1V5 - Avec option éclairage : passer le câble secteur par le bras de la potence puis connecter ce câble sur le bornier dans les bornes L-N-... -
Page 13: Installation Électrique - Modèle Afnor
2.2.2.2 Installation électrique - Modèle AFNOR - Avec option éclairage : passer le premier câble secteur par le bras de la potence puis connecter ce câble sur le bornier dans les bornes L-N- dédiées à l’éclairage - Passer le deuxième câble secteur par le bras de la potence puis connecter ce câble sur le bornier dans les bornes L-N- dédiées à... -
Page 14: Mise En Service Et Mise À L'heure
3. Mise en service et mise à l’heure Réceptrice IMPULSION MIN 24V Un réseau de distribution horaire n’émet que des impulsions. Il est nécessaire d’arrêter le réseau et de mettre toutes les horloges réceptrices à la même heure avant le démarrage. Pour mettre à... -
Page 15: Caractéristiques Techniques
- Directive LVD 2014/35/EU Informations complémentaires Pour modèle simple face: Ø câbles secteur : 6-12 mm (PG13) Ø câbles synchronisation : 2,5-6,5 mm (PG7) Dimensions Profil 750 Simple Face 25,4 124,5 Profil 750 Double Face A ( 1 : 2 ) 11... - Page 16 Profil 760 Simple Face Profil 760 Double Face...
-
Page 17: Que Faire Si
5. Que faire si..? Vérifier. Que faire si... ? Vérifier Vérifier que le type de signal émis par l’horloge mère (Impulsion Minute 24V, AFNOR/ Irig-B), Pas de synchronisation après l’installation. est de même type que celui du mouvement l’horloge. Absence de message horaire depuis plus d’une Réceptrice AFNOR / Irig-B arrêtée heure. -
Page 18: Safety Informations And Protective Measures
Safety informations and protective measures The following symbols and pictograms are used to illustrate a source of danger during installation, use, and maintenance of this product. Symbol Description IEC60417 - 1641 Operating instructions IEC60417 - 5002 Positioning of cell IEC60417 - 5019 Protective earth (ground) IEC60417 - 5031 Direct current... -
Page 19: Initial Checks
1. Initial checks Thank you for choosing a BODET clock. This product has been carefully designed for your satisfaction according to the rules of our ISO9001 and ISO14001 quality system. We recommend that you read this manual carefully before installing the product. Retain this manual throughout the lifespan of your product so that you can refer to it when necessary. -
Page 20: Safety - Electrical Installation
30 kg, - For double-sided clocks, each of the four M8 screws must be able to withstand a tensile strength of : 270 kg (Profil 780) or 150 kg (Profil 750 or Profil 760). 1.3.4 Safety - Opening the clock There are no user-repairable parts inside this equipment. -
Page 21: Installation
2. Installation 2.1 Wall installation - Single-sided clock 2.1.1 Mechanical installation Where the clock is to be installed, drill three holes in the wall according to the following layout and dimensions pertaining to your model: For standard mounting on a concrete wall, insert the anchors into the drilled holes. Note that the clock must be opened before being mounted onto the wall. - Page 22 - Remove the cardboard wedge between the movement and the dial, - Tighten the stud bolts in the anchors (three stud bolts are supplied with the clock in a separate package), - Anticipate adjustment of the nuts and washers, remembering to leave sufficient space (at least 25mm) between the wall and the back of the clock to fit the cables and cable glands, 25 mm M8 x 80 stud bolt...
-
Page 23: Electrical Installation
2.1.2 Electrical installation There are two different clock versions: IMPULSE MIN 24V, MIN 1V5 or AFNOR. Refer to the product label to determine which version you have. The lighting (if option chosen) is always powered via a mains power supply. 2.1.2.1 Electrical installation - IMPULSE MIN 24V - MIN 1V5 model - With lighting option: feed the mains cable through the left-hand cable gland then connect this cable to the terminal block... -
Page 24: Electrical Installation - Afnor Model
2.1.2.2 Electrical installation - AFNOR model - With lighting option: feed the first mains cable through the left-hand cable gland then connect this cable to the terminal block in the N-L- terminals reserved for lighting - Feed the second mains cable through the right-hand cable gland then connect this cable to the terminal block in the N-L- terminals reserved for the circuit board... -
Page 25: Wall Installation - Double-Sided Clock
Wall installation - Double-sided clock 2.2.1 Mechanical installation Caution: the double-sided version of this clock model can weigh up to 29 kg. This fact, in addition to the mechanical stress involved, means that we recommend a concrete wall as the preferred installation for this double-sided clock. - Unscrew and remove the air inlet screw located beneath the bracket arm (Allen key 6),... -
Page 26: Electrical Installation
2.2.2 Electrical installation There are two different clock versions: IMPULSE MIN 24V, MIN 1V5 or AFNOR. Refer to the product label to determine which version you have. The lighting (if option chosen) is always powered via a mains power supply. 2.2.2.1 Electrical installation - IMPULSE MIN 24V - MIN 1V5 model - With lighting option: feed the mains cable through the bracket arm then connect this cable to the terminal block... -
Page 27: Electrical Installation - Afnor Model
2.2.2.2 Electrical installation - AFNOR model - With lighting option: feed the first mains cable through the bracket arm then connect this cable to the terminal block in the N-L- terminals reserved for lighting - Feed the second mains cable through the bracket arm then connect this cable to the terminal block in the N-L- terminals reserved for the circuit board... -
Page 28: Starting The Clock And Setting The Time
3. Starting the clock and setting the time IMPULSE MIN 24V slave clock A time distribution network emits only impulses. You need to stop the network and set all slave clocks to the same time before starting it. To set the time on the clock, adjust the thumbwheel located on the movement at the back of the removable clock face. -
Page 29: Technical Requirements
- EMC Directive 2014/30/EU - LVD Directive 2014/35/EU Additional information For single-sided models: Ø mains cables: 6-12 mm (PG13) Ø synchronisation cables : 2.5-6.5 mm (PG7) Dimensions Profil 750 Single-sided 25,4 124,5 Profil 750 Double-sided A ( 1 : 2 ) 11... - Page 30 Profil 760 Single-sided Profil 760 Double-sided...
-
Page 31: What To Do If
5. What to do if… Check. What to do if… Check Check that the signal type emitted by the master clock (Impulse Minute 24V, AFNOR/ No synchronisation after installation. IRIG-B) is the same signal type as the clock movement. No time message for longer than an hour. AFNOR/IRIG-B slave clock has stopped Check the master clock, the network and the cable connections inside the clock.