Table des Matières
Publicité
Les langues disponibles
Les langues disponibles
Liens rapides
Publicité
Table des Matières

Manuels Connexes pour Sonnenkonig LIVORNO


Sommaire des Matières pour Sonnenkonig LIVORNO
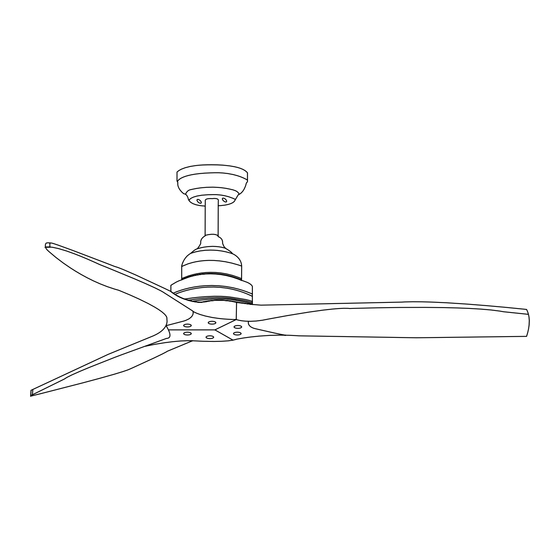
- Page 1 LIVORNO DECKENVENTILATOR Bedienungsanleitung Artikel-Nr.: 10530619...
-
Page 2: Table Des Matières
INDEX 1 Sicherheitshinweise ..........................3 2 Technische Angaben .......................... 4 3 Erforderliche Teile ..........................5 4 Vorbereitung ............................6 5 Montage ............................... 7 6 Betrieb des Ventilators ........................10 7 Anweisungen zur Fernbedienung ....................11 8 Anschluss-Schema..........................11 9 Reinigung ............................12 10 Garantie / Entsorgung / Technische Änderungen .............. -
Page 3: Sicherheitshinweise
1 Sicherheitshinweise Bitte lesen Sie vor erster Inbetriebnahme die Gebrauchsanweisung genau durch und beachten Sie die Sicherheitshinweise um Schäden durch falsche oder unsachgemäße Bedienung sowie unzulässige Umgebungsbedingungen zu vermeiden. Bewahren Sie diese zum späteren Nach- schlagen gut auf. Kontrollieren Sie das Gerät nach dem Entfernen der Verpackung auf Beschädigungen. Setzen Sie das Gerät bei Verdacht auf eine Beschädigung nicht in Betrieb und wenden Sie sich an einen Fachmann. -
Page 4: Technische Angaben
Wenn Sie eine Wartung benötigen, senden Sie den Ventilator bitte an den Verkäufer zurück. • Keine Teile des Ventiltors dürfen vom Benutzer entfernt werden. Der Lüfter darf nicht durch den Benutzer geöffnet werden. 2 Technische Angaben Modell LIVORNO Spannung 220-240 V Frequenz 50 Hz Leistung... -
Page 5: Erforderliche Teile
3 Erforderliche Teile 1 x Montageplatte 1 x Empfänger 1 x Obere 1 x Stativstange Abdeckung 1 x Untere 3 x Rotorblätter Abdeckung 1 x Fernbedienung Querstift / R pin Schrauben und 1 x Motor Unterlegscheiben Empfänger für Montageplatte Fernbedienung Obere Abdeckung Deckenstange Untere Abdeckung... -
Page 6: Vorbereitung
4 Vorbereitung Wichtig: Bei Verwendung einer vorhandenen Anschlusssteckdose stellen Sie bitte sicher, dass die Steckdose fest in der Gebäude-Struktur verankert ist und sie das volle Gewicht des Ventilators tragen kann. Bei Nichtbeachtung kann es zu schweren Verletzungen oder zum Tod führen. Benötigte Werkzeuge zur Installation Ihres Lüfters: •... -
Page 7: Montage
5 Montage MONTAGE DER MONTAGEPLATTE Wählen Sie den richtigen Ort für Ihren Ventilator und treffen Sie alle notwendigen Sicherheitsvorkehrungen, bevor Sie mit der Installation beginnen. Lösen Sie die seitlichen Schrauben des Dachträgers wie in der Ab- bildung unten gezeigt. Zeichnen Sie Ihre Bohrlöcher mit einem Bleistift durch die Platte, indem Sie sie an der Decke platzieren. - Page 8 KOPPLUNG Nehmen Sie das Baldachin und die dekorative Motor- abdeckung, und schieben Sie es durch die von Ihnen gewählte Stange. Nehmen Sie die Kabel, die aus dem Motor kommen, und schieben Sie sie in die untere Stange, damit sie auf der anderen Seite herauskom- men.
-
Page 9: Elektrische Anschlüsse
ELEKTRISCHE ANSCHLÜSSE Nehmen Sie den Empfänger von der Fernbedienung und schieben Sie ihn unter die Halbkugel des Ventila- L-Line: Black tors. Achten Sie darauf, die Seitenkabel des Empfän- N-Line: White E-Line: Green+Yellow gers nicht zu beschädigen. Verbinden Sie das eklekti- sche Netzwerk mit dem Terminal oder Domino, das sich an der Montageplatte befindet. -
Page 10: Betrieb Des Ventilators
6 Betrieb des Ventilators Modelle mit Fernbedienung: • Wählen Sie die Lüftungsdrehzahl durch Drücken des Drehzahlreglers auf der Fernbedienung (Hohe Geschwindigkeit – Mittlere Geschwindigkeit – Niedrige Geschwindigkeit – OFF) • Setzen Sie die Fernbedienung nicht der direkten Sonneneinstrahlung aus. • Versuchen Sie nicht, abgelaufene Batterien wieder aufzuladen. Es gibt spezielle Akkus, die deutlich gekennzeichnet sind. -
Page 11: Anweisungen Zur Fernbedienung
7 Anweisungen zur Fernbedienung Das Gerät verfügt über eine Fernbedienung, die eine komfortable und effiziente Nutzung ermög- licht. Damit die Fernbedienung funktioniert, muss sie immer auf den Ventilator gerichtet sein. Bevor Sie die Fernbedienung benutzen, nehmen Sie sich bitte ein paar Minuten Zeit, um sich mit den Funktionen vertraut zu machen: LIGHT ON/OFF: Drücken Sie die Taste, um das Licht am Gerät ein- oder auszuschalten. -
Page 12: Reinigung
9 Reinigung • Stellen Sie sicher, dass das Kabel aus der Steckdose gezogen und der Lüfter nicht angeschlos- sen ist, bevor Sie mit der Reinigung starten. • Die Teile sollen mit einem weichen, trockenen Tuch gereinigt werden. • Flecken sollten mit einer milden Seife (Reinigungsmittel) und einem feuchten Tuch entfernt werden. - Page 13 ENTSORGUNGSHINWEISE FÜR DEN ELEKTRISCHEN TEIL DES PRODUKTS Gemäß Artikel 26 des Gesetzeserlass vom 14. März 2014 zur Umsetzung der Richtlinie 2012/19/ EG und des Erlasses vom 4. März 2014 zur Umsetzung der Richtlinie 2011/65/EG zur Verringe- rung der Verwendung gefährlicher Stoffe in Elektro- und Elektronikgeräten und zur Abfallent- sorgung.
- Page 14 Firma Armin Schmid Olensbachstrasse 9–15 CH-9631 Ulisbach Tel. Int. +41 58 611 60 00 Tel. Nat. 0848870850 info@sonnenkoenig.ch www.sonnenkoenig.ch Firma Armin Schmid Peter-Henlein-Strasse 5 D-89331 Burgau Tel: 0180 500 64 35 info@sonnenkoenig.ch www.sonnenkoenig.ch Festnetz 14 Cent/Minute Mobilnetz bis 42 Cent/Minute...
-
Page 15: Ventilateur De Plafond
LIVORNO VENTILATEUR DE PLAFOND Mode d‘emploi Article-nr.: 10530619... - Page 16 SOMMAIRE 1 Consignes de sécurité .......................... 17 2 Données Techniques ..........................18 3 Pièces nécessaires ..........................19 4 Préparation ............................20 5 Montage ..............................21 6 Fonctionnement du ventilateur ......................24 7 Mode d‘emploi de la télécommande ....................25 8 Schéma de raccordement ........................25 9 Entretien ...............................
-
Page 17: Consignes De Sécurité
1 Consignes de sécurité Avant la première mise en service, veuillez lire scrupuleusement le mode d‘emploi dans son Intégralité et tenir compte des consignes de sécurité afin d‘éviter les dommages liés à une commande mauvaise ou non conforme ainsi qu‘à des conditions d‘environnement non auto- risées. -
Page 18: Données Techniques
Pour toute maintenance du ventilateur, veuillez retourner le ventilateur au vendeur. • L’utilisateur n’est autorisé à retirer aucune pièce du ventilateur. Le ventilateur ne doit pas être ouvert par l’utilisateur. 2 Données Techniques Modell LIVORNO Tension 220-240 V Fréquence 50 Hz Puissance 70 Watt 0 123 x 33.5 cm... -
Page 19: Pièces Nécessaires
3 Pièces nécessaires 1 x Plaque de 1 x Récepteur montage 1 x Supérieur 1 x Tige de trépied Couverture 1 x Bas 3 x Pales de rotor Couverture Goupille transversale 1 x Télécommande / R pin 1 x Moteur Vis et rondelles Récepteur pour Plaque de montage... -
Page 20: Préparation
4 Préparation si vous utilisez une prise de courant existante, assurez-vous que la prise est solide- Important : ment ancrée dans la structure du bâtiment et qu‘elle peut supporter le poids total du ventila- teur. Le non-respect de cette consigne peut entraîner des blessures graves ou la mort. Outils nécessaires pour installer votre ventilateur : •... -
Page 21: Montage
5 Montage MONTAGE DE LA PLAQUE DE MONTAGE Choisissez le bon emplacement pour votre ventilateur et prenez toutes les mesures de sécurité nécessaires avant de commencer l‘installation. Dévissez les vis latérales du support de toit comme indiqué sur l‘il- lustration ci-dessous. Dessinez vos trous de perçage à... - Page 22 COLLECTION Prenez le baldaquin et le cache-moteur décoratif, et faites-le glisser à travers la barre que vous avez choisie.tige que vous avez choisie. Prenez les câbles qui sortent du moteur et glissez-les dans la barre in- férieure pour qu‘ils sortent de l‘autre côté. Attention, placez la barre dans la bonne direction, le trou hémi- sphérique vers le haut et le trou de vis vers le bas du moteur.
-
Page 23: Raccordements Électriques
RACCORDEMENTS ÉLECTRIQUES Retirez le récepteur de la télécommande et glis- sez-le sous la demi-sphère du ventilateur. Veillez à L-Line: Noir ne pas endommager les câbles latéraux du récepteur. N-Line: Blanc E-Line: vert+jaun Connectez le réseau éclectique au terminal ou au do- mino qui se trouve sur la plaque de montage. -
Page 24: Fonctionnement Du Ventilateur
6 Fonctionnement du ventilateur Modèles avec télécommande: • Choisissez le nombre de tours de ventilation en appuyant sur le bouton de réglage des tours sur la télécommande (Vitesse haute – Vitesse moyenne – Vitesse basse – OFF) • Ne laissez jamais la télécommande en plein soleil. •... -
Page 25: Mode D'emploi De La Télécommande
7 Mode d’emploi de la télécommande L‘appareil dispose d‘une télécommande qui permet une utilisation confortable et efficace. Pour que la télécommande fonctionne, elle doit toujours être dirigée vers le ventilateur. Avant d‘utiliser la télécommande, veuillez prendre quelques minutes pour vous familiariser avec ses fonctions : LIGHT ON/OFF: Appuyez sur la touche pour allumer ou éteindre la lumière de l‘appareil. -
Page 26: Entretien
9 Entretien • Assurez-vous que la fiche a préalablement été retirée de la prise de courant et que le venti- lateur n’est pas branché avant de commencer à le nettoyer. • Les éléments doivent être nettoyés à l’aide d’un chiffon doux et sec. •... - Page 27 INSTRUCTIONS D’ÉLIMINATION DES COMPOSANTS ÉLECTRIQUES DU PRODUIT Conformément à l’article 26 du décret-loi du 14 mars 2014 portant application de la directive 2012/19/CE et à la loi du 4 mars 2014 portant application de la directive 2011/65/CE concernant la réduction de l’utilisation de substances dangereuses dans les équipements électriques et électroniques et la gestion des déchets.
- Page 28 Maison Armin Schmid Olensbachstrasse 9–15 CH-9631 Ulisbach Tel. Int. +41 58 611 60 00 Tel. Nat. 0848870850 info@sonnenkoenig.ch www.sonnenkoenig.ch Maison Armin Schmid Peter-Henlein-Strasse 5 D-89331 Burgau Tel: 0180 500 64 35 info@sonnenkoenig.ch www.sonnenkoenig.ch Festnetz 14 Cent/Minute Mobilnetz bis 42 Cent/Minute...
-
Page 29: Manuale Dell'utente
LIVORNO VENTILATORE DA SOFFITTO Manuale dell‘utente Articolo-nr.: 10530619... - Page 30 INDICE 1 Avvertente per la sicurezza ........................ 31 2 Specifiche tecniche ..........................32 3 Parti necessarie ............................33 4 Preparazione............................34 5 Montaggio .............................35 6 Funzionamento del ventilatore ......................38 7 Funzionamento del telecomando ......................39 8 Diagramma di connessione ........................39 9 Istruzioni per la pulizia del ventilatore ................... 40 10 Garanzia / Smaltimento / Modifiche tecniche ................
-
Page 31: Avvertente Per La Sicurezza
1 Avvertenze per la sicurezza Prima di mettere in funzione per la prima volta il deumidificatore, si raccomanda di leggere con cura le istruzioni d’uso e di rispettare le avvertenze di sicurezza al fine di evitare un utilizzo improprio o sbagliato come pure condizioni ambientali non idonee. -
Page 32: Specifiche Tecniche
• Tenete il ventilatore in luoghi freschi ed asciutti • Se non utilizzate il ventilatore per lungo tempo, pulitelo e riponetelo in un sac-chetto di pla- stica al riparo da fonti di calore ed umidità. 2 Specifiche tecniche Modello LIVORNO Tensione 220-240 V Frequenza 50 Hz... -
Page 33: Parti Necessarie
3 Parti necessarie 1 x Piastra di 1 x Ricevitore montaggio 1 x Superiore 1 x Asta di supporto Copertina 1 x Inferiore 3 x Pale del rotore Copertina 1 x Controllo remoto Perno a croce / R pin 1 x Motore Viti e rondelle Ricevitore per Piastra di montaggio... -
Page 34: Preparazione
4 Preparazione Importante: quando si utilizza una scatola di collegamento elettrico al soffitto già esistente, assicurarsi che questo sia agganciato in sicurezza al soffitto e che possa sopportare il peso del ventilatore. Non effettuare questo controllo può provocare gravi infortuni o la morte. Strumenti necessari per installare il vostro ventilatore: - Un trapano - Cacciavite magnetico a croce... -
Page 35: Montaggio
5 Montaggio MONTAGGIO DELLA PIASTRA DI MONTAGGIO Scegliete la giusta posizione per il vostro ventilatore e prendete tutte le precauzioni di sicurezza necessarie prima di iniziare l‘installazione. Allentare le viti sul lato del supporto del tetto come mostrato nell‘illus- trazione qui sotto. Disegnate i vostri fori attraverso il pannello con una matita, posizionandoli sul soffitto. - Page 36 COUPLING Prendete il baldacchino e la copertura decorativa del motore, e fatelo scorrere attraverso il vostro asta scelta. Prendete i cavi che escono dal motore e spingeteli nell‘asta inferiore in modo che escano dall‘altra parte. Fate attenzione a mettere l‘asta nella giusta direzione, con il foro dell‘emisfero rivolto verso l‘alto e il foro della vite verso il basso sul motore.
-
Page 37: Collegamenti Elettrici
COLLEGAMENTI ELETTRICI Rimuovere il ricevitore dal telecomando e farlo scor- rere sotto l‘emisfero del ventilatore. Fate attenzione a Linea L: Nero non danneggiare i cavi laterali del ricevitore. Collega- N-Line: Bianco Linea E: Verde+Giallo re la rete eclettica al terminale o al domino situato sulla piastra di montaggio. -
Page 38: Funzionamento Del Ventilatore
6 Funzionamento del ventilatore Modelli dotati di telecomando: • Selezionare la velocità del ventilatore premendo il pulsante di controllo della velocità sul teleco- mando (alta velocità - media velocità - bassa velocità - Off). • Premendo il pulsante „ON / OFF“ del bottone della luce sul telecomando è possibile controllare l‘accensione o lo spegnimento della luce. -
Page 39: Funzionamento Del Telecomando
7 Funzionamento del telecomando L‘unità ha un telecomando per un uso comodo ed efficiente. Affinché il telecomando funzioni, deve essere sempre puntato verso il ventilatore. Prima di usare il telecomando, prendetevi qualche minuto per familiarizzare con le funzioni: LIGHT ON/OFF: Premere il pulsante per accendere o spegnere la luce sull‘unità. -
Page 40: Istruzioni Per La Pulizia Del Ventilatore
9 Istruzioni per la pulizia del ventilatore • Prima di ogni intervento assicurarsi che il cavo di alimentazione del ventilatore sia disinserito dalla presa di corrente. • Per la pulizia usare esclusivamente un panno inumidito con acqua e un detergente non aggressivo. •... - Page 41 INFORMATIVA SMALTIMENTO RELATIVA ALLA PARTE ELETTRICA DEL PRODOTTO Ai sensi del D.L. 14 marzo 2014 art. 26, di attuazione della direttiva 2012/19/EU e del D.L. 27 del 4 marzo 2014, di attuazione della direttiva 2011/65/EU relativa alla riduzione dell‘uso di sostanze pericolose nelle apparecchiature elettriche ed elettroniche, nonché...
- Page 42 Ditta Armin Schmid Olensbachstrasse 9–15 CH-9631 Ulisbach Tel. Int. +41 58 611 60 00 Tel. Nat. 0848870850 info@sonnenkoenig.ch www.sonnenkoenig.ch Ditta Armin Schmid Peter-Henlein-Strasse 5 D-89331 Burgau Tel: 0180 500 64 35 info@sonnenkoenig.ch www.sonnenkoenig.ch Telefono fisso 14 Cent/Minute Telefono mobile bis 42 Cent/Minute...
- Page 43 LIVORNO CEILING FAN User manual Article-Nr.: 10530619...
- Page 44 INDEX 1 Safety instructions ..........................45 2 Technical specifications........................46 3 Requested tool ............................47 4 Preparation ............................48 5 Assembly .............................. 49 5 Operating your fan ..........................52 6 Instructions of the remote control ....................53 8 Connection diagram..........................53 9 Cleaning ..............................54 10 Warranty / Disposal / Technical change ..................
-
Page 45: Safety Instructions
1 Safety instructions Please read before first commissioning the safety instructions carefully and observe the safety in- structions to prevent damage due to misuse, improper operation, and improper environmental condi- tions to be avoided. Keep these for later reference. Check the device after removing the packaging for damage . Do not put the unit in case of suspected corruption in operation and consult a specialist. -
Page 46: Technical Specifications
If you need maintenance, please send back the fan to the agent. • No part of this fan must be replaced by the user. The fan should not be opened by user. 2 Technical specifications Modell LIVORNO Voltage 220-240 V Frequency... -
Page 47: Requested Tool
3 Requested tools 1 x Mounting plate 1 x Receiver 1 x Upper 1 x Support rod Cover 1 x Lower 3 x Rotor blades Cover 1 x Remote Control Cross pin / R pin 1 x Motor Screws and washers Receiver for Mounting plate Remote control... -
Page 48: Preparation
4 Preparation Important: When using an existing outlet box, make sure the box is securely attached to the building struc-ture and can support the full weight of the fun. Failure to do this can result in serious injury or death. Tools needed to install your fan: - A drill - Magnetic Phillips screwdriver... -
Page 49: Assembly
5 Assembly MOUNTING THE MOUNTING PLATE Choose the right location for your fan and take all necessary safety precautions before you start the in- stallation. Loosen the screws on the side of the roof support as shown in the illustration below. Draw your drill holes through the panel with a pencil, placing them on the ceiling. - Page 50 COPPLING Take the canopy and the decorative motor cover, and slide it through your chosen rod. Take the cables coming out of the motor and push them into the lower rod so that they come out the other side. Attention, put the rod in the right direction, the hemisphere hole upwards and screw hole downwards to the motor.
-
Page 51: Electrical Connections
ELECTRICAL CONNECTIONS Remove the receiver from the remote control and slide it under the hemisphere of the fan. Be careful L-Line: Black not to damage the receiver‘s side cables. Connect the N-Line: White E-Line: Green+Yellow eclectic network to the terminal or domino located on the mounting plate. -
Page 52: Operating The Fan
6 Operating the fan Models with remote control: - Select the ventilation speed by pressing the speed control on the remote control (High speed - Medium speed - Low speed - OFF). - Do not expose the remote control to direct sunlight. - Do not attempt to recharge expired batteries. -
Page 53: Instructions Of The Remote Control
7 Instructions of the remote control The unit has a remote control for convenient and efficient use. For the remote control to work, it must always be pointed at the fan. Before using the remote control, please take a few minutes to familiarise yourself with the fun- ctions: LIGHT ON/OFF: Press the button to switch the light on the unit on or off. -
Page 54: Cleaning
9 Cleaning • Ensure that the fan is unplugged from the power socket before starting. • Parts should be cleaned with a soft dry cloth. • Dirt marks should be removed with a mild soap (detergent) and a damp cloth. Ensure that all traces of the soap film are removed with a damp cloth. - Page 55 DISPOSAL INSTRUCTIONS FOR THE ELECTRICAL PART OF THE PRODUCT In accordance with Article 26 of the Decree-Law of 14 March 2014 implementing Directive 2012/19/ EC, and the Law of 4 March 2014 implementing Directive 2011/65/EC on the reduction of the use of hazardous substances in electrical and electronic equipment and on waste management.
- Page 56 Company Armin Schmid Olensbachstrasse 9–15 CH-9631 Ulisbach Tel. Int. +41 58 611 60 00 Tel. Nat. 0848870850 info@sonnenkoenig.ch www.sonnenkoenig.ch Company Armin Schmid Peter-Henlein-Strasse 5 D-89331 Burgau Tel: 0180 500 64 35 info@sonnenkoenig.ch www.sonnenkoenig.ch Landline 14 Cent/Minute Mobile network to 42 Cent/Minute...