Table des Matières
Publicité
Les langues disponibles
Les langues disponibles
Liens rapides
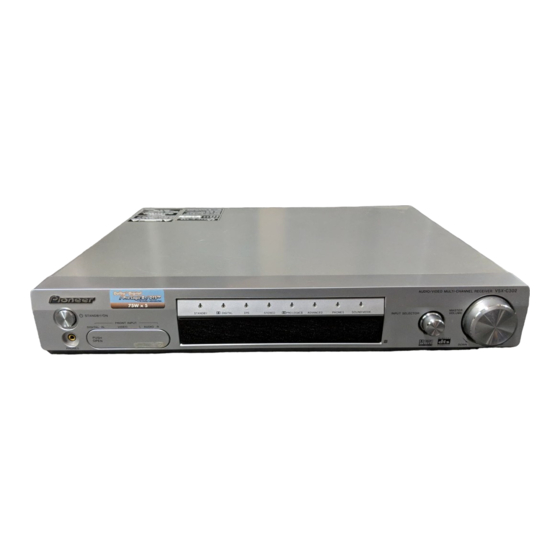
AUDIO/VIDEO MULTI-CHANNEL
RECEIVER
RECEPTEUR AUDIOVISUEL A
VOIES MULTI-CANAUX
VSX-C302
Register your product at
www.pioneerelectronics.com
• Protect your new investment
The details of your purchase will be on file for reference in the event of an
insurance claim such as loss or theft.
• Receive free tips, updates and service bulletins on
your new product
• Improve product development
Your input helps us continue to design products that meet your needs.
• Receive a free Pioneer newsletter
Registered customers can opt in to receive a monthly newsletter.
Operating Instructions
Mode d'emploi
Publicité
Chapitres
Table des Matières
Dépannage

Manuels Connexes pour Pioneer VSX-C302


Sommaire des Matières pour Pioneer VSX-C302
- Page 1 • Receive free tips, updates and service bulletins on your new product • Improve product development Your input helps us continue to design products that meet your needs. • Receive a free Pioneer newsletter Registered customers can opt in to receive a monthly newsletter. Operating Instructions Mode d’emploi...
- Page 2 D1-4-2-3_En NOTE: THE NO USER-SERVICEABLE PARTS COMPARTMENT WARNING IS LOCATED ON THE APPLIANCE BONNET Thank you for buying this Pioneer product. WARNING – TO PREVENT FIRE OR SHOCK Please read through these operating instructions so HAZARD, DO NOT EXPOSE THIS APPLIANCE TO RAIN OR MOISTURE.
-
Page 3: Important Safety Instructions
IMPORTANT SAFETY INSTRUCTIONS READ INSTRUCTIONS — All the safety and GROUNDING OR POLARIZATION OBJECT AND LIQUID ENTRY — Never push operating instructions should be read before the • If this product is equipped with a polarized objects of any kind into this product through product is operated. - Page 4 We Want You Listening For A Lifetime Used wisely, your new sound equipment will provide a lifetime of fun and enjoyment. Since hearing damage from loud noise is often undetectable until it is too late, this manufacturer and the Electronic Industries Association’s Selecting fine audio equipment such as the unit Consumer Electronics Group recommend you avoid you’ve just purchased is only the start of your...
-
Page 5: Before You Start
• Dry cell batteries (AA Size / IEC R6P) x2 • Don’t place anything on top of the receiver except for • Remote control unit a Pioneer DV-463, 363, 263, 260, 353, 251, 250, 578A • Operating instructions DVD player. If you do place one of these pieces of •... -
Page 6: Table Des Matières
Installing your speaker system ....15 SR+ control for Pioneer plasma displays ..34 Connecting the speakers ....16 Using the SR+ mode with a Pioneer plasma Placing the speakers . -
Page 7: Quick Start Guide
6–16Ω. ANTENNA VIDEO AM LOOP FM UNBAL 75Ω AC IN SPEAKERS FRONT SURROUND CENTER MONITOR CONTROL DIGITAL IN TV/SAT DVR/VCR TV/SAT DVR/VCR (DVD) (TV/SAT) WOOFER AUDIO OPT1 OPT2 COAX VSX-C302 LINE LEVEL... -
Page 8: Connecting Your Tv And Dvd Player
DVD player and the TV/ IN on this receiver and plug in the other end to a SAT(DVD) OPT1 jack on this receiver. However, you power outlet. VSX-C302 ANTENNA VIDEO AM LOOP FM UNBAL 75Ω... -
Page 9: Introductory Information
Introductory information Chapter 2 Introductory information Introduction to home theater Dialog Enhancement (page 27) Use the Dialog Enhancement feature to accentuate You are probably used to using stereo equipment to listen dialog and vocals in a program source and match the to music, but may not be used to home theater systems vertical placement of the center channel with the front that give you many more options (such as surround... -
Page 10: Connecting Your Equipment
CONTROL IN jack / CONTROL OUT jack (pages 18 and 19) Use to link Pioneer components together to enable all components in the chain to use just one remote control sensor. • When storing optical cable, coil loosely. The cable AC IN (page 19) may be damaged if bent around sharp corners. -
Page 11: Installing The Receiver
Connecting your equipment Installing the receiver DVD(TV/SAT) COAX jack (page 12) Coaxial digital audio jack for the DVD input (although • When installing this unit, make sure to put it on a it is possible to reassign it to the TV/SAT input). secure and level plane that is stable. -
Page 12: Connecting A Dvd Player And Tv
• If your TV has a built-in digital TV tuner, see also audio. Connecting a TV with a built-in digital TV tuner below. If your DVD player doesn’t have a coaxial digital audio out VSX-C302 ANTENNA VIDEO AM LOOP FM UNBAL 75Ω... -
Page 13: Connecting A Satellite/Cable Receiver Or Other Set-Top Box
This connection carries stereo and multichannel digital audio. ANTENNA VIDEO AM LOOP FM UNBAL 75Ω AC IN SPEAKERS FRONT SURROUND CENTER MONITOR CONTROL DIGITAL IN TV/SAT DVR/VCR TV/SAT DVR/VCR (DVD) (TV/SAT) WOOFER AUDIO COAX OPT1 OPT2 VSX-C302 DIGITAL OUT VIDEO AUDIO AV OUT STB (TV) -
Page 14: Connecting Other Video Components
FM UNBAL 75Ω AC IN SPEAKERS FRONT SURROUND CENTER MONITOR CONTROL DIGITAL IN TV/SAT DVR/VCR TV/SAT DVR/VCR (DVD) (TV/SAT) WOOFER AUDIO OPT1 OPT2 COAX VSX-C302 OPTICAL COAXIAL VIDEO AUDIO VIDEO AUDIO DIGITAL OUT AV OUT AV IN DVR, VCR, etc. -
Page 15: Connecting Equipment To The Front Panel Inputs
L/R) and an optical digital audio input (DIGITAL). You can • The illustration below shows example connections to use these connections for any kind of audio/video a portable DVD player. component, but they are especially convenient for VSX-C302 VSX-C302 AUDIO/VIDEO MULTI-CHANNEL RECEIVER STANDBY/ON MASTER... -
Page 16: Connecting The Speakers
Connecting your equipment Connecting the speakers Placing the speakers Before you can start connecting the speakers, make sure Where you put your speakers in the room has a big effect that the speaker cable you’re going to use is properly on the quality of the sound. -
Page 17: Connecting Antennas
(TV/SAT) WOOFER AUDIO OPT1 OPT2 COAX VSX-C302 AM loop antenna FM wire antenna Assemble the stand as shown in the illustration. • Connect the FM wire antenna to the FM UNBAL 75Ω in the same way as the AM antenna. -
Page 18: Using This Receiver With A Pioneer Plasma Display
OUT jack of your plasma display. If you have a Pioneer plasma display, you can use an Before you can use the extra SR+ features, you need to SR+ cable (see note below) to connect it to this unit and make a few settings in the receiver. -
Page 19: Operating Other Pioneer Components With This Unit's Sensor
• You can also set up the supplied remote to control other components in your system (both Pioneer and non-Pioneer). See Using the remote control with other components on page 36 for how to do this. -
Page 20: Controls And Displays
Controls and displays Chapter 4 Controls and displays Front panel VSX-C302 AUDIO/VIDEO MULTI-CHANNEL RECEIVER STANDBY/ON MASTER DIGITAL AUTO STEREO PRO LOGICII ADVANCED PHONES SOUND MODE INPUT SELECTOR VOLUME FRONT INPUT DIGITAL IN VIDEO AUDIO PHONES DOWN PHONES jack MASTER VOLUME knob When headphones are connected there is no sound Use to adjust the volume. -
Page 21: Display
Controls and displays Display DIG (digital) / ANA (analog) (page 30) Indicates whether the current input source is analog or digital. Hi-FS Lights when the current input signal is 88.2/96 kHz digital. Lights when the Control Mode Setting is set to SR+ ON for a connected plasma display to control this receiver. -
Page 22: Remote Control
Switches the SR+ mode on/off. DISPLAY CLASS D.ACCESS DVD recorder control buttons When set up, these buttons can be used to control a TIMER REC Pioneer DVD recorder. ENTER CLEAR REC ì Press to start recording. STOP REC TV CONTROL SLEEP Press to stop recording. -
Page 23: Operating Range Of The Remote Control
Controls and displays ADVANCED SURROUND 23 DIMMER Use to select an ADVANCED SURROUND mode for First press RECEIVER , then press DIMMER repeatedly to the current source. change the brightness/switch off the front panel display. The display will light brightly for about two seconds when SOUND MODE you operate the receiver with the display off or dimmed. -
Page 24: Getting Started
Getting started Chapter 5 Getting started Using the Room Setup Note • Default setting: M (medium) / MID • The Room Setup automatically sets up the channel Before using your receiver to enjoy surround sound play- levels and speaker distance according to the room back, we recommend you spend a few minutes using the size. -
Page 25: Playing A Source
• For more detailed surround sound setup, see The RECEIVER System Setup menu on page 32. SIGNAL SEL TV/SAT DVR/VCR FRONT FM/AM MASTER VOLUME RECEIVER VSX-C302 AUDIO/VIDEO MULTI-CHANNEL RECEIVER STANDBY/ON MASTER DIGITAL AUTO STEREO PRO LOGICII ADVANCED PHONES SOUND MODE... -
Page 26: Home Theater Sound
Home theater sound Chapter 6 Home theater sound Playing stereo sources Using this receiver you can enjoy listening to sources, analog or digital, in either stereo or surround sound. Stereo sources, such as CD, FM radio and TV broadcasts, can be played in stereo, or through all your speakers using one of the various Surround modes. -
Page 27: Using The Advanced Surround Effects
Home theater sound Using the Advanced Surround effects • NATURAL – Adjusts the overall tonal balance for better reproduction through small speakers Advanced Surround effects can be used with • MIDNIGHT – For effective surround sound at low multichannel or stereo sources for a variety of additional volume surround sound effects. -
Page 28: Using The Tuner
Using the tuner Chapter 7 Using the tuner Finding a station Tuning directly to a station The following steps show you how to tune in to FM and Sometimes, you'll already know the frequency of the AM radio broadcasts using the automatic (search) and station you want to listen to. -
Page 29: Memorizing Station Presets
Using the tuner Memorizing station presets Use the (cursor left/right) buttons to choose the first character. If you often listen to a particular radio station, it's Scroll through the letters, numbers and symbols, convenient to have the receiver store the frequency for stopping on the one you want. -
Page 30: Using Other Functions
Using other functions Chapter 8 Using other functions Selecting the input signal type Using the sleep timer The DVD, TV/SAT, DVR/VCR and FRONT inputs all have The sleep timer automatically puts the receiver into both analog and digital jacks. You can select the type of standby after the specified period of time. -
Page 31: Resetting The System
Using other functions Resetting the system Default receiver settings The table below shows the factory default settings. When Use this feature to reset the system to its factory default you reset the system, the receiver reverts to these settings. defaults (see Resetting the system above). Setting type Default setting Page ref. -
Page 32: The System Setup Menu
The System Setup menu Chapter 9 The System Setup menu Making receiver settings from the Center speaker setting Specifies the size of the center speaker: System Setup menu • CENTER S – Small (the cone diameter is less than This receiver allows you to make detailed settings to 5 in.) optimize the surround sound performance. - Page 33 The System Setup menu LFE attenuator setting Note Dolby Digital and DTS audio sources include ultra-low • On the ch1 and ch2 settings the sound comes only bass tones. Set the LFE attenuator as needed to prevent from the center speaker (or from the front speakers if the ultra-low bass from distorting the sound.
-
Page 34: Sr+ Control For Pioneer Plasma Displays
Pioneer plasma display even easier. These features include: See also Using this receiver with a Pioneer plasma display on page 18 and Using the SR+ mode with a Pioneer • Automatic video input switching on the plasma plasma display below. -
Page 35: Setting Individual Channel Levels
The System Setup menu Setting individual channel levels Use to set the relative volume of each channel as you find necessary for balanced surround sound. RECEIVER MASTER VOLUME TUNE TUNE CH SELECT TEST TONE Use MASTER VOLUME to adjust the volume to an appropriate level. -
Page 36: Controlling Other Equipment
Input/control mode select buttons Changes the receiver input and also the mode of the remote control. DVD recorder control buttons Dedicated buttons for controlling a Pioneer DVD recorder. Receiver control buttons Buttons used only for controlling receiver functions. Buttons for controlling other components... -
Page 37: Recalling Preset Codes
Controlling other equipment TV CONTROL buttons Note Dedicated buttons for controlling your TV. • See Preset code list on page 40 for the components and manufacturers available. Recalling preset codes • The preset codes cover a wide variety of equipment, The following steps show you how to recall preset codes however, there may be some models from a for each input and for the TV CONTROL buttons. -
Page 38: Vcr / Dvd / Ld Player And Dvd Recorder Controls
ENTER/TIMER REC Use as ENTER. Press after keying a channel number. Press to display timer recording screen. DVD recorder (PIONEER DVR-520H, 320) Press to switch side of a disc. +10 •/CLEAR Use as +10 button when entering numbers. Press to clear a numeric entry. -
Page 39: Cable Tv / Satellite Tv / Digital Tv / Tv Controls
Press to switch the TV input. CHANNEL +/– Use to select channels. VOLUME +/– Use to adjust the TV volume. Press together to mute the Pioneer TV volume. Pioneer VOLUME – & ENTER TV ( MENU Press to display menu screen. -
Page 40: Preset Code List
Controlling other equipment Preset code list DVD player Manufacturer Code Manufacturer Code Manufacturer Code PIONEER 000, 003, 008, 020, PIONEER PIONEER FUNAI FISHER 410, 412, 420, 425, AKAI 426, 427 601, 602, 607, 608, DENON 003, 010 610, 617, 618, 628... -
Page 41: Additional Information
• The cooling fan is broken. • Unplug the receiver from the wall and call a Pioneer- • The thermistor (temperature sensor) is accredited repair center. faulty. • The receiver has a serious problem. - Page 42 Additional information Symptom Cause Remedy No sound from subwoofer. • The subwoofer is disconnected or switched • Connect or switch on the subwoofer (see page 15). off. • The subwoofer's settings are incorrect. • Set the subwoofer (see page 32). •...
-
Page 43: Surround Sound Formats
Additional information Symptom Cause Remedy The receiver cannot be remote • The remote control batteries have worn out. • Replace the batteries (see page 5). controlled. • You are too far away or at a bad angle for • Operate within 23 ft., 30° of the remote sensor on the operation. -
Page 44: Specifications
Frequency Response ... .30 Hz to 15 kHz (±1dB) Published by Pioneer Corporation. Antenna Input (DIN)....75 Ω unbalanced Copyright © 2004 Pioneer Corporation. All rights reserved. - Page 45 Additional information...
- Page 46 D1-4-2-3_Fr Nous vous remercions pour cet achat d’un produit Ce produit est destiné à une utilisation domestique Pioneer. générale. Toute panne due à une utilisation autre Nous vous demandons de lire soigneusement ce qu'à des fins privées (comme une utilisation à des mode d’emploi ;...
-
Page 47: Avant Le Démarrage
• Veuillez ne rien placer au dessus du combiné excepté • Carte de garantie un Pioneer DV-463, 363, 263, 260, 353, 578A un lecteur DVD 251 ou 250. Si vous positionnez un de ces composants sur le dessus du combiné assurez-vous Insertion des piles que l’espace au-dessus de celui-ci est suffisant pour en... - Page 48 Comment rappeler les codes prédéfinis... 36 Pioneer ........16 Réinitialisation de tous les réglages de la...
-
Page 49: Guide De Démarrage Rapide
SPEAKERS FRONT SURROUND CENTER MONITOR CONTROL DIGITAL IN TV/SAT DVR/VCR TV/SAT DVR/VCR WOOFER (DVD) (TV/SAT) AUDIO COAX OPT1 OPT2 VSX-C302 LINE LEVEL R (Avant L (Avant C (Centrale) RS (Droite LS (Gauche SW (Caisson droite) gauche) Surround) Surround) de basses) -
Page 50: Connexion De Votre Appareil Tv Et De Votre Lecteur Dvd
AC IN de cet appareil et insérez l’autre extrémité coaxiale, vous pouvez utiliser un câble optique dans la prise murale. raccordé entre la prise de sortie otique de votre lecteur DVD et la prise TV/SAT(DVD) OPT1 présente sur ce VSX-C302 ANTENNA VIDEO AM LOOP FM UNBAL 75Ω... -
Page 51: Informations De Base
Informations de base Chapitre 2 Informations de base Introduction sur le Home Cinéma Dialog Enhancement (Optimisation de dialogue) (page 25) L’ utilisation d’un appareil stéréo pour écouter de la Pour mettre l’accent sur les dialogues et les matériaux musique vous est sans doute familière, mais peut-être pas vocaux dans une source de programme, utilisez la fonction celle d’un équipement de Home Cinéma, qui en mesure de Optimisation de dialoque et alignez la position verticale du... -
Page 52: Comment Raccorder Votre Équipement
Prise CONTROL IN / prise CONTROL OUT (pages 16 et 17) Utilisez-les pour relier ensemble les composants Pioneer afin de permettre à tous les composants de la chaîne d’utiliser un seul capteur de télécommande. -
Page 53: Positionnement Du Combiné
Comment raccorder votre équipement Positionnement du combiné Prise DVD(TV/SAT) COAX (page 10) Prise audionumérique coaxiale pour l’entrée DVD • Au moment de décider d’un emplacement pour votre (mais peut aussi être réaffectée à l’entrée TV/SAT). combiné, assurez-vous qu’il le positionnement se fera Prises entrée/sortie audio/vidéo sur une surface plane et stable offrant des garanties de sécurité. -
Page 54: Comment Connecter Un Lecteur Dvd Et L'appareil Tv
• Si votre téléviseur dispose d’un tuner TV numérique intégré reportez-vous aussi ci-dessous à Comment connecter un téléviseur à un tuner TV numérique intégré. VSX-C302 OPEN/CLOSE STANDBY/ON Lecteur DVD Comment connecter un téléviseur à un tuner TV numérique intégré... -
Page 55: Comment Connecter Un Récepteur Câble/Satellite Ou Tout Autre Décodeur
Ce raccordement transmet l’ audio stéréo ainsi que l’audio numérique multicanal. ANTENNA VIDEO AM LOOP FM UNBAL 75Ω AC IN SPEAKERS FRONT SURROUND CENTER MONITOR CONTROL DIGITAL IN TV/SAT DVR/VCR TV/SAT DVR/VCR (DVD) (TV/SAT) WOOFER AUDIO OPT1 OPT2 COAX VSX-C302 DIGITAL OUT VIDEO AUDIO AV OUT STB (TV) -
Page 56: Comment Raccorder D'autres Composants Vidéo
FM UNBAL 75Ω AC IN SPEAKERS FRONT SURROUND CENTER MONITOR CONTROL DIGITAL IN TV/SAT DVR/VCR TV/SAT DVR/VCR (DVD) (TV/SAT) WOOFER AUDIO COAX OPT1 OPT2 VSX-C302 OPTICAL COAXIAL VIDEO AUDIO VIDEO AUDIO DIGITAL OUT AV OUT AV IN DVR, VCR, etc. -
Page 57: Comment Raccorder L'équipement Aux Sorties Du Panneau Avant
à un lecteur DVD portable. numérique optique (DIGITAL). Vous pouvez utiliser ces connexions pour toute sorte de composants audio/vidéo mais elles sont particulièrement indiquées pour des équipements portables comme les caméscopes, jeux vidéo VSX-C302 VSX-C302 AUDIO/VIDEO MULTI-CHANNEL RECEIVER STANDBY/ON MASTER... -
Page 58: Comment Raccorder Les Enceintes
Comment raccorder votre équipement Comment raccorder les enceintes Raccordez le caisson de basses à la prise SUBWOOFER OUT. Avant de commencer l’opération de raccordement des enceintes, assurez-vous que le câble d’enceinte que vous vous apprêtez à utiliser est correctement préparé, sa gaine Comment positionner les enceintes de plastique isolante ayant été... -
Page 59: Comment Raccorder Les Antennes
(DVD) (TV/SAT) WOOFER AUDIO COAX OPT1 OPT2 VSX-C302 Antenne cadre AM Cordon d’antenne FM Assemblez le socle comme le montre la figure ci- • Connectez l’antenne câble FM à FM UNBAL 75 Ω Ω Ω Ω en dessous. procédant de la même manière que pour l’antenne fig. -
Page 60: Utilisation Du Récepteur Avec Un Écran Plasma Pioneer
CONTROL IN du récepteur à la prise CONTROL écran plasma Pioneer OUT de votre écran plasma. Si vous avez un écran plasma Pioneer, vous pouvez utiliser Avant de pouvoir utiliser les autres fonctions SR+, vous un câble SR+ (voir la Remarque ci-dessous) pour le devez procéder à... -
Page 61: Comment Utiliser D'autres Composants Pioneer Avec Le Capteur De Ce Combiné
Lorsque vous voulez contrôler l’un des composants de la temps en temps. Contacter le service après-vente chaîne c’est le capteur de ce componant vers lequel vous PIONEER le plus proche ou le revendeur pour un devez pointer la télécommande. remplacement. -
Page 62: Commandes Et Fenêtres D'affichage
Commandes et fenêtres d’affichage Chapitre 4 Commandes et fenêtres d’affichage Panneau avant VSX-C302 AUDIO/VIDEO MULTI-CHANNEL RECEIVER STANDBY/ON MASTER DIGITAL AUTO STEREO PRO LOGICII ADVANCED PHONES SOUND MODE INPUT SELECTOR VOLUME FRONT INPUT DIGITAL IN VIDEO AUDIO PHONES DOWN Prise PHONES Bouton MASTER VOLUME Lorsque des écouteurs sont raccordés, les enceintes ne... -
Page 63: Affichage
Commandes et fenêtres d’affichage Affichage DIG (numérique) / ANA (analogique) (page 28) Indique si la source d’entrée en cours d’utilisation est analogique ou numérique. Hi-FS S’allume quand le signal entrée en cours d’utilisation est numérique à 88,2/96 kHz. S’allume lorsque le mode de contrôle est réglé sur SR+ ON. L’écran plasma qui est raccordé... -
Page 64: Télécommande
Touches de commande du lecteur DVD INPUT CHANNEL VOLUME CHANNEL enregistreur Une fois initialisées, ces touches permettent de DIMMER commander un lecteur DVD enregistreur Pioneer. REC ì Appuyez sur cette touche pour commencer RECEIVER l’enregistrement. STOP REC RECEIVER (recepteur) Appuyez sur cette touche pour arrêter Appuyez sur cette touche pour positionner la l’enregistrement. -
Page 65: Portée Opérationnelle De La Télécommande
Commandes et fenêtres d’affichage Touches de son (page 24) 19 Touches numériques (page 37) Utilisez pour la saisie numérique des numéros de pistes, AUTO fréquences radio, etc. Sert à sélectionner le son AUTO (par défaut) pour la 20 Touches TV CONTROL (page 38) source en cours d’utilisation (stéréo, Dolby Digital, DTS, etc.,) et désactiver tous les autres traitements de Utilisez ces touches pour commander votre appareil TV... -
Page 66: Démarrage
Démarrage Chapitre 5 Démarrage Comment utiliser le Room Setup Remarque (Paramètres de pièce) • La touche Room Setup (réglages espace de la pièce) • Réglage par défaut: M (moyen) / MID règle automatiquement les niveaux du canal et la Avant d’utiliser votre appareil en lecture pour goûter les distance des enceintes selon l’espace de la pièce. -
Page 67: Lecture D' Une Source
SIGNAL SELECT (reportez-vous aussi page 28 à Sélectionner le type de signal d’entrée). • Pour un réglage plus détaillé du son surround, reportez-vous page 31 à Le menu Installation du Système. RECEIVER VSX-C302 AUDIO/VIDEO MULTI-CHANNEL RECEIVER STANDBY/ON MASTER INPUT SELECTOR DIGITAL... -
Page 68: Son Home Cinéma
Son Home Cinéma Chapitre 6 Son Home Cinéma Lecture des sources stéréo Grâce à ce combiné vous pouvez écouter les sources analogiques ou numériques, aussi bien en mode stéréo Les sources stéréo telles que les CD, les émissions radio qu’en mode surround. FM et TV, peuvent etre lues en stéréo ou en utilisant la totalité... -
Page 69: Comment Utiliser Les Effets Advanced Surround
Son Home Cinéma Comment utiliser les effets Advanced • OFF – Aucun Sound Mode • NATURAL – Règle l’équilibre général pour une Surround meilleure reproduction à I’aide de petites enceintes Les effets Advanced Surround peuvent être utilisés avec • MIDNIGHT – Pour un son surround crédible même à des sources multicanal ou stéréo pour enrichir la gamme faible volume des effets surround disponibles. -
Page 70: Comment Utiliser Le Tuner
Comment utiliser le tuner Chapitre 7 Comment utiliser le tuner Comment localiser une station Syntonisation directe sur la station Procédez comme ci-dessous pour syntoniser des émissions Parfois vous connaissez déjà la fréquence de la station que radio FM et AM par le biais des fonctions de syntonisation vous voulez écouter. -
Page 71: Comment Mémoriser Les Préréglages Des Stations
Comment utiliser le tuner Comment mémoriser les préréglages Utilisez les touches ST +/– pour sélectionner une station FM préréglée. des stations Appuyez sur la touche T.EDIT pour sélectionner le Si vous écoutez souvent une station radio particulière, la mode Nom de Station (ST.NAME). mémorisation de sa fréquence au niveau du combiné... -
Page 72: Comment Utiliser Les Autres Fonctions
Comment utiliser les autres fonctions Chapitre 8 Comment utiliser les autres fonctions Sélectionner le type de signal d’entrée Comment utiliser le sleep timer Les entrées DVD, TV/SAT, DVR/VCR et FRONT disposent (timer de repos) toutes des deux types de prise, analogique et numérique. Le sleep timer (timer de repos) mettra automatiquement Vous pouvez sélectionner le type de signal à... -
Page 73: Comment Réinitialiser Le Système
Comment utiliser les autres fonctions Comment réinitialiser le système Réglages par défaut du combiné Le tableau ci-dessous montre les réglages d’usine par Utilisez cette fonction pour rétablir par défaut les réglages défaut. Lorsque vous réinitialisez le combiné, l’appareil d’usine. retourne à ces paramètres par défaut (reportez-vous ci- dessus à... - Page 74 Comment utiliser les autres fonctions Type de réglage Réglage par défaut Réf. page Avant: 0 dB Niveaux de canal page 34 Central: 0 dB Surround: 0 dB Caisson de basses: 0 dB M / MID Réglage espace page 22 pièce OFF (HORS TENSION) page 33 Remarque...
-
Page 75: Le Menu Installation Du Système
Le menu Installation du Système Chapitre 9 Le menu Installation du Système Comment effectuer les réglages du Paramètre de l’enceinte centrale Il spécifie la dimension de l’enceinte centrale: combiné à partir du menu • CENTER S – Small (petit) (le diamètre du cône est de Installation du Système moins de 5 pouces) Cet appareil vous permet de d’effectuer des réglages... -
Page 76: Contrôle De La Gamme Dynamique
Le menu Installation du Système Paramètres Dual mono • Selon la source utilisée et les autres paramètres de l’appareil, dans certains cas il se peut que vous spécifient comment les pistes Dolby Digital encodées dual n’entendiez pas de son en provenance du caisson de mono devraient être lues: basses. -
Page 77: Contrôle Sr+ Pour Les Écrans Plasma Pioneer
Pioneer Procédez aux réglages suivants si vous avez raccordé un écran plasma Pioneer au récepteur avec un câble SR+. Il En cas de raccordement avec un câble SR+, un certain est à noter que le nombre de réglages possibles dépend de nombre de fonctionnalités facilitent l’utilisation du... -
Page 78: Comment Régler Les Niveaux De Chaque Canal
Le menu Installation du Système Comment régler les niveaux de chaque canal Réglez habituellement le volume de chaque canal comme vous l’estimez adéquat pour obtenir un son surround équilibré. RECEIVER MASTER VOLUME TUNE TUNE CH SELECT TEST TONE Utiliser MASTER VOLUME pour régler le volume à un niveau adéquat. -
Page 79: Comment Commander D' Autres Composants
Touches de commande du lecteur DVD enregistreur Touches spéciales permettant de commander un lecteur DVD enregistreur Pioneer. Touches de commande du récepteur Ces touches ne sont utilisées que pour commander les fonctions du récepteur. Touches de contrôle des autres composants La fonction d’une touche donnée varie selon le mode de... -
Page 80: Comment Rappeler Les Codes Prédéfinis
Comment commander d’ autres composants Touches TV CONTROL Répétez la même procédure pour attribuer des Touches spéciales pour contrôler votre téléviseur. codes prédéfinis pour autant de composants que vous le souhaitez. Comment rappeler les codes prédéfinis Remarque Les étapes suivantes indiqueront comment rappeler les codes prédéfinis pour chaque entrée et pour les touches •... -
Page 81: Commandes D'enregistreur Dvd Et De Lecteur Vcr / Dvd / Ld
Magnétoscope Appuyez sur cette touche pour faire apparaître le timer Lecteur DVD enregistreur d’enregistrement. (PIONEER DVR-520H, 320) Appuyez sur cette touche pour lire l’autre face du disque. +10 •/CLEAR Utilisez comme touche +10 pour saisir des nombres. Appuyez pour effacer une entrée numérique. -
Page 82: Commandes Tv / Tv Câblée / Tv Satellite / Tv Numérique
MENU Appuyez pour afficher l’écran de menu. TV câblée/TV Satellite/TV DISC NAVIGATOR Appuyez pour sélectionner DTV. DTV (Pioneer PDP-5040, 4340) /DTV RETURN Appuyez sur cette touche pour revenir à la page précédente du menu. Tous. Appuyez sur cette touche pour quitter le menu. -
Page 83: Liste Des Codes Prédéfinis
Comment commander d’ autres composants Liste des codes prédéfinis Lecteur de DVD Fabricant Code Fabricant Code Fabricant Code PIONEER 000, 003, 008, 020, PIONEER PANASONIC FUNAI PIONEER 207, 229 AKAI 601, 602, 607, 608, DENON 003, 010 610, 617, 618, 628... -
Page 84: Informations Complémentaires
être corrigé en appliquant la liste ci- Si vous pensez que ce combiné a des problèmes de dessous, confiez la réparation au centre de service Pioneer fonctionnement, vérifiez les points ci-dessous. Parfois le le plus proche ou à votre revendeur. - Page 85 Informations complémentaires Symptôme Cause Mesure à prendre Aucun son ne sort du caisson • Le caisson est déconnecté ou désactivé. • Raccordez ou mettez sous tension le caisson de basses de basses. (voir page 13). • Les réglages du caisson sont incorrects. •...
-
Page 86: Formats De Son Surround
Informations complémentaires Symptôme Cause Mesure à prendre Après avoir effectué un • L’écran est réglé sur la position hors tension. • Appuyez plusieurs fois sur la touche DIMMER de la réglage la fenêtre d’affichage télécommande pour sélectionner une luminosité. différente. disparaît. -
Page 87: Spécifications
Séparation stéréo ......40 dB (1 kHz) Réponse en fréquence ... 30 Hz tà 15 kHz (±1dB) Publication de Pioneer Corporation. © 2004 Pioneer Corporation. - Page 88 Should this product require service in the U.S.A. and you wish to locate the nearest Pioneer Authorized Independent Service Company, or if you wish to purchase replacement parts, operating instructions, service manuals, or accessories, please call the number shown below.