Publicité
Table des Matières
- 1 Battery Installation F Installation des Piles
- 2 Connecting Smart Cycle to Your TV F pour Brancher le Vélo Dans
- 3 Getting Started on the Learning Adventure F Commence Ton Aventure D'apprentissage
- 4 Troubleshotting Guide
- 5 Guide de Dépannage
- 6 Pour Brancher Dans un Téléviseur ou un Magnetoscope et Téléviseur
- Télécharger ce manuel
Publicité
Table des Matières

Manuels Connexes pour Fisher-Price Smart Cycle


Sommaire des Matières pour Fisher-Price Smart Cycle
- Page 1 PHYSICAL LEARNING ARCADE SYSTEM SYSTÈME D'EXERCICE ET D'APPRENTISSAGE VIDÉO e ENGLISH VERSION ONLY f LOGICIEL EN ANGLAIS SEULEMENT...
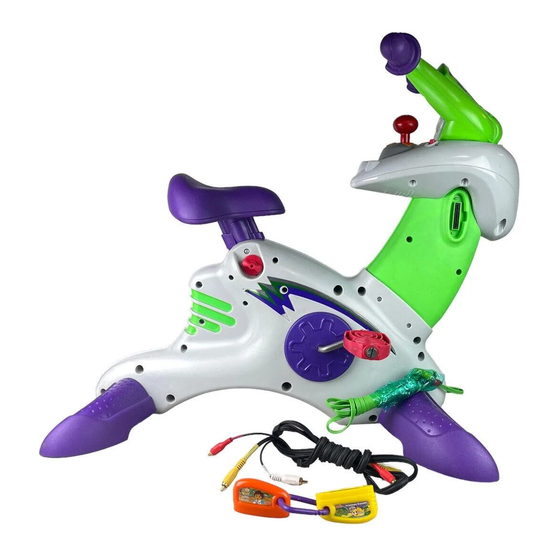
- Page 2 Get up. Get smart. Get going! Apprends tout en Bougeant ! e It’s a stationary bike, a learning centre, and an arcade game system – all rolled into one! Smart Cycle ™ plugs right into your TV, ready to take kids on learning adventures like no other.
- Page 3 Parts Pieces e H andlebar f Guidon e Front Base (Wide) e Frame with Console f Pied avant (large) and Plug-and-Play Cord f Cadre avec console et câble audio-vidéo e R ear Base (Narrow) e 2 Pedals (Left and Right) f Pied arrière (étroit) f 2 pédales (gauche et droite) e L earning Adventure Game Cartridge with Key Ring e Assembly Tool f C artouche de jeux Learning Adventure avec anneau f Outil d'assemblage e Adult assembly is required. Tools needed for assembly: Phillips screwdriver (not included) and assembly tool (included).
- Page 4 Assembly Assemblage e Seat f Selle e CAUTION f MISE EN GARDE e S eat Peg e This product contains f T ige de small parts in its unassem- la selle bled state. Adult assembly is required. f Le produit non assemblé comprend de petits éléments détachables susceptibles d'être avalés.
- Page 5 e Front Base (Wide) e R ear Base (Narrow) f Pied avant (large) f Pied arrière (étroit) e • Fit the rear base (narrow) into the groove in the rear of the frame. Hint: The rear base is designed to fit easily e • Turn the cycle upside down. into the groove in the frame. If it does not • Identify the front base (wide) and the fit, turn the base around so that it curves rear base (narrow). away from the seat.
- Page 6 e Console f Console e • Align the screw holes in the frame and e • While tucking the wires into the frame, console. Insert four #8 x 2,5 cm (1") fit the console into the frame. screws through the frame and into f • Tout en insérant les câbles dans le the console.
- Page 7 e Tab f Languette e Post f Tube e Handlebar f Guidon e Connector f Connecteur e Socket e • Place the handlebar, at an angle, onto f Prise the top of the post. • Push to insert the tab on the back of the handlebar into the slot in the console.
- Page 8 e • Next, push the handlebar forward and down to "snap" it in place. Make sure you hear a "snap". This may require a lot of force. e • Insert two #8 x 2,5 cm (1") screws into f • Ensuite, pousser le guidon vers l'avant the handlebar and tighten. tout en exerçant une pression vers le Hint: If the screws cannot be tightened, bas pour bien l'enclencher.
- Page 9 e Right Pedal Tighten Clockwise f Serrer la pédale droite dans le sens horaire e Right Pedal Axle (R) f Axe de la pédale droite (R) e Right Pedal (R) f Pédale droite e • Check to be sure the handlebar is e Assembly Tool secured on the console by pulling it up. f Outil d'assemblage If you can remove it, you have not assembled it properly. Please refer back to Assembly steps 6-9. f •...
- Page 10 f • Repérer la pédale droite identifiée par un R sur le bout de la pédale. • Trouver maintenant l'axe de la pédale identifié par un R. • Insérer l'extrémité filetée de la pédale droite dans le trou pratiqué dans l'axe e Left Pedal de la pédale droite.
-
Page 11: Battery Installation F Installation Des Piles
Battery Installation Installation des Piles f • Repérer le compartiment des piles situé sous le vélo. • Desserrer les vis du compartiment des piles et enlever le couvercle. • Insérer quatre piles alcalines D (LR20). Remarque : Il est recommandé d'utiliser des piles alcalines car elles durent plus longtemps. • Replacer le couvercle du compartiment des piles et serrer les vis. - Page 12 Battery Safety Information Mises en Garde au Sujet des Piles f Lors de circonstances exceptionnelles, des substances liquides peuvent s'écouler des piles et provoquer des brûlures 1.5V x 4 chimiques ou endommager le produit. “D” (LR20) Pour éviter que les piles ne coulent : •...
-
Page 13: Connecting Smart Cycle To Your Tv F Pour Brancher Le Vélo Dans
Pour Brancher le Vélo dans le Téléviseur e Important! Your TV or VCR must have audio and video input jacks. • Place the Smart Cycle™ in front of your TV. • Locate the plug-and-play cord on the front of the cycle. - Page 14 f • Insérer la cartouche de jeux dans la prise située sur le côté du vélo. Pousser pour s'assurer qu'il est bien fixé. Remarque : On peut facilement ajouter d'autres cartouches (vendues séparément) à l'anneau. • Allumer le téléviseur ou le magnétoscope. • Glisser l’interrupteur du vélo sur marche .
-
Page 15: Getting Started On The Learning Adventure F Commence Ton Aventure D'apprentissage
Getting Started on the learning adventure Commence ton Aventure D'apprentissage e Handlebar Use for steering on the road or in games. f Guidon Te permet d'effectuer des manoeuvres sur la route ou dans les jeux. e Snap Shot Button Press to make a selection e Horn Button or take "pictures"... - Page 16 e • Use the joystick to choose the type of e Find the objects! vehicle you’d like to “drive.” • Pedal the cycle to move down the road. • Press either handlebar button to make The faster you pedal the faster you go! your selection.
- Page 17 e Taking Snap Shots • Press the right handlebar button to take snap shots in any activity. f Prendre des photos e Find the Letters! • Appuie sur le bouton droit du guidon • Listen carefully to the letter you need to pour prendre des photos pendant find.
- Page 18 e • Select the correct letter and you complete a word! “G – Goat” • When you’re finished with this activity, press the exit button to return to e Frog Lives e Score e Word the road. Pedal to the next activity! f Grenouilles f Mot f Pointage f •...
- Page 19 f Attrape les lettres pour épeler les mots! • Regarde le mot qui est inscrit dans le coin inférieur gauche de l'écran. Il s'agit du mot que tu dois épeler. Tu as droit à 5 grenouilles pour épeler le mot correctement à chaque niveau de jeu. •...
- Page 20 e 1 Player e 2 Player • Pedal down the road as fast as you can • Each player takes a turn. Pedal down to the finish line. Try to speed past the the road as fast as you can to the finish other cars.
- Page 21 f Associe les formes pour faire éclater les bulles ! • Regarde la forme qui se trouve dans le bec. Avec la manette, pointe le bec en direction de la forme correspondante. • Appuie sur un des boutons du guidon pour lancer la forme et faire «...
- Page 22 e • Hear the number identified and see it counted out. • When you’re finished with this activity, e Lots of counting fun! press the exit button to return to the road. Pedal to the next activity! • Use the joystick to move the clouds over a number.
- Page 23 e Timer f Compteur e • When time runs out, you're on to the e Timer e Score next level. Numbers appear and disap- f Compteur f Pointage pear faster now and there are obstacles to avoid too. Don't lose points! e Use the tractor to run over numbers in •...
- Page 24 e • Watch the ant parade. The ants march by carrying letters, numbers or shapes. • When you’re finished with this activity, e • To visit here, you need to visit all of press the exit button to return to the activities around the course and the road.
- Page 25 e E rase e Stamp Tool f E ffacer f Applicateur de vignette e • Next, use the joystick and handlebar See previous See next buttons to select the stamp tool snap shot snap shot to decorate your picture. Voir la photo Voir la photo précédente suivante • Choose a stamp with the joystick and handlebar buttons and place it on the e •...
- Page 26 Bonus Activity The Big Race Letter Creek Shape Lake Alphabet Barn Math Mountain Customize Your Vehicle Number Fields Learning Adventure e • You can travel down the road and head onto an off-ramp to access activities or simply press the map button to visit any of the activities around the course. f •...
-
Page 27: Troubleshotting Guide
Troubleshotting Guide Problem Cause Solution No image on the TV TV or VCR is not set Press the channel down to proper input button on the VCR or TV and check for an INPUT channel below channel 2. Use the menu system on your TV or VCR to find INPUT or SOURCE. -
Page 28: Guide De Dépannage
Guide de Dépannage ProblemE Cause Solution Il n'y a pas d'image sur le Le téléviseur ou le magnéto- Appuyer sur le bouton de téléviseur scope n'est pas réglé sur le sélection du canal antérieur bon mode (input) situé sur le magnétoscope ou le téléviseur, et chercher un canal INPUT sous le canal 2. -
Page 29: Pour Brancher Dans Un Téléviseur Ou Un Magnetoscope Et Téléviseur
Connecting to a TV or VCR and TV Pour Brancher dans un Téléviseur ou un Magnetoscope et Téléviseur INPUT AUDIO IN White LEFT RIGHT VIDEO IN Yellow e Note: Input jacks may be on the back of your TV or VCR. INPUT AUDIO IN Blanc... - Page 30 Consumer Information Renseignements pour les Consommateurs e Safety Tips • Always sit on the seat. • Always wear shoes. • Only one (1) rider at a time. Notes • Please keep this owner's manual for future reference, as it contains important information. •...
- Page 31 Questions? 1-800-432-5437. Mattel Canada Inc., 6155 Freemont Blvd., Mississauga, Ontario L5R 3W2. Fisher-Price, Inc., a subsidiary of Mattel, Inc., East Aurora, New York 14052, U.S.A. ©2007 Mattel, Inc. All Rights Reserved. ® and ™ designate U.S. trademarks of Mattel, Inc. Fisher-Price, Inc., filiale de Mattel, Inc., East Aurora, New York 14052, É. -U.
- Page 32 Stretch your mind with other software titles for your Smart Cycle ™ f Apprends encore plus de choses avec d’autres logiciels Smart Cycle ! e Each sold separately and subject to availability. f Tous vendus séparément. Certains produits peuvent ne pas être commercialisés.