
Manuels Connexes pour ETNA A2127


Sommaire des Matières pour ETNA A2127
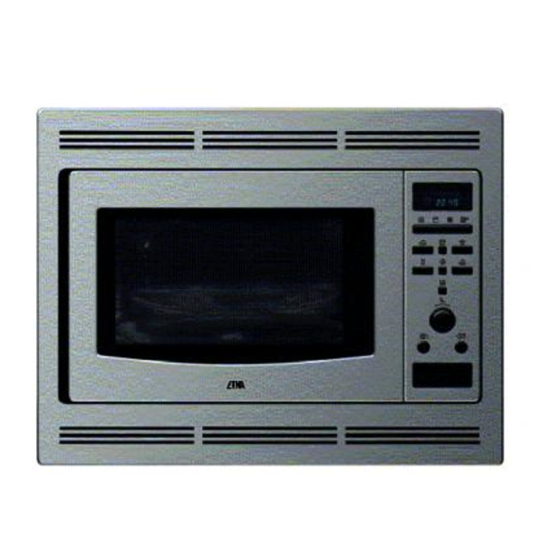
- Page 1 A2127 A2126 GEBRUIKSAANWIJZING INSTRUCTIONS FOR USE MODE D’EMPLOI GEBRAUCHSANWEISUNG P/No: 3828W5A3846...
-
Page 2: Voorzorgsmaatregelen
Voorzorgsmaatregelen Voorzorgsmaatregelen om overmatig energieverbruik te voorkomen. Als gevolg van ingebouwde veiligheidsvoorzieningen kunt u de oven niet Wanneer u vloeistoffen zoals soepen, sauzen en drankjes in de magnetron gebruiken met de ovendeur in geopende stand. Deze opwarmt, kan er een vertraagde spatreactie optreden zonder zichtbare veiligheidsvoorzieningen schakelen automatisch elke kookactiviteit uit op het luchtbellen vooraf. -
Page 3: Table Des Matières
Inhoud Hoe een magnetron werkt. Voorzorgsmaatregelen Inhoud Microgolven van een magnetron zijn te vergelijken met radio- en televisiegolven en Uitpakken en installeren 4 ~ 5 gewoon daglicht. Gewoonlijk bewegen microgolven zich buitenwaarts wanneer ze Klok instellen door de atmosfeer reizen en ze verdwijnen zonder effect. Magnetronovens zijn Kinderslot echter dusdanig ontworpen dat zij gebruik maken van microgolven als energie. -
Page 4: Uitpakken En Installeren 4
Uitpakken en Door het juist opvolgen van de basisstappen, zoals uiteengezet op deze twee bladzijden, kunt u snel controleren of de oven correct functioneert. Let goed op de richtlijnen over waar u de oven moet installeren. Let er bij het installeren uitpakken op, dat u alle accessoires en verpakkingsmateriaal verwijdert. - Page 5 Open de ovendeur door aan de DEURHANDEL te trekken. Steek de stekker in een standaard Zet de DRAAIENDE RING in de oven en plaats er de GLAZEN stopcontact. Controleer of de oven het enige BAKPLAAT bovenop. elektrische huishoudelijke apparaat is dat op deze wandcontactdoos is aangesloten.
-
Page 6: Klok Instellen
Klok U kunt de klok volgens het 12-delig of het 24-delig stelsel instellen. instellen In het volgende voorbeeld toon ik u hoe u de klok kunt instellen op 14:35 in de 24-uurstand. Zorg ervoor alle verpakkingsmateriaal van uw oven te hebben verwijderd. Controleer of u uw oven correct geïnstalleerd hebt, zoals eerder in deze handleiding beschreven. -
Page 7: Kinderslot
Kinderslot Druk op de toets STOP/CLEAR. Uw oven is met een Houd de toets STOP/CLEAR ingedrukt tot "L" op het display verschijnt en er een PIEP-signaal weerklinkt. veiligheidsvoorziening uitgerust die voorkomt dat uw oven ongewild in Het KINDERSLOT is nu ingeschakeld. werking wordt gesteld. -
Page 8: Bereidingen Met De Microgolffunctie
Bereidingen met In het volgende voorbeeld toon ik u hoe u voedsel kunt bereiden met 720W (80%) van het de microgolffunctie vermogen gedurende 5 minuten en 30 seconden. Controleer of u uw oven correct geïnstalleerd hebt, zoals eerder in deze handleiding beschreven. - Page 9 Vermogensniveaus Uw magnetronoven is met 5 vermogensniveaus uitgerust, die u maximale flexibiliteit en controle over het bereidingsproces geven. van de magnetronfunctie Onderstaande tabel toont voorbeelden van levensmiddelen en het aanbevolen vermogensniveau om hen in deze magnetronoven te bereiden. VERMOGENS VERMOGENSNI UITGANGSVER GEBRUIK NIVEAU...
-
Page 10: Bereidingen In Twee Stadia
Bereidingen In het volgende voorbeeld toon ik u hoe u sommige eetwaren in twee stadia kunt klaarmaken. In het eerste in twee stadia stadium wordt uw voedsel gedurende 11 minuten bereid in de hoge vermogensstand; in het tweede stadium wordt het nog 35 minuten bereid met een vermogen van 360 W. Druk op de toets STOP/CLEAR. -
Page 11: Snelstart
Snelstart In het volgende voorbeeld toon ik u hoe u 2 minuten bereidingstijd met hoog vermogen instelt. Druk op de toets STOP/CLEAR. Druk viermaal op de toets QUICK START om 2 minuten bereidingstijd Dankzij de SNELSTARTFUNCTIE kunt u met een HOOG vermogen in te stellen. via een druk op de toets QUICK START De oven start reeds voordat u de toets viermaal heeft ingedrukt. -
Page 12: Grillen
Grillen In het volgende voorbeeld toon ik u hoe u de grill kunt gebruiken om voedsel gedurende 12 minuten en 30 seconden te grillen. Druk op de toets STOP/CLEAR. Druk op de toets GRILL. Dit model is met een QUARTZGRILL uitgerust. -
Page 13: Convectiebereidingen 13
Convectiebereidingen In het volgende voorbeeld toon ik u hoe u eerst de oven kunt voorverwarmen en dan voedsel kunt bereiden op een temperatuur van 230 °C gedurende 50 minuten. 1. Voorverwarmen. Druk op de toets STOP/CLEAR. Druk op de toets CONVECTION. De convectieoven heeft een temperatuurbereik van 40 °C en 100 °C ~ 250 °C (180 °C wordt automatisch... - Page 14 Convectiebereidingen 2. Bereiden. Druk op de toets STOP/CLEAR. Druk op de toets CONVECTION. Als u geen temperatuur instelt, kiest de oven automatisch 180 °C. De bereidingstemperatuur kan worden gewijzigd door aan de DRAAIKNOP te Draai aan de DIAL tot het display "230°C" weergeeft. draaien.
-
Page 15: Combinatiebereidingen 15
Combinatiebereidingen In het volgende voorbeeld toon ik u hoe u uw oven kunt programmeren met het magnetronvermogen op 20 % gedurende 25 minuten. 1. GRILLCOMBINATIE. Druk op de toets STOP/CLEAR. Druk op de toets COMBI. Draai aan de DIAL om "Co-1" te kiezen. Uw oven is in staat om gecombineerde bereidingen te maken, zodat u voedsel Druk op de toets START. - Page 16 Combinatiebereidingen In het volgende voorbeeld toon ik u hoe u uw oven kunt programmeren in de magnetronmodus op (540W) 60% en met een convectietemperatuur van 200 °C voor een bereidingstijd van 25 minuten. 2. CONVECTIECOMBINATIE. Druk op de toets STOP/CLEAR. Druk op de toets COMBI.
-
Page 17: Geheugen
Geheugen Met deze functie kunt u een enkelvoudig programma instellen dat u vaak gebruikt. Eens u het kookprogramma hebt ingesteld, kunt u het telkens weer gebruiken door de Geheugentoets in te drukken. Hierna toon ik u hoe u een kookprogramma van 10 minuten 30 seconden op vermogen 720 W (80%) moet instellen. -
Page 18: Temperatuur Houden
Temperatuur Hierna toon ik u hoe u een temperatuur van 90°C gedurende 30 minuten kunt behouden. Houden Druk op STOP/CLEAR. Druk op KEEP WARMING. De oven heeft een temperatuurbereik van 30°C – 90°C wanneer ‘temperatuur Draai de DIAL tot "90°C" wordt weergegeven in de behouden’... - Page 19 De temperatuur en de dichtheid van voedsel varieert. Ik beveel u daarom aan het voedsel hierop te controleren alvorens Automatisch met de bereiding te beginnen. Let in het bijzonder op bij grote stukken vlees en kip. Sommige voedingsmiddelen moeten niet volledig ontdooid zijn vooraleer met de bereiding te beginnen. Vis, bijvoorbeeld, is zo snel gaar dat het soms beter is om hem reeds te beginnen bereiden wanneer hij nog lichtjes bevroren is.
- Page 20 RICHTLIJNEN VOOR HET ONTDOOIEN MET AUTOMATISCHE GEWICHTSINSTELLING * Plaats de te ontdooien levensmiddelen in een magnetronbestendige recipiënt en plaats ze onafgedekt op de glazen draaitafel. * Scherm indien nodig kleine stukken vlees of gevogelte af met vlakke gedeelten aluminiumfolie. Zo voorkomt u dat dunne gedeelten tijdens het ontdooien warm worden.
-
Page 21: Automatische Bereidingen 21
Automatische In het volgende voorbeeld toon ik u hoe u 0,6kg aardappelen in de schil kunt klaarmaken. bereidingen Druk op de toets STOP/CLEAR. Met de functie voor AUTOMATISCHE Druk op AUTO COOK. BEREIDINGEN kunt u de meeste van uw favoriete voedingsmiddelen gemakkelijk bereiden door het voedseltype en het gewicht ervan in te stellen. - Page 22 Voedseltem Functie Categorie Gewichtslimiet Kookgerei Aanwijzingen peratuur Automatische Aardappelen in 0,1 ~ 1,0 kg Metalen Kamertemp Kies aardappelen uit van middelmatige grootte 200 tot 220 gr. bereidingen schaal eratuur Was en droog de aardappelen. Prik met een vork verschillende malen in de de schil aardappelen.
- Page 23 Voedseltem Functie Categorie Gewichtslimiet Kookgerei Aanwijzingen peratuur Automatische 0,1 ~ 0,6 kg Magnetronb Gekoeld Hele vis, steaks Verse vis bereidingen estendige - Olierijke vis: zalm, makreel vlaaischotel - Witte vis: kabeljauw, schelvis Leg de vis in een enkele laag in een grote magnetronbestendige vlaaischotel. Dek de schotel goed af met plastic folie en prik hier enkele gaatjes in op verschillende plaatsen.
- Page 24 Voedseltem Functie Categorie Gewichtslimiet Kookgerei Aanwijzingen peratuur Automatische 0,5 ~ 1,2 kg Laag rooster + Kamertem Gebruik deze toets voor thuis bereide aardappelgratin. Aardappel Plaats het gerecht op het lage rooster op de metalen schaal. bereidingen gratin metalen schaal peratuur Laat het na het bereiden nog 1 tot 2 minuten staan.
-
Page 25: Automatisch Heropwarmen 25
Automatisch In het volgende voorbeeld toon ik u hoe u een gekoelde maaltijd van 0,6 kg kunt bereiden. heropwarmen Druk op de toets STOP/CLEAR . Druk op de toets AUTO REHEAT. De AUTOMATISCHE HEROPWARMFUNCTIE is een handige en eenvoudige manier om voedsel te heropwarmen. - Page 26 Voedseltem Functie Categorie Gewichtslimiet Kookgerei Aanwijzingen peratuur Automatisch 0,2 ~ 0,4 kg Laag rooster en Gekoeld Deze functie is bestemd voor het bereiden van overgebleven gekoelde pizza. Gekoelde heropwarmen pizza metalen schaal Plaats de gekoelde pizza op het lage rooster op de metalen schaal. Neem de pizza na de bereidingstijd onmiddellijk uit de oven.
- Page 27 Automatisch In het volgende voorbeeld toon ik u hoe u 1,4 kg rosbief kunt klaarmaken. roosteren Druk op de toets STOP/CLEAR. Druk op de toets AUTO ROAST. Met de functie voor AUTOMATISCHE ROOSTEREN kunt u de meeste van uw favoriete voedingsmiddelen gemakkelijk bereiden door het voedseltype en het gewicht ervan in te stellen.
- Page 28 RICHTLIJNEN VOOR HET AUTOMATISCH ROOSTEREN Voedseltem Functie Categorie Gewichtslimiet Kookgerei Aanwijzingen peratuur Automatisch Rosbief 0,5 ~ 1,5 kg Laag rooster Gekoeld Strijk de rosbief in met gesmolten margarine of boter. en metalen Plaats de rosbief op het lage rooster op de metalen schaal. schaal Bij het piepsignaal draait u de rosbief om.
-
Page 29: Richtlijnen Voor Verwarmen Of Opwarmen
Om voedsel met succes te verwarmen of op te warmen in de magnetron, is het belangrijk dat u bepaalde richtlijnen Richtlijnen voor volgt. Meet de hoeveelheid voedsel af om te bepalen hoeveel tijd er nodig is om het op te warmen. Plaats het voedsel in cirkelvorm voor optimale resultaten. -
Page 30: Richtlijnen Voor Verse Groenten
Richtlijnen voor verse groenten Kooktijd Kooktijd Groente Hoeveelheid Richtlijnen Standtijd Groente Hoeveelheid Richtlijnen Standtijd (HIGH) (HIGH) Schillen. 2 eetlepels water toevoegen in Artisjokken 2 middelgrote 1 /2 tot 7 Schoonmaken. 2 eetlepels water en 2 2tot3 minuten Maïs, vers 2 kolven 4 tot 8 2tot3 minuten (230 gr per stuk) -
Page 31: Richtlijnen Voor Grillen
Richtlijnen voor grillen Richtlijnen voor het grillen van vlees Richtlijnen voor het grillen van vis en schaaldieren Plaats vis en schaaldieren op het rek. Een hele vis moet vóór het grillen aan beide zijden • Snijd het overtollige vet van het vlees. Let bij het afsnijden van het vet op dat u niet in het diagonaal worden ingesneden. -
Page 32: Veiligheidsvoorschriften
WAARSCHUWING Veiligheidsvoorschriften Zorg ervoor dat u de kooktijden correct instelt. Te lang koken kan immers BRAND en bijgevolg SCHADE aan de OVEN veroorzaken. 1. Aan de ovendeur, het bedieningspaneel, de veiligheidsvergrendelingen of enig ander 12. Prik door de schil van aardappelen, appels of ander dergelijk fruit of groenten alvorens deel van de oven mag u niets veranderen en geen afstellingen of herstellingen uitvoeren. - Page 33 Magnetronbestendig kookgerei Gebruik nooit metalen of met metaal afgewerkt kookgerei in uw Papier magnetronoven Papieren borden en houders zijn handig en kunnen veilig in uw magnetronoven Microgolven dringen immers niet door metaal. Metalen voorwerpen in de oven worden gebruikt, op voorwaarde dat de kooktijd kort is en dat het te koken voedsel zullen de microgolven weerkaatsen, waardoor een vonkoverslag ontstaat, een vet- en vochtarm is.
-
Page 34: Eigenschappen Van Voedsel En Koken In De Magnetron 34
Eigenschappen van voedsel en koken in de magnetron Houd het voedsel in het oog Vochtgehalte van voedsel De recepten in het boek zijn met veel zorg opgesteld. Het welslagen ervan hangt echter af Vocht heeft de neiging te verdampen onder invloed van de warmte van de microgolven. Daarom moet relatief droog voedsel, zoals gebraad en sommige groenten, vóór het koken van de mate waarin u het voedsel tijdens het koken in het oog houdt. - Page 35 Eigenschappen van voedsel en koken in de magnetron Roeren Uw oven reinigen Roeren is één van de belangrijkste technieken tijdens het koken in de magnetron. Bij gewoon koken, roert u om het voedsel te mengen. Bij het koken in de magnetron dient het roeren echter om de warmte te verspreiden en te herverdelen.
-
Page 36: Vragen En Antwoorden
Vragen en antwoorden V Wat is er mis wanneer de ovenlamp niet gaat branden? V Kan men popcorn maken in een magnetronoven? A Als de ovenlamp niet brandt, kan dit verschillende oorzaken hebben. A Ja, op één van de twee hierna beschreven manieren De lamp is doorgebrand 1 Door gebruik te maken van kookgerei dat speciaal bedoeld is voor het De deur is niet gesloten... -
Page 37: Technische Gegevens
Informatie over elektrische aansluiting Technische gegevens Waarschuwing Technische gegevens Dit apparaat moet geaard worden A2127/A2126 De draden in de toevoerkabel hebben de kleur overeenkomstig de volgende codes: Voltage 230 V AC / 50Hz BLAUW - min Vermogen 900 W (IEC60705 standard) BRUIN –... - Page 38 Precautions Precautions to avoid possible exposure to excessive microwave energy. You cannot operate your oven with the door open due to the safety interlocks When heating liquids, e.g. soups, sauces and beverages in your microwave built into the door mechanism. These safety interlocks automatically switch off oven, delayed eruptive boiling can occur without evidence of bubbling.
-
Page 39: How The Microwave Oven Works
Contents How the Microwave Oven Works Precautions Contents Unpacking & Installing Microwaves are a form of energy similar to radio and television waves and 40 ~ 41 ordinary daylight. Normally, microwaves spread outwards as they travel Setting the Clock through the atmosphere and disappear without effect. Microwave ovens, Child Lock however, have a magnetron which is designed to make use of the energy in Micro Power Cooking... -
Page 40: Unpacking & Installing 40
Unpacking & By following the basic steps on these two pages you will be able to quickly check that your oven is operating correctly. Please pay particular attention to the guidance on where to install your oven. When unpacking your Installing oven make sure you remove all accessories and packing. - Page 41 Open your oven door by pressing the DOOR OPEN Plug your oven into a standard household BUTTON. Place the ROTATING RING inside the oven and socket. Make sure your oven is the only place the GLASS TRAY on top. appliance connected to the socket. If your oven does not operate properly, unplug it from the electrical socket and then plug it back in.
-
Page 42: Setting The Clock
Setting the You can set either12 hour clock or 24 hour clock. Clock In the following example I will show you how to set the time for 14:35 when using the 24 clock. Make sure that you have removed all packaging from your oven. Make sure that you have correctly installed your oven as described earlier in this book. -
Page 43: Child Lock
Child Lock Press STOP/CLEAR. Your oven has a safety feature that Press and hold STOP/CLEAR until “L” appears on the display and BEEP sounds. prevents accidental running of the oven. Once the child lock is set, you will be The CHILD LOCK is now set. unable to use any functions and no cooking can take place. -
Page 44: Micro Power Cooking
Micro Power In the following example I will show you how to cook some food on 720W(80%) power for 5 minutes and 30 Cooking seconds. Make sure that you have correctly installed your oven as described earlier in this book. Press STOP/CLEAR. -
Page 45: Micro Power Level
Micro Power Your microwave oven is equipped with 5 power levels to give you maximum flexibility and control over cooking. Level The table below shows the examples of food and their recommended cooking power levels for use with this microwave oven. POWER LEVEL POWER LEVEL (%) POWER OUTPUT... -
Page 46: Two Stage Cooking
Two stage In the following example I will show you how to cook some food in two stages. The first stage will cook your food Cooking for 11 minutes on High the second will cook for 35 minutes on 360W. Press STOP/CLEAR. -
Page 47: Quick Start
Quick In the following example I will show you how to set 2 minutes of cooking on high power. Start Press STOP/CLEAR. Press QUICK START four times to select 2 minutes on HIGH power. The QUICK START feature allows you to Your oven will start before you have finished the fourth press. -
Page 48: Grill Cooking
Grill In the following example I will show you how to use the grill to cook some food for 12 minutes and 30 seconds. Cooking Press STOP/CLEAR. This model is fitted with a QUARTZ Press GRILL. GRILL, so preheating is not needed. This feature will allow you to brown and crisp food quickly. - Page 49 Convection In the following example I will show you how to preheat the oven first, then cook some food at a temperature of Cooking 230 °C for 50 minutes. 1. To preheat. Press STOP/CLEAR. Press CONVECTION. The convection oven has a temperature range of 40 °C and 100 °C~250 °C (180 °C is automatically available when convection mode is selected).
-
Page 50: Convection Cooking 49
Convection Cooking 2. To cook. Press STOP/CLEAR. Press CONVECTION. If you do not set a temperature your oven will automatically select 180 °C, the cooking temperature can be changed by turning DIAL. Turn DIAL until display shows “230˚C”. The convection rack(low rack) must be Press START for temperature confirmation. - Page 51 Combination In the following example I will show you how to programme your oven with micro power 180W(20%) and grill for a cooking time of 25 minutes. Cooking 1. GRILL COMBINATION. Press STOP/CLEAR. Press COMBI. Turn DIAL until display shows “Co-1”. Your oven has a combination cooking feature which allows you to cook food Press START for category confirmation.
-
Page 52: Combination Cooking 51
Combination In the following example I will show you how to programme your oven with micro power 540W(60%) and at a convection temperature 200°C for a cooking time of 25 minutes. Cooking 2. CONVECTION COMBINATION. Press STOP/CLEAR. Press COMBI. Turn DIAL until display shows “Co-2”. Press START for category confirmation. -
Page 53: Memory
This feature allows you to set and execute a frequently used single stage programme. Once the cooking Memory programme is set, you can use it by pressing the Memory cook key. In the following example I will show you how to set the cooking programme for 10 minutes 30 seconds at power level 720W(80%). 1. -
Page 54: Keep Warming
Keep In the following example I will show you how to keep warming at the temperature of 90°C for 30 minutes. Warming Press STOP/CLEAR. Press KEEP WARMING. The oven has a temperature range of 30 °C~90 °C when keep warming is Turn DIAL until display shows “90°C”. - Page 55 The temperature and density of food varies, I would recommend that the food is checked before cooking Auto commences. Pay particular attention to large joints of meat and chicken, some foods should not be completely thawed before cooking. For example fish cooks so quickly that it is sometimes better to begin cooking while still slightly frozen.
-
Page 56: Weight Limit
AUTO WEIGHT DEFROST GUIDE * Food to be defrosted should be in a suitable microwave proof container and place uncovered on the glass turntable. * If necessary, shield small areas of meat or poultry with flat pieces of aluminum foil. This will prevent thin areas becoming warm during defrosting. Ensure the foil does not touch the oven walls. -
Page 57: Auto Cook 57
Auto In the following example I will show you how to cook 0.6kg of jacket potato . Cook Press STOP/CLEAR. AUTO COOK allows you to cook most of Press AUTO COOK. your favorite food easily by selecting the food type and entering the weight of the food. - Page 58 Function Category Weight Limit Utensil Food Temp. Instructions Auto Cook Jacket 0.1 ~ 1.0 kg Metal tray Room Choose medium sized potatoes 200 -220g. Wash and dry potatoes. Pierce the potatoes several times with fork. Place the Potato potatoes on the metal tray. Adjust weight and press start. After cooking, r emove the potatoes from the oven.
- Page 59 Function Category Weight Limit Utensil Food Temp. Instructions Auto Cook Fresh fish 0.1 - 0.6 kg Microwave- Refrigerated Whole fish, steaks safe flat dish - Oily fish : salmon, mackerel - White fish : cod, haddock Arrange in a single layer in a large microwave-safe flat dish. Cover dish tightly with plastic wrap and pierce in several places.
- Page 60 Function Category Weight Limit Utensil Food Temp. Instructions Auto Cook Gratin 0.5 - 1.2 kg Gratin dish, Room Use this key to cook home made Gratins. Place food on the low rack on the metal tray. After cooking, remove from the oven and stand for 1~2 minutes. Low rack on Metal tray * Potato Gratin *...
- Page 61 Auto In the following example I will show you how to cook 0.6 kg of chilled meal. Reheat Press STOP/CLEAR . AUTO REHEAT cooking make food Press AUTO REHEAT. reheating convient and easy to use. The oven has been pre-programmed to automatically reheat food Your oven has four AUTO REHEAT settings: Chilled Pizza, Soup/Sauce,...
- Page 62 Function Category Weight Limit Utensil Food Temp. Instructions Auto 0.2 - 0.4 kg Low rack on Refrigerated This function is for reheating leftover chilled pizza. Place chilled pizza on the Chilled low rack on the metal tray. Reheat Pizza Metal tray After cooking, take food out immediately.
-
Page 63: Auto Roast 63
Auto In the following example I will show you how to cook 1.4kg of Roast Beef. Roast Press STOP/CLEAR. Press AUTO ROAST. AUTO ROAST cook allows you to cook most of your favorite food easily by selecting the food type and entering the weight of the food. - Page 64 AUTO ROAST GUIDE Function Category Weight Limit Utensil Food Temp. Instructions Auto Roast Roast Beef 0.5 ~ 1.5 kg Low rack on Refrigerated Brush the beef with melted margarine or butter. Place on the low rack Metal tray on the metal tray. When beeps, turn food over. And then press start to continue cooking.
-
Page 65: Heating Or Reheating Guide
Heating or Reheating To heat or reheat successfully in the microwave, it is important to follow several guidelines. Measure the amount of food in order to determine the time needed to reheat. Arrange the food in a circular pattern for best results. Room temperature food will heat faster than refrigerated food. -
Page 66: Fresh Vegetable Guide
Fresh Vegetable Guide Cook time Standing Cook time Standing Vegetable Amount Instructions Vegetable Amount Instructions (at HIGH) Time (at HIGH) Time Artichokes 2 medium 1 /2 Trim. Add 2 tsp water and 2 tsp juice. 2~3 minutes Corn, Fresh 2 ears 4 ~ 8 Husk. -
Page 67: Grill Cooking Guide
Grill Cooking Guide Directions for grilling meat on grill Directions for grilling fish and seafood • Trim excess fat from meat. Cut fat, making sure you do not cut into the lean. Place fish and seafood on the rack. Whole fish should be scored diagonally on both sides (This will stop the fat curling.) before grilling. -
Page 68: Important Safety Instructions
WARNING Important safety instructions Please ensure cooking times are correctly set as over cooking may result in FIRE and Read carefully and keep for future reference subsequent DAMAGE to the OVEN. 1 Do not attempt to tamper with, or make any adjustments or repairs to the 12 Before cooking, pierce the skin of potatoes, apples or any such fruit or door, control panel, safety interlock switches or any other part of the oven. -
Page 69: Microwave - Safe Utensils
Microwave-safe Utensils Never use metal or metal trimmed utensils in your Paper microwave oven Paper plates and containers are convenient and safe to use in your microwave oven, Microwaves cannot penetrate metal. They will bounce off any metal object in the provided that the cooking time is short and foods to be cooked are low in fat and oven and cause arcing, an alarming phenomenon that resembles lightning. -
Page 70: Food Characteristics & Microwave Cooking 70
Food characteristics & Microwave cooking Moisture content of food Keeping an eye on things Since the heat generated from microwaves tends to evaporate moisture, relatively dry food The recipes in the book have been formulated with great care, but your success in such as roasts and some vegetables should either be sprinkled with water prior to cooking preparing them depends on how much attention you pay to the food as it cooks. -
Page 71: To Clean Your Oven
Food characteristics & Microwave cooking. Stirring To Clean Your Oven Stirring is one of the most important of all microwaving techniques. In conventional cooking, food is stirred for the purpose of blending. Microwaved food, however, is stirred 1 Keep the inside of the oven clean in order to spread and redistribute heat. -
Page 72: Questions & Answers
Questions & Answers Q What’s wrong when the oven light will not glow? Q Is it possible to pop corn in a microwave oven? A There may be several reasons why the oven light will not glow. A Yes, if using one of the two methods described Light bulb has blown below Door is not closed... -
Page 73: Plug Wiring Information/Technical Specifications
Plug wiring information/ Technical Specifications Warning Technical Specification This appliance must be earthed A2127/A2126 The wires in this mains lead are colored in accordance with the following codes Power Input 230 V AC / 50Hz BLUE ~ Neutral Output 900 W (IEC60705 rating standard) BROWN ~ Live GREEN &... - Page 74 Précautions Précautions destinées à éviter toute surexposition aux micro-ondes. Le four ne peut fonctionner porte ouverte grâce à son système de verrouillage Lors du réchauffage de liquides, soupes, sauces et boissons dans votre four à micro-ondes, une ébullition éruptive tardive peut se produire sans de sécurité...
-
Page 75: Mode De Fonctionnement Du Four À Micro-Ondes
Sommaire Mode de fonctionnement du four à micro-ondes Précautions Sommaire Les micro-ondes sont une forme d’énergie semblable aux ondes radio ou télé Déballage de l’appareil et Installation 76 ~ 77 et à la lumière du jour. En général les micro-ondes se propagent vers Réglage de l’Horloge l’extérieur alors qu’elles se déplacent dans l’atmosphère et disparaissent sans Sécurité... -
Page 76: Déballage De L'appareil Et Installation 76
Déballage de l’appareil et En suivant les étapes de base décrites sur ces deux pages, vous serezrapidement en mesure de vérifier le bon fonctionnement de votre four. Veuillez faire particulièrement attention aux instructions portant surl’emplacement de votre four. Lorsque vous sortez le Installation four de son emballage, veillez à... - Page 77 Branchez le four dans une prise standard. Ouvrez la porte du four en appuyant sur le bouton DOOR Vérifiez que le four est le seul appareil OPEN. Placez le BAGUE ROTATIVE dans le four et posez le branché à cette prise. PLATEAU EN VERRE dessus.
-
Page 78: Réglage De L'horloge
Réglage de Vous pouvez choisir l’affichage de l’heure sur 12 heures ou 24 heures. L’exemple ci-dessous vous montre comment régler l’heure à 14:35, avec un affichage sur 24 heures. Vérifiez qu’il ne reste aucun élément d’emballage ou de conditionnement sur ou dans votre four. l’Horloge Vérifiez que votre four est installé... - Page 79 Sécurité Enfant Appuyez sur STOP/CLEAR. Appuyez et maintenez enfoncée la touche STOP/CLEAR jusqu’à ce que Votre four est muni d’un dispositif de “L” apparaisse sur l’afficheur et qu’un signal sonore retentisse. sécurité qui empêche la mise en marche La SÉCURITÉ ENFANT est enclenchée. accidentelle de votre four.
-
Page 80: Puissance Micro-Ondes Cuisson
Puissance Micro-Ondes L’exemple ci-dessous vous montre comment cuire des aliments à une puissance de 720W (80%), Cuisson pendant 5 minutes et 30 secondes. Vérifiez que votre four est installé conformément aux instructions données précédemment. Appuyez sur STOP/CLEAR. Appuyez sur MICRO. Votre four possède cinq réglages de puissance différents. -
Page 81: Niveau De Puissance
Niveau de Votre four à micro-ondes possède 5 niveaux de puissance pour vous permettre un maximum de puissance flexibilité et un contrôle optimal de la cuisson. Le tableau ci-dessous vous indique le niveau de puissance recommandé pour différents types d'opérations possibles avec ce four à micro-ondes. POURCENTAGE USAGE PUISSANCE... -
Page 82: La Cuisson En Deux Étapes
La cuisson en L’exemple ci-dessous vous montre comment cuisiner un plat en deux étapes. La première étape cuit votre plat deux étapes pendant 11 minutes à une puissance élevée et la deuxième étape va cuire le plat pendant 35minutes à 360W. Appuyez sur STOP/CLEAR. -
Page 83: Démarrage Rapide
Démarrage Dans cet exemple, je vous montre comment sélectionner 2 minutes de cuisson à puissance maximale. rapide Appuyez sur STOP/CLEAR. Appuyez quatre fois sur QUICK START pour sélectionner 2 minutes à La fonction DEMARRAGE RAPIDE vous puissance maximale (HIGH). permet d'introduire des intervalles de 30 secondes de cuisson à... -
Page 84: Gril Cuisson
Gril L’exemple ci-dessous vous montre comment utiliser le gril pour cuisiner un plat pendant 12 minutes et 30 Cuisson secondes. Appuyez sur STOP/CLEAR. Votre four est équipé d’un GRIL À Appuyez sur GRILL. QUARTZ, il n’y a donc pas de préchauffage. - Page 85 Convection L’exemple ci-dessous vous montre comment préchauffer le four, puis cuire des aliments à une température de Cuisson 230°C pendant 50 minutes. 1. Pour préchauffer. Appuyez sur STOP/CLEAR. Appuyez sur CONVECTION. Le four à convection peut fonctionner à une température de 40°C, puis dans une plage allant de 100°C à...
-
Page 86: Convection Cuisson 85
Convection Cuisson 2. Pour cuire. Appuyez sur STOP/CLEAR. Appuyez sur CONVECTION. Si vous n’affichez aucune température, le four affichera 180°C par défaut. Vous pouvez alors afficher la température de votre choix à l’aide de la molette. Afficher "230°C" à l’aide de la DIAL. Utilisez exclusivement la clayette basse Appuyez sur START pour valider la température. - Page 87 Combinaison Dans l'exemple suivant, je vous montre comment programmer votre four pour cuire des aliments pendant 25 Cuisson minutes, à une puissance de 180W (20%) et avec la fonction gril. 1. GRIL COMBINÉE. Appuyez sur STOP/CLEAR. Appuyez sur COMBI. Votre four dispose d'une fonction Tournez la DIAL de sélection pour afficher “Co-1”...
-
Page 88: Combinaison Cuisson 87
Combination Dans l'exemple suivant, je vous montre comment programmer votre four pour cuire des aliments pendant 25 Cuisson minutes, à une puissance de 540W (60%) et avec une température de convection de 200°C. 2. CONVECTION COMBINÉE. Appuyez sur STOP/CLEAR. Appuyez sur COMBI. Tournez la DIAL de sélection pour afficher “Co-2”... -
Page 89: Memoire
Memoire Ce dispositif vous permet d’installer et d’utiliser un programme simple fréquemment utilisé. Une fois que le programme Cuisson est paramétré, vous pouvez l’utiliser en appuyant sur la touche mémoire Cuisson. Dans l’exemple suivant, nous vous présentons comment paramétrer le programme Cuisson pendant 10 minutes 30 secondes au niveau de puissance 720W(80%). -
Page 90: Maintien Au Chaud
Maintien au Dans l’exemple suivant, nous vous présentons comment garder au chaud un plat à une température de 90°C Chaud pendant 30 minutes. Appuyer sur STOP/CLEAR. Appuyer sur KEEP WARMING. La fonction “maintien au chaud” a une température variable de 30°C à 90°C. Tourner le DIAL jusqu’à... -
Page 91: Décongélation
La température et la densité des aliments varient. Il est recommandé de bien vérifier l’état des aliments avant de commencer la Décongélation cuisson. Soyez particulièrement vigilant concernant les gros morceaux de viande ou de volaille. Certains aliments n’ont pas besoin d’être complètement décongelé... -
Page 92: Guide De Decongelation
GUIDE DE DECONGELATION * La nourriture à décongeler doit se trouver dans un récipient adapté au micro-ondes et être placée, sans couvercle, sur le plateau tournant en verre. * Au besoin, protégez les morceaux plus petits de viande ou de volaille avec des feuilles de papier aluminium. De cette manière, ces pièces ne se réchaufferont pas pendant la décongélation. - Page 93 Cuisson L’exemple ci-dessous vous montre comment cuisiner 0,6 kg de pomme de terre en chemise. Automatique Appuyez sur STOP/CLEAR. AUTO COOK permet de cuisiner la Appuyez sur AUTO COOK. plupart de vos plats préférés, en entrant simplement le type d’aliment et son poids.
- Page 94 Température Fonction Catégorie Limite de poids Ustensile Instructions de l'aliment Cuisson 0,1 ~ 1,0kg Plateau Temp. de Choisissez des pommes de terre de taille moyenne (200-220g). Lavez et essuyez les pommes Pomme de terre de terre. Faites plusieurs trous dans les pommes de terre avec une fourchette. Posez-les sur le Automatique en chemise métallique...
- Page 95 Température Fonction Catégorie Limite de poids Ustensile Instructions de l'aliment Cuisson Poisson frais 0,1 ~ 0,6kg Plat adapté au Réfrigérée Poisson entier, steak four Automatique Poisson gras: saumon, maquereaux micro-ondes Poisson blanc: morue, églefin Disposez en une couche, dans un plat adapté. Recouvrez le plat d’un film plastique et percez la feuille à...
- Page 96 Température Fonction Catégorie Limite de poids Ustensile Instructions de l'aliment Gratin 0,5 ~ 1,2kg Grille basse Temp. de Utilisez cette fonction pour faire des gratins maison. Posez les aliments sur la grille basse, Cuisson au-dessus du plateau métallique. Après la cuisson, sortez le gratin du four et laissez-le et plateau la pièce Automatique...
-
Page 97: Réchauffage Automatique 97
Réchauffage L’exemple ci-dessous vous montre comment réchauffer un repas réfrigéré d’un poids de 0,6 kg. Automatique Appuyez sur STOP/CLEAR. La fonction RÉCHAUFFAGE Appuyez sur AUTO REHEAT. AUTOMATIQUE facilite le réchauffage des plats. Votre four possède quatre positions RÉCHAUFFAGE AUTOMATIQUE: Pizza part,Soupe/Sauce, Repas réfrigéré, Repas congelé. - Page 98 Fonction Catégorie Poids Maxi Ustensile Temp. Alim. Instructions Réchauffage Pizza 0,2 - 0,4 kg Grille basse & Réfrigérée Cette fonction permet de réchauffer un reste de pizza froide. Placez la part de part pizza sur la grille inférieure au- dessus du plateau métallique. Après cuisson, Automatique Plateau enlevez du four tout de suite.
-
Page 99: Rôtissoire
Rôtissoire Dans l’exemple suivant, je vous explique comment faire des rôti de boeuf. Automatique Appuyez sur STOP/CLEAR. Appuyez sur AUTO ROAST. Choisir “Ar-1” en tournant le DIAL de sélection. Appuyez sur START pour valider la catégorie. Choisir “1.4kg” en tournant le DIAL de sélection. Appuyer sur START. - Page 100 GUIDE DE RÔTISSERIE AUTOMATIQUE Fonction Catégorie Poids Maxi Ustensile Temp. Alim. Instructions Rôtissoire Rôti de boeuf 0,5 ~ 1,5 kg Grille basse Réfrigérée Enduisez le rôti de margarine ou de beurre. Placez-le sur la grille basse Automatique & au-dessus du plateau métallique. Lorsque le BIP retentit, retourner le rôti. Plateau Puis appuyez sur Start pour continuer la cuisson.
-
Page 101: Guide De Cuisson Ou Réchauffage
Guide de cuisson La cuisson ou le réchauffage d’aliments au micro-ondes nécessite de suivre quelques précautions: déterminer le poids des aliments, les disposer de façon homogène. Les produits conservés à température ambiante cuiront plus rapidement que ceux réfrigérés. Les aliments en conserve doivent être disposés dans un plat adapté... -
Page 102: Legumes Frais Guide
Legumes Frais Guide Temps de cuisson Temps Temps de cuisson Temps Légumes Quantité Instructions Légumes Quantité Instructions (sur ELEVEE) de repos (sur ELEVEE) de repos Artichauts 2 moyens 1 /2 Nettoyez. Ajoutez 2 c.à s. d’eau et 2 c.à 2~3 minutes Maïs, Frais 2 épis 4 ~ 8... - Page 103 Gril Guide 1) Instructions pour griller la viande. 2) Instructions pour griller le poisson ou les crustacés Otez l'excédent de gras autour de la viande pour éviter qu'elle ne se rétracte. Placez le poisson ou les crustacés sur la clayette. Le poisson entier doit être vidé et coupé sur Placez sur la grille badigeonnée d'un corps gras.
-
Page 104: Consignes Importantes De Sécurité
ATTENTION Consignes importantes de sécurité Vérifiez que les temps de cuisson sont correctement Lisez ces consignes avec grande attention et réglés ; toute surcuisson peut mettre le FEU et conservez-les pour pouvoir vous y référer ENDOMMAGER alors le FOUR. 1. Ne pas tenter d’altérer, ou de réparer la porte, le panneau de commande, les moins 8 cm derrière le bord de la surface sur laquelle il est posé, afin d’éviter interrupteurs de verrouillage de sécurité... -
Page 105: Micro-Ondes
Ustensiles pour Micro-ondes Ne jamais utiliser d’objets métalliques ou bordés de Papier Les assiettes et les récipients en papier conviennent et peuvent être utilisés dans votre métal dans votre four à micro-ondes. four à micro-ondes, dans la mesure où le temps de cuisson est court et que les aliments Les micro-ondes ne peuvent traverser le métal. -
Page 106: Caractéristiques Des Aliments Et Cuisson Micro-Ondes 106
Caractéristiques des aliments et Cuisson micro-ondes Ne quittez pas le four des yeux Quantité d’os et teneur en graisses des aliments Les recettes de ce livre ont été écrites soigneusement, mais votre réussite dépend de Les os conduisent la chaleur et la graisse cuit plus rapidement que la viande. Il faut faire l’attention que vous portez aux aliments pendant leur cuisson. -
Page 107: Pour Nettoyer Votre Four
Caractéristiques des aliments et Cuisson micro-ondes Penser à remuer les aliments Pour Nettoyer Votre Four Remuer les aliments est l’une des techniques les plus importantes de l’utilisation en micro- ondes. Dans la cuisson traditionnelle, on remue les aliments pour bien les mélanger. 1. -
Page 108: Questions Et Réponses
Questions et Réponses Q. Que se passe-t-il lorsque la lampe du four ne s’allume pas? Q. Est-il possible de faire du pop-corn dans un four à micro-ondes? R. Il peut y avoir plusieurs raisons à cela : R. Oui, si l’on utilise l’une des deux méthodes suivantes : L’ampoule a grillé. -
Page 109: Spécifications Techniques
Avertissements et Spécifications Techniques Attention Spécifications Techniques CET APPAREIL DOIT ÊTRE RELIE A LA TERRE A2127/A2126 Les fils de connexion au secteur respectent le code suivant: Alimentation 230 V AC / 50Hz BLUE : Neutre Sortie 900 W (valeur standard IEC60705) MARRON : Phase Fréquence micro-ondes... - Page 110 Vorsichtsmaßnahmen Vorsichtsmaßnahmen zum Schutz gegen Mikrowellenstrahlung Aufgrund einer Sicherheitsverriegelung lässt sich der Mikrowellenherd/Ofen Beim Erhitzen von Flüssigkeiten wie z. B. Suppen, Saucen oder Getränken nicht bei geöffneter Tür betreiben. Diese Sicherheitsschaltung stoppt den kann es ohne vorherige Blasenbildung zu plötzlichem Kochen kommen. Gar- und Kochbetrieb automatisch, sobald die Tür geöffnet wird.
- Page 111 Inhalt So funktioniert der Mikrowellenherd Vorsichtsmaßnahmen Inhalt Wie Radio- und TV-Wellen oder Tageslicht stellen Mikrowellen nichts anderes Auspacken und Aufstellen 112-113 als eine Energieform dar. Normalerweise verteilen sich Mikrowellen in der Einstellen der Uhr Atmosphäre und verschwinden ohne Auswirkung. Mikrowellenherde Kindersicherung verwenden allerdings ein Magnetron, um die Energie von Mikrowellen zu Kochen mit Mikrowelle...
-
Page 112: Auspacken Und Aufstellen
Auspacken und Durch Befolgen der grundlegenden Schritten auf diesen zwei Seiten wissen Sie umgehend, ob Ihr Herd einwandfrei funktioniert. Beachten Sie insbesondere die Anweisungen hinsichtlich des Aufstellorts. Entfernen Sie Aufstellen beim Auspacken sämtliches Zubehör und Verpackungsmaterial. Jetzt ist auch die Gelegenheit, um das Gerät auf eventuelle Transportschäden zu prüfen. - Page 113 Ziehen Sie am TÜRGRIFF, um den Herd zu öffnen. Das Netzkabel an eine Steckdose anschließen. Setzen Sie dann den DREHRING in den Herd ein und den Verwenden Sie für dieses Gerät eine separate GLASDREHTELLER darauf. Steckdose, an der keine anderen Geräte angeschlossen sind. Falls der Mikrowellenherd nicht ordnungsgemäß...
-
Page 114: Einstellen Der Uhr
Einstellen Sie können die Uhrzeit im 12- oder 24-Stunden-Format anzeigen lassen. der Uhr Im folgenden Beispiel zeige ich Ihnen, wie Sie im 24-Stunden-Format die Uhr auf 14:35 Uhr stellen. Dazu müssen Sie jedoch Ihre Mikrowelle vollständig ausgepackt haben. Überprüfen Sie, ob das Gerät ordnungsgemäß angeschlossen ist, wie weiter vorn in dieser Bedienungsanleitung beschrieben. -
Page 115: Kindersicherung
Kindersicherung Drücken Sie die Taste STOP/CLEAR. Drücken Sie die Taste STOP/CLEAR, bis im Display die Meldung “L” Ihre Mikrowelle ist mit einer angezeigt wird und ein Piepton zu hören ist. Sicherheitsfunktion ausgestattet, die ein versehentliches Einschalten des Geräts Damit ist die KINDERSICHERUNG aktiviert. verhindert (Kindersicherung). -
Page 116: Kochen Mit Mikrowelle
Kochen mit Im folgenden Beispiel zeige ich Ihnen, wie Sie ein Gericht mit 720W (80 %) der Mikrowelle Maximalleistung des Geräts in 5 Minuten und 30 Sekunden garen. Überprüfen Sie, ob das Gerät ordnungsgemäß angeschlossen ist, wie weiter vorn in dieser Bedienungsanleitung beschrieben. Drücken Sie die Taste STOP/CLEAR. -
Page 117: Energiepegel Zum Kochen
Energiepegel Beim Einsatz Ihrer Mikrowelle können Sie aus fünf Leistungsstufen wählen. Damit haben Sie eine maximale zum Kochen Flexibilität und können den Kochprozess optimal steuern. In der folgenden Tabelle finden Sie Beispiele dafür. IN PROZENT LEISTUNGSAUFNAHME VERWENDUNG LEISTUNG MAXIMAL 900 W (Max.) * Wasser kochen * Bräunen von Hackfleisch * Garen von Geflügelstücken, Fisch, Gemüse... -
Page 118: Zubereiten Von Speisen In Zwei Stufen
Zubereiten von Speisen Im folgenden Beispiel zeige ich Ihnen, wie Sie Speisen in zwei Stufen zubereiten. In der in zwei Stufen ersten Phase wird das Gericht bei Leistungsstufe MAXIMAL für 11 Minuten erhitzt und danach für 35 Minuten bei 360 Watt gegart. Drücken Sie die Taste STOP/CLEAR. - Page 119 Schnell Im folgenden Beispiel zeige ich Ihnen, wie Sie das Gerät auf “Zwei Minuten Garen mit maximaler Leistung” Start einstellen. Drücken Sie die Taste STOP/CLEAR. Um das Gerät auf 2 Minuten Betrieb mit maximaler Leistung einzustellen, Durch die SCHNELL START-Funktion drücken Sie viermal die Taste QUICK START.
-
Page 120: Garen Von Speisen Im Grill
Garen von Im folgenden Beispiel zeige ich Ihnen, wie Sie den Grill auf eine Betriebsdauer von 12 Minuten und 30 Sekunden Speisen im Grill einstellen. Drücken Sie die Taste STOP/CLEAR. Dieses Modell ist mit einem QUARZGRILL Drücken Sie die Taste GRILL. ausgestattet, der nicht vorgewärmt werden muss. - Page 121 Garen von Speisen Im folgenden Beispiel zeige ich Ihnen, wie Sie zunächst den Ofen vorheizen und dann die im Heissluftofen gewünschte Speise für 50 Minuten bei 230 °C garen. 1. Vorheizen Drücken Sie die Taste STOP/CLEAR. Drücken Sie die Taste CONVECTION. Wenn Sie den Betriebsmodus „Heissluftofen"...
-
Page 122: Garen Von Speisen Im Heissluftofen
Garen von Speisen im Heissluftofen 2. Garen Drücken Sie die Taste STOP/CLEAR. Drücken Sie die Taste CONVECTION. Wenn Sie keine Temperatur auswählen, wird der Ofen automatisch auf 180°C eingestellt. Die Gartemperatur kann mithilfe des PROGRAMMWÄHLERS Drehen Sie den DIAL, bis eine Temperatur von “230°C” angezeigt wird. verändert werden. - Page 123 Garen von Speisen im Im folgenden Beispiel zeige ich Ihnen, wie Sie Ihr Gerät so programmieren, dass es mit einer Kombinationsmodus Mikrowellenleistung von 20 % und einer Grilldauer von 25 Minuten arbeitet. 1. KOMBINATION VON GRILL- UND MIKROWELLENFUNKTION Drücken Sie die Taste STOP/CLEAR. Drücken Sie die Taste COMBI.
-
Page 124: Garen Von Speisen Im Kombinationsmodus
Garen von Speisen im Im folgenden Beispiel zeige ich Ihnen, wie Sie Ihr Gerät so programmieren, dass es mit einer Kombinationsmodus Mikrowellenleistung von 540W (60%), einer Ofentemperatur von 200°C sowie einer Zubereitungsdauer von 25 Minuten arbeitet. 2. KOMBINATION VON OFEN- UND MIKROWELLENFUNKTION Drücken Sie die Taste STOP/CLEAR. -
Page 125: Speicher
Mit dieser Funktion können Sie Programme speichern die Sie oft gebrauchen. Wenn das Programm Speicher gespeichert ist können Sie es jederzeit automatisch durch einen Druck auf den Memory-Knopf aufrufen. Beispiel: Gebrauch der Mikrowelle für 10 Minuten u. 30 Sekunden auf 720W (80%). 1. -
Page 126: Warmhalten
Warmhalten Im folgenden Beispiel zeige ich Ihnen wie Sie eine Mahlzeit 30 Minuten auf 90 Grad warmhalten können. Drücken Sie die Taste STOP/CLEAR. Drücken Sie die Taste KEEP WARMING. Der Temperaturbereich des Ofens ist auf 30 °C-90 °C zu programmieren Drehen Sie mit dem DIAL bis das im Display "90°C"... - Page 127 Die verschiedenen Nahrungsmittel und Gerichte weisen ganz unterschiedliche Temperaturen und Dichten auf. Deshalb Automatikfunktion empfehle ich, sie vor dem Beginn des Zubereitungsprozesses auf ihre diesbezüglichen Eigenschaften zu prüfen. Achten Sie besonders auf große Fleisch- und Geflügelstücke. Manche Produkte sollten vor der Zubereitung nicht komplett aufgetaut werden.
- Page 128 LEITFADEN ZUR NUTZUNG DER AUFTAUFUNKTION * Frieren Sie die Lebensmittel in einem geeigneten, mikrowellenfesten Behälter ein. Stellen Sie diesen Behälter zum Auftauen ungeöffnet auf die Glasplatte. * Bei Bedarf schirmen Sie dünnere Abschnitte von tiefgekühltem Fleisch während des Auftauprozesses ab, um ein Erhitzen zu vermeiden. Achten Sie darauf, dass die Folie nicht in Kontakt zu den Gerätewänden kommt.
-
Page 129: Automatikfunktion Garen
Automatikfunktion Nachfolgend erkläre ich Ihnen, wie Sie 0,6 kg Folienkartoffel. Garen Drücken Sie die Taste STOP/CLEAR. Mit Hilfe der Automatikfunktion GAREN Drücken Sie die Taste AUTO COOK. können Sie die meisten Ihrer Lieblingsgerichte problemlos durch Auswahl der Art des Gerichts und Eingabe des Gewichts garen. - Page 130 Art des Gewicht Temperatur vor Zubehör Anweisungen Funktion Gerichts vonbis der Zubereitung Automatik- Folienkartoffel 0,1-1,0 kg Fettpfanne Zimmertemp. Mittelgroße Kartoffeln (je 200-220 g) verwenden. funktion Kartoffeln waschen und trocknen. In jede Kartoffel mehrmals mit einer Gabel ein- stechen. Die Kartoffeln in die Fettpfanne legen. Gewicht prüfen, ggf. korrigieren. Garen Taste START drücken.
- Page 131 Art des Gewicht Temperatur vor Funktion Zubehör Anweisungen Gerichts vonbis der Zubereitung 0,1-0,6 kg Mikrowellenfe Gekühlt Für ganze Fische und Fischsteaks Automatik- Frischer Fisch - Fette Fische: Lachs, Makrele funktion ste Auflauf- Garen oder - Weißfische: Kabeljau, Schellfisch Backform Den Fisch in einer einzelnen Schicht in einer großen, mikrowellenfesten Auflauf- oder Backform auslegen.
- Page 132 Art des Gewicht Temperatur vor Zubehör Anweisungen Funktion Gerichts vonbis der Zubereitung 0,5-1,2 kg Niedriger Zimmertemp. Nutzen Sie diese Einstellung für das Garen selbst zubereiteter Aufläufe und Gratins. Automatik- Aufläufe und Die Auflaufschale auf den niedrigen Rost über die Fettpfanne stellen. Das Gericht funktion Gratins Rost und...
-
Page 133: Automatikfunktion Erwärmen
Automatikfunktion Nun zeige ich Ihnen, wie Sie 0,6 kg Gekühltes Fertiggericht. Erwärmen Drücken Sie die Taste STOP/CLEAR. Die vorprogrammierte Drücken Sie die Taste AUTO REHEAT. AUTOMATIKFUNKTION ERWÄRMEN dient zum einfachen, problemlosen Erwärmen von Speisen. Sie können aus Voreinstellungen für folgende Arten von Gerichten wählen: Gekühlte Pizza, Suppen/Soßen, Drehen Sie den DIAL, bis im Display “rh-3”... - Page 134 Art des Gewicht Temperatur vor Funktion Zubehör Anweisungen Gerichts vonbis der Zubereitung 0,2-0,4 kg Niedriger Gekühlt Zum Erwärmen von gekühlter Pizza. Die Pizza auf den niedrigen Rost Automatik- Gekühlte über der Fettpfanne ablegen. funktion Pizza Rost und Nach dem Erhitzen die Pizza sofort aus dem Gerät nehmen. Für 2-3 Erwärmen Fettpfanne Minuten stehen lassen.
-
Page 135: Automatikfunktion Braten
Automatikfunktion Nun zeige ich Ihnen, wie Sie 1,4 kg Rinderbraten. Braten Drücken Sie die Taste STOP/CLEAR. Drücken Sie die Taste AUTO ROAST. Die vorprogrammierte AUTOMATIKFUNKTION BRATEN dient zum einfachen, problemlosen Braten vieler Ihrer Lieblingsgerichte. Geben Sie dazu einfach Art und Gewicht des gewünschten Gerichts ein. - Page 136 LEITFADEN ZUM AUTOMATISCHEN BRATEN Art des Gewicht Temperatur vor Funktion Zubehör Anweisungen Gerichts vonbis der Zubereitung Automatik- Rinderbraten 0,5-1,5 kg Niedriger Gekühlt Das Fleisch mit geschmolzener Margarine oder Butter einpinseln. Auf den niedrigen Rost über die Fettpfanne legen. Nach dem Piepton das Fleisch Rost und funktion wenden.
-
Page 137: Aufwärmen Anleitung
Um in der Mikrowelle erfolgreich etwas aufzuwärmen, ist es wichtig folgende Richtlinien zu beachten. Wiegen Sie die Lebensmittelmenge aus, Aufwärmen um die notwendige Zeit für das Erhitzen zu ermitteln. Um beste Ergebnisse zu erzielen, plazieren Sie die Speisen kreisförmig. Raumtemperierte Lebensmittel werden schneller erhitzt als gekühlte Lebensmittel. -
Page 138: Frisches Gemüse
Frisches Gemüse Gemüse Menge Kochzeit Hinweise Standzeit Gemüse Menge Kochzeit Hinweise Standzeit (höchste Stufe) (höchste Stufe) Artischoken 2 mittlere 4,5~7 Min. Beschneiden. 2Teel. Wasser Und 2~3 Minuten Maiskolben 2 Kolben 4~8 Min. Schälen. 2Teel. Wasser in 1,5 Liter 2~3 Minuten fassende Auflaufform zufügen. - Page 139 Grillen Anleitung Richtlinien für Grillfleisch im Grill Richtlinien für Grillfisch und Meeresfrüchte Fisch und Meeresfrüchte auf dem Rost plazieren. Ganze Fische sollten von beiden Seiten vor • Fettränder vom Fleisch entfernen. Fett abschneiden und sichergehen, nicht ins magere dem Grillen eingeschnitten werden. Vor und während dem Grillen den Fisch und die Fleisch zu schneiden.
-
Page 140: Sicherheitshinweise
Sicherheitshinweise ACHTUNG Achten Sie auf korrekte Garzeiten. Überlanges Garen kann zu BRAND und SCHÄDEN am HERD führen. 1. Keinesfalls die Herdtür, das Bedienfeld, die Schalter der 11. Das Gerät mindestens 8 cm von der Kante der Unterlage aufstellen, um Sicherheitsverriegelung oder andere Teile des Herds verändern oder Kippen zu verhindern. - Page 141 Mikrowellenverträgliche Materialien Niemals Gegenstände aus Metall oder Objekte, die Metallteile enthalten in Papier den Mikrowellenherd geben. Papierteller und -formen sind praktisch und können bei kurzen Kochzeiten gefahrlos Mikrowellen können Metalle nicht durchdringen. Stattdessen werden sie vom Metall im Mikrowellenherd eingesetzt werden, falls die enthaltenen Speisen wenig Fett und reflektiert, wodurch es zu Entladungen kommt, die Blitzen ähneln.
-
Page 142: Eigenschaften Von Nahrungsmitteln Und Kochen Mit Mikrowelle
Eigenschaften von Nahrungsmitteln und Kochen mit Mikrowelle Regelmäßige Kontrolle sorgt für Erfolg Feuchtigkeitsgehalt Zwar wurden die Rezepte im Kochbuch mit großer Sorgfalt erstellt, aber der Erfolg Da die von Mikrowellen erzeugt Hitze zum Verdampfen von Feuchtigkeit führt, sollten hängt davon ab, wie gut Sie das Kochen überwachen. Es gilt: Gerichte während des relativ trockene Speisen wie Bratenfleisch oder gewisse Gemüse entweder vor dem Kochen mit Wasser besprenkelt werden oder aber beim Kochen abgedeckt sein. - Page 143 Eigenschaften von Nahrungsmitteln und Kochen mit Mikrowelle Umrühren Reinigen des Mikrowellenherds Umrühren ist eine der wichtigsten Mikrowellen-Kochtechniken. Beim herkömmlichen Kochen dient das Umrühren zum Vermischen. Beim Zubereiten mit Mikrowelle sorgt es jedoch für 1. Das Innere des Mikrowellenherds sauber halten. die Verteilung von Hitze.
-
Page 144: Fragen Und Antworten
Fragen und Antworten F: Warum brennt das Licht im Herd nicht? F: Lässt sich Popcorn im Mikrowellenherd zubereiten? A: Dafür sind mehrere Gründe möglich: A:Ja, falls Sie eine der beiden folgenden Ausrüstungen verwenden: Glühlampe durchgebrannt 1 Spezielle Popcorn-Utensilien für Mikrowelle Tür nicht richtig geschlossen 2 Popcorn in Verpackung für Mikrowellen-Zubereitung mit genauen Angaben über Energiepegel und Zubereitungszeit. -
Page 145: Kochen Mit Der Mikrowelle
IEC Test Anweisung • Auftauen mit der Mikrowelle Speisenart Mikrowellenleistung (Watt), Kochzeit (Min.) Bemerkung Fleisch 180 Watt, 11 - 12 Min. oder Übersicht Automatik-Kochen auf flachen Grillteller legen, wenden nach 6 Min. • Kochen mit der Mikrowelle Speisenart Mikrowellenleistung (Watt), Kochzeit (Min.) Bemerkung Vanillesauce 360 Watt, 22 - 25 Min. -
Page 146: Hinweise Zum Netzkabel/Technische Daten
Hinweise zum Netzkabel/ Technische Daten Achtung Technische Daten Dieses Gerät muss geerdet werden. A2127/A2126 Betriebsspannung 230 V Wechselspannung/50 Hz Die Kabelstränge des Netzkabels sind folgendermaßen kodiert: BLAU Neutral Leistung 900 W (nach IEC-Messnorm IEC60705) BRAUN Aktiv Mikrowellenfrequenz 2,450 MHz GRÜN & GELB Erde... - Page 147 Printed in Korea...