Publicité
Les langues disponibles
Les langues disponibles
Liens rapides
AVO INTERNATIONAL
Archcliffe Road
Dover
Kent, CT17 9EN.
England.
Tel: +44 (0) 1304 502100
Fax: +44 (0) 1304 207342
This instrument is manufactured in the United Kingdom.
The company reserves the right to change the specification or design without prior notice.
MEGGER is the registered Trade Mark of AVO INTERNATIONAL LIMITED. Copyright ©, AVO INTERNATIONAL LIMITED
Part No 6172-484 Edition 3 – Printed in England – 01HH
PO Box 9007
Valley Forge
PA 19484-9007
U.S.A.
Tel: +1 (610) 676-8500
Fax: +1 (610) 676-8610
4271 Bronze Way
Dallas
TX 75237-1017
U.S.A.
Tel: +1 (800) 723-2861 (U.S.A. only)
Tel: +1 (214) 330-3203 (International)
MEGGER SARL
29 Allée de Villemomble
93340 Le Raincy
Paris, France
Tel: +33 (1) 43.02.37.54
Fax: +33 (1) 43.02.16.24
Publicité
Chapitres

Manuels Connexes pour Megger BMM2500


Sommaire des Matières pour Megger BMM2500
- Page 1 The company reserves the right to change the specification or design without prior notice. MEGGER is the registered Trade Mark of AVO INTERNATIONAL LIMITED. Copyright ©, AVO INTERNATIONAL LIMITED Part No 6172-484 Edition 3 – Printed in England – 01HH...
- Page 2 I N S U L ATION MULTIMETERS MEGGER BMM2500 User Guide MEGGER ® Guide de l’utilisateur B e d i e n u n g s a n l e i t u n g...
-
Page 3: Table Des Matières
CONTENTS Safety Warnings General Description Continuity Testing Continuity Bleeper Millivolt Tests Capacitance Tests Milliamps Tests Storing Results Datalogging Setup Modes Specification Symbols used on the instrument are: Repair and Warranty Risk of Electric Shock Refer to User Guide. Equipment protected throughout by Double Insulation (Class II). -
Page 4: Safety Warnings
SAFETY WARNINGS Safety Warnings and Precautions must be read and understood before the instrument is used. They must be observed during use. The circuit under test must be de-energized and isolated before connections are made except for voltage measurement. Circuit connections must not be touched during a test. After insulation tests, capacitive circuits must be allowed to discharge before disconnecting the test leads. -
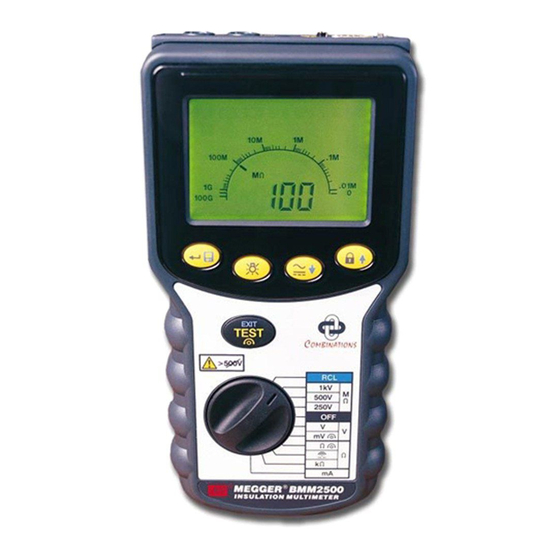
Page 5: General Description
The display is also backlit puter peripherals. giving clear visibility even in low light conditions. The BMM2500 series instruments have a current The BMM2500 Series instruments have the unique facility which enables up to 500mA to be mea- sured, this together with Ω, V and mV ranges... - Page 6 The down- load format is also AVO Powersuite compatible enabling instruments to form part of an integrat- ed test and certification system. The BMM2500 series instruments also have the capability to data-log results over an extended time period so that long term measurements of systems can be taken.
- Page 7 OPERATION Refer to Safety Warnings before using ages above 30V, particularly in high energy sys- the instrument tems. Fused test leads are available as optional accessories for local situations where increased Testing is automatically inhibited if: protection is required. • An external voltage >25V is present when switched to any insulation range position.
- Page 8 Insulation enabled). The last reading will hold on the display. Tests (MΩ) 5. Any capacitive circuits charged during a test (See fig.1) will automatically discharge. If significant voltage remains the voltage warning will occur The insulation tests and the voltage present displayed. apply a known volt- 6.
- Page 9 Good procedure whilst Insulation Testing Automatic Discharge Care must be taken when taking measurements When the TEST button is released after an insula- greater than a few GΩ. The leads must be clean tion test (or re-pressed if ltb feature is enabled), a dry and in good condition.
-
Page 10: Continuity Testing
Continuity Testing (Ω) (See fig.2) 3. When the reading has stabilised, press the The continuity tests are activated when the probes TEST button. make contact of less than a few kΩ. The test oper- z e ro offset symbol ates without the need to press the TEST button. will appear. -
Page 11: Continuity Bleeper
Possible sources of error the same way as the continuity ranges. Measurements and results can be effected by the 1. Set the selector switch to kΩ. following: 2. Connect the test leads. 3. The test will activate automatically. • The impedance of operating circuits connect- ed in parallel The kΩ... -
Page 12: Millivolt Tests
(0,01kΩ to 10000kΩ) make the resistance range 2. Select either a.c. or d.c. mV using the ∼ very useful for general purpose testing. key. 3. Connect the test leads. Voltage Tests (V) 4. After a short settling time, the reading will be displayed automatically. -
Page 13: Capacitance Tests
mV press the key again. For inputs less than The range is suitable for the testing of discrete 10mV frequency is not displayed. components and short low interference level signal lines. If electrolytic capacitors are being tested Capacitance Tests (uF) then the red lead should be connected to +ve of the capacitor. -
Page 14: Storing Results
∼ Storing Results on MΩ and Ω (RCL) key. After an insulation test or continuity test the result 1. Set the selector switch to mA. is displayed on the screen, this may be saved with 2. Connect the test leads. additional information. - Page 15 Testing may now continue with all subsequent procedure aborted by pressing the EXIT but- results associated with the new distribution board ton. number. 7. When the result is saved, the code Std is displayed (accompanied by a long bleep) to Storing a result confirm that the data has been saved.
- Page 16 Delete all data The distribution board numbers are shown in 1. Move the rotary selector switch to the RCL the order that the results were stored. A long position. The code rcl is displayed. bleep is sounded when the end of the list is ∼...
-
Page 17: Datalogging
the above order. Hold a key down to auto- guide giving you full instructions on the use of repeat. A long bleep is sounded when the end Download Manager. of the list is reached. Cable Configuration 7. Press the EXIT button to return to the circuit Normally, a double-ended 9-way ‘D’... - Page 18 Storage v. Datalogging Comparison. Starting a logging session By storage, we mean the saving to memory of Once logging has been enabled and the interval results one-by-one as tests are performed. Each set up, a session of data-logging can begin. (see result has to be individually saved after associating Setup Modes) it with user-selectable connection data and circuit...
-
Page 19: Setup Modes
Alternatively, logging can be left running and will serial cable. The disk supplied with the instrument stop automatically a short while after the memory carries a programme capable of handling the data. becomes full. The method is similar to that for ‘downloading’ stored results. - Page 20 given by a printer, and therefore waits at the end of Note: Language 2 can be changed – see below. each line. This time (“Printer delay time”) and the 3. Press the key until the required language printer report language can be changed. setting is displayed 1.
- Page 21 Using the MEGGER SP1 Switched Probe Operation Battery Replacement The MEGGER SP1 is an accessory for designated When the low battery symbol appears, the cells MEGGER installation test instruments. When fitted are nearly exhausted and should be replaced as in the specially designed connector, in place of the soon as possible.
- Page 22 fitted with the correct polarity in accordance with the label in the battery holder. Reconnect the bat- tery holder to the battery leads. Replace and re- secure the battery compartment cover. Remove the cells if the instrument is not going to be used for an extended period of time.
-
Page 23: Specification
0,01MΩ to 200GΩ (0-100GΩ on analogue scale). EN61557 Operating range: 0,10MΩ to 1,00GΩ Nominal Test Leakage Current: 10% ±3digits 250V,500V,1000V (BMM2500) Voltage (d.c.): 50V,100V,250V,500V,1000V (BMM2580) CONTINUITY Test voltage accuracy: +15% maximum on open circ u i t Short circuit curre n t : <... - Page 24 VOLTAGE MILLI-AMPS Measuring Range: ±1V to ±500V (0 to 1000V Measuring Range: 0,1mA to 500mA (0 to 1000mA on on analogue scale) analogue scale) Accuracy: 0-500V d.c. ±2% ±3 digit Accuracy: 0,1mA to 10mA d.c. or a.c. (50/60 Hz) ±2% ±5 digits 0-500V a.c (50/60Hz) ±2% ±3 digits 10mA to 500mA d.c.
- Page 25 Basic and service errors for Insulation Resistance – MΩ Insulation and Resistance ranges. Limit Min. Indicated Reading Limit Min. Indicated Reading The basic error is the maximum inaccuracy of the instru- 0,10 0,14 2,00 2,12 ment under ideal conditions, whereas the service error is 0,20 0,25 3,00...
-
Page 26: Power Supply
SAFETY POWER SUPPLY The instruments meet the requirements for double insula- Battery Type: 6x1,5V Alkaline cells tion to IEC 1010-1 (1995), EN 61010-1 (1995) to Category IEC LR6 type or 1.2V NiCd III*, 300 Volts phase to earth (ground) and 440 Volts phase re-chargeable cells. -
Page 27: Accessories
ACCESSORIES Supplied: Part Number Test lead set 6220-437 Test-&-carry case 6420-112 Optional: Part Number Fused lead set, FPK8 6111-218 Switch Test Probe SP1 6220-606 Test Record Cards (Pack of 20) 6111-216 AVO PowerSuite 6111-237 AVO NiceOne 6111-403 9-way Serial Lead 25955-025 Publications: ‘A Stitch in Time’... -
Page 28: Repair And Warranty
A number of independent instrument repair companies b o a rd. If the protection of an instrument has been have been authorised for repair work on most MEGGER impaired it should not be used, and be sent for repair by instruments, using genuine MEGGER spare parts. -
Page 30: M U Ltimètres D'isolat I O Nmegger Bmm2500
M U LTIMÈTRES D’ISOLAT I O N MEGGER BMM2500 Guide de l’utilisateur MEGGER ®... - Page 31 CONTENU Avertissements de Securite Description Generale Fonctionnement Tests de Continuité Alarme de Continuité Tests en Millivolts Tests de Capacitance Tests en Milliampères Stocker les Rèsultats Consignation de Donneés Les symboles utilisés sur l’instrument sont: Modes de Configuration Attention, risque de Specifications décharge électrique.
-
Page 32: Avertissements De Securite
AVERTISSEMENTS DE SECURITE Les avertissements et précautions de sécurité doivent être lues et comprises avant que l’instrument soit utilisé. Ils doivent être suivis pendant l’utilisation. L’alimentation du circuit testé doit être coupée et il doit être isolé avant que les connexions soient faites, sauf pour les mesures de tension. -
Page 33: Description Generale
équipements de télécommunications qui dans des conditions de basse luminosité. seraient endommagés par des tensions plus élevées. La gamme à 50V (BMM2500) est utile Les instruments de la série BMM2500 ont la pour tester les équipements sensibles, tels que capacité... - Page 34 Pour des intensités plus élevées, un limiteur de difficiles. courant est disponible en option. Les instruments de la série BMM2500 ont une interface RS232 intégrée, et permettront le stockage et le déchargement de résultats vers un PC. Les instruments sont livrés avec le logiciel nécessaire pour décharger les résultats et les...
-
Page 35: Fonctionnement
FONCTIONNEMENT Se reporter aux avertissements de p a r t i c u l i è rement dans des systèmes à haute sécurité avant d’utiliser l’instrument. é n e rgie. Des fils de tests à fusibles sont disponibles en tant qu’accessoires optionnels pour Les tests sont automatiquement bloqués si: des situations locales dans lesquelles une •... -
Page 36: Tests D'isolation (Mω) (Voir Fig. 1)
Tests d’isolation 5. Tous les circuits à condensateurs charg é s pendant test décharg e ro n t (MΩ) (voir fig. 1) automatiquement. Si des tensions significatives Les tests d’isolation persistent, l’alarme de tension se déclenchera et appliquent les tensions relevées s’aff i c h e ro n t . tension connue à... - Page 37 appuyer de nouveau sur la touche XXXXX. Déchargement automatique Lorsque le bouton de TEST est relâché après un Bonne procédure pendant la réalisation de test d’isolation (ou renfoncé si la fonction ltb est tests d’isolations activée), une charge de 200kΩ est automatique- Il faut faire attention lors de la prise de mesure s ment transférée à...
-
Page 38: Tests De Continuité (Ω)
Tests de continuité (Ω) (voir fig.2) Les tests de continuité sont activés lorsque les sondes e n t rent en contact à moins de quelques kΩ. Le test fonctionne sans avoir besoin d’appuyer sur le bouton T E S T. Lorsque les fils de test sont retirés, l’affichage se maintient pendant quelques secondes puis est remis à... -
Page 39: Alarme De Continuité
touche XXXXX. Pour désengager la fonction de Tests de résistance (kΩ) BLOCAGE, maintenir la touche XXXXX enfoncée. C’est un test à basse tension (5V) et à basse intensité (25µA) pour un équipement électronique Sources possibles d’erreur sensible. Il fonctionne de la même manière que les Les mesures et les résultats peuvent être affectés gammes de continuité. -
Page 40: Tests En Millivolts
Tests de diode en cours de mesure, appuyer sur la touche XXXXX. Cette gamme peut également être utilisée pour La fréquence s’affichera dans la fourchette 16Hz- tester des diodes, la borne positive étant la source 460Hz. Pour visualiser la tension du courant du courant de test. -
Page 41: Tests De Capacitance
indiquer que le zéro a été réglé. Mise à zéro de uF 1. Sélectionner la gamme de mV en courant Pour mettre la gamme uF à zéro, déconnecter les continu. fils, attendre que l’affichage se stabilise et appuyer 2. Raccorder les fils de tests ensemble. sur le bouton de T E S T. -
Page 42: Tests En Milliampères
restera ou clignotera pour indiquer qu’il y a trop de lecture apparaîtra automatiquement. bruit pour pouvoir atteindre un résultat. Pour visualiser la fréquence du courant alternatif Tests en milliampères (mA) mesuré en mA, appuyer sur la touche XXXXX. La En raison de la faible impédance de sourc e fréquence s’affichera dans la fourchette 16Hz- associée à... - Page 43 1. Tourner le sélecteur rotatif sur la position RCL. que pour l’isolation, un code, tel que donné Le code rcl s’affiche. dans le tableau ci-après s’affiche. Ce code est 2. Appuyer sur la touche XXXXX. Le code TD utilisé pour décrire le circuit testé et peut de ce actuellement sélectionné...
- Page 44 les tests. Environ 300 résultats peuvent être 2. Déplacer le commutateur de sélection rotatif sauvegardés dans la mémoire. sur la position RCL. Le code rcl s’affiche. 3. Commencer l’impression en appuyant sur le Tests à sauvegarder Code d’affichage Signification bouton de TEST. Annuler n’importe quand en Continuité...
- Page 45 ∼ sur les touches XXXXX et XXXXX. Les numéros Télécharger sur un PC de circuits sont présentés dans l’ordre suivant La série BMM a été conçue pour être utilisée avec lequel les résultats ont été sauvegardés. Un AVO Powersuite pour Windows qui acceptera les long signal sonore retentit lorsque la la fin de la résultats de tests et permettra la production de liste est atteinte.
-
Page 46: Consignation De Donneés
lorsque la consignation de données est en cours, S i g n a l Testeur d’isolation ‘D’ à 9 voies ‘D’ à 25 voies les résultats sont sauvegardés automatiquement et de manière continue dans la mémoire et aucune autre information n’est enregistrée. Le stockage et la consignation sont des fonctions r é... - Page 47 consignation de données peut commencer (voir déroule, elle peut être arrêtée à tout moment en modes de configuration): tournant le commutateur de gamme. Toutes les 1. Maintenir la touche X X X X X enfoncée et données consignées jusqu’à ce moment seront déplacer le commutateur rotatif sur la position conservées.
-
Page 48: Modes De Configuration
PC connecté par un câble en série. Le disque Mode de configuration de l’imprimante fourni avec l’instrument comprend un programme L’instrument ne peut répondre à un signal capable de traiter les données. La méthode est “occupé” donné par l’imprimante et attend donc à comparable à... - Page 49 Pour sélectionner la langue de l’imprimante Dans le réglage d’usine, la consignation est activée 1. Appuyer sur la touche XXXXX pour se déplacer et le stockage est désactivé. et afficher le code lng. 1. To u rner le bouton de gamme sur ‘RCL’ tout en 2.
- Page 50 * Cela se rapporte à une surtension parasite susceptible d’être observée dans les câblages Fonctionnement: d’installation fixe. La MEGGER SP1 est un accessoire pour les instruments de tests d’installations conçus par XXXX Ne pas utiliser la sonde si une quelconque MEGGER.
- Page 51 batterie. Replacer et rebloquer le couvercle du compartiment des batteries. Retirer les piles si l’instrument ne doit pas être utilisé pendant une longue période. Vérification et remplacement du fusible Pour vérifier le fusible de l’instrument, se mettre sur une gamme d’isolation et appuyer sur le bouton de TEST.
-
Page 52: Specifications
Remarque: Les spécifications ci-dessus s’appliquent seulement lorsque des fils au silicone de haute qualité sont utilisés. Gammes d’isolation Test nominal 2 5 0 V, 500V, 1000V (BMM2500) Gamme de mesure : Tension (c.c.): 5 0 V, 100V, 250V, 500V, 1000V De 0,01MΩ... - Page 53 P r é c i s i o n : ±3% ±2 chiff re s P r é c i s i o n : ±3% ±2 chiff res ±0,2nF Tension de circuit ouvert: 5V ±1V Mise à zéro des uF: Jusqu’à...
-
Page 54: Résistance De Continuité - Ω
Erreurs de base et de service pour les Résistance d’isolation – MΩ gammes d’isolation et de résistance. Limite Lecture mini. indiquée Limite Lecture mini. indiquée L’ e r reur de base est l’imprécision maximale de 0,10 0,14 2,00 2,12 l’instrument dans des conditions idéales, tandis que 0,20 0,25 3,00... - Page 55 Securite Fusible L’instrument répond aux exigences de sécurité 500mA (F) 500V, 32x 6mm Céramique HBC 10kA pour la double isolation conformément aux normes minimum. IEC1010-2-031 (1995), EN61010-2-031 (1995), C.E.M. Catégorie III*, de 300V de la phase à la terre et de L’instrument est conforme aux normes EN 50081- 440V de phase à...
- Page 56 Conditions Environnementales Accessoires Fourchette de fonctionnement Fourni: Numéro de pièce de -5 à +40°C Jeu de fils de tests 6220-437 Humidité de fonctionnement Mallette de tests portable 6420-112 90% d’humidité relative à En option: Numéro de pièce 40°C maxi. Jeu de fils à fusibles, FPK8 6111-218 Fourchette de températures de Stockage Sonde de tests à...
-
Page 57: Reparations Et Garantie
Si la protection d’un instrument s’est indépendantes ont été approuvées pour des travaux de détériorée, il ne devra pas être utilisé, et être envoyé pour des réparations sur la plupart des instruments MEGGER , à l’aide ®... - Page 58 I S O L AT I O N S M U LTIMETER MEGGER BMM2500 B e d i e n u n g s a n l e i t u n g MEGGER ®...
- Page 59 INHALTSVERSEICHNIS Sicherheitshinweise Allgemeine Beschreibung Bedienung Durchgangsprüfung Durchgangspiepser Spannungsprüfungen Millivoltprüfungen Speichern von Ergebnissen Datenaufzeichnung Auf dem Gerät werden die folgenden Einrichtbetrieb Symbole verwendet: Technische Daten Vorsicht, Gefahr eines elektrischen Schlags. Reparatur und Garantie Vorsicht, Lesen Sie bitte in der Benutzeranleitung. Das Gerät ist durchwegs durch doppelte Isolations geschützt (Klasse II).
-
Page 60: Sicherheitshinweise
SICHERHEITSHINWEISE Die Sicherheitshinweise und Vorsichtsmaßnahmen müssen gelesen und verstanden werden, bevor das Gerät benutzt wird. Sie müssen während des Gebrauchs befolgt werden. Der zu prüfende Stromkreis muß, außer für die Spannungsmessung, stromlos geschaltet und abgetrennt werden, bevor die Anschlüsse hergestellt werden. Während der Prüfung dürfen keine Schaltverbindungen berührt werden. -
Page 61: Allgemeine Beschreibung
ALLGEMEINE BESCHREIBUNG Die Geräte der Reihe MEGGER BMM2500 sind Ein speziell angefertigter Stecker oben am Gerät batteriebetriebene Isolations- und Durc h g a n g s- ermöglicht die Verwendung der als Sonderzubehör prüfgeräte mit einer Meßfähigkeit von 0,01Ω erhältlichen geschalteten Sonde MEGGER SP1 für Durchgang bis 200GΩ... - Page 62 AVO PowerSuite kompatibel, so daß die Geräte als Teil eines integrierten Prüf- und Zertifikationssystems eingesetzt werden können. Die Geräte der Reihe BMM2500 sind außerdem in der Lage, Ergebnisse über einen längeren Zeitraum aufzuzeichnen, so daß Langzeitmessungen von Anlagen durchgeführt werden können.
-
Page 63: Bedienung
BEDIENUNG Lesen Sie die Sicherheitshinweise, bevor Sie das benötigt wird, als Sonderzubehör erhältlich. Gerät benutzen. Automatisches Ausschalten Zum Schonen der Batterie schaltet das Gerät (nachdem zuvor Die Prüfung wird automatisch verhindert, wenn: eine Reihe von Piepstönen ertönt) nach ca. 10 Minuten der •... - Page 64 Verbinden Sie die Prüfkabel zuerst mit dem Gerät, dann mit dem isolierten Gegenstand, der geprüft werden soll. Drücken Sie die Taste TEST, um die Prüfspannung anzulegen. Lesen sie das Ergebnis ab. Lassen Sie die Taste TEST am Ende der Prüfung los. Der letzte Ablesewert bleibt auf der Anzeige.
- Page 65 Isolationsprüfung fließt. Drücken Sie die Taste XXXXX, um den Automatische Entladung K r i e c h s t rom anzuzeigen. Drücken Sie die Taste X X X X X Wenn die Taste TEST nach einer Isolationsprüfung losgelassen nochmals, um den Isolationswiderstand anzuzeigen. wird (bzw.
-
Page 66: Durchgangsprüfung
Durchgangsprüfung (Ω) (Siehe Abb. 2) Die Durchgangsprüfungen werden aktiviert, wenn die Sonden einen Kontakt von weniger als einigen kΩ machen. Die Prüfung läuft ab, ohne daß die Taste TEST gedrückt werden muß. Wenn die Prüfkabel entfernt werden, bleibt die Anzeige während einiger Sekunden erhalten und wird dann zurückgesetzt. -
Page 67: Durchgangspiepser
gedrückt, um die VERRIEGELUNGSFUNKTION zu deaktivieren. Widerstandsprüfungen (kΩ) Dies ist eine Prüfung bei niedriger Spannung (5V) und niedrigem Mögliche Fehlerquellen S t rom (25µA) für empfindliche elektronische Geräte. Sie Messungen und Ergebnisse können folgendermaßen funktioniert genauso, wie die Durchgangsbereiche. beeinträchtigt werden: Stellen Sie den Wahlschalter in die Stellung kΩ. -
Page 68: Spannungsprüfungen
entstehenden Spannung innerhalb der Grenzen für Stellen Sie den Wahlschalter in die Stellung mV. ∼ Halbleiterübergänge liegt. Diese Funktion, zusammen mit dem Wählen Sie mit der Taste X X X X X entweder a.c. mV geringen Prüfstrom und dem großen Meßbereich (0,01kΩ to (Wechselstrom) oder d.c. - Page 69 Frequenz wird im Bereich 16Hz-460Hz. angezeigt. Drücken Sie Der Bereich eignet sich für die Prüfung von diskreten Bauteilen die Taste XXXXX nochmals, um die Wechselspannung a.c. mV und kurzen Signalleitungen mit geringen Interferenzen. Wenn anzuzeigen. Bei Eingängen von weniger als 10mV wird die Elektrolytkondensatoren geprüft werden, ist das rote Kabel an Frequenz nicht angezeigt.
-
Page 70: Speichern Von Ergebnissen
Stellen Sie den Wahlschalter in die Stellung mA. Ändern von Verteilertafeln Schließen Sie die Prüfkabel an. Vor einer Prüfung kann die Nummer der Verteilertafel wie folgt Drücken Sie die Taste TEST, und halten Sie sie während geändert werden: ca. 2 Sekunden gedrückt. Stellen Sie den Wahldrehschalter in die Stellung RCL. - Page 71 Durchgang als auch die Isolation wird ein Kode gemäß der Prüfspeicher vorhanden ist. Im Speicher können ca. 300 nachfolgenden Tabelle angezeigt. Dieser Kode wird Ergebnisse gespeichert werden. verwendet, um den geprüften Stromkreis zu beschreiben Zu speichernde PrüfungA n z e i g e k o d e B e d e u t u n g und kann dementsprechend vom Benutzer geändert Durchgang...
- Page 72 Vorgang, indem Sie eine beliebige andere Taste drücken. zur Anzeige RCL zurückzukehren. Der Kode rcl wird angezeigt. Wählen Sie die gewünschte Stro m k reisnummer aus, ∼ indem Sie die Tasten XXXXX XXXXX drücken. Die Ergebnisse drucken (siehe Einrichtbetrieb) Stromkreisnummern werden in der Reihenfolge angezeigt, Verbinden Sie den Drucker und das Gerät mit einem in der die Ergebnisse gespeichert werden.
-
Page 73: Datenaufzeichnung
Auf einen PC herunterladen Signal Insulations-prüfer 9-fach ‘D’ 25-fach ‘D’ Die Reihe BMM wurde für die Benutzung mit AVO Powersuite für Windows ausgelegt, das die Prüfergebnisse akzeptiert und die Erstellung einer Reihe von Prüfzertikfikaten ermöglicht, z.B. Periodische Inspektion und Abschluß. Die mit dem Gerät gelieferte CD enthält das Programm AVO Download Manager. - Page 74 S p e i c h e rn und Aufzeichnen sind zwei sich gegenseitig Durch Drücken der Taste EXIT wird die Aufzeichnung ausschließende Funktionen. Das Gerät kann nicht für die abgebrochen, und die Anzeige OFF erscheint. Ausführung beider Abläufe zum selben Zeitpunkt eingerichtet Wenn die Datenaufzeichnung eingeschaltet ist, beginnt sie, werden.
-
Page 75: Einrichtbetrieb
Batterien versagen, bleiben alle bereits aufgezeichneten mit Strom zu versorgen, muß eine zusätzliche Versorgung Ergebnisse erhalten. Beachten Sie, daß beim Aufzeichnen von bereitgestellt werden. Wenden Sie sich für Angaben dazu an Isolationsergebnissen die Taste TEST eingerastet ist. den AVO Produktsupport. Anzeigen aufgezeichneter Daten Einrichtbetrieb des Druckers Aufgezeichnete Ergebnisse können nur über die RS232-... - Page 76 Zum Wählen der Druckersprache halten Sie gleichzeitig die Taste XXXXX gedrückt. Pdt wird Drücken Sie die Taste X X X X X, um die Kodes zu angezeigt. durchlaufen und den Kode lng anzuzeigen. Drücken Sie die Taste X X X X X bis log (aufzeichnen) Drücken Sie die Taste XXXXX.
-
Page 77: Ersetzen Der Batterie
, Bedienung: sind die Zellen beinahe leer und sollten so bald wie möglich ersetzt Die Sonde MEGGER SP1 ist ein Zubehörteil für als solche w e rden. Verwenden Sie Alkalizellen IEC LR6 (AA) oder bezeichnete Installationsprüfgeräte von MEGGER. Wenn sie w i e d e r a u f l a d b a re NiCd-Zellen. -
Page 78: Technische Daten
(Alle Genauigkeiten sind für +20°C angegeben.) Hinweis: Die obengenannten Daten gelten nur, wenn hochwertige Silikonkabel verwendet werden. Isolationsbereich Meßbereich: 0,01MΩ bis 200GΩ Nennprüfspannung 250V, 500V, 1000V (BMM2500) (0-100GΩ auf Analogskala). (Gleichstrom): 50V, 100V, 250V, 500V, 1000V Betriebsbereich (BM2580) nach EN61557: 0,10Ω... - Page 79 Widerstand Kapazität Meßbereich: 0,01 kΩ bis 9,99MΩ Meßbereich: 0,1nF to 9,99mF (0 bis 100 MΩ auf Analogskala) Genauigkeit: ±3% ±2 Ziffern ±0,2nF Genauigkeit: ±3% ±2 Ziffern Nullen von mF: bis 10nF Spannung bei offenem Stromkreis: 5V ±1V Milliampère Kurzschlußstrom: 25µA ±5µA Meßbereich: 0,1mA bis 500mA (0 bis 1000mA auf Spannung...
- Page 80 Grundfehler und Betriebsfehler für die Isolationswiderstand – MΩ Isolations- und Widerstandsbereiche. Der Grundfehler ist die maximale Ungenauigkeit des Grenze Min. angezeigter Ablesewert Limit Min. Indicated Reading Geräts unter idealen Bedingungen, während der 0,10 0,14 2,00 2,12 Betriebsfehler die maximale Ungenauigkeit unter 0,20 0,25 3,00...
- Page 81 Sicherheit E.M.V. Die Geräte erfüllen die Anforderungen für Doppelisolation nach Die Geräte entsprechen EN 50081-1 und EN 50082-1 (1992). IEC 1010-1 (1995), EN 61010-1 (1995) für Kategorie III*, 300V Stromversorgung Phase gegen Erde (Masse) und 440V Phase gegen Phase, Batterietyp: 6x1,5V Alkalizellen Typ IEC LR6 oder ohne Notwendigkeit getrennt abgesicherter Prüfkabel.
- Page 82 Zubehör Mitgeliefert: Teilenummer Prüfkabelsatz 6220-437 Prüf- & Tragekoffer 6420-112 Sonderzubehör: Teilenummer Abgesicherter Kabelsatz, FPK8 6111-218 Geschaltete Prüfsonde SP1 6220-606 Prüfprotokollkarten (Packung à 20 Stk) 6111-216 AVO PowerSuite 6111-237 AVO NiceOne 6111-403 9-fach serielles Kabel 25955-025 Veröffentlichungen: ‘A Stitch in Time’ AVTM21-P8B ‘Testing Electrical Installations’...
-
Page 83: Reparatur Und Garantie
Dem Absender wird bei Bedarf vor Aufnahme der Arbeit macht die Garantie automatisch ungültig. an dem Gerät ein Reparaturkostenvoranschlag überreicht, der Gerätereparatur und Ersatzteile Frachtkosten und andere Kosten aufweist. Wenn Sie Service-Ansprüche für MEGGER -Geräte haben, wenden Sie ® sich bitte an: AVO INTERNATIONAL...