Aprimatic AT 80/E Notice D'installation Mécanique, D'utilisation Et D'entretien
Masquer les pouces
Voir aussi pour AT 80/E:
Table des Matières
Publicité
Les langues disponibles
Les langues disponibles
Liens rapides
SCOPO DEL MANUALE
Questo manuale è stato redatto dal costruttore ed è parte integrante del prodotto.
In esso sono contenute tutte le informazioni necessarie per:
• la corretta sensibilizzazione degli installatori alle problematiche della sicurezza;
• la corretta installazione del dispositivo;
• la conoscenza approfondita del suo funzionamento e dei suoi limiti;
• il corretto uso in condizioni di sicurezza;
La costante osservanza delle indicazioni fornite in questo manuale, garantisce la sicurezza dell'uomo, l'economia
di esercizio e una più lunga durata di funzionamento del prodotto.
Al fi ne di evitare manovre errate con il rischio di incidenti, è importante leggere attentamente questo manuale,
rispettando scrupolosamente le informazioni fornite.
Le istruzioni, i disegni, le fotografi e e la documentazione contenuti nel presente manuale sono di proprietà
APRIMATIC S.p.a. e non possono essere riprodotti in alcun modo, né integralmente, né parzialmente.
Il logo "APRIMATIC" è un marchio registrato di APRIMATIC S.p.a.
PURPOSE OF THE MANUAL
This manual was drawn up by the manufacturer and is an integral part of the product.
It contains all the necessary information:
• to draw the attention of the installers to safety related problems
• to install the device properly
• to understand how it works and its limits
• to use the device under safe conditions
Strict observance of the instructions in this manual guarantees safe conditions as well as effi cient operation and
a long life for the product.
To prevent operations that may result in accidents, read this manual and strictly obey the
instructions provided.
Instructions, drawings, photos and literature contained herein are the exclusive property of the
manufacturer and may not be reproduced by any means.
The "Aprimatic" logo is a trademark registered by Aprimatic S.p.A.
BUT DU MANUEL
Ce manuel a été rédigé par le constructeur et fait partie intégrante du produit.
Il contient toutes les informations nécessaires pour :
• sensibiliser les installateurs aux problèmes liés à la sécurité ;
• installer le dispositif de manière correcte ;
• connaître le fonctionnement et les limites du dispositif ;
• utiliser correctement le dispositif dans des conditions de sécurité optimales ;
Le respect des indications fournies dans ce manuel garantit la sécurité personnelle, une économie de fonctionnement
et une longue durée de vie du produit.
Afi n d'éviter des opérations incorrectes et de ne pas risquer des accidents sérieux, lire attentivement ce manuel et
respecter scrupuleusement les informations fournies.
Les instructions, les dessins, les photos et la documentation contenus dans ce manuel sont la propriété d'APRIMATIC
S.p.A. et ne peuvent être reproduits sous aucune forme, ni intégralement, ni partiellement.
Le logo « Aprimatic » est une marque déposée par Aprimatic S.p.A.
ZWECK DES HANDBUCHS
Dieses Handbuch wurde vom Hersteller verfasst und ist ein ergänzender Bestandteil des Produkts.
Es enthält alle nötigen Informationen für:
• die Sensibilisierung der Monteure für Fragen der Sicherheit;
• die vorschriftsmäßige Installation der Vorrichtung;
• die umfassende Kenntnis ihrer Funktionsweise und ihrer Grenzen;
• die vorschriftsmäßige und sichere Benutzung.
Die Beachtung der in diesem Handbuch enthaltenen Anweisungen gewährleistet die Sicherheit der Personen, den
wirtschaftlichen Betrieb und eine lange Lebensdauer des Produkts.
Zur Vermeidung von Fehlbedienung und somit Unfallgefahr dieses Handbuch aufmerksam durchlesen und die
Anweisungen genau befolgen.
Die Anleitungen, Zeichnungen, Fotos und Dokumentationen in diesem Handbuch sind Eigentum von APRIMATIC
S.p.A. und dürfen in keiner Weise ganz oder teilweise reproduziert werden.
Das Logo „Aprimatic" ist ein eingetragenes Warenzeichen der Aprimatic S. p. A.
OBJETO DEL MANUAL
Este manual ha sido redactado por el constructor y forma parte integrante del producto.
El mismo contiene todas las informaciones necesarias para:
• la correcta sensibilización de los instaladores hacia los problemas de la seguridad
• la correcta instalación del dispositivo
• el conocimiento en profundidad de su funcionamiento y de sus límites
• el correcto uso en condiciones de seguridad
La constante observación de las indicaciones suministradas en este manual, garantiza la seguridad del hombre,
la economía del ejercicio y una mayor duración de funcionamiento del producto.
Con el fi n de evitar maniobras equivocadas con riesgo de accidente, es importante leer atentamente este manual,
respetando escrupulosamente las informaciones suministradas.
Las instrucciones, los dibujos, las fotografías y la documentación que contiene este manual son propiedad de
APRIMATIC S.p.a. y no pueden ser reproducidas en ninguna manera, ni integral ni parcialmente.
El logotipo "Aprimatic" es una marca registrada de Aprimatic S. p. A.
AT 80/E
Motoriduttore 230V per cancello scorrevole
230V gearmotor for sliding gate
Motoréducteur 230V pour portail coulissant
Getriebemotor 230V für Schiebetor
Motorreductor 230V para cancela corredera
Istruzioni di installazione meccanica Uso e
Mechanical installation, Use and Mainte-
Notice d'installation mécanique, d'Utilisation
Anleitung für die mechanische Installation,
Instrucciones para la instalación mecánica,
el uso y el mantenimiento
Manutenzione
nance instructions
et d'Entretien
Gebrauch und Wartung
Publicité
Chapitres
Table des Matières
Dépannage

Manuels Connexes pour Aprimatic AT 80/E


Sommaire des Matières pour Aprimatic AT 80/E
- Page 1 Afi n d’éviter des opérations incorrectes et de ne pas risquer des accidents sérieux, lire attentivement ce manuel et respecter scrupuleusement les informations fournies. Les instructions, les dessins, les photos et la documentation contenus dans ce manuel sont la propriété d’APRIMATIC S.p.A. et ne peuvent être reproduits sous aucune forme, ni intégralement, ni partiellement.
-
Page 2: Table Des Matières
CANCELLI AD ANTE SCORREVOLI AT 80/E SOMMARIO Norme di sicurezza e Obblighi dell’installatore Avvertenze per l’utilizzatore Terminologia e simboli Adottati nel manuale 1. Descrizione del prodotto Uso previsto e Campo d’impiego ......................4 Rischi residui ............................4 Dati tecnici .............................. 4 Dimensioni d’ingombro ........................... -
Page 3: Norme Di Sicurezza E Obblighi Dell'installatore
CANCELLI AD ANTE SCORREVOLI AT 80/E NORME DI SICUREZZA E OBBLIGHI DELL’INSTALLATORE per l’uso e la manutenzione. Queste istruzioni devono Per lavorare nel pieno rispetto delle norme di sicurezza essere conservate e consegnate a tutti i futuri possibili occorre: utilizzatori. -
Page 4: Descrizione Del Prodotto
VELOCITÀ ANTA NOMINALE 9,5 m/min (Z16) Uso previsto e Campo d’impiego 12 m/min (Z20) AT 80/E è stato progettato per automatizzare il movimento Quantità di LUBRIFICANTE 1,25 l di cancelli scorrevoli con peso max. di 1200 Kg, se adibiti Tipo di LUBRIFICANTE... -
Page 5: Controlli Preliminari Sul Cancello
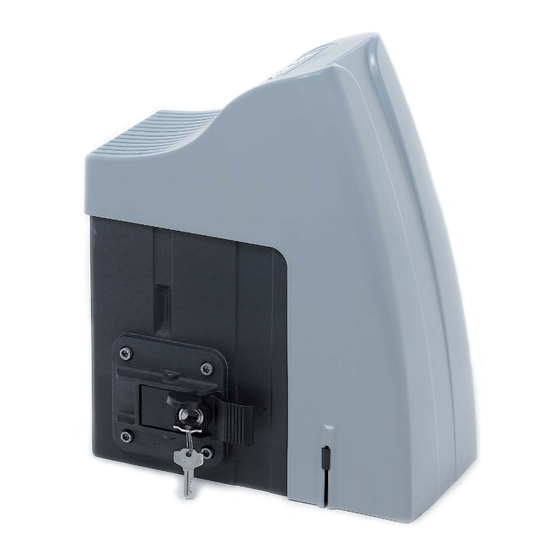
CANCELLI AD ANTE SCORREVOLI AT 80/E Tab.2 COMPONENTI FORNITI CON L ATTUATORE TÀ Fig.3 PF80 attuatore (con 2 chiavi di sblocco) piastrini fi necorsa (con 4 viti 6x8 UNI 5927 INOX) istruzioni; avvertenze; garanzia Aprimatic DA ACQUISTARE SEPARATAMENTE CATALOGO CZ - cremagliera (con nr.15 distanziali+viti / 5x1m 8x25 UNI 5739-8.8+rondelle 8x17 UNI 6592) -
Page 6: Predisposizione Allacciamenti Elettrici
CANCELLI AD ANTE SCORREVOLI AT 80/E PREDISPOSIZIONE ALLACCIAMENTI ELETTRICI Attenzione L’intero impianto deve essere realizzato da personale qualifi cato e in perfetta conformità con le norme vigenti nel Paese di installazione (norme CEI 64 - 8 / EN 60335-1...) È obbligatoria la messa a terra delle masse metalliche della struttura (cancello e pilastri). -
Page 7: Installazione
CANCELLI AD ANTE SCORREVOLI AT 80/E INSTALLAZIONE Fig.7A Fig.7B Realizzare la fondazione per la piastra da cementare e utilizzare il kit di supporto fi sso o basculante. Attenzione Sono vietati dal costruttore altri tipi di montaggio con la base del motore non in assetto orizzontale. -
Page 8: Installazione Dell'attuatore
CANCELLI AD ANTE SCORREVOLI AT 80/E Installazione dell'attuatore • Svitare la vite di fi ssaggio e rimuovere il cofano dell'attuatore (dovrà essere rimontato al termine dell'installazione e ribloccato con la relativa vite di fi ssaggio). Fig.12 4.2.1 Installazione fi ssa - con Kit IF80 IMPORTANTE! con cancelli pesanti si raccomanda l’installazione fi... -
Page 9: Fissaggio Cremagliera
CANCELLI AD ANTE SCORREVOLI AT 80/E Fissaggio cremagliera Fig.14 La cremagliera CZ è in acciaio zincato. Viene fissata mediante appositi distanziali da saldare alla base del cancello. A (mm) Cautela I componenti della cremagliera devono essere ben allineati l’uno con l’altro. -
Page 10: Fissaggio Piastrini Finecorsa
CANCELLI AD ANTE SCORREVOLI AT 80/E Fissaggio piastrini fi necorsa L’attuatore è dotato di un fi necorsa elettromeccanico con asta a molla. L'azionamento è determinato da due piastrini Fig.19 metallici da fi ssare sulla cremagliera in modo da impegnare il fi... -
Page 11: Regolazione Della Frizione
CANCELLI AD ANTE SCORREVOLI AT 80/E REGOLAZIONE DELLA FRIZIONE Fig.21 La frizione meccanica regolabile consente di limitare la forza di spinta che l’attuatore esercita contro un ostacolo che si opponga al movimento dell'anta. REGOLAZIONE • Togliere tensione all'attuatore. • Rimuovere il cofano dell'attuatore e poi il tappo ( Fig.21-... -
Page 12: Note Per L'utente
CANCELLI AD ANTE SCORREVOLI AT 80/E NOTE PER L'UTENTE Ricerca guasti Vedi Tab.4. IMPORTANTE Si consiglia di far effettuare periodicamente un controllo Tab.4 TIPO DI GUASTO PROBABILI CAUSE RIMEDI per constatare il buon funzionamento dell’attuatore, da • • C O M A N D O... - Page 13 SLIDING GATES AT 80/E INDEX Safety Standards and Installer Obligations Warnings for the user Terminology and symbols used in this manual 1. Product technical features Destined use and Working range ......................15 Residual risks ............................15 Technical data ............................15 Overall dimensions ..........................
-
Page 14: Safety Standards And Installer Obligations
SLIDING GATES AT 80/E SAFETY STANDARDS AND INSTALLER hazardous. • Keep away from moving mechanical parts. Keep away OBLIGATIONS from the operating range of the device during operation. Installers must proceed as follows to conform with safety Do not try to obstruct the movement of the device as such standards: action may be hazardous. -
Page 15: Product Technical Features
12 m/min (Z20) Destined use and Working range LUBRICANT quantity 1,25 l AT 80/E operator is designed to automate the movement of LUBRICANT type AprimOil DN22 max. 1200 Kg sliding gates for residential-use, or of max. 800 kg for condominium-use (pinion Z20 is necessary). -
Page 16: Gate Preliminary Checks
SLIDING GATES AT 80/E .2 - COMPONENTS SUPPLIED WITH THE OPERATOR Fig.3 PF80 Operator (with 2 release keys) Limit switch plates (with 4 s/s screws 6x8 UNI 5927) instructions; warnings; warranty Aprimatic TO BE PURCHASED SEPARATELY CATALOGUE CZ - rack (with nr.15 spacers+screws 8x25 / 5x1m UNI 5739-8.8+washers 8x17 UNI 6592) -
Page 17: Preparing Electrical Connections
SLIDING GATES AT 80/E PREPARING ELECTRICAL CONNECTIONS Warning The system must only be installed by skilled personnel qualifi ed in compliance with the regulations of the country of installation (CEI 64 - 8 / EN 60335-1... standards) The metallic components of the structure (i.e. the gate and pillars) must have an earth connection. -
Page 18: Fitting The Operator
SLIDING GATES AT 80/E FITTING THE OPERATOR Fig.7A Fig.7B Realise the foundation for the plate to be cemented and use the fi xed or pivoting support kit to install the operator. Warning Other assembly methods where the motor base is not horizontal are forbidden by the manufacturer. -
Page 19: Fixing The Operator
SLIDING GATES AT 80/E Fixing the operator • Loosen the fi xing screw and remove the operator cover (iIt will be remounted at the end of the installation and blocked by the fi xing screw). Fig.12 4.2.1 Fixed installation - with Kit IF80 IMPORTANT! the fi... -
Page 20: Fitting The Bar Rack
SLIDING GATES AT 80/E Fitting the bar rack Fig.14 The rack CZ is a Galvanized steel rack. Fixing is made using the relevant spacers to be welded on the gate base. A (mm) Caution The different components of the rack must be well aligned with each other. -
Page 21: Fixing The Limit Switch Plates
SLIDING GATES AT 80/E FixIng the limit switch plates The actuator has an electromechanical limit switch with a spring rod. The limit switch is tripped by two metal plates Fig.19 that must be fi tted on the rack in such a way as to engage the limit switch rod when the gate is near the fully open and fully closed positions. -
Page 22: Clutch Adjustment
SLIDING GATES AT 80/E CLUTCH ADJUSTMENT Fig.21 The adjustable mechanical clutch make possible to limit the pressure of the gate againts any obstacle in its path. ADJUSTMENT • Turn OFF the mains supply to geared-motor. • Remove the cover from the geared-motor and remove the plug (Fig.21-ref.1). -
Page 23: Notes For Users
SLIDING GATES AT 80/E NOTES FOR USERS Troubleshooting See Tab.4. IMPORTANT At regular intervals, we recommend carrying out regular TYPE OF FAULT PROBABLE CAUSES SOLUTIONS checks by specialised personnel to ensure that the • • operator is running smoothly. Do this at least once every... - Page 24 PORTAILS COULISSANTS AT 80/E TABLE DES MATIÈRES Normes de sécurité et obligations de l’installateur Mises en garde pour l’utilisateur Terminologie et symboles utilisés dans le manuel 1. Caractéristiques du produit Utilisation prévue et Secteur d’emploi ....................26 Risques résiduels ..........................26 Données techniques ..........................
-
Page 25: Normes De Sécurité Et Obligations De L'installateur
PORTAILS COULISSANTS AT 80/E NORMES DE SÉCURITÉ ET OBLIGATIONS attentivement parce qu’elles contiennent des informations DE L’INSTALLATEUR importantes pourl’utilisation et l’entretien. Ces instructions doivent être conservées et remises à tous les utilisateurs Pour travailler dans le respect des normes de sécurité, il faut: futurs éventuels. -
Page 26: Caractéristiques Du Produit
(fi xe ou basculante - voir le Catalogue). 12 m/min (Z20) Utilisation prévue et Secteur d’emploi Quantitée d’huile 1,25 l AT 80/E a été conçu pour automatiser le mouvement des Type d’huile AprimOil DN22 portails coulissants de MAXI 1200 Kg à usage résidentiel Degré de protection IP 44 ou de MAXI 800 Kg à... -
Page 27: Contrôles Préliminaires Sur Le Portail
PORTAILS COULISSANTS AT 80/E .2 - COMPOSANTS FOURNIS AVEC LE MOTORÉDUCTEUR RÉF TÉ Fig.3 PF80 Actionneur (avec 2 clés de déverrouillage) Plaquettes fi n de course (avec 4 vis 6x8 UNI 5927 INOX) instructions; avertissements; garantie Aprimatic À ACHETER SEPARAMMENT CATALOGUE CZ - crémaillère (avec nr.15 entretoises+vis... -
Page 28: Préparation Des Raccordements Électriques
PORTAILS COULISSANTS AT 80/E PRÉPARATION DES RACCORDEMENTS ÉLECTRIQUES Attention Toute l’installation doit être réalisée par des personnes qualifi ées, conformément aux normes en vigueur dans le pays d’installation (normes CEI 64 - 8 / EN 60335-1..). La mise à la terre des masses métalliques de la structure (portail et piliers) est obligatoire. -
Page 29: Fixation De L'actionneur
PORTAILS COULISSANTS AT 80/E FIXATION DE L’ACTIONNEUR Fig.7A Fig.7B Pour fi xer l’actionneur au sol, réaliser la fondation pour la plaque à immerger dans le béton et utiliser le kit de support fi xe ou basculante. Attention D’autres montages avec la base du moteur en position non horizontale sont interdits par le constructeur. -
Page 30: Installation De L'actionneur
PORTAILS COULISSANTS AT 80/E Installation de l’actionneur • Desserrer la vis de fi xation du couvercle du motoréducteur et enlever-le. Le couvercle sera à réassembler et fi xer avex la vis en conclusion de l’installation. Fig.12 4.2.1 Installation fi xe - avec Kit IF80 IMPORTANT! avec des portails lourds, utiliser l’installation fi... -
Page 31: Fixation De La Crémaillère
PORTAILS COULISSANTS AT 80/E Fixation de la crémaillère Fig.14 La crémaillère CZ est en acier zingué. La fi xation se fait par des douilles fi letées à souder à la base du portail. A (mm) Prudence Les différents composants de la crémaillère doivent être bien alignés entre eux. -
Page 32: Fixation Des Plaques De Fin De Course
PORTAILS COULISSANTS AT 80/E FIxation des plaques de fi n de course L’opérateur est équipé d’un fi n de course électromécanique avec tige à ressort dont l’actionnement dépend de deux Fig.19 plaques métalliques montées sur la crémaillère de façon à... -
Page 33: Réglage De L'embrayage
PORTAILS COULISSANTS AT 80/E RÉGLAGE DE L’EMBRAYAGE Fig.21 L’embrayage mécanique réglable permit de limiter la poussée que le portail exerce sur un obstacle. REGLAGE • Mettre hors tension l’actionneur. • Enlever le couvercle du motoréducteur et retirer le bouchon (Fig.21-réf.1). -
Page 34: Informations Pour L'usager
PORTAILS COULISSANTS AT 80/E INFORMATIONS POUR L’USAGER Dépannage IMPORTANT - Il est conseillé de faire effectuer périodiquement Voir Tab.4. un contrôle pour vérifier le bon fonctionnement de l’actionneur, par du personnel spécialisé avec une TYPE DE PANNE RAISONS PROBABLES REMÈDES fréquence qui ne dépasse pas 12 mois. - Page 35 SCHIEBETOREN AT 80/E INHALTSVERZEICHNIS Sicherheitsvorschriften und Pfl ichten des Installateurs Hinweise für den Benutzer Im Text verwendete Begriffe und Symbole 1. Beschreibung des Antriebs Vorgesehene Verwendung und Einsatzbereich ................... 37 Restrisiken ............................37 Technische Daten ..........................37 Abmessungen ............................37 Transportverpackung ...........................
-
Page 36: Hinweise Für Den Benutzer
SCHIEBETOREN AT 80/E SICHERHEITSVORSCHRIFTEN UND HINWEISE FÜR DEN BENUTZER PFLICHTEN DES INSTALLATEURS • Die folgenden Angaben und Hinweise sind Bestandteil des Produkts. Sie müssen dem Benutzer ausgehändigt F ü r d a s A r b e i t e n u n t e r v o l l e r B e a c h t u n g d e r... -
Page 37: Beschreibung Des Antriebs
Schwingbefestigung - siehe Katalog). 12 m/min (Z20) Vorgesehene Verwendung und Einsatzbereich Höhe der Schmierstoff 1,25 l Der Antrieb AT 80/E wurde für die Automatisierung von Art der Schmierstoff AprimOil DN22 Schiebetoren entwickelt. Der Einsatzbereich ist auf Tore Schutzgrad IP 44 mit Gewicht bis 1200 kg bei Einsatz im Privathäusern und... -
Page 38: Betriebsvorbereitende Arbeitsvorgänge
SCHIEBETOREN AT 80/E Tab.2 BAUTEILE GELIEFERTE MIT DER ANTRIEB Abb.3 Antrieb (mit 2 Entriegelungschlüssel) PF80 Endschalter Platte (mit 4 Schrauben 6x8 UNI 5927 Edelstahl) Anleitung; Hinweise; Garantie Aprimatic DAS GETRENNT ZU KAUFEN IST VERKAUFSKATALOG CZ - Zahnstange (mit Nr.15 Distanzstücken+Schrauben / 5x1m 8x25 UNI 5739-8.8+Scheiben 8x17 UNI 6592) -
Page 39: Vorbereitung Der Elektrischen Anschlüsse
SCHIEBETOREN AT 80/E VORBEREITUNG DER ELEKTRISCHEN ANSCHLÜSSE Achtung Die gesamte Anlage muss von Fachkräften gemäß den im Installationsland geltenden Vorschriften ausgeführt werden (Normen CEI 64 - 8 / EN 60335-1...). Die Erdung der Metallbauteile der Struktur (Tor und Pfosten) ist obligatorisch. -
Page 40: Befestigung
SCHIEBETOREN AT 80/E BEFESTIGUNG Abb.7A Abb.7B Das Fundament für die einzuzementierende Platte ausführen und das Halterkit für fi xe bzw. Schwingbefestigung verwenden. Achtung Andere Montagearten, bei denen die Basis des Motor sich nicht in horizontaler Lage befi ndet, sind vom Hersteller untersagt. -
Page 41: Montage Des Getriebemotors
SCHIEBETOREN AT 80/E Montage des Getriebemotors • Die Haube des Antriebs abnehmen. Nach der Installation wieder aufsetzen und die Befestigungsschraube wieder anziehen. Abb.12 4.2.1 Fixe Befestigung - mit Kit IF80 WICHTIG! Bei schweren Toren ist empfohlen die Installation feste. •... -
Page 42: Befestigung Regelstange
SCHIEBETOREN AT 80/E Befestigung Regelstange Abb.14 Die Zahnstange CZ ist aus verzinktem Stahl. Sie wird mithilfe geeigneter Distanzstücke befestigt, die an der Torbasis anzuschweißen sind. A (mm) Vorsicht Die verschiedenen Bestandteile der Zahnstange müssen optimal gegeneinander ausgerichtet werden. Bei den Verbindungen muss der Schritt zwischen den Zähnen konstant gehalten werden. -
Page 43: Befestigung Der Anschlagplatten
SCHIEBETOREN AT 80/E Befestigung der Anschlagplatten Der Antrieb besitzt einen elektromechanischen Endschalter mit Federstange. Der von zwei Metallplatten betrieben Abb.19 wird, die auf die Zahnstange montiert werden und die Endschalterstange bei Annäherung an die Torpositionen “Vollständig geöffnet” und Vollständig geschlossen” auslösen. -
Page 44: Einstellung Der Kupplung
SCHIEBETOREN AT 80/E EINSTELLUNG DER KUPPLUNG Abb.21 Die mechanischen regulierbare Kupplung begrenzt die Schubkraft des Torfl ügels, sobald ein Hindernis dessen Bewegung unmöglich macht. EINSTELLUNG • Strom vom Getriebemotor wegnehmen. • Deckel und Gewindeverschluß vom Getriebemotor entfernen (Abb.21-Pos.1). • Mittels Imbusschlüssel 4 die Schraube ( Pos.2) festhalten und... -
Page 45: Hinweise Für Den Benutzer
SCHIEBETOREN AT 80/E HINWEISE FÜR DEN BENUTZER Tab.4 DEFEKT MÖGLICHE URSACHEN ABHILFEN WICHTIG - Es wird empfohlen, die einwandfreie • • BEI ÖFFNUNGSBEFEHL STROM FEHLT STROM ANSCHLIESSEN Funktionstüchtigkeit des Antriebs regelmäßig (mindestens KEIN AUFSCHLIESSEN • • alle 12 Monate) durch Fachpersonal überprüfen zu lassen. - Page 46 CANCELA COREDERA AT 80/E ÍNDICE Normas de seguridad y obligaciones del instalador Advertencia para el usuario Términos y símbolos utilizados en el manual 1. Descripción del producto Uso previsto y Campo de aplicación ....................48 Peligros residuos ..........................48 Datos técnicos ............................48 Dimensiones ............................
-
Page 47: Normas De Seguridad Y Obligaciones Del Instalador
CANCELA COREDERA AT 80/E NORMAS DE SEGURIDAD Y OBLIGACIONES • Esta automatización debe utilizarse exclusivamente para DEL INSTALADOR el uso al cual ha sido destinada. Todo uso que no sea el indicado es impropio y por tanto peligroso. Para trabajar respetando las normas de seguridad es necesario: •... -
Page 48: Descripción Del Producto
12 m/min (Z20) Uso previsto y Campo de aplicación Cantidad de lubricante 1,25 l AT 80/E ha sido diseñado para automatizar el movimiento Tipo de lubricante AprimOil DN22 de todas aquellas cancelas correderas con peso Máx. de 1200 Kg, de uso residencial o con peso Máx. de 800 Kg, Grado de protección... -
Page 49: Comprobación Preliminares Cancela
CANCELA COREDERA AT 80/E Fig.3 COMPONENTES SUMINISTRADOS CON EL MOTORREDUCTOR PF80 motorreductor (con 2 llaves de desbloqueo) placas fi nal de carrera (con 4 tornillos 6x8 UNI 5927 INOX) instrucciónes; advertencias; garantía Aprimatic QUE DEBEN COMPRARSE POR SEPARADO CATÁLOGO CZ - cremallera (con n°15 distanciadores+tornillos / 5x1m 8x25 UNI 5739-8.8+arandelas 8x17 UNI 6592) -
Page 50: Predisposición De La Instalación Eléctrica
CANCELA COREDERA AT 80/E PREDISPOSICIÓN DE LA INSTALACIÓN ELÉCTRICA Atención Toda la instalación debe ser llevada a cabo por personal cualifi cado y en perfecta conformidad con las normas vigentes en el país de instalación (normas CEI 64 - 8 / EN 60335-1...) Es obligatoria la puesta a tierra de las masas metálicas de la estructura (cancela y pilares). -
Page 51: Installación
CANCELA COREDERA AT 80/E INSTALLACIÓN Fig.7A Fig.7B Realizar la fundación por la placa de cimentación y emplear el kit de soporte fi jo o basculante para fi jar el actuador. Atención Cualquier otro tipo de montaje en el que la base del motor no esté en equilibrio horizontal está... -
Page 52: Instalación Del Actuador
CANCELA COREDERA AT 80/E Instalación del actuador • Afl ojar el tornillo de fi jación y retirar de la cubierta de protección del actuador. Después de la instalación, la cubierta debe ser recolocada y fi jada apretando su Fig.12 tornillo. -
Page 53: Montaje De La Cremallera
CANCELA COREDERA AT 80/E Montaje de la cremallera Fig.14 La cremallera CZ está fabricada en acero galvanizado. La fi jación se efectúa mediante especiales distanciadores que se sueldan en la base de la cancela. A (mm) Precaución Las distintas piezas de la cremallera deben estar bien alineadas entre sí. -
Page 54: Fijación De Las Placas Final Carrera
CANCELA COREDERA AT 80/E Fijación de las placas fi nal carrera El actuador está provisto de un fi nal de carrera electromecánico con varilla de muelle. Su accionamiento está determinado Fig.19 por dos placas metálicas que se montan sobre la cremallera y que accionan la varilla del fi... -
Page 55: Ajuste Del Embrague
CANCELA COREDERA AT 80/E AJUSTE DEL EMBRAGUE Fig.21 El embrague regulable permite de limitar el empuje que la hoja ejerce sobre un obstáculo que impida el movimiento. AJUSTE • Quitar la tensión al motorreductor. • Quitar la tapadera al motorreductor y sacar el tapón (Fig.21-ref.1). -
Page 56: Notas Para El Usuario
CANCELA COREDERA AT 80/E NOTAS PARA EL USUARIO Búsqueda de averías ¡IMPORTANTE! Se aconseja realizar periódicamente Véase la Tab.4. un control para comprobar el buen funcionamiento del actuador, por personal especializado, con una periodicidad Tab.4 TIPO DE AVERÍA CAUSAS PROBABILES SOLUCIONES no superior a los 12 meses. - Page 57 AT 80/E - 57 -...
- Page 58 AT 80/E - 58 -...
- Page 59 AT 80/E - 59 -...
- Page 60 Aprimatic S.p.A. via Leonardo da Vinci, 414 40059 Villa Fontana di Medicina - Bologna - Italia Tel. +39 051 6960711 - fax +39 051 6960722 info@aprimatic.com - www.aprimatic.com...