Publicité
Les langues disponibles
Les langues disponibles
Liens rapides
Electric products must not be put into household waste. Please bring them to a recycling centre. Ask your
local authorities or your dealer about the way to proceed.
NOTE IMPORTANTE : Les produits électriques ne doivent pas être mis au rebut avec les ordures ménagères.
Veuillez les faire recycler là où il existe des centres pour cela. Consultez les autorités locales ou votre revendeur sur la
façon de les recycler.
BELANGRIJK: De elektrische producten mogen niet naast het huisvuil geplaatst worden. Gelieve deze te laten
recycleren daar waar er centra's hiervoor voorzien is. Raadpleeg de plaatselijke autoriteiten of uw verkoper ivm de
manier van recycleren.
WICHTIGER HINWEIS: Elektrogeräte gehören nicht in den Hausmüll. Sie müssen in speziellen Betrieben recycelt
werden. Bringen Sie sie zu einer speziellen Entsorgungsstelle für Elektrokleingeräte (Wertstoffhof)!
©Copyright LOTRONIC 2012
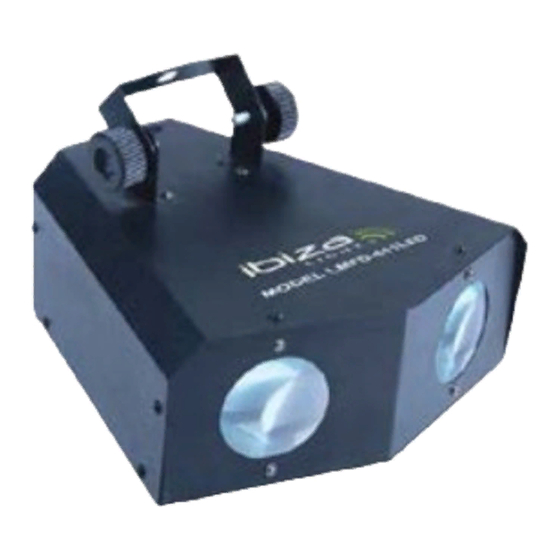
DUAL MOON FLOWER
LMFD-611LED / 15-1052
INSTRUCTION MANUAL
MANUEL D'UTILISATION
HANDLEIDING
BEDIENUNGSANLEITUNG
Page 1
Publicité

Manuels Connexes pour Ibiza Light LMFD-611LED


Sommaire des Matières pour Ibiza Light LMFD-611LED
- Page 1 DUAL MOON FLOWER LMFD-611LED / 15-1052 INSTRUCTION MANUAL MANUEL D’UTILISATION HANDLEIDING BEDIENUNGSANLEITUNG Electric products must not be put into household waste. Please bring them to a recycling centre. Ask your local authorities or your dealer about the way to proceed.
- Page 2 Introduction of Dual Moon Flower ① ② ③ ④ ⑤ ① Digital display screen ② Esc ③ Up ④ Down ⑤ Enter The digital display screen has three-class menu: The 1 : PROG (patterns moving style) NODE (master/slave) NAN (adjusting color) The 2 :C1 (single photo change) C2 (single photo fade)
- Page 3 AUTO (auto-running) SOUND (sound activated) Example of Operating: Master setting: Press ENTER to the 1st-class menu (PROG, NODE, NAN), press UP and DOWN, choose NODE, and press ENTER to get into the 2nd-class menu (SLA, NASE), then press UP and DOWN, choose SLA , press ENTER to get the third-class menu (0~255, AUTO, SOUND), choose AUTO or SOUND by UP and DOWN, press ENTER.
- Page 4 The same method for setting the third color. Any time, when power on, the light will be the chosen color last time (this light should be set up into slaves first) 3. Operation The function is to set each light as auto master All intellectual master connected by DMX signal cord, the PAR64 lights will recognize one as master, others as slaves in 5 to 10 seconds.
- Page 5 0-200 dimming Channel 1 201-240 strobe 241-255 Sound activated colour change Channel 2 0-255 Channel 3 0-255 Green Channel 4 0-255 Blue Channel 5 0-255 Adjust strobe speed when channel 1 is set to 201—240 NOTE If you are not familiar with DMX operation, we suggest setting every light as a master and allocating a digital address.
- Page 6 Présentation du Double Moon Flower Afficheur Echap Vers le haut Vers le bas Entrée Menu à l’écran menu : PROG (mouvement des motifs) NODE (maître /esclave) NAN (réglage de la couleur) ème menu : C1 (changement 1 photo) C2 (fondu 1 photo)
- Page 7 AUTO (fonctionnement automatique) SOUND (activation par le son) Exemple de Fonctionnement Réglage Master : Appuyez sur Entrée pour accéder au 1 menu (PROG, NODE, NAN). Appuyez sur UP ou DOWN (vers le haut ou le bas) pour sélectionner NODE et appuyez sur Entrer ème pour entrer dans le 2 menu (SLA, NASE).
- Page 8 Appuyez sur ENTER pour entrer dans le 1 menu (PROG, NODE, NAN). Choisissez ème NAN, entrez dans le 2 menu (rouge, bleu, vert), choisissez la couleur et appuyez ème sur ENTRER. Entrez dans le 3 menu. Choisissez la luminosité entre 0-255 et appuyez sur entrée pour terminer. Appuyez ème sur ECHAP pour revenir au 2 menu (rouge, bleu et vert) et choisir une autre...
- Page 9 Réglez chaque appareil comme un appareil indépendant en réglant le code d’adresse de l’écran numérique. Méthode de réglage : Lorsque vous mettez l’appareil sous tension, appuyez sur la touche ESC (Echap) . L’afficheur indique « 001 » sans A. Appuyez sur les touches Haut et Bas et réglez l’adresse numérique de votre choix.
- Page 10 DOUBLE MOON FLOWER Digital display screen, Esc, Up, Down, Enter Digitaal display met 3 menus 1. menu: PROG (beweging van de patronen) NODE (Master/slave) NAN (kleur instelling) 2. Menu: C1 (een foto wissel) C2 (1 foto fade) C3 (Multi fotos wissel) C4 (multi fotos fade)
- Page 11 Master instelling: Druk ENTER om in de 1.menu te gaan (PROG, NODE, NAN). Druk UP of DOWN toets en druk ENTER om in de 2. menu te gaan (SLA, NASE). Met de UP/DOWN toetsen SLA kiezen. ENTER drukken om in de deerde menu te gaan (0-255, AUTO, SOUND). Met de UP/DOWN toetsen AUTO of SOUND kiezen.
- Page 12 wordt aangesloten, wordt een lamp geselecteerd als een Master en alle anderen als slaves binnen 5-10 seconden. Alle slaves werken in fase met de master. Indien een DMX512 controller is aangesloten, worden alle lampen van de controller gecontroleerd. Indien de controller wordt afgekoppeld, de master/slave synchronisatie wordt direct ingesteld.
- Page 13 Indien het toestel is ingeschakeld, druk op ESC. De digitale display toont alleen “001” zonder de “A”. Druk de UP/DOWN toetsen en stel het gewenste digitaal adres in. Druk ENTER. NOTA Indien u niet goed de werking kent, zet iedere lamp op automatische Master en geef iedere lamp een digitaal adres.
- Page 14 2. Menü: C1 (Einzelbildwechsel) C2 (Einzelbildumblendung) C3 (Mehrbildwechsel) C4 (Mehrbildumblendung) SLA (Master) NASE (Slave) RED (rot) BLU (blau) GRE (grün) 3. Menü : 0-255 (Dateneinstellung) AUTO (Automatikbetrieb) SOUND (Klangaktiviert) Bedienungsbeispiel : Master Einstellung : Auf ENTER drücken, um ins erste Menü zu gehen (PROG, NODE, NAN), auf UP oder DOWN drücken, NODE drücken und ENTER, um ins 2.
- Page 15 NODE wählen und ENTER drücken, um ins 2. Menü (SLA, NASE) zu gehen. Mit den UP/DOWN Tasten SLA (Master) oder NASE (Slave) wählen und ENTER drücken. 2. Farbwahl (für Slaves geeignet) Wenn die PAR64 Leuchte als Slave eingestellt ist, kann sie durch Mischen der drei Grundfarben RGB die Farbe annehmen, die Sie möchten, und die Farbe speichern.
- Page 16 werden. Dazu muss man einen 120 Ohm Widerstand zwischen Stift 1 und 2 des letzten XLR Verbinders in Serie schalten. 3. Geben Sie jedem Gerät eine DMX Adresse (s. DMX Tabelle). 4. Schalten Sie alle Geräte ein. Nach dem Reset sind sie einsatzbereit. 5.
- Page 17 ©Copyright LOTRONIC 2012 Page 17...