
Manuels Connexes pour Speedlink Blue Lightning Wheel SL-6685


Sommaire des Matières pour Speedlink Blue Lightning Wheel SL-6685
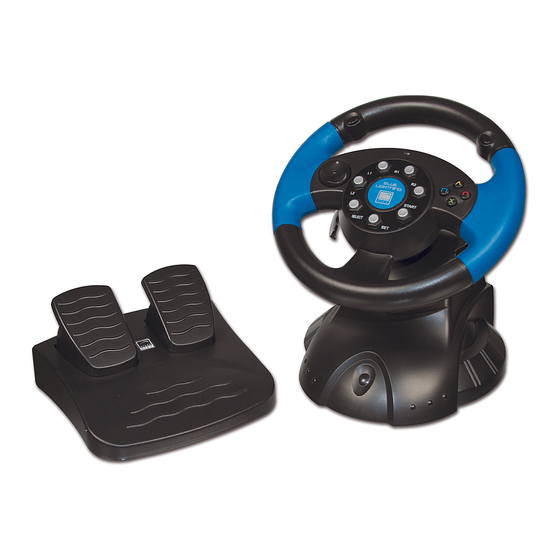
- Page 1 Bedienungsanleitung Bedienungsanleitung Bedienungsanleitung User‘s guide Mode d‘emploi Manual del usuario Manuale dell‘utente 4in1 Blue Lightning Racing wheel SL-6685...
- Page 2 Einleitung Vielen Dank für den Kauf des 4in1 Blue Lightning Wheels. Dieses Produkt bietet Ihnen mit vier verschiedenen Anschlüssen die Möglichkeit packende Rennen an Playstation, Xbox, GameCube oder PC zu erleben. Produkteigenschaften • Dual Vibration • Analoges Gas- und Bremspedal •...
- Page 3 2. Einstellen der Lenkempfindlichkeit Die Lenkempfindlichkeit kann je nach Vorlieben individuell eingestellt werden. Dabei stehen drei Einstellungsstufen zur Verfügung: 30°/60°/90° Zum Einstellen der Lenkempfindlichkeit gehen Sie wie folgt vor: 1.) Drücken Sie mehrmals kurz die Taste “SET”, bis zwei Beep-Töne ertönen. 2.) Halten Sie einen der Richtungspfeile so lange gedrückt, bis erneut zwei Beep-Töne zu hören sind.
-
Page 4: Auf Standard-Einstellungen Zurücksetzen
4. Ein/Ausschalten der Vibrations-Funktion 1. Drücken Sie mehrmals kurz auf die „SET“-Taste, bis Sie zwei Beep-Töne hören. 2. Drücken Sie nun auf „Start“. 3. Um die Vibrations-Funktion wieder ein/bzw. auszuschalten, wiederholen Sie diese beiden Schritte. Ob die Vibrations-Funktion ein- oder ausgeschaltet ist, können Sie der LED-Anzeige entnehmen. - Page 5 6. Tastenfunktion MOTOR/SET LED HAND PEDAL R HAND PEDAL L D-PAD SELECT FOOT PEDAL R PS2.GC/XBOX.US B PS2/ XBOX /USB SELECT SWITCH FOOT HAND PEDAL PEDAL PEDAL SELECT START HAND PEDAL/FOOT PEDAL FOOT PEDAL L SELECT SWITCH PlayStation2 Game Cube Xbox Steuerkreuz Steuerkreuz...
- Page 6 *LD= digitaler Trigger links; RD= digitaler Trigger rechts; LA= analoger Trigger links; RA= analoger Trigger rechts 7. Anschluss an den PC (nur für Windows 98/2000/ ME/XP) Beachten Sie: a) Bitte installieren Sie erst den mitgelieferten Treiber und schließen Sie erst dann das Lenkrad an Ihren PC an! b) Legen Sie den Schalter auf der Vorderseite des Lenkrads auf „PC“-Betrieb um, damit das Lenkrad funktioniert.
-
Page 7: Sicherheitshinweise
Die Fußpedale reagieren nicht a) Vergewissern Sie sich, dass der Schalter an der Vorderseite des Lenkrads auf Position „Foot pedals“ steht. b) Überprüfen Sie die Kabelverbindung zwischen den Pedalen und dem Lenkrad. Sicherheitshinweise • Versuchen Sie nicht, das Gerät selbst zu warten oder zu reparieren. -
Page 8: Product Features
Introduction Thank you for purchasing the 4in1 Blue Lightning Wheel. The product provides a choice of four different sockets, allowing you to experience thrilling racing on the Playstation, Xbox, GameCube and Product features • Dual vibration • Analogue accelerator and brake pedal •... - Page 9 2.) Hold down one of the direction buttons until you again hear two beep tones (for the functions of the direction buttons, see the table below). Direction button Steering sensitivity 30°, high sensitivity t or u 60, medium sensitivity 90°, low sensitivity 3.
-
Page 10: Returning To The Default Settings
Vibration switched Vibration switched green PSOne LED off Game Cube LED off Xbox green green Always press the “SET” briefly, do not hold it down. 5. Returning to the default settings 1. To restore the default settings, press the “L1/L2 + Start“... -
Page 11: Driver Installation
PlayStation2 Game Cube Xbox d-pad d-pad d-pad d-pad d-pad wheel left analog left analog left analog X-axis stick , X-axis stick ,X-axis stick , X-axis Foot pedal (L) L-Trigger â Analog c Y- axis Foot pedal(R) Analog X R-Trigger á Y- axis hand pedal (L) Analog c... -
Page 12: Safety Advice
2. Click on “Start/Run” and enter “A:setup.exe”. 3. In the window that opens, click on “Next” and follow the instructions on the screen. 4. The installation wizard should appear. Click on “Next” and follow the instructions on the screen. Troubleshooting My games console / PC is not detecting my steering wheel. - Page 13 Guarantee We guarantee this product for two years from the date of purchase in respect of workmanship and all built-in components. If you need help... In case of technical problems, please contact our technical support. The hotline number can be found on the back of this manual.
-
Page 14: Caractéristiques
Introduction Merci d’avoir choisi le volant 4 en 1 Blue Lightning Wheel. Ce produit, doté de quatre interfaces de raccordement différentes, vous permettra de vivre des courses haletantes sur Playstation, Xbox, GameCube et PC. Caractéristiques • Dual Vibration • Pédales d’accélération et de freinage analogiques •... -
Page 15: Transfert Des Fonctions Entre La Pédale Et Le Levier À Main
1.) Appuyez plusieurs fois brièvement sur la touche SET jusqu’à ce que vous entendiez deux bips. 2.) Maintenez une des flèches enfoncées jusqu’à ce que vous entendiez de nouveau deux bips. (Les fonctions des flèches sont indiquées dans le tableau ci-dessous.) Flèche Sensibilité... -
Page 16: Réactiver Les Réglages Par Défaut
3. Répétez les deux étapes pour activer ou désactiver de nouveau la fonction vibration. L’affiche par DEL vous indique si la fonction vibration est activée ou non. Reportez-vous au tableau ci-dessous pour connaître la signification des différentes DEL de couleur selon la console utilisée. Vibration activée Vibration désactivée rouge... -
Page 17: Disposition Des Boutons
6. Disposition des boutons MOTOR/SET LED HAND PEDAL R HAND PEDAL L D-PAD SELECT FOOT PEDAL R PS2.GC/XBOX.US B PS2/ XBOX /USB SELECT SWITCH FOOT HAND PEDAL PEDAL PEDAL SELECT START HAND PEDAL/FOOT PEDAL FOOT PEDAL L SELECT SWITCH PlayStation2 Game Cube Xbox directional... -
Page 18: Installation Du Pilote
Select Select Back bouton de tir Start Start Start Start bouton de tir *LD= Trigger gauche numérique; RD= Trigger droit numérique; LA= Trigger gauche analogique; RA= Trigger droit analogique 7. Raccordement au PC (uniquement sous Windows 98/2000/ME/XP) Respectez les consignes suivantes : a) Commencez par installer le pilote fourni avant de raccorder le volant à... -
Page 19: Instructions De Sécurité Importante
c) Vérifiez dans le « Gestionnaire de périphériques » de votre système que le contrôleur jeu est bien configuré et en état de marche (dans le cas contraire, l’entrée est signalée par un point d’exclamation jaune). Les pédales ne réagissent pas a) Assurez-vous que l’interrupteur à... -
Page 20: Características Del Producto
Introducción Muchas gracias por la compra del volante Lightning 4 en 1. Este producto le ofrece cuatro conexiones diferentes que le garantizan espectáculo para la conducción con Playstation, Xbox, GameCube y Características del producto • Vibración dual • Pedales de aceleración y freno analógicos •... - Page 21 2.) Mantenga pulsada una de la flechas de dirección hasta que vuelva a escuchar otros 2 tonos „beep“. (Para la función de la flecha de dirección, ver la table adjunta más abajo). Flecha de dirección Sensibilidad del volante 30°, alta sensibilidad t o u 60, sensibilidad media 90°, baja sensibilidad...
- Page 22 Para saber si está activada o desactivada la función de vibración, puede comprobar el indicador LED, referencias en la tabla adjunta más abajo, y sabrá cuáles son los colores e indicaciones de los LEDS cuando se están utilizando distintas marcas de consolas. Vibración activada V i b r a c i ó...
- Page 23 6. Disposición de los botones MOTOR/SET LED HAND PEDAL R HAND PEDAL L D-PAD SELECT FOOT PEDAL R PS2.GC/XBOX.US B PS2/ XBOX /USB SELECT SWITCH FOOT HAND PEDAL PEDAL PEDAL SELECT START HAND PEDAL/FOOT PEDAL FOOT PEDAL L SELECT SWITCH PlayStation2 Game Cube Xbox...
-
Page 24: Instalación Del Controlador
Black botón de acción L-Trigger â eje Y R-Trigger á eje Y Select Select Back botón de acción Start Start Start Start botón de acción *LD= Trigger izquierdo digital; RD= Trigger derecho digital; LA= Trigger izquierdo analógico; RA= Trigger derecho analógico 7. -
Page 25: Medidas De Seguridad
b) Compruebe si el software que utiliza soporta volantes. Dado el caso, realice los ajustes correspondientes en las opciones de su software de videojuegos. c) Compruebe en el administrador de periféricos de su sistema, si el puerto para juegos está bien configurado y funciona (De no ser así, esto vendrá... -
Page 26: Caratteristiche Del Prodotto
Introduzione Congratulazioni per aver acquistato il nostro volante 4in1 Blue Lightning Wheel. Grazie alle sue ben quattro diverse possibilità di collegamento di console giochi, questo prodotto Vi offre una giocabilità senza precedenti per le console giochi Playstation, Xbox, GameCube, nonché per l’utilizzo al PC. Caratteristiche del prodotto •... - Page 27 2. Regolazione della sensibilità del volante La sensibilità del volante può essere regolata a seconda delle proprie esigenze. Si hanno tre possibilità di regolazione a disposizione: 30°/60°/90° Al fine di impostare la sensibilità del volante attenetevi al seguente procedimento: 1.) Premete più volte brevemente il pulsante “SET” fin quando non sentiate due beep.
- Page 28 3.) Schiacciate nuovamente il pedale o la leva manuale fin quando non sentiate due beep. 4. Per attivare o disattivare la funzione di vibrazione 1. Premete più volte brevemente il pulsante “SET” fin quando non sentiate due beep. 2. Premete adesso il pulsante “Start”. 3.
- Page 29 6. Layout dei pulsanti MOTOR/SET LED HAND PEDAL R HAND PEDAL L D-PAD SELECT FOOT PEDAL R PS2.GC/XBOX.US B PS2/ XBOX /USB SELECT SWITCH FOOT HAND PEDAL PEDAL PEDAL SELECT START HAND PEDAL/FOOT PEDAL FOOT PEDAL L SELECT SWITCH PlayStation2 Game Cube Xbox Selettorel...
-
Page 30: Installazione Del Driver
â L-Trigger asse Y R-Trigger á asse Y Select Select Back pulsanti grilletto Start Start Start Start pulsanti grilletto *LD= Trigger sinistro digitale; RD= Trigger diestro digitale; LA= Trigger sinistro analogico; RA= Trigger diestro analogico 7. Collegamento ad un PC (solo per Windows 98/2000/ ME/XP) Attenzione: a) Se volete collegare il volante al PC, installate prima il software... -
Page 31: Precauzioni Per La Sicurezza
b) Verificate se la Vostra console giochi supporti un volante. Eventualmente dovrete in tal senso cambiare le relative impostazioni nelle opzioni della Vostra console giochi. c) Controllate nella “Gestione periferiche “ del Vostro sistema operativo che la porta giochi (game-port) sia configurata o funzioni correttamente (In caso contrario, una configurazione scorretta o il cattivo funzionamento verranno segnalati mediante un punto esclamativo di... - Page 32 SL-6685...