Table des Matières
Publicité
Les langues disponibles
Les langues disponibles
Liens rapides
Betriebsanleitung | Operating Instructions | Mode d'emploi
Istruzioni d'uso | Instrucciones de servicio | Bruksanvisning
Druckregelventil
Pressure Regulator
Régulateur de pression
Valvola riduttrice di pressione
Válvula reguladora de presión
Tryckregleringsventil
ED12
R414001164(R414002587)/02.2016, Replaces: - DE/EN/FR/IT/ES/SV
Publicité
Chapitres
Table des Matières

Manuels Connexes pour Aventics ED12 Série


Sommaire des Matières pour Aventics ED12 Série
- Page 1 Betriebsanleitung | Operating Instructions | Mode d'emploi Istruzioni d’uso | Instrucciones de servicio | Bruksanvisning Druckregelventil Pressure Regulator Régulateur de pression Valvola riduttrice di pressione Válvula reguladora de presión Tryckregleringsventil ED12 R414001164(R414002587)/02.2016, Replaces: - DE/EN/FR/IT/ES/SV...
-
Page 3: Table Des Matières
AVENTICS | ED12 | R414002587–BDL–001–AB Inhalt Inhalt Zu dieser Anleitung ............5 Weiterführende Dokumentation..........5 Verwendete Abkürzungen ............5 Zu Ihrer Sicherheit ............5 Bestimmungsgemäßer Gebrauch ..........6 Nicht bestimmungsgemäßer Gebrauch ........6 Qualifikation des Personals............7 Warnhinweise in dieser Anleitung..........7 Das müssen Sie für das ED12 beachten ......... - Page 4 AVENTICS | ED12 | R414002587–BDL–001–AB Inhalt ED12 pflegen und warten ..........27 10.1 ED12 pflegen ................. 27 10.2 ED12 warten .................. 27 10.2.1 Dichtungen des ED12 prüfen ..........27 Wenn Störungen auftreten ..........28 Technische Daten ............. 29 Zubehör ................31...
-
Page 5: Zu Dieser Anleitung
AVENTICS | ED12 | R414002587–BDL–001–AB Zu dieser Anleitung Zu dieser Anleitung Diese Anleitung enthält wichtige Informationen, um das Druckregelventil ED12 sicher und sachgerecht zu montieren, zu bedienen, zu warten und einfache Störungen selbst zu beseitigen. Lesen Sie diese Anleitung und insbesondere das Kapitel „2 Zu Ihrer Sicherheit“... -
Page 6: Bestimmungsgemäßer Gebrauch
AVENTICS | ED12 | R414002587–BDL–001–AB Zu Ihrer Sicherheit Lesen Sie diese Anleitung gründlich und vollständig, bevor Sie mit dem ED12 arbeiten. Bewahren Sie die Anleitung so auf, dass sie jederzeit für alle Benutzer zugänglich ist. Geben Sie das ED12 an Dritte stets zusammen mit der Bedienungsanleitung weiter. -
Page 7: Qualifikation Des Personals
AVENTICS | ED12 | R414002587–BDL–001–AB Zu Ihrer Sicherheit Qualifikation des Personals Die Montage und Inbetriebnahme erfordert grundlegende elektrische und pneumatische Kenntnisse sowie Kenntnisse der zugehörigen Fachbegriffe. Die Montage und Inbetriebnahme darf daher nur von einer Elektro- oder Pneumatikfachkraft oder von einer unterwiesenen Person unter der Leitung und Aufsicht einer Fachkraft erfolgen. -
Page 8: Das Müssen Sie Für Das Ed12 Beachten
AVENTICS | ED12 | R414002587–BDL–001–AB Zu Ihrer Sicherheit Tabelle 2: Gefahrenklassen nach ANSI Z535.6-2006 Warnzeichen, Signalwort Bedeutung Kennzeichnet eine gefährliche Situation, in der Tod oder schwere GEFAHR Körperverletzung eintreten werden, wenn sie nicht vermieden wird Kennzeichnet eine gefährliche Situation, in der Tod oder schwere WARNUNG Körperverletzung eintreten können, wenn sie nicht vermieden wird... - Page 9 AVENTICS | ED12 | R414002587–BDL–001–AB Zu Ihrer Sicherheit Vor der Montage Lassen Sie das Gerät vor dem Einbau einige Stunden akklimatisieren, da sich ansonsten im Gehäuse Kondenswasser niederschlagen kann. Bei der Montage Schalten Sie immer den relevanten Anlagenteil drucklos und spannungsfrei, bevor Sie das Gerät montieren bzw.
-
Page 10: Lieferumfang
AVENTICS | ED12 | R414002587–BDL–001–AB Lieferumfang Bei der Reinigung Verwenden Sie niemals Lösemittel oder aggressive Reinigungsmittel. Reinigen Sie das Gerät ausschließlich mit einem leicht feuchten Tuch. Verwenden Sie dazu ausschließlich Wasser und ggf. ein mildes Reinigungsmittel. Bei der Entsorgung Entsorgen Sie das Gerät nach den Bestimmungen Ihres Landes. -
Page 11: Gerätebeschreibung
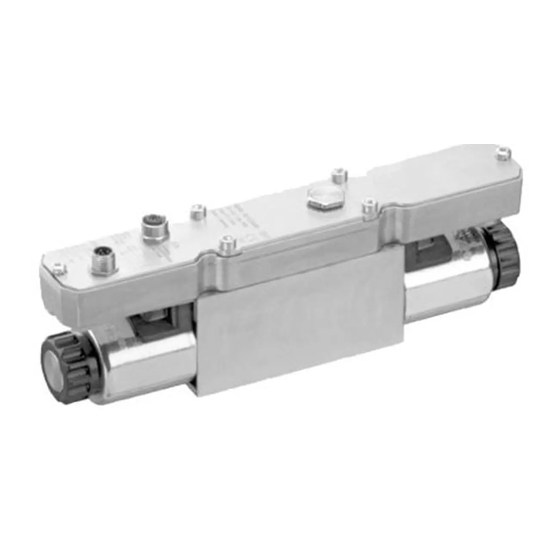
AVENTICS | ED12 | R414002587–BDL–001–AB Gerätebeschreibung Gerätebeschreibung Das ED12 gibt es in drei verschiedenen Anschluss-Varianten. ED12 mit M12-Stecker 00122952 Abb. 1: ED12 mit Einbaustecker XPC, M12 1 Verschluss der 8 Schrauben M6x70 Abgleichöffnung (DIN EN ISO 4762, 2 Gehäusebelüftungsöffnung ehemals DIN 912) -
Page 12: Ed12 Mit Zwei M12-Steckern
AVENTICS | ED12 | R414002587–BDL–001–AB Gerätebeschreibung ED12 mit zwei M12-Steckern 00000000 Abb. 2: ED12 mit Einbaustecker X1S und Einbaubuchse X2M, M12 1 Verschluss der 8 Schrauben M6x70 (DIN EN Abgleichöffnung ISO 4762, ehemals DIN 912) 2 Gehäusebelüftungsöffnung 9 Grundplatten-Dichtung 3 Ventilspulen 10 Gehäusedichtung... -
Page 13: Ed12 Mit Zwei Rechtecksteckern
AVENTICS | ED12 | R414002587–BDL–001–AB Gerätebeschreibung ED12 mit zwei Rechtecksteckern 00122954 Abb. 3: ED12 mit zwei Rechtecksteckern X1S und X2A, DIN EN 175301-803 1 Verschluss der 8 Schrauben M6x70 (DIN EN ISO Abgleichöffnung 4762, ehemals DIN 912) 2 Gehäusebelüftungsöffnung 9 Grundplatten-Dichtung 3 Ventilspulen 10 Gehäusedichtung... -
Page 14: Ed12 Montieren
AVENTICS | ED12 | R414002587–BDL–001–AB ED12 montieren ED12 montieren ACHTUNG Produkt enthält elektronische Bauteile, die gegenüber elektrostatischer Entladung (ESD) empfindlich sind! Berühren der elektrischen Bauteile durch Personen oder Gegenstände kann zu einer elektrostatischen Entladung führen, die das Produkt beschädigt oder zerstört. - Page 15 AVENTICS | ED12 | R414002587–BDL–001–AB ED12 montieren ACHTUNG Gefahr durch falsche Befestigung des Geräts! Falsch befestigtes Gerät kann sich unkontrolliert bewegen und andere Anlagenteile beschädigen. Stellen Sie sicher, dass das Gerät auf einer Grundplatte und diese an der Maschine oder auf einer Montageplatte sicher befestigt ist.
-
Page 16: Grundplatten-Dichtung Einlegen
AVENTICS | ED12 | R414002587–BDL–001–AB ED12 montieren Stellen Sie vor dem Einbau sicher, dass die Gehäusebelüftungsöffnung (2) offen ist und nicht z. B. durch Überlackierung verschlossen ist. 00121338 Grundplatten-Dichtung einlegen ACHTUNG Fehlende Dichtungen und Verschlüsse führen zum Verlust der Schutzklasse IP 65! Flüssigkeiten und Fremdkörper können in das Gerät und in die Steckverbindungen... -
Page 17: Ed12 An Der Grundplatte Festschrauben
AVENTICS | ED12 | R414002587–BDL–001–AB ED12 montieren ED12 an der Grundplatte festschrauben Setzen Sie die vier Schrauben M6 x 70, wie in der Abbildung 4 auf Seite 14 gezeigt, in die vier Bohrungen ein und ziehen Sie sie an. Anzugsmoment: 6 Nm Versorgungsspannung und Sollwert anschließen... - Page 18 AVENTICS | ED12 | R414002587–BDL–001–AB ED12 montieren Tabelle 8: ED12 mit Einbaustecker X1S, M12 Einbaustecker X1S, M12, male, 5-polig Pin 1 24 V DC Pin 2 nicht belegt Pin 3 00125293 Pin 4 nicht belegt Pin 5 Tabelle 9: ED12 mit Einbaubuchse X2M, M12...
- Page 19 AVENTICS | ED12 | R414002587–BDL–001–AB ED12 montieren Die Kontakte X1S Pin 1 und X2A Pin 1 sind intern verbunden. Stellen Sie vor dem Anschließen der Stecker sicher, dass alle Dichtungen und Verschlüsse vorhanden und nicht beschädigt sind. Verwenden Sie ausschließlich geprüfte Stecker und Leitungen.
-
Page 20: Ed12 In Betrieb Nehmen
AVENTICS | ED12 | R414002587–BDL–001–AB ED12 in Betrieb nehmen Das ED12 kann jetzt mit Spannung versorgt und mit einem Sollwert angesteuert werden. Da bei den Anschlüssen X2M und X1S bzw. X1S und X2A die 0- V-Leitungen verbunden sind, müssen Sie die richtige Polung bei allen Steckverbindungen sicherstellen. -
Page 21: Grundplatte Pneumatisch Anschließen
AVENTICS | ED12 | R414002587–BDL–001–AB ED12 in Betrieb nehmen 7.1.1 Grundplatte pneumatisch anschließen Der Innendurchmesser der Versorgungsleitung muss mindestens 6 mm betragen, damit die Luftleistung gemäß Spezifikation erreicht wird. 1. Schließen Sie die Versorgungsleitung an den Eingangsanschluss der Grundplatte (Bohrung 1) (21) an. -
Page 22: Sollwert Einstellen
AVENTICS | ED12 | R414002587–BDL–001–AB ED12 ansteuern Sollwert einstellen Geben Sie den gewünschten Sollwert durch die Steuerung oder an einem Potentiometer vor. Beachten Sie dazu das Kapitel „Den richtigen Versorgungsdruck wählen” auf Seite 23. ED12 ansteuern Wenn Sie die elektrische und die pneumatische Versorgung an das ED12 angeschlossen haben, können Sie den Druck kontinuierlich... -
Page 23: Den Richtigen Versorgungsdruck Wählen
AVENTICS | ED12 | R414002587–BDL–001–AB ED12 ansteuern Den richtigen Versorgungsdruck wählen Ist der Versorgungsdruck kleiner als der durch den elektrischen Sollwert vorgegebene Ausgangsdruck, kommt es zu einer bleibenden Regelabweichung. Um zu verhindern, dass sich dadurch das ED12 erwärmt, reduziert die Elektronik die Stromaufnahme und damit die max. -
Page 24: Kennlinien
AVENTICS | ED12 | R414002587–BDL–001–AB ED12 ansteuern Die Kennlinien im folgenden Abschnitt stellen je nach Bauart den linearen Zusammenhang zwischen Strom und Ausgangsdruck bzw. zwischen Spannung und Ausgangsdruck dar. Für Geräte mit einem externen Potentiometer erzeugt das Gerät die Versorgungsspannung für das Potentiometer. Der Schleifkontakt des Potentiometers wird mit dem Sollwert-Eingang verbunden (siehe „Versorgungsspannung und Sollwert... -
Page 25: Ausgangsdruck 0 Bis 10 Bar
AVENTICS | ED12 | R414002587–BDL–001–AB ED12 demontieren, austauschen oder entsorgen 8.2.2 Ausgangsdruck 0 bis 10 bar [bar] 145 [psi] [bar] 145 [psi] 72,5 72,5 [mA] [mA] 100% 100% 00121348 00121347 Sollwert/Istwert Sollwert/Istwert R414001636 R414001635 R414000729 R414000728 R414001638 R414001637 [bar] 145 [psi]... -
Page 26: Ed12 Austauschen
AVENTICS | ED12 | R414002587–BDL–001–AB ED12 demontieren, austauschen oder entsorgen ACHTUNG Ziehen von Steckern unter Spannung zerstört das Gerät! Beim Ziehen von Steckern unter Spannung entstehen große Potenzialunterschiede, die das Gerät zerstören können. Schalten Sie den relevanten Anlagenteil spannungsfrei, bevor Sie das Gerät demontieren. -
Page 27: Ed12 Pflegen Und Warten
AVENTICS | ED12 | R414002587–BDL–001–AB ED12 pflegen und warten 10 ED12 pflegen und warten 10.1 ED12 pflegen Für das ED12 ist keine besondere Pflege erforderlich. VORSICHT Verbrennungsgefahr durch heiße Ventilspulen! Berühren der Ventilspulen im laufenden Betrieb kann zu Verbrennungen führen. -
Page 28: Wenn Störungen Auftreten
AVENTICS | ED12 | R414002587–BDL–001–AB Wenn Störungen auftreten Überprüfen Sie von Zeit zu Zeit, ob die Dichtungen am Druckregelventil einwandfrei sind. Eine schadhafte Dichtung ist daran zu erkennen, dass Teile der Dichtung sichtbar aus den Gehäusespalten hervortreten. 11 Wenn Störungen auftreten Tabelle 12: Störung... -
Page 29: Technische Daten
AVENTICS | ED12 | R414002587–BDL–001–AB Technische Daten Tabelle 12: Störung mögliche Ursache Abhilfe Luft entweicht hörbar Grundplatten-Dichtung fehlt oder Grundplatten-Dichtung überprüfen und ist beschädigt ggf. austauschen Undichtigkeit zwischen Schrauben mit Anzugsmoment 6 Nm ED12 und Grundplatte anziehen ED12 ist undicht ED12 austauschen pneumatische Anschlüsse an der... - Page 30 AVENTICS | ED12 | R414002587–BDL–001–AB Technische Daten Tabelle 13: Allgemeine Daten Schutzart nach EN 60529/IEC529 IP 65 (nur in montiertem Zustand und mit allen montierten Steckern) Einbaulage bevorzugte Einbaulage: vertikal (siehe Abb. 5 auf Seite 15) beliebig bei trockener und ölfreier Druckluft Die Gehäusebelüftungsöffnung muss frei bleiben...
-
Page 31: Zubehör
AVENTICS | ED12 | R414002587–BDL–001–AB Zubehör Tabelle 16: berücksichtigte Normen und Richtlinien RL 93/97 EWG: „Elektromagnetische Verträglichkeit“ (EMV-Richtlinie) DIN EN 61010-1: „Sicherheitsbestimmungen für elektrische Mess-, Steuer-, Regel- und Laborgeräte“, Teil 1: Allgemeine Anforderungen DIN EN 61000-6-2: „Elektromagnetische Verträglichkeit“ (Störfestigkeit Industriebereich) DIN EN 61000-6-4: „Elektromagnetische Verträglichkeit“... -
Page 32: Stichwortverzeichnis
AVENTICS | ED12 | R414002587–BDL–001–AB Stichwortverzeichnis 14 Stichwortverzeichnis Abluft Einbaulage 15 gefasste 21 Einsatzbereiche 10 Anschlüsse Einschalten Abluft 22 Reihenfolge 21 Ausgangsdruck 22 Einstellen Sollwert 17 Betriebsdruck 23 Versorgungsdruck 22 Sollwert 22 Anschluss-Varianten 11 Entsorgung 26 Ansteuerung 22 Anzugsmoment 17... - Page 33 AVENTICS | ED12 | R414002587–BDL–001–AB Stichwortverzeichnis Montage 14 Versorgungsspannung 17 Anzugsmoment 17 Verwendung 6, 10 Einbaulage 15 Grundplatte 14 Grundplatten-Dichtung 16 Warnhinweis Kodierbohrung 16 Bedeutung 7 Kodierstift 16 Wartung 27 Sollwert 17 Steckerbelegung 17 Versorgungsspannung 17 Vorbereitung 14 Montageplatte 15...
- Page 35 AVENTICS | ED12 | R414002587–BDL–001–AB Contents Contents About this document ............37 Related documents ..............37 Abbreviations used ..............37 For your safety ..............37 Intended use...................38 Improper use..................38 Personnel qualifications.............38 Safety instructions in this document........39 Observe the following instructions for the ED12 ....40 Delivery contents .............
- Page 36 AVENTICS | ED12 | R414002587–BDL–001–AB Contents Servicing and maintaining the ED12 ......58 10.1 Servicing the ED12 ..............58 10.2 Maintaining the ED12..............58 10.2.1 Checking the seals of the ED12 ..........59 If malfunctions occur ............59 Technical data ..............60 Accessories ..............
-
Page 37: About This Document
AVENTICS | ED12 | R414002587–BDL–001–AB About this document About this document These instructions contain important information on the safe and appropriate assembly, operation, and maintenance of the pressure regulator ED12 and how to remedy simple malfunctions yourself. Read these instructions completely, especially chapter “2 For your safety”... -
Page 38: Intended Use
AVENTICS | ED12 | R414002587–BDL–001–AB For your safety Keep these instructions in a location where they are accessible to all users at all times. Always include the operating instructions when you pass the ED12 on to third parties. Intended use The ED12 is a pneumatic device with integrated electronics that is only designed to regulate pneumatic pressures. -
Page 39: Safety Instructions In This Document
AVENTICS | ED12 | R414002587–BDL–001–AB For your safety possible hazards and institute the appropriate safety measures due to their professional training, knowledge, and experience, as well as their understanding of the relevant conditions pertaining to the work to be done. Qualified personnel must observe the rules relevant to the subject area. -
Page 40: Observe The Following Instructions For The Ed12
AVENTICS | ED12 | R414002587–BDL–001–AB For your safety The following symbols indicate information that is not relevant for safety but that helps in comprehending the documentation: Table 3: Symbol Meaning If this information is disregarded, the product cannot be used or operated optimally. - Page 41 AVENTICS | ED12 | R414002587–BDL–001–AB For your safety During commissioning Before commissioning, make sure that all the connection seals and plugs are leaktight to prevent fluids and foreign bodies from penetrating the device or plug connections and destroying the electronics.
-
Page 42: Delivery Contents
AVENTICS | ED12 | R414002587–BDL–001–AB Delivery contents Delivery contents The following is included in the delivery contents: 1x ED12 1x base plate seal 4x M6x70 screw (DIN EN ISO 4762, formerly DIN 912) 1x operating instructions Additionally for the ED12 with rectangular plug:... -
Page 43: Device Description
AVENTICS | ED12 | R414002587–BDL–001–AB Device description Device description The ED12 comes with three different connection variants. ED12 with M12 plug 00122952 Abb. 1: ED12 with integrated XPC plug, M12 1 Equalization port cap 8 M6x70 screws (DIN EN ISO 4762,... -
Page 44: Ed12 With Two M12 Plugs
AVENTICS | ED12 | R414002587–BDL–001–AB Device description ED12 with two M12 plugs 00000000 Abb. 2: ED12 with integrated X1S plug and integrated X2M socket, M12 1 Equalization port cap 8 M6x70 screws (DIN EN ISO 4762, 2 Housing ventilation port... -
Page 45: Ed12 With Two Rectangular Plugs
AVENTICS | ED12 | R414002587–BDL–001–AB Device description ED12 with two rectangular plugs 00122954 Abb. 3: ED12 with two rectangular X1S and X2A plugs, DIN EN 175301- 1 Equalization port cap 8 M6x70 screws (DIN EN ISO 4762, 2 Housing ventilation port... -
Page 46: Assembling The Ed12
AVENTICS | ED12 | R414002587–BDL–001–AB Assembling the ED12 Assembling the ED12 NOTICE Product contains electronic components that are sensitive to electrostatic discharge (ESD)! If the electronic components are touched by persons or objects, this may lead to an electrostatic discharge that could damage or destroy the device. - Page 47 AVENTICS | ED12 | R414002587–BDL–001–AB Assembling the ED12 NOTICE Risk due to incorrectly mounted device! An incorrectly mounted device may result in uncontrolled movements that could damage other system parts. Make sure that the device is attached to a base plate that is securely fastened to the machine or a mounting plate.
-
Page 48: Inserting The Base Plate Seal
AVENTICS | ED12 | R414002587–BDL–001–AB Assembling the ED12 Before installation, ensure that the housing ventilation port (2) is open and not e.g. painted shut. 00121338 Inserting the base plate seal NOTICE Missing seals and connections will lead to non-compliance with the IP 65 protection class! Liquids and foreign objects could penetrate the device and plug connections and destroy the electronics. -
Page 49: Screwing The Ed12 Onto The Base Plate
AVENTICS | ED12 | R414002587–BDL–001–AB Assembling the ED12 Screwing the ED12 onto the base plate Insert both of the M6 x 70 screws as shown in Fig. 4 on page 46 in the four holes and tighten. Tightening torque: 6 Nm... - Page 50 AVENTICS | ED12 | R414002587–BDL–001–AB Assembling the ED12 Table 9: ED12 with integrated X2M socket, M12 Integrated X2M socket, M12, female, 5-pin Pin 1 Pressure reached switch output Pin 2 Set point (+): current 0/4 to 20 mA or voltage 0 to 10 V...
- Page 51 AVENTICS | ED12 | R414002587–BDL–001–AB Assembling the ED12 For devices with an integrated XPC plug, M12: Use a shielded cable to connect the XPC. The shield must be connected to the plug housing. Connect the cable at the integrated XPC (12) plug.
-
Page 52: Commissioning The Ed12
AVENTICS | ED12 | R414002587–BDL–001–AB Commissioning the ED12 For devices with two rectangular plugs controlled via a potentiometer: Connect the cables at the rectangular X2A plug as in the 0 V DC 0-10 V DC illustration on the left. +10 V DC The ED12 can now be supplied with voltage and the set point set on the potentiometer. -
Page 53: Switching On The Electrical And Pneumatic Supply
AVENTICS | ED12 | R414002587–BDL–001–AB Controlling the ED12 CAUTION Danger caused by escaping compressed air! Device is operating under pressure. If the additional inlet connection (23) on the base plate is opened, the blanking screw may be forced out by the compressed air and cause injuries or damage. -
Page 54: Selecting The Correct Supply Pressure
AVENTICS | ED12 | R414002587–BDL–001–AB Controlling the ED12 24 V CONTROLLER 00121356 Abb. 6: Function block diagram for ED12 with analog output and switch output Inlet connection for supply pressure b Outlet pressure connection Exhaust connection 24 Supply voltage 25 Set point input... -
Page 55: Pressure Reached" Switch Output
AVENTICS | ED12 | R414002587–BDL–001–AB Controlling the ED12 8.1.1 “Pressure reached” switch output The “pressure reached” switch output is only available in “ED12 with integrated X1S plug, M12, and integrated X2M socket, M12” devices. The ED12 with integrated X1S plug, M12, and integrated X2M socket, M12, recognizes whether the desired outlet pressure is set within a tolerance of ±200 mbar. -
Page 56: Characteristic Curves
AVENTICS | ED12 | R414002587–BDL–001–AB Controlling the ED12 8.2.1 Characteristic curves The characteristic curves for all ED12 models are depicted below, sorted according to outlet pressures. NOTICE Malfunction caused by closed housing ventilation port! If the housing ventilation port is closed, there is no atmospheric equalization and the characteristics curve will change. -
Page 57: Disassembling, Exchanging, Or Disposing Of The Ed12
AVENTICS | ED12 | R414002587–BDL–001–AB Disassembling, exchanging, or disposing of the ED12 Disassembling, exchanging, or disposing of the ED12 Disassembling the ED12 CAUTION Danger of burns caused by hot valve coils! Touching the valve coils during operating may lead to burns. -
Page 58: Disposing Of The Ed12
AVENTICS | ED12 | R414002587–BDL–001–AB Servicing and maintaining the ED12 Disposing of the ED12 Dispose of the ED12 in accordance with the currently applicable regulations in your country. 10 Servicing and maintaining the ED12 10.1 Servicing the ED12 No special care is required for the ED12. -
Page 59: Checking The Seals Of The Ed12
AVENTICS | ED12 | R414002587–BDL–001–AB If malfunctions occur 10.2.1 Checking the seals of the ED12 The seals in the ED12 may age faster under aggressive ambient conditions. Defective seals will lead to pneumatic leaks and non- compliance with the IP 65 protection class. -
Page 60: Technical Data
AVENTICS | ED12 | R414002587–BDL–001–AB Technical data Table 12: Malfunction Possible cause Remedy Air is audibly escaping Base plate seal is missing or Check the base plate seal and damaged exchange, if necessary Leaks between the ED12 and Tighten screws with 6 Nm torque. - Page 61 AVENTICS | ED12 | R414002587–BDL–001–AB Technical data Table 13: General Protection class according to EN 60529/ IP 65 IEC529 (only when assembled and with all plugs assembled) Mounting orientation Preferred mounting orientation: vertical (see Fig. 5 on page 47) Any if used with dry and oil-free compressed air...
-
Page 62: Accessories
AVENTICS | ED12 | R414002587–BDL–001–AB Accessories Table 16: Standards and directives complied with RL 93/97 EEC: “Electromagnetic compatibility“ (EMC directive) DIN EN 61010-1: “Safety requirements for electrical equipment for measurement, control, and laboratory use, part 1: general requirements” DIN EN 61000-6-2: “Electromagnetic compatibility”... -
Page 63: Index
AVENTICS | ED12 | R414002587–BDL–001–AB Index 14 Index Delivery contents 42 Applications 42 Deviations 54 Assembly 46 Directives 62 Base plate 46 Disassembly 57 Base plate seal 48 Disposal 58 Coded hole 48 Coded pin 48 Mounting orientation 47 Error table 59... - Page 64 AVENTICS | ED12 | R414002587–BDL–001–AB Index Intended 38 Plug assignment 49 Pressure Control 55 Working pressure Tolerance 55 Setting 54 Safety 37 Safety instruction Meaning 39 Safety instructions Meaning 39 Seal Base plate 48 Checking 59 Service 58 Set point...
- Page 65 AVENTICS | ED12 | R414002587–BDL–001–AB Sommaire Sommaire A propos de ce mode d’emploi ........67 Documentation supplémentaire..........67 Abréviations utilisées ..............67 Pour votre sécurité ............67 Utilisation conforme ..............68 Utilisation non conforme ............68 Qualification du personnel............69 Consignes de danger dans ce mode d’emploi .....69 Pour le ED12, respecter ce qui suit.........70...
- Page 66 AVENTICS | ED12 | R414002587–BDL–001–AB Sommaire Démonter, remplacer ou éliminer le ED12 ....88 Démonter le ED12................ 88 Remplacer le ED12 ..............88 Eliminer le ED12 ................89 Entretien et maintenance du ED12 ......... 89 10.1 Entretenir le ED12 ..............89 10.2...
-
Page 67: Propos De Ce Mode D'emploi
AVENTICS | ED12 | R414002587–BDL–001–AB A propos de ce mode d’emploi A propos de ce mode d’emploi Ce mode d’emploi contient des informations importantes pour installer, utiliser et entretenir le régulateur de pression ED12 de manière sûre et conforme, ainsi que pour pouvoir éliminer soi- même de simples interférences. -
Page 68: Utilisation Conforme
AVENTICS | ED12 | R414002587–BDL–001–AB Pour votre sécurité Ranger le mode d’emploi à un endroit tel que tous les utilisateurs puissent y accéder à tout moment. Transmettre le ED12 à de tierces personnes toujours accompagné du mode d’emploi. Utilisation conforme Le ED12 est un appareil pneumatique à... -
Page 69: Qualification Du Personnel
AVENTICS | ED12 | R414002587–BDL–001–AB Pour votre sécurité Qualification du personnel Le montage et la mise en service exigent des connaissances électriques et pneumatiques fondamentales, ainsi que des connaissances concernant les termes techniques adéquats. Le montage et la mise en service ne doivent donc être effectués que par du personnel spécialisé... -
Page 70: Pour Le Ed12, Respecter Ce Qui Suit
AVENTICS | ED12 | R414002587–BDL–001–AB Pour votre sécurité Tableau 2: Classes de dangers selon la norme ANSI Z535.6-2006 Signal de danger, mot-clé Signification Signale une situation dangereuse entraînant à coup sûr des DANGER blessures graves ou mortelles si le danger n’est pas évité... - Page 71 AVENTICS | ED12 | R414002587–BDL–001–AB Pour votre sécurité créer dans le boîtier. Lors du montage La partie importante de l’installation doit être sans pression et sans tension avant de monter l’appareil ou de le brancher ou débrancher. Protéger l’installation contre une remise en marche.
-
Page 72: Fourniture
AVENTICS | ED12 | R414002587–BDL–001–AB Fourniture Lors de l’élimination Eliminer l’appareil selon les directives du pays concerné. Fourniture Compris dans la fourniture : 1 ED12 1 joint pour embase 4 vis M6x70 (DIN EN ISO 4762, anciennement DIN 912) 1 mode d’emploi... -
Page 73: Ed12 Avec Connecteur M12
AVENTICS | ED12 | R414002587–BDL–001–AB Description de l’appareil ED12 avec connecteur M12 00122952 Fig. 1: ED12 avec connecteur incorporé XPC, M12 1 Bouchon de l’orifice 8 Vis M6x70 (DIN EN ISO 4762, d’ajustement anciennement DIN 912) 2 Orifice de ventilation du 9 Joint d’embase... -
Page 74: Ed12 Avec Deux Connecteurs M12
AVENTICS | ED12 | R414002587–BDL–001–AB Description de l’appareil ED12 avec deux connecteurs M12 00000000 Fig. 2: ED12 avec connecteur incorporé X1S et douille incorporée X2M, 1 Bouchon de l’orifice 8 Vis M6x70 (DIN EN ISO 4762, d’ajustement anciennement DIN 912) 2 Orifice de ventilation du 9 Joint d’embase... -
Page 75: Ed12 Avec Deux Connecteurs Rectangulaires
AVENTICS | ED12 | R414002587–BDL–001–AB Description de l’appareil ED12 avec deux connecteurs rectangulaires 00122954 Fig. 3: ED12 avec deux connecteurs rectangulaires X1S et X2A, DIN EN 175301-803 1 Bouchon de l’orifice 8 Vis M6x70 (DIN EN ISO 4762, d’ajustement anciennement DIN 912) 2 Orifice de ventilation du 9 Joint d’embase... -
Page 76: Montage Du Ed12
AVENTICS | ED12 | R414002587–BDL–001–AB Montage du ED12 Montage du ED12 REMARQUE L’appareil comprend des composants électroniques sensibles aux décharges électrostatiques (ESD) ! Le contact des composants électriques par des personnes ou des objets peut provoquer une décharge électrostatique qui endommage ou détériore l’appareil. - Page 77 AVENTICS | ED12 | R414002587–BDL–001–AB Montage du ED12 REMARQUE Danger en raison d’une mauvaise fixation de l’appareil ! Un appareil qui n’est pas fixé correctement peut bouger de manière incontrôlée et endommager d’autres pièces de l’installation. S’assurer que l’appareil soit fixé sur une embase et que celle-ci soit fixée de manière sûre sur la machine ou sur une plaque de montage.
-
Page 78: Insérer Le Joint D'embase
AVENTICS | ED12 | R414002587–BDL–001–AB Montage du ED12 S’assurer, avant le montage, que l’orifice de ventilation (2) est ouvert et qu’il n’est pas p. ex. bouché par un revernissage. 00121338 Insérer le joint d’embase REMARQUE Des joints et bouchons manquants entraînent la perte de l’indice de protection IP 65 ! Des liquides et corps solides peuvent s’infiltrer dans l’appareil et dans les raccords... -
Page 79: Visser Le Ed12 Sur L'embase
AVENTICS | ED12 | R414002587–BDL–001–AB Montage du ED12 Visser le ED12 sur l’embase Insérer les quatre vis M6 x 70, comme l’indique la Fig. 4 à la page 76, dans les quatre trous et les serrer. Couple de serrage : 6 Nm Raccorder la tension d’alimentation et la... - Page 80 AVENTICS | ED12 | R414002587–BDL–001–AB Montage du ED12 Tableau 8: ED12 avec connecteur incorporé X1S, M12 Connecteur incorporé X1S, M12, mâle, 5 pôles Broche 1 24 V CC Broche 2 Pas affecté Broche 3 00125293 Broche 4 Pas affecté Broche 5 Tableau 9: ED12 avec connecteur incorporé...
- Page 81 AVENTICS | ED12 | R414002587–BDL–001–AB Montage du ED12 Les contacts X1S broche 1 et X2A broche 1 sont reliés de façon interne. S’assurer avant le branchement des connecteurs que tous les joints et bouchons soient présents et non endommagés. Utiliser uniquement des connecteurs et des câbles contrôlés.
-
Page 82: Mise En Service Du Ed12
AVENTICS | ED12 | R414002587–BDL–001–AB Mise en service du ED12 Etant donné que pour les raccordements X2M et X1S ou X1S et X2A les câbles 0-V sont reliés, il convient de s’assurer de la polarité correcte de tous les connecteurs enfichables. Une inversion de polarité... -
Page 83: Effectuer Le Raccordement Pneumatique De L'embase
AVENTICS | ED12 | R414002587–BDL–001–AB Mise en service du ED12 7.1.1 Effectuer le raccordement pneumatique de l’embase Le diamètre intérieur de la conduite d’alimentation doit correspondre au minimum à 6 mm afin d’atteindre la puissance d’air conformément à la spécification. -
Page 84: Régler La Valeur Consigne
AVENTICS | ED12 | R414002587–BDL–001–AB Commander le ED12 Régler la valeur consigne Indiquer la valeur consigne souhaitée par l’intermédiaire de la commande ou sur un potentiomètre. Pour ce, lire le chapitre « Sélectionner la pression d’alimentation correcte » à la page 85. -
Page 85: Sélectionner La Pression D'alimentation Correcte
AVENTICS | ED12 | R414002587–BDL–001–AB Commander le ED12 Sélectionner la pression d’alimentation correcte Si la pression d’alimentation est inférieure à celle de sortie donnée au préalable par la valeur consigne électrique, il s’ensuit un écart permanent. Par conséquent, afin d’empêcher que le ED12- ne s’échauffe, l’électronique réduit la puissance absorbée et donc le... -
Page 86: Régler La Pression
AVENTICS | ED12 | R414002587–BDL–001–AB Commander le ED12 Régler la pression Suivant le type de construction, il est possible de prérégler la pression de sortie du ED12 par l’intermédiaire du courant, de la tension ou d’un potentiomètre. Dans le chapitre ci-après, les courbes caractéristiques représentent, suivant le type de construction, le rapport linéaire... -
Page 87: Pression De Sortie De 0 À 10 Bar
AVENTICS | ED12 | R414002587–BDL–001–AB Commander le ED12 8.2.2 Pression de sortie de 0 à 10 bar [bar] 145 [psi] [bar] 145 [psi] 72,5 72,5 [mA] [mA] 100% 100% 00121348 Valeur consigne/ Valeur consigne/ 00121347 Valeur réelle Valeur réelle R414001636... -
Page 88: Démonter, Remplacer Ou Éliminer Le Ed12
AVENTICS | ED12 | R414002587–BDL–001–AB Démonter, remplacer ou éliminer le ED12 Démonter, remplacer ou éliminer le ED12 Démonter le ED12 ATTENTION Danger de brûlures à cause de bobines de distributeur chaudes ! Le contact des bobines de distributeur pendant le fonctionnement peut provoquer des brûlures. -
Page 89: Eliminer Le Ed12
AVENTICS | ED12 | R414002587–BDL–001–AB Entretien et maintenance du ED12 Eliminer le ED12 Eliminer le ED12 selon les directives de votre pays. 10 Entretien et maintenance du ED12 10.1 Entretenir le ED12 Le ED12 ne nécessite aucun entretien particulier. ATTENTION Danger de brûlures à... -
Page 90: Vérifier Les Joints Du Ed12
AVENTICS | ED12 | R414002587–BDL–001–AB En cas de défaillances 10.2.1 Vérifier les joints du ED12 Les joints du ED12 peuvent s’user plus rapidement en cas de conditions ambiantes agressives. Defekte Dichtungen führen zu pneumatischen Leckagen und zum Verlust der Schutzklasse IP 65. -
Page 91: Données Techniques
AVENTICS | ED12 | R414002587–BDL–001–AB Données techniques Tableau 12: Défaillance Cause possible Remède Fuite d’air audible Le joint d’embase est manquant Vérifier le joint d’embase et le ou endommagé remplacer le cas échéant Fuite entre le ED12 et l’embase Serrer les vis selon un couple de serrage de 6 Nm Le ED12 n’est pas étanche... - Page 92 AVENTICS | ED12 | R414002587–BDL–001–AB Données techniques Tableau 13: Données générales Type de protection selon EN 60529 / IEC529 IP65 (uniquement à l’état monté et muni de tous les connecteurs) Position de montage Position de montage recommandée : verticale (voir Fig. 5 à...
-
Page 93: Accessoires
AVENTICS | ED12 | R414002587–BDL–001–AB Accessoires Tableau 15: Electronique < 300 Ω Sortie de courant (valeur réelle), charge externe Sortie de tension (valeur réelle), charge > 1 kΩ externe Tableau 16: Normes et directives prises en compte RL 93/97 CEE : «... -
Page 94: Index
AVENTICS | ED12 | R414002587–BDL–001–AB Index 14 Index Embase 78 Affectation des connecteurs 79 Vérifier 90 Joint d’embase 78 Commande 84 Consignes de danger Maintenance 89 Construction 69 Manipulation 68, 72, 84 Signification 69 Débrancher 88 Couple de serrage 79 Mise en marche 83 Courbes caractéristiques 86... - Page 95 AVENTICS | ED12 | R414002587–BDL–001–AB Index Plaque de montage 77 Valeur consigne Position de montage 77 Raccordement 79 Pression Régler 84 Régler 86 Variantes de raccordement 72 Tolérance 85 Pression de service Régler 85 Pression de sortie 75 Raccords Echappement 84 Pression d’alimentation 84...
- Page 97 AVENTICS | ED12 | R414002587–BDL–001–AB Indice Indice Spiegazione delle istruzioni ........... 99 Ulteriore documentazione ............99 Abbreviazioni utilizzate...............99 Per la vostra sicurezza ........... 99 Utilizzo a norma................. 100 Utilizzo non a norma..............100 Qualifica del personale ............101 Avvertenze di sicurezza in queste istruzioni..... 101 Cosa bisogna osservare per la ED12........
- Page 98 AVENTICS | ED12 | R414002587–BDL–001–AB Indice Smontaggio, sostituzione e smaltimento della ED12 ............... 120 Smontaggio della ED12............120 Sostituzione della ED12 ............120 Smaltimento della ED12 ............121 Cura e manutenzione della ED12 ......... 121 10.1 Cura della ED12 ................121 10.2 Manutenzione della ED12 ............121 10.2.1 Controllare le guarnizioni della ED12 ........
-
Page 99: Spiegazione Delle Istruzioni
AVENTICS | ED12 | R414002587–BDL–001–AB Spiegazione delle istruzioni Spiegazione delle istruzioni Le istruzioni contengono informazioni importanti per installare, azionare e sottoporre a manutenzione la valvola riduttrice di pressione ED12 e per riparare autonomamente piccoli guasti, nel rispetto delle norme e della sicurezza. -
Page 100: Utilizzo A Norma
AVENTICS | ED12 | R414002587–BDL–001–AB Per la vostra sicurezza Leggere perciò attentamente queste istruzioni in ogni parte prima di adoperare la ED12. Conservare le istruzioni in modo che siano sempre accessibili a tutti gli utenti. Consegnare la ED12 a terzi sempre con le relative istruzioni per l’uso. -
Page 101: Qualifica Del Personale
AVENTICS | ED12 | R414002587–BDL–001–AB Per la vostra sicurezza Qualifica del personale Il montaggio e la messa in funzione richiedono conoscenze basilari elettriche e pneumatiche, nonché conoscenze dei relativi termini tecnici. Il montaggio e la messa in funzione devono perciò essere... -
Page 102: Cosa Bisogna Osservare Per La Ed12
AVENTICS | ED12 | R414002587–BDL–001–AB Per la vostra sicurezza Le parole di segnalazione hanno i seguenti significati: Tab. 2: Classi di pericolo secondo ANSI Z535.6–2006 Segnale di avvertimento, parola Significato di segnalazione Indica una situazione potenzialmente pericolosa che, se non evitata, PERICOLO può... - Page 103 AVENTICS | ED12 | R414002587–BDL–001–AB Per la vostra sicurezza Prima del montaggio Prima di procedere al montaggio, lasciare ambientare l’apparecchio per alcune ore, poiché nel corpo può depositarsi acqua di condensa. Durante il montaggio Togliere sempre l’alimentazione elettrica e pneumatica della parte rilevante dell’impianto prima di montare l’apparecchio o...
-
Page 104: Fornitura
AVENTICS | ED12 | R414002587–BDL–001–AB Fornitura Durante la pulizia Non usare mai solventi o detergenti aggressivi. Pulire l’apparecchio esclusivamente con un panno leggermente umido. Usare a tal scopo esclusivamente acqua ed eventualmente un detergente delicato. Durante lo Smaltire l’apparecchio nel rispetto delle norme vigenti nel smaltimento proprio paese. -
Page 105: Descrizione Dell'apparecchio
AVENTICS | ED12 | R414002587–BDL–001–AB Descrizione dell’apparecchio Descrizione dell’apparecchio La ED12 è disponibile in tre diverse varianti di collegamento. ED12 con connettore M12 00122952 Fig. 1: ED12 con connettore integrato XPC, M12 1 Tappo dell’apertura di 8 Viti M6x70 (DIN EN ISO 4762,... -
Page 106: Ed12 Con Due Connettori M12
AVENTICS | ED12 | R414002587–BDL–001–AB Descrizione dell’apparecchio ED12 con due connettori M12 00000000 Fig. 2: ED12 con connettore X1S e boccola X2M, M12 integrati 1 Tappo dell’apertura di 8 Viti M6x70 (DIN EN ISO 4762, compensazione precedentemente DIN 912) 2 Apertura di aerazione del... -
Page 107: Ed12 Con Due Connettori Rettangolari
AVENTICS | ED12 | R414002587–BDL–001–AB Descrizione dell’apparecchio ED12 con due connettori rettangolari 00122954 Fig. 3: ED12 con 2 connettori rettangolari X1S e X2A, DIN EN ISO 175301- 1 Tappo dell’apertura di 8 Viti M6x70 (DIN EN ISO 4762, compensazione precedentemente DIN 912) -
Page 108: Montaggio Della Ed12
AVENTICS | ED12 | R414002587–BDL–001–AB Montaggio della ED12 Montaggio della ED12 AVVISO Il prodotto contiene componenti elettrici sensibili alle scariche elettromagnetiche (ESD)! Se persone o cose toccano i componenti elettrici, può verificarsi una scarica elettrostatica che può danneggiare o distruggere il prodotto. - Page 109 AVENTICS | ED12 | R414002587–BDL–001–AB Montaggio della ED12 AVVISO Pericolo in caso di fissaggio sbagliato dell’apparecchio! Se l’apparecchio non viene fissato correttamente può muoversi in maniera incontrollata, danneggiando altri componenti dell’impianto. Assicurarsi che l’apparecchio sia fissato in modo sicuro su una piastra base e che questa sia fissata a sua volta alla macchina o ad una piastra di montaggio.
-
Page 110: Inserimento Della Guarnizione Della Piastra Base
AVENTICS | ED12 | R414002587–BDL–001–AB Montaggio della ED12 Prima del montaggio assicurarsi che l’apertura di aerazione del corpo (2) sia aperta e non otturata p. es. da laccatura. 00121338 Inserimento della guarnizione della piastra base AVVISO Guarnizioni e tappi mancanti comportano la perdita della classe di protezione IP65! Fluidi e corpi estranei potrebbero penetrare nell'apparecchio e nei connettori distruggendo l’elettronica. -
Page 111: Avvitamento Della Ed12 Sulla Piastra Base
AVENTICS | ED12 | R414002587–BDL–001–AB Montaggio della ED12 Avvitamento della ED12 sulla piastra base Inserire le quattro viti M6x70 nei quattro fori come illustrato nella figura 4 a pagina 108 e avvitarle. Coppia di serraggio: 6 Nm Collegamento della tensione di alimentazione e del valore nominale Per azionare la ED12 è... - Page 112 AVENTICS | ED12 | R414002587–BDL–001–AB Montaggio della ED12 Tab. 9: ED12 con connettore X2M, M12 integrati Boccola integrata X2M, M12, femmina, a 5 poli Pin 1 Uscita di commutazione per pressione raggiunta Pin 2 Valore nominale (+): corrente 0/4 fino a 20 mA o...
- Page 113 AVENTICS | ED12 | R414002587–BDL–001–AB Montaggio della ED12 In caso di apparecchi con un connettore integrato XPC, M12: Per il collegamento dell’XPC servirsi di un cavo schermato. La schermatura deve essere connessa al corpo del connettore. Collegare il cavo al connettore integrato XPC (12).
-
Page 114: Messa In Funzione Della Ed12
AVENTICS | ED12 | R414002587–BDL–001–AB Messa in funzione della ED12 Collegare i cavi alla boccola integrata X2M come illustrato Schaltausgang nella figura a fianco. La ED12 può essere ora alimentata da tensione e il valore nominale può essere impostato sul potenziometro. -
Page 115: Collegamento Dell'alimentazione Elettrica E Pneumatica
AVENTICS | ED12 | R414002587–BDL–001–AB Messa in funzione della ED12 1. Collegare il cavo di alimentazione all’attacco di ingresso della piastra base (foro 1) (21). 2. Collegare il cavo di uscita all’attacco della pressione di uscita posto di fronte (foro non etichettato). -
Page 116: Pilotaggio Della Ed12
AVENTICS | ED12 | R414002587–BDL–001–AB Pilotaggio della ED12 Pilotaggio della ED12 Dopo aver collegato l’alimentazione pneumatica ed elettrica alla ED12 è possibile regolare la pressione in modo progressivo. A tal scopo pilotare la ED12 p. es. tramite un comando o un potenziometro, con un valore nominale. -
Page 117: Scelta Della Giusta Pressione Di Alimentazione
AVENTICS | ED12 | R414002587–BDL–001–AB Pilotaggio della ED12 Scelta della giusta pressione di alimentazione Se la pressione di alimentazione è più piccola della pressione di uscita definita tramite il valore nominale, ne deriva uno scarto di regolazione costante. Per impedire che di conseguenza la ED12 si riscaldi, l’elettronica riduce l’assorbimento di corrente e quindi la... -
Page 118: Regolazione Della Pressione
AVENTICS | ED12 | R414002587–BDL–001–AB Pilotaggio della ED12 Regolazione della pressione In base alla versione, la pressione di uscita della ED12 può essere regolata tramite corrente, tensione o potenziometro. Le linee caratteristiche del paragrafo che segue rappresentano, in base alla versione, il rapporto lineare tra corrente e pressione di uscita o tra tensione e pressione di uscita. -
Page 119: Pressione Di Uscita 0 - 10 Bar
AVENTICS | ED12 | R414002587–BDL–001–AB Pilotaggio della ED12 8.2.2 Pressione di uscita 0 - 10 bar [bar] 145 [psi] [bar] 145 [psi] 72,5 72,5 [mA] [mA] 100% 100% Valore nominale/ 00121348 Valore nominale/ 00121347 Valore effettivo Valore effettivo R414001636 R414001635... -
Page 120: Smontaggio, Sostituzione E Smaltimento Della Ed12
AVENTICS | ED12 | R414002587–BDL–001–AB Smontaggio, sostituzione e smaltimento della ED12 Smontaggio, sostituzione e smaltimento della ED12 Smontaggio della ED12 ATTENZIONE Pericolo di ustioni dovuto a bobine valvola surriscaldate! Toccando le bobine valvola durante il funzionamento si rischiano ustioni. Prima di smontare l’apparecchio lasciarlo raffreddare. -
Page 121: Cura E Manutenzione Della Ed12
AVENTICS | ED12 | R414002587–BDL–001–AB Cura e manutenzione della ED12 Smaltimento della ED12 Smaltire la ED12 nel rispetto delle norme vigenti nel proprio paese. 10 Cura e manutenzione della ED12 10.1 Cura della ED12 Per la ED12 non è necessaria alcuna cura particolare. -
Page 122: Controllare Le Guarnizioni Della Ed12
AVENTICS | ED12 | R414002587–BDL–001–AB In caso di disturbi 10.2.1 Controllare le guarnizioni della ED12 In condizioni ambientali aggressive le guarnizioni della ED12 possono essere soggette ad un invecchiamento più veloce. Guarnizioni rotte comportano perdite pneumatiche e la perdita della classe di protezione IP65. -
Page 123: Dati Tecnici
AVENTICS | ED12 | R414002587–BDL–001–AB Dati tecnici Tab. 12: Disturbo Causa possibile Soluzione La pressione di uscita non L’apertura di aerazione del corpo Assicurarsi che l’apertura di aerazione corrisponde al valore è chiusa del corpo sia aperta nominale definito Membrana dell’apertura di Sostituzione della ED12 aerazione dell’apparecchio... - Page 124 AVENTICS | ED12 | R414002587–BDL–001–AB Dati tecnici Tab. 13: Dati generali Modello Valvola a magnete Fluido consentito Aria con classe di qualità DIN ISO 8573-1 per impurità solide:5 per contenuto di acqua:3 per contenuto totale di olio:1 Tipo di protezione secondo EN 60529/...
-
Page 125: Accessori
AVENTICS | ED12 | R414002587–BDL–001–AB Accessori Tab. 15: Elettronica Resistenza ingresso tensione (valore Tensione di alimentazione connessa: 1 MΩ nominale) Tensione di alimentazione disconnessa: > 3 MΩ < 300 Ω Uscita di corrente (valore effettivo), carico esterno Uscita di tensione (valore effettivo), carico >... -
Page 126: Indice Analitico
AVENTICS | ED12 | R414002587–BDL–001–AB Indice analitico 14 Indice analitico Apertura di aerazione del corpo 109, 110 Impostazione Aria di scarico Pressione di esercizio 117 convogliata 115 Valore nominale 115 Attacchi Aria di scarico 116 Pressione di alimentazione 116 Linee caratteristiche 118... - Page 127 AVENTICS | ED12 | R414002587–BDL–001–AB Indice analitico Pressione Collegamento 111 Regolazione 118 Impostazione 115 Tolleranza 117 Varianti di collegamento 105 Pressione di esercizio Impostazione 117 Pressione di uscita 107 Pulizia 121 Scarto 117 Schema di funzionamento 116 Sicurezza 99 Silenziatori 115...
- Page 129 AVENTICS | ED12 | R414002587–BDL–001–AB Índice Índice Acerca de estas instrucciones ........131 Otra documentación ..............131 Abreviaturas utilizadas............131 Para su seguridad ............131 Utilización conforme a las especificaciones ..... 132 Utilización no conforme a las especificaciones ....132 Cualificación del personal............
- Page 130 AVENTICS | ED12 | R414002587–BDL–001–AB Índice Desmontar, sustituir o eliminar la ED12 ..... 152 Desmontar la ED12..............152 Sustituir la ED12.................152 Eliminar la ED12.................153 Conservar y mantener la ED12 ........153 10.1 Conservar la ED12 ..............153 10.2 Mantener la ED12...............153 10.2.1 Comprobar las juntas de la ED12 ........154 Si se producen averías ..........
-
Page 131: Acerca De Estas Instrucciones
AVENTICS | ED12 | R414002587–BDL–001–AB Acerca de estas instrucciones Acerca de estas instrucciones Estas instrucciones contienen información importante para montar, utilizar, mantener y eliminar por uno mismo averías sencillas de la válvula reguladora de presión ED12 de un modo seguro y apropiado. -
Page 132: Utilización Conforme A Las Especificaciones
AVENTICS | ED12 | R414002587–BDL–001–AB Para su seguridad advertencia ante indicaciones de manejo que aparecen en estas instrucciones. Lea estas instrucciones con detenimiento y por completo antes de empezar a trabajar con la ED12. Guarde estas instrucciones en un lugar al que siempre puedan acceder fácilmente todos los usuarios. -
Page 133: Cualificación Del Personal
AVENTICS | ED12 | R414002587–BDL–001–AB Para su seguridad Cualificación del personal Es necesario tener conocimientos básicos de electrónica y neumática y conocimientos de la terminología técnica pertinente para realizar el montaje y la puesta en servicio. Por lo tanto, solamente personal cualificado en electrónica o neumática o bien otra persona vigilada y controlada por una persona cualificada podrá... -
Page 134: Debe Tener En Cuenta Lo Siguiente Acerca De La Ed12
AVENTICS | ED12 | R414002587–BDL–001–AB Para su seguridad Tabla 2: Clases de peligros según ANSI Z535.6–2006 Símbolo de advertencia, palabra Significado de advertencia Identifica una situación de peligro con riesgo de lesiones graves, PELIGRO incluso mortales. Identifica una situación de peligro en la que puede existir riesgo de ADVERTENCIA lesiones graves, incluso mortales. - Page 135 AVENTICS | ED12 | R414002587–BDL–001–AB Para su seguridad Antes del montaje Antes del montaje, deje que el aparato se aclimate durante varias horas, ya que, de lo contrario, se puede depositar agua de condensación en la carcasa. Durante el montaje Desconecte siempre la presión y la conexión con la red...
-
Page 136: Volumen De Suministro
AVENTICS | ED12 | R414002587–BDL–001–AB Volumen de suministro Durante la limpieza No utilice nunca disolventes ni detergentes agresivos. Limpie el aparato exclusivamente con un paño humedecido con agua o, en caso necesario, un detergente suave. Durante la eliminación Elimine el aparato de acuerdo con las especificaciones de su país. -
Page 137: Descripción Del Aparato
AVENTICS | ED12 | R414002587–BDL–001–AB Descripción del aparato Descripción del aparato La ED12 está disponible en tres variantes de conexión diferentes. ED12 con conector M12 00122952 Fig. 1: ED12 con conector de montaje XPC, M12 1 Cierre del orificio de 8 Tornillos M6x70 (DIN EN ISO compensación... -
Page 138: Ed12 Con Dos Conectores M12
AVENTICS | ED12 | R414002587–BDL–001–AB Descripción del aparato ED12 con dos conectores M12 00000000 Fig. 2: ED12 con conector de montaje X1S y casquillo de montaje X2M, 1 Cierre del orificio de 8 Tornillos M6x70 (DIN EN ISO compensación 4762, antiguamente DIN 912) 2 Abertura de ventilación de... -
Page 139: Ed12 Con Dos Conectores Rectangulares
AVENTICS | ED12 | R414002587–BDL–001–AB Descripción del aparato ED12 con dos conectores rectangulares 00122954 Fig. 3: ED12 con dos conectores rectangulares X1S y X2A, DIN EN 175301-803 1 Cierre del orificio de 8 Tornillos M6x70 (DIN EN ISO compensación 4762, antiguamente DIN 912) 2 Abertura de ventilación de... -
Page 140: Montar La Ed12
AVENTICS | ED12 | R414002587–BDL–001–AB Montar la ED12 Montar la ED12 NOTA ¡El producto contiene componentes electrónicos que son sensibles a las descargas electroestáticas! Si los componentes eléctricos entran en contacto con personas u objetos puede provocarse una descarga electroestática que dañe o destruya el producto. - Page 141 AVENTICS | ED12 | R414002587–BDL–001–AB Montar la ED12 NOTA ¡Peligro originado por una fijación incorrecta del aparato! Un aparato fijado incorrectamente se puede mover de forma descontrolada y puede dañar otras piezas de la instalación. Asegúrese de que el aparato está fijado de manera segura a una placa base y ésta a la máquina o a una placa de montaje.
-
Page 142: Colocar La Junta De La Placa Base
AVENTICS | ED12 | R414002587–BDL–001–AB Montar la ED12 Asegúrese antes del montaje que el orificio de ventilación de la carcasa (2) está abierto y no está cerrado p. ej. mediante un pintado excesivo. 00121338 Colocar la junta de la placa base NOTA ¡La ausencia de juntas y cierres origina la pérdida de la clase de protección IP 65! -
Page 143: Atornillar La Ed12 En La Placa Base
AVENTICS | ED12 | R414002587–BDL–001–AB Montar la ED12 Atornillar la ED12 en la placa base Inserte los cuatro tornillos M6 x 70, como se indica en la ilustración 4 en la página 140 en los cuatro agujeros y apriételos. Par de apriete: 6 Nm Conectar la tensión de alimentación y el valor... - Page 144 AVENTICS | ED12 | R414002587–BDL–001–AB Montar la ED12 Tabla 8: ED12 con conector de montaje X1S, M12 Conector de montaje X1S, M12, macho, de 5 pins Pin 1 24 V DC Pin 2 No ocupado Pin 3 00125293 Pin 4...
- Page 145 AVENTICS | ED12 | R414002587–BDL–001–AB Montar la ED12 Los contactos X1S pin 1 y X2A pin 1 están unidos internamente. Antes de conectar los enchufes, asegúrese de que todas las juntas y cierres están disponibles y no se encuentran dañados.
-
Page 146: Poner En Servicio La Ed12
AVENTICS | ED12 | R414002587–BDL–001–AB Poner en servicio la ED12 Como en el caso de las conexiones X2M y X1S o X1S y X2A los cables de 0 V están unidos, usted tendrá que asegurar la polaridad correcta en el caso de todas las conexiones por enchufe. -
Page 147: Conectar Neumáticamente La Placa Base
AVENTICS | ED12 | R414002587–BDL–001–AB Poner en servicio la ED12 7.1.1 Conectar neumáticamente la placa base El diámetro interior del conducto de alimentación debe ser como mínimo de 6 mm para que se alcance el rendimiento de aire según las especificaciones. -
Page 148: Controlar La Ed12
AVENTICS | ED12 | R414002587–BDL–001–AB Controlar la ED12 Tenga en cuenta para ello el capítulo “Seleccionar la presión de alimentación correcta” en la página 149. Controlar la ED12 Una vez que usted haya conectado el suministro eléctrico y neumático a la ED12, usted podrá regular la presión de forma continuada. -
Page 149: Seleccionar La Presión De Alimentación Correcta
AVENTICS | ED12 | R414002587–BDL–001–AB Controlar la ED12 Seleccionar la presión de alimentación correcta Si la presión de alimentación es inferior a la presión prescrita a través del valor nominal eléctrico, se produce una desviación de regulación permanente. Para impedir que debido a ello se caliente la ED12, la electrónica reduce el consumo de corriente y con ello... -
Page 150: Regular La Presión
AVENTICS | ED12 | R414002587–BDL–001–AB Controlar la ED12 Regular la presión Según el tipo de construcción, la presión de salida de la ED12 se puede prescribir a través de la corriente, la tensión o por medio de un potenciómetro. Las curvas características en el siguiente apartado representan según el tipo constructivo la relación lineal entre corriente y... -
Page 151: Presión De Salida 0 Hasta 10 Bar
AVENTICS | ED12 | R414002587–BDL–001–AB Controlar la ED12 8.2.2 Presión de salida 0 hasta 10 bar [bar] 145 [psi] [bar] 145 [psi] 72,5 72,5 [mA] [mA] 100% 100% Valor nominal/ Valor nominal/ 00121348 00121347 Valor real Valor real R414001636 R414001635... -
Page 152: Desmontar, Sustituir O Eliminar La Ed12
AVENTICS | ED12 | R414002587–BDL–001–AB Desmontar, sustituir o eliminar la ED12 Desmontar, sustituir o eliminar la ED12 Desmontar la ED12 ATENCIÓN ¡Peligro de quemaduras debido a bobinas de válvula calientes! Entrar en contacto con las bobinas de válvula durante el funcionamiento puede originar quemaduras. -
Page 153: Eliminar La Ed12
AVENTICS | ED12 | R414002587–BDL–001–AB Conservar y mantener la ED12 Sustituir la ED12 Para sustituir la ED12 deberá desmontarla en primer lugar tal y como se ha descrito con anterioridad y después montar la nueva ED12 (véase “Montar la ED12” en la página 140). -
Page 154: Comprobar Las Juntas De La Ed12
AVENTICS | ED12 | R414002587–BDL–001–AB Si se producen averías 10.2 Mantener la ED12 La ED12 no requiere mantenimiento. No obstante, tenga en cuenta los intervalos de mantenimiento específicos de la instalación. 10.2.1 Comprobar las juntas de la ED12 Las juntas de la ED12 pueden envejecer con más rapidez bajo condiciones ambientales agresivas. -
Page 155: Datos Técnicos
AVENTICS | ED12 | R414002587–BDL–001–AB Datos técnicos Tabla 12: Avería Posible causa Remedio Presión de salida inferior al Un consumidor con una toma de Reducir toma de aire valor nominal aire grande (> 2600 Nl/min) genera una gran caída de presión en el aparato La presión de salida no... - Page 156 AVENTICS | ED12 | R414002587–BDL–001–AB Datos técnicos Tabla 13: Generalidades –20 °C hasta +80 °C Rango de temperatura para el almacenamiento Pilotaje Analógico Tipo de construcción Válvula de asiento Medio admisible Aire de la clase de calidad DIN ISO 8573-1 Para impurezas sólidas:5...
-
Page 157: Accesorios
AVENTICS | ED12 | R414002587–BDL–001–AB Accesorios Tabla 15: Electrónica Tensión de alimentación 24 V DC (+30%/–20%) La tensión de alimentación debe producirse de una fuente de alimentación con separación segura Distorsión armónica permitida Consumo de corriente máx. 1,4 A Tensión de alimentación conectada: 100 Ω... -
Page 158: Índice Temático
AVENTICS | ED12 | R414002587–BDL–001–AB Índice temático 14 Índice temático Abertura de ventilación de la carcasa 142 Funcionamiento 148 Advertencias Ajustar la presión de servicio 149 Estructura 133 Conexión 147 Significado 133 Desconexión 152 Aire de salida Regular la presión 150 Captación 147... - Page 159 AVENTICS | ED12 | R414002587–BDL–001–AB Índice temático Utilización conforme a las Ocupación de conectores 143 especificaciones 132 Orificio de codificación 142 Valor nominal Par de apriete 143 Ajustar el 147 Pilotaje 148 Conectar 143 Placa base 140 Variantes de conexión 137...
- Page 161 AVENTICS | ED12 | R414002587–BDL–001–AB Innehål Innehål Bruksanvisning .............. 163 Övrig dokumentation ..............163 Förkortningar................163 Säkerhetsföreskrifter ........... 163 Tillåten användning..............164 Inte tillåten användning ............164 Personalens kvalifikationer............ 165 Varningstexter i denna bruksanvisning......165 Viktigt att veta om ED12 ............166 Leveransomfattning ............
- Page 162 AVENTICS | ED12 | R414002587–BDL–001–AB Innehål Skötsel och underhåll av ED12 ........184 10.1 Skötsel av ED12................184 10.2 Underhåll av ED12 ..............185 10.2.1 Kontroll av tätningar i ED12 ..........185 Om störningar skulle uppträda ........186 Tekniska data ..............187 Tillbehör ................
-
Page 163: Bruksanvisning
AVENTICS | ED12 | R414002587–BDL–001–AB Bruksanvisning Bruksanvisning Denna bruksanvisning innehåller viktig information för att montera tryckregleringsventil ED12 säkert och fackmässigt och att sköta, vårda och själv undanröja enkla störningar. Du bör läsa igenom hela anvisningen noga, särskilt då kapitlet 2 “Säkerhetsföreskrifter” på sidan163, innan du börjar arbeta med ED12. -
Page 164: Tillåten Användning
AVENTICS | ED12 | R414002587–BDL–001–AB Säkerhetsföreskrifter Förvara bruksanvisningen så att den alltid är tillgänglig för alla användare. Se till att instruktionsboken alltid överlämnas tillsammans med ED12 till näste användare. Tillåten användning ED12 är en pneumatisk enhet med integrerad elektronik som är avsedd att användas uteslutande för reglering av pneumatiska... -
Page 165: Personalens Kvalifikationer
AVENTICS | ED12 | R414002587–BDL–001–AB Säkerhetsföreskrifter Personalens kvalifikationer Montering och driftstart kräver grundläggande kunskaper om elektronik och pneumatik liksom kunskap om de tillämpliga facktermerna. Montering och driftstart får därför endast göras av en fackman inom elektronik och pneumatik eller av en upplärd person under ledning och uppsikt av en fackman. -
Page 166: Viktigt Att Veta Om Ed12
AVENTICS | ED12 | R414002587–BDL–001–AB Säkerhetsföreskrifter Tabell 2: Riskklasser enligt ANSI Z535.6–2006 Varningssymbol, signalord Betydelse Markerar en farlig situation som med säkerhet leder till svåra FARA skador eller till och med dödsfall om den inte avvärjes. Markerar en farlig situation som kan leda till svåra skador eller till VARNING och med dödsfall om den inte avvärjes. - Page 167 AVENTICS | ED12 | R414002587–BDL–001–AB Säkerhetsföreskrifter Vid montering Gör alltid den aktuella anläggningsdelen trycklös och spänningsfri innan enheten monteras eller stickkontakter ansluts eller tas bort. Säkra anläggningen mot återinkoppling. Sätt upp varningsskyltar på huvudströmbrytaren under monteringen som varning för återinkoppling.
-
Page 168: Leveransomfattning
AVENTICS | ED12 | R414002587–BDL–001–AB Leveransomfattning Leveransomfattning Leveransen innehåller: 1 ED12 1 tätning till basplattan 4 skruvar M6x70 (DIN EN ISO 4762, tidigare DIN 912) 1 bruksanvisning Till ED12 med kvadratisk stickkontakt: 2 kvadratiska stickkontakter format A enligt DIN EN 175301-803 Användningsområde för ED12... -
Page 169: Beskrivning Av Enheten
AVENTICS | ED12 | R414002587–BDL–001–AB Beskrivning av enheten Beskrivning av enheten ED12 finns i tre olika anslutningsvarianter. ED12 med M12-stickkontakt 00122952 Fig. 1: ED12 med infälld stickkontakt XPC, M12 1 Förslutning till 8 Skruvar M6x70 (DIN EN ISO utjämningsöppningen 4762, tidigare DIN 912) 2 Luftningsöppning i huset... -
Page 170: Ed12 Med Två Stickkontakter M12
AVENTICS | ED12 | R414002587–BDL–001–AB Beskrivning av enheten ED12 med två stickkontakter M12 00000000 Fig. 2: ED12 med infälld stickkontakt X1S och infälld hylskontakt X2M, 1 Förslutning till 8 Skruvar M6x70 (DIN EN ISO utjämningsöppningen 4762, tidigare DIN 912) 2 Luftningsöppning i huset 9 Basplattstätning... -
Page 171: Ed12 Med Två Kvadratiskastickkontakter M12
AVENTICS | ED12 | R414002587–BDL–001–AB Beskrivning av enheten ED12 med två kvadratiskastickkontakter M12 00122954 Fig. 3: ED12 med två kvadratiska stickkontakter X1S och X2A, DIN EN 175301-803 1 Förslutning till 8 Skruvar M6x70 (DIN EN ISO utjämningsöppningen 4762, tidigare DIN 912) 2 Luftningsöppning i huset... -
Page 172: Montering Av Ed12
AVENTICS | ED12 | R414002587–BDL–001–AB Montering av ED12 Montering av ED12 Produkten innehåller elektroniska komponenter som är känsliga för elektrostatiska urladdningar (ESD)! Om elektriska komponenter kommer i beröring med personer eller föremål kan det ske en elektrostatisk urladdning som skadar eller förstör produkten. - Page 173 AVENTICS | ED12 | R414002587–BDL–001–AB Montering av ED12 Risk för felaktig fastsättning av enheten! En felaktigt fastsatt enhet kan röra sig okontrollerat och skada andra anläggningsdelar. Kontrollera noga att enheten sitter säkert fast på basplattan och att plattan sitter säkert fast på...
-
Page 174: Iläggning Av Basplattans Tätning
AVENTICS | ED12 | R414002587–BDL–001–AB Montering av ED12 Kontrollera före monteringen att husetsluftningsöppning (2) är öppen och inte är täppt t. ex. genomöverlackering. 00121338 Iläggning av basplattans tätning Om tätningar och förslutningar saknas, gäller inte kapslingsklassen IP65! Vätskor och främmande partiklar kan tränga in i enheten och stickanslutningarna och förstöra elektroniken. -
Page 175: Fastskruvning Av Ed12 På Basplattan
AVENTICS | ED12 | R414002587–BDL–001–AB Montering av ED12 Fastskruvning av ED12 på basplattan Sätt i de fyra skruvarna M6x70 enligt bilden 4 på sidan 172i de fyra hålen och dra åt dem. Åtdragningsmoment: 6 Nm Anslutning av matningsspänning och börvärde För att tryckregleringsventilen ED12 ska fungera måste enheten... - Page 176 AVENTICS | ED12 | R414002587–BDL–001–AB Montering av ED12 Tabell 9: ED12 med infälld hylskontakt X2M, M12 Infälld hylskontakt X2M, M12, hona, 5-polig Stift 1 Kopplingsutgång för uppnått tryck Stift 2 Börvärde (+): Ström 0/4 till 20 mA eller spänning 0 till...
- Page 177 AVENTICS | ED12 | R414002587–BDL–001–AB Montering av ED12 Avsäkra matningsspänningen med en extern säkring M 2,5 A. För enheter med infälld stickkontakt XPC, M12: Använd skärmad ledning för anslutning av XPC. Skärmen ska vara förbunden med stickkontaktens hus. Anslut ledningen till infälld stickkontakt XPC (12).
-
Page 178: Idrifttagning Av Ed12
AVENTICS | ED12 | R414002587–BDL–001–AB Idrifttagning av ED12 För enheter med inbyggda stickkontakter X1S och X2M och styrning via potentiometer: Anslut ledningarna enligt vidstående bild till hylskontakt X2M. Schaltausgang ED12 kan nu matas med spänning och börvärdet kan ställas in på... -
Page 179: Start Av Elektrisk Och Pneumatisk Matning
AVENTICS | ED12 | R414002587–BDL–001–AB Idrifttagning av ED12 1. Anslut matningsledningen till ingångsanslutningen på basplattan (hål 1) (21). 2. Anslut utgångsledningen till anslutningen för utgångstrycket på motsatta sidan (omärkt hål). 3. Anslut alltid en ljuddämpare eller en ledning för insamlad avluft till avluftsanslutningen (hål 3) (22). -
Page 180: Aktivering Av Ed12
AVENTICS | ED12 | R414002587–BDL–001–AB Aktivering av ED12 Aktivering av ED12 När den elektriska och pneumatiska matningen har anslutits till ED12 kan trycket justeras kontinuerligt. Tryckventilen ED12 aktiveras med ett börvärde t. ex. via en styrning eller via en potentiometer. Elektroniken jämför börvärdet med utgångstrycket som mäts med en trycksensor och genererar en regleringsstorhet... -
Page 181: Kopplingsutgång För "Uppnått Tryck
AVENTICS | ED12 | R414002587–BDL–001–AB Aktivering av ED12 OBSERVERA Risk för brännskador på grund av varma ventilspolar! Om ventilspolarna vidrörs under drift kan brännskador uppstå. Låt enheten svalna innan den demonteras. Rör inte enheten när den är i drift. Välj alltid ett högre matningstryck än utgångstrycket. -
Page 182: Kurvor
AVENTICS | ED12 | R414002587–BDL–001–AB Aktivering av ED12 1. Välj rätt kurva med ledning av utgångstrycket och enhetsnumret. 2. Bestäm utgångstrycket. 3. Ta med hjälp av kurvan fram strömmen eller spänningen för att kunna ställa in önskat utgångstryck. 4. Reglera utgångstrycket beroende på konstruktionstyp via styrningen eller med en potentiometer. -
Page 183: Demontering, Utbyte Eller Avfallshantering Av Ed12
AVENTICS | ED12 | R414002587–BDL–001–AB Demontering, utbyte eller avfallshantering av ED12 [bar] 145 [psi] [ba r] 145 [ps ] 72,5 72, 5 2,5 5 7,5 10 100% 100% 00125300 00121349 Börvärde Börvärde/ärvärde R414000731 R414000730 R414001640 R414001639 Kontrollera kurvorna för apparater med andra tryckområden i respektive offertritningar. -
Page 184: Byte Av Ed12
AVENTICS | ED12 | R414002587–BDL–001–AB Skötsel och underhåll av ED12 2. Koppla från 24 V DC-matningen. 3. Lossa de anslutna stickkontakterna. 4. Stäng av försörjningstrycket och avlufta matarledningen. 5. Lossa de fyra skruvarna M6x70. ED12 kan nu tas bort. Byte av ED12 När ED12 skall bytas måste den först demonteras enligt... -
Page 185: Underhåll Av Ed12
AVENTICS | ED12 | R414002587–BDL–001–AB Skötsel och underhåll av ED12 Risk för att konstruktionsdelar förstörs! Lösningsmedel och aggressiva rengöringsmedel förstör enhetens yta, märkningar och tätningar! Rengör apparaten uteslutande med en lätt fuktad trasa. Använd endast vatten eller ett milt rengöringsmedel för detta. -
Page 186: Om Störningar Skulle Uppträda
AVENTICS | ED12 | R414002587–BDL–001–AB Om störningar skulle uppträda 11 Om störningar skulle uppträda Tabell 12: Möjlig orsak Åtgärd Det finns inget utgångstryck Ingen spänningsmatning Anslut spänningsmatningen Kontrollera spänningsmatningens poler Koppla till anläggningsdelen Det finns inget inställt börvärde Ställ in börvärde... -
Page 187: Tekniska Data
AVENTICS | ED12 | R414002587–BDL–001–AB Tekniska data 12 Tekniska data Tabell 13: Allmänna data Mått (bredd x höjd x djup) 254 mm x 100 mm x 55 mm Vikt 2,3 kg 5 °C till 50 °C Temperaturområde vid användning –20 °C till +80 °C Temperaturområde vid förvaring... -
Page 188: Tillbehör
AVENTICS | ED12 | R414002587–BDL–001–AB Tillbehör Tabell 15: Elektronik Matningsspänning 24 V DC (+30%/–20%) Spänning måste matas från en nätdel med säker avskiljning Tillåtna övertoner Strömförbrukning max. 1,4 A Matningsspänning tillkopplad: 100 Ω Ingångsmotstånd för strömingång (börvärde) Matningsspänning frånkopplad: > 3 MΩ... -
Page 189: Nyckelordsregister
AVENTICS | ED12 | R414002587–BDL–001–AB Nyckelordsregister 14 Nyckelordsregister Frånkoppling 183 Aktivering 180 Funktionsschema 180 Anslutningar Avluft 180 Börvärde 175 Inställning Matningstryck 180 Arbetstryck 180 Utgångstryck 180 Börvärde 179 Anslutningsvarianter 169 Användning 164, 168 Avsedd 164 Kodningshål 174 Ej avsedd 164 Kodningsstift 174 Användningsområden 168... - Page 190 AVENTICS | ED12 | R414002587–BDL–001–AB Nyckelordsregister Kodningsstift 174 Matningsspänning 175 Monteringsläge 173 Stickkontaktsbeläggning 175 Monteringsläge 173 Monteringsplatta 173 Regleringsavvikelse 180 Rengöring 184 Säkerhet 163 Skötsel 184 Standarder 188 Starta driften 178 Inställning av börvärde 179 Start 179 Stickkontaktsbeläggning 175 Tätning...
- Page 192 German language. R414001164(R414002587)/02.2016 Subject to modifications. © All rights reserved by AVENTICS GmbH, even and especially in cases of proprietary rights applications. It may not be reproduced or given to third parties without its consent.