Publicité
Les langues disponibles
Les langues disponibles
Liens rapides
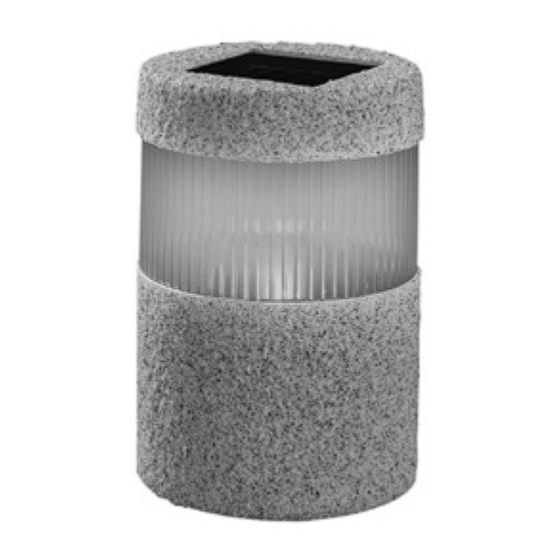
LED SOLAR LIGHT
LED SOLAR LIGHT
Assembly, operating and safety instructions
LED-SOLARLAMP
Montage-, bedienings- en veiligheidsinstructies
IAN 315252
BALISE SOLAIRE À LED
Instructions de montage, d'utilisation et
consignes de sécurité
LED-SOLARLEUCHTE
Montage-, Bedienungs- und Sicherheitshinweise
Publicité

Manuels Connexes pour LIVARNO LUX 315252


Sommaire des Matières pour LIVARNO LUX 315252
- Page 1 LED SOLAR LIGHT LED SOLAR LIGHT BALISE SOLAIRE À LED Assembly, operating and safety instructions Instructions de montage, d‘utilisation et consignes de sécurité LED-SOLARLAMP LED-SOLARLEUCHTE Montage-, bedienings- en veiligheidsinstructies Montage-, Bedienungs- und Sicherheitshinweise IAN 315252...
- Page 2 GB / IE / NI Assembly, operating and safety instructions Page FR / BE Instructions de montage, d‘utilisation et consignes de sécurité Page NL / BE Montage-, bedienings- en veiligheidsinstructies Pagina 32 DE / AT / CH Montage-, Bedienungs- und Sicherheitshinweise Seite...
- Page 3 HG00776A / HG00776C HG00776B / HG00776D...
- Page 5 List of pictograms used ........Page 6 Introduction ..............Page 6 Proper use ................. Page 6 Description of parts and features ........Page 7 Scope of delivery ............. Page 7 Technical data ..............Page 7 Safety instructions ..........Page 8 Product-specific safety instructions ........
- Page 6 List of pictograms used Splash-proof (IP44) LED solar light Introduction We congratulate you on the purchase of your new product. You have chosen a high quality product. The instructions for use are part of the product. They contain important information concern- ing safety, use and disposal.
- Page 7 Description of parts and features Solar cell Groove Solar housing Rechargeable battery Recess compartment Rechargeable battery ON / OFF switch compartment cover Housing Rechargeable battery Ground spike S cope of delivery 1 LED solar light 1 Ground spike 1 Rechargeable battery Ni-MH (nickel-metal hydride), AA / 1.2 V /600 mAh (pre-installed) 1 Assembly, operating and safety instructions T echnical data...
- Page 8 Safety instructions BEFORE USING THE PRODUCT, PLEASE FAMILIARISE YOURSELF WITH ALL OF THE SAFETY INFORMATION AND INSTRUCTIONS FOR USE! WHEN PASSING THIS PRODUCT ON TO OTHERS, PLEASE ALSO INCLUDE ALL THE DOCUMENTS! DANGER TO LIFE AND RISK OF ACCIDENTS FOR INFANTS AND CHILDREN! Never leave children alone and unsupervised with the packaging material.
- Page 9 If the LED fails at the end of its life, the entire product must be replaced. CAUTION! DANGER OF EXPLOSION! Do not operate the product in potentially explosive en- vironments in which there are inflam mable vapours, gases or dusts. Product-specific safety instructions Q D o not subject the product to strong vibrations or high...
- Page 10 Safety instructions for batteries / rechargeable batteries DANGER TO LIFE! Keep batteries / rechargeable batteries out of reach of children. If accidentally swallowed seek immediate medical attention. DANGER OF EXPLOSION! Never recharge non-rechargeable batteries. Do not short-circuit bat- teries / rechargeable batteries and / or open them. Overheating, fire or bursting can be the result.
- Page 11 Risk of damage of the product Only use the specified type of battery / rechargeable battery! Insert batteries / rechargeable batteries according to polarity marks (+) and (-) on the battery / rechargeable battery and the product. Clean the contacts on the battery / rechargeable battery and in the battery / rechargeable battery compartment before inserting! Remove exhausted batteries / rechargeable batteries from the...
- Page 12 Installing the product Q 1. Rotate the solar housing anticlockwise out of the housing 2. Move the ON / OFF switch into the ON position to switch the product on. 3. Insert the solar housing into the housing and tighten by turning it clockwise.
- Page 13 T he light automatically switches on in twilight conditions and off again when normal outdoor lighting conditions return. Replacing the rechargeable battery Q The rechargeable battery should be replaced every 12 months to ensure optimum performance. 1. Rotate the solar housing anticlockwise out of the housing 2.
- Page 14 as perpendicular as possible to the angle of incidence of the light. In this way you will receive the highest light levels. Maintenance and care Q The LED cannot be replaced. The product is maintenance-free, except for any necessary change of rechargeable battery. D o not under any circumstances use abrasive cleaning agents.
- Page 15 Error Cause Solution The light will not Artificial sources Mount the product in switch on even of light, e.g. street a place where it can- though the sun lighting, are inter- not be disturbed by shone on the fering with the other sources of light.
- Page 16 Contact your local refuse disposal authority for more details of how to dispose of your worn-out product. To help protect the environment, please dispose of the product properly when it has reached the end of its use- ful life and not in the household waste. Information on collection points and their opening hours can be obtained from your local authority.
- Page 17 Your legal rights are not limited in any way by our warranty de- tailed below. The warranty for this product is 3 years from the date of purchase. Should this product show any fault in materials or manufacture within 3 years from the date of purchase, we will repair or replace it –...
- Page 18 Légende des pictogrammes utilisés ..Page 19 Introduction ..............Page 19 Utilisation conforme ............Page 19 Descriptif des pièces ............Page 20 Contenu de la livraison ............ Page 20 Caractéristiques techniques ..........Page 20 Consignes de sécurité ........Page 21 Instructions de sécurité...
- Page 19 Légende des pictogrammes utilisés Protégée contre les projections de liquide IP44 Balise solaire à LED Introduction Nous vous félicitons pour l‘achat de votre nouveau produit. Vous avez opté pour un produit de grande qualité. Le mode d‘emploi fait partie intégrante de ce produit. Il contient des indications impor- tantes pour la sécurité, l’utilisation et la mise au rebut.
- Page 20 Descriptif des pièces Cellule solaire Rainure Boîtier solaire Compartiment à accu Évidement Commutateur MARCHE / Couvercle du ARRÊT compartiment à accu Boîtier Accu Piquet de terre Contenu de la livraison 1 balises solaires à LED 1 piquet de terre 1 accu Ni-MH (nickel-hydrure métallique), AA / 1,2 V / 600 mAh (pré-installé) 1 instruction de montage et d’utilisation et consignes de sécurité...
- Page 21 Consignes de sécurité PRENEZ CONNAISSANCE DE TOUTES LES INDICATIONS DE MANIEMENT ET DE SÉCURITÉ AVANT D’UTILISER LE PRODUIT POUR LA PREMIÈRE FOIS ! SI VOUS REMETTEZ LE PRODUIT À UN TIERS, VEUILLEZ ÉGALEMENT LUI TRANSMETTRE TOUS LES DOCUMENTS S‘Y RAPPORTANT ! DANGER DE MORT ET D‘ACCIDENT POUR LES ENFANTS EN BAS ÂGE ET LES ENFANTS ! Ne jamais laisser...
- Page 22 N e pas utiliser ce produit si vous constatez le moindre dommage. La LED n‘est pas remplaçable. Si la LED arrive en fin de vie, l‘ensemble du produit doit alors être remplacé. ATTENTION ! RISQUE D’EXPLOSION ! N‘utilisez pas le produit dans un environnement soumis à...
- Page 23 RISQUE DE BLESSURE ! Lorsque vous retirez le boîtier , veillez également à enlever le piquet de terre pour prévenir tout risque (par ex. de trébuchement). Mettez le produit au rebut en bonne et due forme s‘il est en- dommagé. Consignes de sécurité...
- Page 24 muqueuses ! Rincez les zones touchées à l‘eau claire et con- sultez immédiatement un médecin ! PORTER DES GANTS DE PROTECTION ! Les piles / piles rechargeables endommagées ou sujettes à des fuites peuvent provoquer des brûlures au contact de la peau. Vous devez donc porter des gants adéquats pour les manipuler.
- Page 25 la cellule solaire et de la température ambiante (en raison de la dépendance à la température que témoigne la capacité de la pile). La condition idéale pour l‘utilisation du produit est un angle d’incidence vertical avec des températures situées au-dessus du point de gel.
- Page 26 Installation du produit Plantez aussi profondément que possible le produit assemblé dans le sol (pelouse, massif de fleurs) afin qu‘il soit installé de manière stable. Veillez à vous assurer de sa stabilité. Ne pas faire usage de force, par ex. utiliser un marteau, lors du montage ou de l’installation.
- Page 27 2. Comprimez avec précaution les pinces du couvercle du compartiment à accu et ouvrez-le. 3. Retirez l‘accu usagé. 4. Insérer l‘accu neuf en respectant la polarité indiquée dans le compartiment à accu 5. Rabattez ensuite le couvercle du compartiment à accu laissez-le s‘enclencher.
- Page 28 Utilisez uniquement des accus de taille adéquate et du type recommandé (voir chapitre «Caractéristiques techniques»). N ettoyez le produit régulièrement au moyen d‘une brosse souple ou d‘un pinceau fin. Problèmes et solutions Remarque : Le produit contient des composants électroniques fragiles.
- Page 29 Mise au rebut L’emballage se compose de matières recyclables pouvant être mises au rebut dans les déchetteries locales. Veuillez respecter l‘identification des matériaux d‘emballage pour le tri sélectif, ils sont identifiés avec des abbréviations (a) et des chiffres (b) ayant la signifi- cation suivante : 1–7 : plastiques / 20–22 : papiers et cartons / 80–98 : matériaux composite.
- Page 30 Pollution de l’environnement par la mise au rebut incorrecte des piles / piles rechargeables ! Les piles / piles rechargeables ne doivent pas être mises au rebut avec les ordures ménagères. Elles peuvent contenir des métaux lourds toxiques et doivent être considérées comme des déchets spéciaux.
- Page 31 La garantie couvre les vices matériels et de fabrication. Cette garantie ne s’étend ni aux pièces du produit soumises à une usure normale (p. ex. des piles) et qui, par conséquent, peuvent être considérées comme des pièces d’usure, ni aux dommages sur des composants fragiles, comme des interrupteurs, des batteries ou des éléments fabriqués en verre.
- Page 32 Legenda van de gebruikte pictogrammen ............Pagina 33 Inleiding ..............Pagina 33 Correct gebruik .............Pagina 33 Beschrijving van de onderdelen ........Pagina 34 Omvang van de levering ..........Pagina 34 Technische gegevens ............Pagina 34 Veiligheidsinstructies ........Pagina 35 Productspecifieke veiligheidsinstructies ......Pagina 36 Veiligheidsinstructies voor batterijen / accu‘s ....Pagina 37 Functie ................Pagina 38 Ingebruikname...
- Page 33 Legenda van de gebruikte pictogrammen Spatwaterdicht, IP44 LED-Solarlamp Inleiding Hartelijk gefeliciteerd met de aankoop van uw nieuwe product. U heeft voor een hoogwaardig product gekozen. De gebruiksaanwijzing is een deel van het product. Deze bevat belangrijke aanwijzingen voor veiligheid, gebruik en verwijdering. Maakt U zich voor de ingebruikname van het product met alle bedienings- en veiligheids- voorschriften vertrouwd.
- Page 34 Beschrijving van de onderdelen Zonnecel Groef Zonnecelbehuizing Accuvak Uitsparing AAN- / UIT-schakelaar Accuvakdeksel Behuizing Accu Grondpen Omvang van de levering 1 LED-solarlamp 1 grondpen 1 accu Ni-MH (nikkel-metaalhydride), AA / 1,2 V / 600 mAh (reeds geïnstalleerd) 1 montage-, bedienings- en veiligheidsinstructies Technische gegevens Voedingsspanning: 1,2 V...
- Page 35 Veiligheidsinstructies MAAK U VOOR DE EERSTE INGEBRUIKNAME VAN HET PRODUCT MET ALLE BEDIENINGS- EN VEILIGHEIDSVOOR- SCHRIFTEN VERTROUWD! GEEF ALLE DOCUMENTEN MEE WANNEER U HET PRODUCT AAN DERDEN DOORGEEFT! LEVENSGEVAAR EN KANS OP ONGELUKKEN VOOR PEU- TERS EN KINDEREN! Laat kinderen nooit zonder toezicht bij het verpakkingsmateriaal.
- Page 36 G ebruik het product niet als u beschadigingen heeft geconsta- teerd. De LED is niet vervangbaar. Mochten de LED aan het einde van de levensduur uitvallen, dan dient het gehele product te worden vervangen. VOORZICHTIG! EXPLOSIEGEVAAR! Gebruik het product niet in explosieve omgevingen waarin zich brandbare dampen, gassen of stoffen bevinden.
- Page 37 KANS OP LETSEL! Zorg ervoor dat als de behuizing wordt verwijderd, de grondpen wordt verwijderd, zodat deze geen gevaar vormt (bijv. struikelen). Voer het product op een correcte manier af als het product beschadigd is. Veiligheidsinstructies voor batterijen / accu‘s LEVENSGEVAAR! Houd batterijen / accu‘s buiten het bereik van kinderen.
- Page 38 veroorzaken. Draag daarom in dit geval geschikte veiligheids- handschoenen. Als de batterijen / accu‘s lekken, dient u deze direct uit het product te halen om beschadigingen te vermijden. Verwijder de batterijen / accu‘s, als u het product gedurende een langere periode niet gebruikt. Risico op beschadiging van het product Gebruik uitsluitend het aangegeven type batterij / accu! Plaats de batterijen / accu‘s volgens de weergegeven polariteit...
- Page 39 Ingebruikname Opmerking: verwijder het verpakkingsmateriaal alstublieft in zijn geheel. Product monteren 1. Draai de zonnecelbehuizing linksom uit de behuizing 2. Zet de AAN- / UIT-schakelaar op ON om het product in te schakelen. 3. Plaats de zonnecelbehuizing in de behuizing en draai deze rechtsom vast.
- Page 40 P laats het product niet onder struiken, bomen, afdaken enz. Op deze plekken wordt de inval van zonlicht verminderd. P ositioneer het product zodanig, dat de zonnecel niet wordt afgedekt of in de schaduw staat. Zorg ervoor dat de zonnecel niet door een andere lichtbron, bijv.
- Page 41 van het licht op de zonnecel . Zet de zonnecel zo haaks mogelijk op de lichtinval. Zo krijgt de zonnecel het meeste licht. Onderhoud en reiniging De LED is niet vervangbaar. Het product is, afgezien van het vervangen van de batterij, onderhoudsvrij. G ebruik in geen geval agressieve reinigingsmiddelen.
- Page 42 Storing Oorzaak Oplossing Het licht gaat niet Kunstmatige licht- Monteer het product aan, terwijl het pro- bronnen, zoals bijv. op een andere locatie, duct de hele dag straatlantaarns, ver- waar het niet door aan de zon was storen het product. andere lichtbronnen blootgesteld.
- Page 43 Informatie over de mogelijkheden om het uitgediende product na gebruik te verwijderen, verstrekt uw ge- meentelijke overheid. Gooi het afgedankte product omwille van het milieu niet weg via het huisvuil, maar geef het af bij het daar- voor bestemde depot of het gemeentelijke milieupark. Over afgifteplaatsen en hun openingstijden kunt u zich bij uw aangewezen instantie informeren.
- Page 44 van het product. Deze wettelijke rechten worden door onze hierna vermelde garantie niet beperkt. Op dit product verlenen wij 3 jaar garantie vanaf aankoopdatum. De garantieperiode start op de dag van aankoop. Bewaar de originele kassabon alstublieft. Dit document is nodig als bewijs voor aankoop.
- Page 45 Legende der verwendeten Piktogramme ............Seite 46 Einleitung ..............Seite 46 Bestimmungsgemäße Verwendung ......... Seite 46 Teilebeschreibung ............Seite 47 Lieferumfang ..............Seite 47 Technische Daten ............. Seite 47 Sicherheitshinweise ..........Seite 48 Produktspezifische Sicherheitshinweise ......Seite 49 Sicherheitshinweise für Batterien / Akkus ......Seite 50 Funktionsweise ............
- Page 46 Legende der verwendeten Piktogramme Spritzwassergeschützt (IP44) LED-Solarleuchte Einleitung Wir beglückwünschen Sie zum Kauf Ihres neuen Produkts. Sie haben sich damit für ein hochwertiges Produkt entschieden. Die Bedienungs- anleitung ist Teil dieses Produkts. Sie enthält wichtige Hinweise für Sicherheit, Gebrauch und Entsorgung. Machen Sie sich vor der Benutzung des Produkts mit allen Bedien- und Sicherheitshinweisen vertraut.
- Page 47 T eilebeschreibung Solarzelle Solargehäuse Akkufach Aussparung EIN- / AUS-Schalter Akkufachdeckel Gehäuse Akku Erdspieß L ieferumfang 1 LED-Solarleuchte 1 Erdspieß 1 Akku Ni-MH (Nickel-Metallhydrid), AA / 1,2 V / 600 mAh (vorinstalliert) 1 Montage-, Bedienungs- und Sicherheitshinweise T echnische Daten Betriebsspannung: 1,2 V (Gleichstrom) Akku: 1 x Ni-MH-Akku (Nickel-Metallhydrid) / AA /...
- Page 48 Sicherheitshinweise MACHEN SIE SICH VOR DER ERSTEN BENUTZUNG DES PRODUKTS MIT ALLEN BEDIEN- UND SICHERHEITSHINWEISEN VERTRAUT! HÄNDIGEN SIE ALLE UNTERLAGEN BEI WEITER- GABE DES PRODUKTS AN DRITTE EBENFALLS MIT AUS! LEBENS- UND UNFALLGE- FAHREN FÜR KLEINKINDER UND KINDER! Lassen Sie Kinder niemals unbeaufsichtigt mit dem Verpackungsmaterial.
- Page 49 V erwenden Sie das Produkt nicht, wenn Sie irgendwelche Beschädigungen feststellen. Die LED ist nicht austauschbar. Sollte die LED am Ende ihrer Lebensdauer ausfallen, muss das ganze Produkt ersetzt werden. VORSICHT! EXPLOSIONSGEFAHR! Verwenden Sie das Produkt nicht in explosionsgefährdeter Umge- bung, in der sich brennbare Dämpfe, Gase oder Stäube befinden.
- Page 50 sicher, dass, wenn das Gehäuse entfernt wird, auch der Erdspieß mit entfernt wird, damit dieser keine Gefahr dar- stellt (z. B. Stolpern). Entsorgen Sie das Produkt ordnungsgemäß, wenn das Produkt beschädigt ist. Sicherheitshinweise für Batterien / Akkus LEBENSGEFAHR! Halten Sie Batterien / Akkus außer Reich- weite von Kindern.
- Page 51 SCHUTZHANDSCHUHE TRAGEN! Ausge- laufene oder beschädigte Batterien / Akkus können bei Berührung mit der Haut Verätzungen verursachen. Tragen Sie deshalb in diesem Fall geeignete Schutzhandschuhe. Im Falle eines Auslaufens der Batterien / Akkus entfernen Sie diese sofort aus dem Produkt, um Beschädigungen zu vermeiden. Entfernen Sie die Batterien / Akkus, wenn das Produkt längere Zeit nicht verwendet wird.
- Page 52 kapazität) abhängig. Ideal ist ein senkrechter Lichteinfallwinkel bei Temperaturen über dem Gefrierpunkt. Der Akku erreicht erst nach mehreren Lade- und Entladezyklen seine maximale Kapazität. I nbetriebnahme Hinweis: Entfernen Sie sämtliches Verpackungsmaterial vom Produkt. P rodukt montieren 1. Drehen Sie das Solargehäuse gegen den Uhrzeigersinn aus dem Gehäuse 2.
- Page 53 P rodukt aufstellen S tecken Sie das montierte Produkt so weit in den Boden (Rasen, Blumenbeet), dass es stabil steht. A chten Sie auf einen sicheren Stand. Wenden Sie bei der Montage bzw. beim Aufstellen keine Gewalt an, z. B. durch Hammerschläge.
- Page 54 4. Legen Sie den neuen Akku unter Beachtung der Polarität in das Akkufach ein. 5. Klappen Sie den Akkufachdeckel wieder zu und lassen Sie diesen einrasten. 6. Setzen Sie das Solargehäuse in das Gehäuse ein und drehen Sie es im Uhrzeigersinn fest. Akkus aufladen Achten Sie darauf, dass das Produkt eingeschaltet sein muss, wenn der Akku lädt.
- Page 55 F ehler beheben Hinweis: Das Produkt enthält empfindliche elektronische Bauteile. Daher ist es möglich, dass es durch Funkübertragungsgeräte in un- mittelbarer Nähe gestört wird. Falls Sie Störungen in der Funktion feststellen, entfernen Sie solche Störquellen aus der Umgebung des Produkts. Hinweis: Elektrostatische Entladungen können zu Funktionsstörungen führen.
- Page 56 Beachten Sie die Kennzeichnung der Verpackungs- materialien bei der Abfalltrennung, diese sind gekenn- zeichnet mit Abkürzungen (a) und Nummern (b) mit folgender Bedeutung: 1–7: Kunststoffe / 20–22: Papier und Pappe / 80–98: Verbundstoffe. Das Produkt und die Verpackungsmaterialien sind recy- celbar, entsorgen Sie diese getrennt für eine bessere Ab- fallbehandlung.
- Page 57 sind wie folgt: Cd = Cadmium, Hg = Quecksilber, Pb = Blei. Geben Sie deshalb verbrauchte Batterien / Akkus bei einer kommunalen Sammelstelle ab. Garantie Das Produkt wurde nach strengen Qualitätsrichtlinien sorgfältig produziert und vor Anlieferung gewissenhaft geprüft. Im Falle von Mängeln dieses Produkts stehen Ihnen gegen den Verkäufer des Produkts gesetzliche Rechte zu.
- Page 58 HG00776C / HG00776D Version: 04 / 2019 Last Information Update · Version des informations Stand van de informatie · Stand der Informationen: 01 / 2019 Ident.-No.: HG00776A / B / C / D012019-IE / NI / BE / NL IAN 315252...