Publicité
Liens rapides
USA office: Fontana
AUS office: Truganina
DEU office: FDS GmbH, Neuer Höltigbaum 36, 22143 Hamburg, Deutschland
If you're having difficulty, our friendly
customer team is always here to help.
GBR office: Ipswich
ITA office: Milano
POL office: Gdańsk
FRA office: Saint Vigor d'Ymonville
USA:cs.us@costway.com
POL:sklep@costway.com
AUS:cs.au@costway.com
DEU:cs.de@costway.com
GBR:cs.uk@costway.com
FRA:cs.fr@costway.com
I T A :cs.i t @costway.com
ESP:cs.es@costway.com
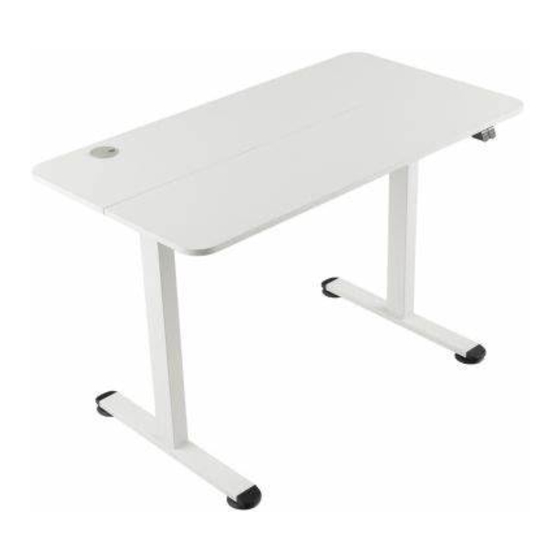
Electric Standing Desk
Höhenverstellbarer elektrisher Schreibtisch
Bureau Assis Debout Électrique
Escritorio Eléctrico de Pie
Scrivania Elettrica in Piedi
Biurko elektryczne stojące
JV10711
THIS INSTRUCTION BOOKLET CONTAINS IMPORTANT SAFETY INFORMATION. PLEASE READ AND KEEP FOR FUTURE REFERENCE.
Publicité

Sommaire des Matières pour Costway JV10711
- Page 1 USA:cs.us@costway.com POL:sklep@costway.com If you're having difficulty, our friendly AUS:cs.au@costway.com DEU:cs.de@costway.com customer team is always here to help. GBR:cs.uk@costway.com FRA:cs.fr@costway.com I T A :cs.i t @costway.com ESP:cs.es@costway.com THIS INSTRUCTION BOOKLET CONTAINS IMPORTANT SAFETY INFORMATION. PLEASE READ AND KEEP FOR FUTURE REFERENCE.
- Page 2 Before You Start Avant de Commencer Please read all instructions carefully. Veuillez lire attentivement toutes les instructions. Retain instructions for future reference. Conservez les instructions pour vous y référer ultérieurement. Separate and count all parts and hardware. Vérifiez toutes les pièces et les accessoires. Read through each step carefully and follow the proper order.
- Page 3 Prima di Iniziare Si prega di leggere attentamente tutte le istruzioni. Conservare le istruzioni per riferimento futuro. Separare e contare tutte le parti e gli accessori. Leggere attentamente ogni passo e seguire l'ordine corretto. Si consiglia, ove possibile, di assemblare tutti gli articoli vicino alla zona in cui verranno posti in uso, per evitare di spostare inutilmente il prodotto una volta assemblato.
- Page 4 IMPORTANT SAFEGUARDS GARANTIES IMPORTANTES Read these instructions carefully and retain them for future use. Lisez attentivement ces instructions et conservez-les pour une utilisation When using the product, basic safety precautions should always be ultérieure. followed to reduce the risk of injury including the followings: Lors de l’utilisation du produit, les précautions de sécurité...
- Page 5 Parts List/Teileliste/Liste des Pièces GARANZIE IMPORTANTI /Lista de Piezas/Elenco Parti/Lista części Leggere attentamente queste istruzioni e conservarle per un uso futuro. Quando si utilizza il prodotto, è necessario seguire sempre le precauzioni di sicurezza di base per ridurre il rischio di lesioni, tra cui: ●...
- Page 6 Assembly steps/Montage-Schritte /Étapes de l’Assemblage/Pasos del Montaje /Fasi di Assemblaggio/Montaż Power Supply Holder Handset + Power Supply +Power Cord /Handgerät+Netzteil+Netzkabel /Netzteilhalterung /Ensemble Manuel + Alimentation + /Support d’Alimentation Cordon d’Alimentation /Soporte de la Fuente de /Mando Manual + Fuente de Alimentación + Alimentación Cable de Alimentación /Supporto per Alimentatore...
- Page 7 prohibited remove /verbotene Entfernung /Interdit de suppression /Prohibir mover Pay attention to side bracket direction /Divieto di cancellazione /Achten Sie auf die Richtung der Seitenhalterung /Nie demontuj /Faites attention à la direction du support latéral /Preste atención a dirección del soporte lateral /Prestare attenzione alla direzione del supporto laterale Assembling (D) frame tightened with (J) M6 screws, using the /Zwróć...
- Page 8 5.1 As shown in Figure 1, insert the hexagonal bar into the table leg B until the buckle is not visible. 5.2 Assemble the other end of the connecting rod to the table leg A and screw on the handle. The handle does not need to be tightened. Note: As shown in Figure 2 below, it needs to be aligned with the card slot.
- Page 9 5.1 Come mostrato in Figura 1, inserire la barra esagonale nella On the card slot/Auf dem Kartensteckplatz gamba B del tavolo fino a quando la fibbia non è visibile. /Sur la fente pour carte/En la ranura 5.2 Montare l'altra estremità dell’asta alla gamba A del tavolo e avvitare /Sullo slot della scheda/Na otworze na karty la maniglia.
- Page 10 7.1 Secure the (I1) handset to the (L) position of the self-tapping screws, using the provided (M2) screwdriver. 7.2 Use the power fastener to fix the (I2) power supply in the position Same side on the drawing with the (L) self-tapping screws, using the provided /Gleiche Seite /Le même côté...
- Page 11 Operational instructions/Betriebliche Anweisungen /Instructions Opérationnelles/Instrucciones de Operación 7.1 Przykręć sterownik (I)1 przy przedniej krawędzi blatu za pomocą /Istruzioni Operative/Obsługa wkrętów (L), przy użyciu dostarczonego śrubokrętu (M)2. 7.2 Przykręć zasilacz (I)2 od strony silnika za pomocą wkrętów (L), przy użyciu dostarczonego śrubokrętu (M)2. 7.3 Podłącz silnik oraz zasilacz do sterownika, a następnie przewód zasilający do zasilacza, jak pokazano na rysunku.
- Page 12 A. Zurücksetzen des Betriebs A. Operación de reinicio Halten Sie die Taste " " bis 5 Sekunden nach dem Anhalten der Hubsäule gedrückt, Mantenga pulsado el botón " " hasta 5 segundos después de que la columna de der Reset beginnt, lassen Sie die Taste " "...
- Page 13 A.Reset (Przywracanie ustawienia fabrycznego) Minimum 5 sekund po zatrzymaniu blatu naciśnij i przytrzymaj przycisk . Blat zacznie opuszczać się powoli. Nie zwalniaj przycisku, dopóki blat nie znajdzie się w najniższym położeniu i nie zatrzyma się. Return / Damage Claim Instructions W razie konieczności możesz w każdej chwili zwolnić...
- Page 14 Instructions De Retour / Réclamation De Dommages Istruzioni Per La Restituzione / Reclamo Per Danni NE PAS jeter la boîte/l'emballage d'origine. NON scartare la scatola / confezione originale. Dans le cas où un retour est requis, l'article doit être retourné dans sa boîte Nel caso in cui sia richiesto un reso, l'articolo deve essere restituito nella scatola d'origine.


