Publicité
Les langues disponibles
Les langues disponibles
Liens rapides
Publicité

Manuels Connexes pour TEFAL SECURE 5 NEO P2530853


Sommaire des Matières pour TEFAL SECURE 5 NEO P2530853
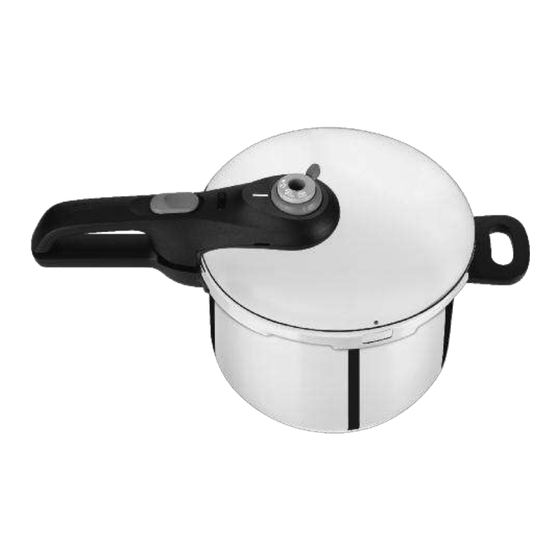
- Page 1 SECURE 5 NEO - User's Guide - www.tefal.com...
- Page 2 *Basket not included with certain models - *...
- Page 3 fig. 1 fig. 2 fig. 3 CLICK fig. 4 fig. 5* fig. 6 fig. 7 fig. 8 fig. 9 fig. 10 fig. 11 fig. 12 fig. 13 fig. 14 fig. 15 *Basket not included with certain models - *...
- Page 4 • Si vous constatez qu'une partie de votre cocotte est cassée ou fissurée, n'essayez en aucun cas de l'ouvrir si elle est fermée, attendez qu'elle refroidisse complètement avant de la déplacer, ne l'utilisez plus et rapportez la à un Centre de Service Agréé TEFAL pour réparation. CONSERVEZ CES INSTRUCTIONS...
- Page 5 Schéma descriptif A. Soupape de fonctionnement H. Repère de positionnement de la B. Conduit d'évacuation de vapeur soupape de fonctionnement C. Soupape de sécurité I. Joint de couvercle D. Indicateur de présence de pression J. Panier vapeur* E. Bouton d’ouverture K.
- Page 6 792691 • Pour le changement d’autres pièces (incluant le joint du 3L) ou pour les réparations, faites appel aux Centres de Service Agréés TEFAL (merci de vous référer à : www.tefal.com). • N’utilisez que des pièces d’origine TEFAL correspondant à votre modèle.
- Page 7 Utilisation Ouverture • À l’aide du pouce tirez sur le bouton d’ouverture (E) et maintenez-le reculé - fig. • Une main tenant la poignée longue de cuve (L), tournez avec l’autre main la poignée longue de couvercle (F) dans le sens inverse des aiguilles d’une montre, jusqu’à...
- Page 8 Utilisation de la soupape de fonctionnement (A) Pour mettre en place la soupape de fonctionnement (A) : Attention, ces opérations ne doivent s'effectuer que lorsque le produit est froid et n'est pas en fonctionnement. • Posez la soupape de fonctionnement (A) en •...
- Page 9 Première utilisation • Posez le support du panier (K) au fond de la cuve La présence de et déposez le panier (J) dessus*. vapeur au niveau de • Remplissez d’eau jusqu’aux 2/3 de la cuve (repère l'indicateur de maximum de remplissage (O)). présence de •...
- Page 10 Pendant la cuisson • La présence de vapeur au niveau de l'indicateur de L'indicateur de présence de présence de pression (D) est normale au début du pression (D) fonctionnement du produit. empêche • Lorsque la soupape de fonctionnement (A) laisse l'autocuiseur de échapper de la vapeur de façon continue, en monter en pression...
- Page 11 Centre de logement. Service Agréé • Pour la remise en place du joint, reportez-vous TEFAL après 10 ans fig. 11 - 12. d’utilisation. Pour nettoyer la soupape de fonctionnement (A) : • Retirez la soupape de fonctionnement (A), voir paragraphe “Utilisation de la soupape de...
- Page 12 Pour changer le joint de votre autocuiseur : • Changez le joint de votre autocuiseur tous les ans ou si celui-ci présente une coupure. • Prenez toujours un joint d’origine TEFAL correspondant à votre modèle. Pour ranger votre autocuiseur : •...
- Page 13 Garantie • Dans le cadre de l’utilisation préconisée par le mode d’emploi, la cuve de votre nouvel autocuiseur TEFAL est garantie 10 ans contre : - Tout défaut lié à la structure métallique de votre cuve, - Toute dégradation prématurée du métal de base.
- Page 14 - Chocs, chutes, passage au four, - Passage du couvercle et de la soupape de fonctionnement au lave-vaisselle. • Seuls les Centres de Services Agréés TEFAL sont habilités à vous faire bénéficier de cette garantie (merci de vous référer à : www.tefal.com).
- Page 15 on la destine, ou qui diminuent tellement cet usage que l'acheteur ne l'aurait pas acquise, ou n'en aurait donné qu'un moindre prix, s'il les avait connus. » • Article 1648, al.1er du Code civil : « L'action résultant des vices rédhibitoires doit être intentée par l'acquéreur dans un délai de deux ans à...
- Page 16 TEFAL répond à vos questions Problèmes Recommandations Si l’autocuiseur a Faites vérifier votre autocuiseur par un Centre de Service chauffé sous pres- Agréé TEFAL. sion sans liquide à l’intérieur : Si l’indicateur de Ceci est normal pendant les premières minutes.
- Page 17 Légumes FRAIS SURGELÉS Position de la Position de la Cuisson soupape soupape - vapeur** 18 min. Artichauts - immersion*** 15 min. Asperges - immersion 5 min. Betterave rouge - vapeur 20 - 30 min. Blé (lég. secs) - immersion 15 min. Brocolis - vapeur 3 min.
- Page 18 • Do not undertake any operation on the safety systems other than those featuring in the instructions for cleaning and maintenance. • Only use original TEFAL parts corresponding to your model. In particular, use a TEFAL pot and lid. • Alcohol vapours are inflammable. Bring to the boil for around 2 minutes before fitting the lid.
- Page 19 Descriptive diagram Operating valve Lid gasket Steam release outlet Steam basket* Safety valve Trivet* Pressure indicator Long pot handle Lid release button Lid handle Short pot handle G(a). Lid positioning mark Maximum fill level mark G(b). Lid-pot positioning mark Operating valve positioning mark Compulsory Checks Prior to Each Use...
- Page 20 Lid gasket (4, 6, 7, 8L) X9010101 Steam basket* 792185 Trivet* 792691 • To change other parts (including the 3L's gasket) or for repairs, contact an Approved TEFAL Service Centre (please go to: www.tefal.com). • Only use original TEFAL parts corresponding to your model.
- Page 21 Opening • Using your thumb, pull back on the lid release button (E) and hold it in the Fig. 1 retracted position - • Holding the long handle of the pot (L) with one hand, turn the long handle of the lid (F) with the other hand in an anti-clockwise direction until open Fig.
- Page 22 Using the operating valve (A) To fit the operating valve (A): Caution, these operations must only be carried out when the product is cold and not in use. • Place the operating valve (A) in position, aligning the • on the valve with the positioning mark (H) symbol as shown in the diagram opposite.
- Page 23 Before first use • Place the basket trivet (K) in the bottom of the pot It is normal for and place the basket (J) on top of it*. steam to be present • Fill the pot to two-thirds full with water (maximum near the pressure fill mark (O)).
- Page 24 During cooking • It is normal for steam to be present at the pressure The pressure indicator (D) when the product begins operating. indicator (D) • When steam escapes continuously from the prevents the operating valve (A), with a steady "pschhht" sound, pressure from rising in the pressure reduce the heat source until the valve (A) continues...
- Page 25 To clean the lid gasket: have your pressure • After each use, clean the gasket (I) and its cooker checked at groove. a TEFAL Approved - Fig. 11 • To replace the gasket, please refer to Service Centre - 12 after 10 years of use.
- Page 26 To change the gasket of your pressure cooker: • Change the gasket of your pressure cooker every year or if split or damaged. • Always original TEFAL gasket corresponding to your model. To store your pressure cooker: • Place the lid upside-down on the pot.
- Page 27 8 - Change the gasket every year or if it is split or damaged. 9 - Only clean your pressure cooker when it is cold and empty. 10 - It is essential to have your pressure cooker checked in a TEFAL Approved Service Centre after 10 years of use.
- Page 28 12 months from the date of purchase.We also guarantee the non-stick coating of this Jamie Oliver by Tefal/Tefal/All-Clad/Moulinex product will be free of blistering or peeling for the life of the Jamie Oliver by Tefal/Tefal/All-Clad/Moulinex product. Should your Jamie Oliver by...
- Page 29 TEFAL answers your questions Problems Recommendations If the pressure coo- Have your pressure cooker checked by a TEFAL Approved Ser- ker has been heated vice Centre. under pressure wi- thout liquid inside: If the pressure indi- This is normal during the first few minutes.
- Page 30 Vegetables FRESH FROZEN Valve position Valve position Cooking - steam** 18 min Artichokes whole - immersion*** 15 min Asparagus whole - immersion 5 min peel after Beetroot - steam 20 - 30 min cooking Broccoli florets - steam 3 min 3 min Brussels sprouts whole...
- Page 31 Meat and Fish FRESH Valve position Beef (1 kg topside) 32 min (medium)** Chicken (1.2 kg whole) 22 min Lamb (1.3 kg leg) 40 min (medium)** Monkfish (0.6 kg fillets) (special case food) 4 min Pork (1 kg roast) 28 min Salmon (4 steaks 0.6 kg) (special case food) 6 min Tuna (4 x 0.6 kg steaks) (special case food)
- Page 32 • For steamed suet puddings, sponge puddings or Christmas puddings, a short pre- steaming time is best to enable the raising agent to activate and prevent a heavy, close texture. Extra liquid is required so use a minimum of 1½ pint/900 ml of boiling water for a combined steaming and cooking time of up to 1 hour.
- Page 33 • Let's protect the environment! Your appliance contains many materials which can be recovered or recycled. Leave it at a local civic waste collection point for processing.
- Page 34 POMEMBNA OPOZORILA • • • • • • • • • • • • • • • • • • • • • • • • SHRANITE NAVODILA.
- Page 35 G(a). G(b). • •...
- Page 36 Specifikacije: PLINSKA ELEKTRIČNA STEKLOKERAMIČNA INDUKCIJSKA SPIRALNA PLOŠČA HALOGENSKA ELEKTRIČNA SEVALNA • • • • • • (4, 6, 7, 8L) • •...
- Page 37 • • • • G(a) G(b) • • • • • • •...
- Page 38 • • • • • • • • •...
- Page 39 • (J)* • • • • • • • • • • • • • • • •...
- Page 40 • • • • • • •...
- Page 41 • • • • • • • • • • •...
- Page 42 • • • • • • • • •...
- Page 43 • • • • • • •...
- Page 44 • •...
- Page 48 MĂSURI IMPORTANTE DE PRECAUŢIE: • • • • • • • • • • • • • • • • • • • • • • • • PĂSTRAŢI ACESTE INSTRUCŢIUNI...
- Page 49 G(a). G(b). • •...
- Page 50 Informații tehnice REZISTENŢE PLITĂ STICLĂ CERAMICĂ INDUCŢIE ELECTRICĂ CU HALOGEN ELECTRICE RADIANTĂ SPIRALE • • • • • • (4, 6, 7, 8L) • •...
- Page 51 • • • • G(a) G(b) • • • • • • •...
- Page 52 • • • • • • • • •...
- Page 53 • • • • • • • • • • • • • • • • •...
- Page 54 • • • • • • • •...
- Page 55 • • • • • • • • • • •...
- Page 56 • • • • • • • • • •...
- Page 57 • • • • • • •...
- Page 58 • • •...
- Page 62 ВАЖНИ ПРЕДПАЗНИ МЕРКИ • • • • • • • • • • • • • ѝ • • • • • • • • • • • ПАЗЕТЕ НАСТОЯЩАТА ИНСТРУКЦИЯ...
- Page 63 G(a). G(b). • •...
- Page 64 Стандарти: ГАЗ ЕЛЕКТРИЧЕСКИ СТЪКЛОКЕРАМИЧНИ ПЛОТОВЕ ИНДУКЦИОННИ РЕОТАНИ И КОТЛОН ХАЛОГЕННИ ПЛОТОВЕ НАГРЕВАТЕЛИ ЛЪЧЕВИ НАГРЕВАТЕЛИ • • • • • • (4, 6, 7, 8 литра) • •...
- Page 65 • • • • G(a) G(b) • • • • • • •...
- Page 66 • • • • • • • • •...
- Page 67 • • • • • • • • • • • • • • • • •...
- Page 68 • • • • • • • •...
- Page 69 • • • • • • • • • • • • •...
- Page 70 • • • • • • • • • • • •...
- Page 71 • • • • •...
- Page 76 VAŽNE MJERE OPREZA • • • • • • • • • • • • • • • • • • • • • • • • SAČUVAJTE OVE UPUTE...
- Page 77 G(a). G(b). • •...
- Page 78 Normativni podaci: ELEKTRIČNA PLIN ELEKTRIČNA STAKLOKERAMIČKA INDUKCIJSKA PLOČA /HALOGENA PLOČA PLOČA SPIRALNA PLOČA • • • • • • (4, 6, 7, 8L) • •...
- Page 79 • • • • G(a) G(b) • • • • • • •...
- Page 80 • • • • • • • • •...
- Page 81 • • • • • • • • • • • • • • • • •...
- Page 82 • • • • • • • •...
- Page 83 • • • • • • • • • • •...
- Page 84 • • • • • • • • • •...
- Page 85 • • • • • • •...
- Page 86 • •...
- Page 90 Važne mere predostrožnosti • • • • • • • • • • • • • • • • • • • • • • • • SAČUVAJTE OVE INSTRUKCIJE...
- Page 91 G(a). G(b). • •...
- Page 92 Podaci u pogledu standarda: ELEKTRIČNA STAKLO- INDUKCIJA ELEKTRIČNA PLOČA KERAMIČKA SPIRALA HALOGENA PLOČA • • • • • • (4, 6, 7, 8L) • •...
- Page 93 • • • • G(a) G(b) • • • • • • •...
- Page 94 • • • • • • • • •...
- Page 95 • • • • • • • • • • • • • • • • •...
- Page 96 • • • • • • • •...
- Page 97 • • • • • • • • • • •...
- Page 98 • • • • • • • • • •...
- Page 99 • • • • • • •...
- Page 100 • •...
- Page 104 Važne mjere sigurnosti • • • • • • • • • • • • • • • • • • • • • • • • Sačuvajte ova uputstva...
- Page 105 G(a). G(b). • •...
- Page 106 Normativni podaci: ELEKTRIČNA PLIN STRUJA KERAMIČKA INDUKCIJA PLOČA HALOGENA PLOČA • • • • • • (4, 6, 7, 8L) • •...
- Page 107 • • • • G(a) G(b) • • • • • • •...
- Page 108 • • • • • • • • •...
- Page 109 • • • • • • • • • • • • • • • • •...
- Page 110 • • • • • • • •...
- Page 111 • • • • • • • • • • •...
- Page 112 • • • • • • • • • •...
- Page 113 • • • • • • •...
- Page 114 • •...
- Page 118 WAŻNE ZALECENIA • • • • • • • • • • • • • • • • • • • • • • • • ZACHOWAJ NINIEJSZĄ INSTRUKCJĘ...
- Page 119 G(a). G(b). • •...
- Page 120 Informacje normatywne: SPIRALA PŁYTA WITROCERAMICZNA INDUKCYJNA ELEKTRYCZNA ELEKTRYCZNA HALOGENOWA GRZEJNA • • • • • • (4, 6, 7, 8L) • •...
- Page 121 • • • • G(a) G(b) • • • • • • •...
- Page 122 • • • • • • • • •...
- Page 123 • • • • • • • • • • • • • • • • •...
- Page 124 • • • • • • • •...
- Page 125 • • • • • • • • • • •...
- Page 126 • • • • • • • • • •...
- Page 127 • • • • • • •...
- Page 128 • •...
- Page 132 DŮLEŽITÁ UPOZORNĚNÍ • • • • • • • • • • • • • • • • • • • • • • • • TYTO POKYNY SI USCHOVEJTE...
- Page 133 G(a). G(b). • •...
- Page 134 Normativní informace: PLYN ELEKTRICKÁ SKLOKERAMICKÁ INDUKČNÍ ELEKTRICKÁ TOPNÁ VARNÁ DESKA HALOGENOVÁ VARNÁ DESKA SPIRÁLA SÁLAVÁ DESKA • • • • • • (4, 6, 7, 8L) • •...
- Page 135 • • • • G(a) G(b) • • • • • • •...
- Page 136 • • • • • • • • •...
- Page 137 • • • • • • • • • • • • • • • • •...
- Page 138 • • • • • • • •...
- Page 139 • • • • • • • • • • •...
- Page 140 • • • • • • • • • •...
- Page 141 • • • • • • •...
- Page 142 • •...
- Page 146 FONTOS ÓVINTÉZKEDÉSEK • • • • • • • • • • • • • • • • • • • • • • • • ŐRIZZE MEG AZ UTASÍTÁSOKAT...
- Page 147 G(a). G(b) • •...
- Page 148 Normatív információk: FÛTÕSPIRÁLOS GÁZTÛZHELY ELEKTROMOS SUGÁRZÓ INDUKCIÓS FÕZÕLAP HALOGÉN FÕZÕLAP ELEKTROMOS ÜVEGKERÁMIA FÕZÕLAP FÕZÕLAP • • • • • • (4, 6, 7, 8L) •...
- Page 149 • • • • • G(a) G(b) • • • • • • •...
- Page 150 • • • • • • • • •...
- Page 151 • • • • • • • • • • • • • • • • •...
- Page 152 • • • • • • •...
- Page 153 • • • • • • • • • • •...
- Page 154 • • • • • • • • •...
- Page 155 • • • • • • •...
- Page 156 • •...
- Page 160 DÔLEŽITÉ UPOZORNENIA • • • • • • • • • • • • • • • • • • • • • • • • USCHOVAJTETIETO POKYNY...
- Page 161 G(a). G(b). • •...
- Page 162 Normatívne informácie: ELEKTRICKÝ PLYNOVÝ ELEKTRICKÁ SKLOKERAMICKÁ INDUKČNÁ SPORÁK PLATŇA PLATŇA PLATŇA ŠPIRÁLOVÝ SPORÁK HALOGÉNOVÁ PLATŇA VÝHREVNÁ PLATŇA • • • • • • •...
- Page 163 • • • • • G(a) G(b) • • • • • • •...
- Page 164 • • • • • • • • •...
- Page 165 • • • • • • • • • • • • • • • • •...
- Page 166 • • • • • • • •...
- Page 167 • • • • • • • • • • •...
- Page 168 • • • • • • • • • •...
- Page 169 • • • • • • •...
- Page 170 • •...
- Page 174 ІНСТРУКЦІЇ З ТЕХНІКИ БЕЗПЕКИ ЗБЕРЕЖІТЬ ЦЮ ІНСТРУКЦІЮ ДЛЯ ПОДАЛЬШОГО ВИКОРИСТАННЯ...
- Page 175 G(a). G(b). • •...
- Page 176 Нормативні характеристики: ГАЗОВА ЕЛЕКТРОПЛИТА ПЛИТА ЗІ ІНДУКЦІЙНА ЕЛЕКТРИЧНА СПІРАЛЬНА ПЛИТА СКЛОКЕРАМІЧНОЮ ПЛИТА ПОВЕРХНЕЮ НАСТІЛЬНА ПЛИТА • • • • • • щільнювач кришки (4, 6, 7, 8л) X9010101 •...
- Page 177 • • • • • G(a) G(b) • • • • • • •...
- Page 178 • • • • • • • • •...
- Page 179 • • • • • • • • • • • • • • • • •...
- Page 180 • • • • • • •...
- Page 181 • • • • • • • • • • •...
- Page 182 • • • • • • • • • •...
- Page 183 • • • • • • •...
- Page 184 • •...
- Page 190 1 p. 14 p. 30 p. 44 p. 58 p. 72 p. 86 p. 100 p. 114 p. 128 p. 142 p. 156 p. 170 www.tefal.com TEFAL S.A.S. - 21260 Selongey FRANCE...