Publicité
Les langues disponibles
Les langues disponibles
Liens rapides
Publicité

Sommaire des Matières pour KTM Power Parts 61005099000
- Page 1 Information Power Parts 61005099000 01. 2009 3.211.93 *321193*...
- Page 2 Todos nuestros productos han sido desarrollados y producidos según los estándares más altos utilizando los mejores materiales disponibles. Las KTM Power Parts están probadas en competencia y garantizan un óptimo rendimiento. NO SE PUEDE HACER RESPONSABLE A LA KTM POR UN MONTAJE O UN USO INCORRECTO DE ESTE PRODUCTO.
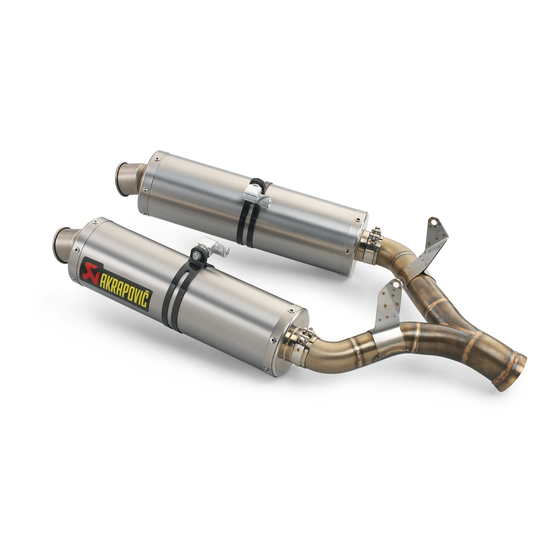
- Page 3 Lieferumfang: 1x Verteilerrohr 2x Enddämpfer 2x Enddämpferschelle 2x Karbonschelle 2x Auspufffeder kurz mit Gummi 1x Anbaukit SD Montage – Sitzbank demontieren – Heckoberteil links und rechts demontieren – Enddämpfer Befestigungsschraube M8x25 [1] links und rechts demontieren – Auspuffschelle [2] demontieren –...
- Page 4 – Karbonschelle [1] auf rechten Enddämpfer montieren – Linke Karbonschelle auf Enddämpfer montieren (spiegelverkehrt) Gegebenenfalls Hitzeschutz (61005099007) [2] montieren (nicht im Lieferumfang) Schrauben mit Loctite 243 sichern Jeweils 2 Scheiben [3] beilegen Enddämpferschellen an Dämpfer links und rechts anbringen Enddämpfer links und rechts montieren Feder [4] einhängen Schraube [5] Befestigung Carbonschelle links und rechts festziehen Befestigungskit festziehen...
- Page 5 – Schelle [1] Enddämpfer festziehen – Schrauben M8x25 Befestigung Verteilerrohr und Auspuffschellen festziehen – Heckoberteil links und rechts montieren – Sitzbank montieren – Kollisionsprüfung Wartung Der Dämmstoff ist alle 30 Betriebsstunden zu tauschen. (Dämmstoff-Kit siehe Ersatzteile) Als Ersatzteil erhältlich: [2] 61005099002 Karbonschelle [3] 61005099003 Dämmstoff-Kit [4] 61005099005 Endkappe 61005099006 Reparatur-Kit (Dämmstoff-Kit + Aussenhülle)
- Page 6 Scope of supply: 1x Common rail 2x Main silencer 2x Main silencer clamp 2x Carbon clamp 2x Short exhaust spring with rubber 1x Fastening kit SD Mounting – Remove seat – Remove left and right upper tail section – Remove M8x25 [1] main silencer fastening screws on the left and right –...
- Page 7 – Mount the carbon clamps [1] on the right main silencer – Mount the left carbon clamps on the main silencer (mirror-inverted) Mount the heat protector (61005099007) [2] if necessary (not included in the scope of supply) Apply Loctite 243 to the screws. Mount 2 washers [3] each Attach the main silencer clamps to the left and right side of the silencer Mount the left and right main silencer...
- Page 8 – Tighten the clamp [1] on the main silencer – Tighten the M8x25 screws on the common rail clamp and exhaust clamp – Mount the left and right upper tail section – Mount the seat – Collision test Maintenance Replace the rockwool every 30 operating hours (see Spare Parts for rock- wool kit) Available spare parts: [2] 61005099002 Carbon clamp...
- Page 9 Volume della fornitura: 1 x collettore a Y 2 x silenziatore 2 x fascetta 2 x fascetta in carbonio 2 x Molla corta con rivestimento in gomma 1 x kit di fissaggio SD Montaggio – Smontare la sella. – Smontare i fianchetti sottosella sinistro e destro. –...
- Page 10 – Montare la fascetta in carbonio [1] sul silenziatore destro. – Montare la fascetta in carbonio sul silenziatore sinistro (in modo sim- metricamente inverso). Montare eventualmente le protezioni paracolore (61005099007) [2] (non incluse nella fornitura). Assicurare le viti con Loctite 243. Frapporre rispettivamente 2 rondelle [3].
- Page 11 – Serrare la fascetta [1] di ogni silenziatore. – Serrare le viti di fissaggio M8x25 del collettore a Y e le fascette. – Rimontare i fianchetti sottosella sinistro e destro. – Rimontare la sella. – Controllare che i silenziatori non tocchino un elemento qualsiasi della parte posteriore del veicolo.
- Page 12 Kit de livraison : 1 tube 1 en 2 2 pots 2 colliers de pot 2 collier carbone 2 Ressort court avec caoutchouc 1 kit de fixation SD Montage – Démonter la selle. – Démonter la partie supérieure de l'arrière de cadre. –...
- Page 13 – Monter le collier carbone [1] sur le pot droit. – Monter le collier carbone gauche sur le pot (symétrie dans le miroir). – Eventuellement monter la protection anti-chaleur (61005099007) [2] (ne fait pas partie du kit de livraison). – Freiner les vis à la loctite 243. –...
- Page 14 – Serrer le collier de pot [1]. – Serrer les vis M8x25 de fixation du tube 1 en 2 et du collier d'é- chappement. – Monter la partie supérieure de l'arrière du cadre à droite et à gauche. – Monter la selle. –...
- Page 15 Volumen de suministro 1 tubo de distribución 2 silenciadores 2 abrazaderas del silenciador 2 abrazadera de carbonífero 2 muelle corto de silenciador con goma 1 juego de fijación SD Montaje – Desmontar el banco de asiento – Desmontar la parte superior trasera a la izquierda y a la derecha –...
- Page 16 – Montar las abrazaderas de carbonífero [1] sobre el silenciador derecho – Montar las abrazaderas de carbonífero izquierdas sobre el silenciador (de manera invertida) Si fuera necesario, montar la protección térmica (61005099007) [2] (no incluida en el volumen de suministro) Asegurar los tornillos con Loctite 243 Adjuntar 2 arandelas [3] respectivamente Instalar las abrazaderas del silenciador sobre el silenciador a la izquierda...
- Page 17 – Apretar la abrazadera [1] del silenciador – Apretar los tornillos M8x25 de fijación del tubo de distribución y la abrazadera del escape – Montar la parte superior trasera a la izquierda y a la derecha – Montar el banco de asiento –...


