Table des Matières

Publicité

Les langues disponibles

Les langues disponibles

Liens rapides

Do not use this equipment before reading this manual!
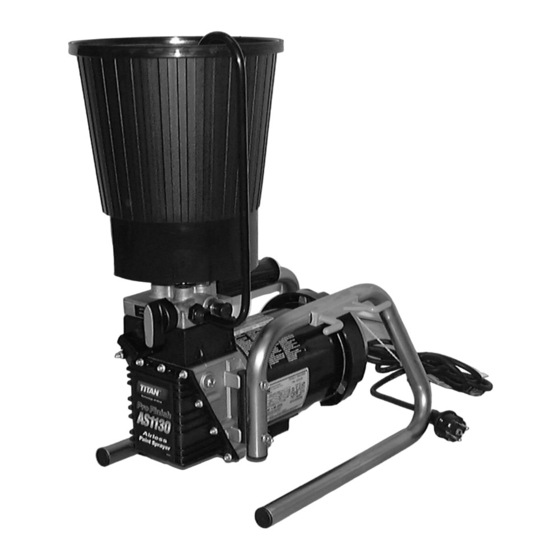
ProFinish AS1130
Model Number:
120V Pump Complete
230V Pump Complete
Printed in the U. S. A.
Airless Sprayer
790-100-CE
790-200-CE
0200 © 2000 Titan Tool Inc. All rights reserved. Form No. 313-1515, REV A
Owner's Manual
Notice d'utilisation
Manual del Propietario
For professional use only
NOTE: This manual contains important warnings
and instructions. Please read and retain for
reference.
Español
Français
English

Publicité

Table des Matières
loading

Sommaire des Matières pour Titan ProFinish AS1130

  • Page 1 230V Pump Complete 790-200-CE NOTE: This manual contains important warnings and instructions. Please read and retain for reference. 0200 © 2000 Titan Tool Inc. All rights reserved. Form No. 313-1515, REV A Printed in the U. S. A. Español Français English...
  • Page 2: Table Des Matières

    The shipping carton for your painting system contains the following: • Stand, motor, and pump attached • Paint hopper and return tube • Spray gun and filter • Spray tip and gasket • Pressure hose English © Titan Tool Inc. All rights reserved.
  • Page 3: Safety Precautions

    • NEVER put your hand in front of the gun. Gloves will not not compatible with aluminum and may cause an provide protection against an injection injury. explosion. If you are unsure of a material’s compatibility with aluminum, contact your coating's supplier. © Titan Tool Inc. All rights reserved.. English...
  • Page 4: Grounding Instructions

    Never repair a paint hose. Replace it with another grounded hose. • All hoses, swivels, guns, and accessories used with this unit must be pressure rated at or above 2800 PSI. • Do not spray on windy days. English © Titan Tool Inc. All rights reserved.
  • Page 5: Setup

    NOTE: When attaching the tip to the gun, align the tip guard as shown in the figure below, then tighten with a wrench. Begin to achieve tightening the desired the tip at spray angle this angle when tight. © Titan Tool Inc. All rights reserved. English...
  • Page 6: Pressure Relief Procedure

    7. Turn the pressure control knob counterclockwise to the minimum pressure setting. 8. Turn the motor switch to OFF. English © Titan Tool Inc. All rights reserved.
  • Page 7: Mounting The Paint Hopper

    4. Thread the nut on the return tube onto the return tube fitting and tighten until the return tube is secure. 5. Place the hook end of the return tube into the hole in the paint hopper cover. Return Tube Paint Hopper Cover © Titan Tool Inc. All rights reserved. English...
  • Page 8: Spraying

    This will save paint and avoid paint buildup at the end of the stroke. Do not trigger the gun during the middle of a stroke. This will result in an uneven spray and splotchy coverage. Good spray pattern Paint tailing pattern English © Titan Tool Inc. All rights reserved.
  • Page 9: Cleanup

    5. Change to clean water or solvent and continue circulating for another 5 minutes to thoroughly clean the hose, pump and spray gun. © Titan Tool Inc. All rights reserved. English...
  • Page 10: Final Cleanup

    12. Trigger the gun to remove any pressure which may still be in the hose. 13. Lock the gun by turning the gun trigger lock so that it is parallel to the gun body. 14. Turn the motor switch to OFF. English © Titan Tool Inc. All rights reserved.
  • Page 11: Maintenance

    If the valve is defective, the end cap will get very hot to the touch. If it is functioning properly, it will stay approximately the same temperature as the water running through it. © Titan Tool Inc. All rights reserved. English...
  • Page 12: Cleaning The Spray Tip

    Check it every time you add paint. Remove the screen by pulling it out of the hopper with a pliers. Clean the screen with water or solvent and a soft-bristle brush, if necessary. English © Titan Tool Inc. All rights reserved.
  • Page 13: Troubleshooting

    7. There is a problem with the motor. 7. Take the sprayer to a Titan Authorized Service Center. The sprayer starts up but does not 1. The unit will not prime properly or has lost prime. 1. Try to prime the unit again.
  • Page 14: Français

    : • Support, moteur et pompe attachés • Trémie à peinture et tube de retour • Pistolet et filtre. • Tête de pulvérisation et joint d'étanchéité. • Tuyau à pression. Français © Titan Tool Inc. Tous droits réservés.
  • Page 15: Consignes De Sécurité

    Le bouton AMORCER/PULVÉRISER doit être tourné à AMORCER, afin d'éliminer la pression. Consulter la PROCÉDURE DE LIMITATION DE LA PRESSION décrite dans le présent manuel. © Titan Tool Inc. Tous droits réservés. Français...
  • Page 16: Directives De Mise À La Terre

    à la terre. • Tous les tuyaux, pivots, pistolets et accessoires utilisés avec ce matériel doivent avoir une valeur nominale d'au moins 2800 PSI. • Ne pas pulvériser par des temps de grand vent. Français © Titan Tool Inc. Tous droits réservés.
  • Page 17: Montage

    à l'aide d'une clé. Commencer pour pulvériser à serrer dans la l'embout direction à l'angle voulue une indiqué fois l'embout serré. © Titan Tool Inc. Tous droits réservés. Français...
  • Page 18: Limitation De La Pression Procédure

    7. Tourner le bouton de réglage de la pression dans le sens inverse des aiguilles d'une montre, jusqu'à ce que la valeur de pression minimum soit atteinte. 8. Tourner le commutateur du moteur à la position ARRÊT. Français © Titan Tool Inc. Tous droits réservés.
  • Page 19: Montage De La Trémie À Peinture

    5. Placer l'extrémité en crochet du tube de retour dans le trou du couvercle de la trémie à peinture. Tube de retour Couvercle de la trŽmie ˆ peinture © Titan Tool Inc. Tous droits réservés. Français...
  • Page 20: Pulvérisation

    Bonne répartition de la pulvérisation d'avoir une accumulation de peinture à l'extrémité du passage. Ne jouez pas avec la gâchette durant le passage afin d'éviter un fini irrégulier ou des éclaboussures. Traînées de peinture Français © Titan Tool Inc. Tous droits réservés.
  • Page 21: Nettoyage

    2. Tourner le bouton de réglage de la pression dans le sens montre, pour augmenter la pression. inverse des aiguilles d'une montre, pour atteindre la valeur 6. Vérifier le fonctionnement du pulvérisateur sur un de pression minimum. morceau d'essai, puis commencer la pulvérisation. © Titan Tool Inc. Tous droits réservés. Français...
  • Page 22: Nettoyage Du Pistolet

    13. Bloquer le pistolet en tournant le cran de sûreté pour qu'il soit parallèle au corps du pistolet. 14. Mettre le commutateur du moteur à la position ARRÊT. Français © Titan Tool Inc. Tous droits réservés.
  • Page 23: Maintenance

    Si la soupape est défectueuse, le capuchon d'extrémité deviendra très chaud au toucher. Si la soupape fonctionne normalement, il restera à plus ou moins la même température que l'eau qui passe par l'appareil. © Titan Tool Inc. Tous droits réservés. Français...
  • Page 24: Nettoyage De La Tête De Pulvérisation

    Nettoyage de la tête de pulvérisation 1. Purgez le pistolet avec du solvant dès votre travail terminé. 2. Huilez les goupilles cylindriques afin d'éviter qu'elles ne se grippent. Si l'embout de pulvérisation est bouché, inverser la position du cône de pulvérisation au moyen du levier et tirer la détente.
  • Page 25: En Cas De Problème

    AMORCER/PULVÉRISER et la nettoyer ou remplacer. NOTA: Le moteur électrique devrait propre et sec en tout temps. La peinture a un effet d'isolement, et par conséquent, une accumulation de peinture sur le moteur peut provoquer la surchauffe. © Titan Tool Inc. Tous droits réservés. Français...
  • Page 26: Español

    • Banco, motor y bomba adheridos • Tolva de pintura y tubo de retorno • Pistola de atomización y filtro. • Boquilla de atomización y empaque. • Manguera de presión. Español © Titan Tool Inc. Todos los derechos reservados.
  • Page 27: Advertencias De Seguridad

    • JAMAS ponga su mano delante de la pistola. Los guantes no proporcionan protección adecuada contra lesiones de perforación. © Titan Tool Inc. Todos los derechos reservados. Español...
  • Page 28: Instrucciones De Puesta A Tierra

    • Todas las mangueras, soportes giratorios, pistolas y accesorios que se usen con esta unidad deben tener una capacidad de presión de 2800 lb/pulg2 o mayor. • No atomice en días con viento. Español © Titan Tool Inc. Todos los derechos reservados.
  • Page 29: Disposición

    Comience para obtener a apretar el ángulo la boquilla adecuado con este al estar ángulo apretado. © Titan Tool Inc. Todos los derechos reservados. Español...
  • Page 30: Cebadura

    7. Gire la perilla de control de la presión en dirección opuesta a las manecillas del reloj hasta la posición de la presión mínima. 8. Gire el interruptor del motor hasta la posición OFF. Español © Titan Tool Inc. Todos los derechos reservados.
  • Page 31: Montando La Tolva De Pintura

    5. Coloque el extremo gancho del tubo de retorno en el agujero en la tapa de la tolva de pintura. Tubo de retorno Tapa de la tolva de pintura © Titan Tool Inc. Todos los derechos reservados. Español...
  • Page 32: Para Atomizar

    No dispare la pistola en medio de una descarga. Esto traería como consecuencia que la atomización Patrón de atomización correcto no fuera uniforme y el recubrimiento tuviera salpicaduras. Patron de desvanecimiento de pintura Español © Titan Tool Inc. Todos los derechos reservados.
  • Page 33: Limpieza

    Tan pronto como el agua o el solvente comience a entrar 6. Pruebe el atomizador en un pieza de práctica y comience en la cubeta, libere el gatillo. a atomizar. © Titan Tool Inc. Todos los derechos reservados. Español...
  • Page 34 13. Bloquee la pistola dándole vuelta al interruptor de seguridad de la pistola de manera que quede paralelo al mango. 14. Gire el interruptor del motor hasta la posición OFF. Español © Titan Tool Inc. Todos los derechos reservados.
  • Page 35: Mantenimiento

    Si la válvula está defectuosa, el anillo estará muy caliente como para tocarlo. Si está funcionando apropiadamente, se quedará aproximadamente a la misma temperatura que la del agua que circule a través de ella. © Titan Tool Inc. Todos los derechos reservados. Español...
  • Page 36: Para Limpiar La Boquilla De Atomización

    Revísela cada vez que añada pintura. Quite la malla jalándola fuera de la tolva con pinzas. Limpie la malla con agua o solvente y un cepillo de cerdas suaves, en caso de ser necesario. Español © Titan Tool Inc. Todos los derechos reservados.
  • Page 37: Detección De Problemas

    7. La válvula de entrada está desgastada o dañada. 8. Hay un problema con el diafragma. 8. Lleve el atomizador al Centro de Servicio Autorizado de Titan. 9. Lleve el atomizador al Centro de Servicio Autorizado de Titan. 9. El nivel de aceite hidráulico es bajo o cero.
  • Page 38: Parts Listings

    0288774 Gasket ..........1 790-002 Leg, right..........1 0270527 Cover ............1 700-761 Cord wrap ..........1 9802279 Screw, cover ........12 790-035 Screw............4 0089930 Seal............1 700-674 Cap ............4 0089929 Bearing ..........1 790-003 Spacer ..........2 English Français Español © Titan Tool Inc. All rights reserved.
  • Page 39: Hopper Assembly

    0090283 Tolva .............1 0093865 Tubo de retorno ........1 0090617 Adaptador ..........1 0090560 Ensamble del tubo de retorno (incluye artículos 4 y 5) 0279971 Tolva completa........1 (incluye artículos 1 – 6) © Titan Tool Inc. All rights reserved. Español Français English...
  • Page 40: Paint Pump Assembly

    Spring, Outlet........1 0093635 Ball, 6mm, Carbide .......1 0270291 Seat, Ball, Outlet Assembly ....1 0089494 Seal, Outlet ...........1 0270460 Paint Pump with Valve......1 0288379 Fitting, Outlet ........1 0090617 Fitting, Return Tube ......1 English Français Español © Titan Tool Inc. All rights reserved.
  • Page 41: Spray Gun

    Pasador deslizable .......2 580-019 Tornillo del gatillo ........1 560-038 Sello de la manubrio......1 500-200-060 Filtro............1 581-081 Collarín (para el uso con la pisotla dos dedo)..1 580-021 Manubrio..........1 580-031 Paréntesis de gatillo ......1 © Titan Tool Inc. All rights reserved. Español Français English...
  • Page 42 Notes/Nota English Français Español © Titan Tool Inc. All rights reserved.
  • Page 43 Notes/Nota © Titan Tool Inc. All rights reserved. Español Français English...
  • Page 44 1-201-405-7520 Fax 1-800-528-4826 Fax 1-905-856-8496 Fax 1-201-405-7449 556 Commerce Street 200 Trowers Road, Unit 7B 556 Commerce Street Franklin Lakes, NJ 07417 Woodbridge, L4L 5Z8 Franklin Lakes, NJ 07417 USA English Français Español © Titan Tool Inc. All rights reserved.

Table des Matières