Harvia M1 Instructions D'installation Et D'utilisation
Masquer les pouces
Voir aussi pour M1:
- Instructions d'installation et d'utilisation (20 pages) ,
- Instructions d'installation et d'utilisation (20 pages)
Table des Matières

Manuels Connexes pour Harvia M1


Sommaire des Matières pour Harvia M1
- Page 1 HARVIA M1, M3, 20 Pro, 20 ES Pro/S, 20 Boiler, 26 Pro, 36, 50 Instructions for Installation and Use of Woodburning Stove Instructions d’installation et d’utilisation du poêle à bois 20 Pro 20 ES Pro/S 20 Boiler 26 Pro 11042011...
-
Page 2: Table Des Matières
4.1.2. Safety Distances ........11 4.1.3. Plaques de protection ......... 12 4.1.3. Protective Covers ........12 4.1.4. Gaine et couche de protection Harvia ... 12 4.1.4. Harvia Protective Sheath and Bedding ... 12 4.2. Installation du poêle..........13 4.2. Installing the Stove ..........13 4.2.1. -
Page 3: General
1. GEnERAL 1. GénéRALITéS 1.1. Technical data 1.1. données techniques 20 Pro 20 ES Pro 20 Boiler 26 Pro WKM11 WK200 WK200ES WK200B WK260 WK360 WK500 20 ES Pro S WKM3 WK200ESST Rated output (kW) Puissance nominale (kW) Sauna room volume (m³) 4,5–13 8–20 8–20... -
Page 4: Stove Parts
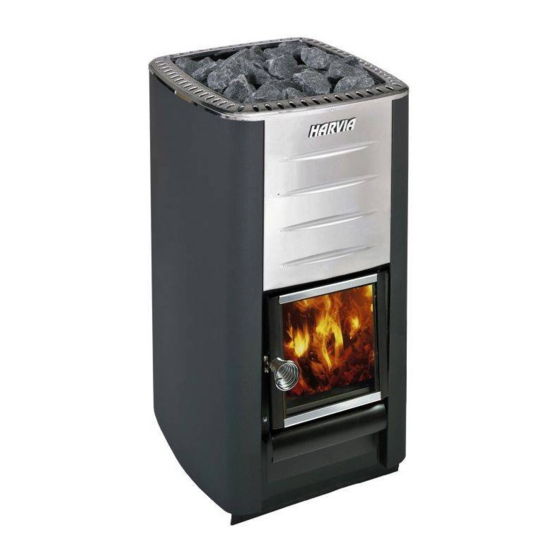
1.2. Stove Parts 1.2. Composants du poêle Upper connection opening Ouverture de raccordement supérieure Rear connection opening Ouverture de raccordement arrière Soot opening Ouverture de ramonage Stove door Porte du foyer Ash box Bac à cendres Figure 1. Stove parts Figure 1. -
Page 5: Preparing The Stove For Use
2.2. Preparing the Stove for Use 2.2. Préparation du poêle à l’utilisation Perform the first heating outdoors or in a well- Procédez à la première utilisation à l’extérieur ou ventilated room. The stove body has been painted dans une pièce bien ventilée. Le corps du poêle with protective paint, which will vaporise during est recouvert d’une peinture de protection qui va the first heating. -
Page 6: Heating The Stove
Make sure that air circulates between the dans le poêle. • stones. Placez les plus grosses pierres au fond et les • do not place stones against the frame around plus petites sur le dessus. • the stone space or on top of it. Les pierres ne doivent pas former une pile trop •... -
Page 7: Sauna Water
maintain the bathing temperature. tre compris entre 12 et 15 cm. Seuls quelques morceaux de bois suffisent à maintenir la Prolonged, intense heating may cause risk température adéquate. of fire! Excessive heating (several full loads in a row, Un chauffage prolongé ou trop intense peut •... -
Page 8: Troubleshooting
2.8. Troubleshooting 2.8. dépannage There is no draught in the flue. Smoke comes into Absence de tirage dans le conduit de fumée. de la the sauna. fumée s’échappe dans le sauna. There are leaks in the flue connection. Seal the Le raccordement du conduit présente des fui- •... -
Page 9: Sauna Room
3. SAUnA RooM 3. CABInE dU SAUnA 3.1. Effects that Heating the Stove has on 3.1. Effets du poêle chaud sur la cabine de the Sauna Room sauna Light-coloured floor materials will become dirty from Les sols de couleur claire seront salis par les cen- the ash, particles of stone and metal flakes that fall dres, les particules de pierre et les paillettes de métal from the stove. -
Page 10: Instructions For Installation
( 4.1.4.). tenir le sol au sec. Vous pouvez aussi utiliser Tile floor. The floor glues and plasters and la gaine et la couche de protection Harvia ( waterproof materials used below the tiles are 4.1.4.). not resistant to the heat radiation of the stove. -
Page 11: Safety Distances
4.1.2. Safety distances 4.1.2. distances de sécurité See figure 6. Voir figure 6. Ceiling. The minimum safety distance between Toit : la distance de sécurité minimale entre le the stove and the ceiling is 1200 mm. poêle et le toit est de 1 200 mm. Masonry walls. -
Page 12: Protective Covers
: M1, M3, 20 Pro, 20 ES Pro/S, 26 Pro.) min. 50 min. 110 min. 50 min. 125 Figure 8. Harvia protective sheath and bedding (all dimensions in millimeters) Figure 8. Gaine et couche de protection Harvia (toutes les dimensions sont fournies en millimètres) -
Page 13: Installing The Stove
(figure 9) that the side with a depression faces upwards. Pliez la trappe vers le bas (modèles : M1/M3). Ensure that the pipe fits tightly in place. If Fixez le conduit de fumée de raccordement necessary, hit it gently with a hammer. - Page 14 (à 45° ou 90°)( 4.4.). Open the cover hatch of the rear connection Ouvrez la trappe de l’ouverture de raccordement opening (M1/M3 only). Move the blocking plug arrière (modèles : M1/M3). Déplacez le bouchon from the upper connection opening on the rear de l'ouverture supérieure vers l'ouverture arrière.
-
Page 15: Connecting The Stove To A Harvia Steel Chimney
M1/M3 Figure 11. Connecting the stove to a Harvia steel chimney (all dimensions in millimeters) Figure 11. Raccordement du poêle à une cheminée en acier Harvia (toutes les dimensions sont fournies en millimètres) 4.3. Changing the opening direction of the 4.3. -
Page 16: Accessories
4.4. Accessories 4.4. Accessoires (For models M1, M3, 20 Pro, 20 ES Pro/S, 20 Boiler, (Modèles : M1, M3, 20 Pro, 20 ES Pro/S, 20 Boiler, 26 Pro and 36 only.) 26 Pro, 36.) Harvia steel chimney WHP1500. 4.2.3. Cheminée en acier Harvia WHP1500. 4.2.3.