
Manuels Connexes pour Zanussi ZYB 460


Sommaire des Matières pour Zanussi ZYB 460
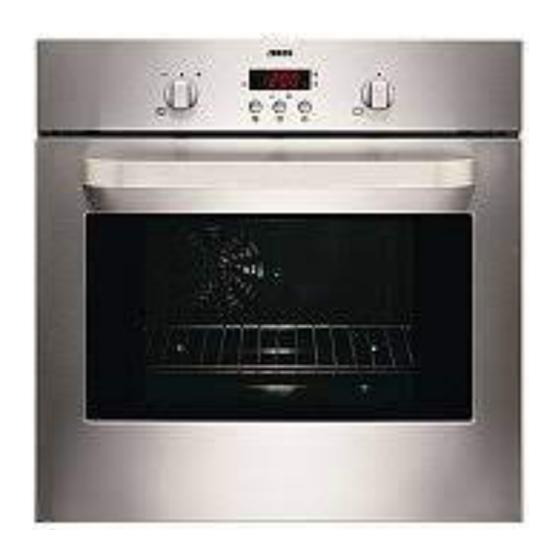
- Page 1 All manuals and user guides at all-guides.com User Notice information d'utilisation Four Built-in électrique oven ZYB 460...
-
Page 2: Table Des Matières
All manuals and user guides at all-guides.com 2 electrolux Contents Warnings and important safety information ......................3 Description of the appliance ..........................5 Before first use ..............................6 Appliance controls ............................6 Daily use ................................ 7 Using the oven ............................... 11 Baking and roasting tables .......................... -
Page 3: Warnings And Important Safety Information
All manuals and user guides at all-guides.com electrolux 3 English Warnings and important safety information Always keep these user instructions with the appliance. Should the appliance be passed on to third persons or sold, or if you leave this appliance behind when you move house, it is very important that the new user has access to these user instructions and the accompanying information. -
Page 4: Customer Service
All manuals and user guides at all-guides.com 4 electrolux • This appliance is not intended for use by children or other persons whose physical, sensory or mental capabilities or lack of experience and knowledge pre- vents them from using the appliance safely without supervision or instruction by a responsible person to ensure that they can use the appliance safely. -
Page 5: Description Of The Appliance
All manuals and user guides at all-guides.com electrolux 5 Description of the appliance 1. Control Panel 2. Oven Function Control Knob 3. Electronic Programmer 4. Temperature/Time Control Knob 5. Air Vents for Cooling Fan 6. Grill 7. Oven Light 8. Oven Fan 9. -
Page 6: Before First Use
All manuals and user guides at all-guides.com 6 electrolux Appliance controls Before first use Remove all packaging, both inside and outside the Oven control knobs oven, before using the appliance. Do not remove The illustration shows the symbols and their meaning on the rating plate. -
Page 7: Safety Thermostat
All manuals and user guides at all-guides.com electrolux 7 Safety thermostat To prevent dangerous overheating (through incorrect use of the appliance or defective components), the oven is fitted with a safety thermostat, which interrupts the power supply. The oven switches back on again automatically, when the temperature drops. -
Page 8: Residual Heat Indicator
All manuals and user guides at all-guides.com 8 electrolux Setting the oven temperature Residual heat indicator When the oven is off, the bars indicate the remaining heat in the oven. When the temperature in the oven drops down below 40 °C, the indication switches off. -
Page 9: Clock Functions
All manuals and user guides at all-guides.com electrolux 9 Child safety device When you switch on the child safety device, you cannot operate the oven. Make sure that no oven function is set. 1. Turn the Temperature/Time control knob to the left side and hold it. -
Page 10: Minute Minder
All manuals and user guides at all-guides.com 10 electrolux Clock functions Time and temperature display. Function indicators. Pyrolytic cleaning confirmation button Time functions button Current temperature button. 5. To stop the flashing and the audible signal turn the oven functions control knob to “0” or push any button. -
Page 11: Using The Oven
All manuals and user guides at all-guides.com electrolux 11 Using the oven The oven is supplied with an exclusive system which produces a natural circulation of air and the constant recycling of steam. This system makes it possible to cook in a steamy environment and keep the dishes soft inside and crusty outside. -
Page 12: Hints And Tips
All manuals and user guides at all-guides.com 12 electrolux Hints and Tips On baking: Cakes and pastries usually require a medium temperature Caution! (150°C-200°C) and therefore it is necessary to preheat Do not line the oven with aluminium the oven for about 10 minutes. foil and do not place a roasting pan or Do not open the oven door before 3/4 of the baking time baking tray on the floor, as otherwise... -
Page 13: Baking And Roasting Tables
All manuals and user guides at all-guides.com electrolux 13 Baking and roasting tables Conventional and Fan cooking Timings do not include pre-heating. The empty oven should always be pre-heated for 10 minutes. Cooking times in Conventional Cooking Fan Cooking minutes TYPE OF DISH NOTES Temp. - Page 14 All manuals and user guides at all-guides.com 14 electrolux Timings do not include pre-heating. The empty oven should always be pre-heated for 10 minutes. Grilling Quantity Grilling Cooking time in TYPE OF DISH minutes 2nd side Pieces Temp. °C 1st side Fillet steaks 12~15 12~14...
-
Page 15: Cleaning And Maintenance
All manuals and user guides at all-guides.com electrolux 15 Cleaning and Maintenance Always disconnect the oven from the mains External cleaning and let it cool down before you clean it, Regularly wipe over the control panel, oven door and door except if performing a pyrolytic cycle. -
Page 16: Cleaning Pyrolytic Enamel Ovens
All manuals and user guides at all-guides.com 16 electrolux Cleaning pyrolytic enamel ovens Everyday maintenance The oven door is hot during the pyrolytic cleaning cycle. Keep young children at a Whenever the oven becomes dirty, make a habit of safe distance. removing the residue with a sponge. -
Page 17: Important
All manuals and user guides at all-guides.com electrolux 17 Pyrolytic cleaning Warning! The oven becomes very hot during Pyrolytic cleaning! Risk of burns! 1. Remove the worst residue manually. 2. Turn the oven function control knob to Pyrolytic cleaning function "... -
Page 18: The Oven Door
All manuals and user guides at all-guides.com 18 electrolux The oven door The oven door consists of three panes of glass. The oven door can be disassembled and the inter- nal panes can be removed to make cleaning easier. Important - Remove the oven door before cleaning it. - Page 19 All manuals and user guides at all-guides.com electrolux 19 7. Release the locking system to remove the internal panes of glass (Fig. 5). 8. Turn the 2 fasteners 90° and extract them from their seats (Fig. 6). 9. Gently lift and carefully take off the uppermost pane (Fig.
- Page 20 All manuals and user guides at all-guides.com 20 electrolux 10.Repeat the procedure described in point 9. for the middle pane marked by a decorative frame on 4 sides (Fig. 8). Clean the oven door with lukewarm water and a soft cloth. Do not use products such as scouring pads, steel wool, abrasive sponges or acids because they could damage the special heat-reflecting surface of the internal panes of...
-
Page 21: Replacing The Oven Light
All manuals and user guides at all-guides.com electrolux 21 Stainless steel or aluminium appliances: We recommend that the oven door is only cleaned using a wet sponge and dried after cleaning with a soft cloth. Never use steel wool, acids or abrasive products as they can damage the oven surface. -
Page 22: What Happens If Something Goes Wrong
All manuals and user guides at all-guides.com 22 electrolux What happens if something goes wrong If the appliance is not working correctly, check the following points before calling your local Electrolux Service Force engineers. Keep in mind that The fuses trip repeatedly If a fault should occur with your appliance, check using Please contact the technical service centre or a certified these instructions to see if you can eliminate any of the... -
Page 23: Technical Data
All manuals and user guides at all-guides.com electrolux 23 Technical data Heating element ratings Bottom heating element 1000 W Top Heating element 800 W Conventional cooking (Top+Bottom) 1800 W Grill 1650 W Dual Grill 2450 W Fan cooking 2000 W Thermal grilling 1675 W Pyrolytic cleaning... -
Page 24: Instructions For The Installer
All manuals and user guides at all-guides.com 24 electrolux Instructions for the Installer Installation and connection must be done After the connection has been carried out, the in compliance with the regulations in force. heating elements must be tested by being operated for Any interventions must be carried out when about 3 minutes. -
Page 25: Instructions For Building In
All manuals and user guides at all-guides.com electrolux 25 Instructions for building In For problem-free functioning of the built-in appliance, the kitchen unit or the recess into which the appliance is built must have suitable dimensions. In accordance with the regulations in force, all parts which ensure the shock protection of live and insulated parts must be fastened in such a way that they cannot be undone Fig. -
Page 26: Declaration Of Guarantee Terms
All manuals and user guides at all-guides.com 26 electrolux Declaration of guarantee terms Belgium Our appliances are produced with the greatest of care. However, a defect may still occur. Our consumer services department will repair this upon request, either during or after the guarantee period. The service life of the appliance will not, however, be reduced as a result. - Page 27 All manuals and user guides at all-guides.com electrolux 27 13. A repair under guarantee does not mean that the normal guarantee period will be extended nor that a new guarantee period begins. 14. We give a twelve month guarantee for repairs, limited to the same defect. 15.
-
Page 28: Service And Spare Parts
All manuals and user guides at all-guides.com 28 electrolux Service and spare parts If after the checks listed in the chapter "What happens if something goes wrong", the appliance still does not work correctly, contact your local Service Centre, specifying the type of malfunctioning, the appliance model (Mod.), the product number (Prod. - Page 29 All manuals and user guides at all-guides.com electrolux 29...
-
Page 30: Avertissements Importants
All manuals and user guides at all-guides.com Français Avertissements importants Important: cette notice d'utilisation doit toujours être conservée avec l'appareil pour toute future consultation. Si cet appareil devait être vendu ou transféré à une autre personne, assurez-vous que la notice d'utilisation suive bien l'appareil, de telle sorte que le nouvel utilisateur puisse être mis au courant du fonctionnement de celui-ci et des avertissements s'y rapportant. -
Page 31: Protection Pour Les Personnes
All manuals and user guides at all-guides.com Ce four (même s'il est associé à une table de cuisson Protection de l’environnement électrique) est fabriqué pour fonctionner en 230 V monophasé. Tous les matériaux marqués par le symbole sont N'essayez pas de réparer l'appareil vous-même. recyclables. - Page 32 All manuals and user guides at all-guides.com Sommaire A l'attention de l'utilisateur Avertissements importants ........................... 30 Description de l'appareil ..........................33 Conseils avant la première utilisation ......................34 Commandes ..............................35 Utilisation quotidienne ............................ 35 Comment utiliser le four ..........................40 Conseils d'utilisation .............................
-
Page 33: Description De L'appareil
All manuals and user guides at all-guides.com Description de l'appareil 1. Bandeau de commande 2. Commande du sélecteur 3. Programmateur électronique 4. Commande du thermostat 5. Trous d’aération pour le ventilateur de refroidissement 6. Gril 7. Eclairage du four 8. Turbine de ventilation 9. -
Page 34: Conseils Avant La Première Utilisation
All manuals and user guides at all-guides.com Conseils avant la première utilisation Avant d'installer et d'utiliser l'appareil, retirez tous les éléments constituant l'emballage, y compris les éti- quettes et tout éven-tuel film protecteur. Ne retirez pas la plaque signalétique. Lorsque vous branchez l'appareil ou en cas de cou- pure de courant, le symbole de l'heure cli-gnote automa- tiquement. -
Page 35: Commandes
All manuals and user guides at all-guides.com Commandes Thermostat de sécurité Le choix du mode de cuisson s'effectue à l'aide du Il coupe l’alimentation de toutes les résistances du four en sélecteur de fonctions. cas de surchauffe imputable à un usage incorrect de Four à... -
Page 36: Consulter La Température
All manuals and user guides at all-guides.com Régler la température du four 1 segment 40 °C - 90 °C 2 segments 90 °C - 150 °C 3 segments 150 °C - 200 °C Indicateur de chaleur résiduelle Lorsque le four a été mis à l'arrêt, les segments indi- quent la température encore présente dans le four. -
Page 37: Sécurité Enfants
All manuals and user guides at all-guides.com Sécurité enfants Vous ne pouvez plus mettre le four en fonctionnement lorsque la sécurité enfants est activée. Aucune fonction du four ne doit être sélectionnée. 1. Tournez la manette Température/Heure vers la gau- che et maintenez-la dans cette position. -
Page 38: Réglage Des Fonctions De L'horloge
All manuals and user guides at all-guides.com Fonctions de l'horloge Affichage de l'heure et de la température. Symboles des fonctions. Touche de confirmation de la pyrolyse Touche Temps Touche d'affichage de la température actuelle. Réglage des fonctions de l'horloge 4. Dès que le temps est écoulé, un signal sonore retentit pendant 2 minutes. - Page 39 All manuals and user guides at all-guides.com Durée cuisson et « Heure de fin de cuisson » Il est possible d'utiliser simultanément les fonctions « Durée de cuisson » et « Heure de fin de cuisson » afin que le four démarre ultérieurement et se mette automatiquement à...
-
Page 40: Comment Utiliser Le Four
All manuals and user guides at all-guides.com Comment utiliser le four Toutes les cuissons doivent être faites avec la porte du four fermée. Ce four est équipé d’un système exclusif de cuisson qui crée une circulation naturelle d’air et la récupération con- tinue des vapeurs de cuisson. -
Page 41: Conseils D'utilisation
All manuals and user guides at all-guides.com Conseils d'utilisation Influence des récipients sur les résultats Ne placez jamais de papier aluminium (ou tout autre utensile, plat et accessoire) de cuisson au four directement en contact avec la sole du four. Sachez que : Cela pourrait entraîner une surchauffe qui affecterait la cuisson de vos mets et la chaleur... - Page 42 All manuals and user guides at all-guides.com A v e r t i s s e m e n t : G u i d e des cuissons i a f Les températures du four ne sont présentées qu'à titre indicatif.
-
Page 43: Tableaux De Cuisson
All manuals and user guides at all-guides.com Tableaux de cuisson Cuisson traditionnelle et Multichaleur tournante Les temps de cuisson n’incluent pas le préchauffage. Il est nécessaire de toujours préchauffer le four pendant 10 minutes. Multichaleur Temps de Cuisson traditionnelle tournante cuisson en TYPE DE PLAT REMARQUES... - Page 44 All manuals and user guides at all-guides.com Les temps de cuisson n’incluent pas le préchauffage. Il est nécessaire de toujours préchauffer le four pendant 10 minutes. Griller Quantité Griller Temps de cuisson TYPE DE PLAT en minutes Pièces temp. °C 1e face 2e face Steaks dans le filet...
-
Page 45: Entretien Et Nettoyage
All manuals and user guides at all-guides.com Entretien et nettoyage Débrancher le four et le laisser refroidir • Détergents et agents de blanchiment domestiques avant d’effectuer tout nettoyage, à l’exception • Tampons imprégnés de savon ne convenant pas aux d’un cycle pyrolyse. poêles non anti-adhérentes •... -
Page 46: Nettoyage Du Four À Émail Pyrolytique
All manuals and user guides at all-guides.com Nettoyage du four à émail pyrolytique Entretien régulier La porte du four est chaude pendant le cycle Après chaque cuisson salissante, pensez à retirer les de nettoyage par pyrolyse, éloignez les projections avec une éponge. jeunes enfants. - Page 47 All manuals and user guides at all-guides.com Pyrolyse Avertissement ! Durant la pyrolyse, le four de- vient très chaud ! Risque de brûlures ! 1. Avant d'activer la fonction Pyrolyse, retirez tous les accessoires du four, y compris les glissières latérales et la sonde à...
-
Page 48: La Porte Du Four
All manuals and user guides at all-guides.com La porte du four La porte du four est constituée de trois vitres. La porte du four peut être démontée et les vitres internes retirées pour faciliter le nettoyage. Important - Retirez la porte du four avant de la nettoyer. - Page 49 All manuals and user guides at all-guides.com 7. Libérez le système de verrouillage pour extraire les vitres internes (Fig. 5). 8. Tournez les 2 fixations de 90° et sortez-les de leur logement (Fig. 6). 9. Soulevez doucement et sortez délicatement la vitre de dessus (Fig.
- Page 50 All manuals and user guides at all-guides.com 10. Répétez les opérations décrites au point 9. pour la vitre du milieu caractérisée par un motif décoratif sur son périmètre (Fig. 8). Nettoyez la porte du four à l’aide d’un chiffon doux humidifié d’eau tiède.
-
Page 51: Remplacement De La Lampe Du Four
All manuals and user guides at all-guides.com Remplacement de la lampe du four Débranchez l’appareil de l’alimentation, avant de remplacer l’ampoule. Dévissez le globe puis l’ampoule et remplacez-la par un modèle identique apte à supporter des hautes températures (300°C) et ayant les caractéristiques suivantes : Tension: 230 V ~ 50 Hz Puissance : 40 W Culot : E 14. -
Page 52: En Cas D'anomalie De Fonctionnement
All manuals and user guides at all-guides.com En cas d’anomalie de fonctionnement ? Si l’appareil ne fonctionne pas correctement, vérifiez les points suivants avant de faire appel à votre service après vente. N’oubliez pas ce qui suit « SAFE » s’affiche à l’écran ? Si une anomalie se produit sur votre appareil, nous vous La sécurité... -
Page 53: Caractéristiques Techniques
All manuals and user guides at all-guides.com Caractéristiques techniques Raccordement électrique 230 V~ 50 Hz Puissance électrique totale 2,515 kW Four électrique Résistance inférieure 1,000 kW Résistance supérieure 0,800 kW Cuisson traditionnelle 1,800 kW Multichaleur tournante 2,000 kW Gril simple 1,650 kW Gril double 2,450 kW... -
Page 54: Instructions Destinées À L'installateur
All manuals and user guides at all-guides.com Instructions destinées à l’installateur L’installation et le branchement doi- Les types de câble suivants sont appropriés, si on vent être conformes à la réglementation lo- tient compte de la section nominale nécessaire : H07 cale en vigueur. -
Page 55: Installation De L'appareil
All manuals and user guides at all-guides.com Installation de l'appareil Mise en place de l’appareil Les instructions suivantes sont destinées à l'installateur qualifié pour lui permettre d'exécuter les opérations d'installation et de branchement de la meilleure façon, tout en respectant la législation et les normes en vigueur. -
Page 56: Fixation Dans Le Meuble
All manuals and user guides at all-guides.com Fixation dans le meuble 1. Placer l'appareil dans la niche de meuble. 2. Ouvrez la porte du four. 3. Fixez le four au meuble à l'aide des 4 entretoises (voir Fig. lettre A) fourni avec l’appareil et des 4 vis à bois (voir Fig. -
Page 57: Garantie/Service-Clientèle
All manuals and user guides at all-guides.com Garantie/service-clientèle Belgique DÉCLARATION DE CONDITIONS DE GARANTIE. Nos appareils sont produits avec le plus grand soin. Malgré cela, un défaut peut toujours se présenter. Notre service clientèle se chargera de réparer ceci sur demande, pendant ou après la période de garantie. La durée de vie de l'appareil n'en sera pas pour autant amputée. -
Page 58: Garantie Européenne
All manuals and user guides at all-guides.com 12. Si au cours de la période de garantie, la réparation répétée d'une même défectuosité n'est pas concluante, ou si les frais de réparations sont jugés disproportionnés, le remplacement de l'appareil défectueux par un autre de même valeur peut être accompli en concertation avec le consommateur. - Page 59 All manuals and user guides at all-guides.com • La garantie de l'appareil est exclusivement reconnue à l'acheteur d'origine et ne peut être cédée à un autre uti- lisateur de l'appareil. • L'appareil devra être installé et utilisé conformément aux instructions fournies par Electrolux, l'usage étant limité à...
- Page 60 All manuals and user guides at all-guides.com www.zanussi.be 397131001 06/09...