Publicité
Liens rapides
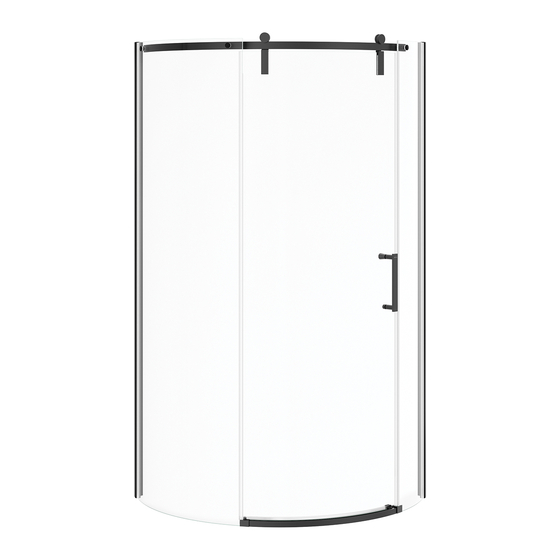
INSTALLATION INSTRUCTIONS
GUIDE D'INSTALLATION
GUÍA DE INSTALACIÓN
Read all instructions carefully before proceeding.
Lire toutes les instructions attentivement avant de commencer
l'installation.
Leer detenidamente todas las instrucciones antes de comenzar
la instalación.
IMPORTANT
• Record the serial number
IMPORTANT
• Noter le numéro de série
IMPORTANTE
• Registre el número de serie
FOR RIGHT AND LEFT SIDE DOOR INSTALLATION
(LEFT SIDE SHOWN)
POUR INSTALLATION DE PORTE CÔTÉ DROIT ET GAUCHE
(CÔTÉ GAUCHE ILLUSTRÉ)
PARA LA INSTALACIÓN DE LA PUERTA DEL LADO DERECHO E IZQUIERDO
(SE MUESTRA INSTALACIÓN AL LADO IZQUIERDO)
MODEL • MODÈLE • MODELO
139410-L
Optional walls 105753 sold separately
Murs optionels 105753 vendu séparament
Muros opcionales 105753 vendidos por separado
139410-R
SAVE THIS GUIDE FOR FUTURE REFERENCE.
CONSERVER POUR UN USAGE ULTÉRIEUR.
CONSERVE ESTE MANUAL COMO REFERENCIA.
Serial number • Numéro de série • Número de Serie
Publicité

Manuels Connexes pour MAAX 139410-L


Sommaire des Matières pour MAAX 139410-L
- Page 1 PARA LA INSTALACIÓN DE LA PUERTA DEL LADO DERECHO E IZQUIERDO GUÍA DE INSTALACIÓN (SE MUESTRA INSTALACIÓN AL LADO IZQUIERDO) MODEL • MODÈLE • MODELO 139410-L 139410-R Optional walls 105753 sold separately Murs optionels 105753 vendu séparament Muros opcionales 105753 vendidos por separado Read all instructions carefully before proceeding.
- Page 2 PARTS PIÈCES PIEZAS AND COMPONENTS ET COMPOSANTES Y COMPONENTES Round door also fits on base 106888 La porte ronde s'adapte aussi sur la base 106888 La puerta redonda también encaja en la base 106888...
- Page 3 PARTS PIÈCES PIEZAS AND COMPONENTS ET COMPOSANTES Y COMPONENTES...
- Page 4 PARTS PIÈCES PIEZAS AND COMPONENTS ET COMPOSANTES Y COMPONENTES 084=Chrome, Cromo 305=Brushed nickel, Nickel brossé, Níquel cepillado 173=Dark bronze, Bronze foncé, Bronce oscuro Code Part Nom de la pièce Pieza Código Cant. 10044403-901 (Right) Door Porte Puerta 10044404-901 (Left) 10093755-901-000 (Right) Fixed panel (Large) Panneau fixe (grand) Panel fijo (grande)
- Page 5 TOOLS OUTILS HERRAMIENTAS REQUIRED REQUIS NECESARIAS Electric drill Level Pencil Perceuse électrique Niveau Crayon Taladro eléctrico Nivel Lápiz ¼" ceramic drill bit Clear silicone sealant Masking tape Mèche à céramique Silicone claire de ¼ po. Ruban adhésif Broca para ceramica Sellador de silicona Cinta de de ¼"...
- Page 6 BEFORE AVANT ANTES YOU BEGIN DE COMMENCER DE COMENZAR A two person installation is recommended. Une installation par deux personnes est recommandé. Se recomienda realizar la instalación entre dos personas. A. Before beginning the installation, make sure that the door and panel fit within the shower enclosure.
- Page 7 If you purchased your door separately, we recommend to install on MAAX round base: 106888 Si vous avez acheté votre porte séparément, nous vous conseillons d'installer sur MAAX base ronde: 106888 Si compro su puerta por separado, se recomienda instalar en la base redonda MAAX: 106888...
- Page 8 Parts required: + Part 34 sold separately Pieces requises: Partes requeridas: + Pièce 34 vendue séparément + Pieza 34 vendida por separado A. Install the base directly against the studs and confirm that the drain pipe is centered in the drain head. A.
- Page 9 Parts required: Optional wall installation 105753 Pieces requises: Installation des murs en option 105753 Partes requeridas: Instalación de muros opcionales 105753 A. Draw layout lines. For side layout lines, measure 38" from the corner, top and bottom. For top layout lines, mea- sure 81"...
- Page 10 Stud centers centre du montants centros de los montantes A. In order to properly secure the wall kit, it is necessary to add additional structural members to the existing stud wall. Layout the locations for the centers of the structural studs. Then install hori- zontal 2"...
- Page 11 Parts required: Pieces requises: Partes requeridas: A. Apply a bead of silicone sealant along the mating sur- faces. The bead of silicone should be located towards the INSIDE of the assembly holes, as shown. For best results, the silicone should be applied in one continuous bead. A.
- Page 12 Parts required: Pieces requises: Partes requeridas: Ø 3/16" B. Lift the entire assembled wall kit and place against the stud wall and down onto the base. Make sure that the wall kit fits se- curely into the corner. The flanges on the wall should line up with the 2"...
- Page 13 Parts required: Pieces requises: Partes requeridas: A. Position and level both wall jambs X distance from the start of the shower base radius according to the information on table to the right. Model With 105753 walls With U-Tile A. Positionner et mettre de niveau les montants mu- Modèle Avec murs 105753 Avec U-Tile...
- Page 14 Parts required: Pieces requises: Partes requeridas: A. Insert the fixed panels in the wall jambs. A. Inserer les panneaux fixes dans les mon- tants muraux. A. Insertar los paneles fijos en los montantes murales. B. From the outside of the shower, insert the u-shape wedge seals between the wall jambs and the fixed glass panels.
- Page 15 Parts required: Pieces requises: Partes requeridas: A. Place the door temporarily and safely on a wall inside the shower over cardboard. A. Appuyer la porte temporairement et sécuritaire- ment contre le mur à l’intérieur de la douche sur des cartons. A.
- Page 16 Parts required: Pieces requises: Partes requeridas: A. Install the rollers on the top of the door panel. Put the door inside the shower over cardboard. A. Installer les roulettes sur le dessus du panneau de porte. Mettre la porte à l'intérieur de la douche sur du carton.
- Page 17 Parts required: Pieces requises: Partes requeridas: A. Install the bottom roller guide on the bottom hole of the door panel. A. Installer le guide inférieur avec roulettes sur le trou inférieur du panneau de porte. A. Instalar la guía inferior con rodamientos en el orificio inferior del panel de la puerta.
- Page 18 Parts required: Pieces requises: Partes requeridas: OPTIONNAL STEP: Only if bottom roller cannot be hooked with bottom rail ÉTAPE OPTIONNELLE: Seulement si la roulette infériure ne peut pas être accrochée au rail inférieur ETAPA OPCIONAL: Solo si el rodamiento inferior no se puede enganchar con el riel inferior A.
- Page 19 Parts required: Pieces requises: Partes requeridas: A. Insert the seals on the fixed panels and on the door, opposite edge on the side of the handle. A. Insérer les joints d'étan- chéité sur les panneaux fixes et sur la porte, le bord oppose du coté...
- Page 20 Parts required: Pieces requises: Partes requeridas: A. Verify door is leveled. Open the door and verify it closes seamlessly. Also verify that the gap when opened on bottom and top is equal. IF NOT, PROCEED WITH STEPS 13B-13C-13D. A. Vérifier la porte est de niveau. Ouvrir la porte et vérifier qu'elle se ferme parfaitement.
- Page 21 Parts required: Pieces requises: Partes requeridas: A. From the inside of the shower, insert the sealing gasket between the wall jambs and the fixed glass panels. Cut excess. A. De l'intérieur de la douche, insérer les joints d'étanchéité entre les montants et les panneaux de verre fixes.
- Page 22 Parts required: Pieces requises: Partes requeridas: A. Install the door roller caps as shown. A. Installer les capuchons pour roulettes de porte comme montré. A. Instalar las tapas de rodamientos para puerta como se muestra. B. Insert the screw cover extrusions on the wall jambs.
- Page 23 Parts required: Pieces requises: Partes requeridas: A. From outside the shower apply a bead of silicone along the wall jambs, the threshold on the base and on the side of the door guide. A. De l'extérieur de la douche, appliquer un joint de silicone le long des montants muraux, le seuil à...
-
Page 24: Maintenance | Entretien | Mantenimiento
A<B A< MAINTENANCE | ENTRETIEN | MANTENIMIENTO Right after installation Check me! Juste après l'installation Cochez-moi! Justo después de la instalación Marcarme! A>B A<B A>B 1. Open the door and verify it closes seamlessly. Also verify that the gap when opened on bottom and top is equal. If not adjust with the excentric. Ouvrir la porte et vérifier qu'elle se ferme parfaitement. -
Page 25: Cada 6 Meses
MAINTENANCE | ENTRETIEN | MANTENIMIENTO A<B A<B Every 6 months Check me! Chaque 6 mois Cochez-moi! Cada 6 meses Marcarme! 1. Open the door and verify it closes seamlessly. Also verify that the gap when opened on bottom and top is equal. If not adjust with the excentric. A>B A<B A>B... - Page 26 MAINTENANCE | ENTRETIEN | MANTENIMIENTO Every 6 months Check me! Chaque 6 mois Cochez-moi! Cada 6 meses Marcarme! 4. Disengage the door and clean. Engage the door. Dégager la porte et nettoyer. Engager la porte. Desenganche la puerta y limpie. Enganche la puerta. 5.
-
Page 27: Garantie Limitée - Canada
LIMITED WARRANTY — UNITED STATES MAAX Bath Inc. offers express limited warranty on each of its products. This warranty extends only to the original owner/end-user for personal household use. For commercial uses, additional limitations apply. For accessing product Limited warranty please visit: www.maax.com/us-warranty... - Page 28 Technical Services / Service technique / Servicio técnico T. 1 877 GET-MAAX (1 877 438-6229) F. 1 877 636-6250 10042170 © 2008 MAAX Bath Inc. PRINTED IN CANADA / IMPRIMÉ AU CANADA / IMPRESO EN CANADA 2020-09-18...